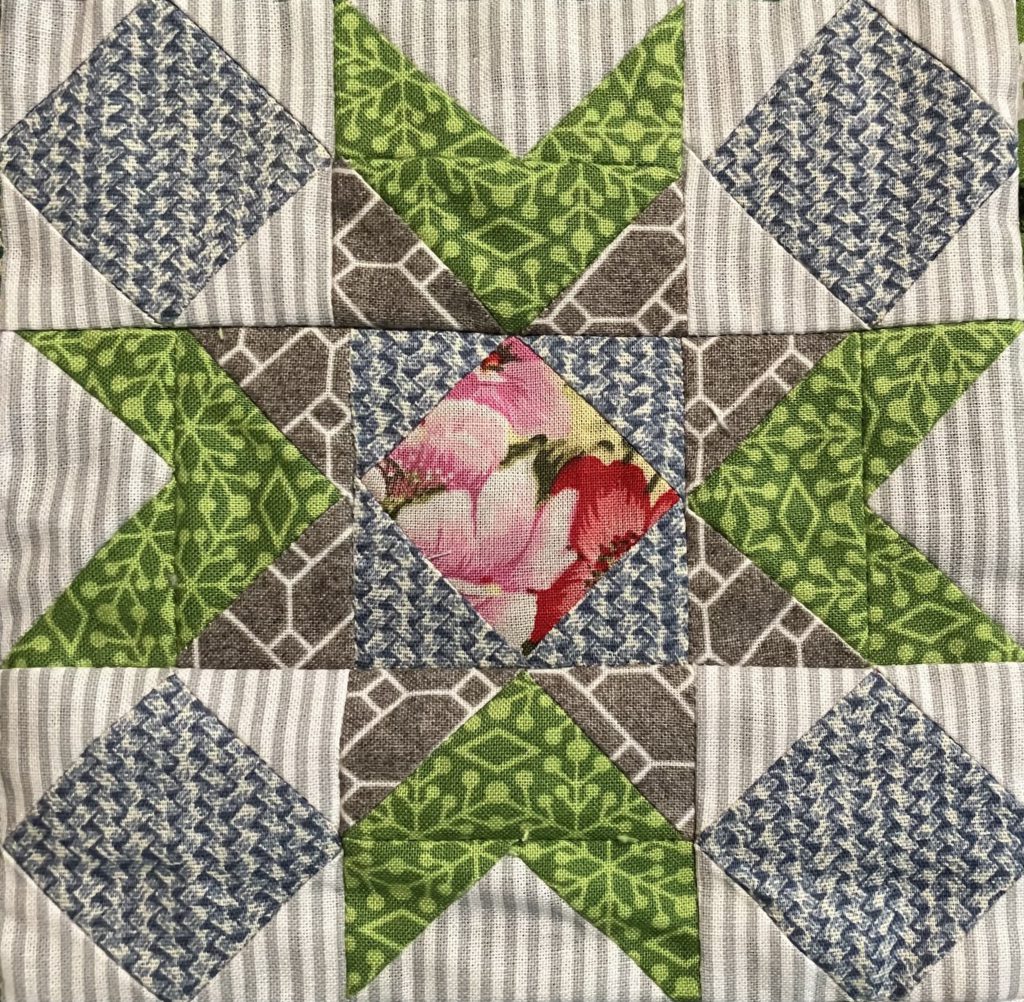
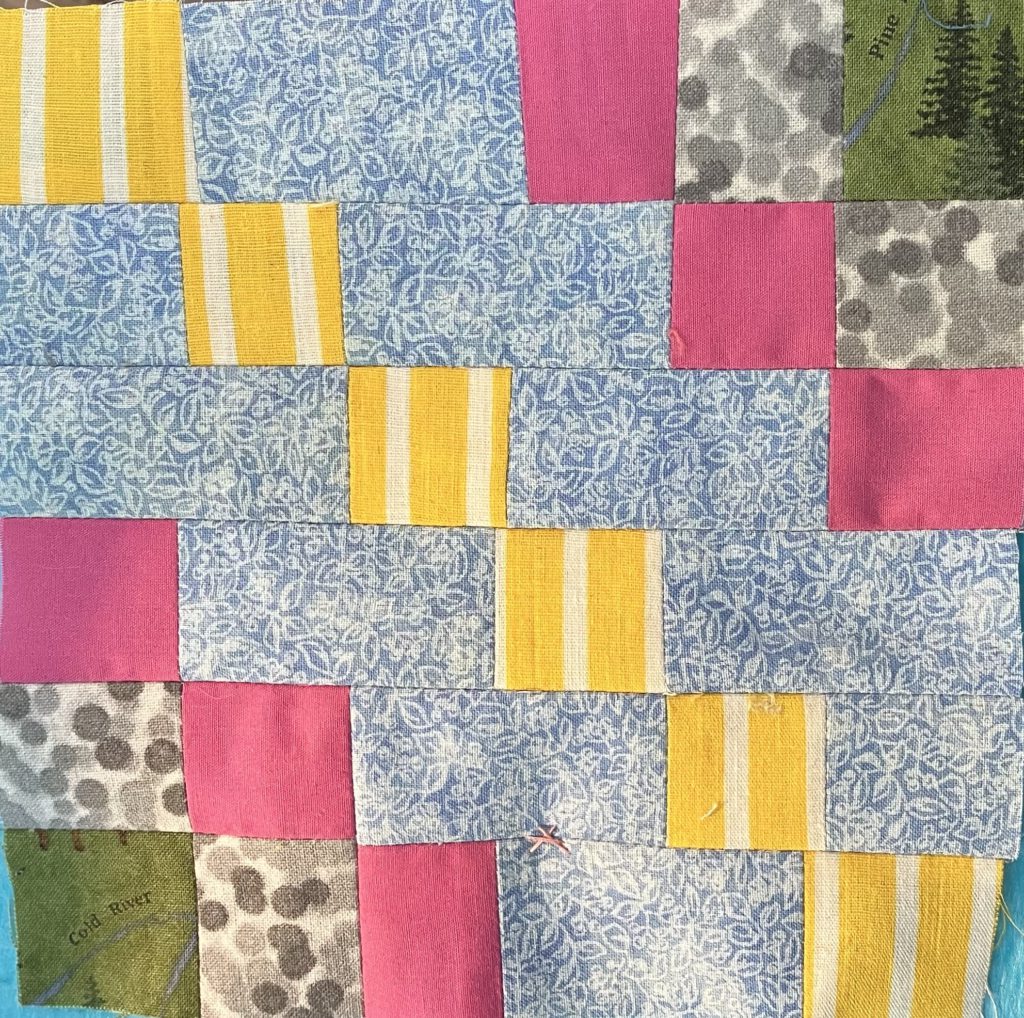
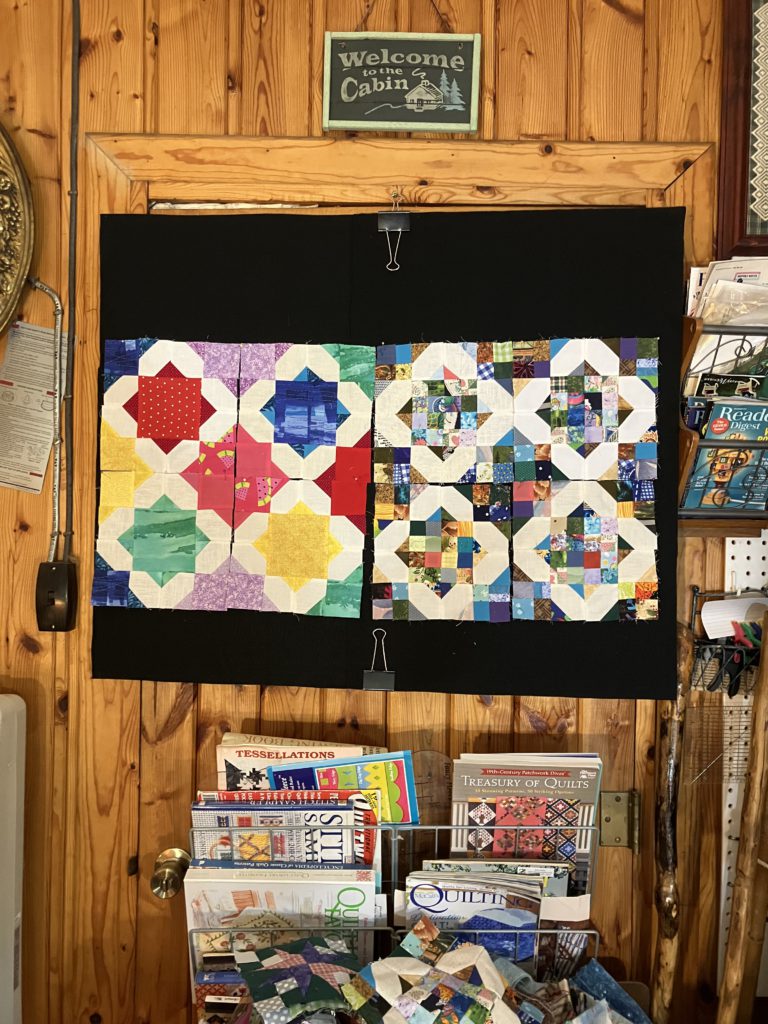
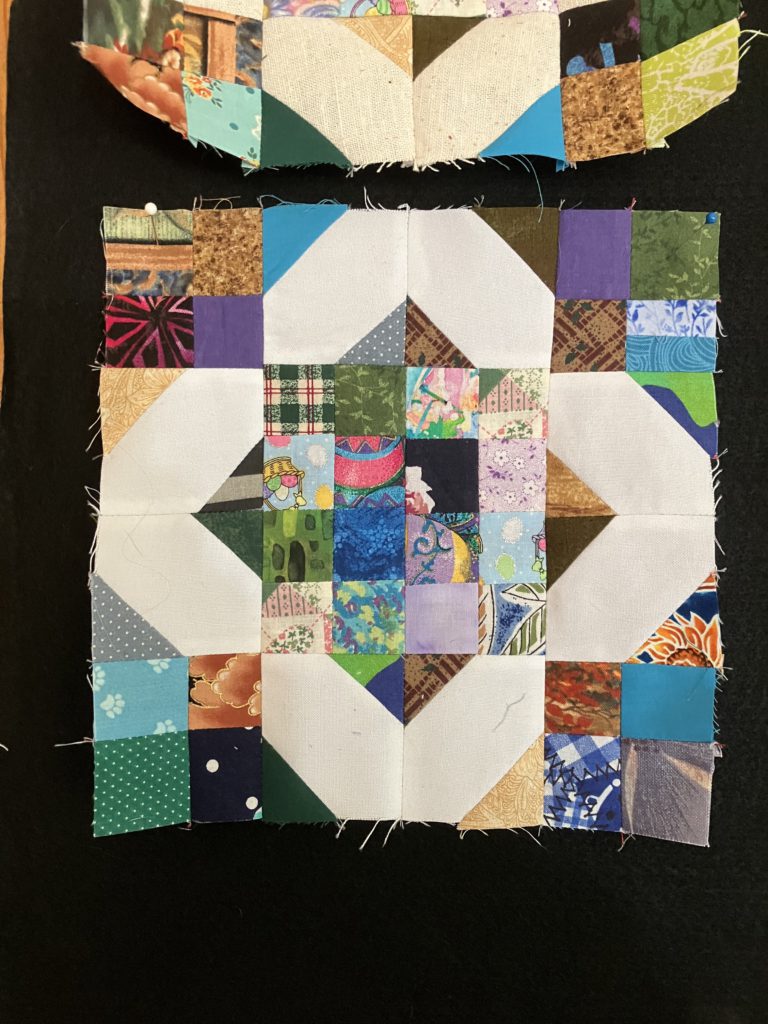
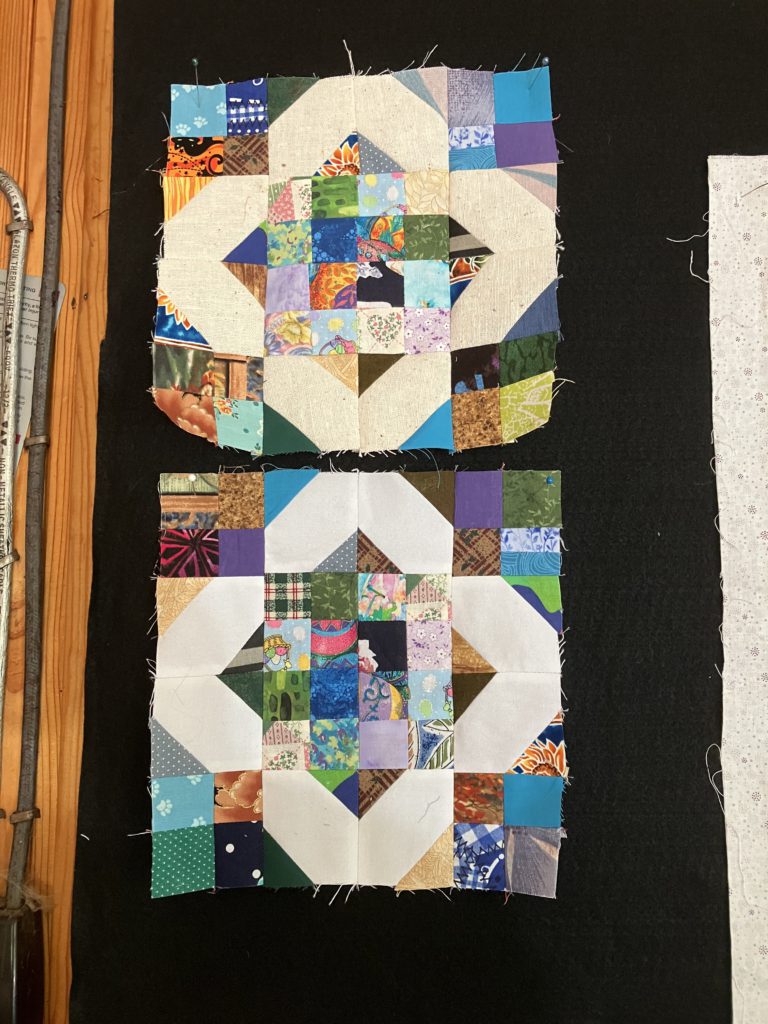
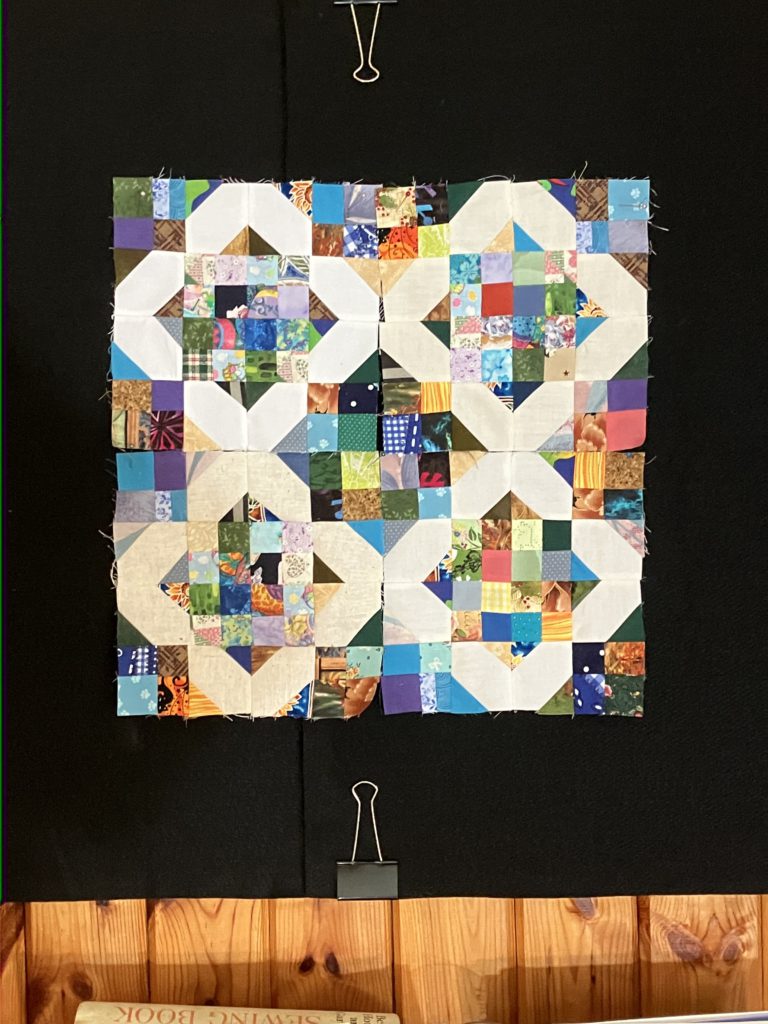
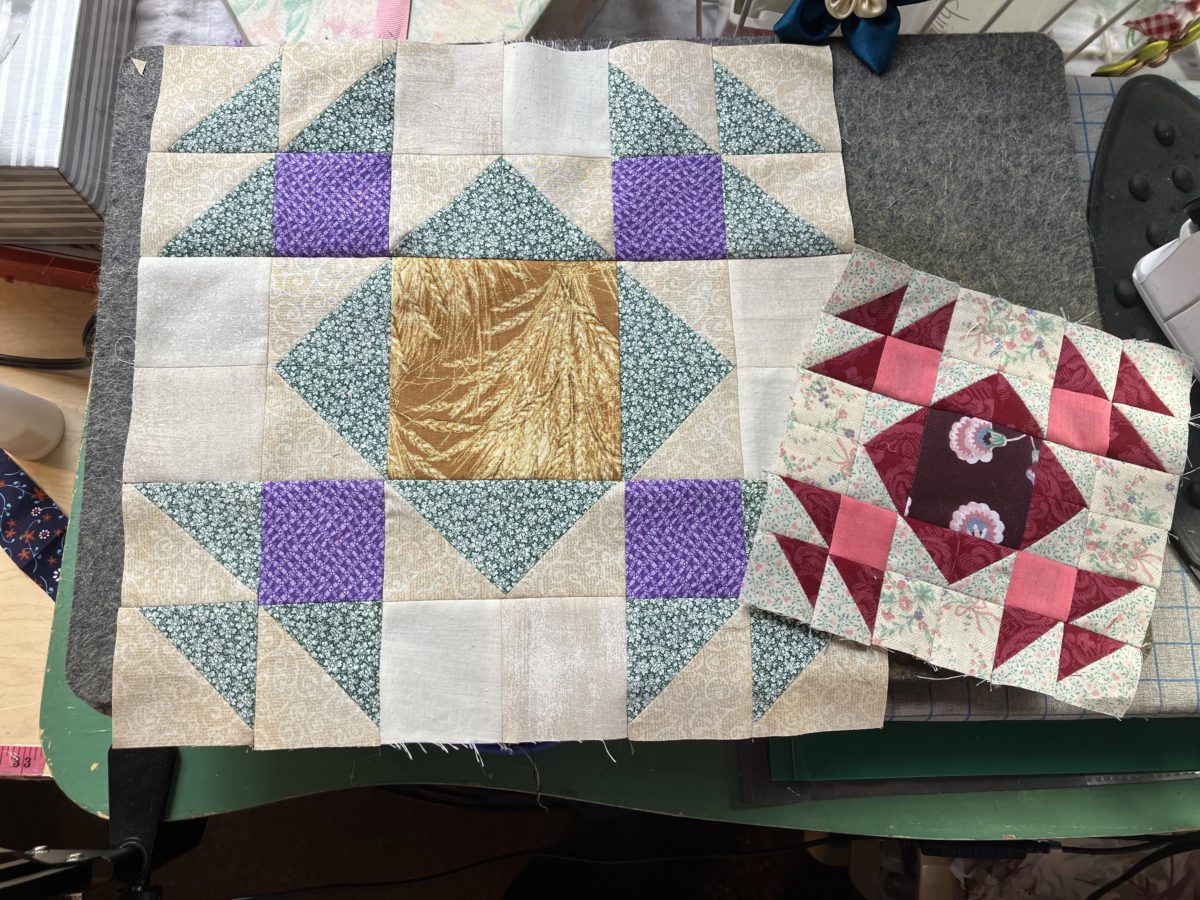
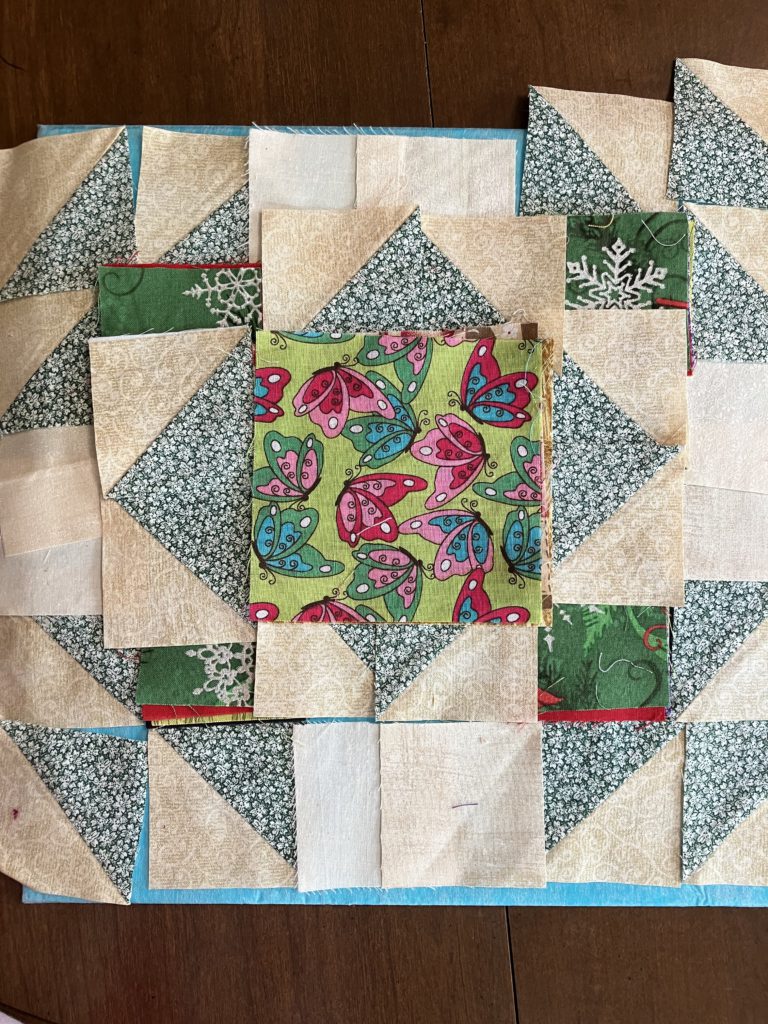
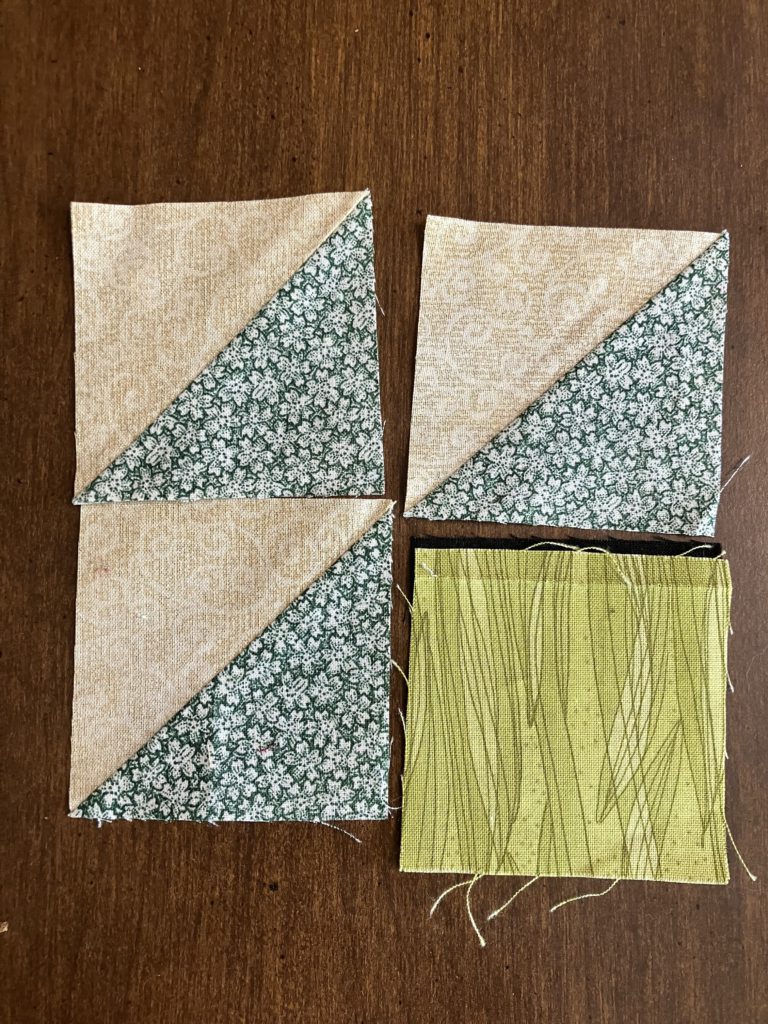
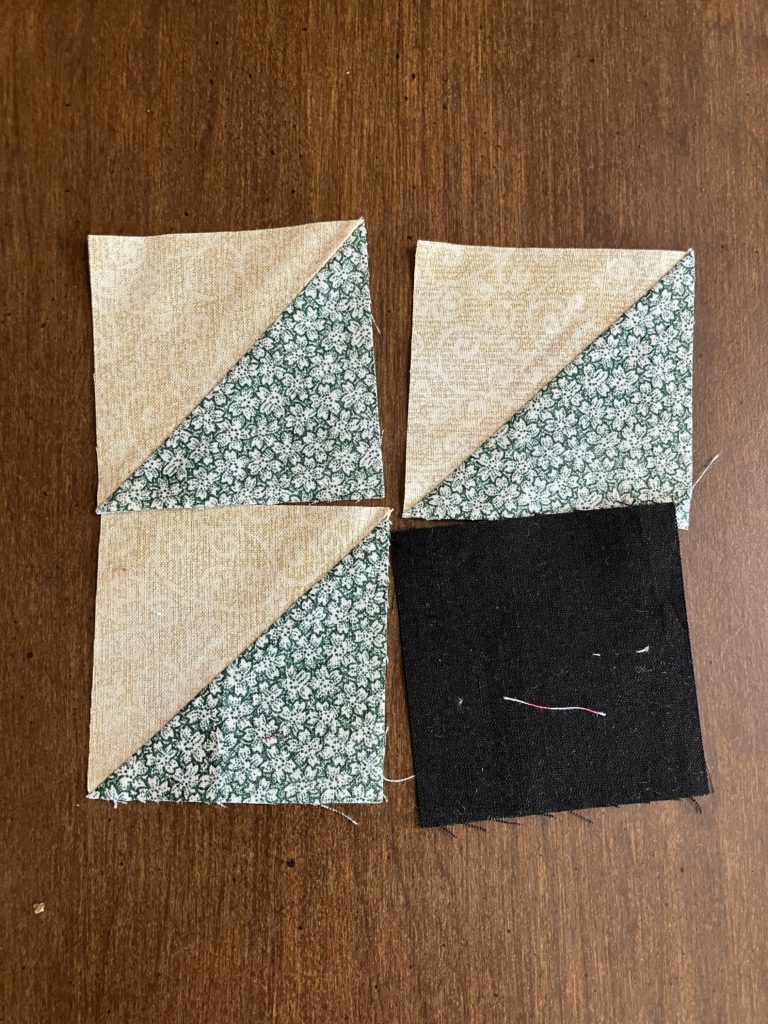
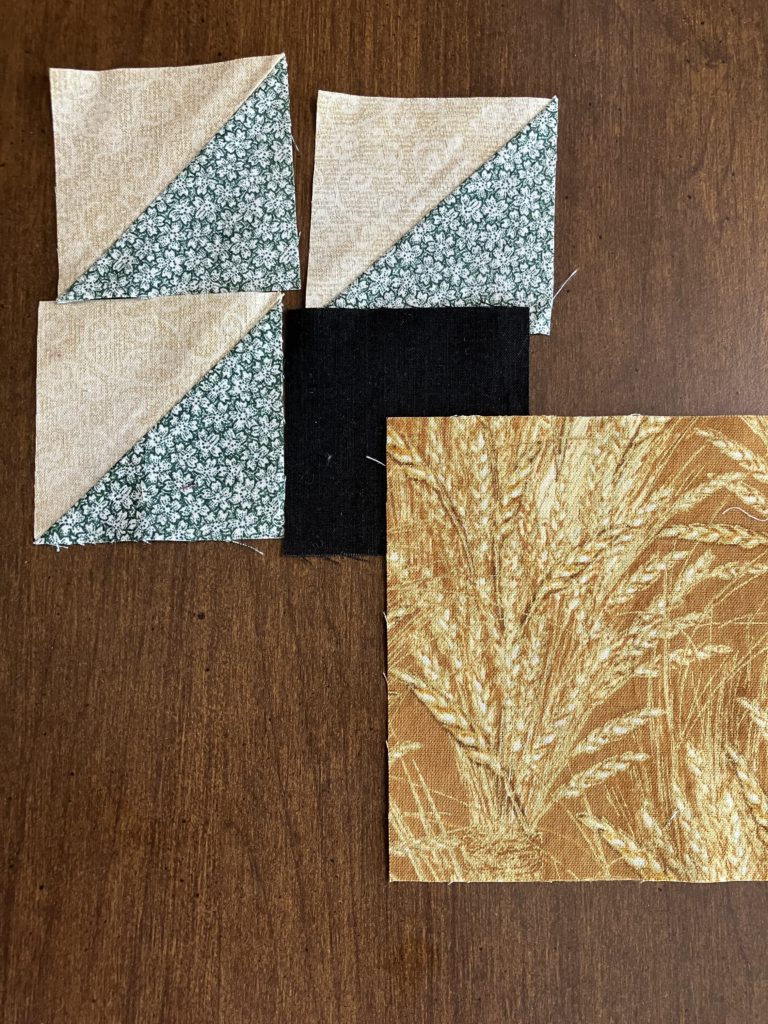
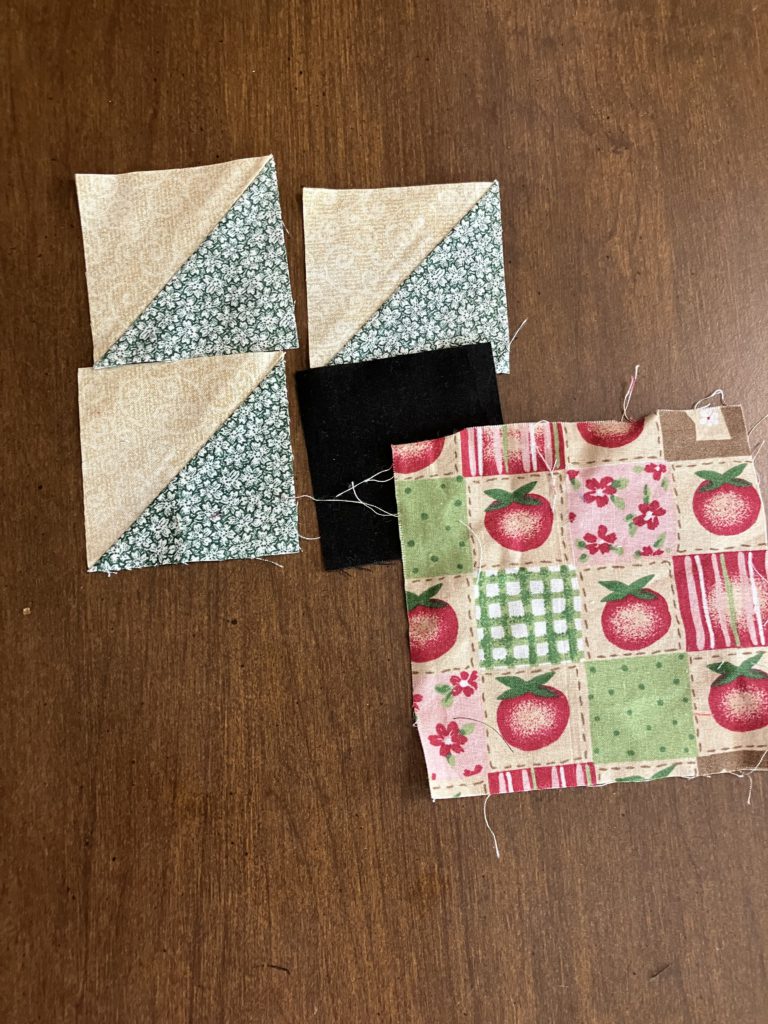
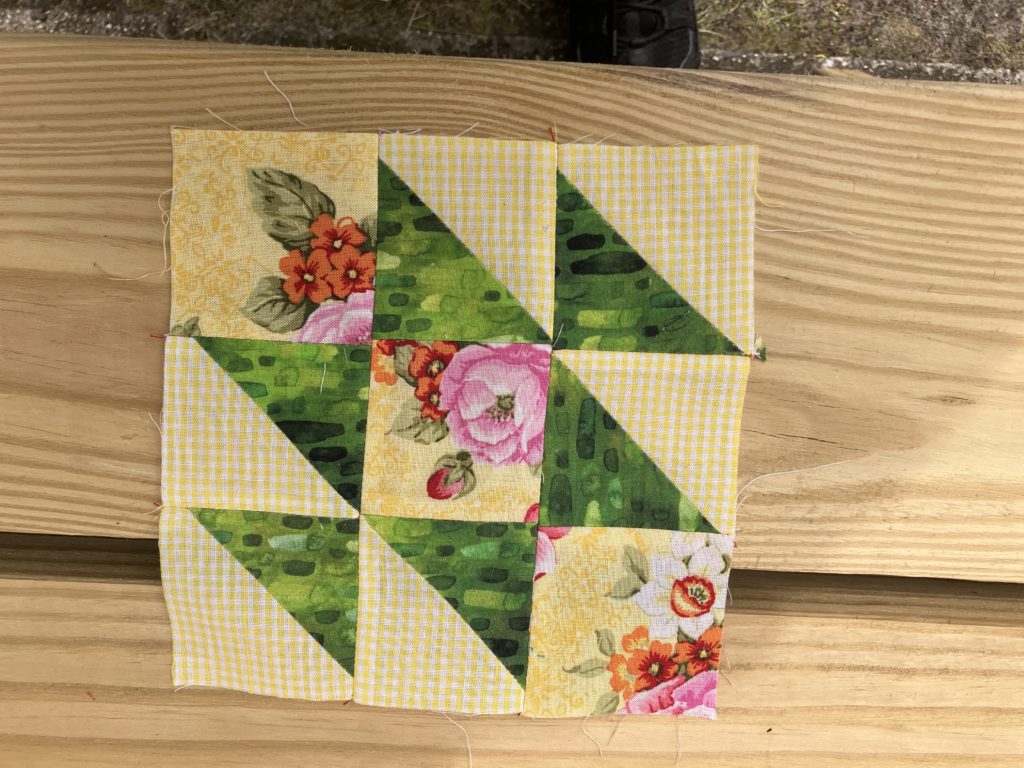
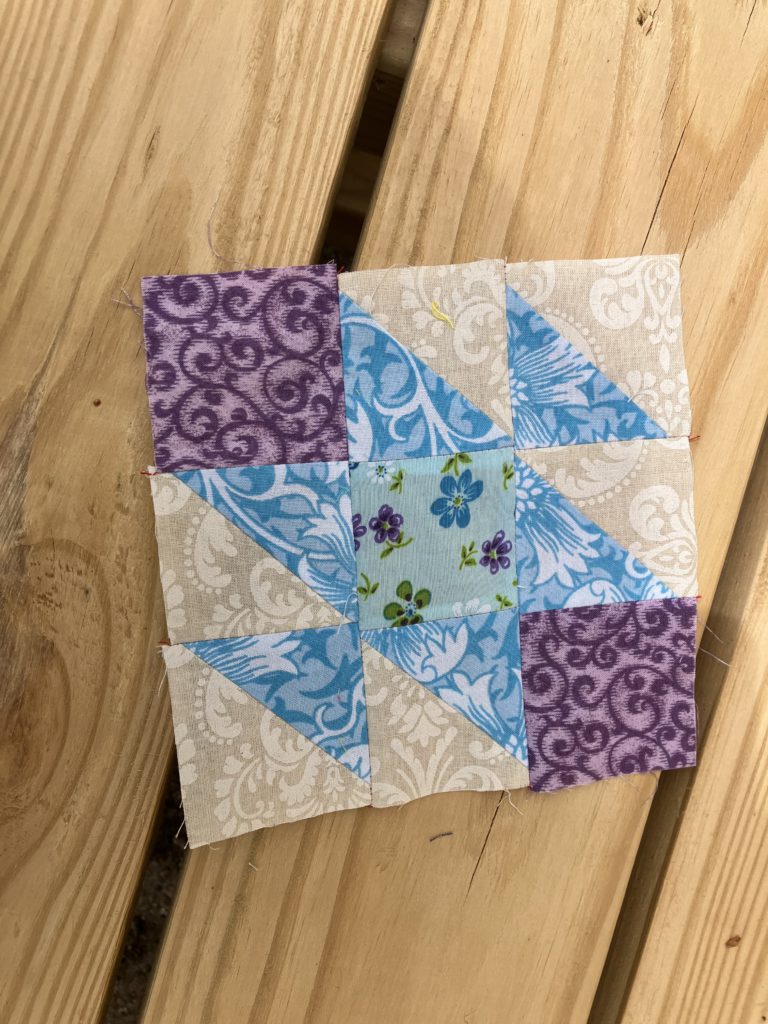
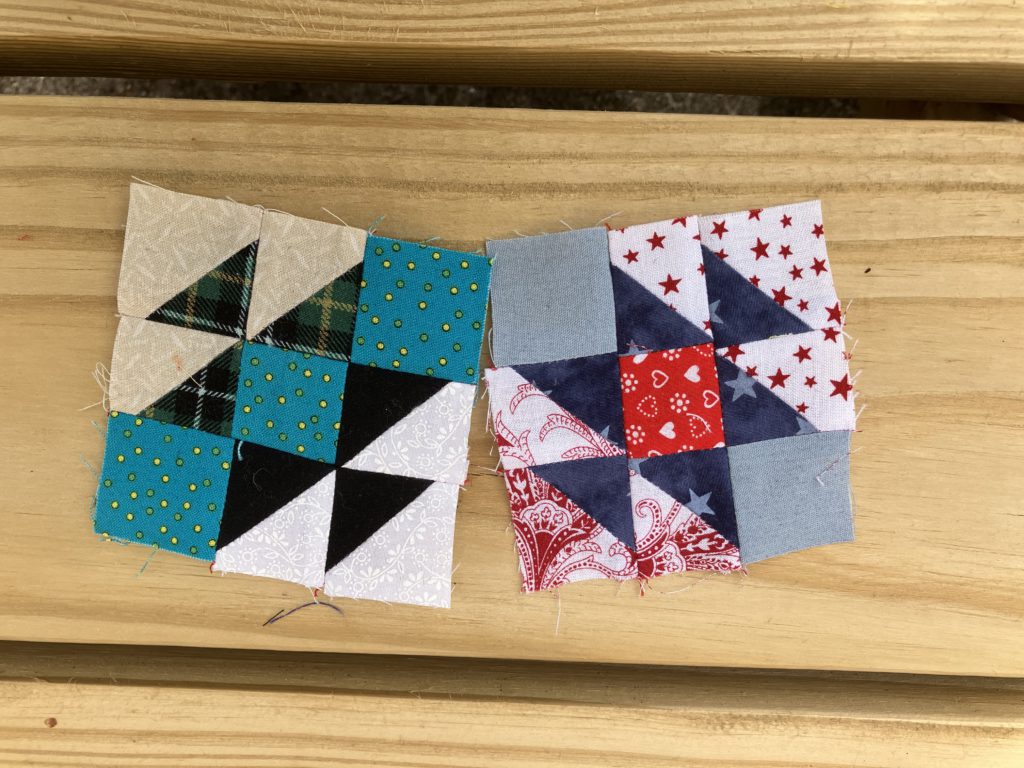
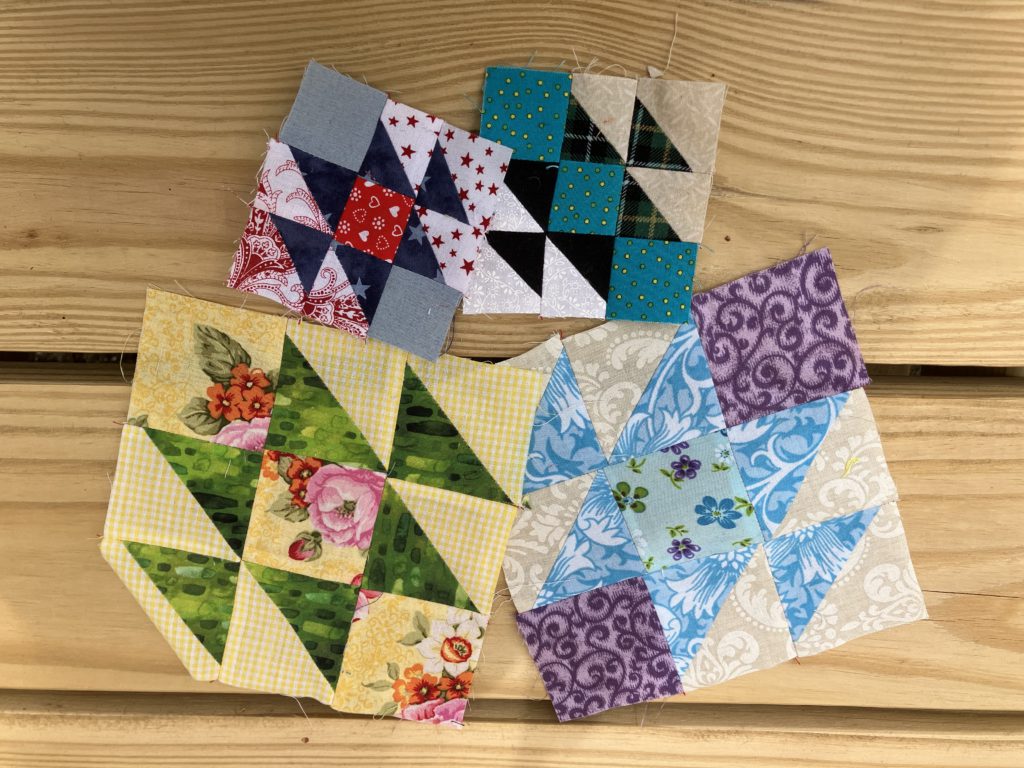
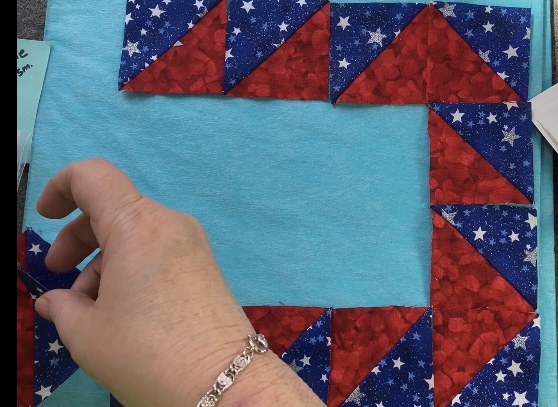
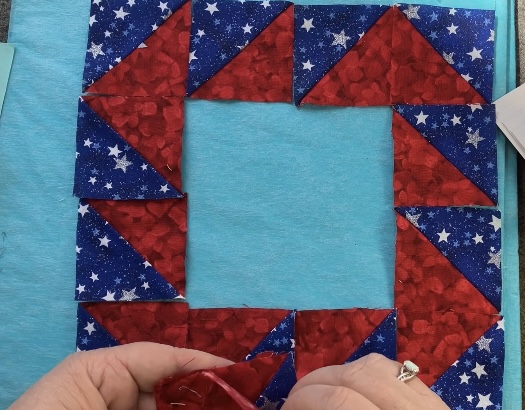
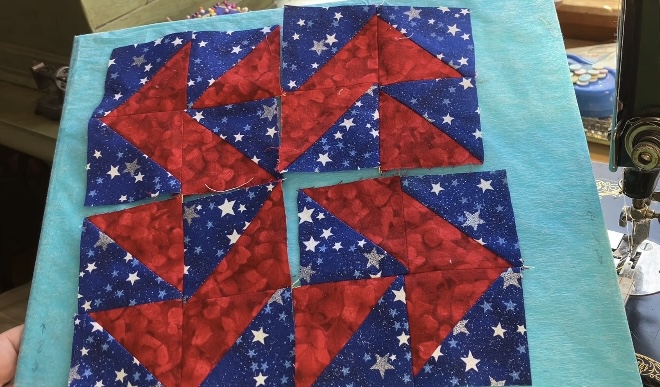
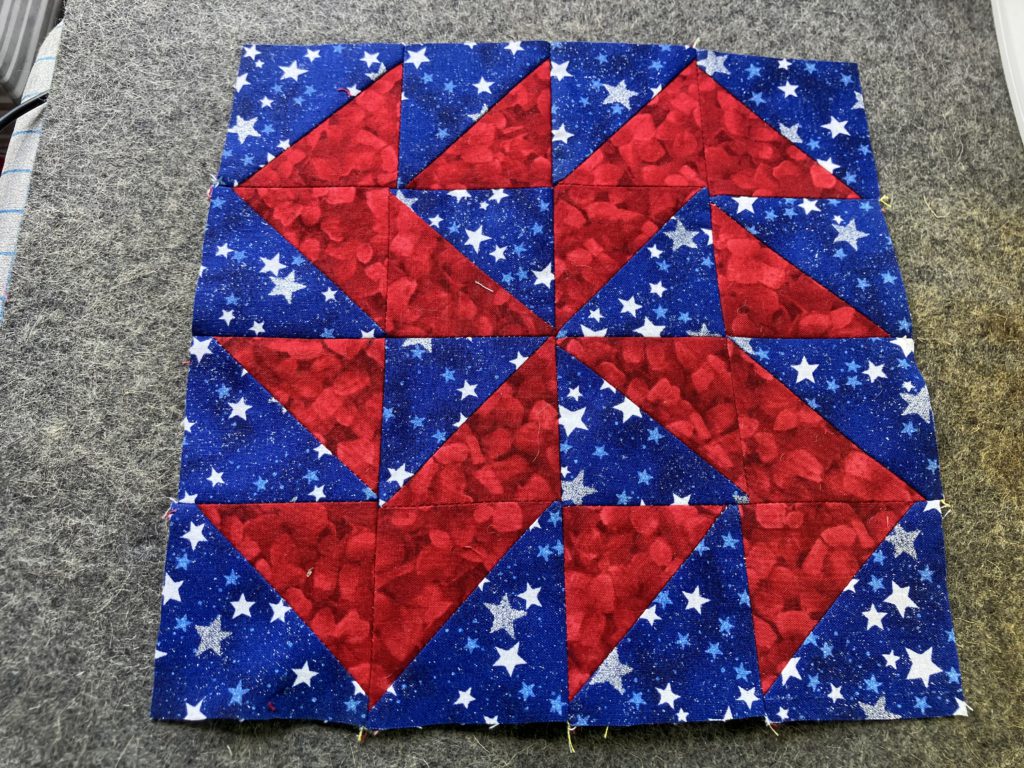
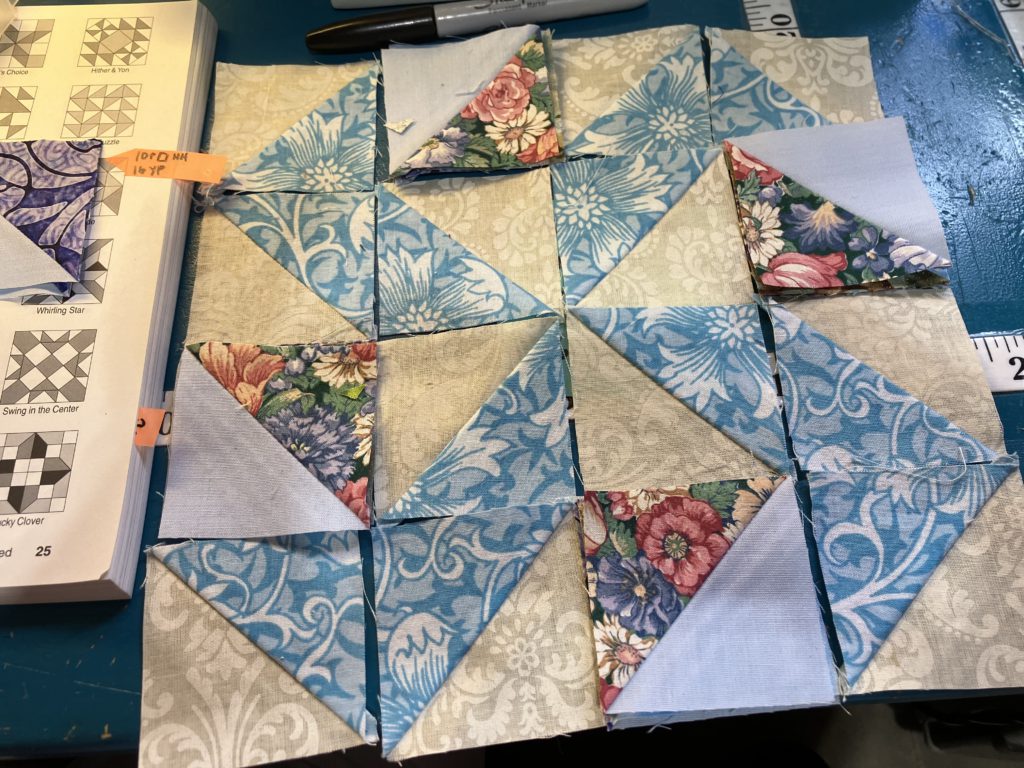
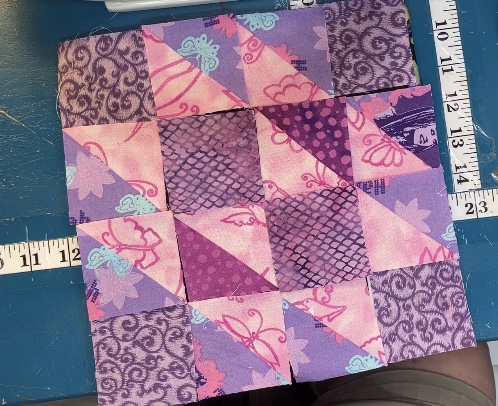
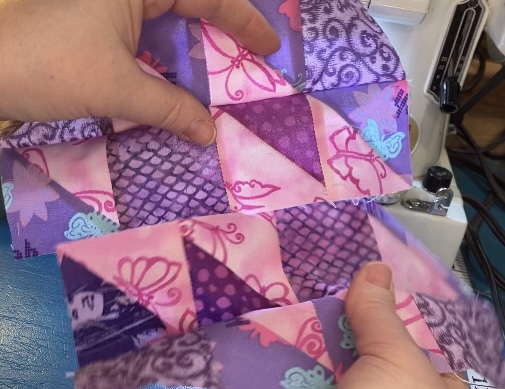
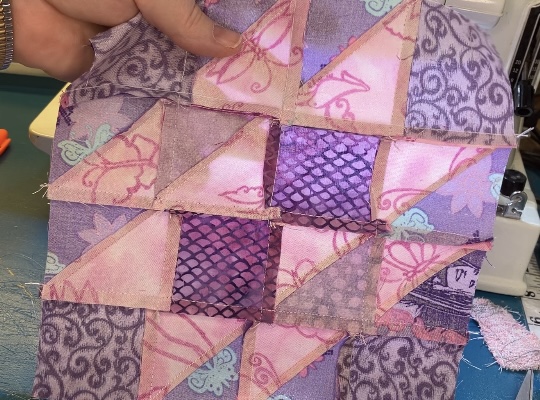
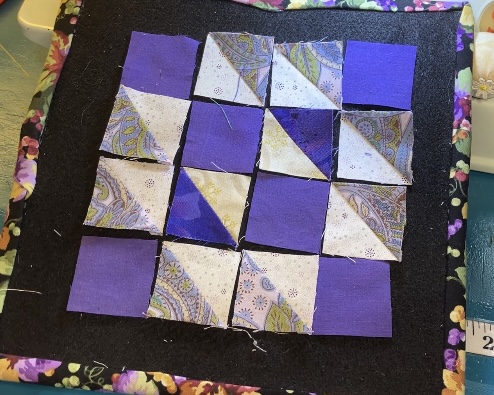
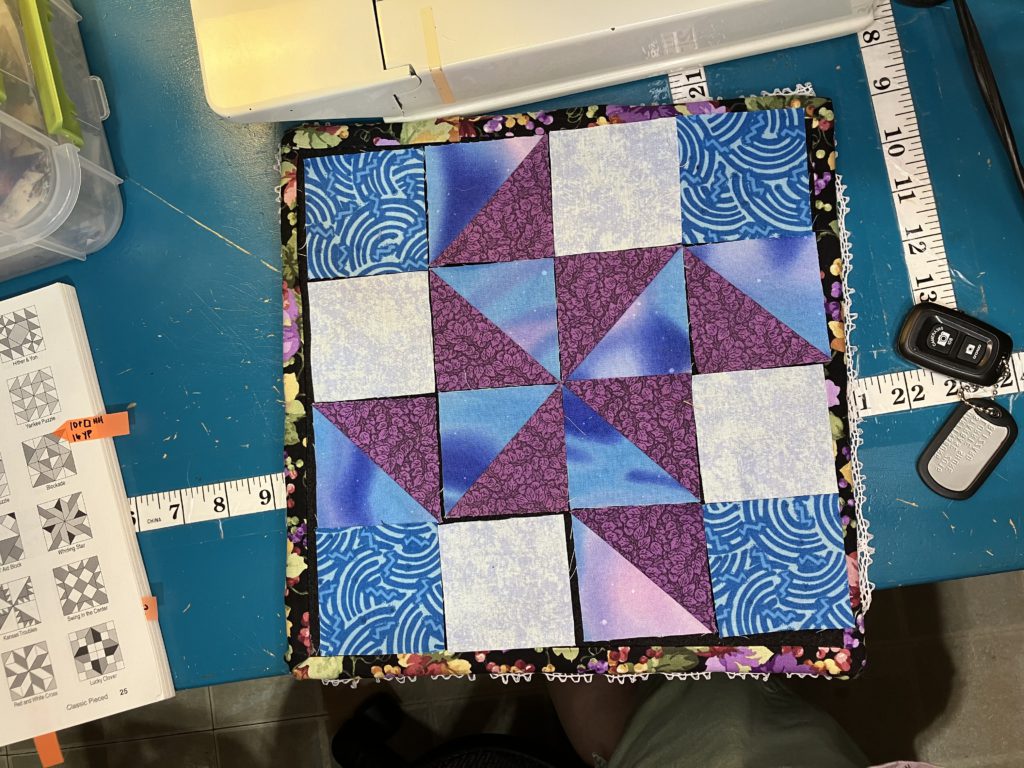
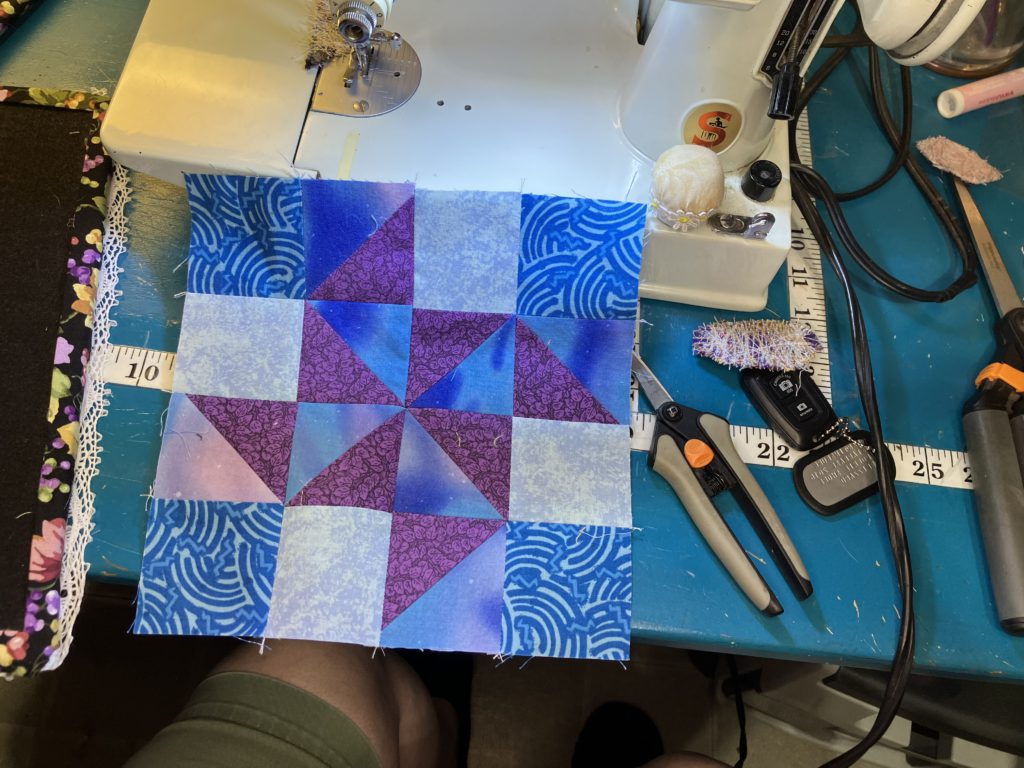
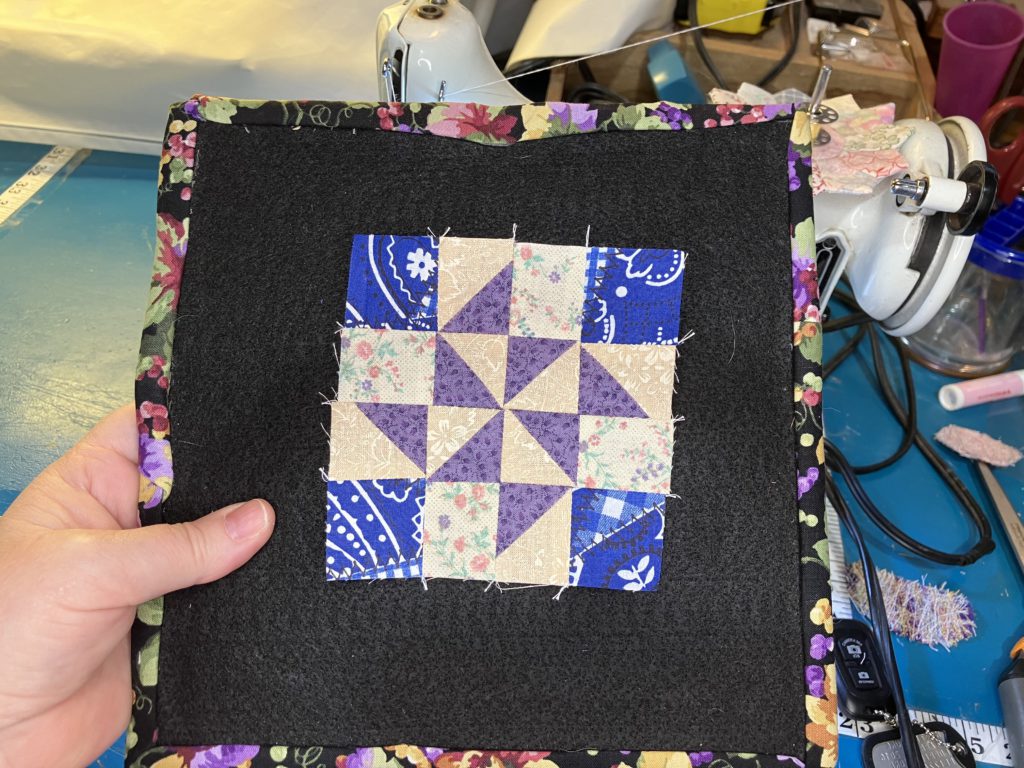
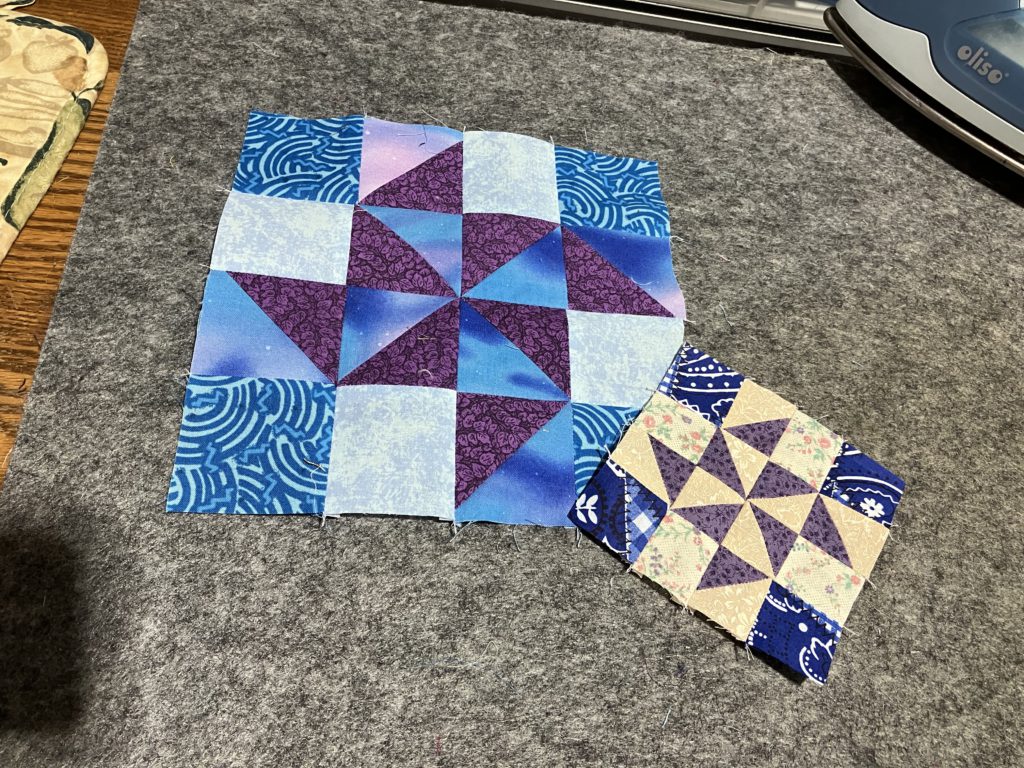
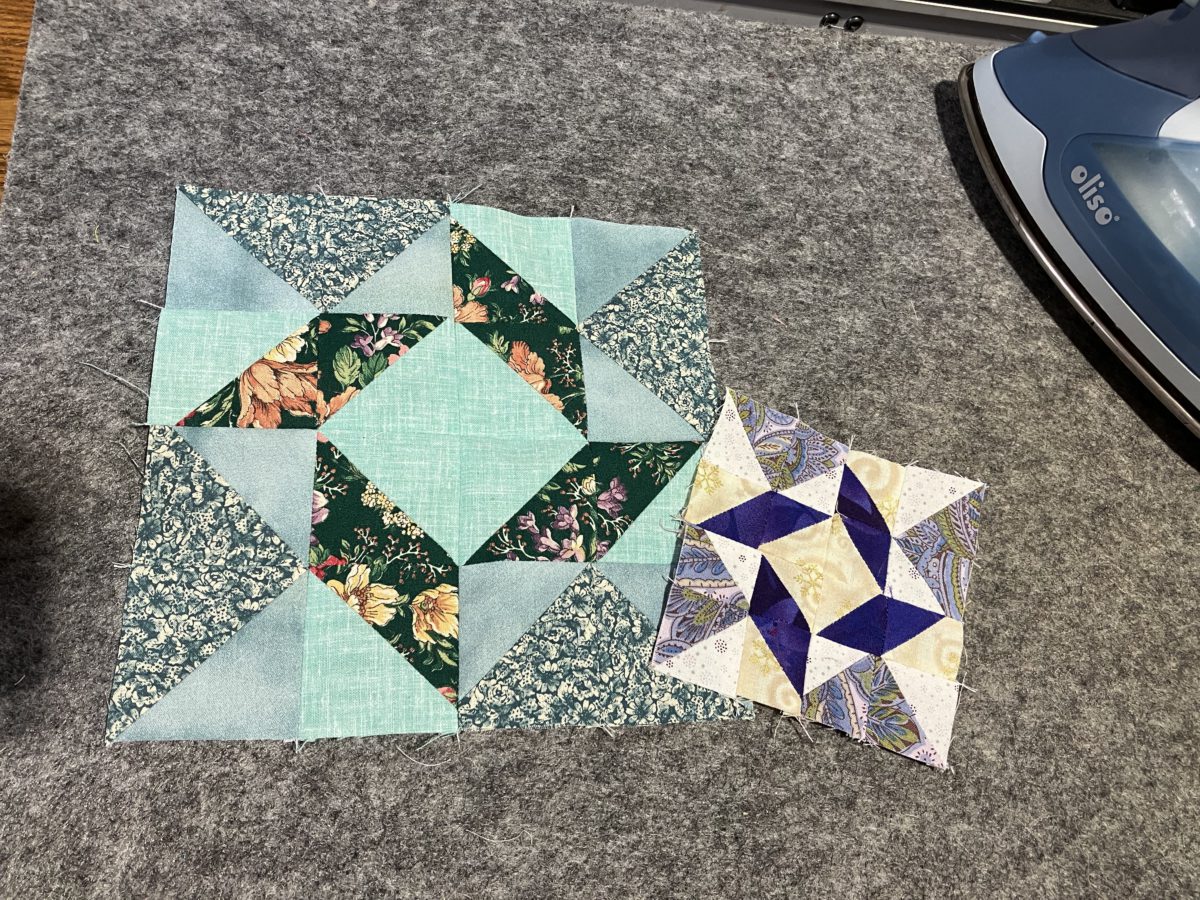
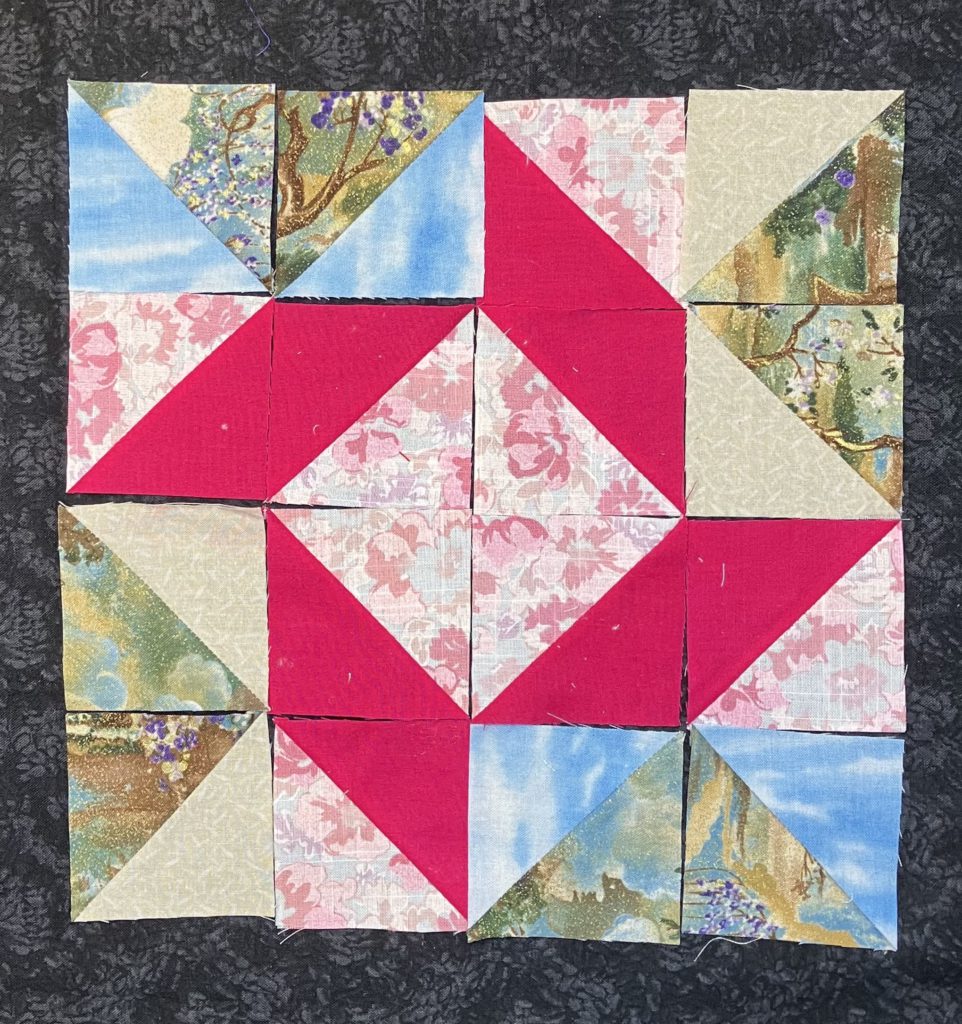
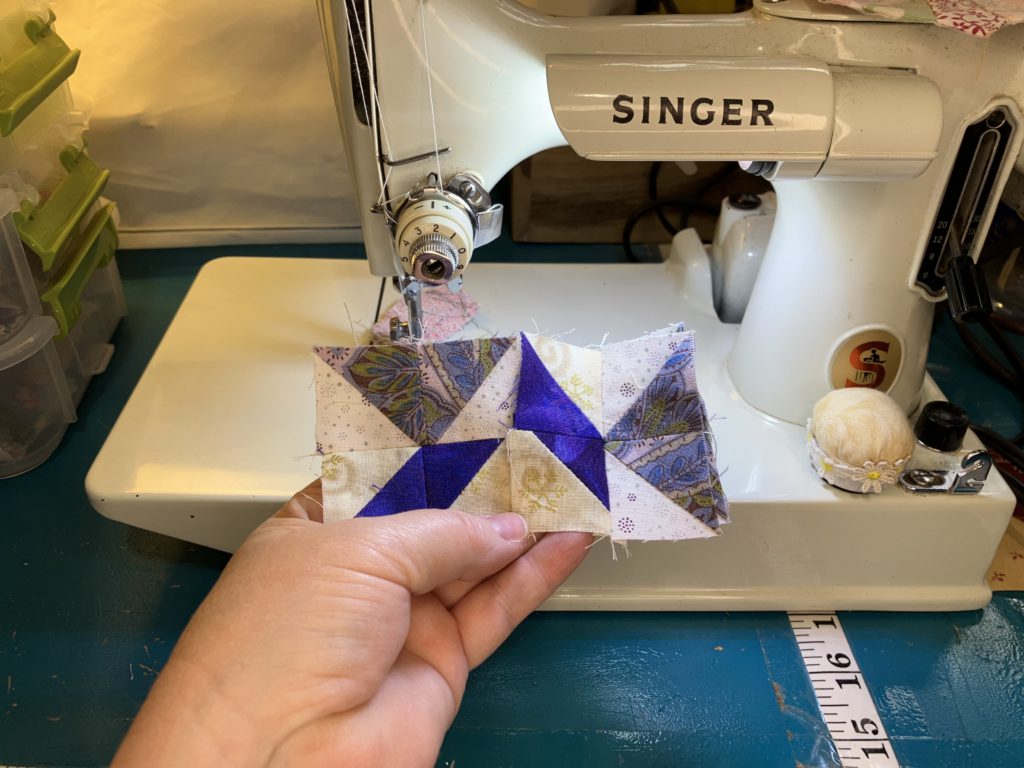
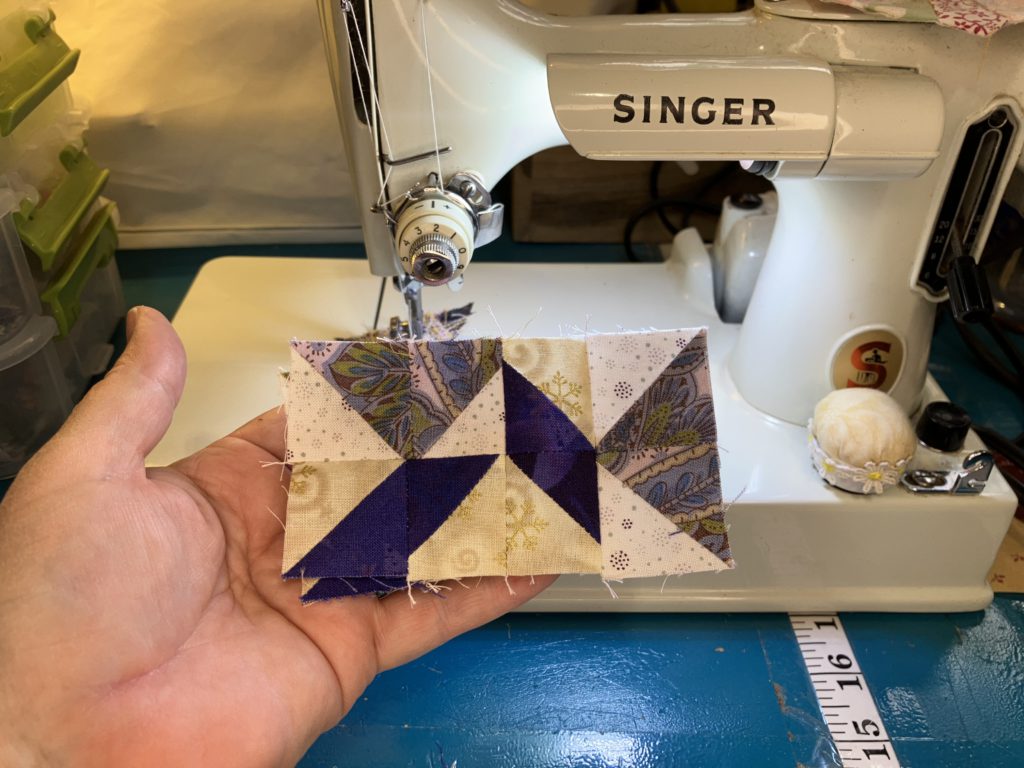
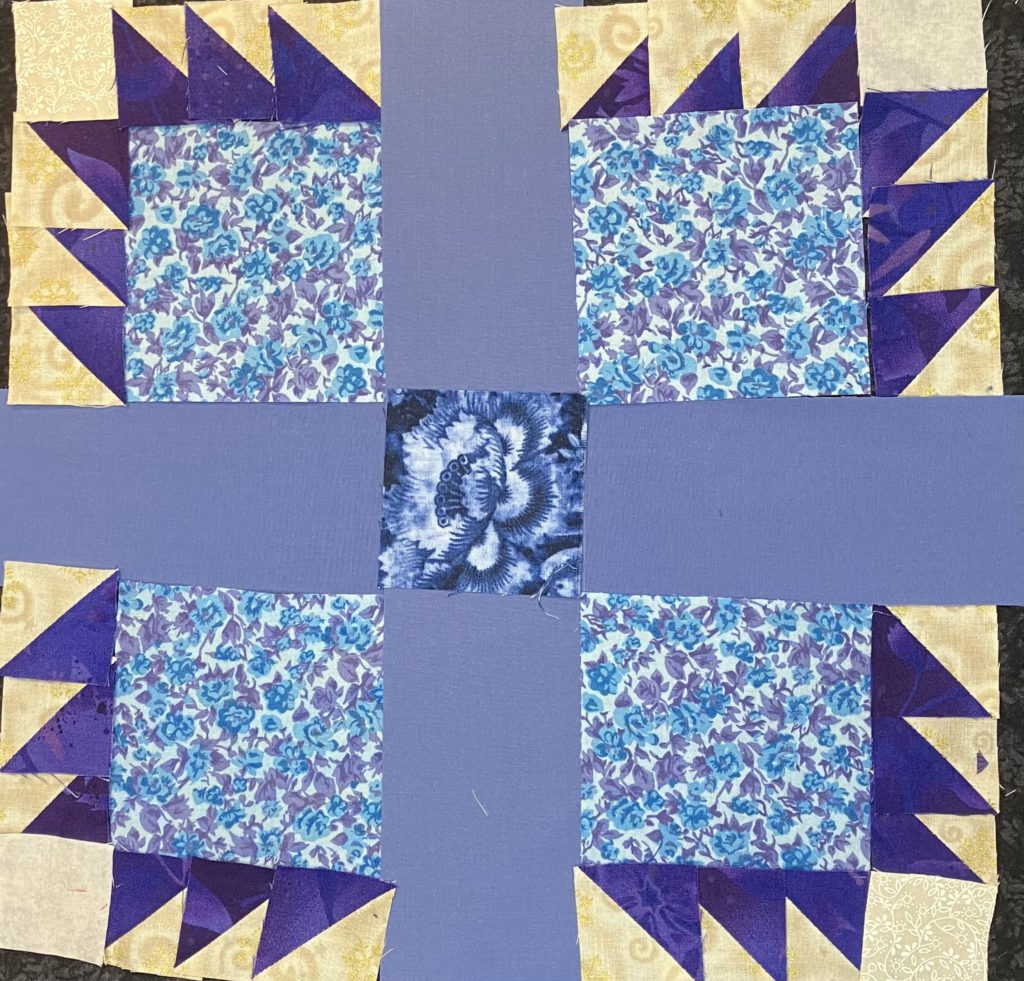
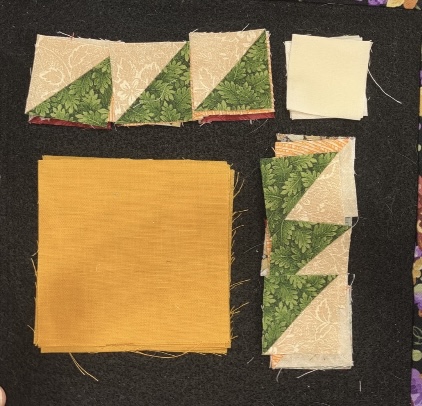
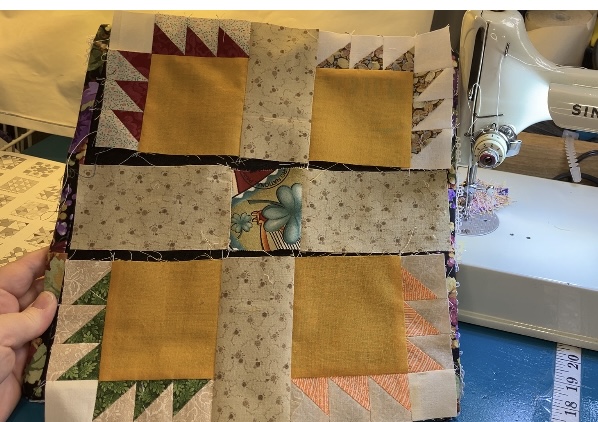
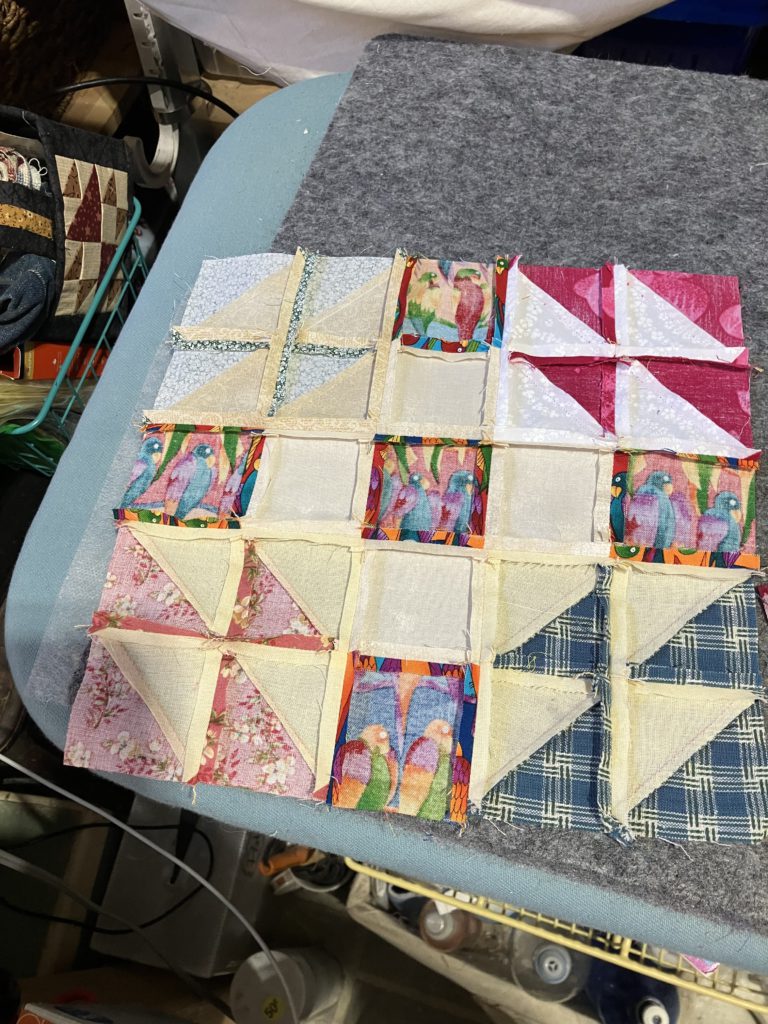
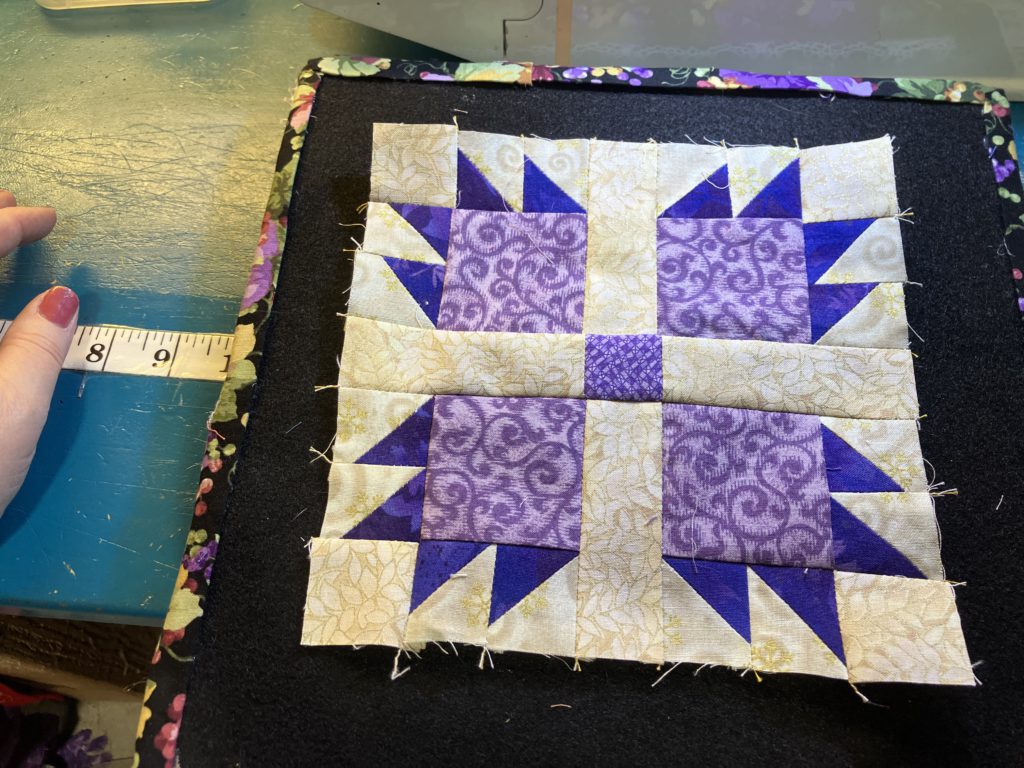
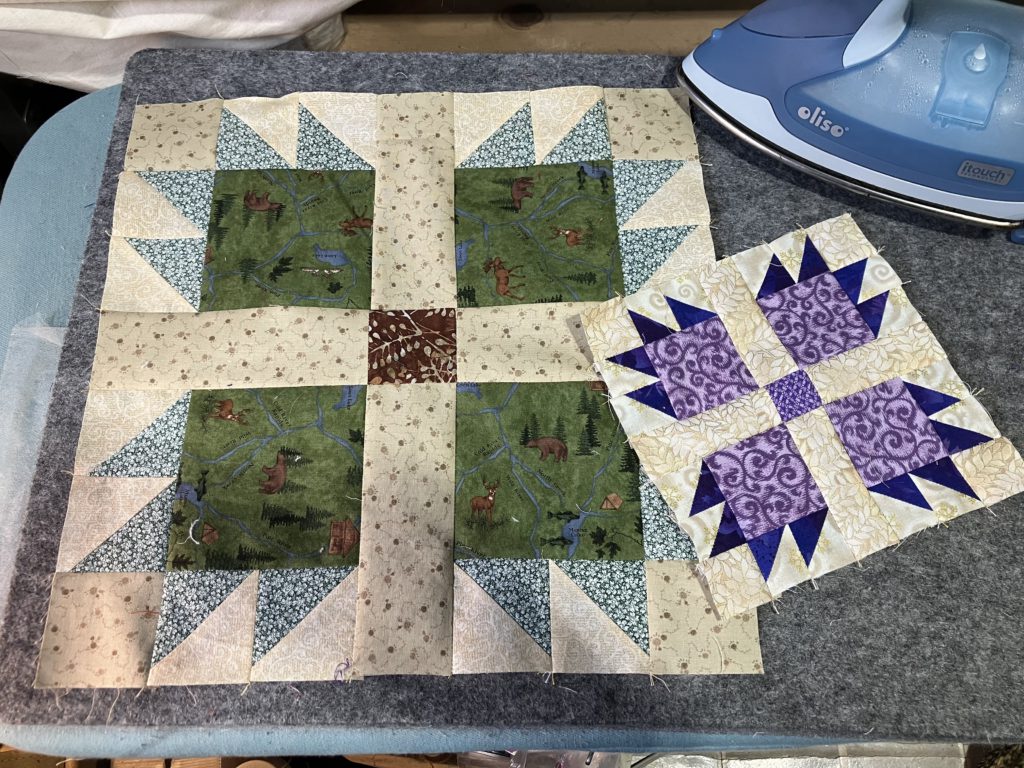
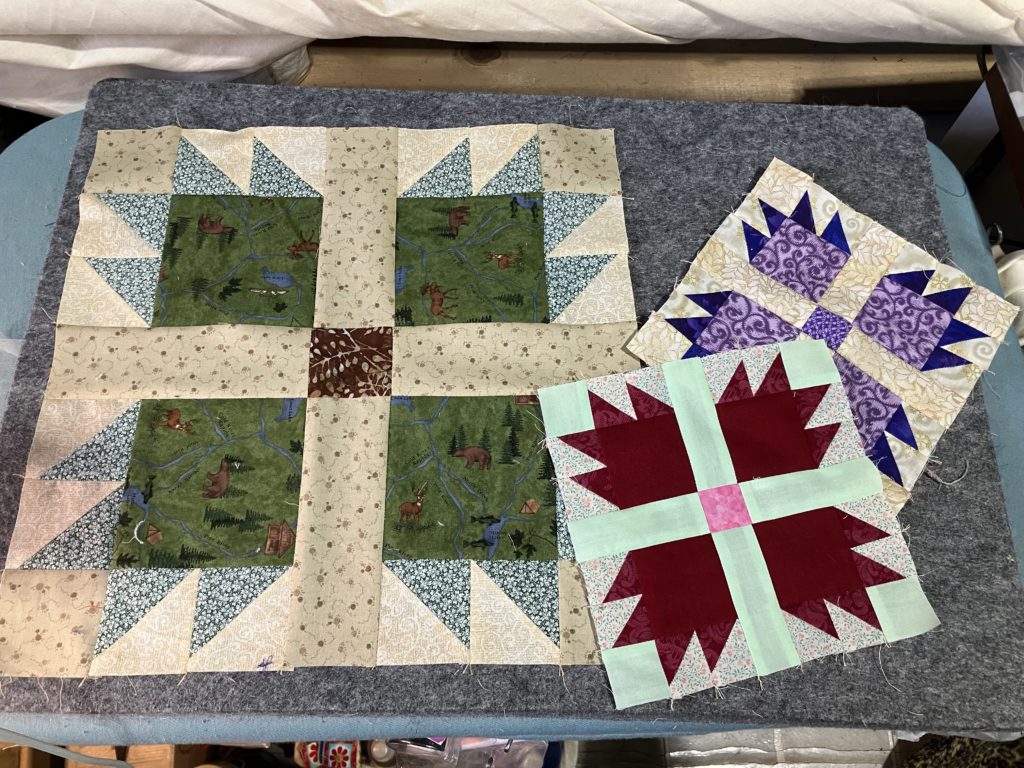
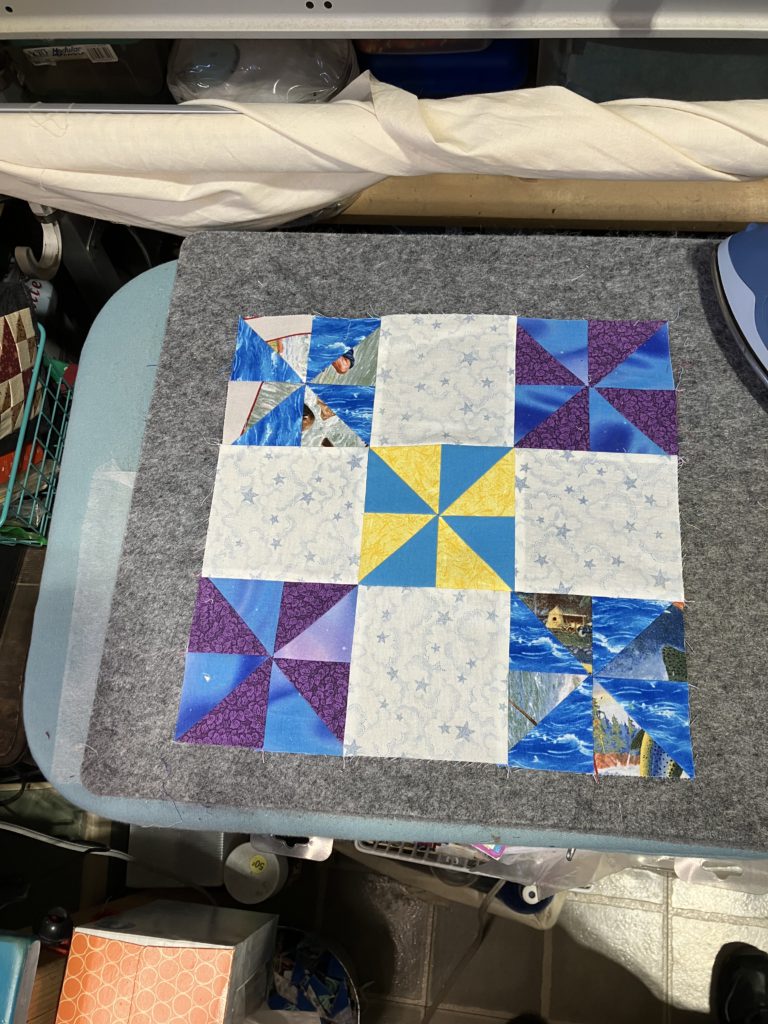
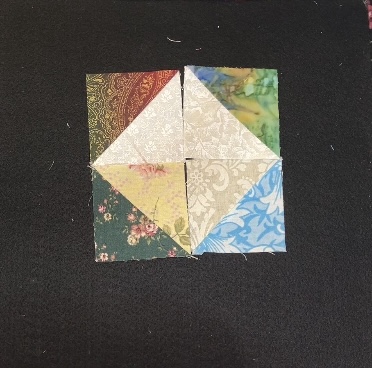
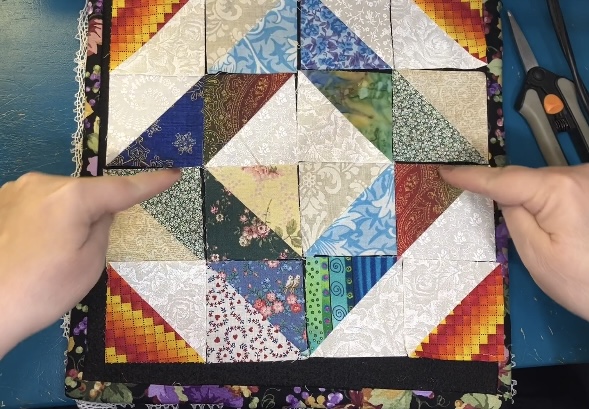
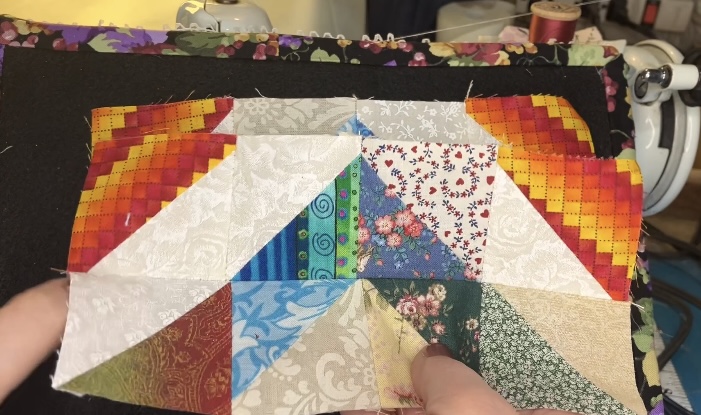
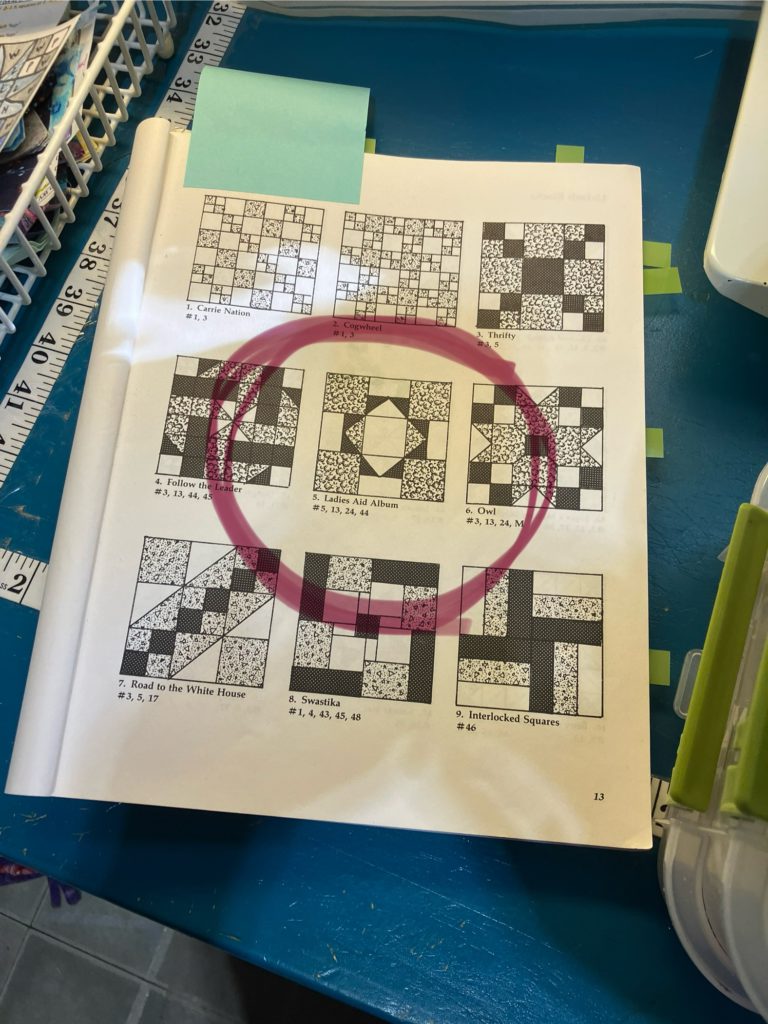
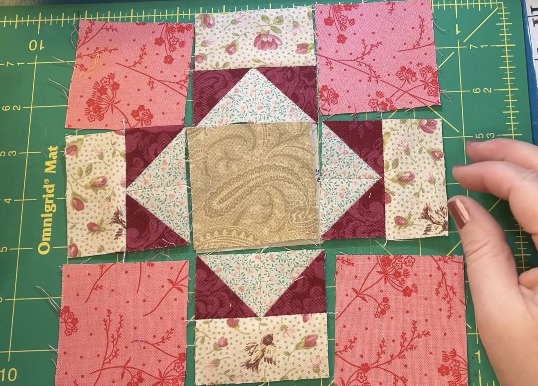
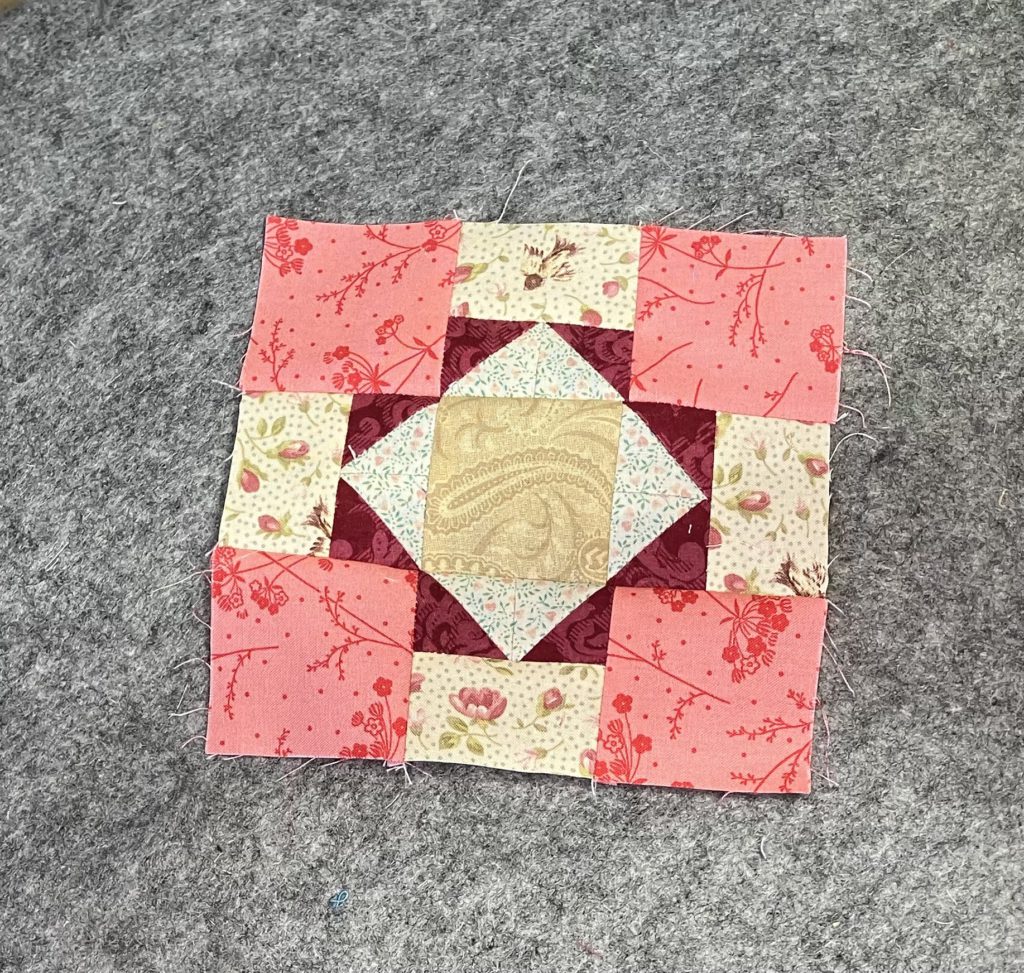
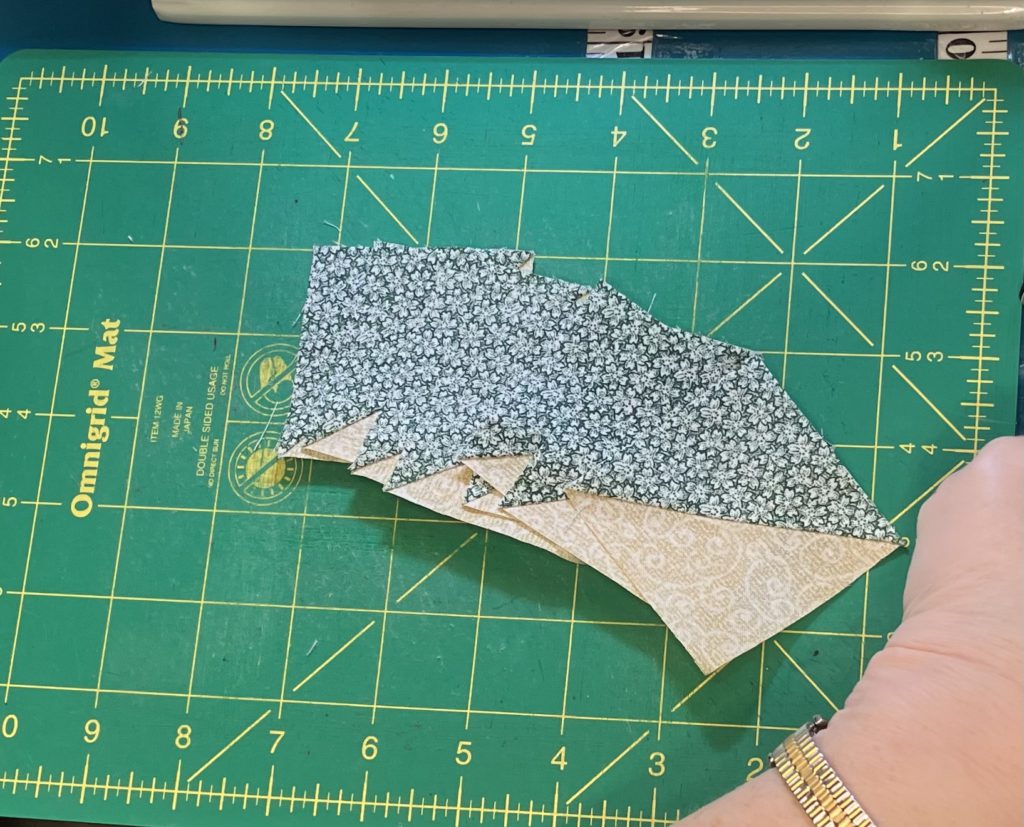
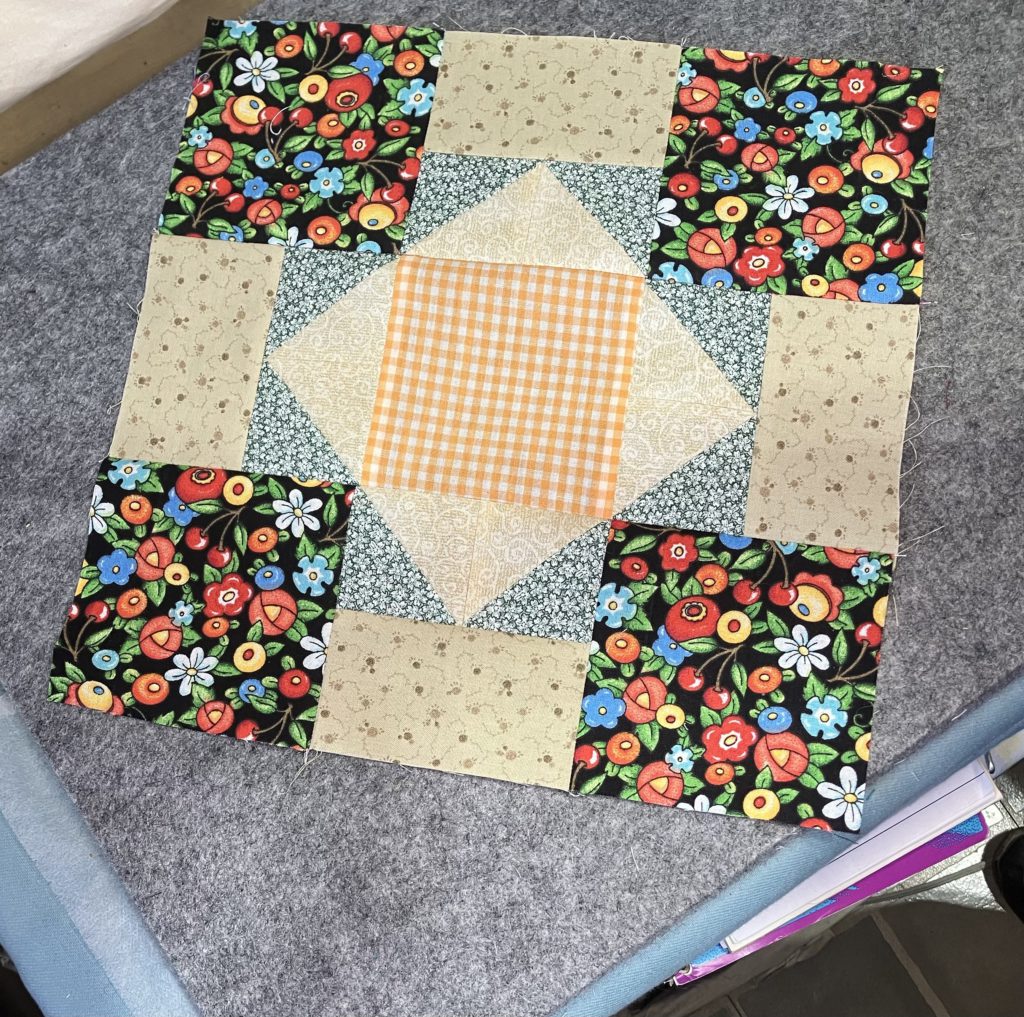
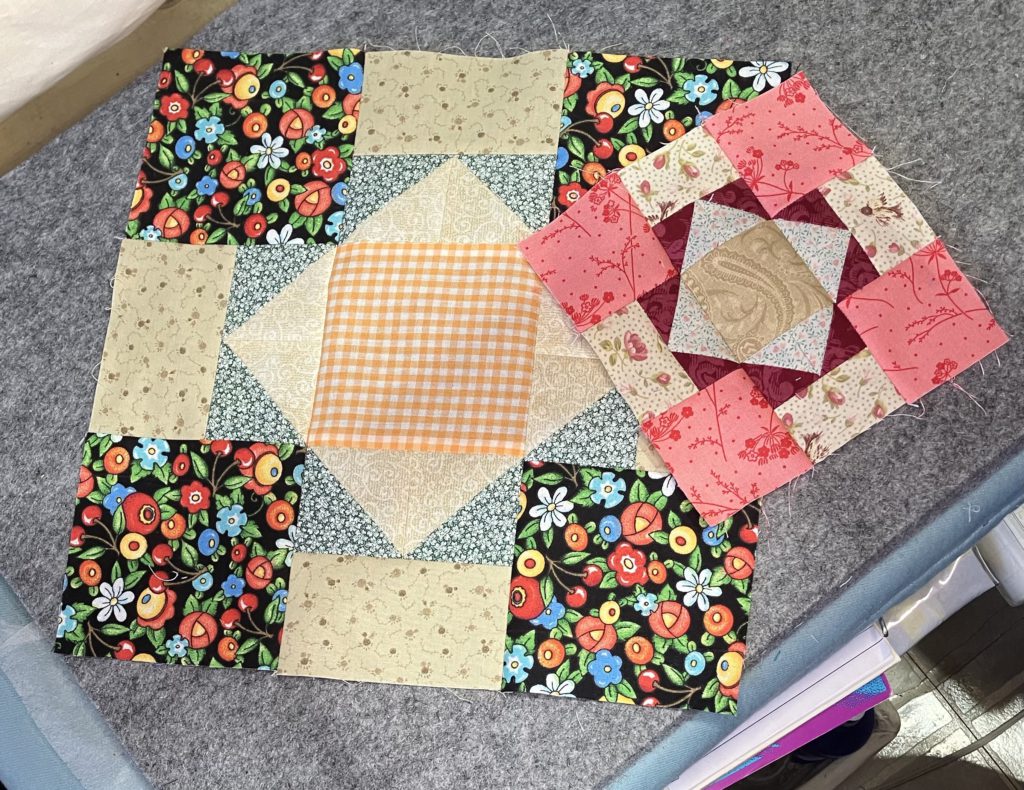
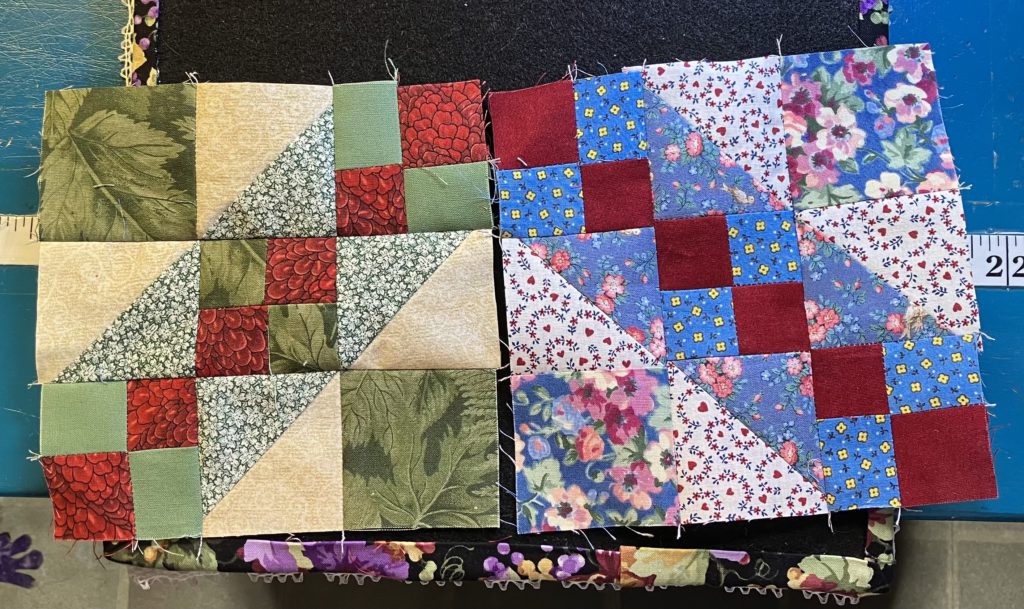
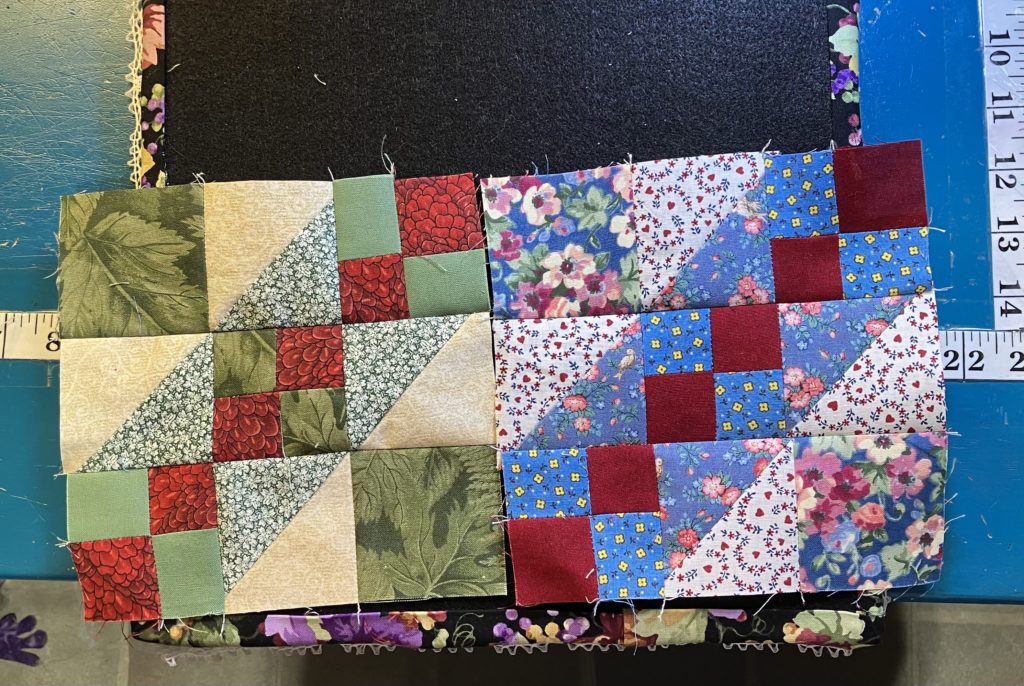
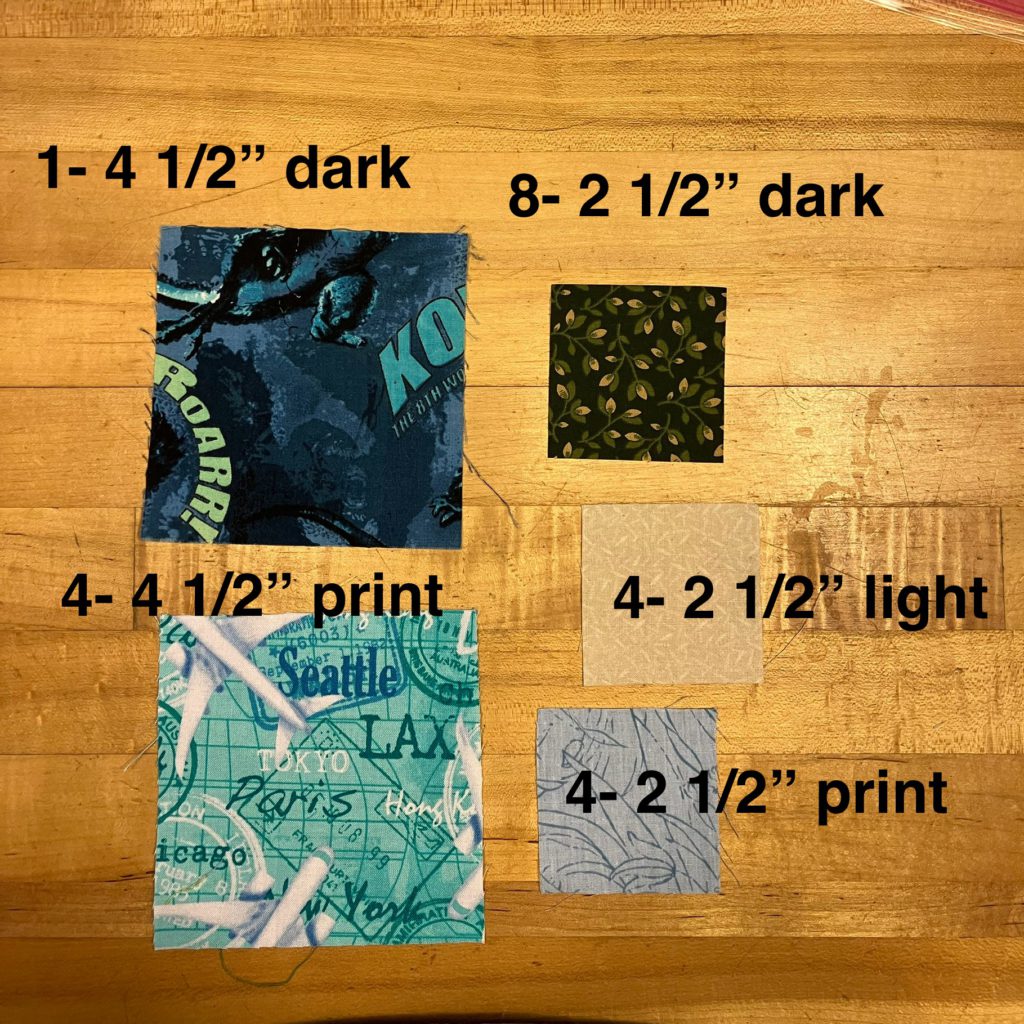
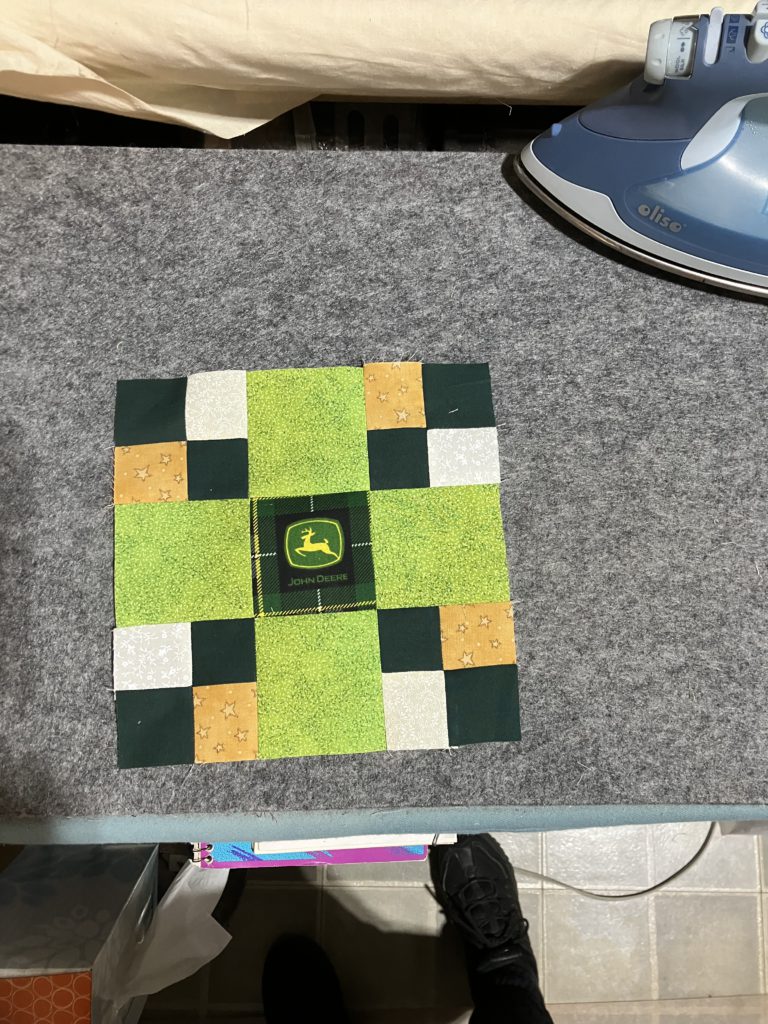
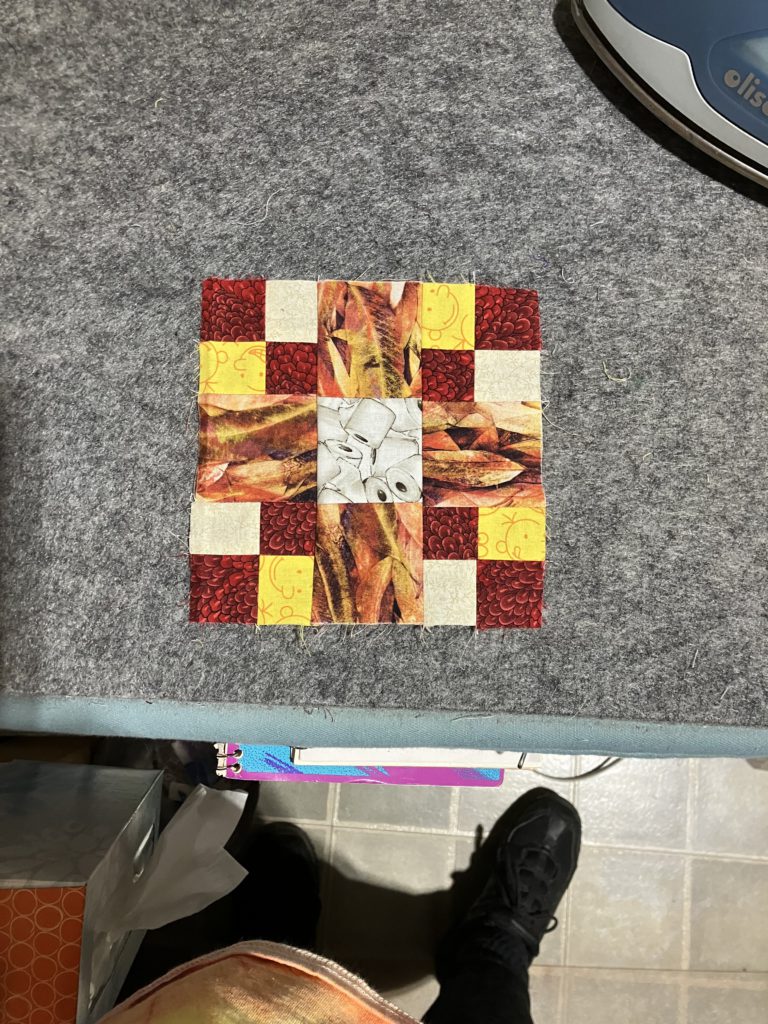
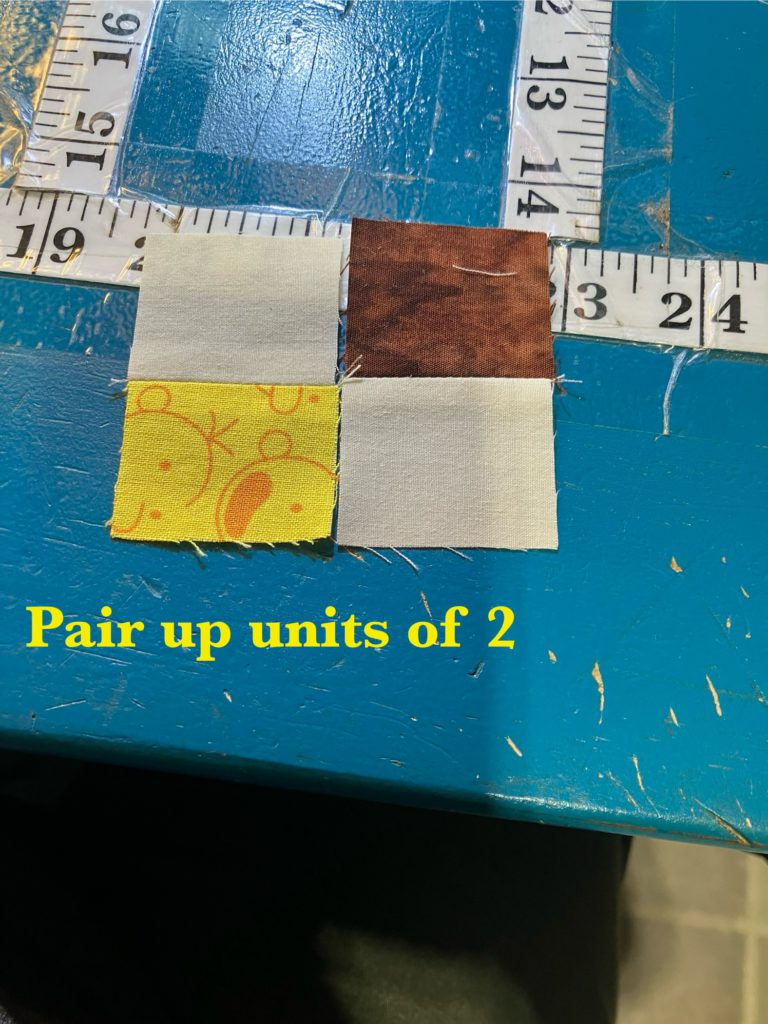
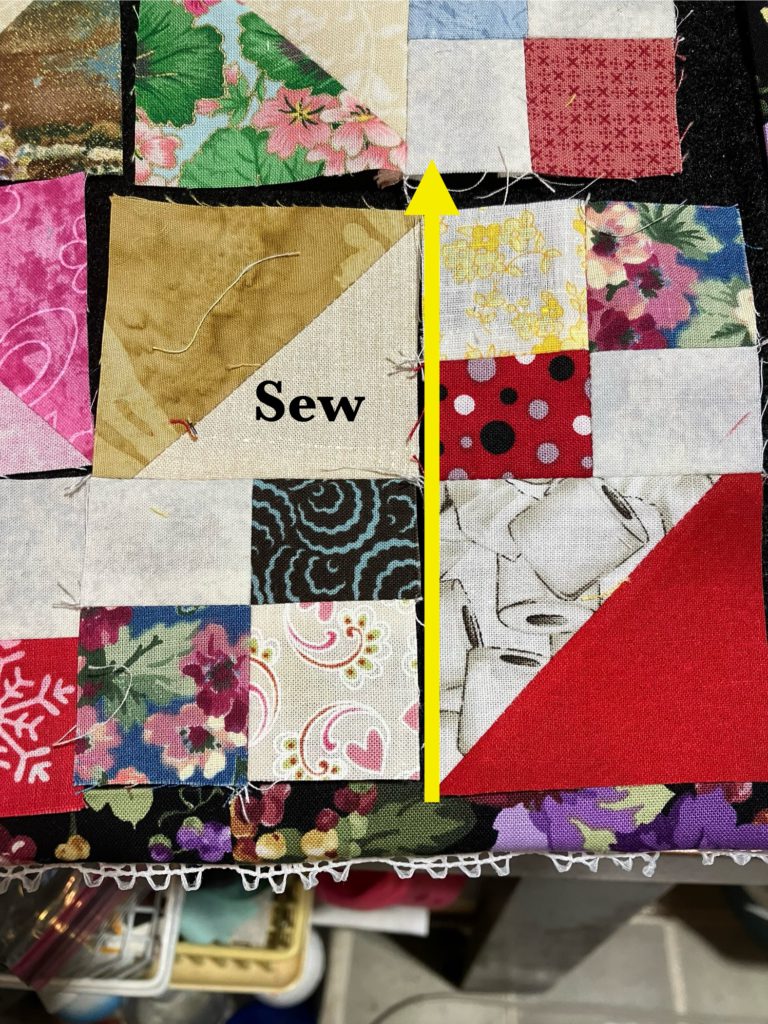
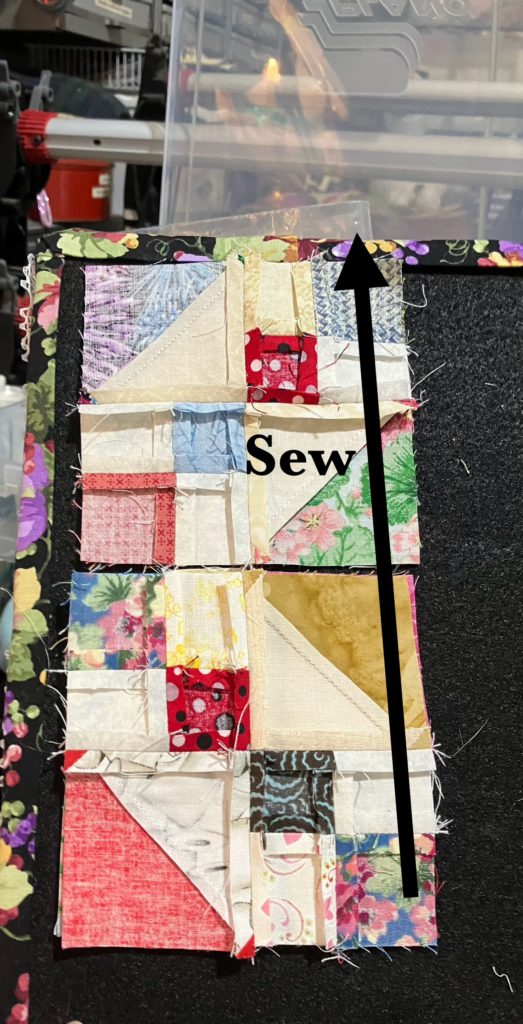
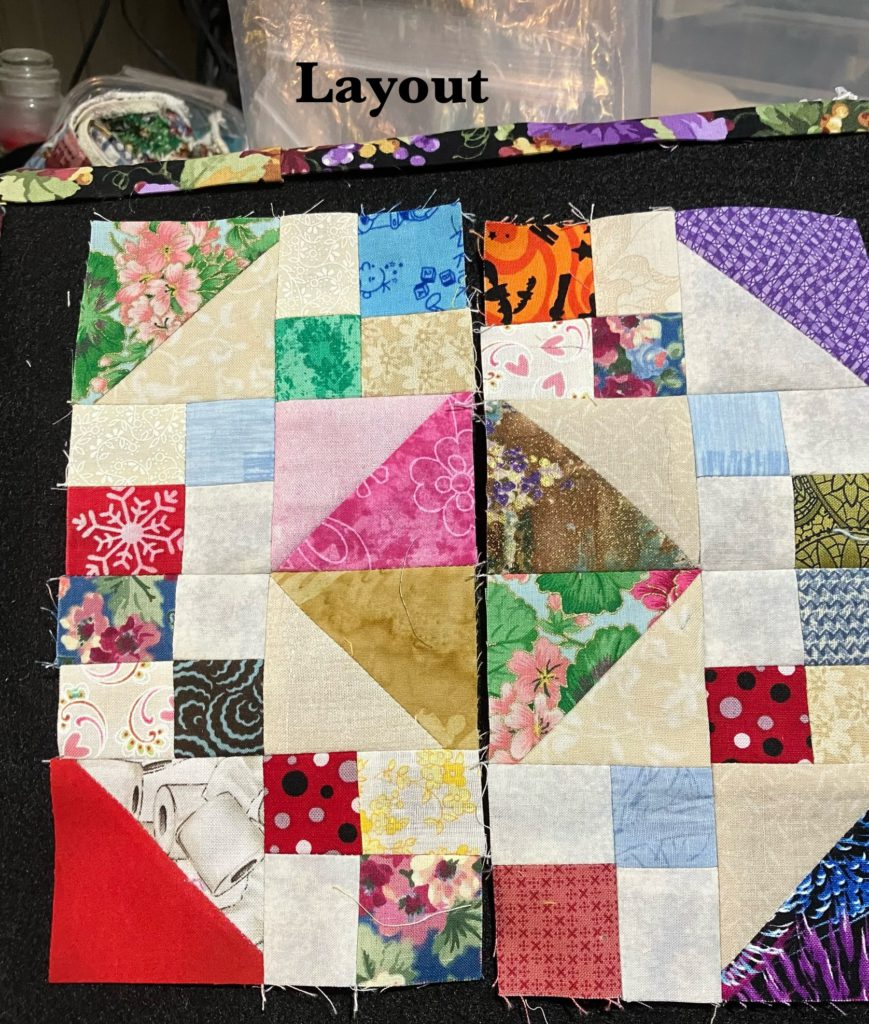
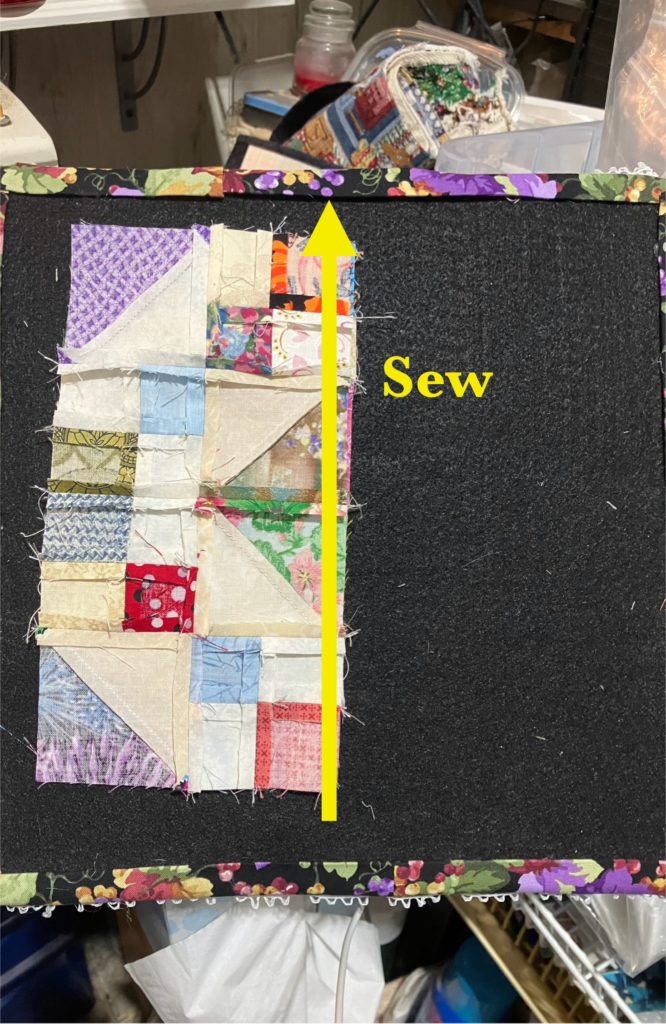
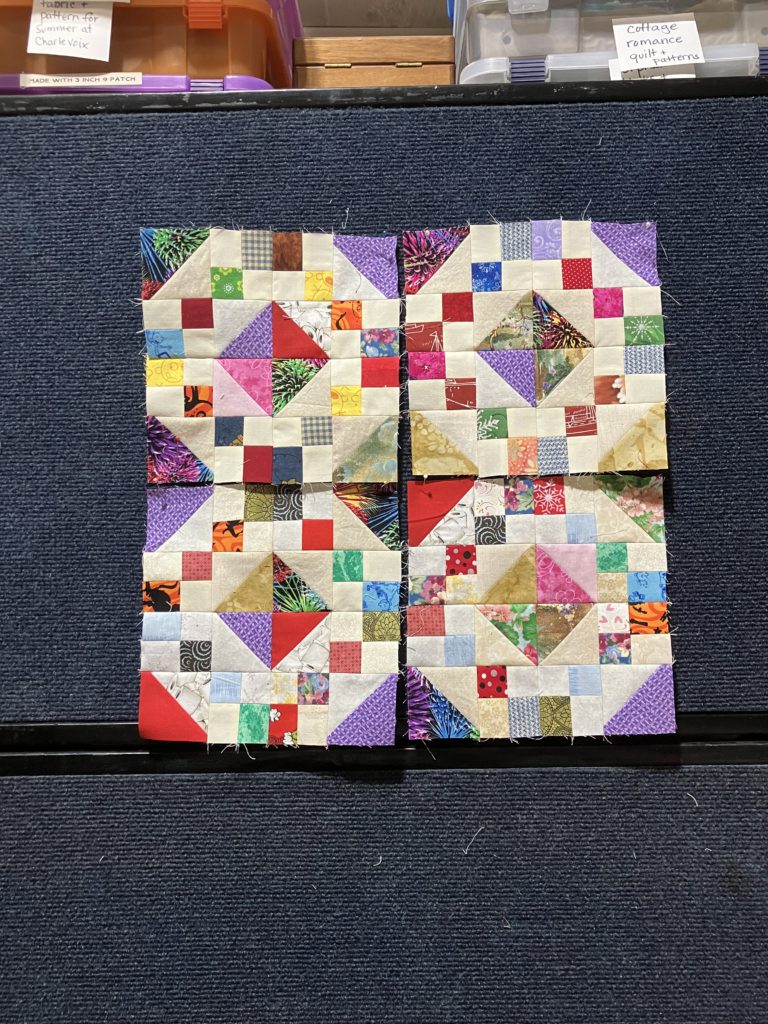
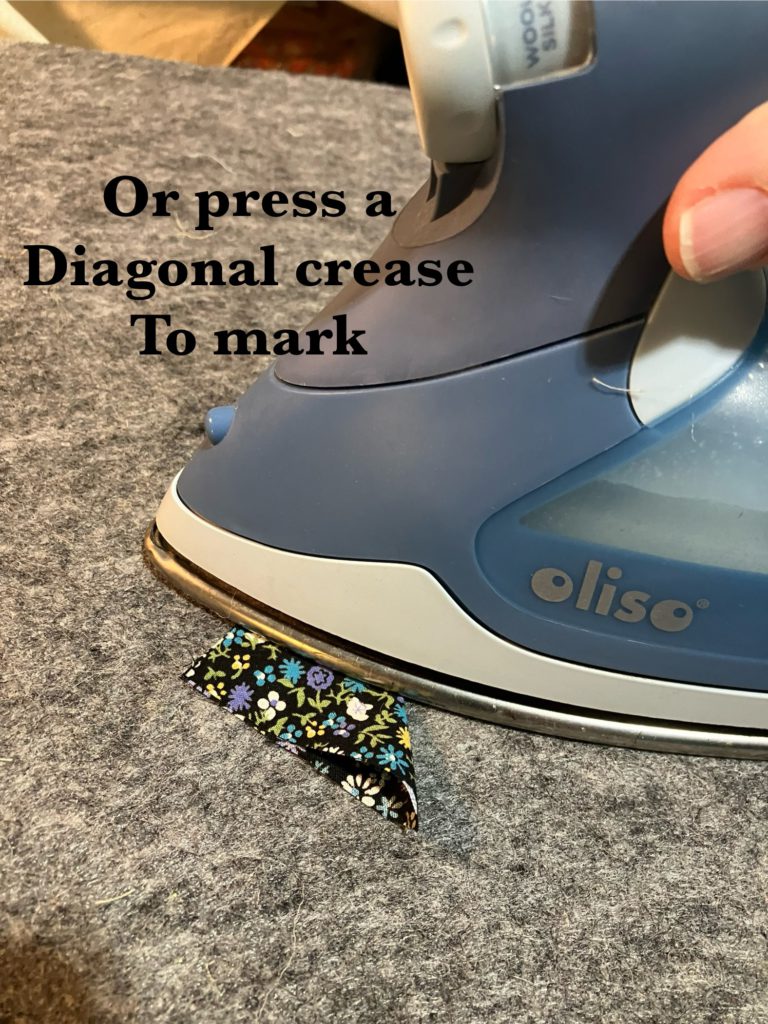
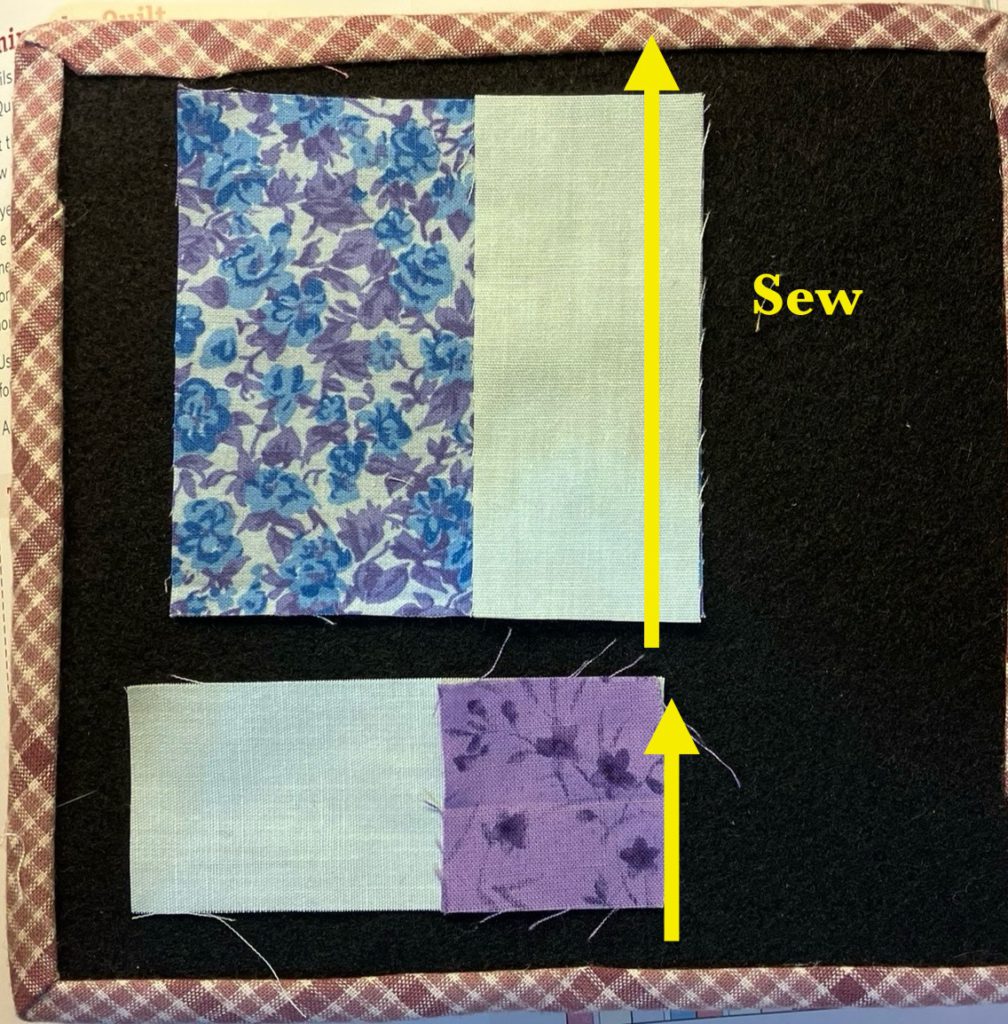
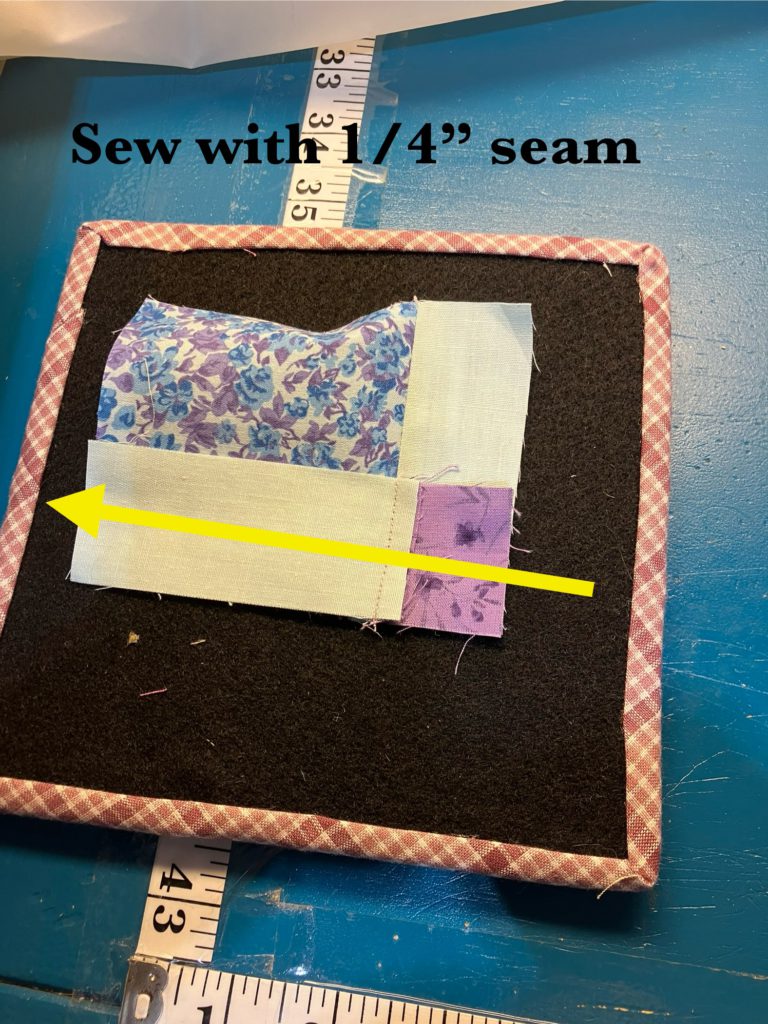
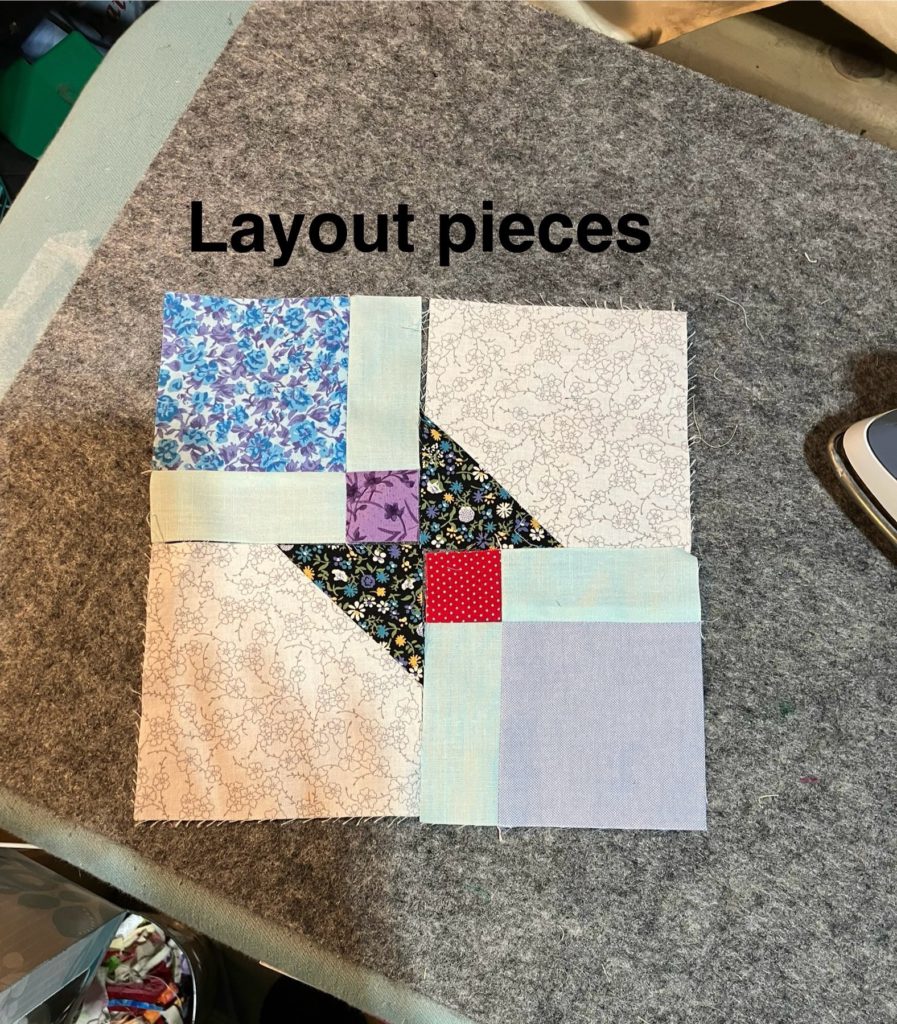
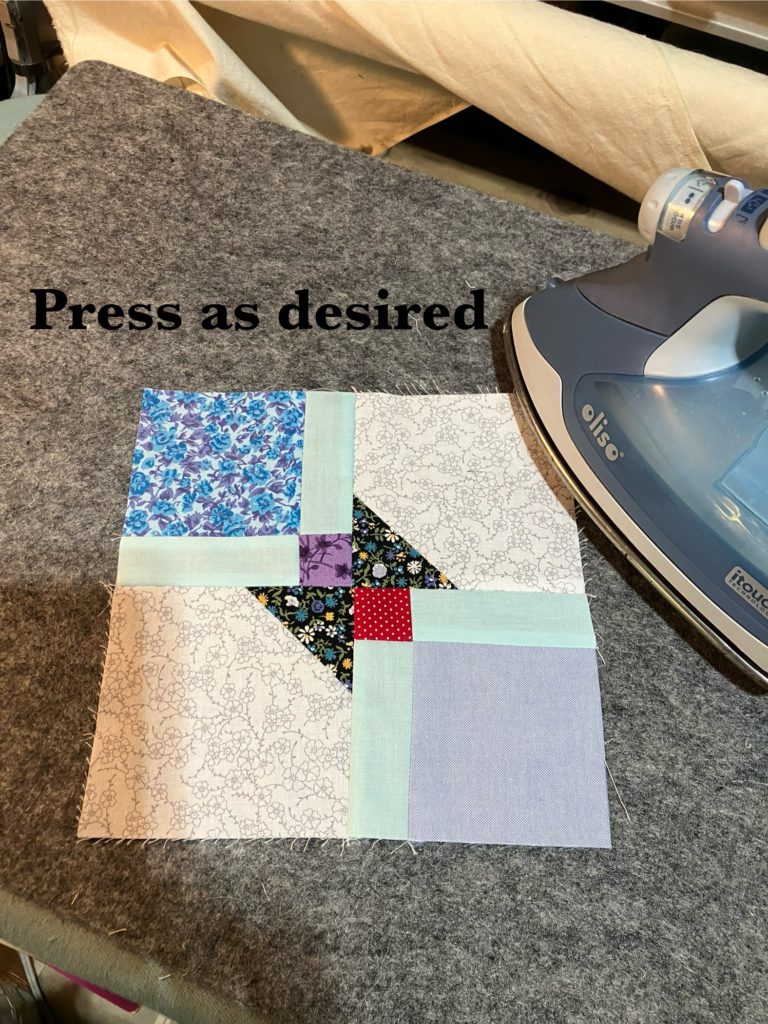
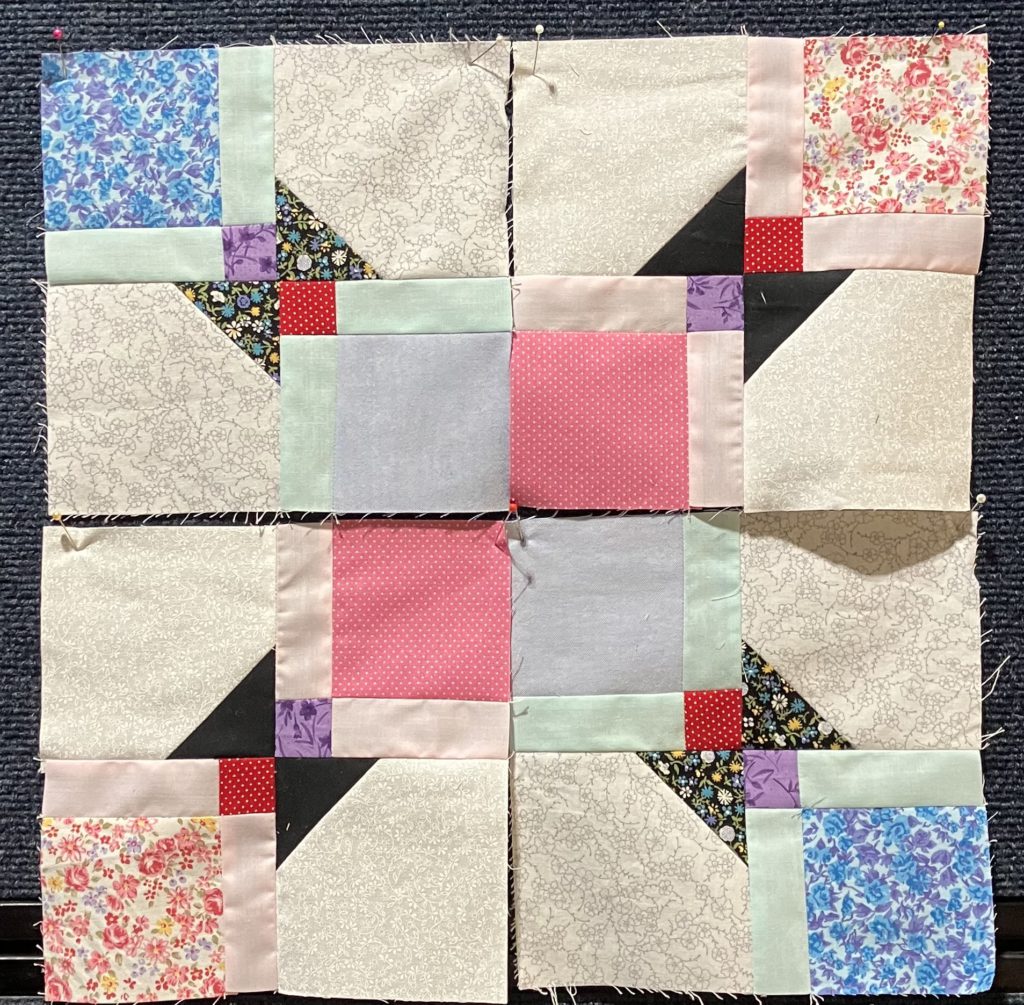
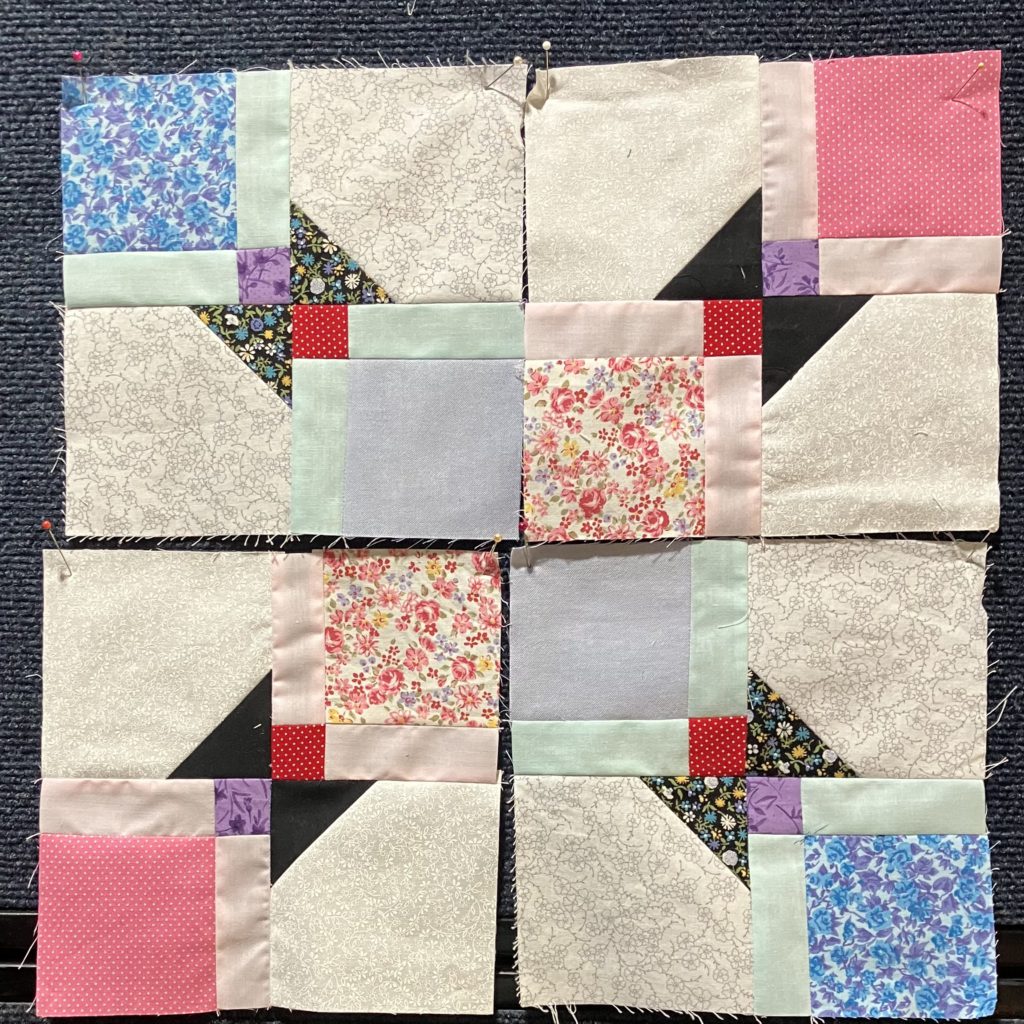
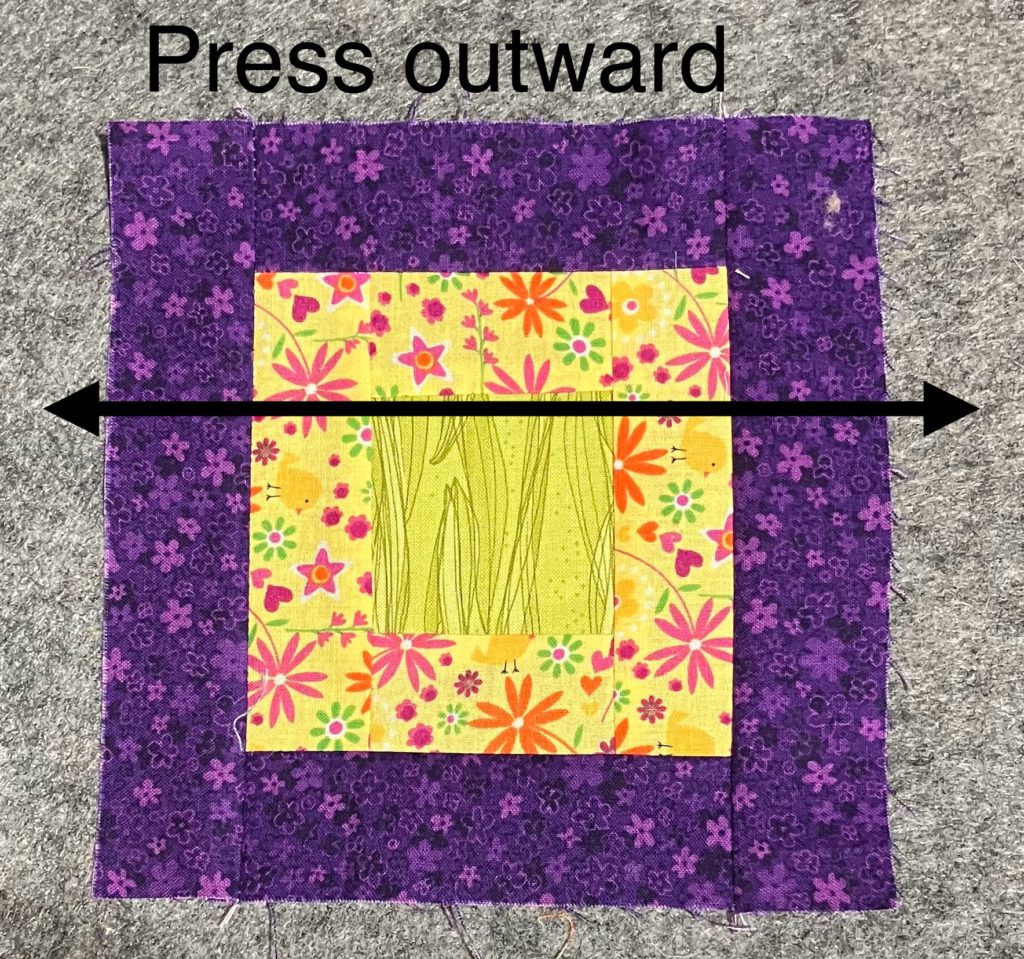
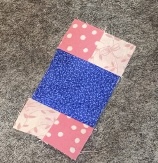
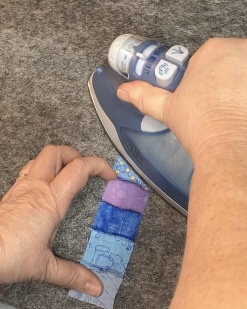
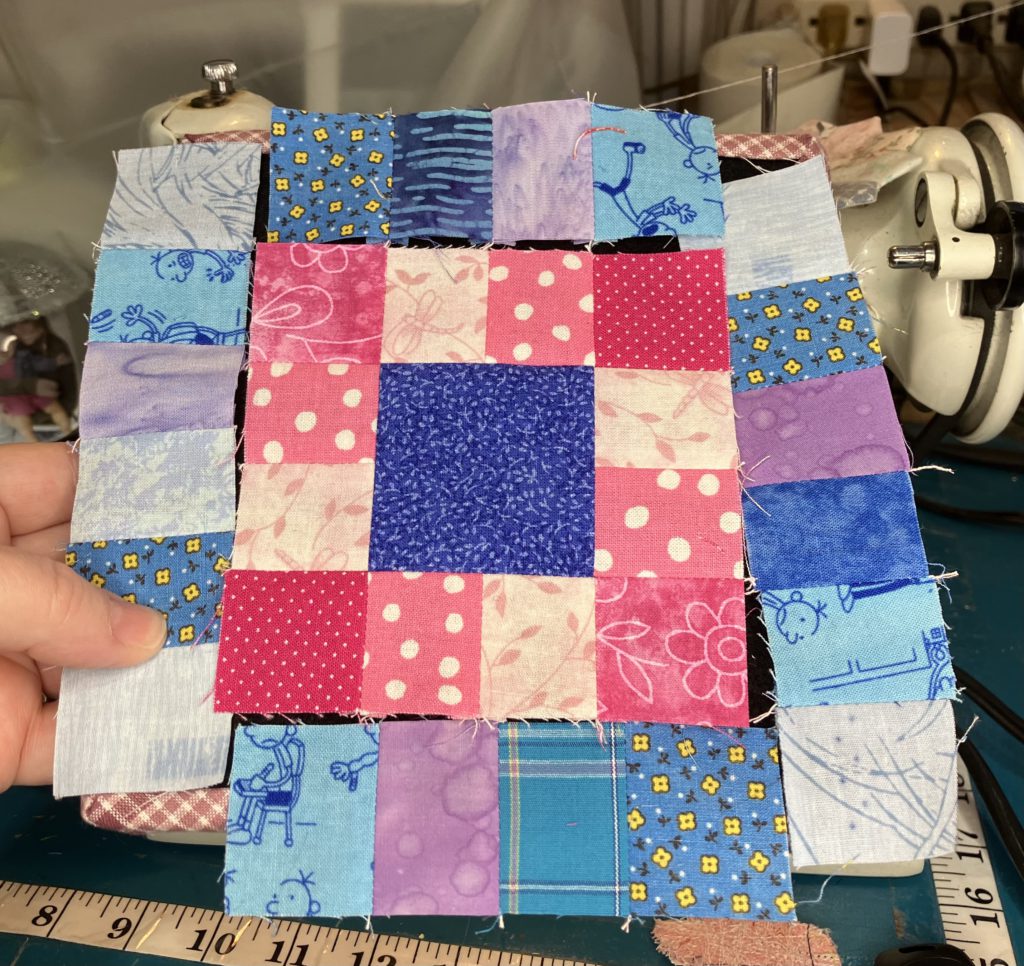
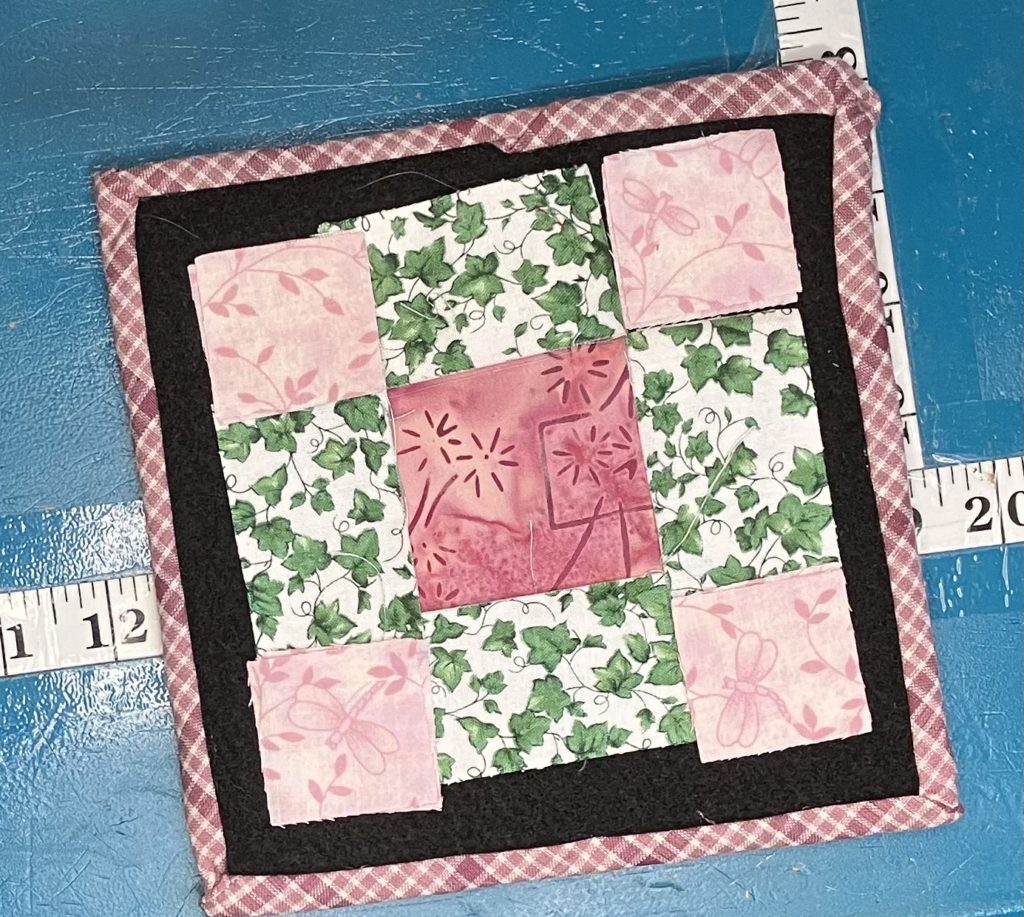
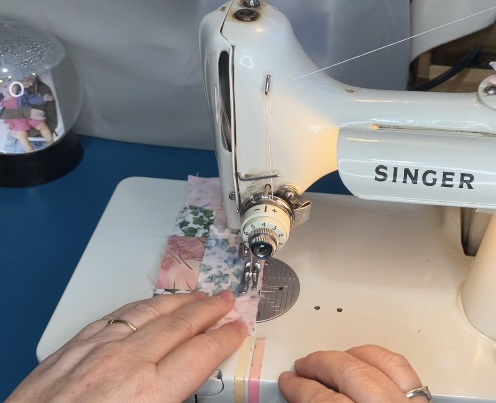
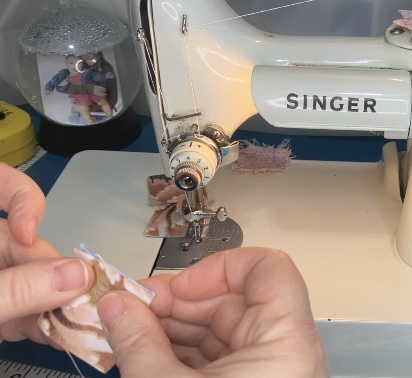
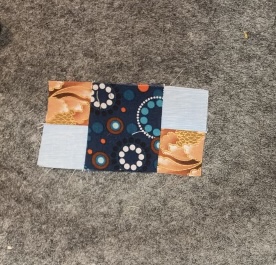
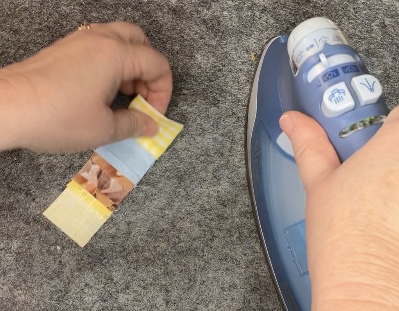
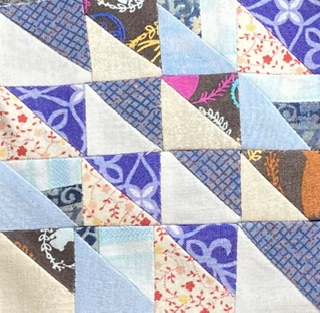
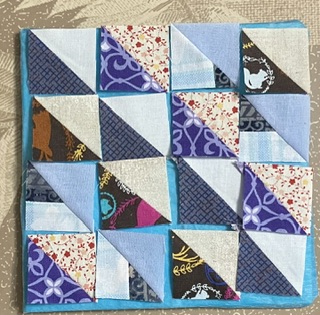
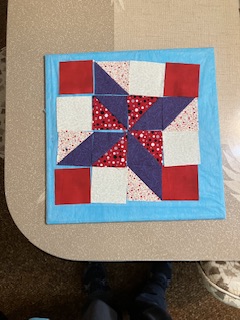
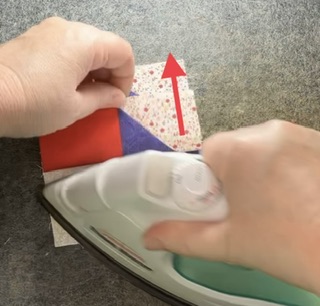
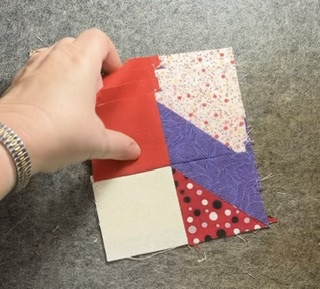
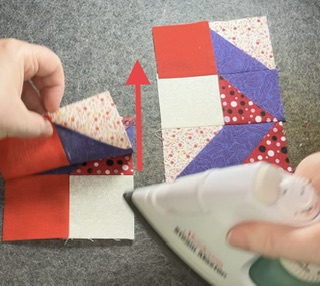
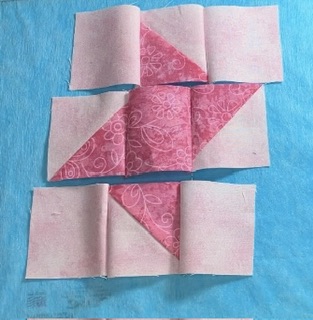
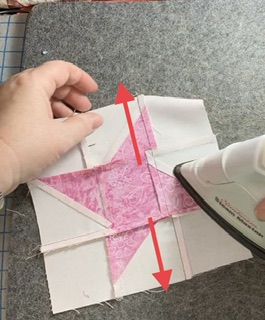
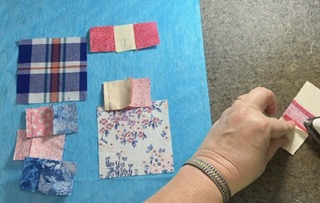
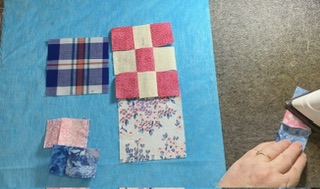
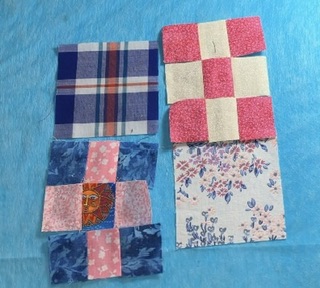
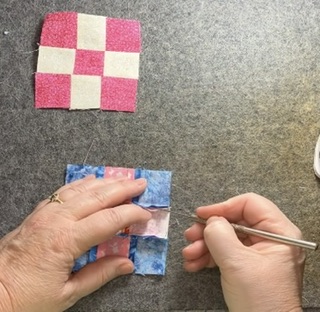
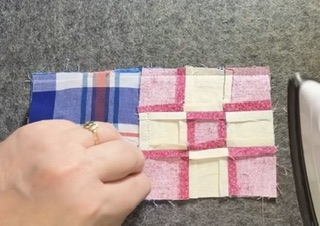
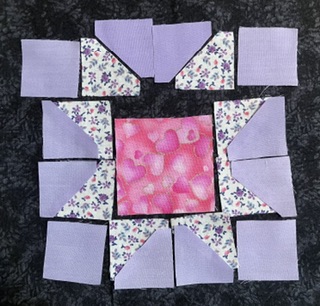
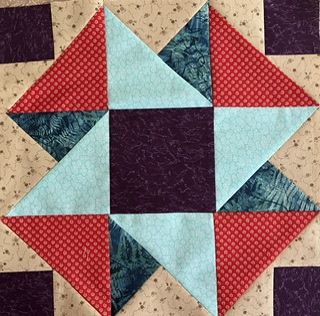
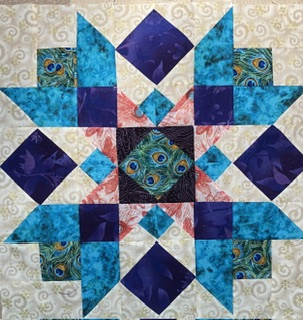
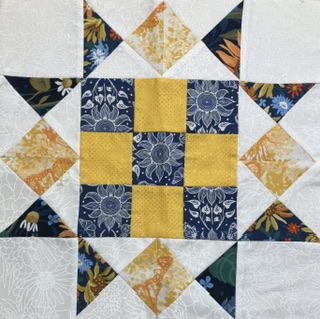
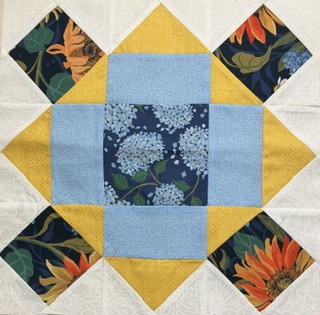
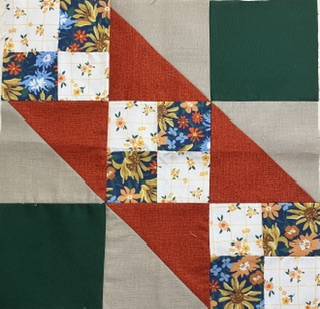
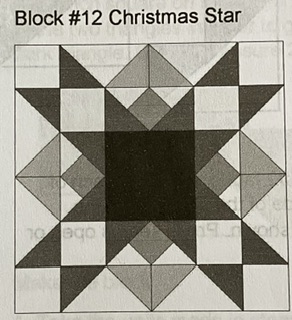
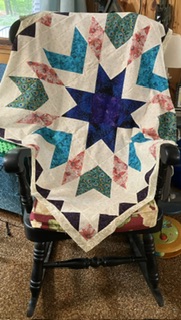
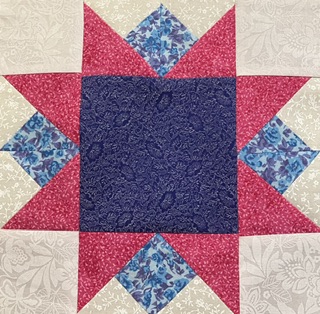
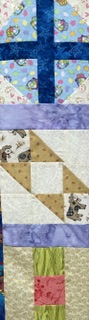
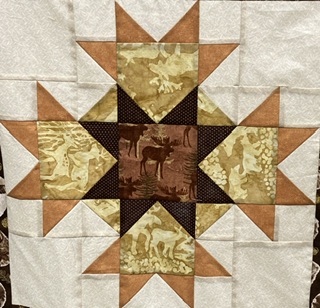
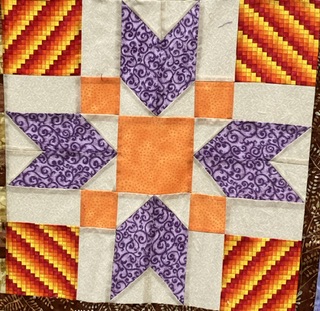
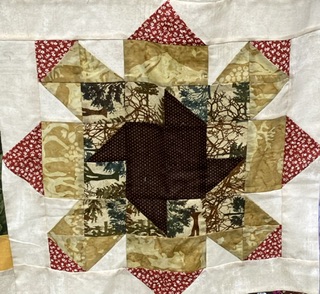
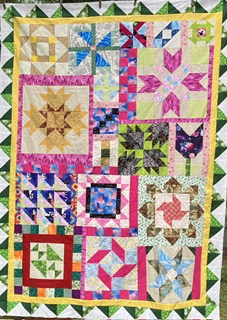
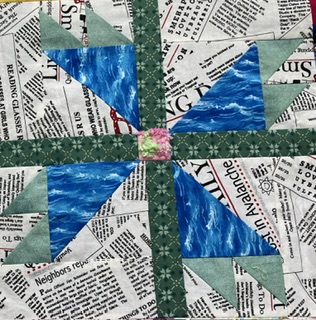
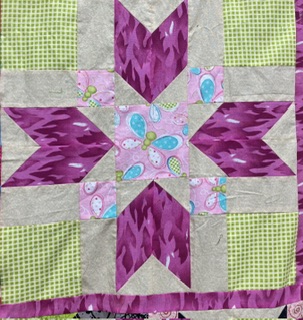
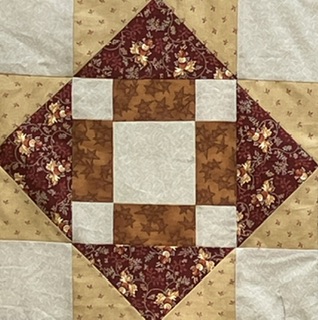
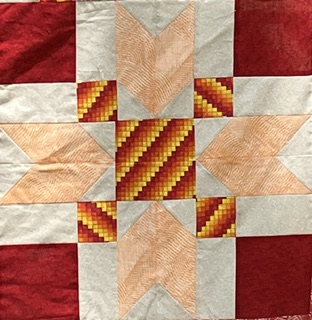
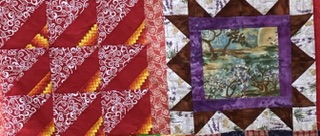
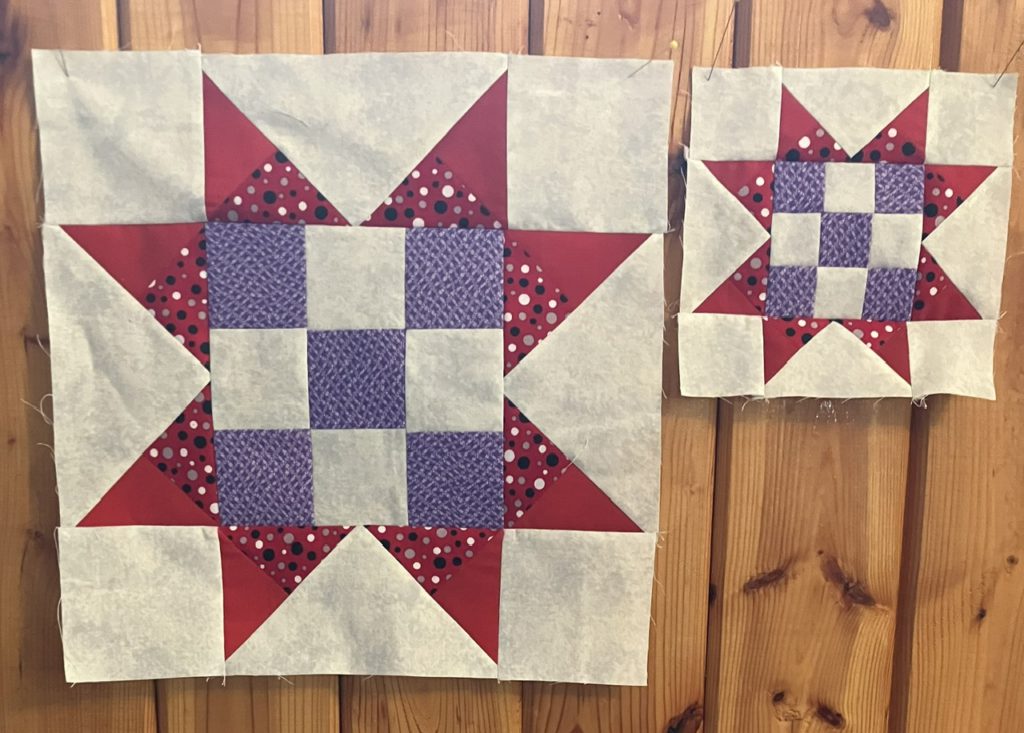
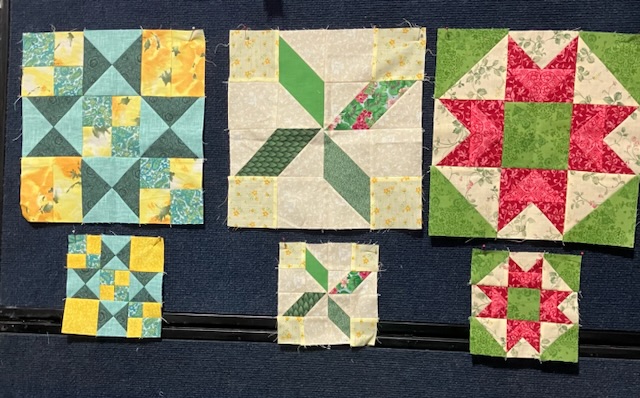
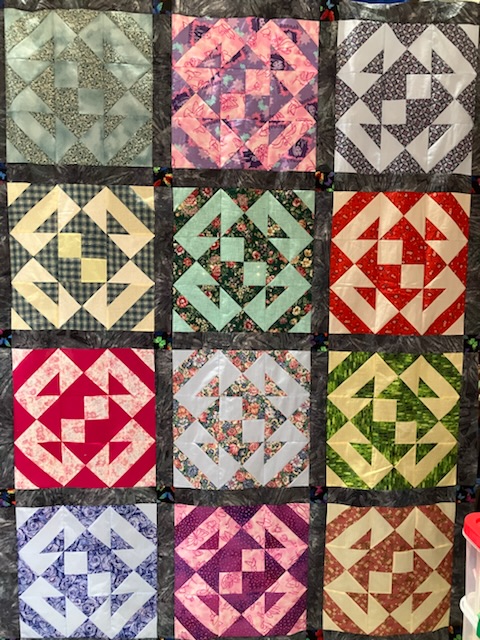
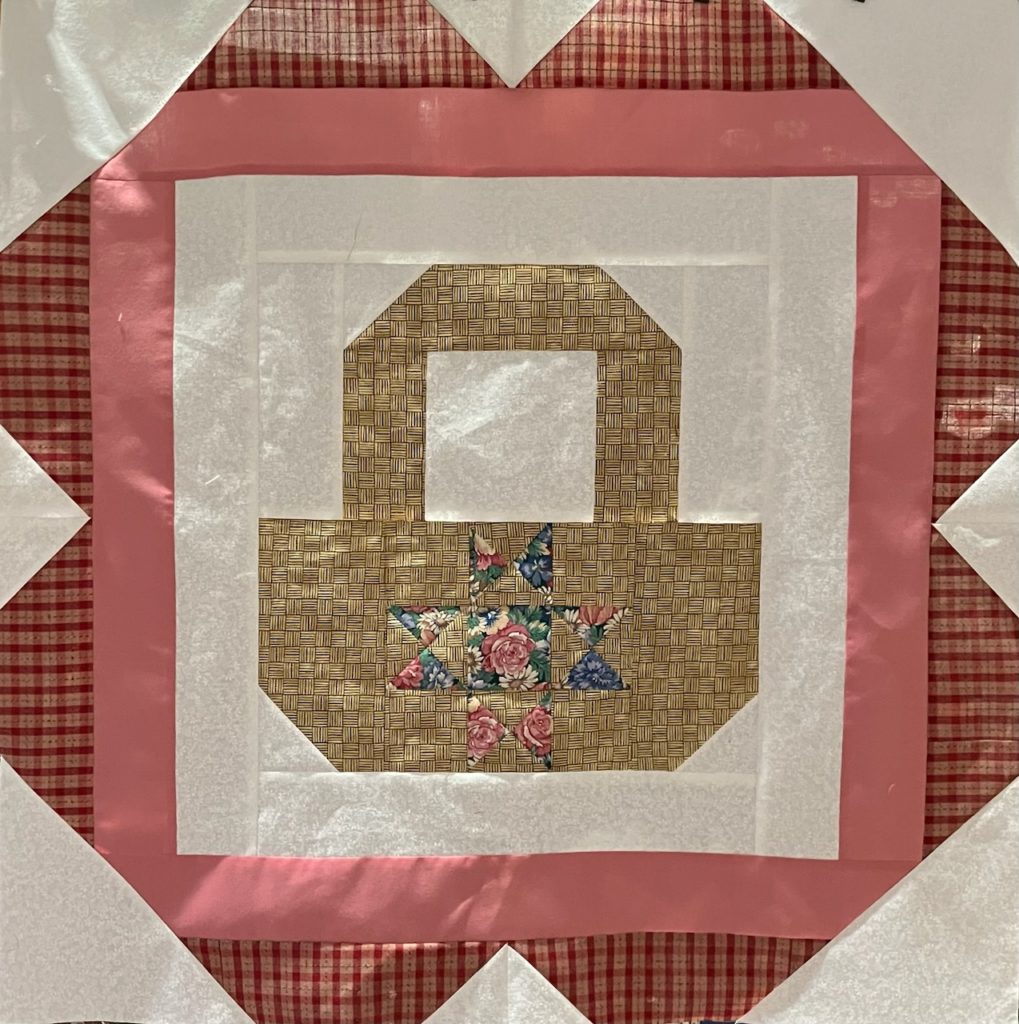
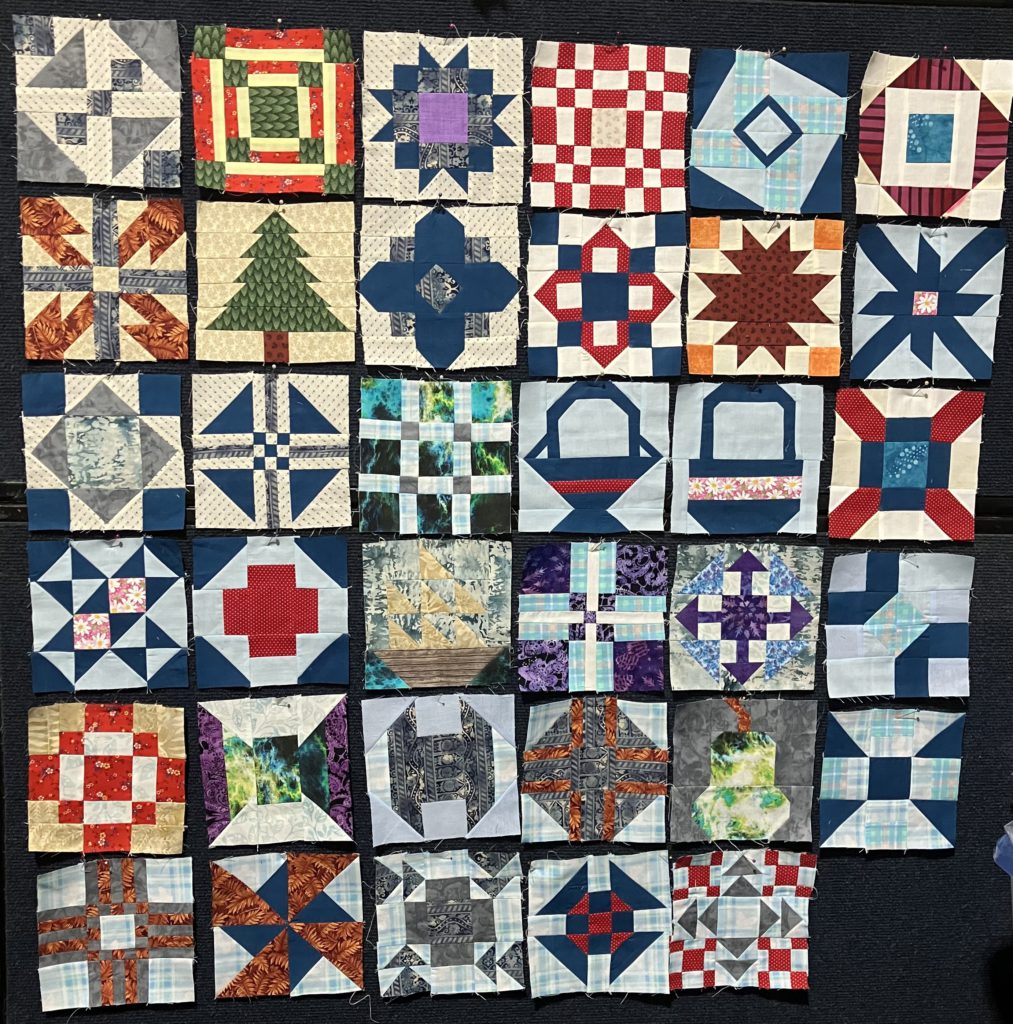
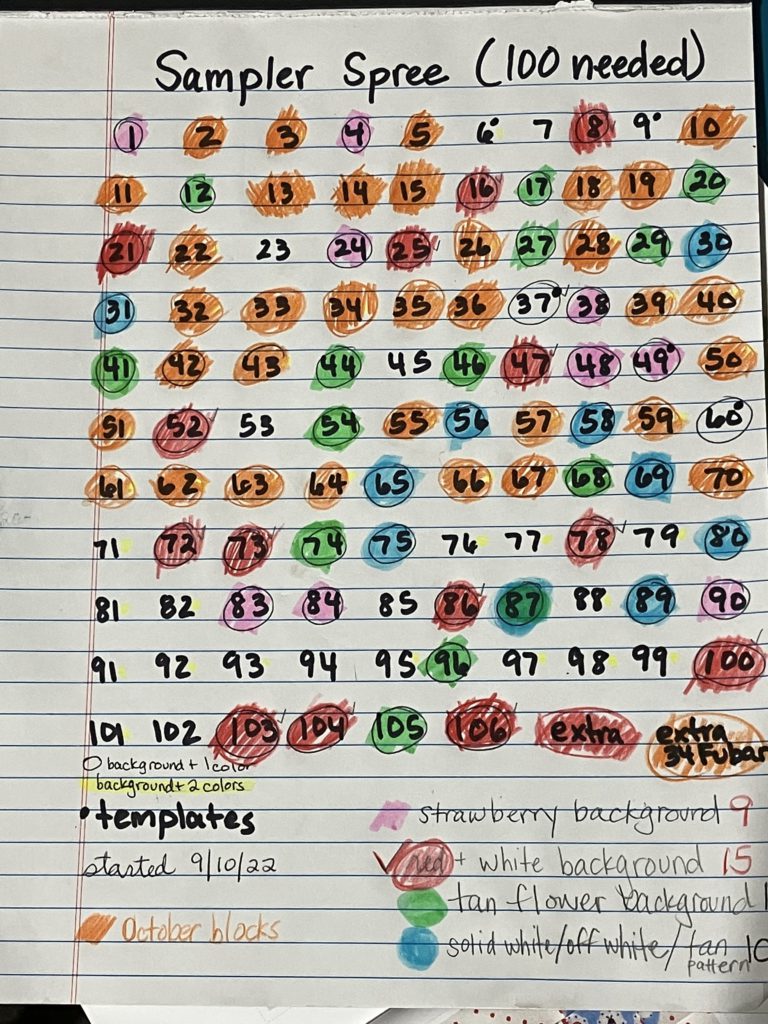
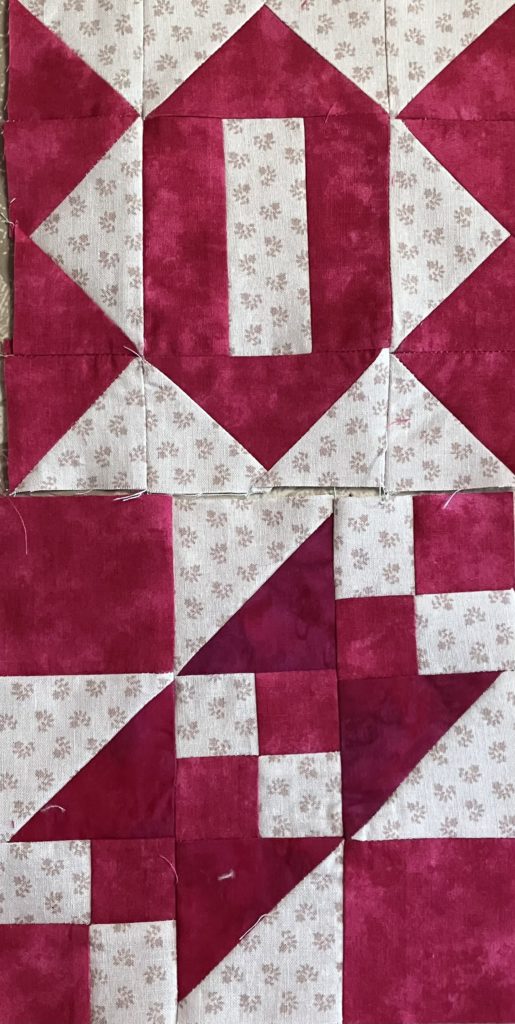
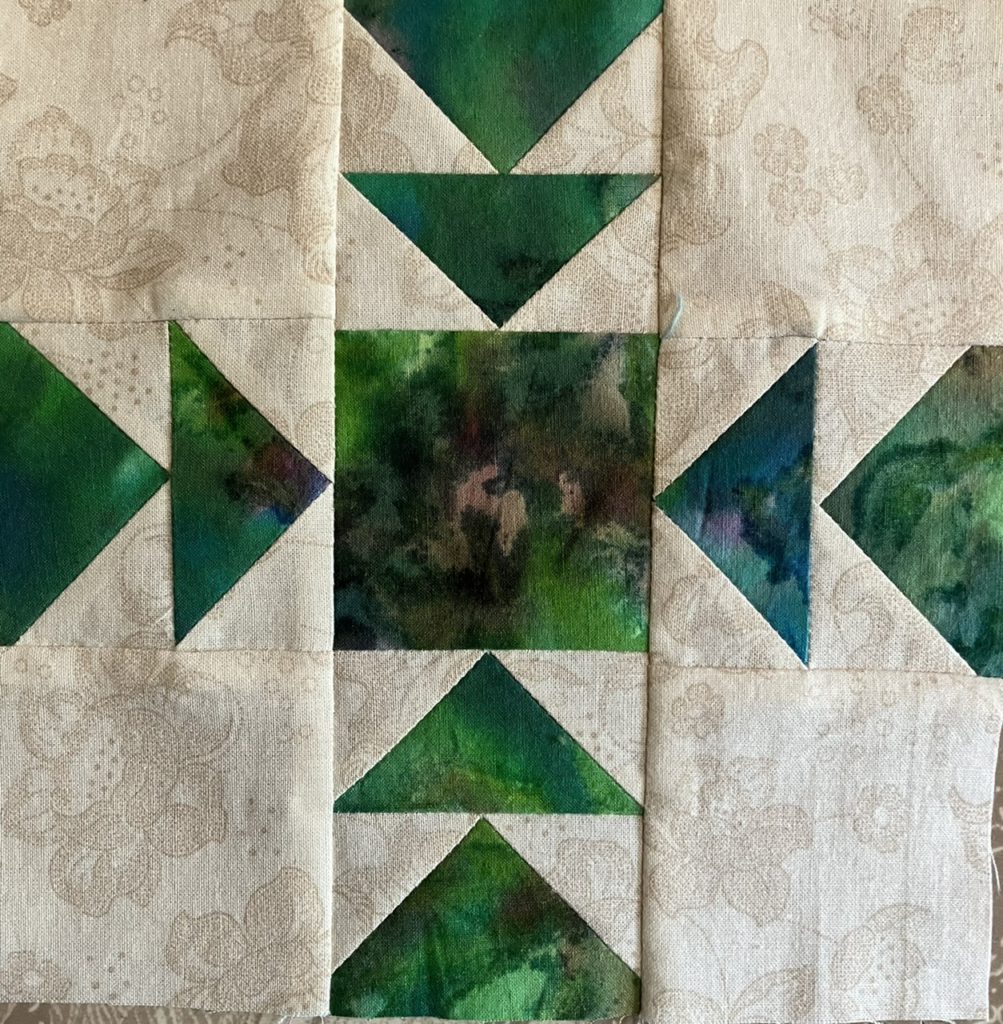
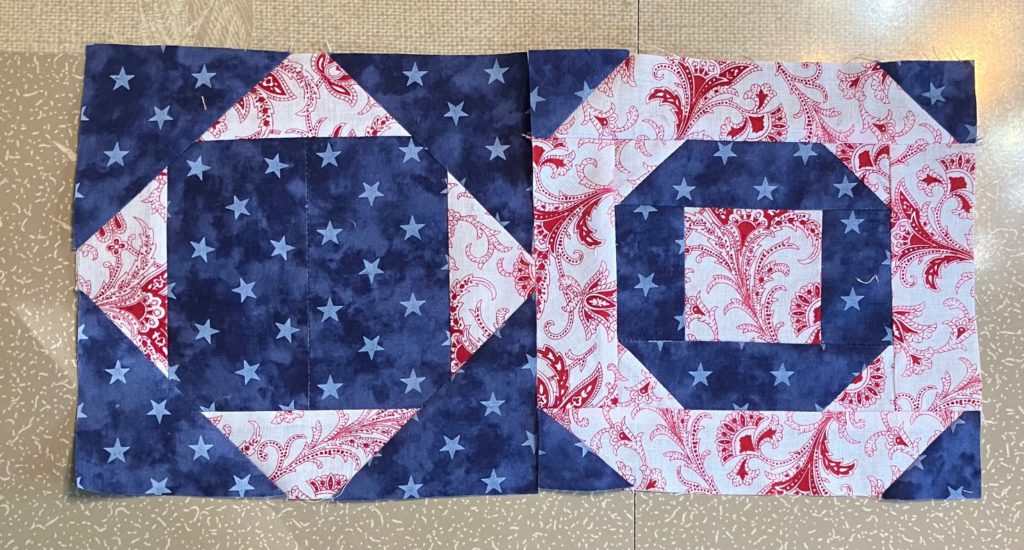
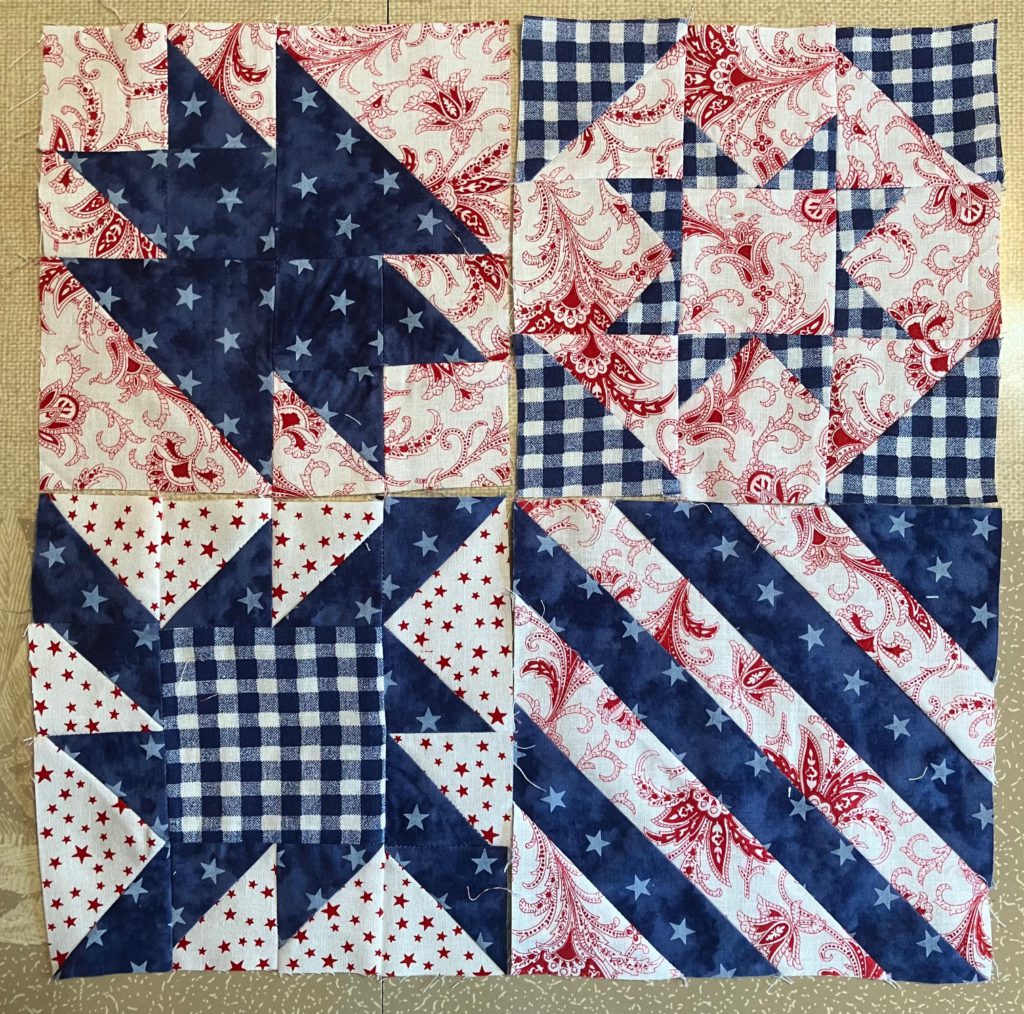
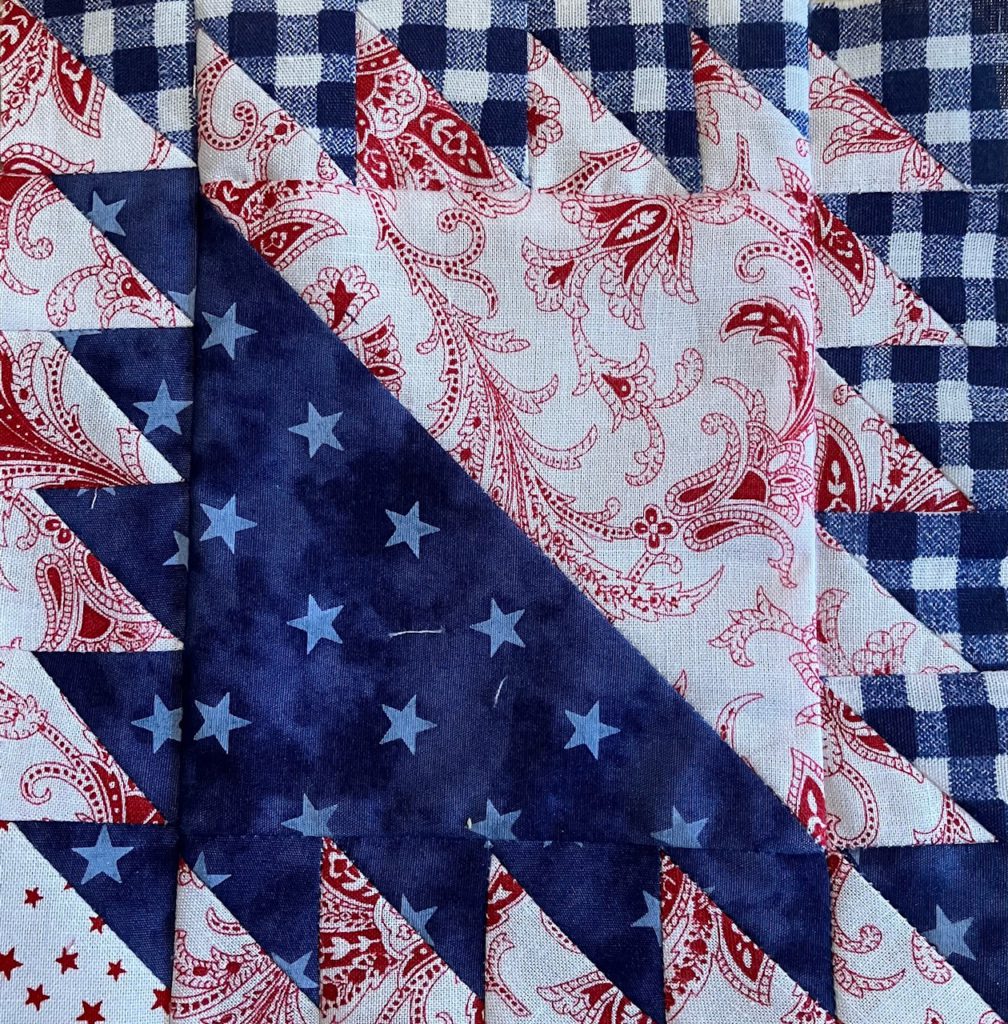
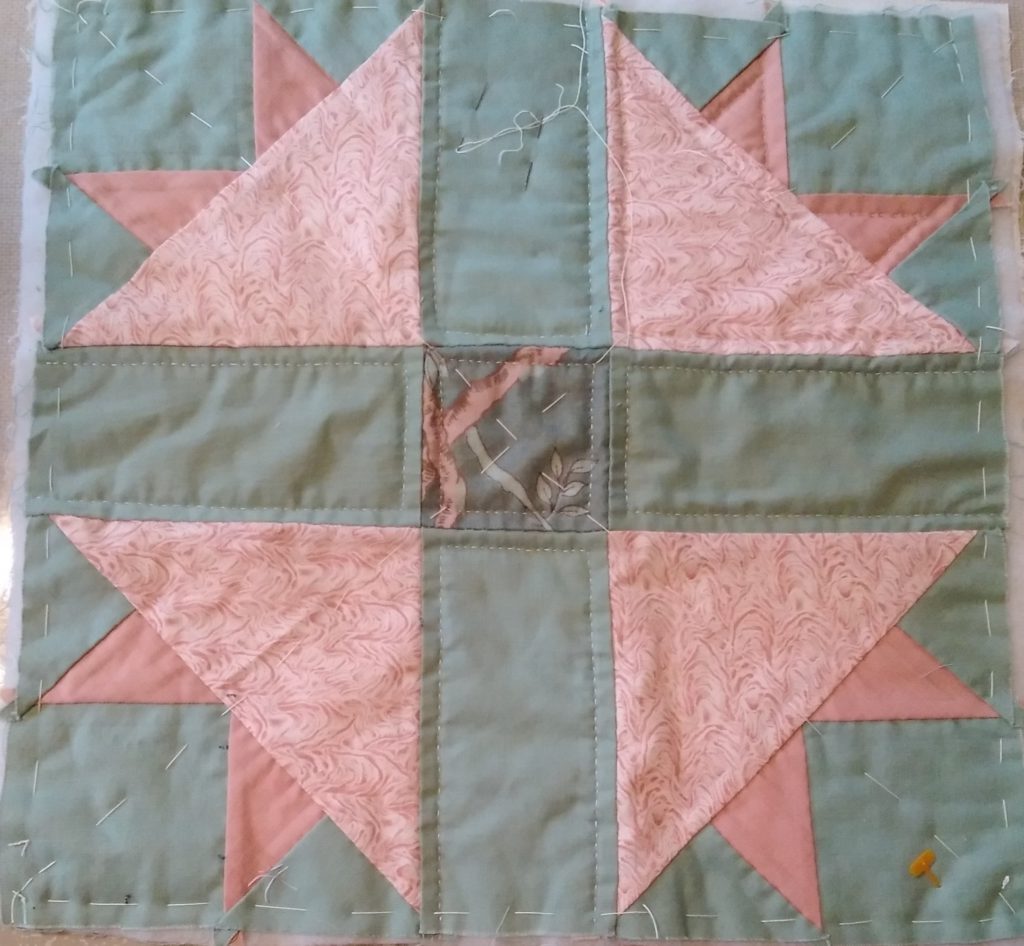
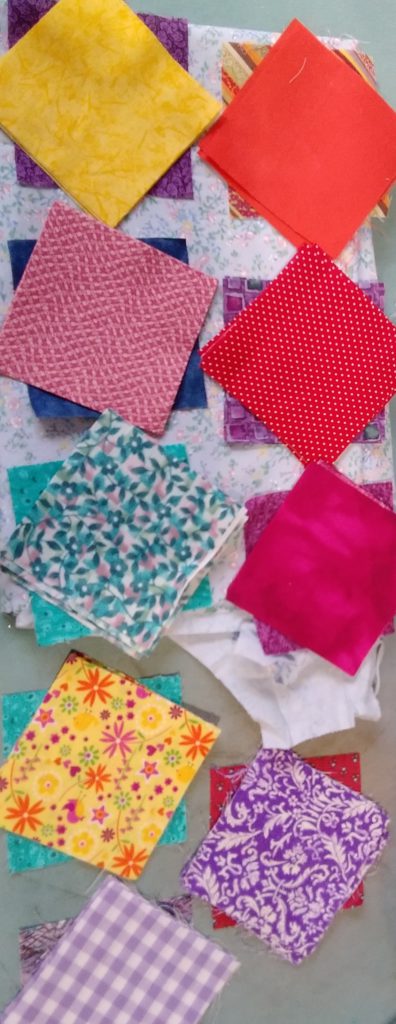
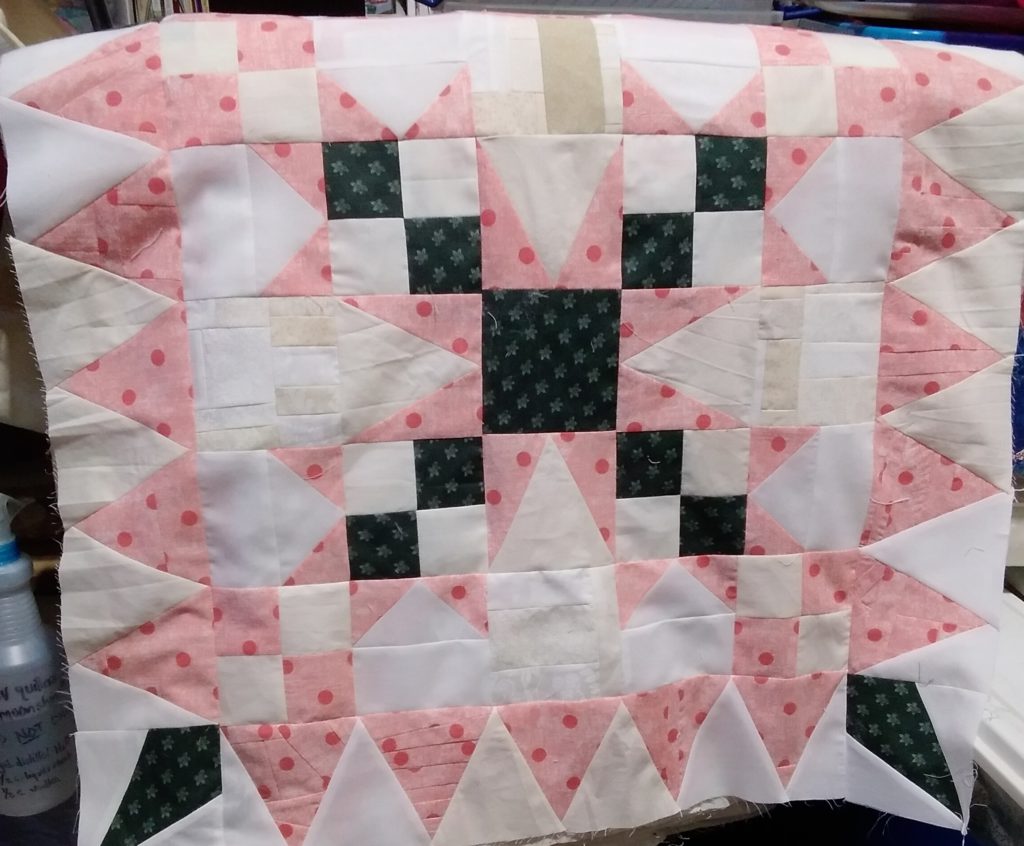
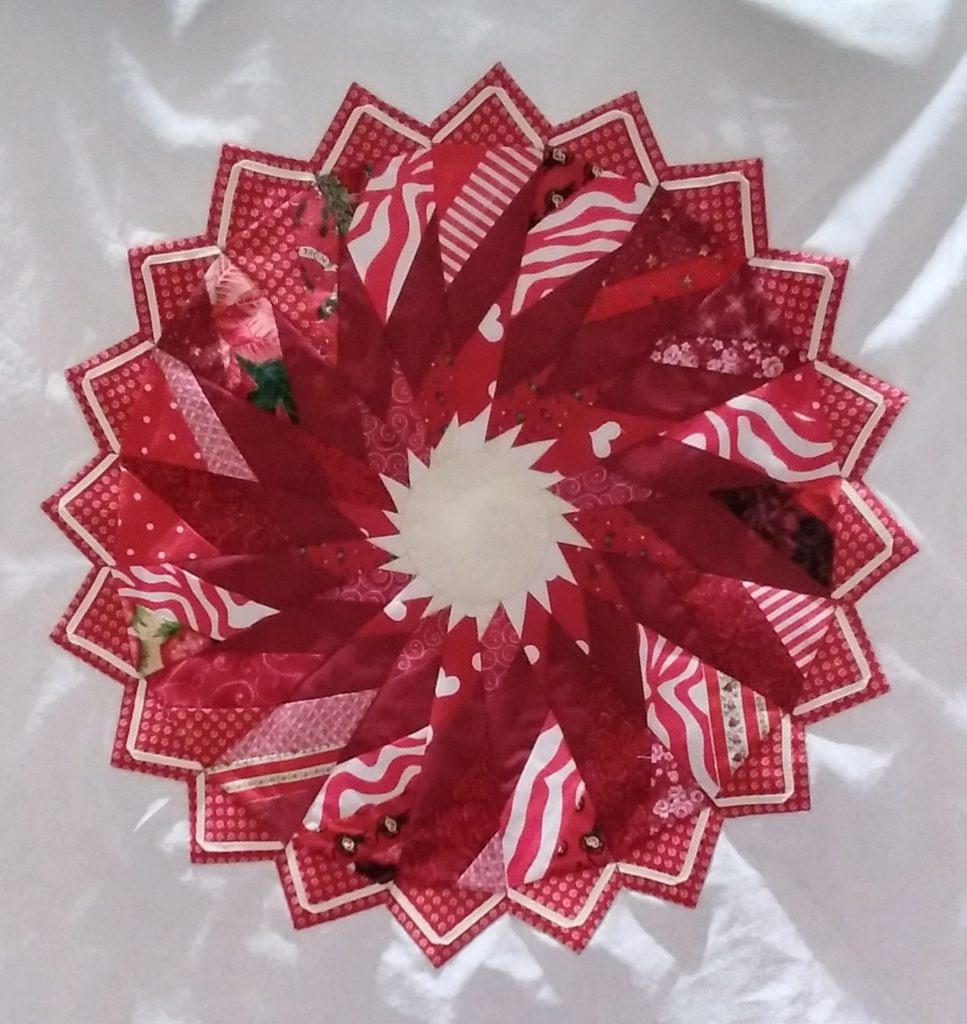
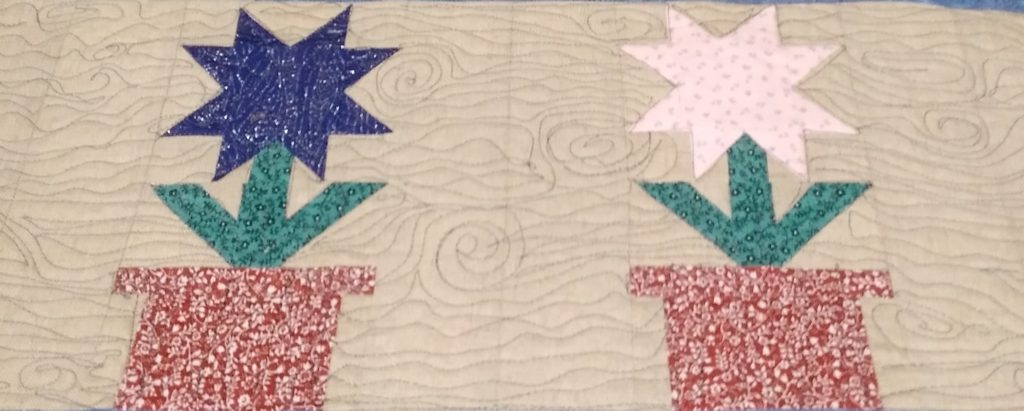
Here are some examples of the Salem block from the weather quilt:
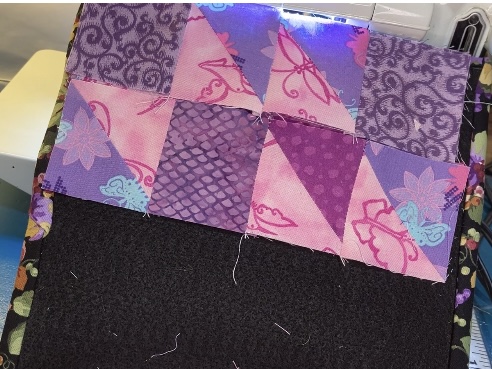
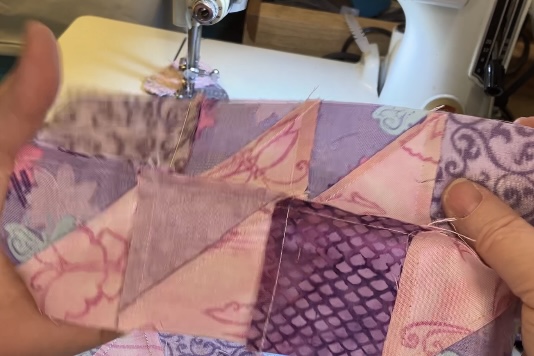
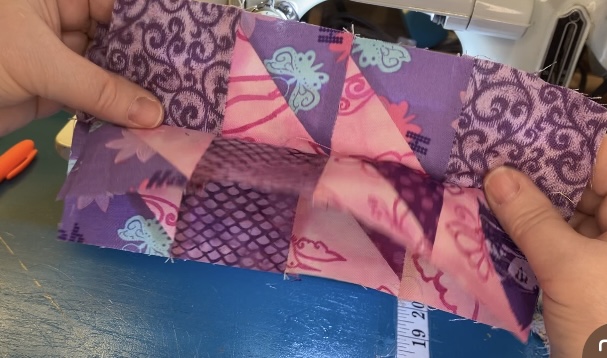
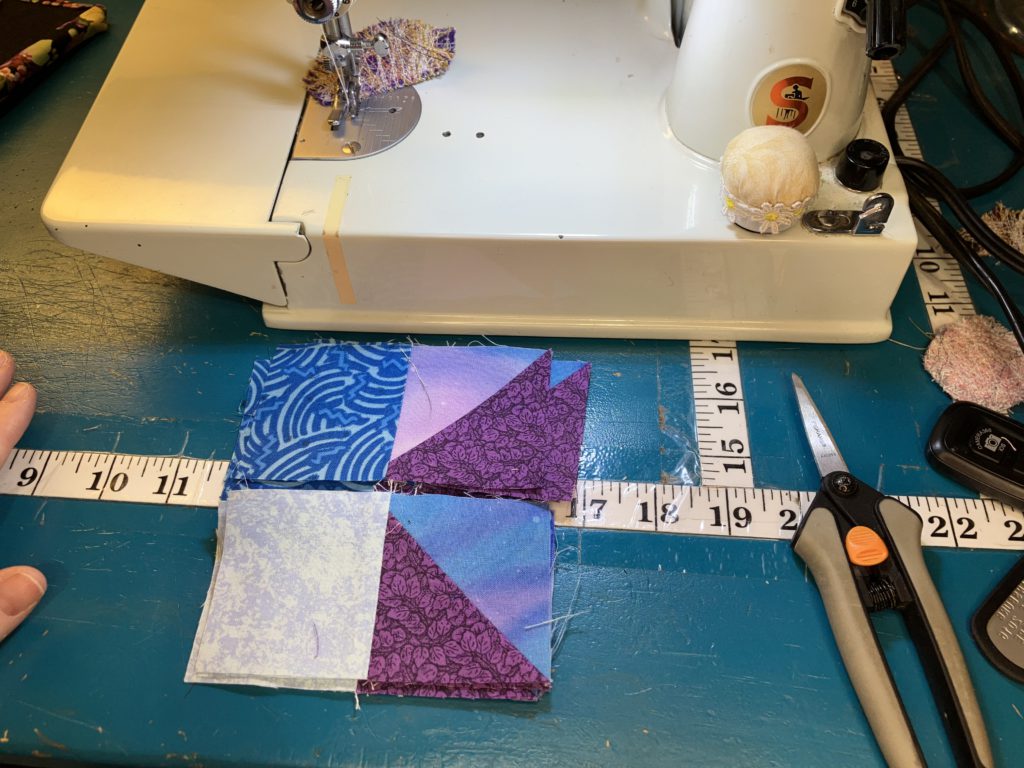
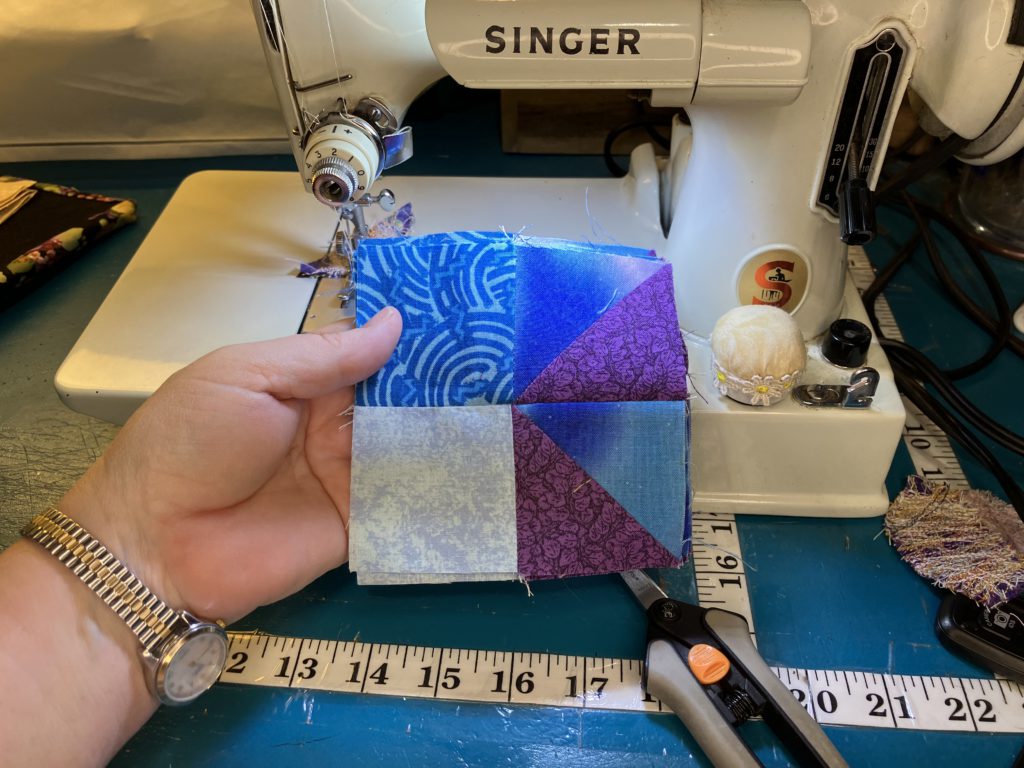
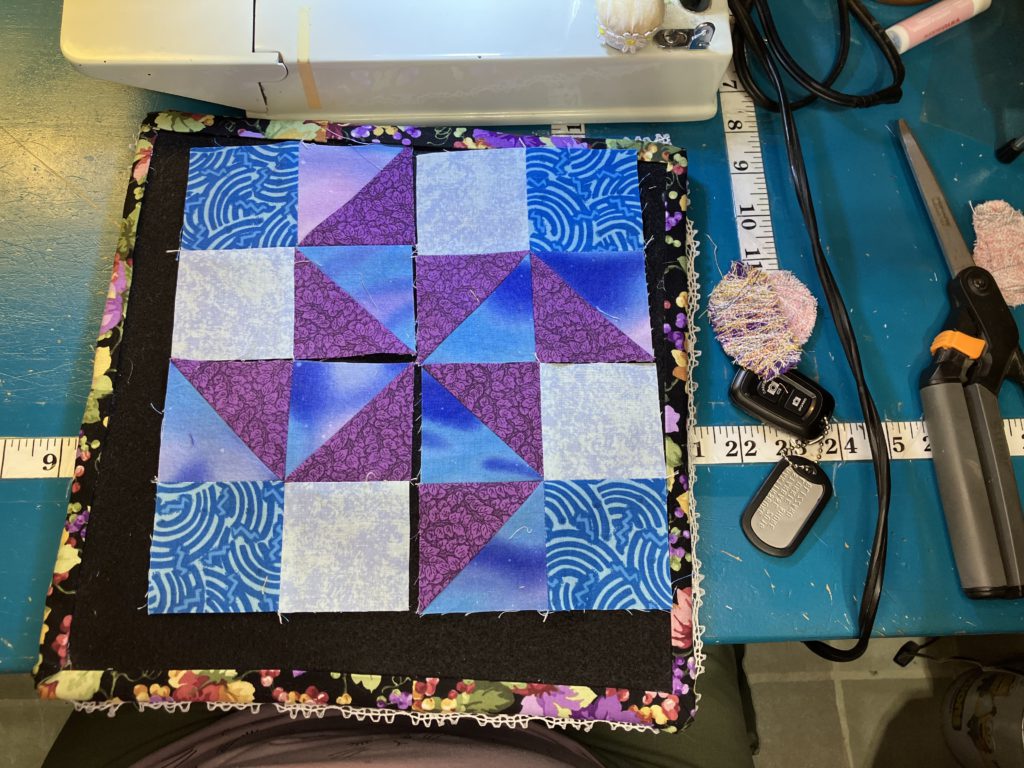
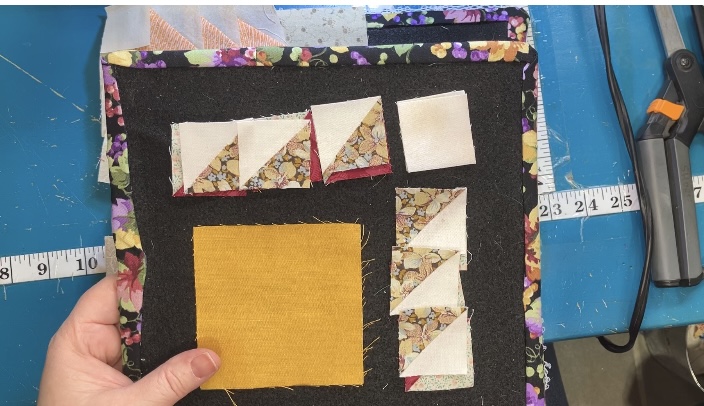
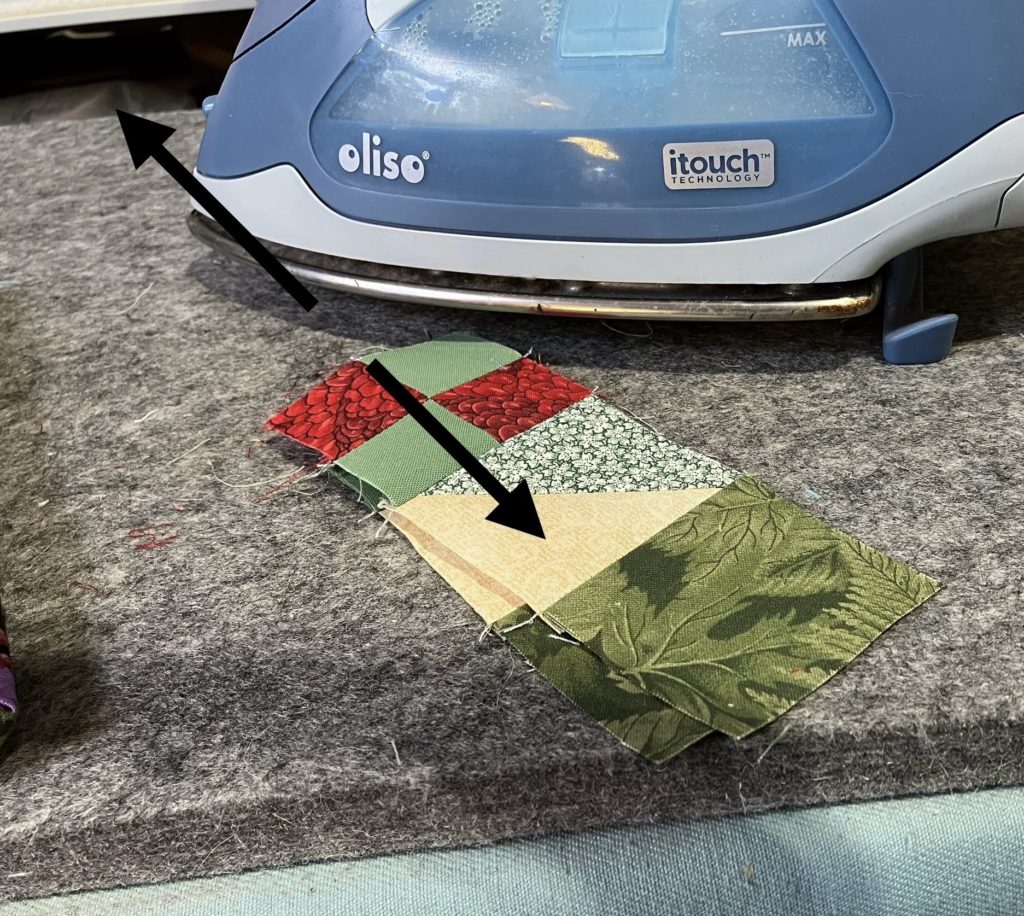
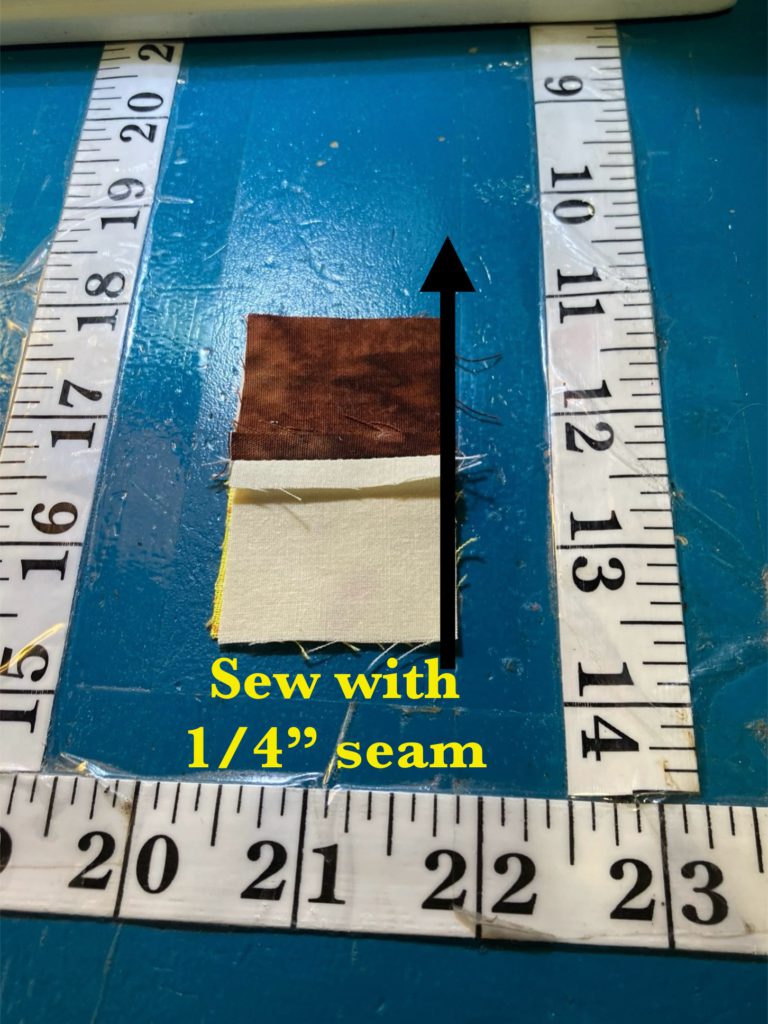
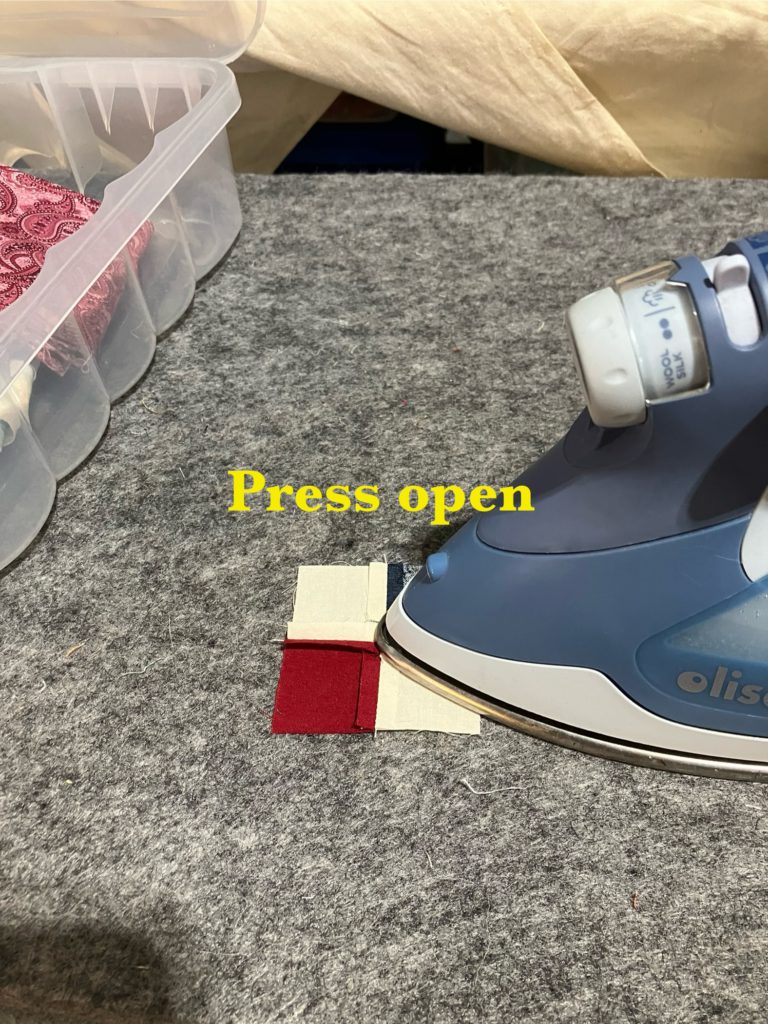
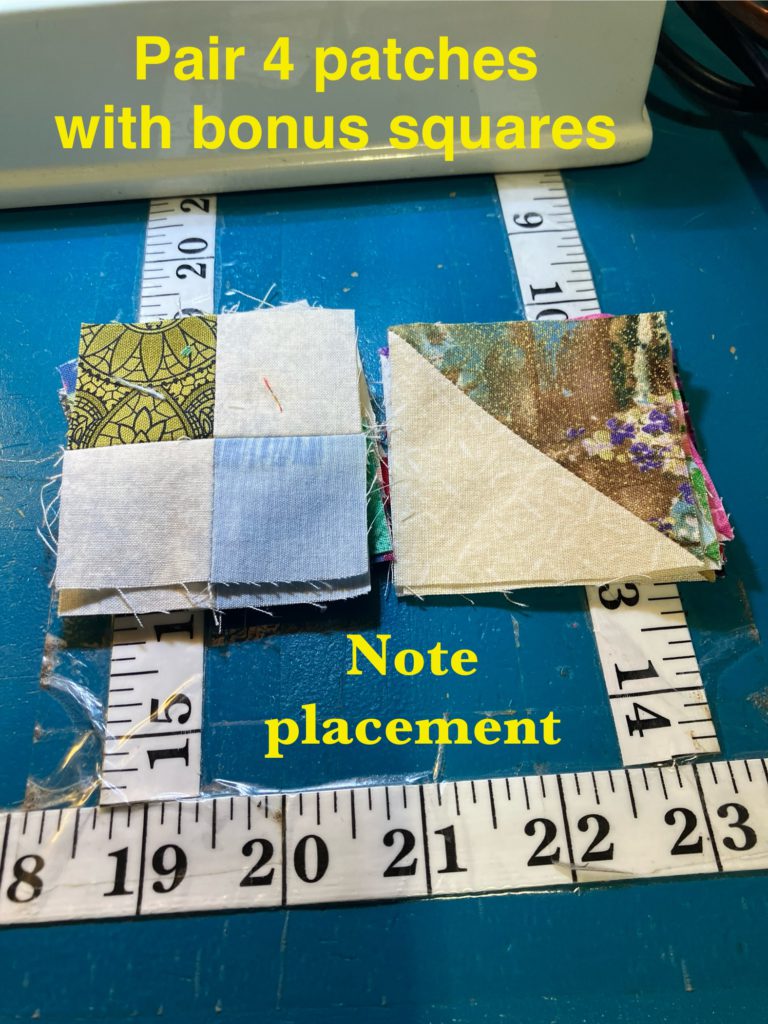
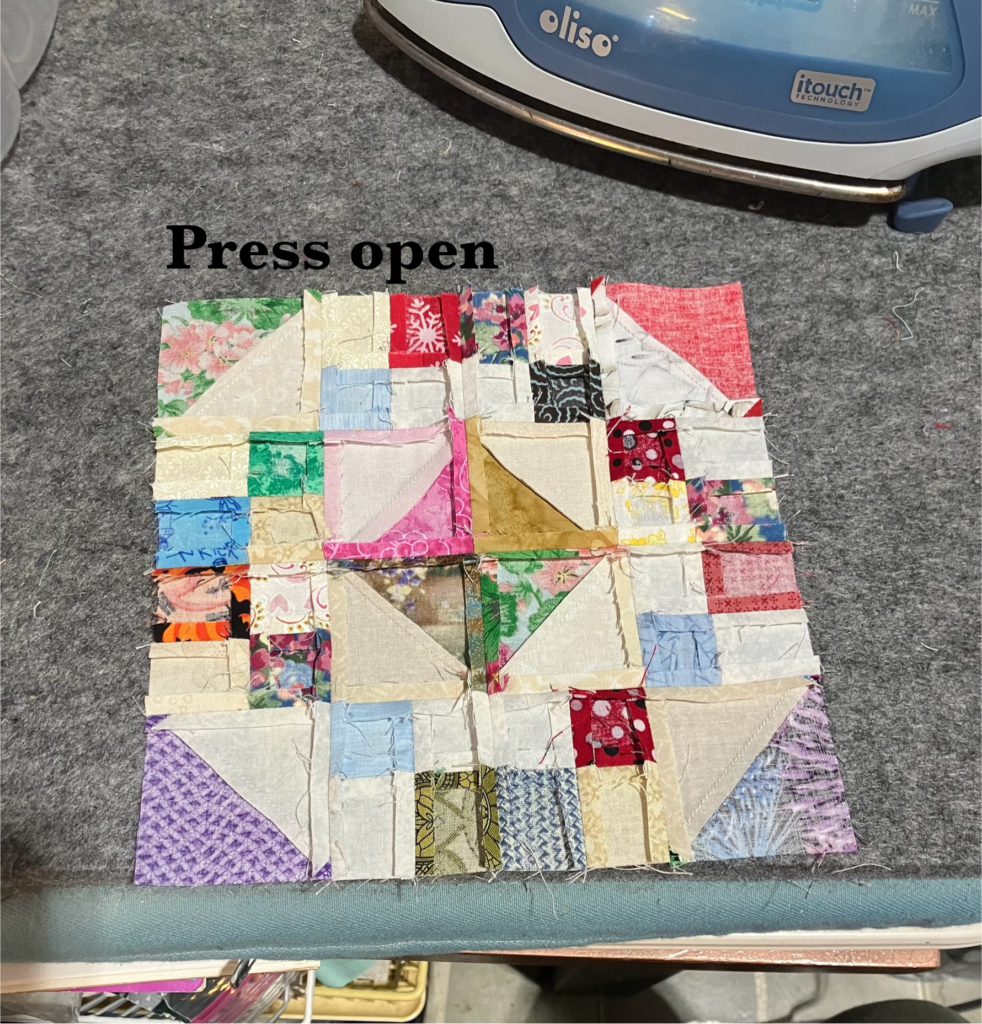
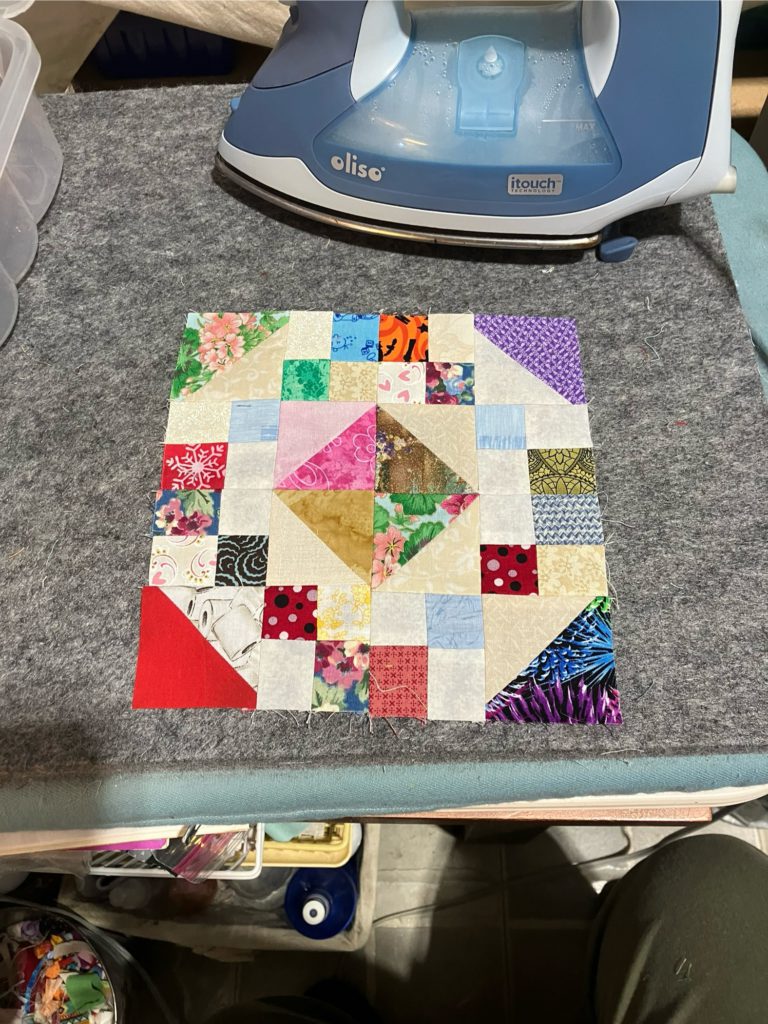
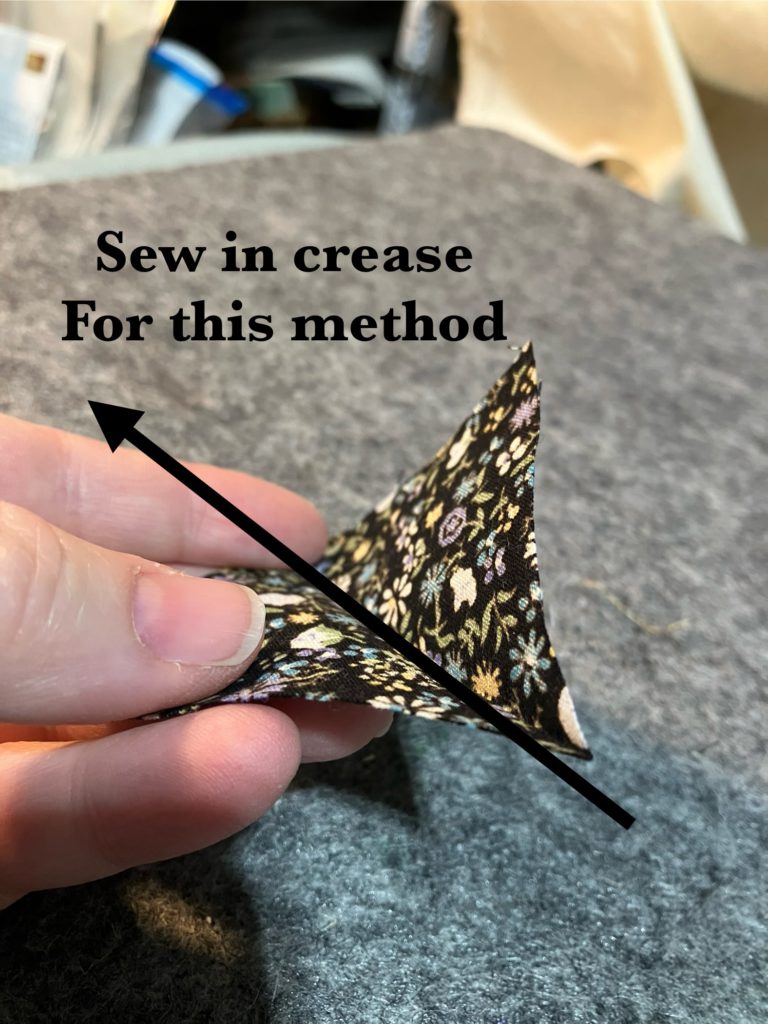
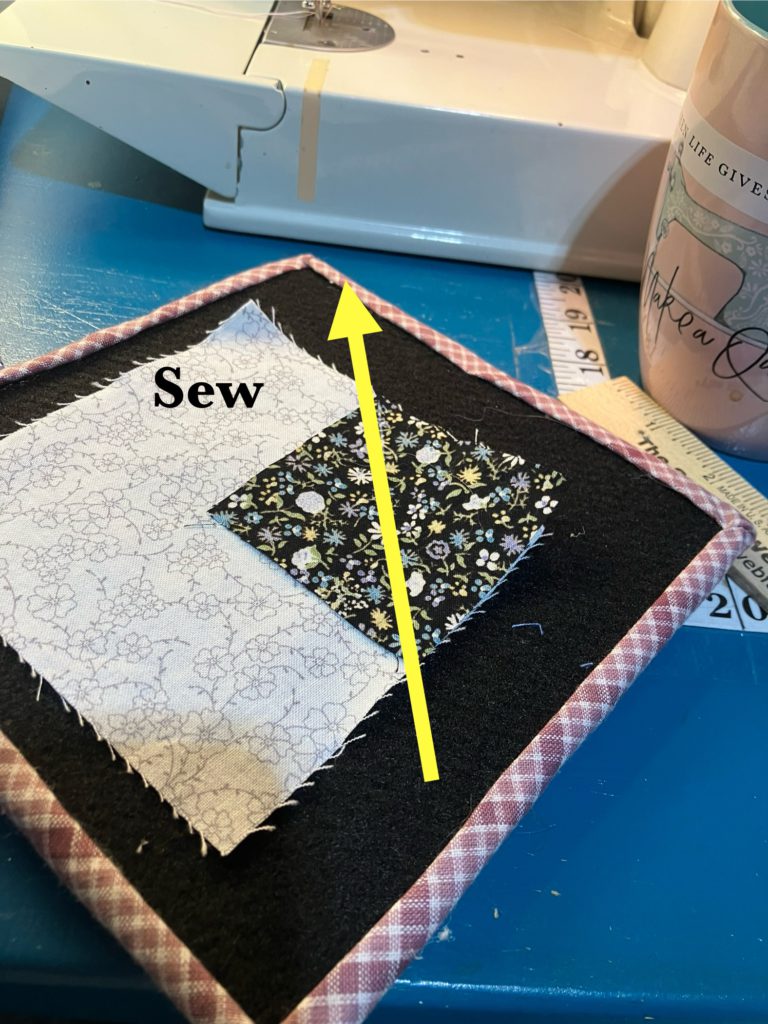
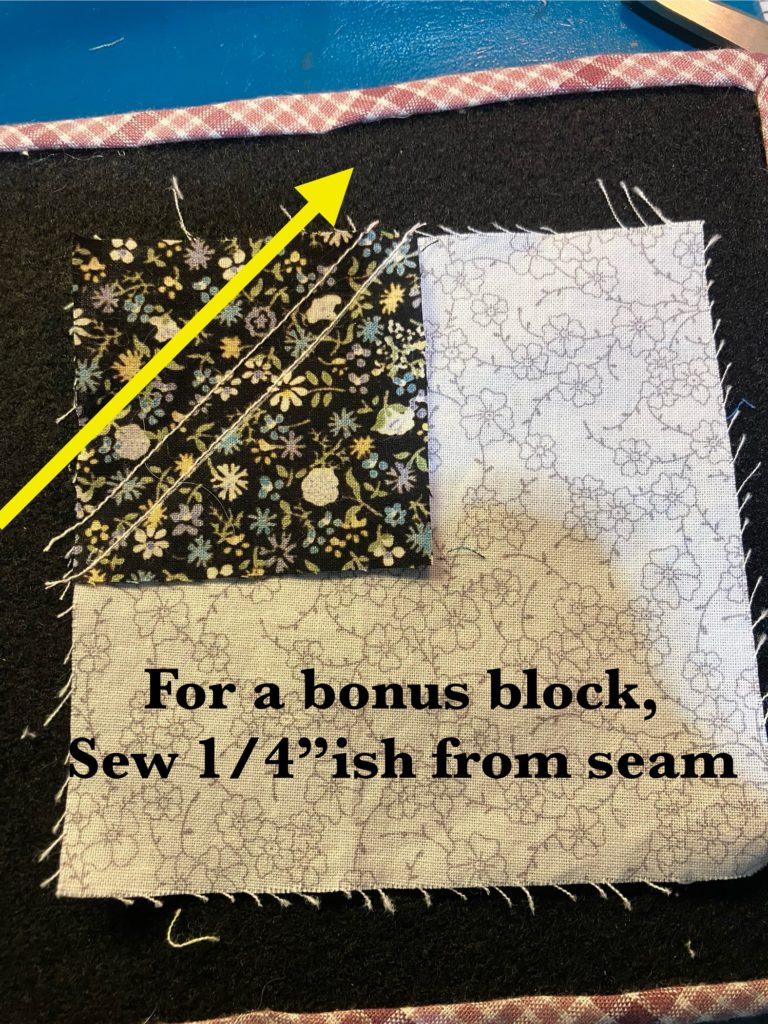
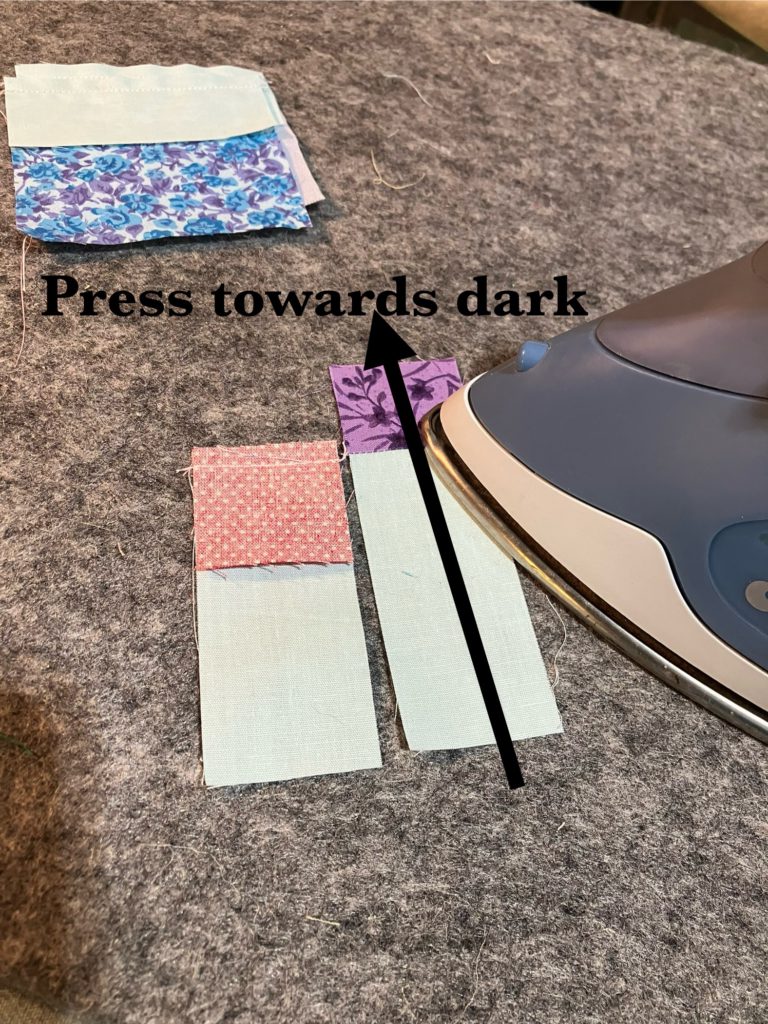
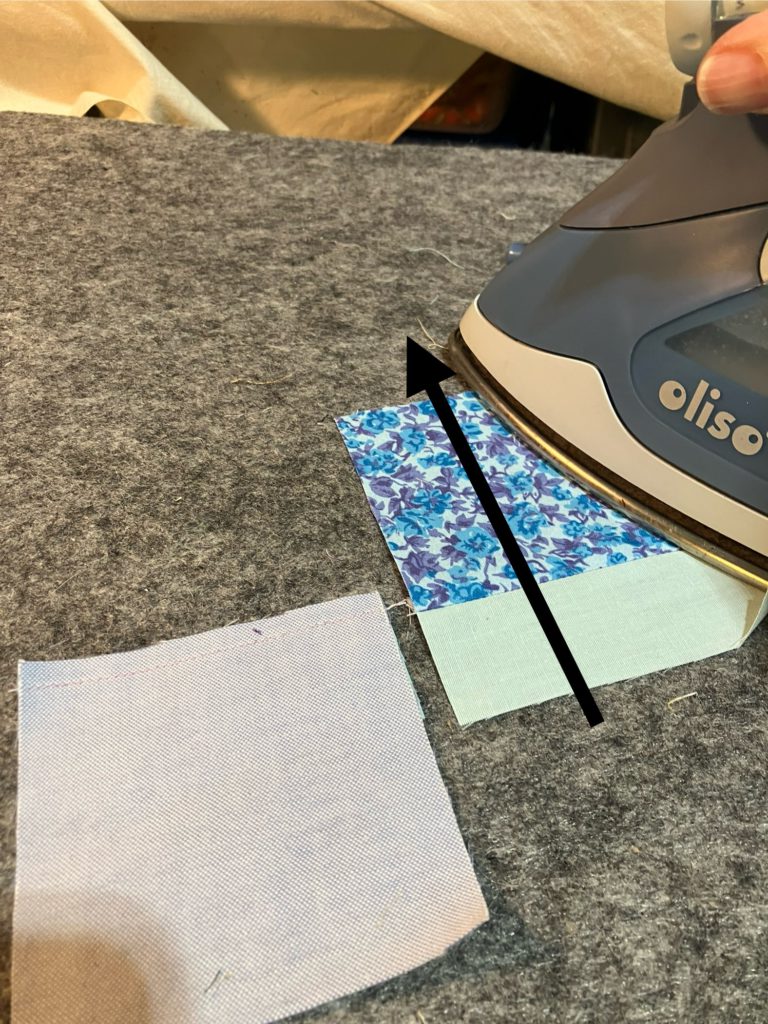
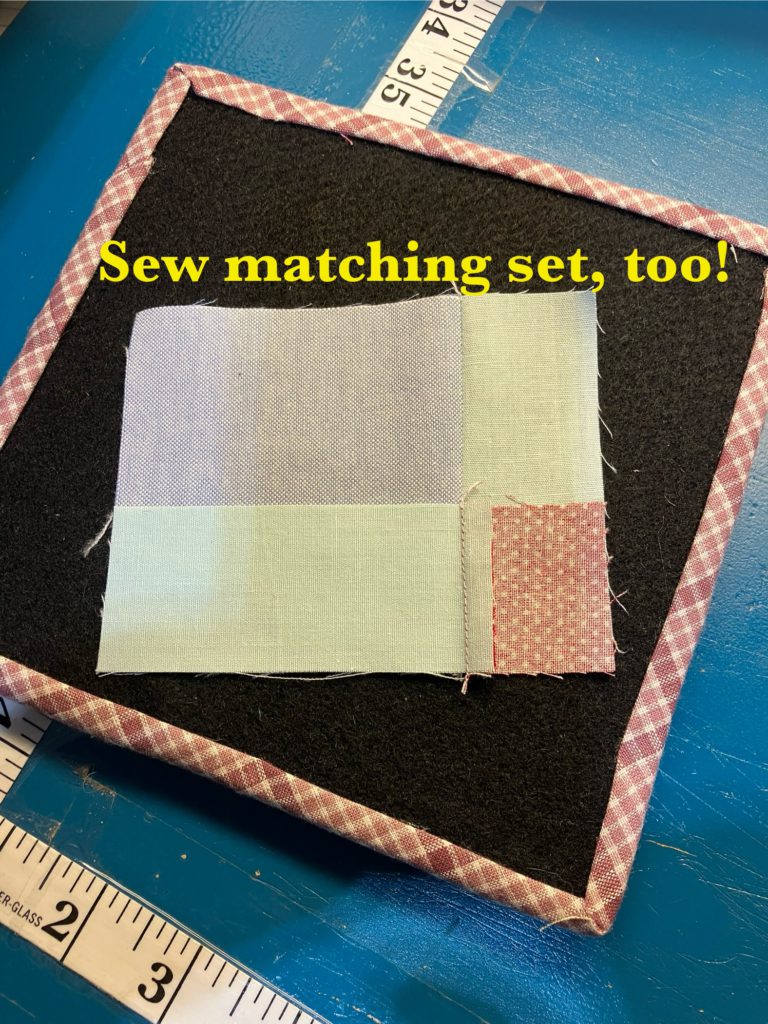
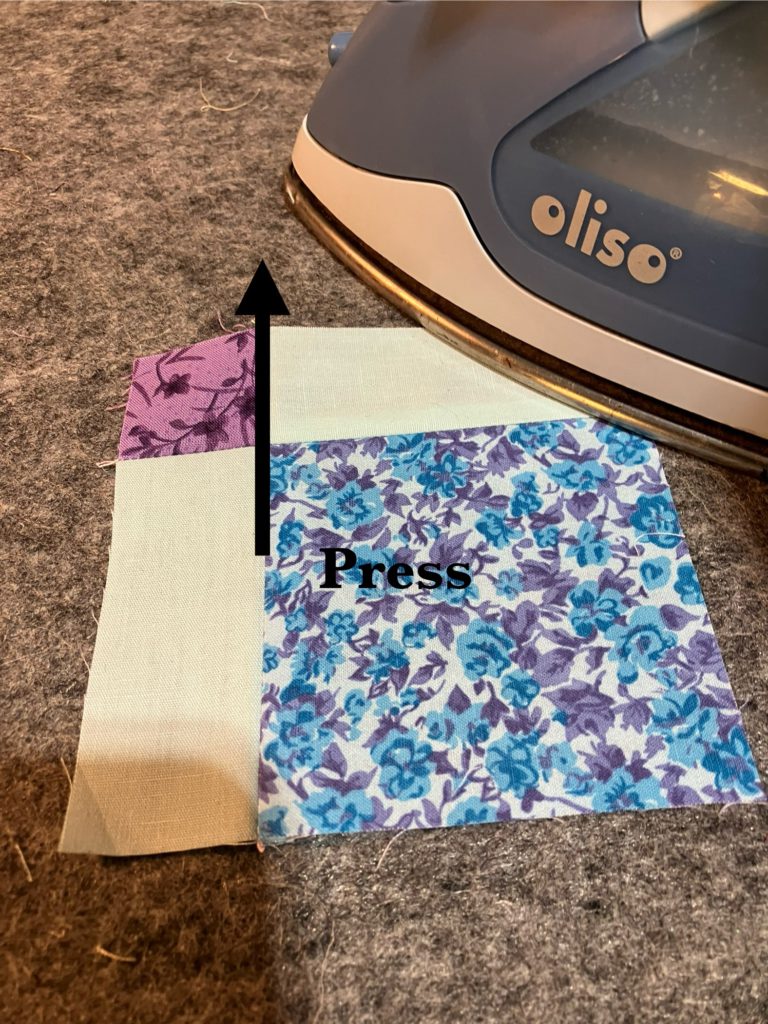
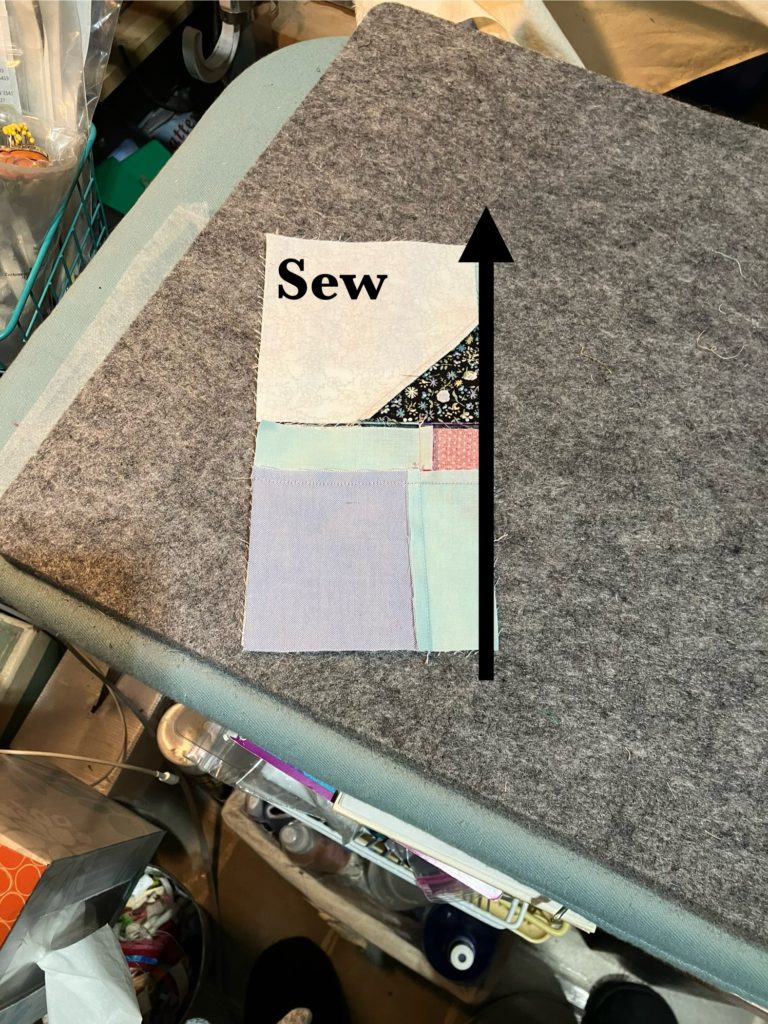
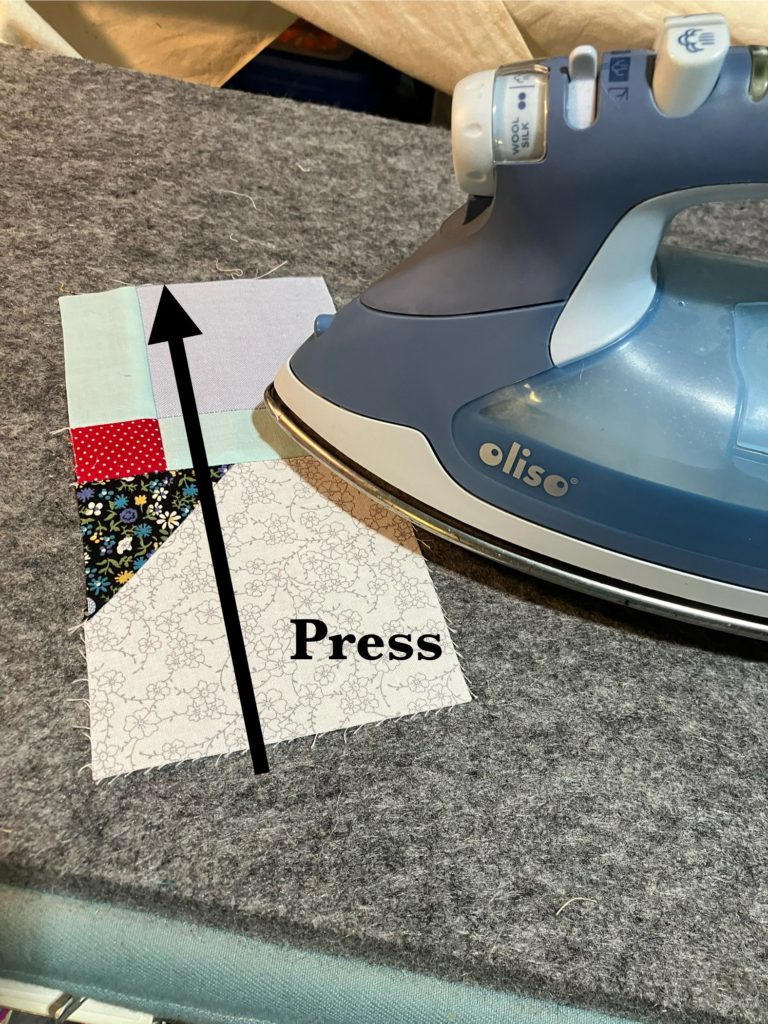
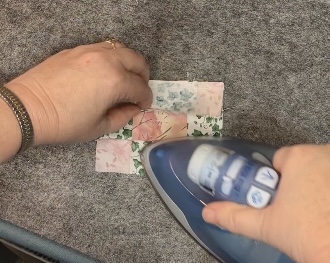
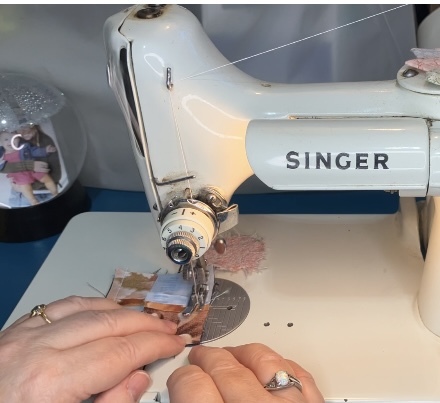
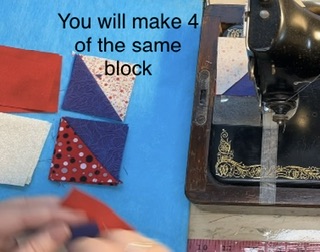
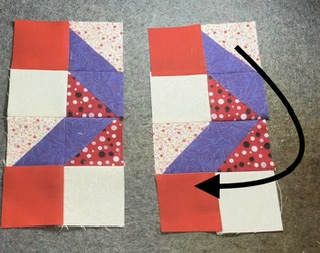
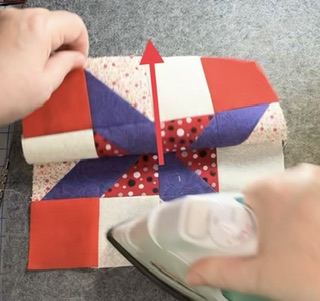
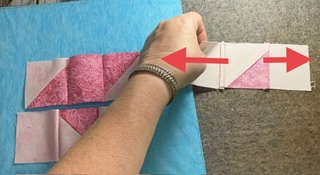
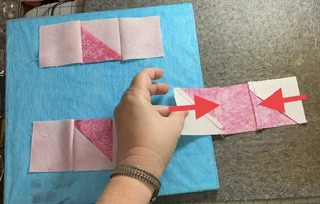
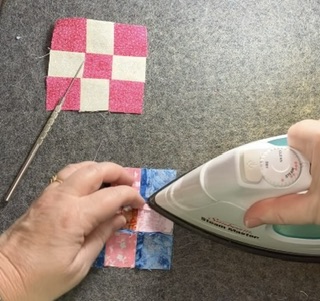
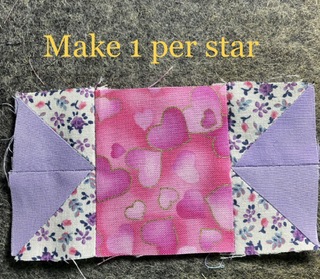
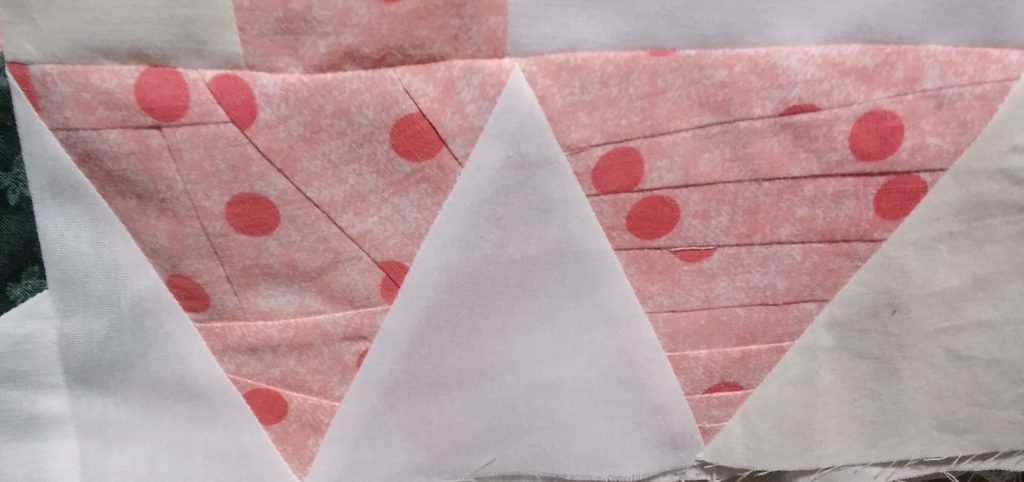
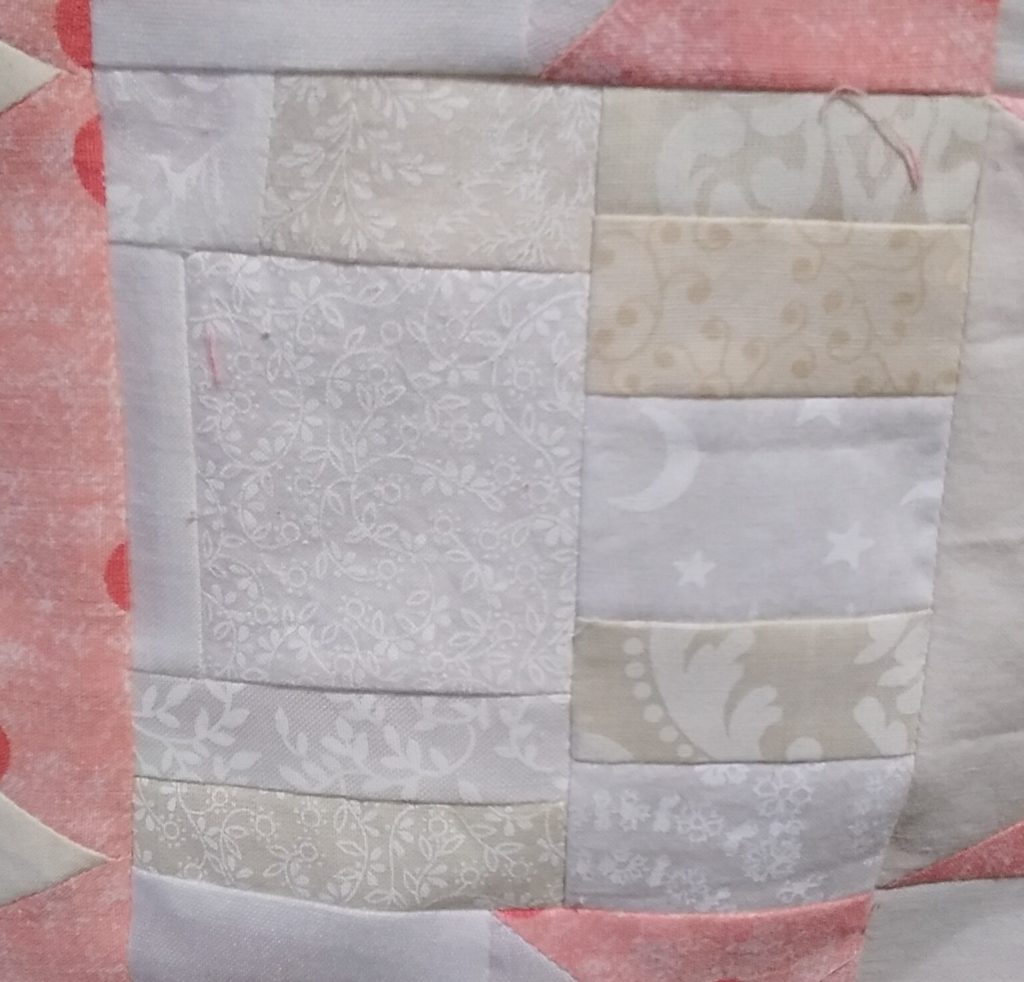
This block finishes at 6 1/2″. It is constructed from all squares and rectangle pieces, using the sew and flip method to create corner triangles and geese.
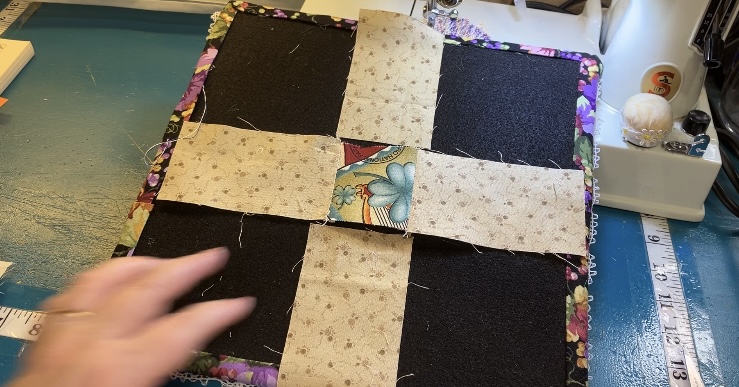
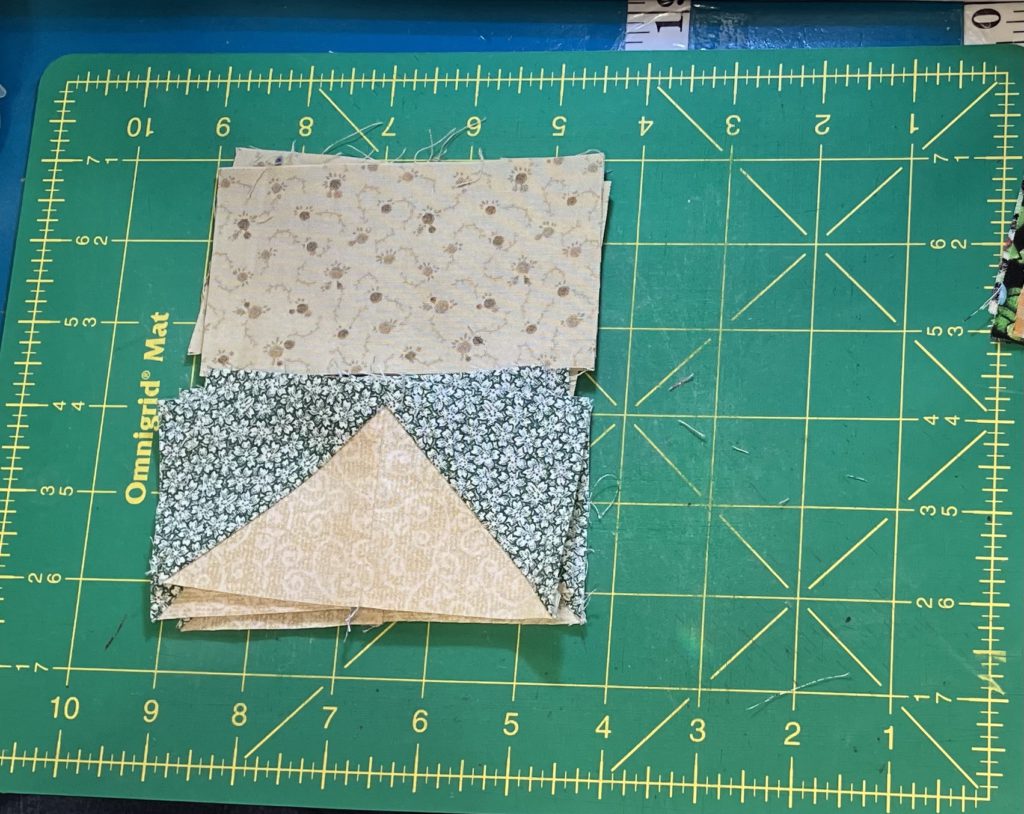
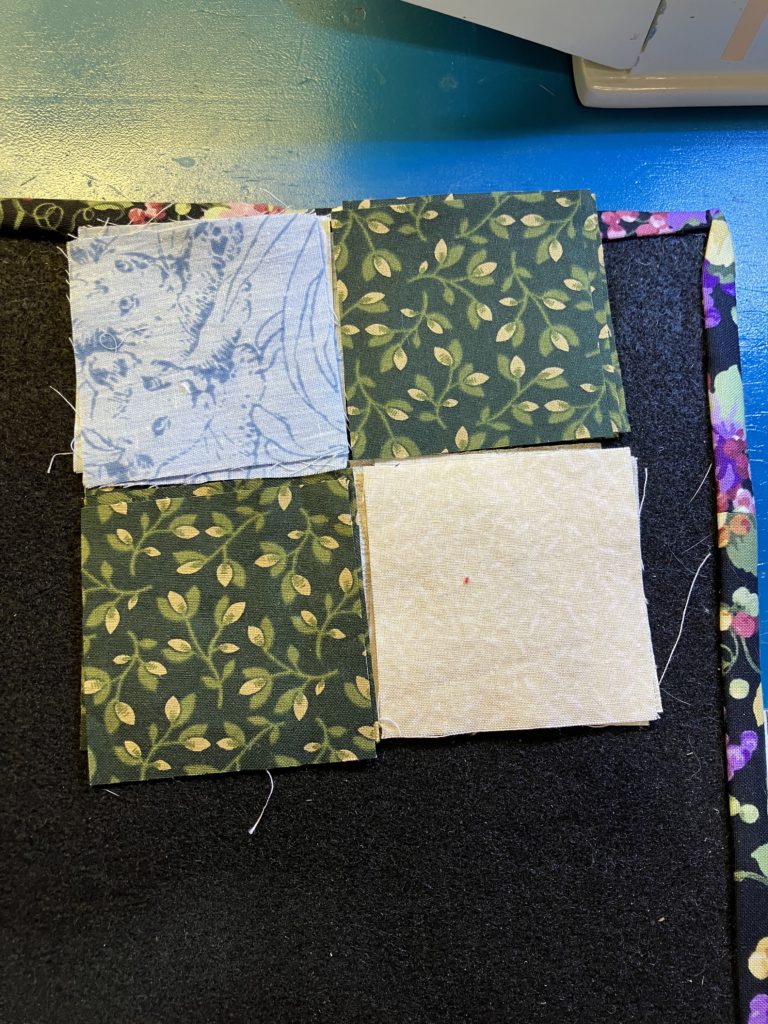
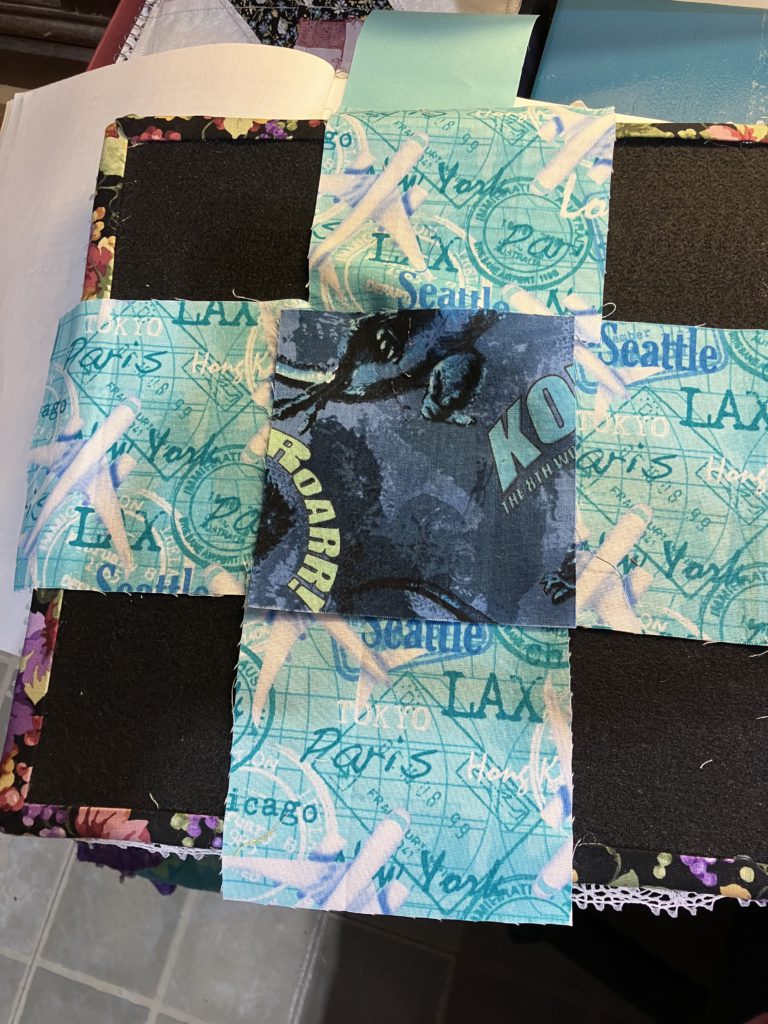
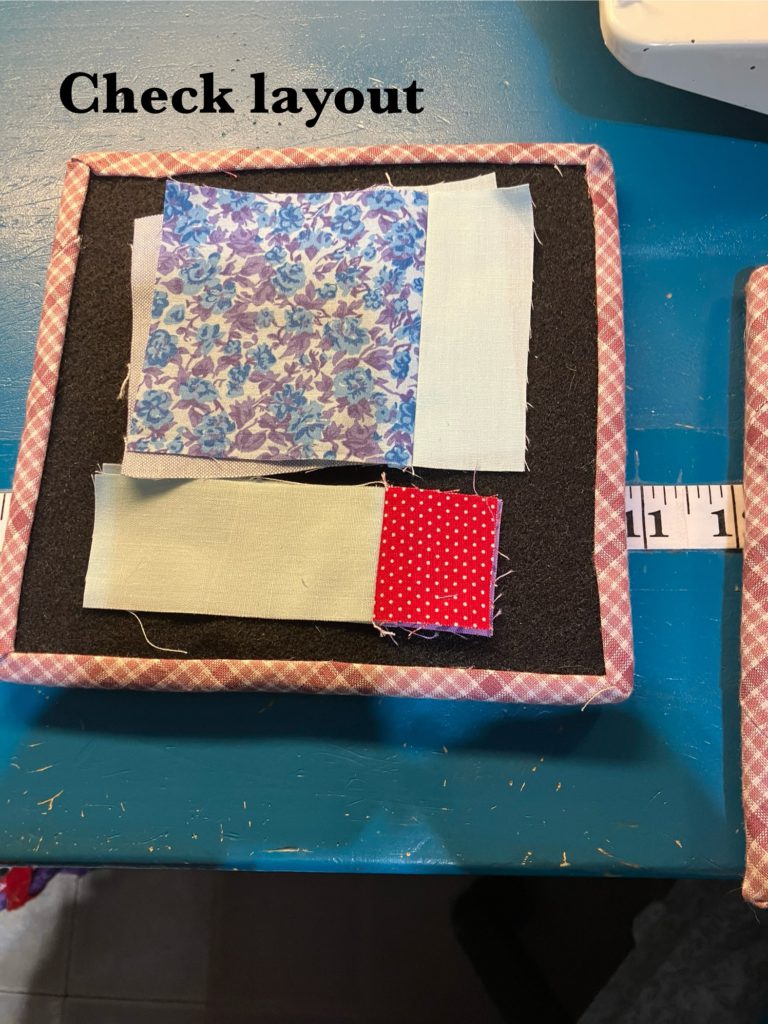
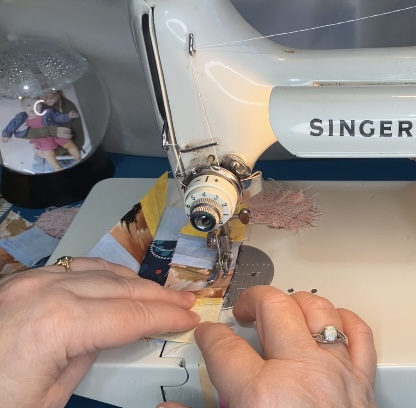
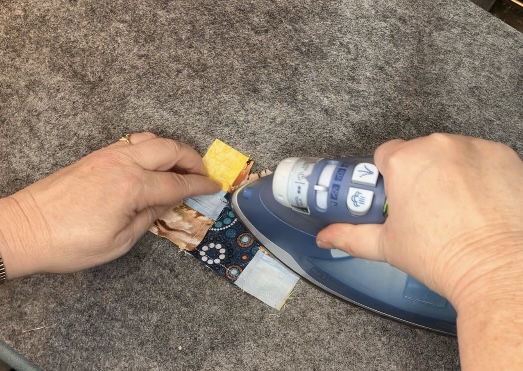
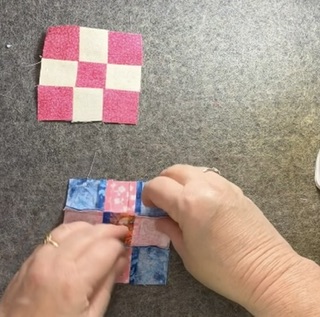
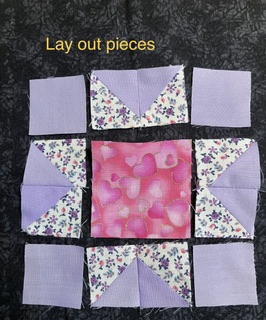
Once the corner/center units and “V” units are constructed, this block is assembled like a basic nine patch.
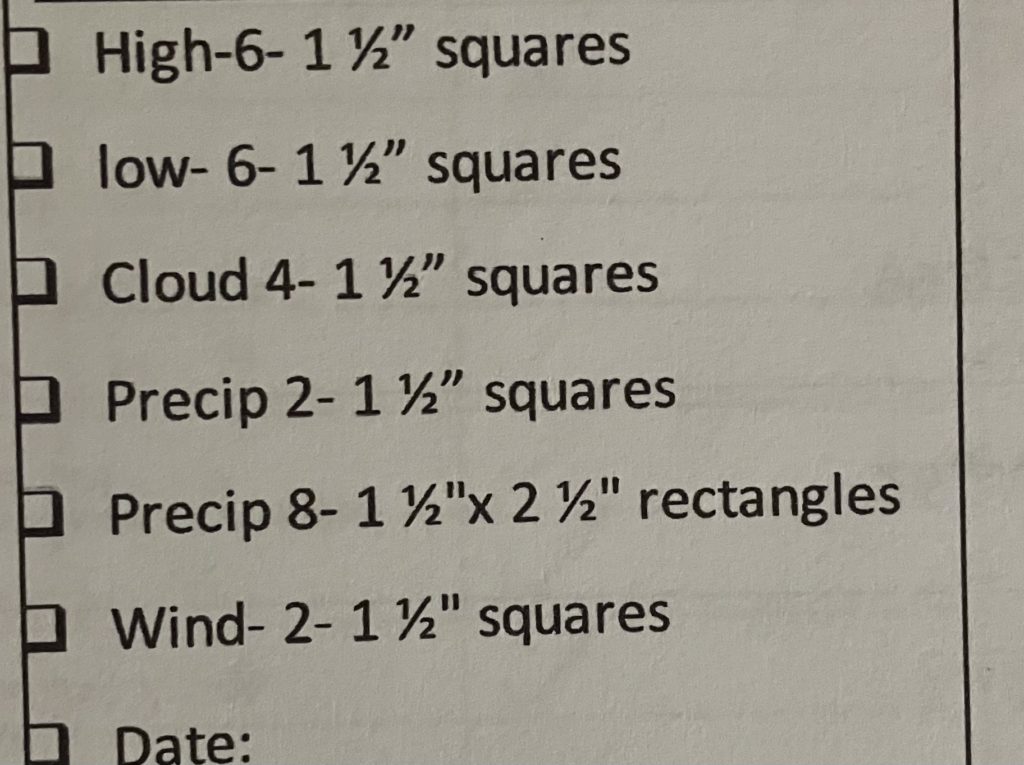
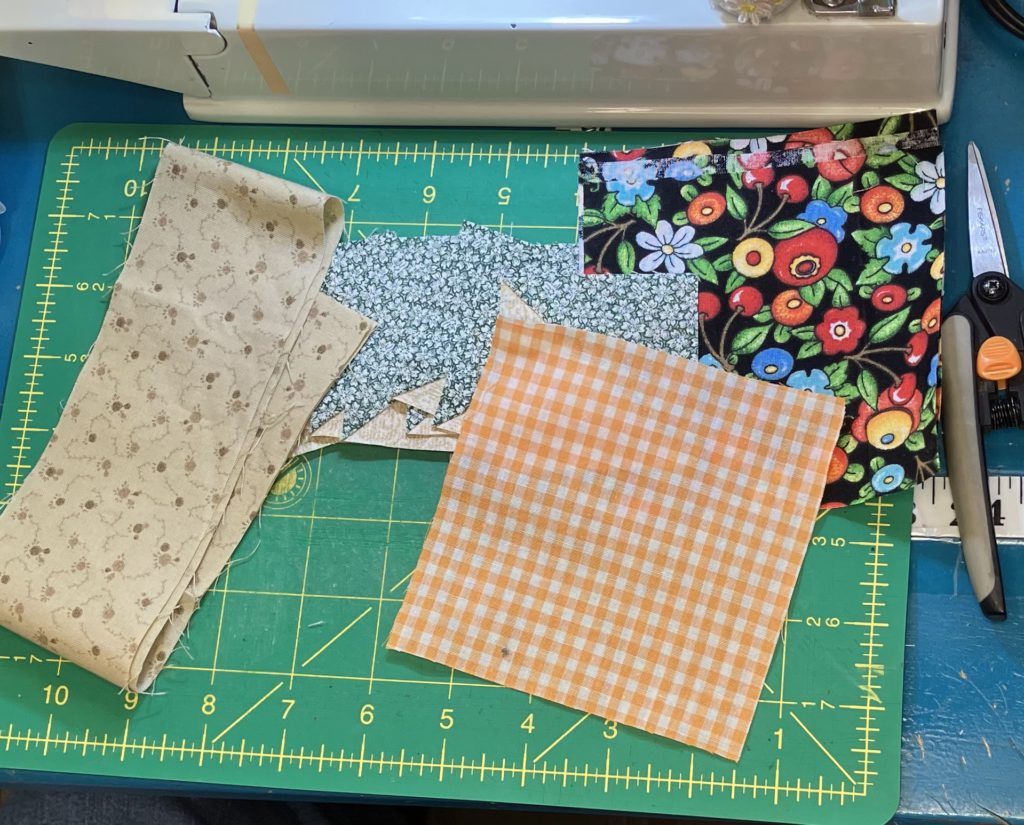
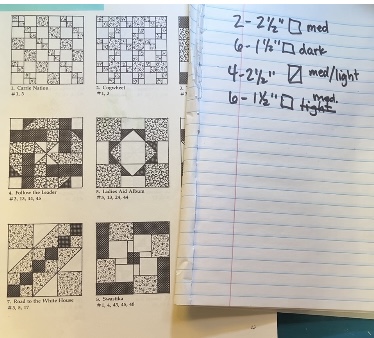
Here is the cutting chart:
This block is so cute and irresistable that you have to give it a try! Don’t be intimidated by the sew and flip units! That makes complicated block construction easy to do!
I hope you are enjoying this block series…happy scrap piecing!
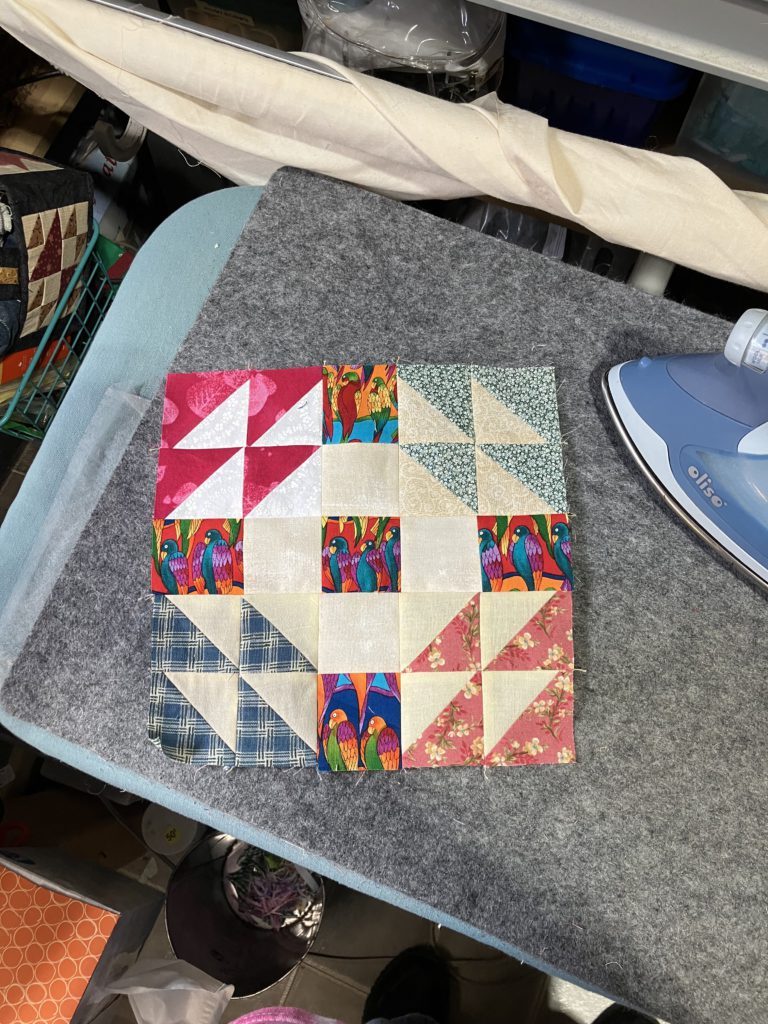
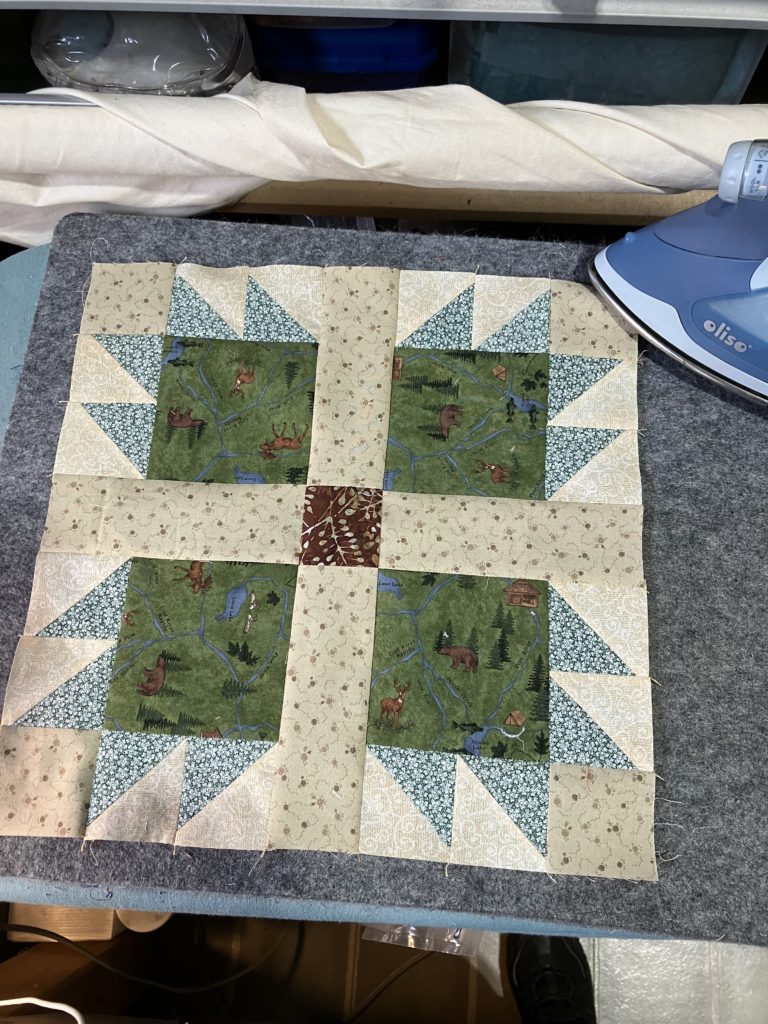
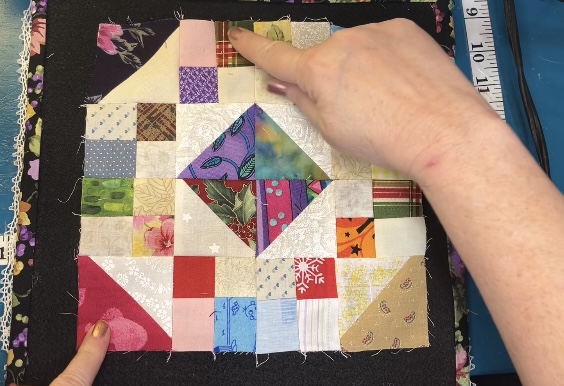
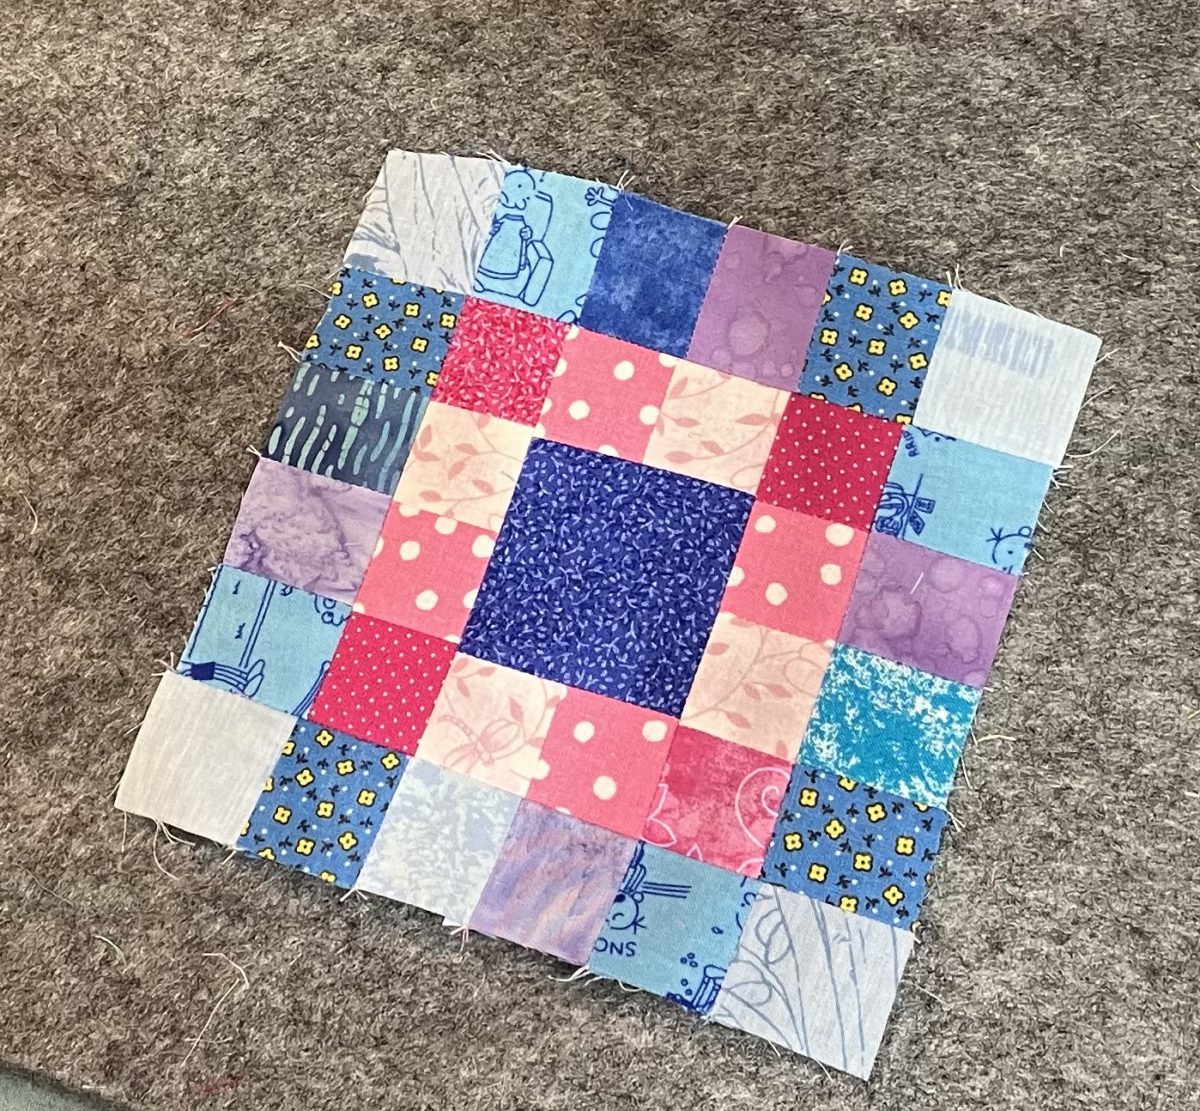
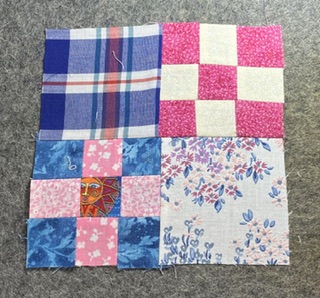
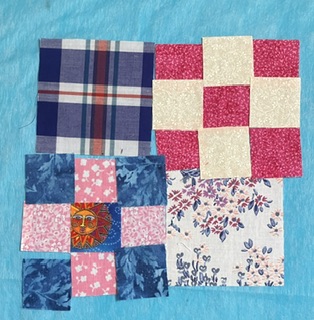
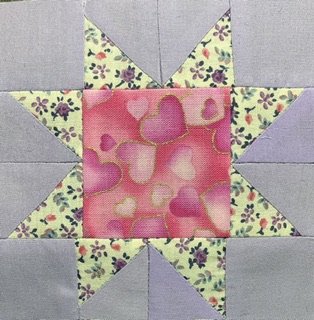
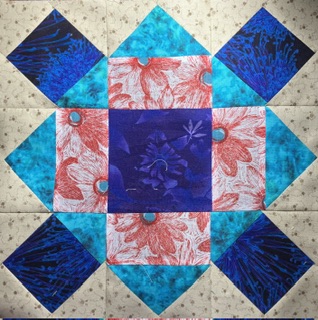
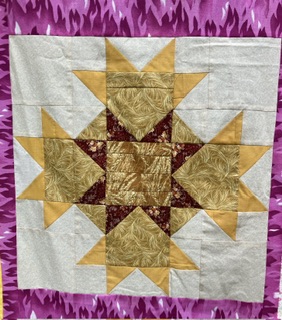
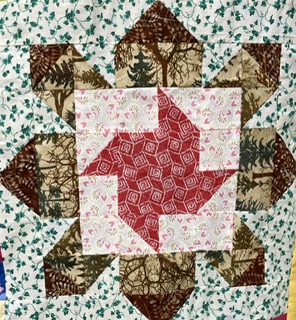
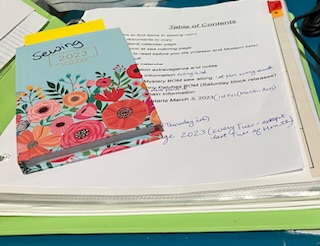
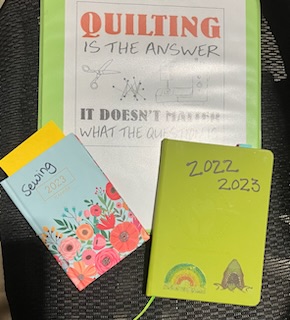
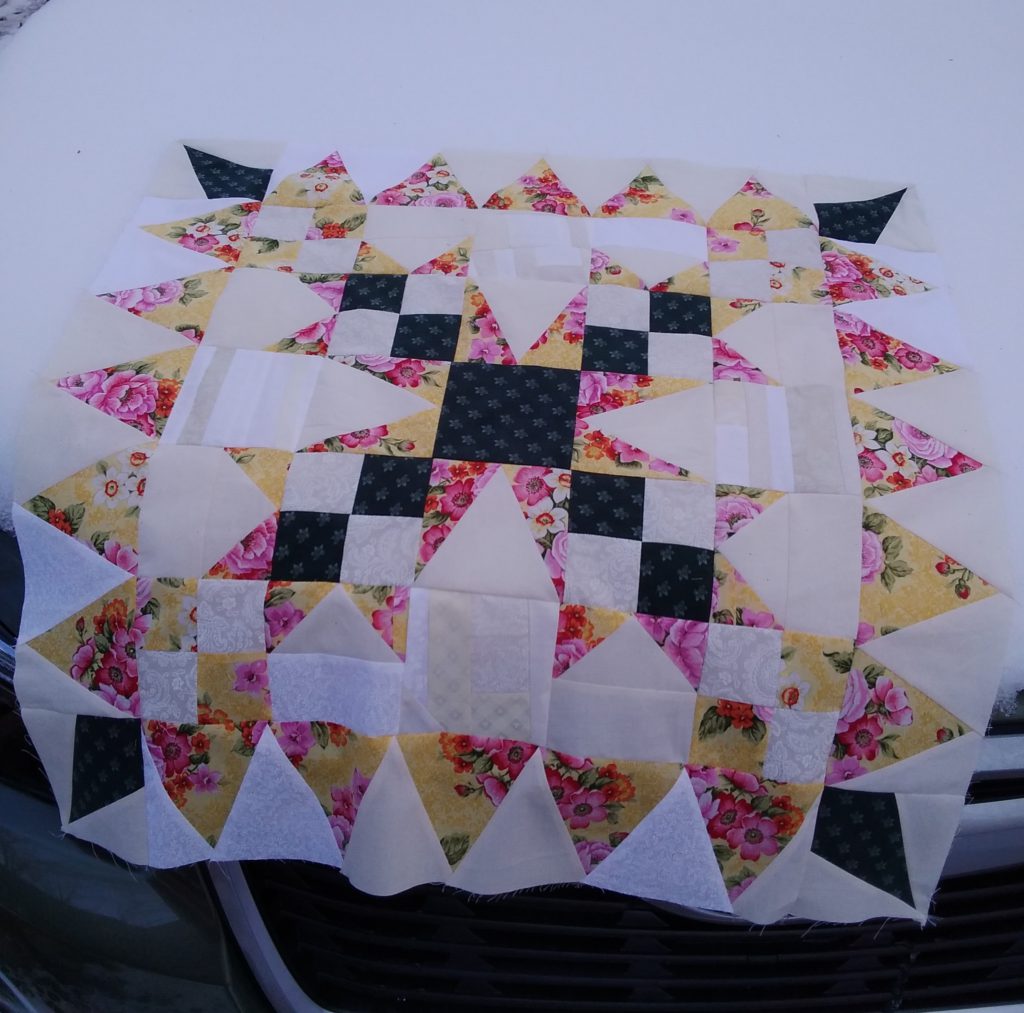
If you have been watching my YouTube channel, you have seen me mention my 2024 weather quilt. A subscriber recently asked if I would do a tutorial on the weather quilt blocks. What a fantastic idea!
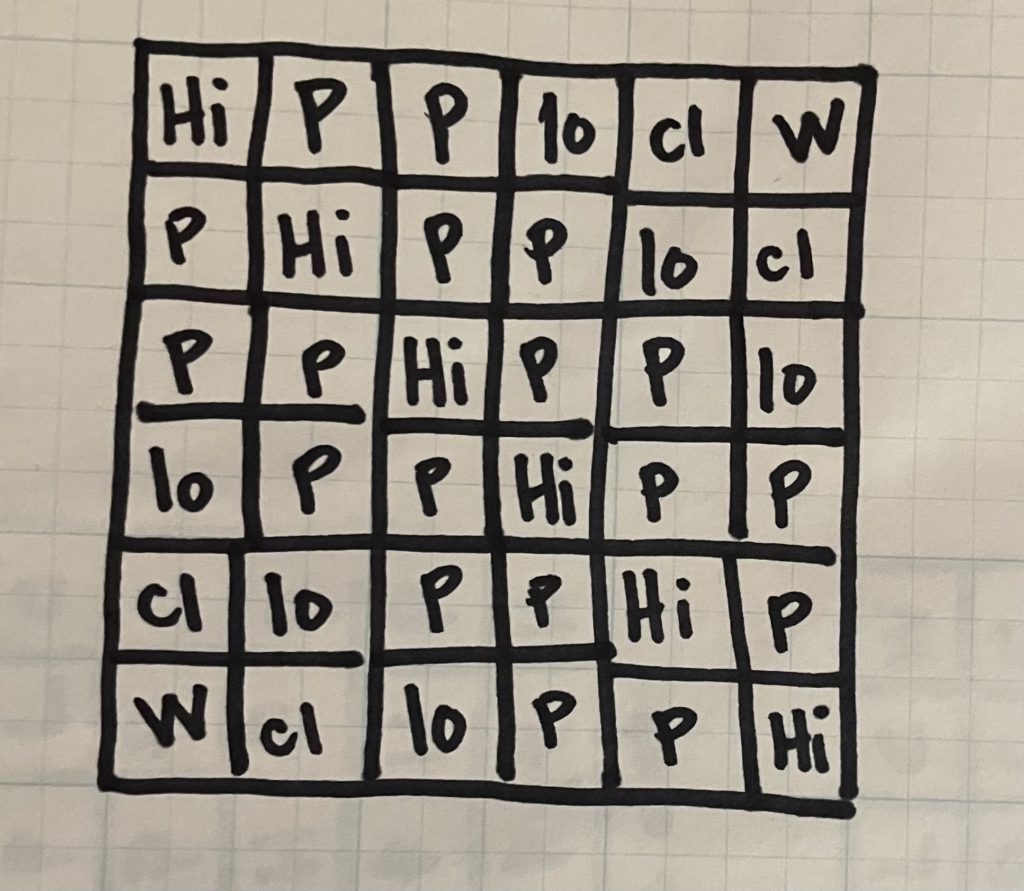
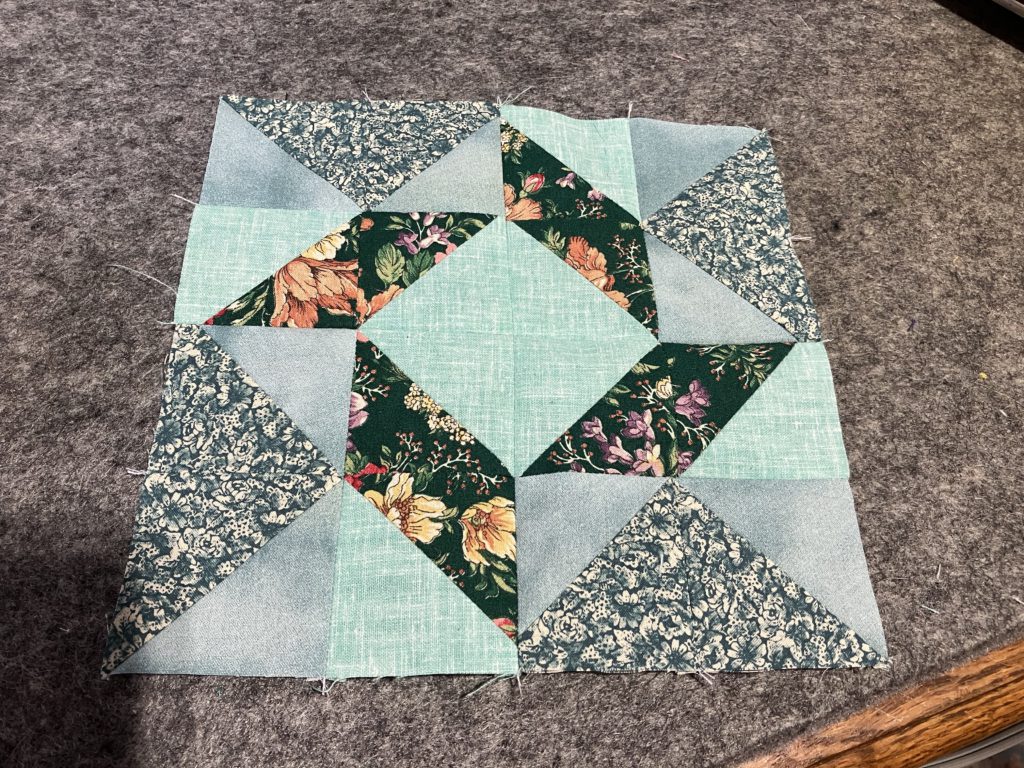
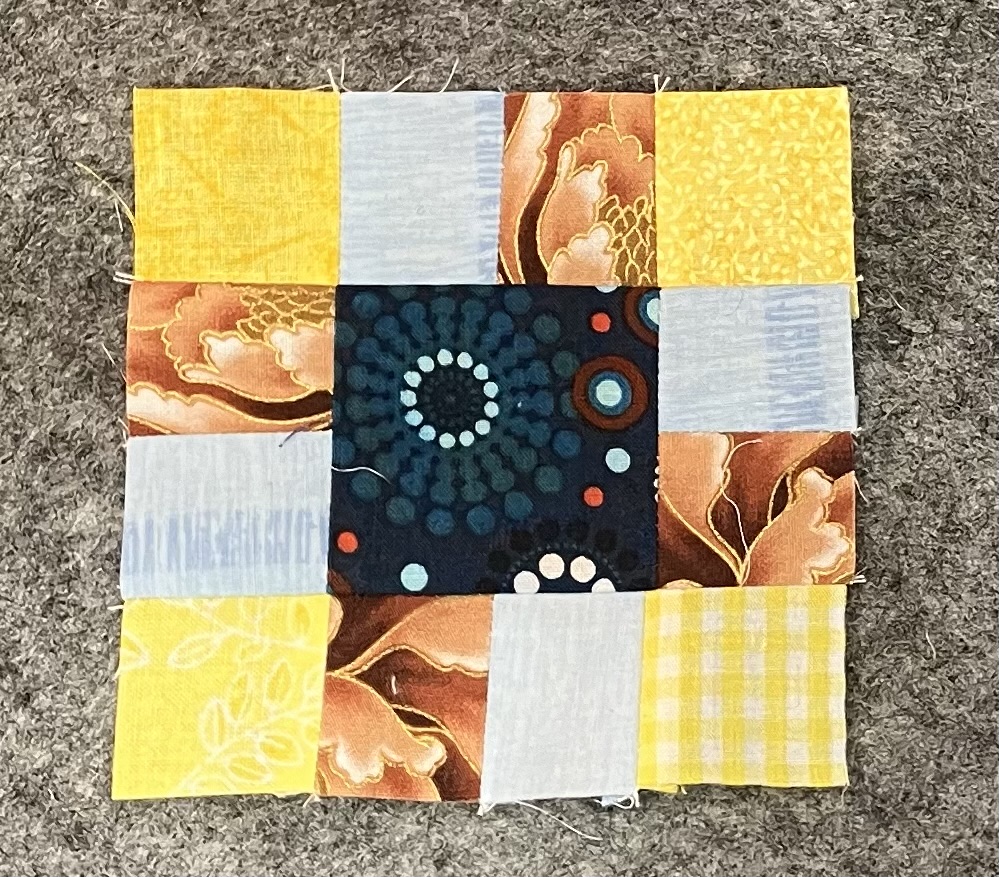
This quilt has five different blocks in it…based on the place where the weather data is collected. This first block represents data that is collected while we are staying somewhere away from home(s) or our son’s house. This is the “away from home block”…not to be confused with the traveling block. I will define that more clearly when we make that block.
All of the blocks have a color that represents these five weather elements: high temperature, low temperature, cloud cover, wind and precipitation. What does that mean for someone who is making this block but is not tracking the weather? It has five colors…of your choosing!
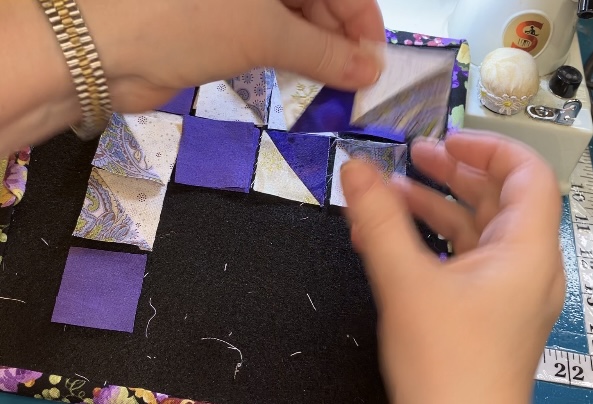
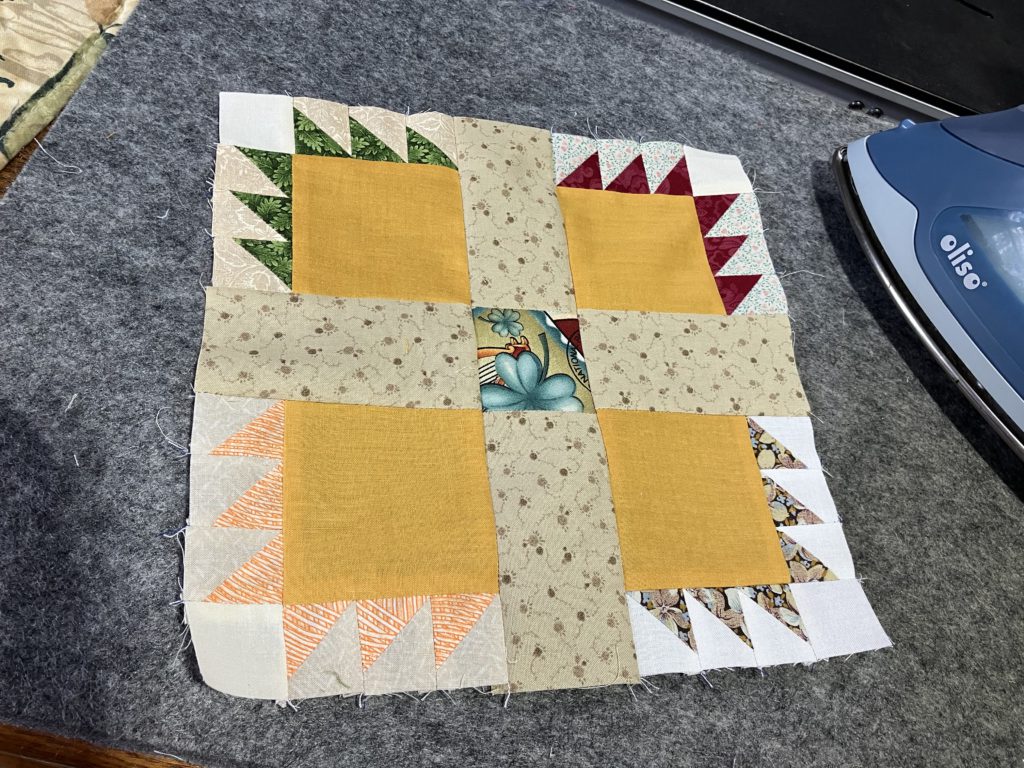
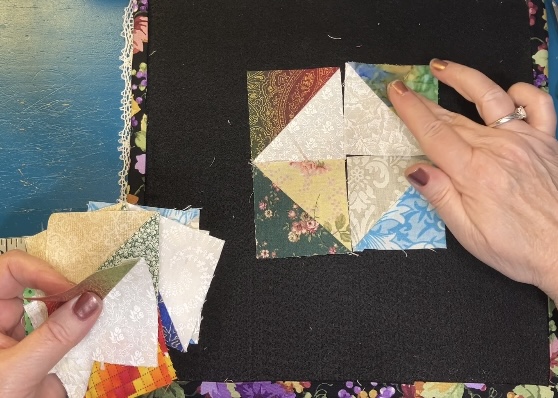
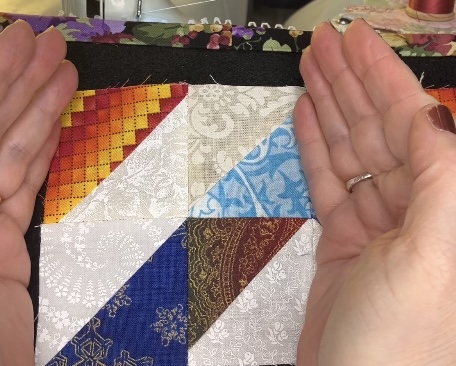
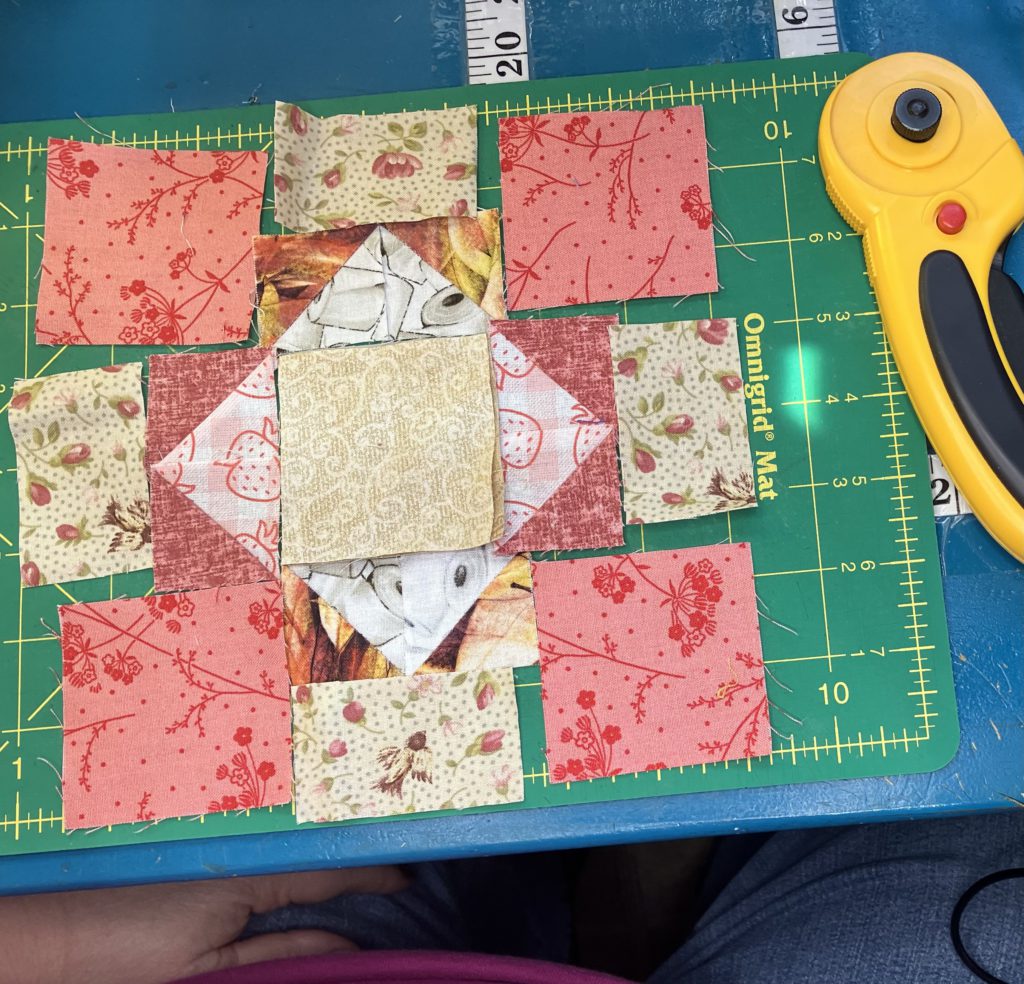
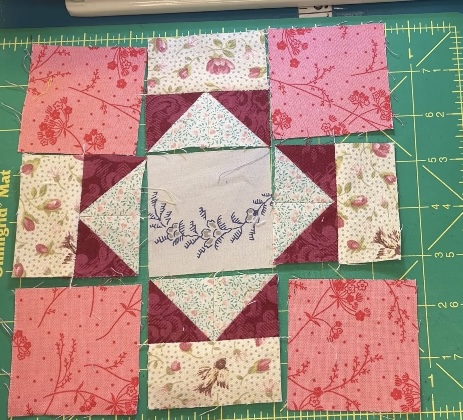
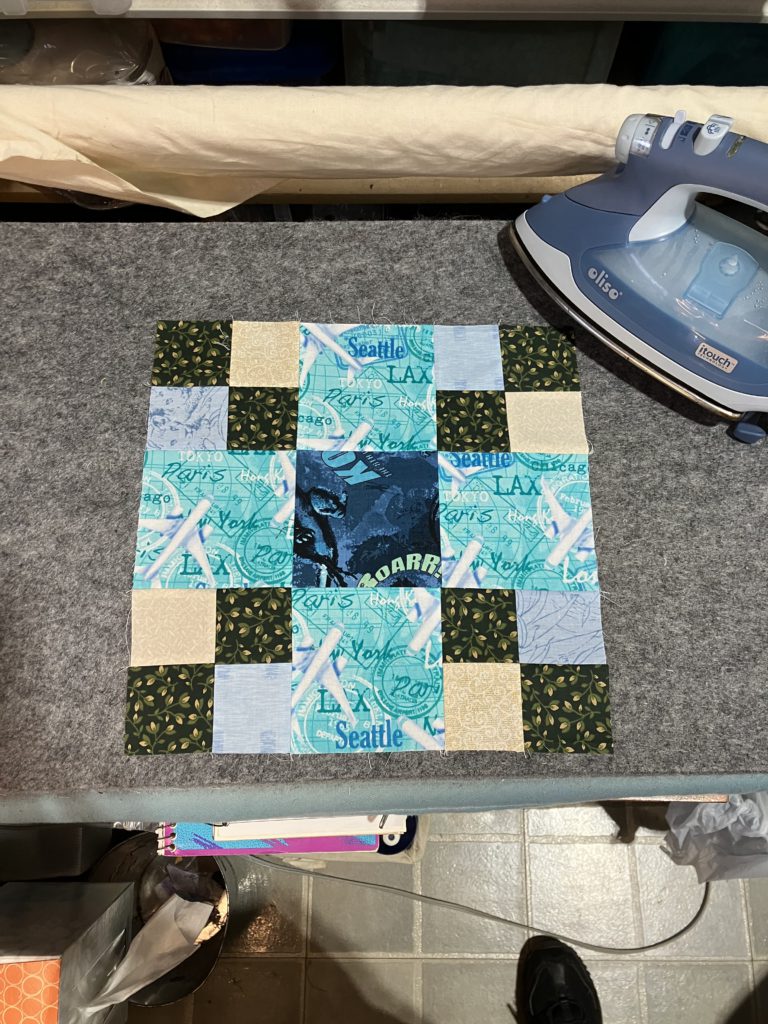
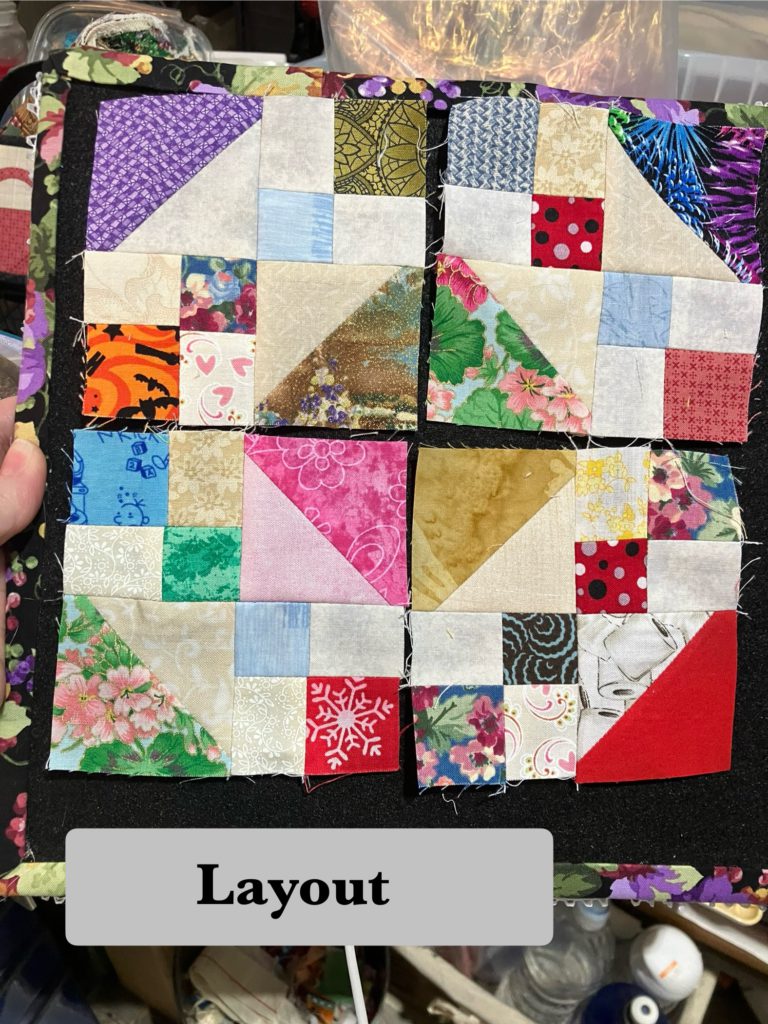
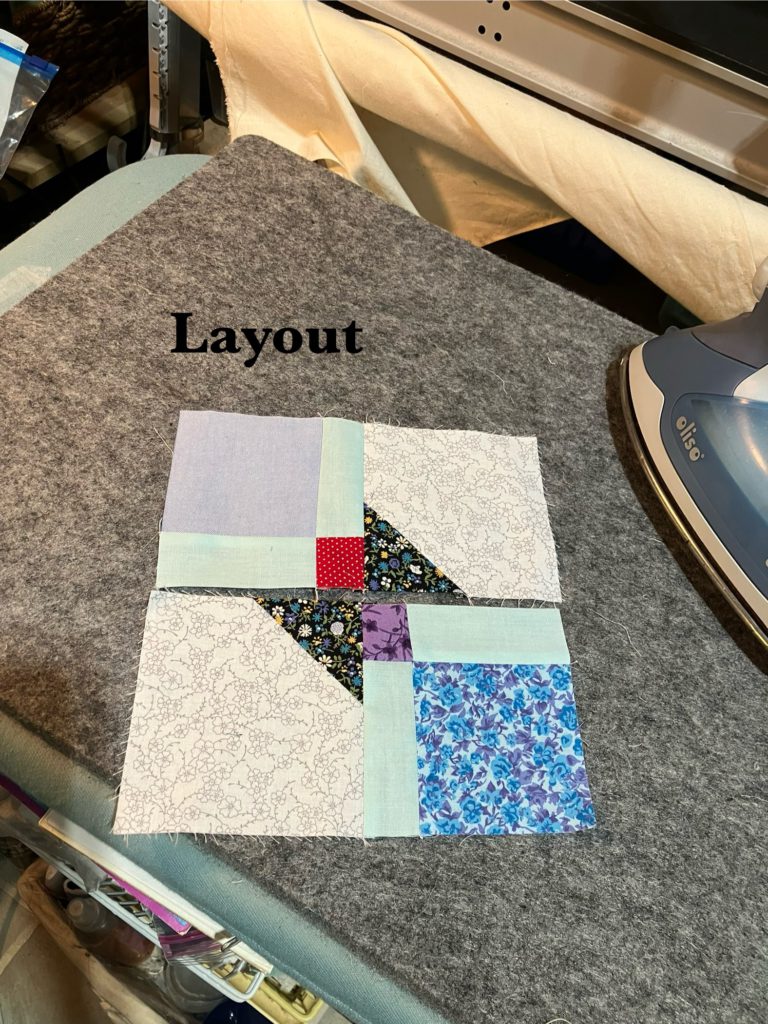
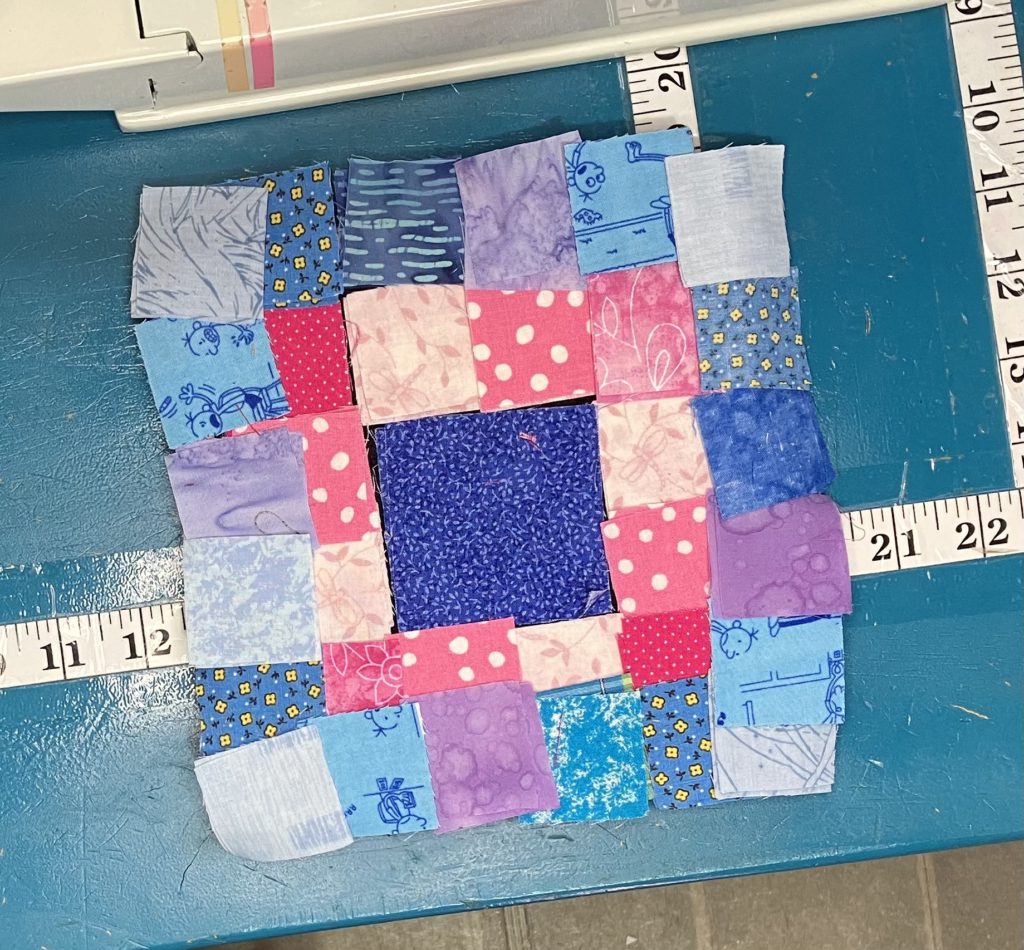
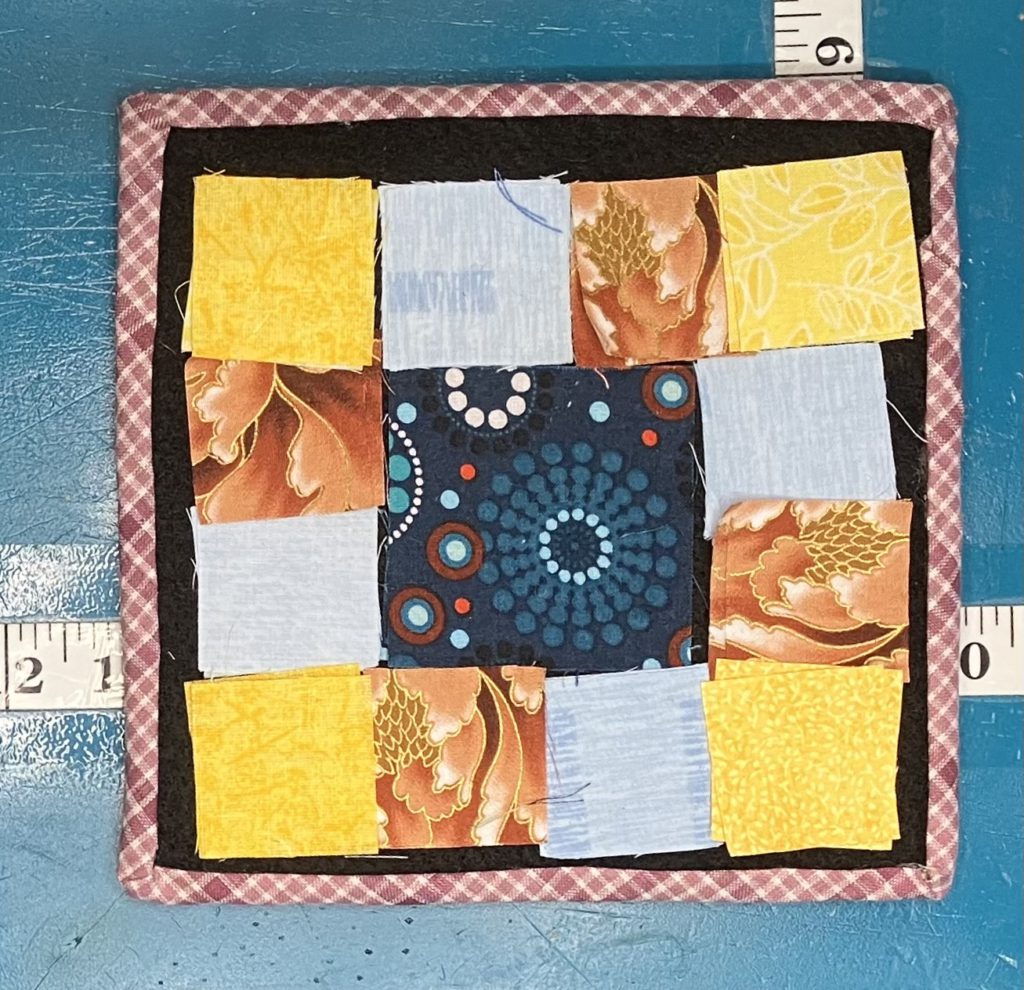
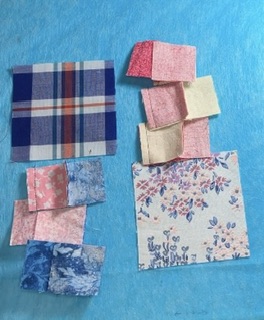
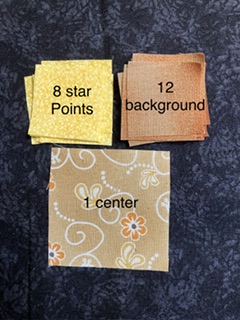
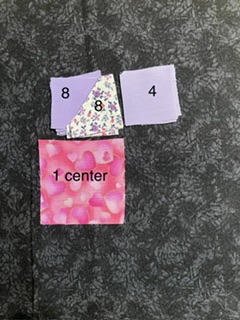
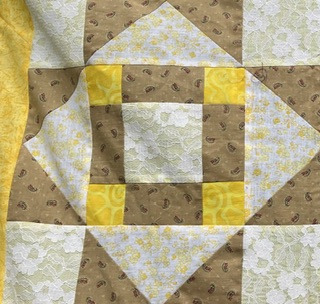
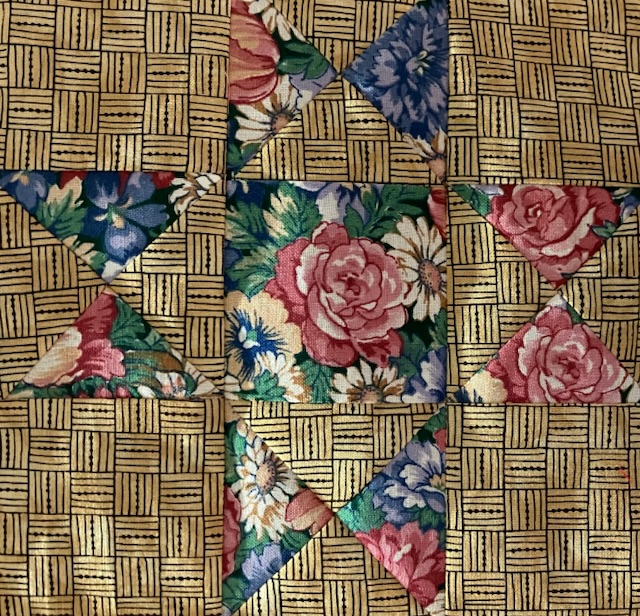
Here is the diagram that I used to layout the pieces for this 6 1/2″ block:
Here is my cutting diagram:
Let me explain how to read the above chart. In the placement diagram, H represents high. You would cut six 1 1/2″ squares… in the picture, these are yellow squares.
I hope you enjoy making this block. It would be great as a regular, old scrappy block, too!
I can’t wait until it is time to share next week’s block!
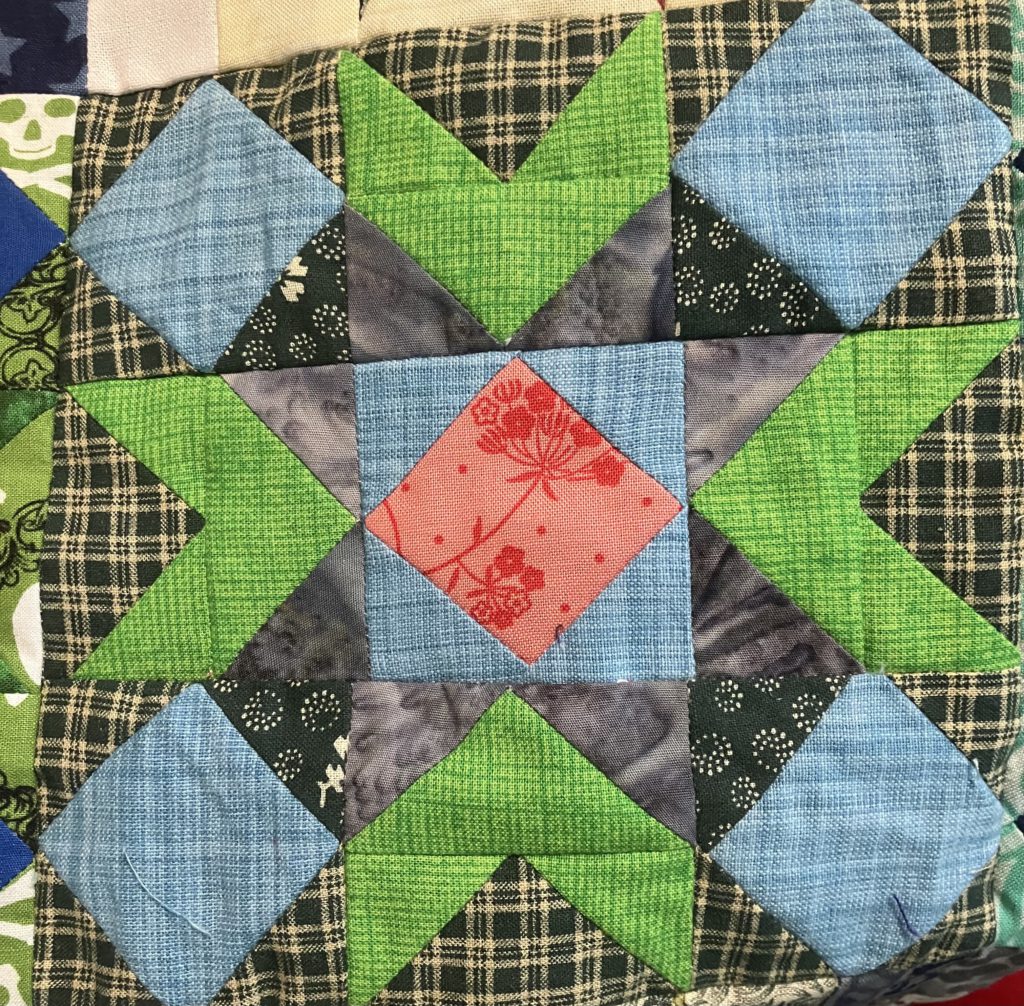
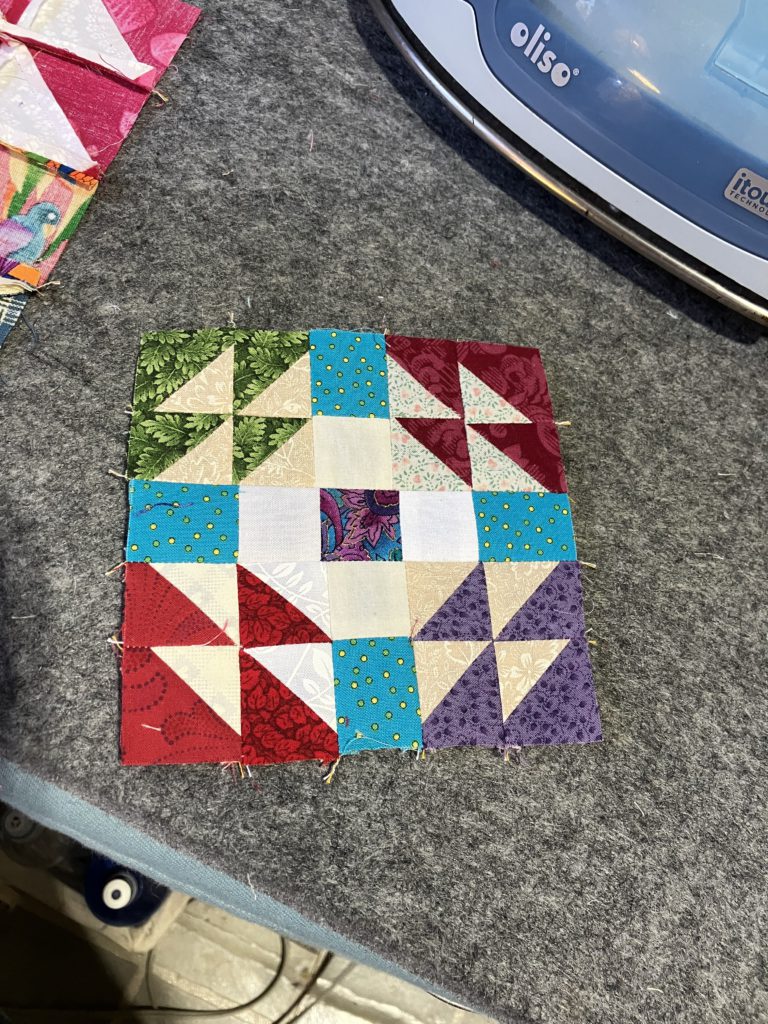
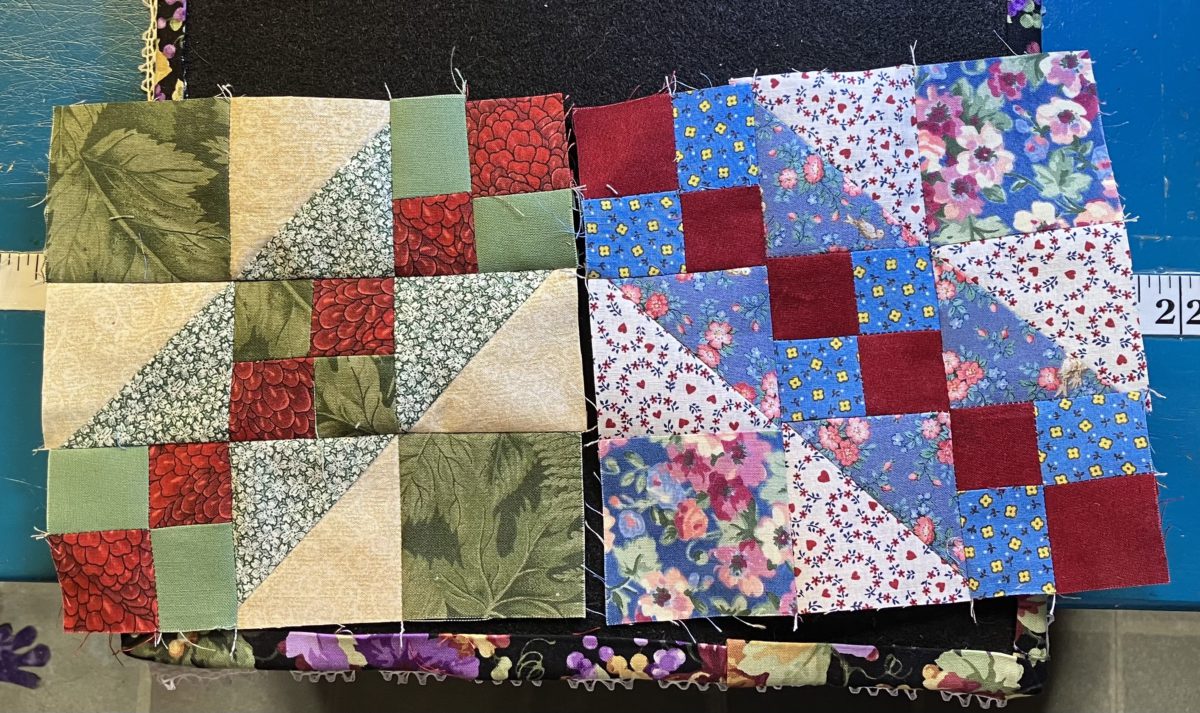
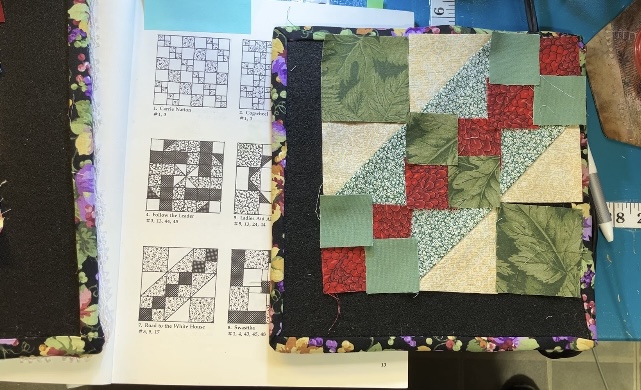
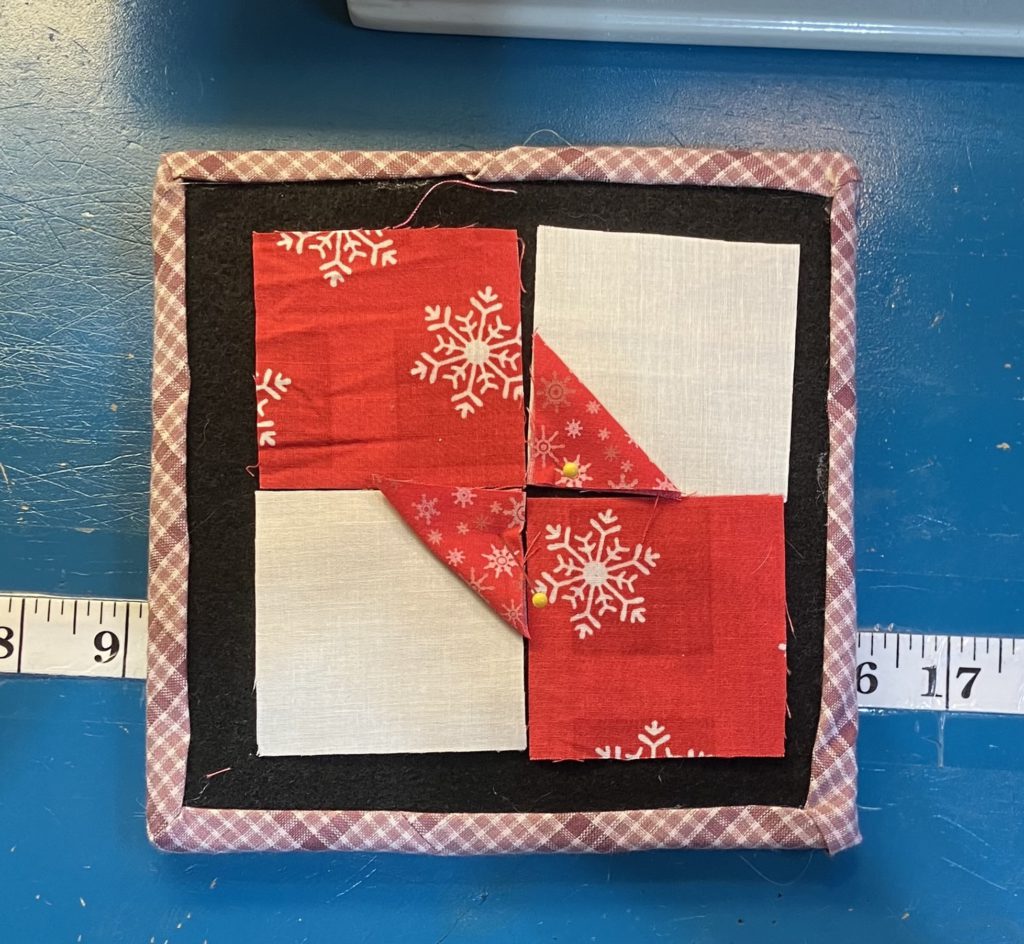
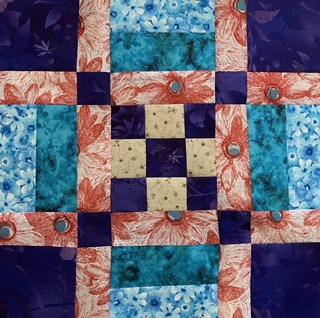
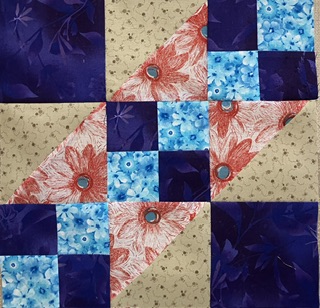
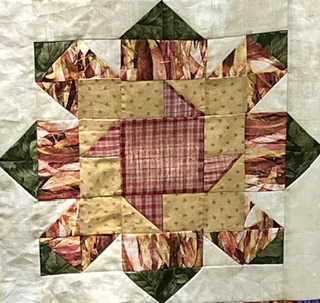
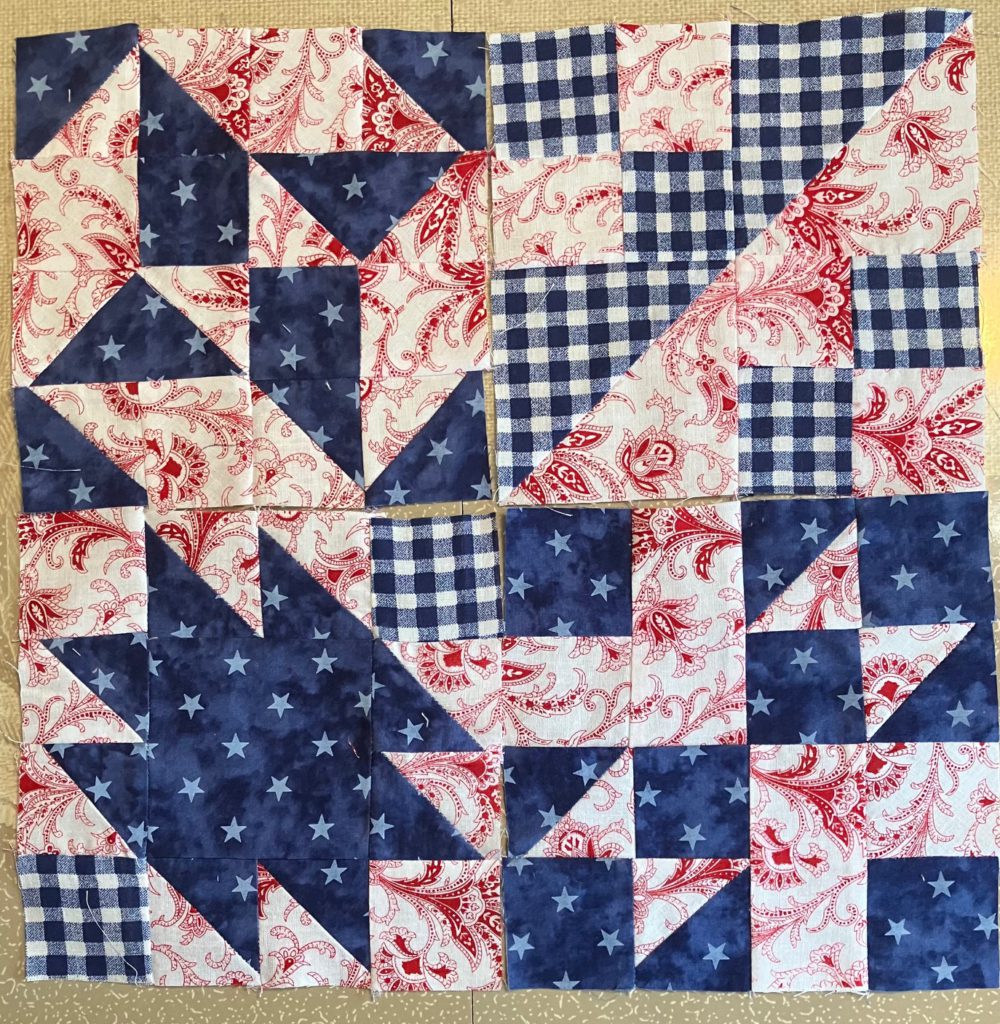
I had an epiphany in the shower. The Road to Kansas block could be remade using larger block pieces…and a little more organization. Yeah…Let’s do that!
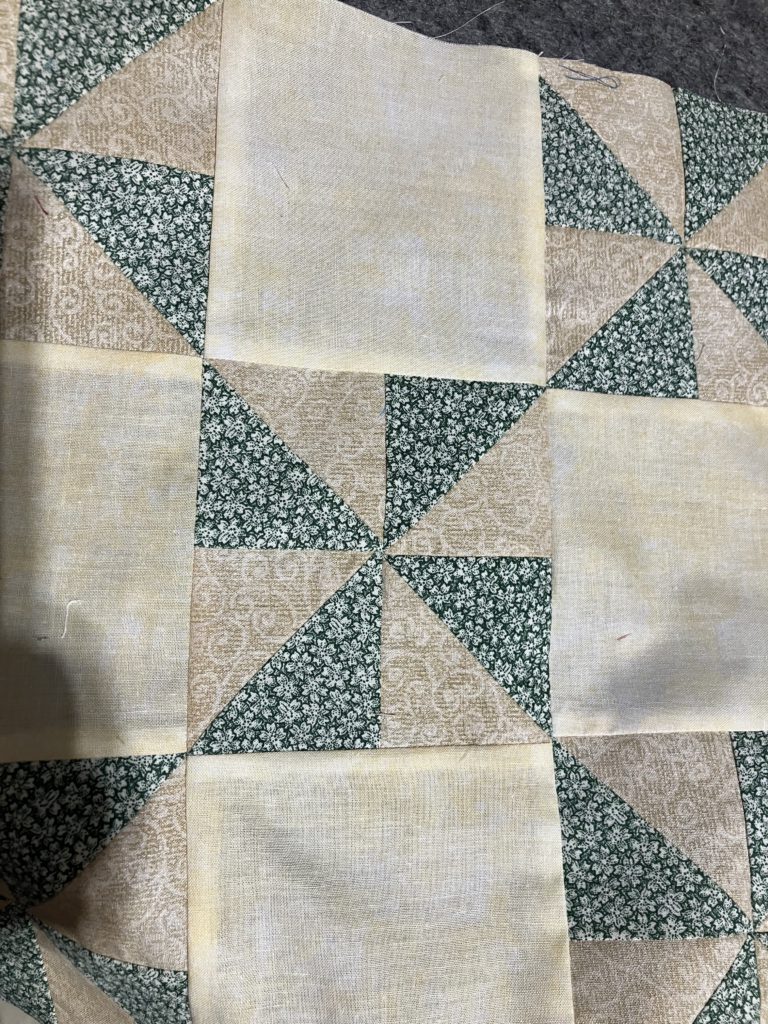
It is assembled in the same manner as last week’s block, but the cutting is different…actually more complicated.
Please use the picture above the chart to help with placement. I will work on a repeat pattern at some point, but not today. A repeat would work if you put a 4 block unit under the one shown, but not to either side. Hmmmm! I will have to think this out some…
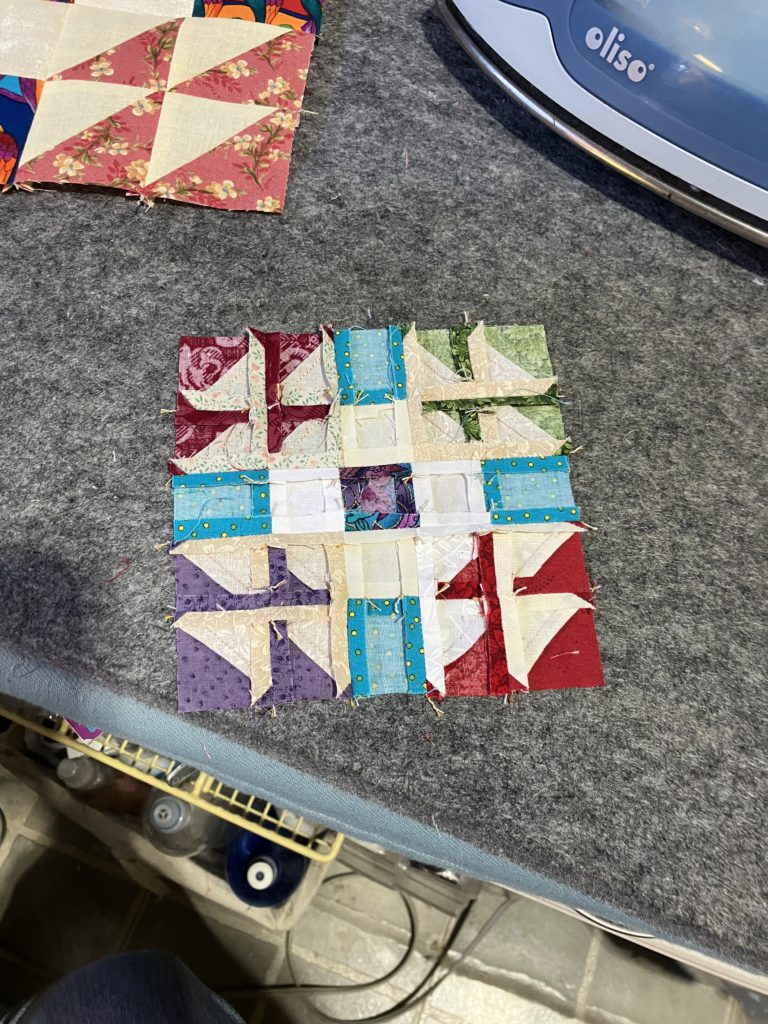
Here is the cutting chart:
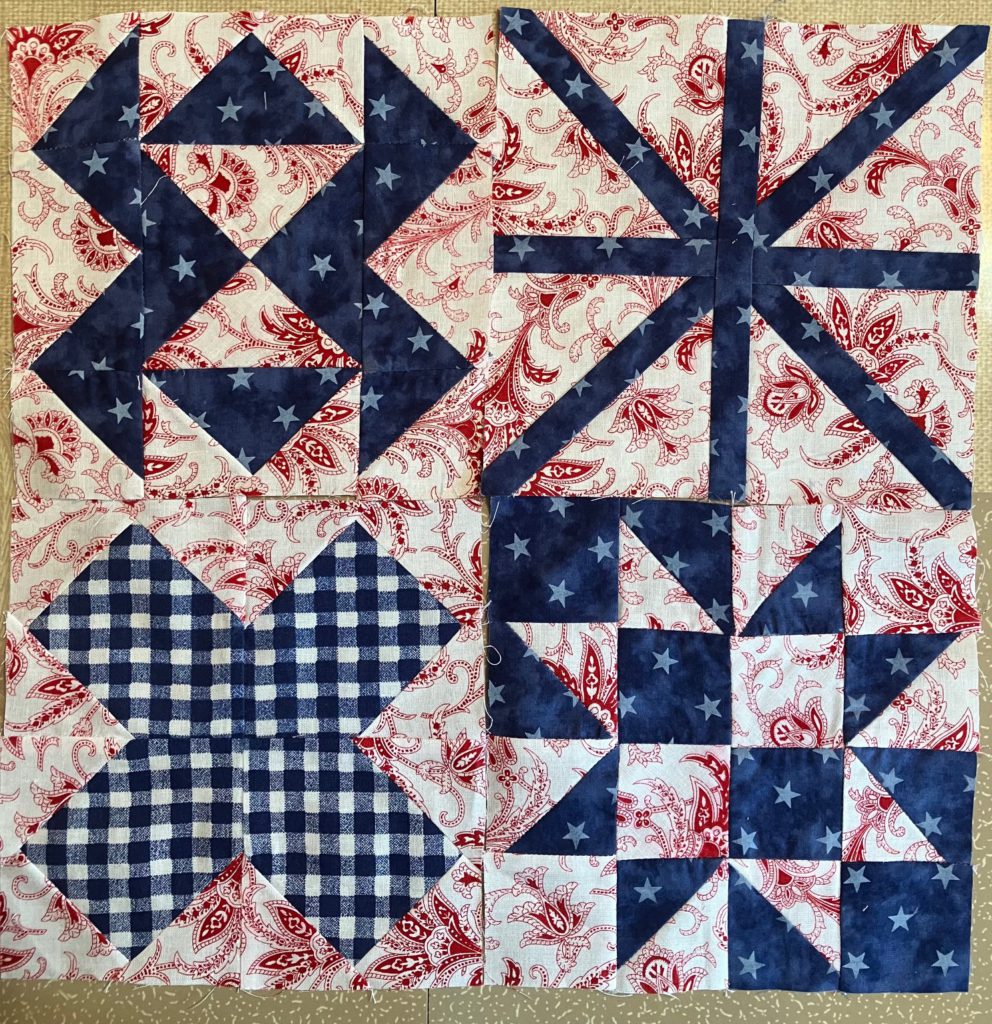
Hard to believe these are the same blocks!
I enjoyed turning this block into a simpler, but yet somehow, more difficult version of its former self! I hope you are enjoying, too!
It is an excellent scrap buster. Do not be intimidated by all the pieces that make up this beauty. I constructed 3 of these blocks as leader/ Enders between the blocks in my weather quilt.
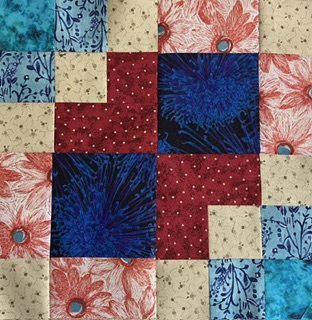
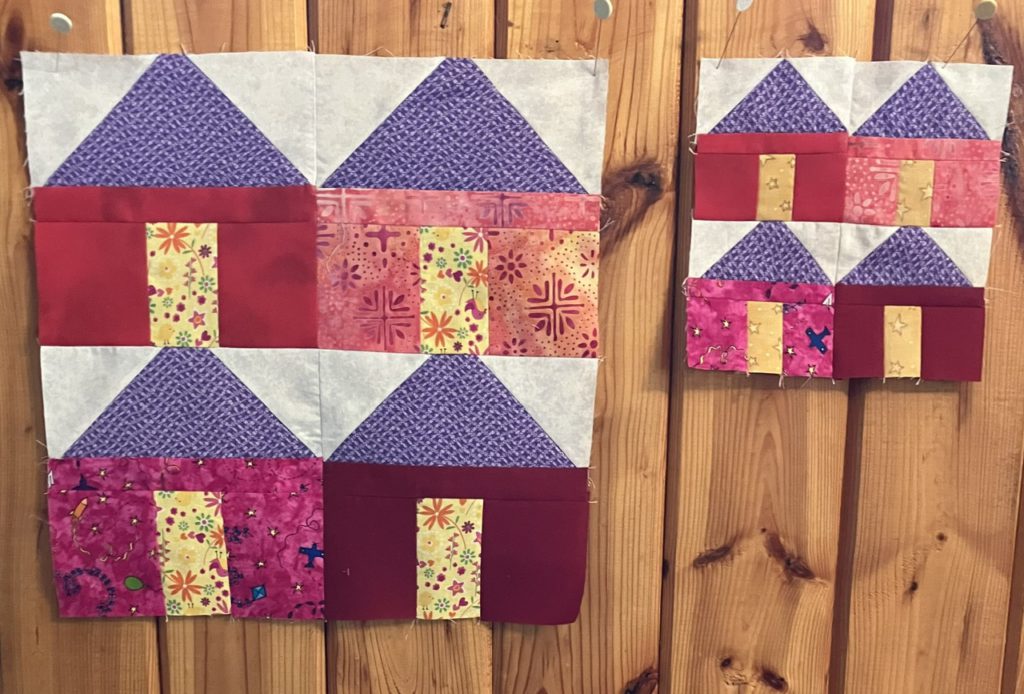
This is the 8 1/2 inch version:
The four 4 patches and 4 x 4 patch are made from 1 1/2 inch blocks.
The eight hatchet units are made from light 2 1/2 inch squares with 2 of the corners ( opposite one another) snowballed to create the shape.
This is the last block from EQ5 inspiration for a little while! Don’t worry, I have many other inspirational sources so that I can continue to make blocks with you!
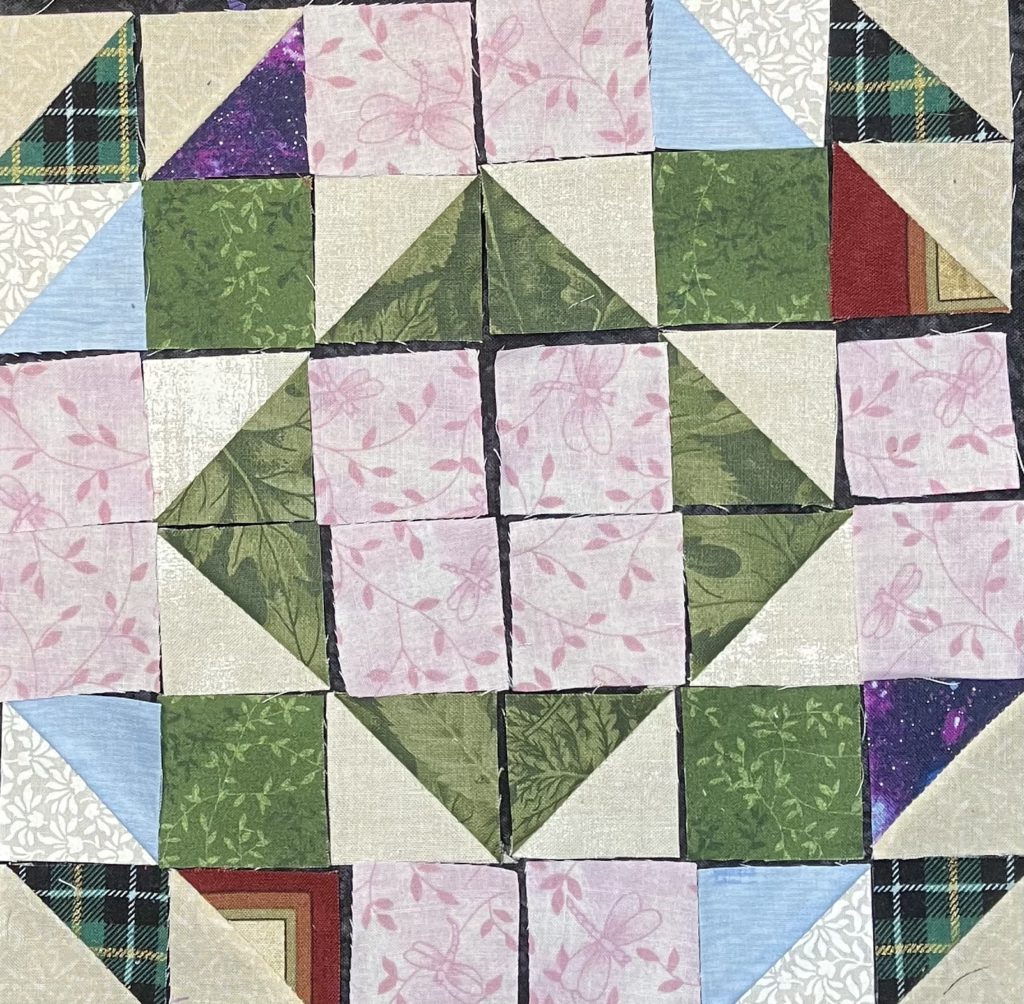
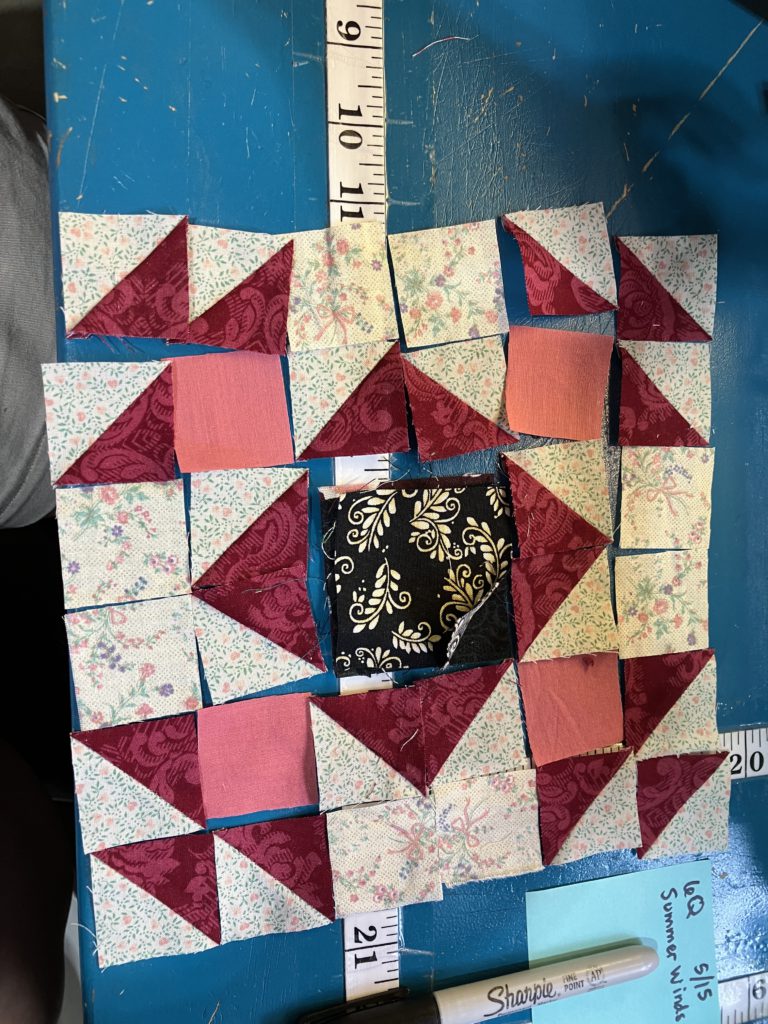
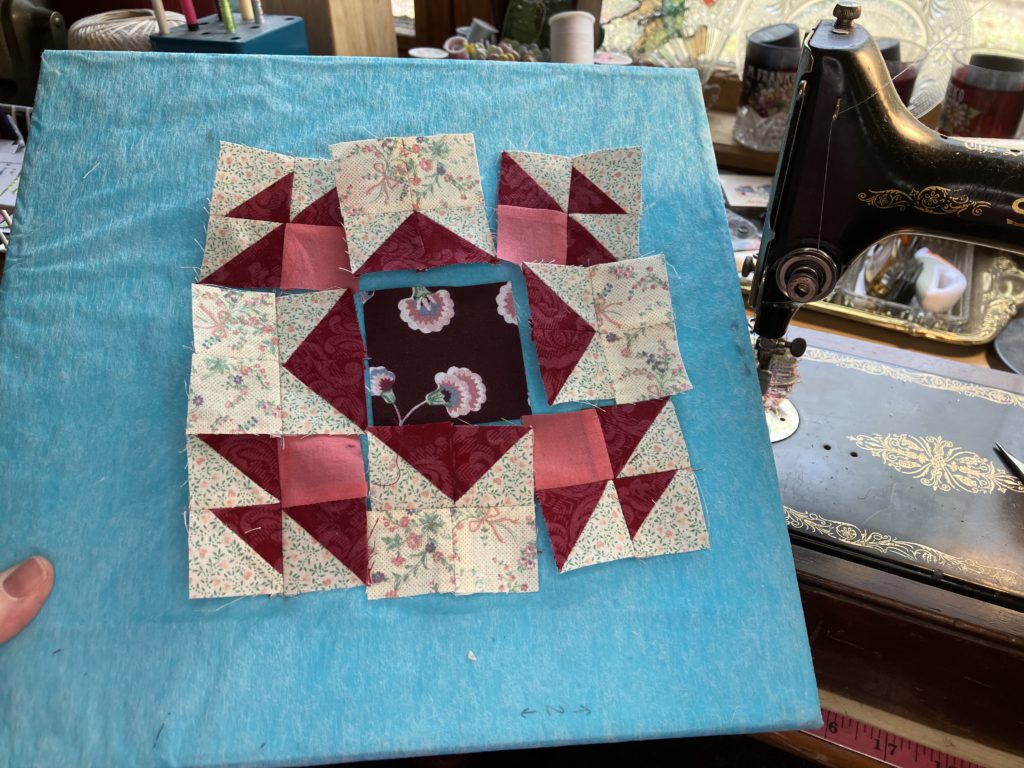
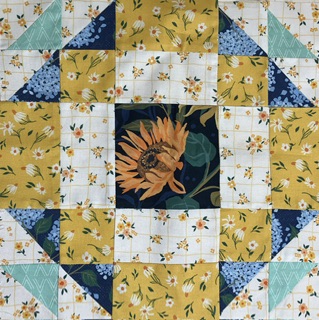
Here is the first summer winds block that I layed out for you in October of 2023:
It is great in super scrappy. I did keep the center half square triangles the same color.
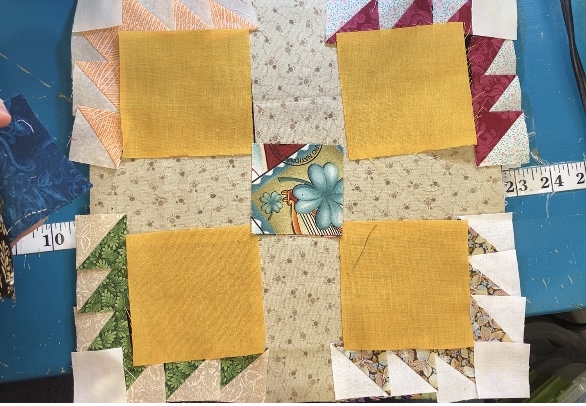
Here is the 6 1/2″ version that we are constructing today:
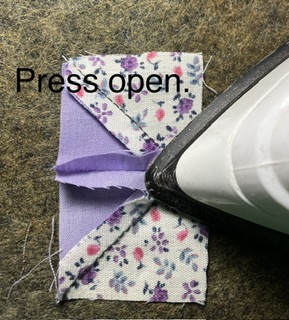
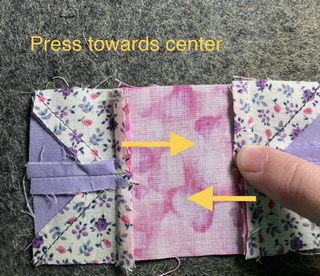
I changed the center block. I also pieced the block in units, so I could assemble it like a classic nine patch to finish it. I pressed most of the seams open to cut down on the bulk.
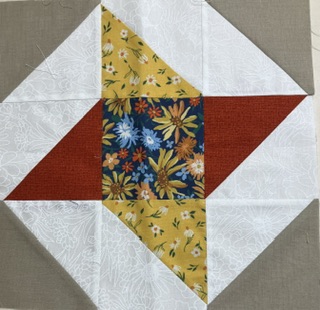
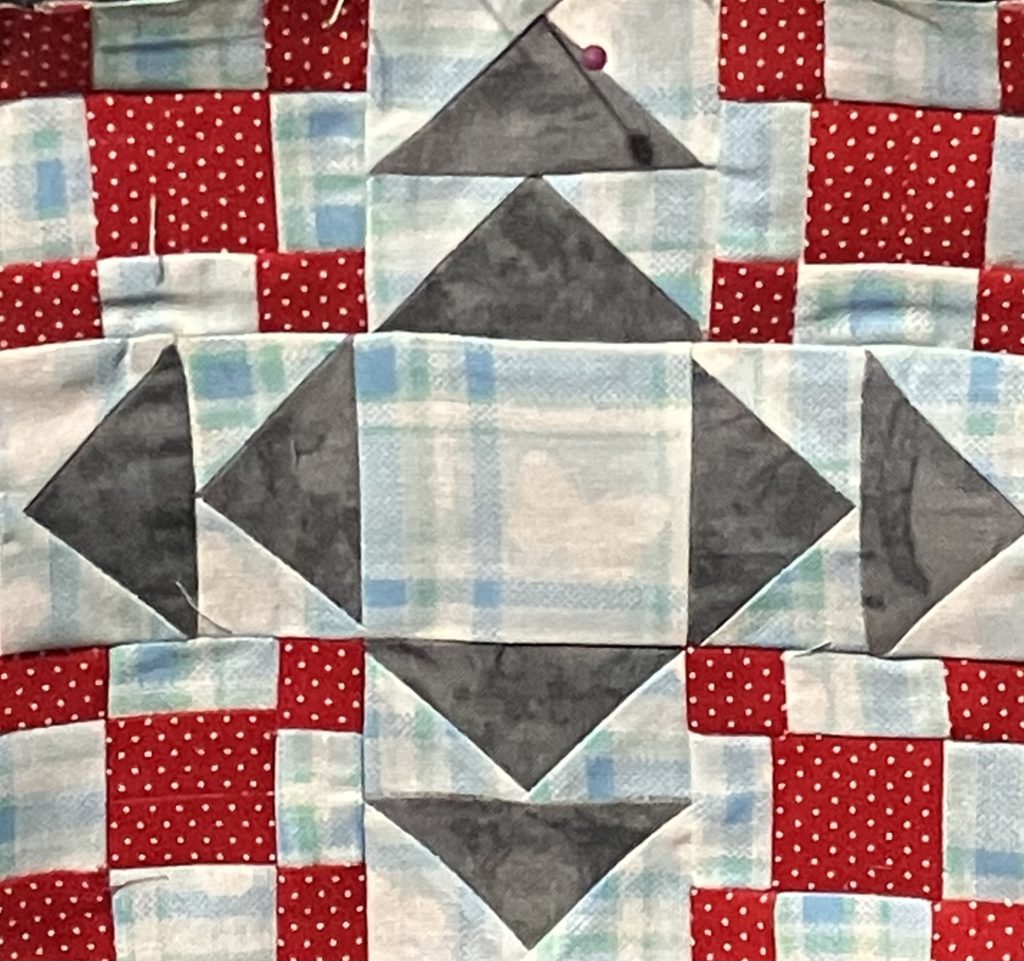
Here is this week’s block! This is a smaller version…very similar to Hovering Hawks.
It is assembled in classic nine patch fashion. See the cutting chart if you are making the half square triangle blocks (not using bonus half square triangles).
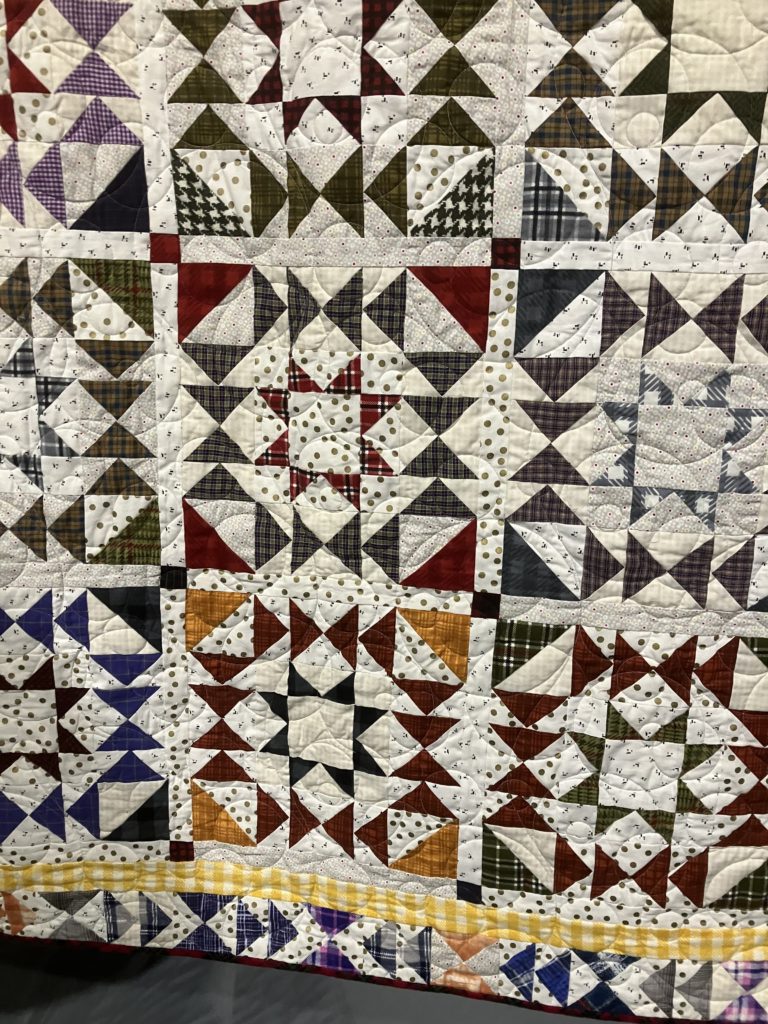
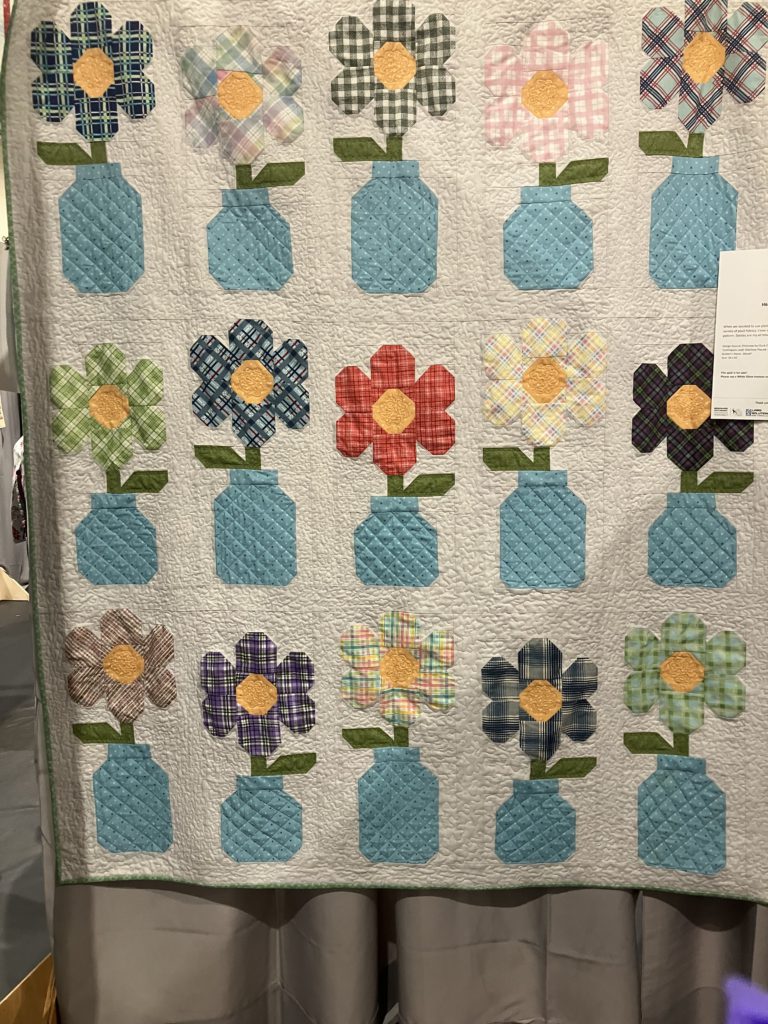
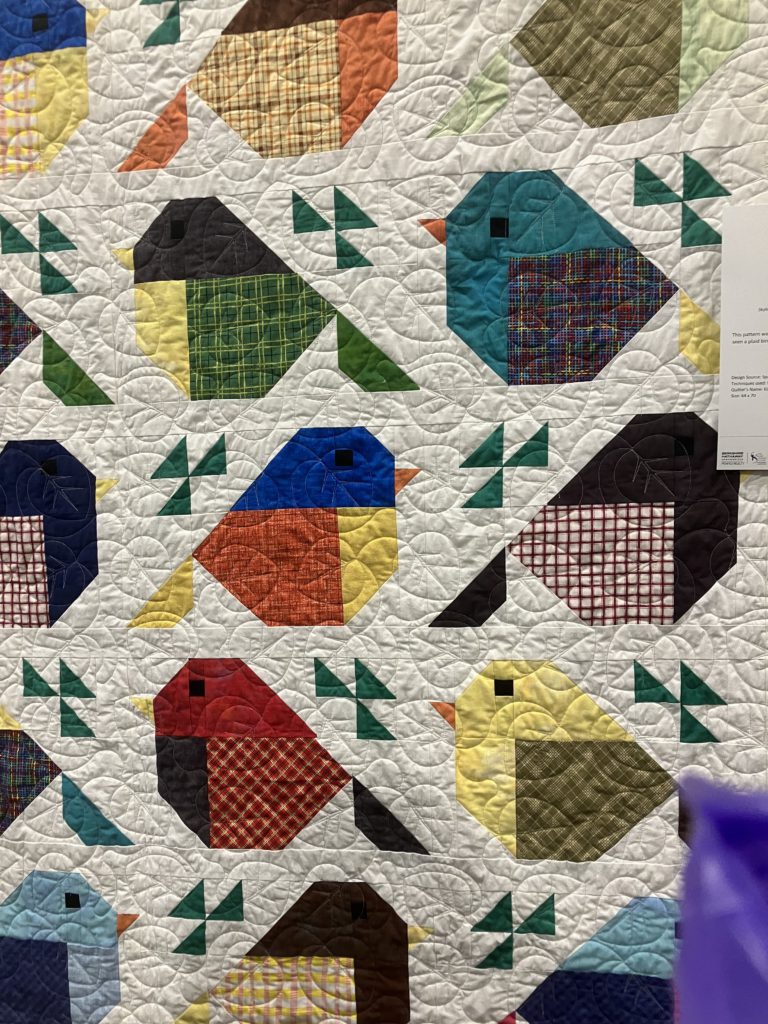
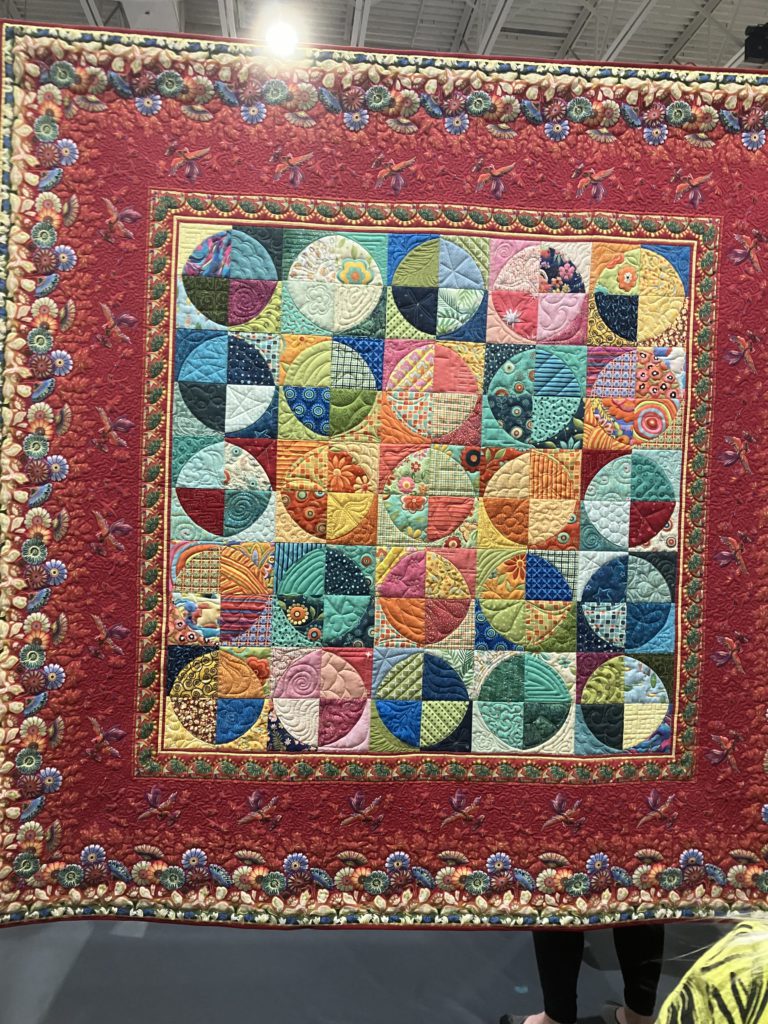
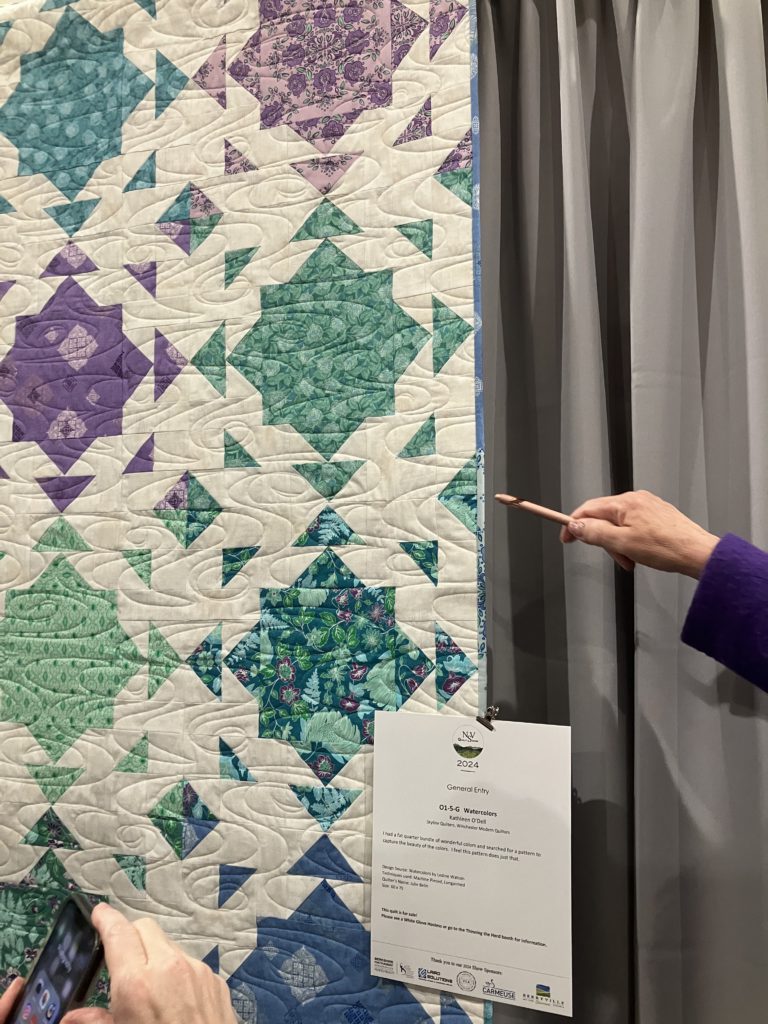
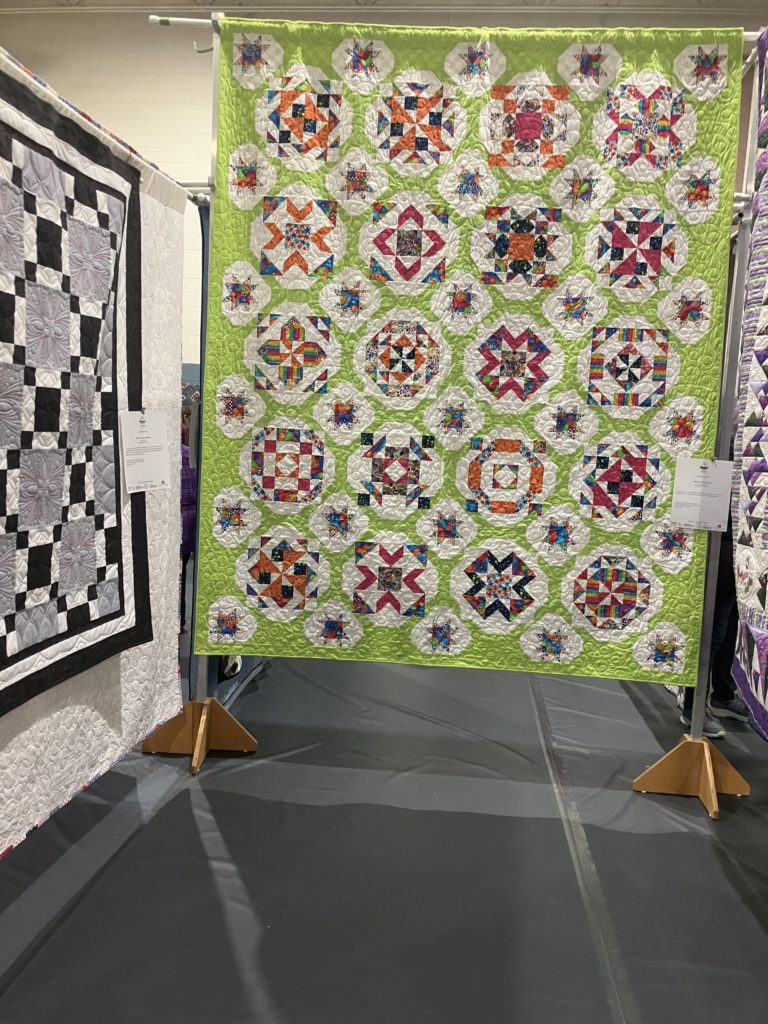
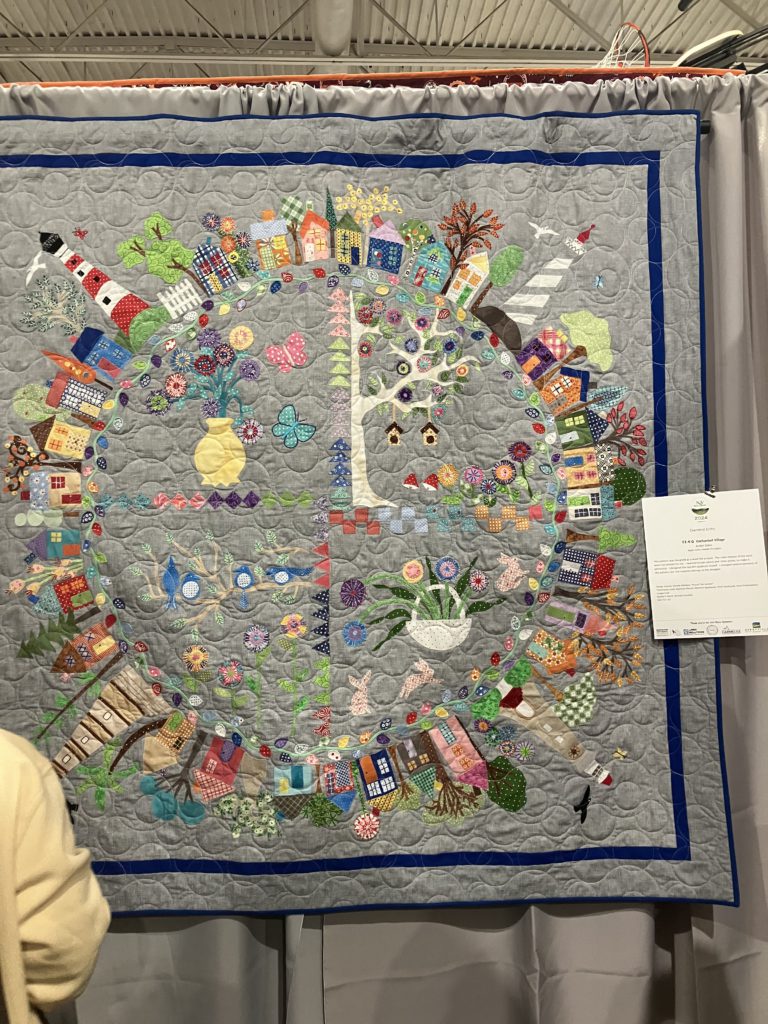
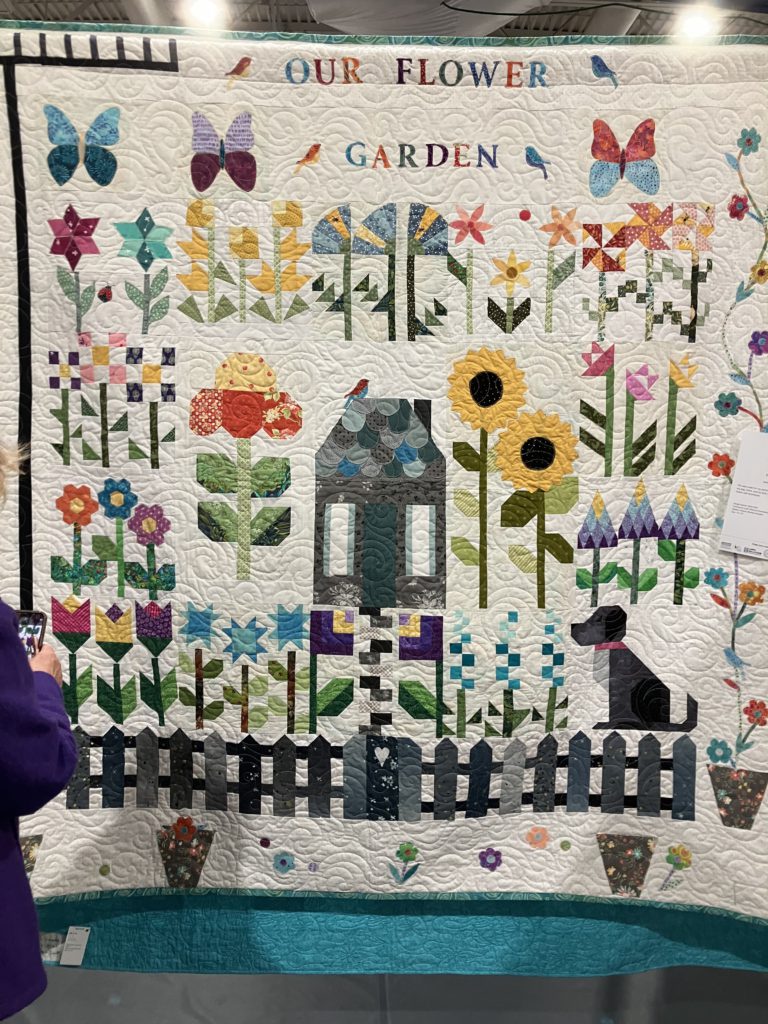
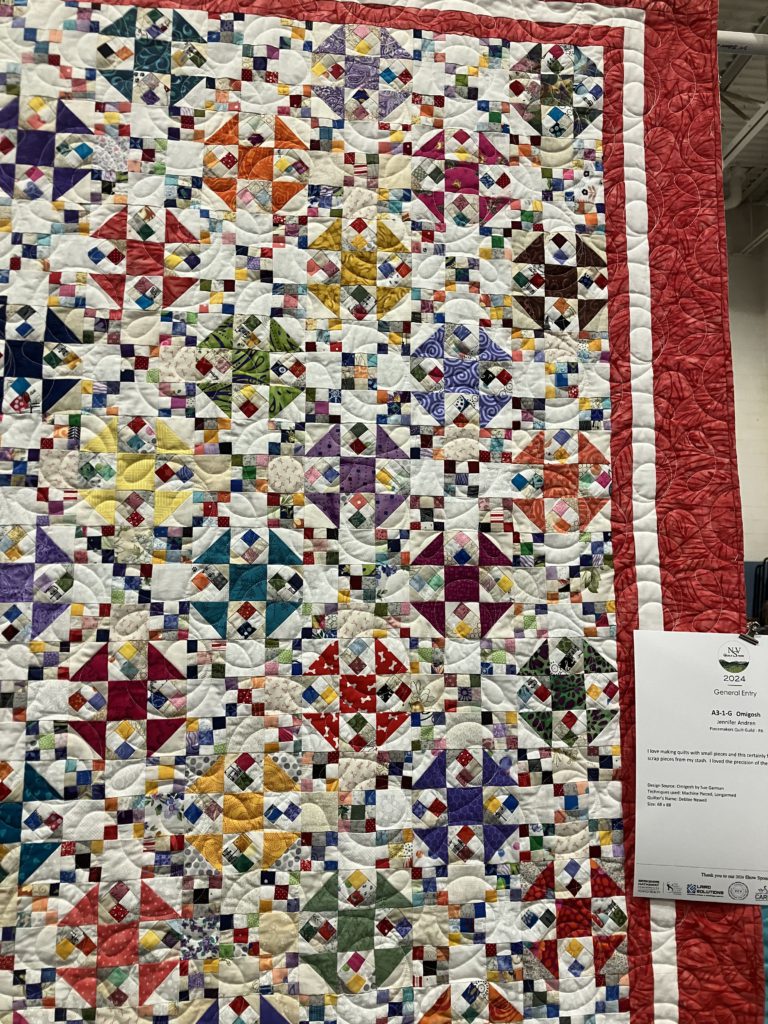
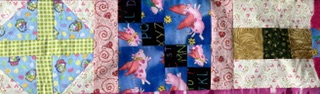
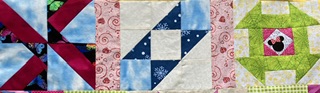
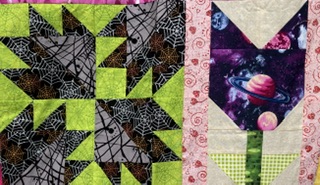
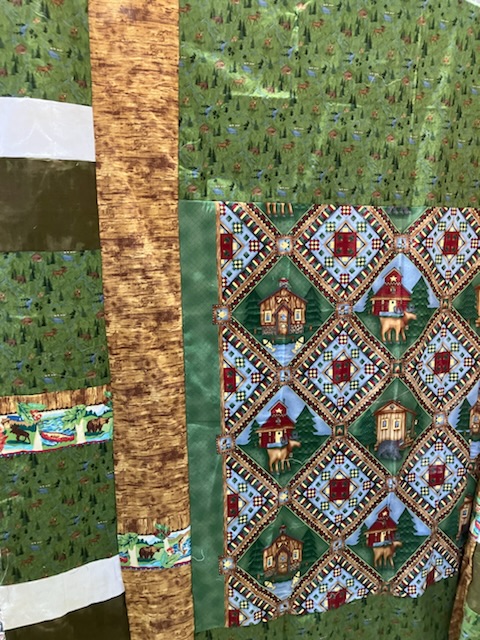
These pictures were taken at the Northern Shenandoah Valley quilt show held in Berryville, VA on April 13, 2024. My friends and I had a great time. I saw many, many beautiful quilts. It was well worth the $10 admission fee. This year’s theme was “My Favorite Color is Plaid”.
I only took a few pictures as I traveled along. Let me tell you why I took each picture…
I love the main star block in this quilt…scrappy…easy to assemble with “standard” parts…probably 16″ squares with sashing and cornerstones. Beautiful!
The blue jars for these flowers remind me of the Estee Lauder perfume that my grandmother wore…because of the color. The flowers are a simple with sew and flip corners on the piecing. One would be a great wall hanging.
Adorable little fat winter birds…do you see the beak of the one that does not line up with the slope of the forehead? I did not notice, but my friend did! I actually like it that way even better.
The border on this quilt sucks you right in. Then you start to notice details. This was a scrap quilt. Every colored piece in the center is different…and even brighter than they appear here. Each quarter circle is custom quilted. This quilt was a “for sale” quilt.
I love the colors on this quilt… a classic combination. The floating nature of the block makes me smile. There is also the secondary design element where the blocks meet. Nice quilting, too.
The nine patch blocks have 1 1/2″ squares…I love this setting with alternate applique blocks. Every applique block was unique. Sometimes setting makes thee quilt.
The sashing in this quilt made the setting seem like an impossibe piecing feat! (The sashing is a “dog bone” looking piece with a small star as a corner stone!) I love the choice of spring green and bright colors for this beautiful sampler.
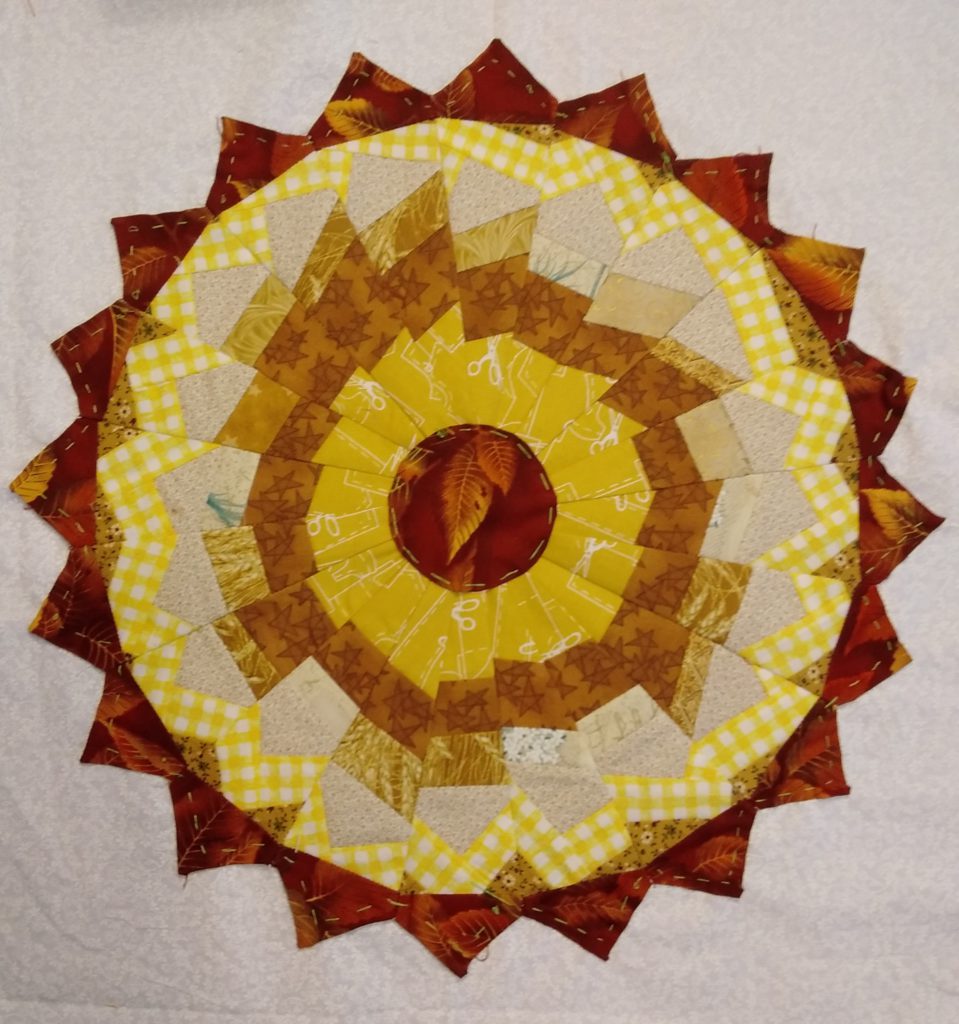
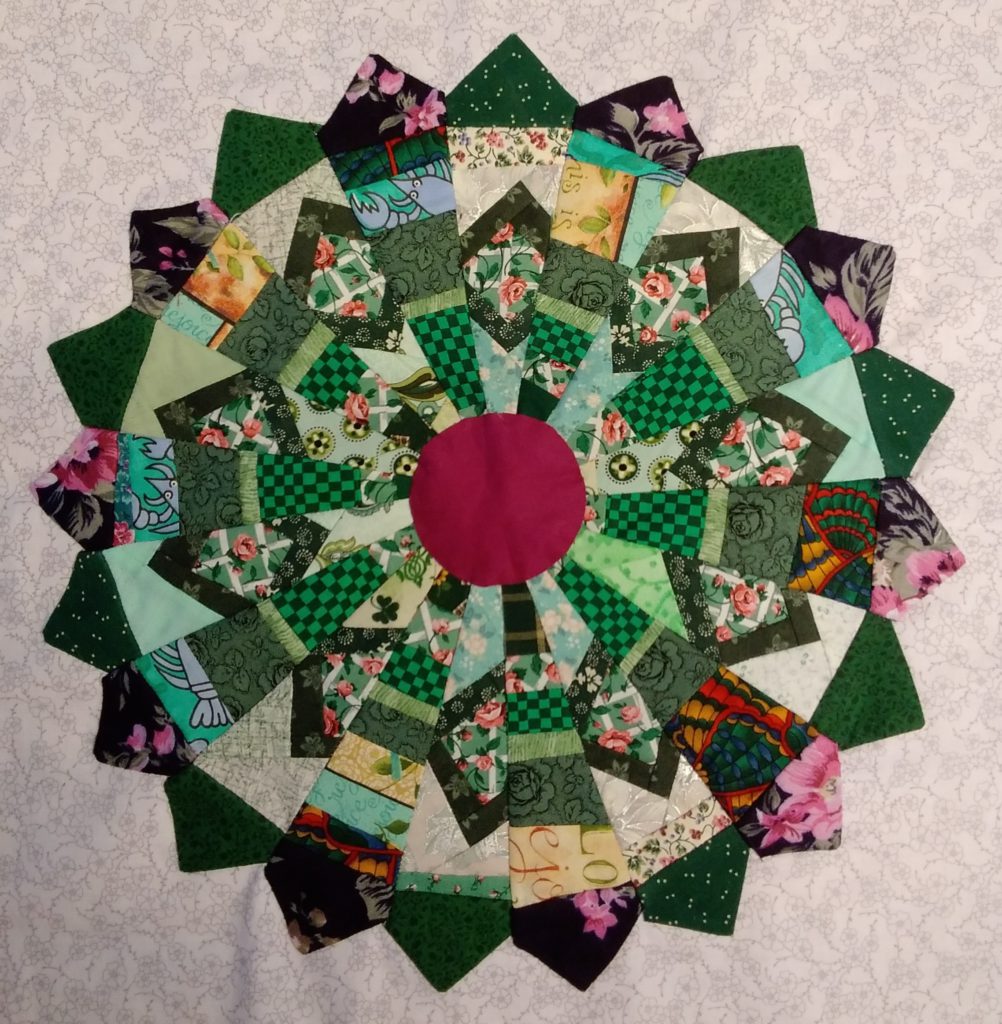
I love mandalas! This quilt is available in a pattern book…a very detailed book. This would be a great idea to make a personal story quilt! There is so much to love about this quilt…birds, flowers, trees, lighthouses…and quirky little houses, too.
For the record, I am not touching this quilt. It was made up of 3 inch blocks…there were 180 blocks. The quilter made this block during Covid to help get through the isolation of quarantine. My finger is there for size reference. I love those itty bitty pieces!
This story quilt was simply pieced, but those simple blocks add up to a big wow factor. There are pieced and appliqued blocks. Something for every skill level in this beauty! This would be a great scrap buster!
This quilt is the ultimate scrap buster. I think that the churn dash blocks are 6 inches. The more you look, the more your eye travels around the quilt to another fabric color choice. This would be a great leader-ender project.
This is the end of my mini quilt show. I enjoyed looking at all of the beautifully presented quilts on display. Great job by the sponsoring quilt guilds! (I think this is a yearly event. I am looking forward to next year’s show!)
I hope you enjoyed my quilt picks…and my logic for taking these few pictures. Please remember, if you would like to comment, return to my YouTube video and comment there.
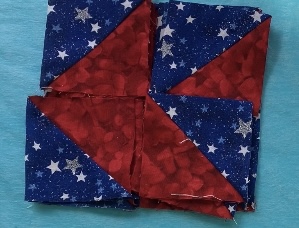
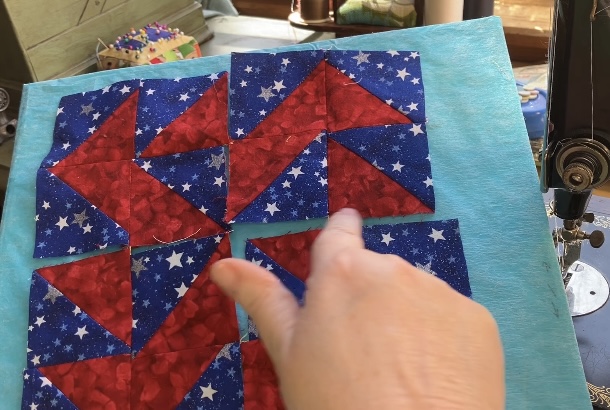
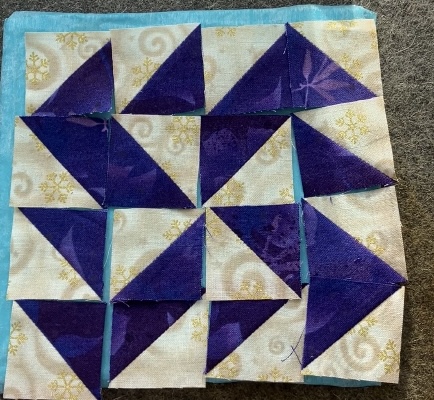
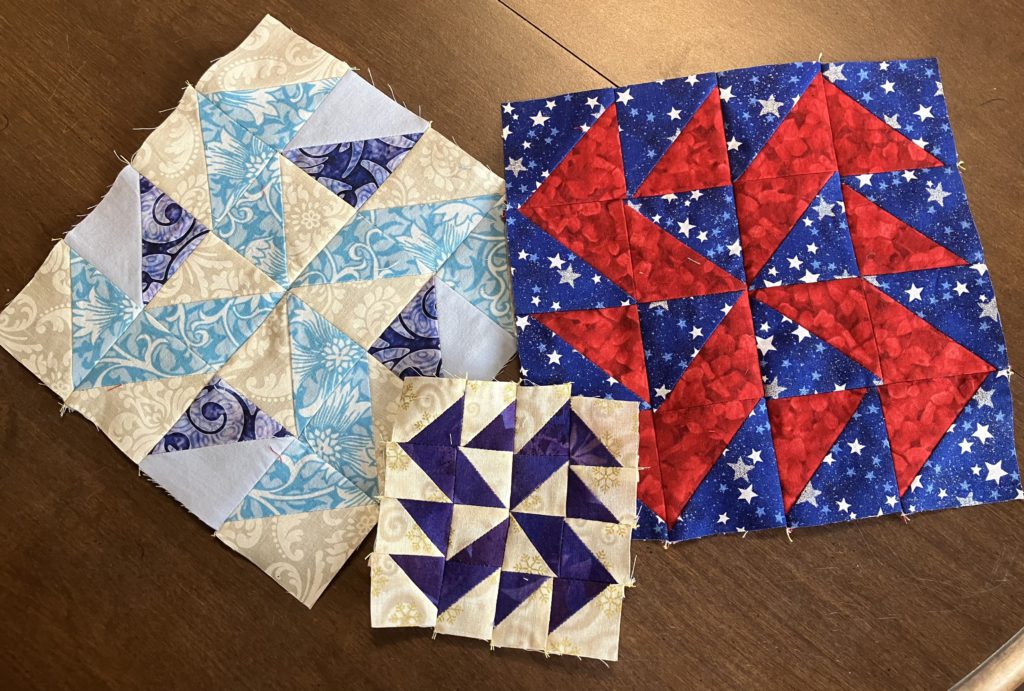
Another block with half square triangles! These triangles will spin and swirl their way into your heart!
Yankee Puzzle is made from 16 half square triangles. If you are making the two color version like the one below, you will need 12 units for the big swirl and 4 for the contrast color.
Here is the YouTube video. The cutting chart is toward the bottom of this post. It is a free printable.
The example below and the red, white, and blue example are both made from 2 1/2″ half square triangles.
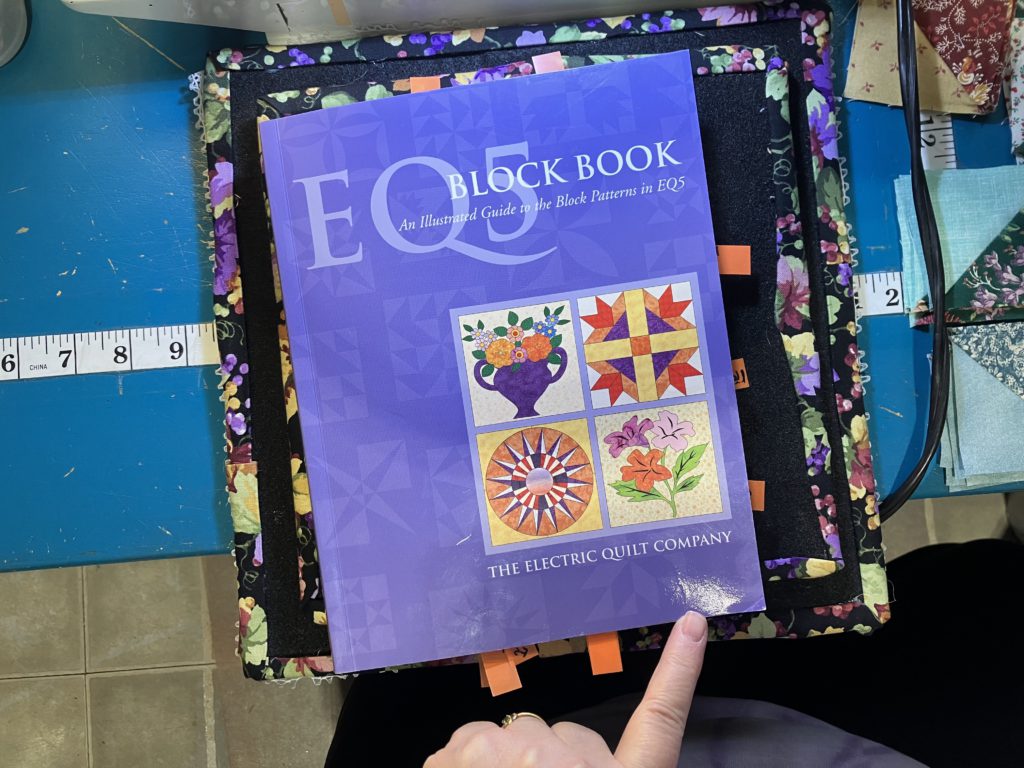
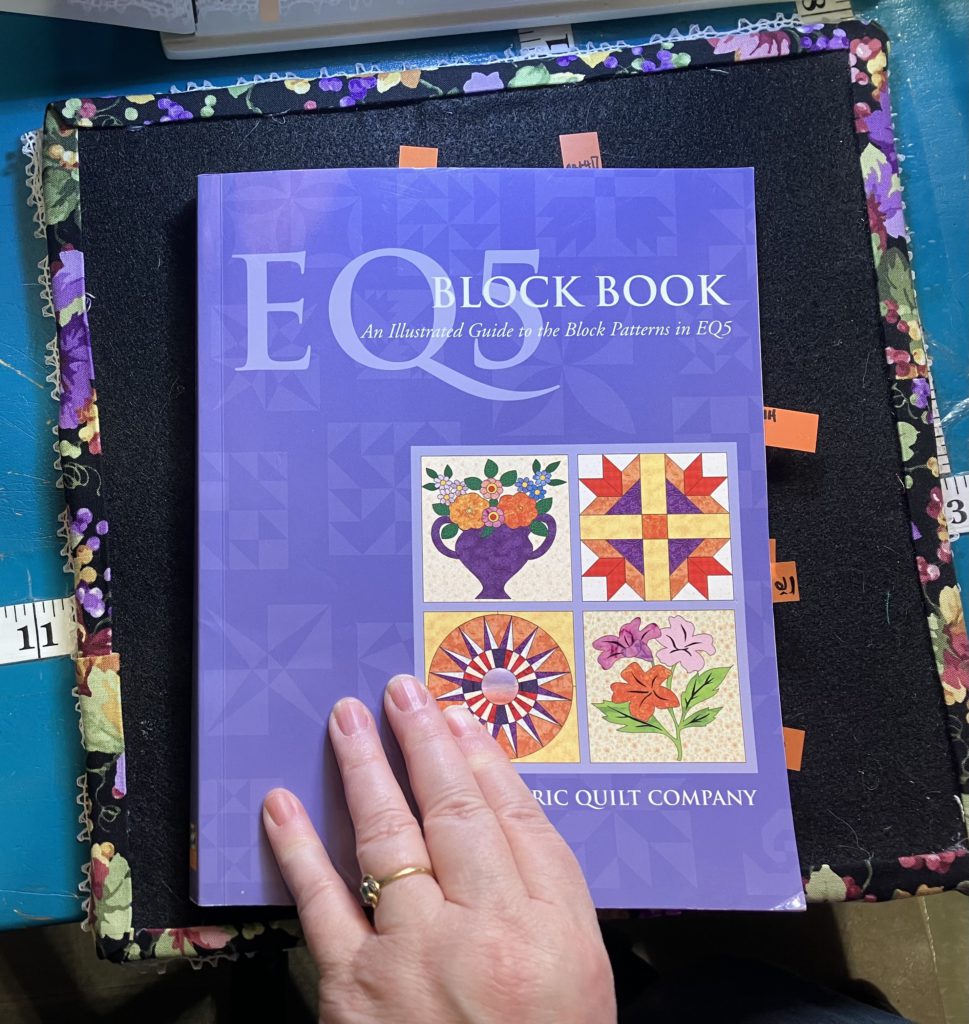
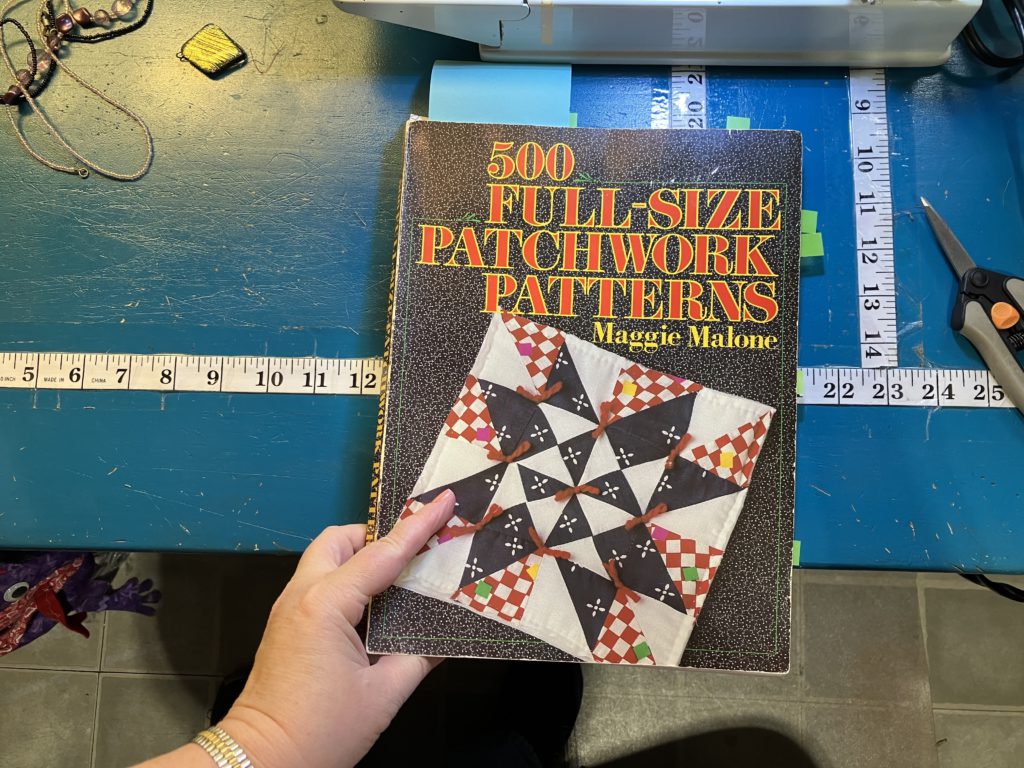
My inspiration is coming from this old EQ5 book again this week…best quarter I ever spent at a yardsale!
Here are the units layed out. Notice that three of the blocks, starting at the left, go the same direction. The last block on the right is turned a quarter turn to make a flying goose.
Continuing along the right side of the block…
Along the bottom…are you seeing the pattern yet? Three in the same direction, then goose…
The rest of the outside frame…next add a pinwheel to the center (scroll down a little more to see…)
This block can be sewn in quadrant pieces. Here is the stacked pile of quadrants ready to sew…zoom, zoom, baby!
After the quadrants are sewn, lay out is as simple as a quarter turn. A large swirling pinwheel will form in the center when pieces are layed out correctly.
Sew the quadrants together…then sew the halves together…
Ta-dah! Ta-done!
Now for the example made from 1 1/2″ pieces. It finishes at 4 1/2″. (You know I couldn’t resist!)
Finished reveal of this little beauty will be at the end of the post!
Now for my version of the 2 color layout! I creat the large swirling pinwheel (12 half square triangles) with one color.
I add in the second color…
Or maybe this version…
Or this one?? Oh, the decisions!
Here they are finished and ready to use in a beautiful scrap quilt!
Here is the printable cutting chart:
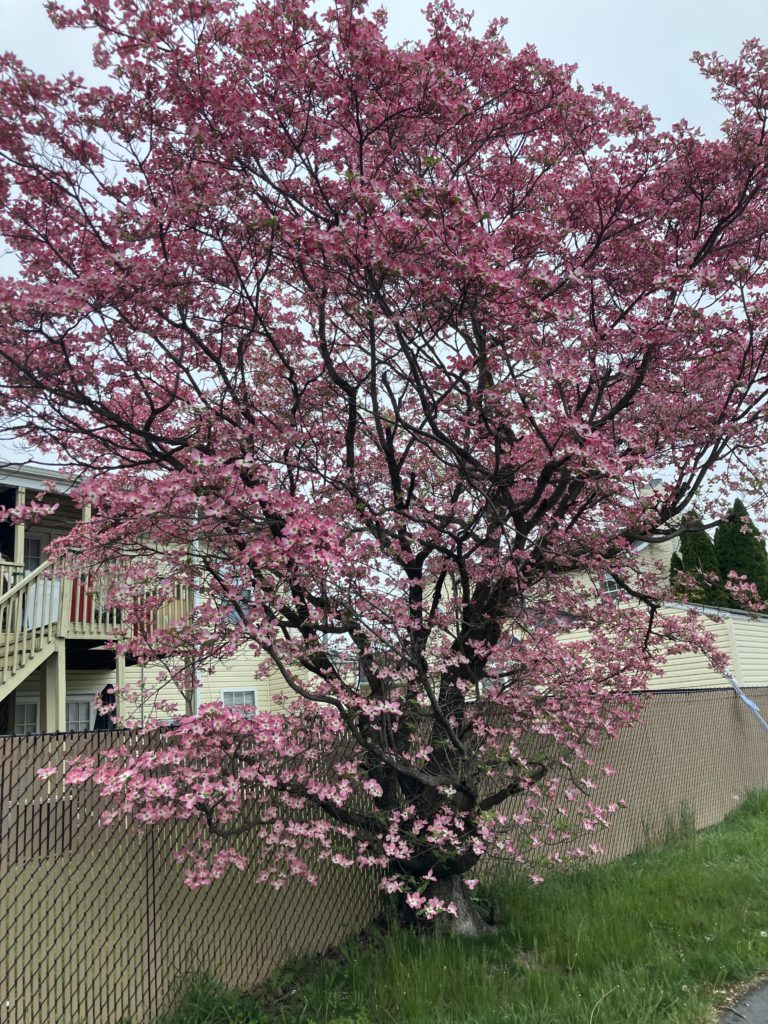
I couldn’t resist adding this beautiful dogwood picture from the post office in Inwood, WV.
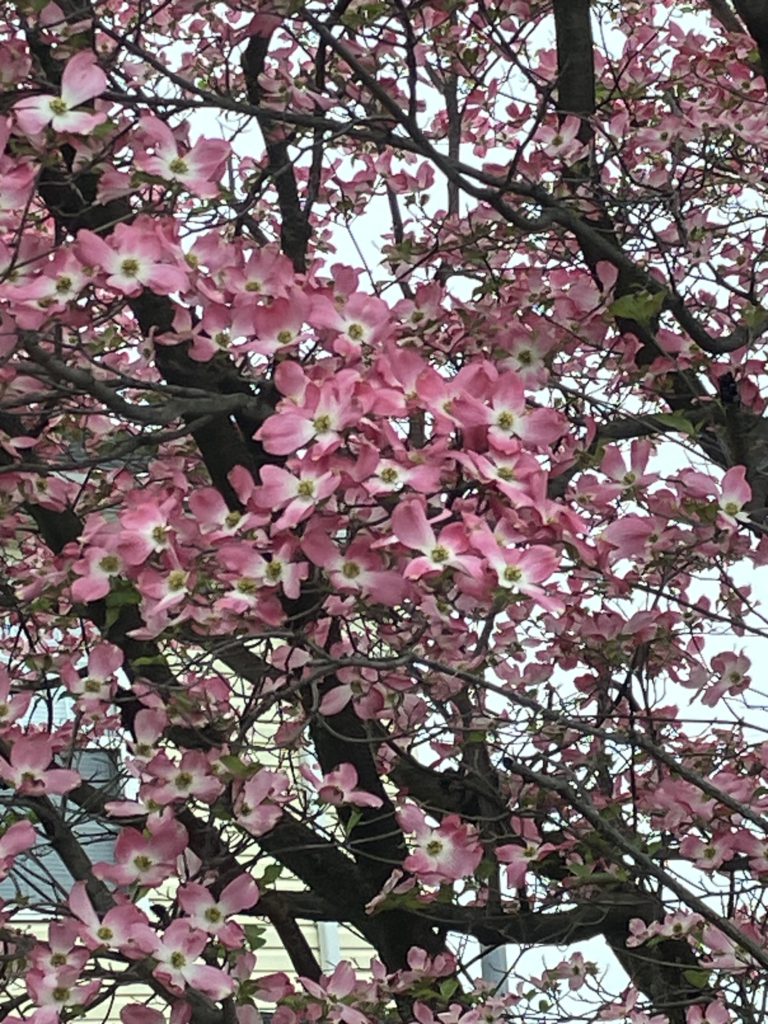
And now for a close up…
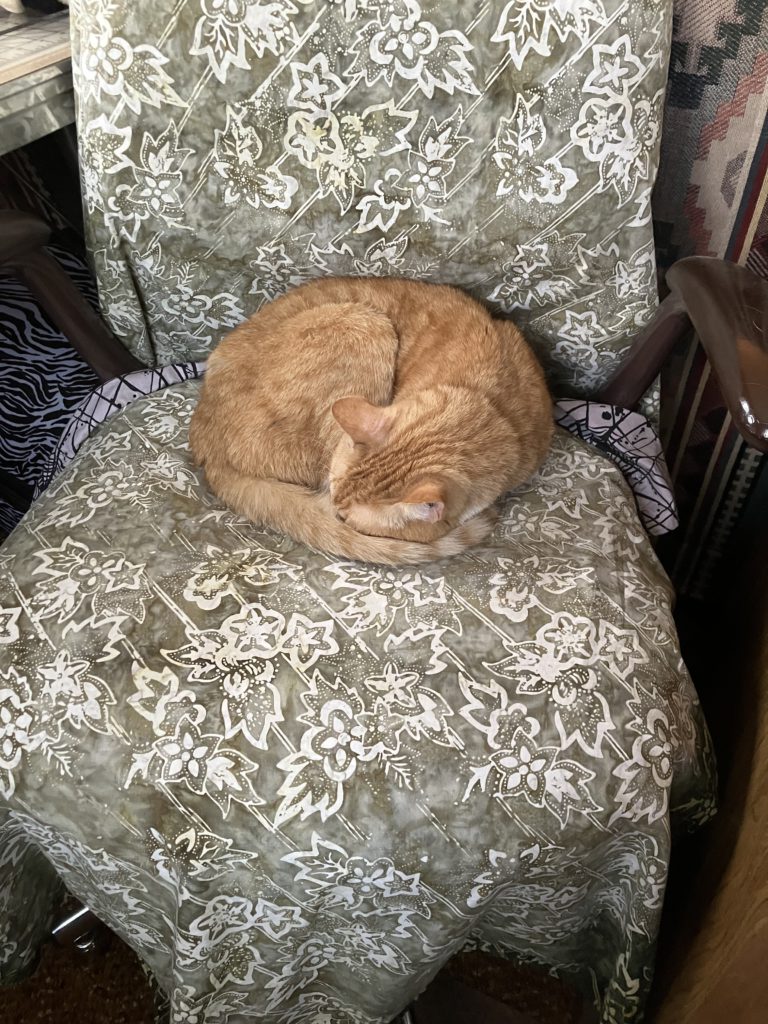
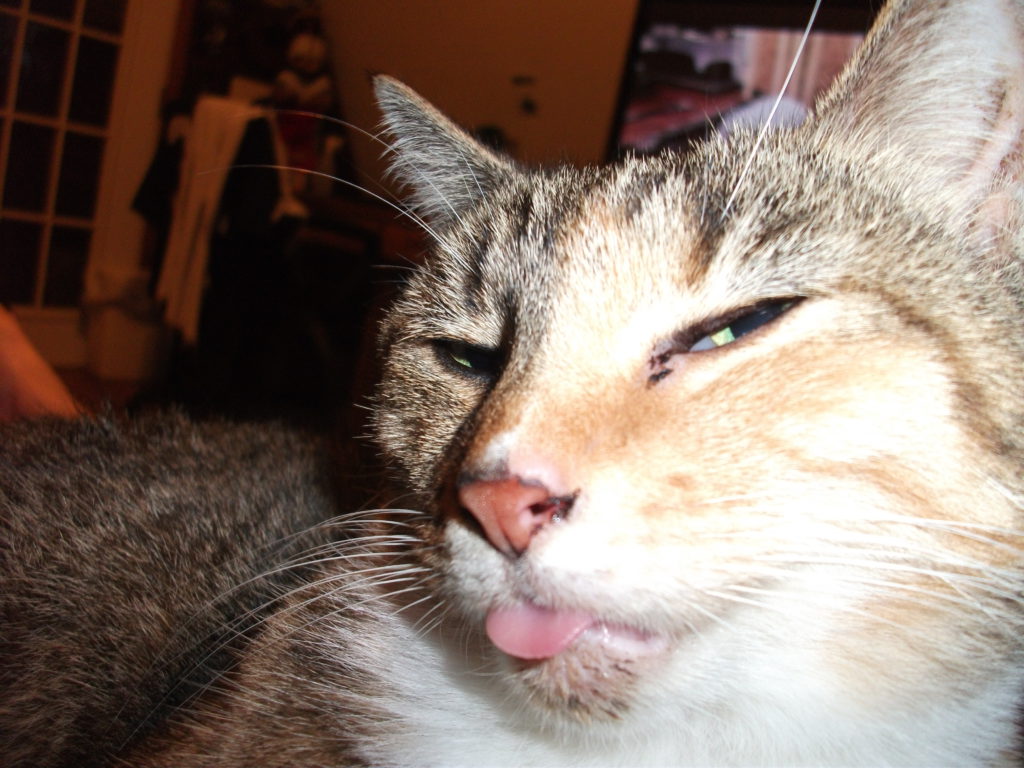
Simba is enjoying a nice nap on my sewing chair. (The green fabric was put on the chair to prevent her fur from becoming a permanent part of my upholstery!)
Just a few more weeks of inspirations from this book, I promise! This week I am presenting the Hovering Hawks block. This block has interesting diagonal movement. Four of them together would look fantastic…maybe for a future scrap quilt. It would also look good in a barn raising setting, if you are familiar with log cabin block setttings. Let’s get to making, shall we?
This block is really all about the contrast of light and dark fabrics. It is great for scrap busting! I am still using up those bonus half square triangles. Here is the link to the related YouTube video on my channel. Also, the printable cutting chart including various sizes is at the bottom of this blog.
This is the version of the block that I originally layed out in my YouTube video back in October of 2023. I tried to cram so much into that episode!
This version uses 2 1/2″ blocks: 6 dark blocks and 10 light/dark half square triangles. The block finishes at 8 1/2″. I start by laying out the dark blocks like pictured below:
Then I add in the half square triangles in the correct orientation. Half of the units (looking at the light part of the block), point to the lower left of the block. The others (again, looking at the light portion of the block) point to the upper right.
Here I changed the center two blocks with some beautiful batik fabric scraps. I think the visual interest here is better.
Recently, I have been sewing blocks in quadrants or fourths. This block does not work for that method…but it does work for assembling by halves! Here the halves are stacked and ready to speed sew:
In each row, I pressed to one side. The following row, I pressed in the opposite direction. Pressing open is always an option, too. You decide.
Half block reveal!
Turn one of the halves in a 180 degree turn…sew together. Yes, it is just that easy.
I pressed all the rows going in the same direction after I assembled the rows. Life should always be this easy!
Here is the version using 1 1/2″ blocks:
I love these little things!
Same layout!
Now with the half square triangles!
Stack to speed piece as half blocks…
Assemble like the bigger block.
Here they are…tah-da…tah-done!
The contrast in this one is so good…I just have to admire it for a moment longer! AAAhhhh! So cute!
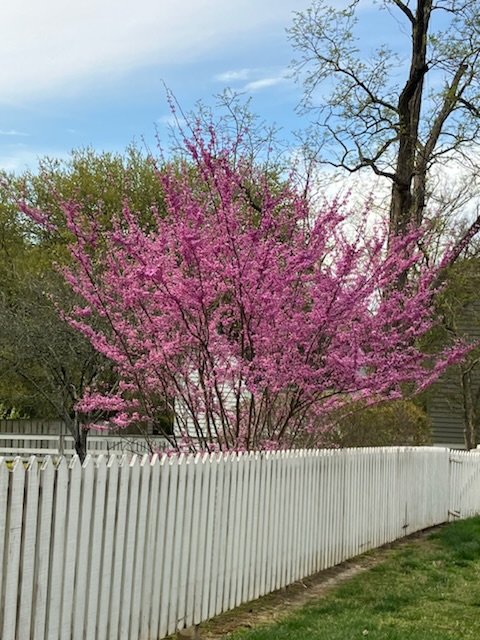
I just have to share a nature picture. I do love redbud!
I hope you enjoy making this block. If you have comments, please go to the video mentioned at the top and leave comments there. When I turn on comments here I get adds for Russian viagra and other “stuff”…Oh, my!
Here is the cutting chart I promised. It should be printable…and it is FREE!
Have a great week! Thank you for reading my blog! The next blog will be a mini quilt show with my commentary! (At least you will get some eye candy! I will mostly tell you why I was compelled to take a picture of those quilts…see you then!)
I have a few more weeks to share blocks with you that have been inspired from this book.
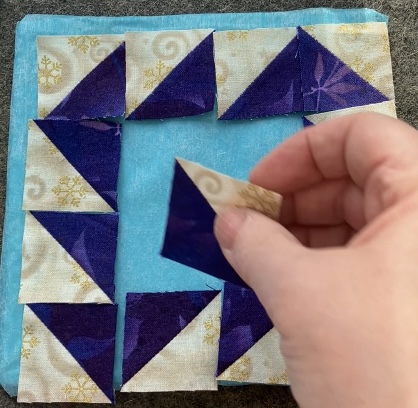
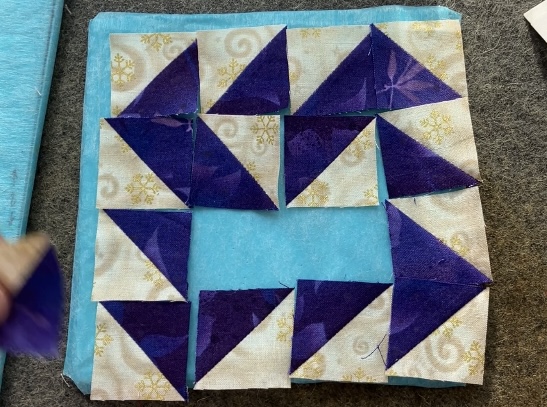
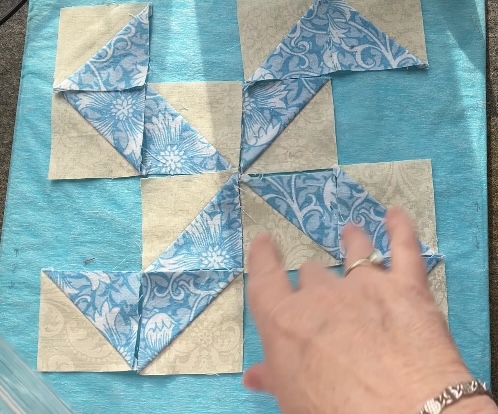
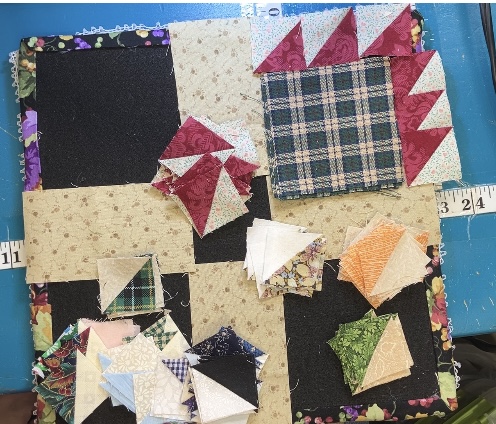
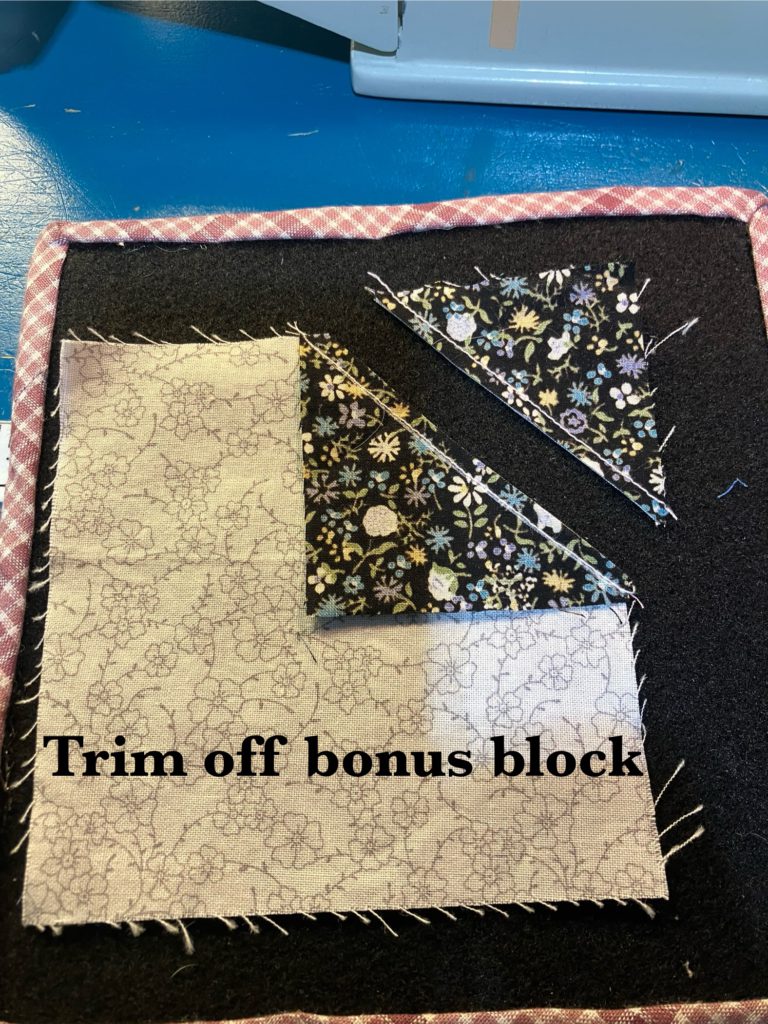
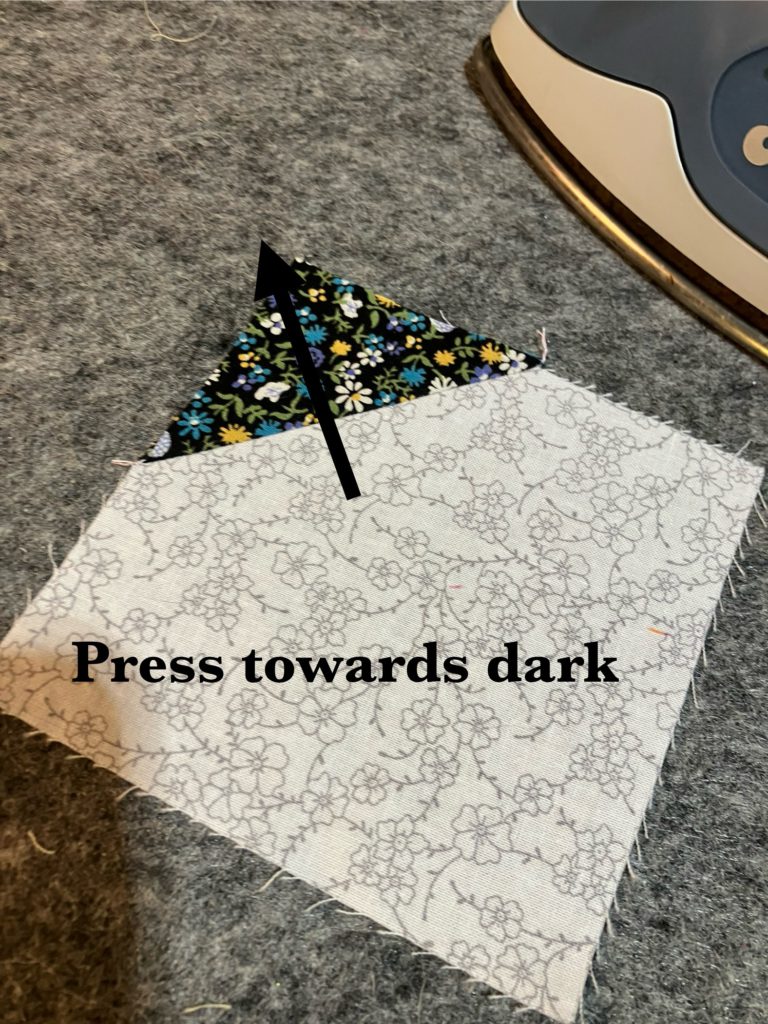
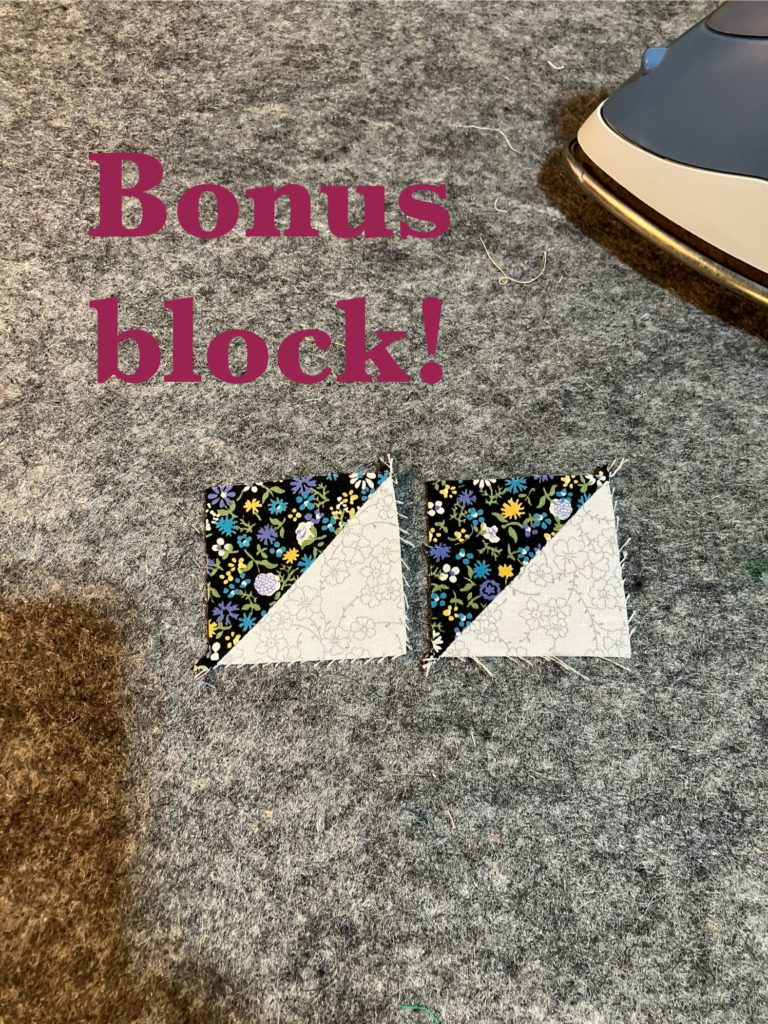
Here are the bonus half square triangle blocks that I grabbed last week when I made the whirlpool blocks.
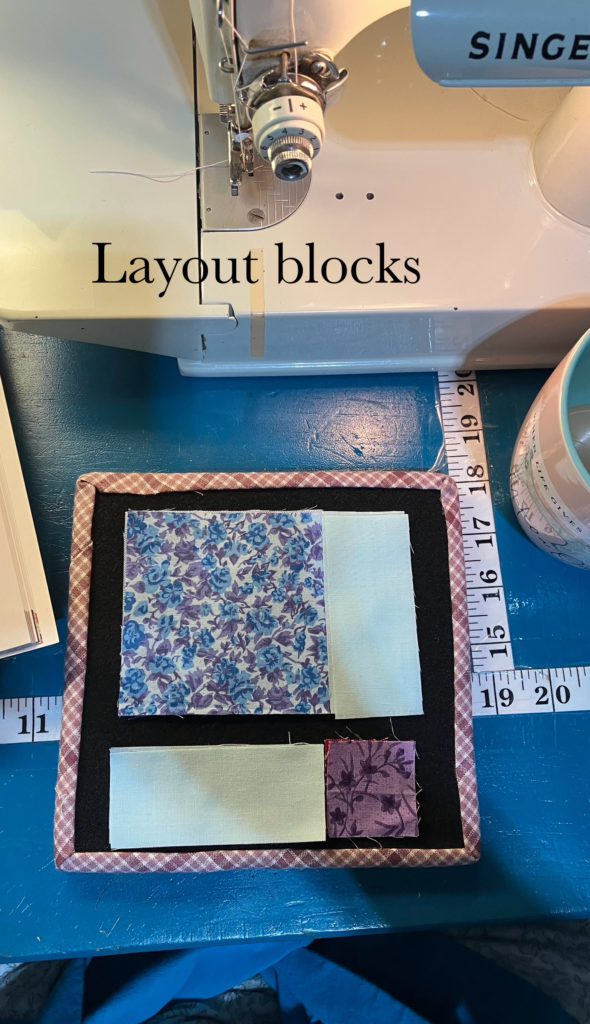
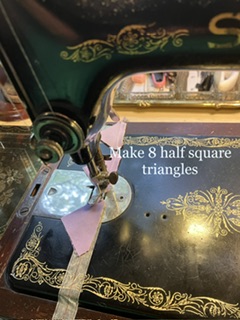
I am assembling the 8 1/2″ block first. It uses 4 dark squares, 4 light squares, and 8 bonus half-square triangle blocks. (Directions for making two at a time half square triangle blocks are on the cutting chart at the end of this post.) Here is a link to the YouTube video that shows assembly.
I love the pinwheel in the middle of this block! I am not sure who named it Flying X…it looks more like a Whirlpool or Tornado to me.
The easiest way to assemble this block is by quadrant or fourths. All quadrants are identical. After they are assemble, the unit is turned a quarter turn.
This looks awkward, but it is correct. Make 4 units.
Here is the layout again.
Assemble the units by sewing like a standard four patch.
Here is the 4 1/2″ version. It is assembled the same way.
This is a cute little block. It goes together easily and quickly. Great scrap buster!
Tah-dah! Tah-done!
I love the vortex imagery in the quilt block, so I decided to throw in some visual vortex images.
Ohhhh….
Aaaaahhhhh! Ring of Fire?
This one looks like a seashell or a fossil….
Here is the cutting chart, as promised, in five different sizes this week!
I hope you are enjoying the Build a Block series! Please leave comments on Facebook or YouTube. (Comments are turned off here because I am not interested in Russian viagra…or manifestos.)
This week I am using up 16 more bonus half square triangle blocks…two sets of eight blocks. Look at the lovely, swirly whirlpool in the center. I used darker half square triangles for the center swirl.
This block can be speed pieced into quadrants or fourths. Notice the layout below for placement…a flying goose and a “blade”.
Make the goose and the blade units. Press open to reduce bulk. Assemble into a four patch as pictured below.
Make two units of two four patches. Note the layout below.
Turn one of the units…sew the final seam to complete the block.
Tah-dah! Tah-done! This is a 4 1/2″ version.
This is the 8 1/2″ version.
I love the swirling movement in this block…almost like a frame.
And look what I found! More blocks to trim! Yeah!
Here is the cutting chart with various sizes:
These are the base blocks for next week…shocker…more bonus half square triangles.
Here is the “rough copy” from my video from back in October. I showed the block layed out, but never sewed it.
For this block, you will need:
16 (bonus) half square triangles, 5 darks, and 4 lights. These blocks should all be the same size. The ones shown below are the 2 1/2″ blocks. The picture below shows all seams pressed open for ease of assembly.
Here is the completed block. It finishes at 10 1/2″. Love those colorful birds!
Here is a smaller 5 1/2 inch version made with 1 1/2″ blocks.
Again, all seams are pressed open.
Here are both examples the 10 1/2″ and the 5 1/2″. As you can see in the picture below, it changes the look of the block when it is on point. (I didn’t notice this until I sat down and started typing the text than went with this post!)
Now for the cutting charts I have been promising:
The cutting chart above is printable, but you will need to download it and save it in your downloads file first.
I hope you enjoy making this great scrappy block! Please contact me on facebook or at my gmail account. Comments have been turned off because I am not interested in black market viagra!
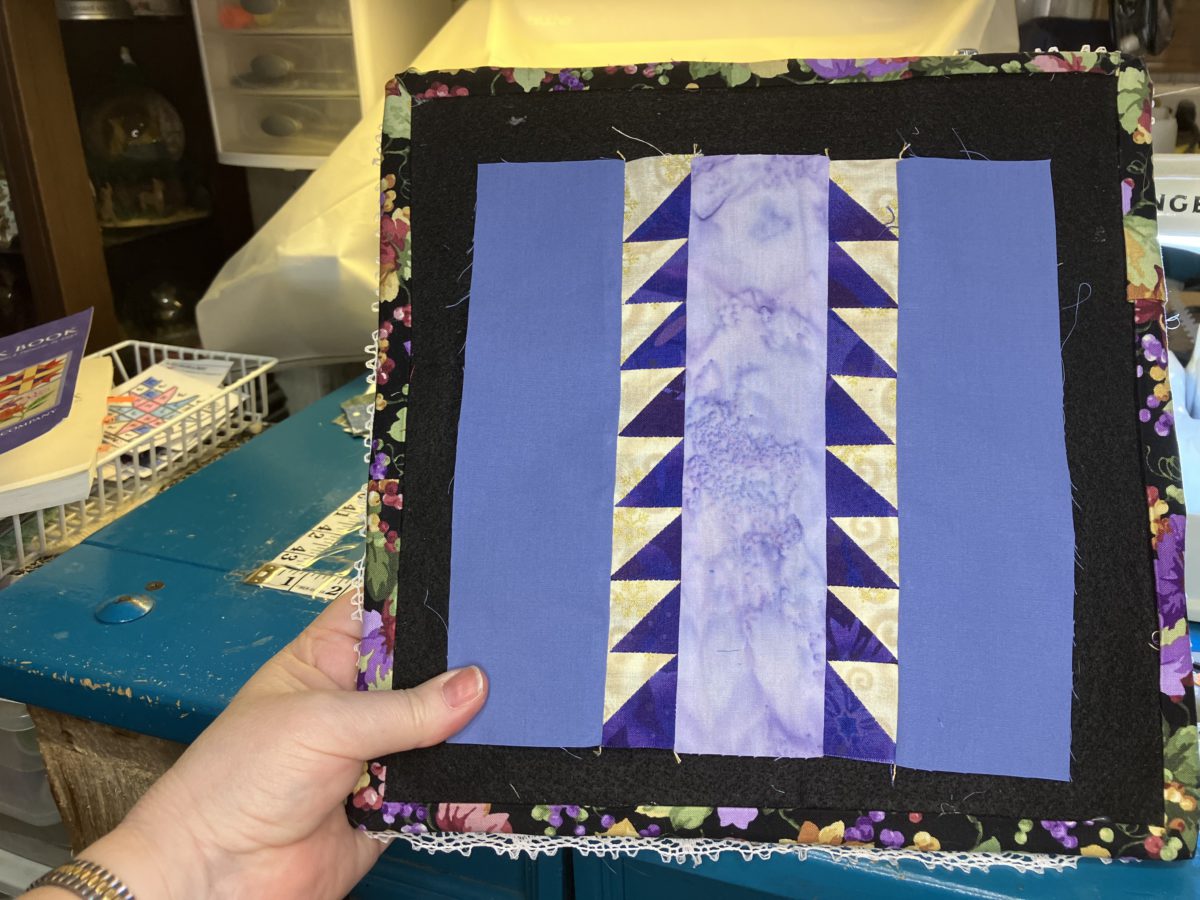
Glad to see you here for my weekly Build a Block post! This one is going to be short and sweet because this block is so easy to make…and has so few pieces!
This block finishes at 8 1/2″ square. It is constructed from the following pieces:
Center: 2 1/2″ x 8 1/2″,
outside strips: Two 2 1/2″ x 8 1/2″
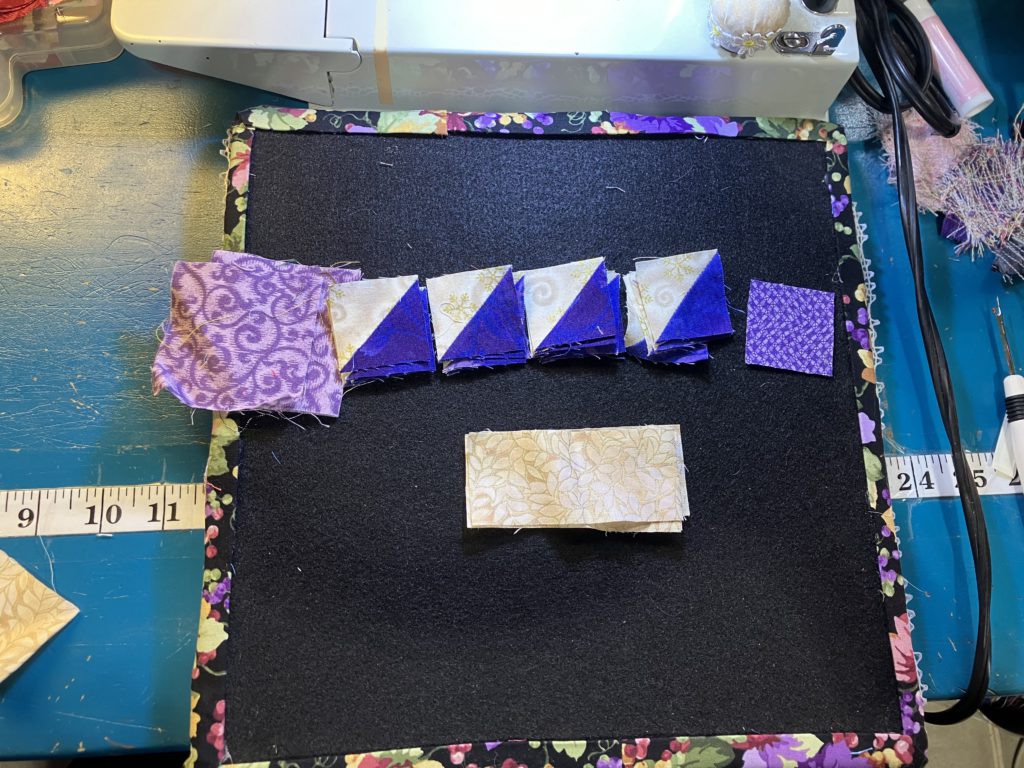
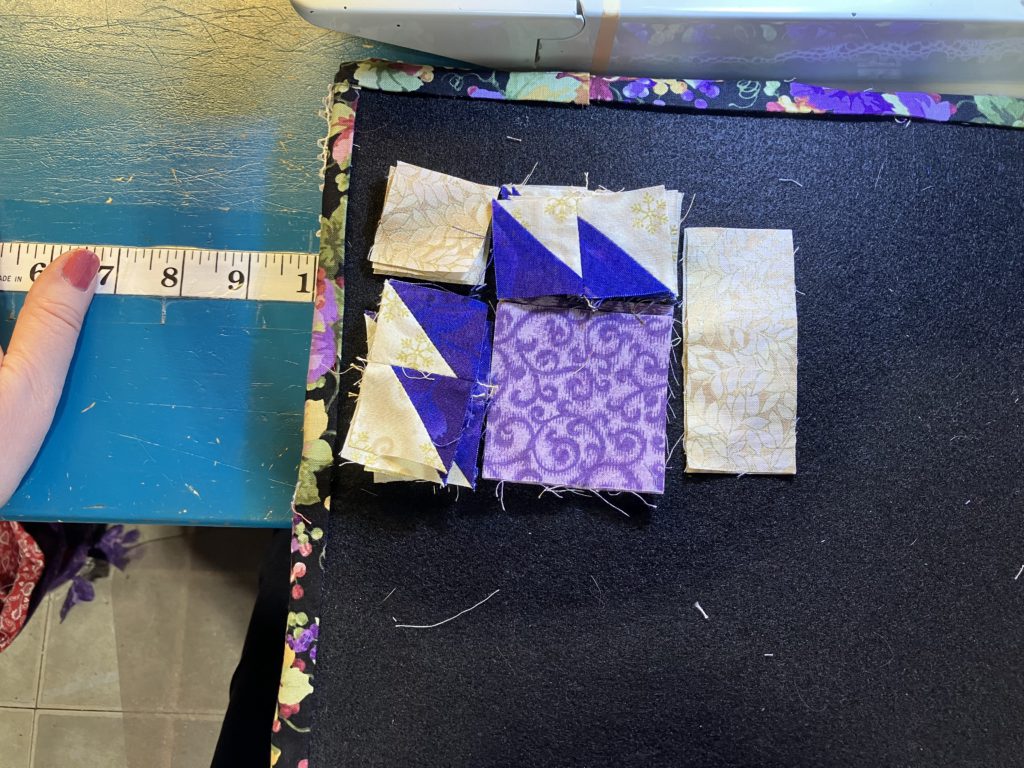
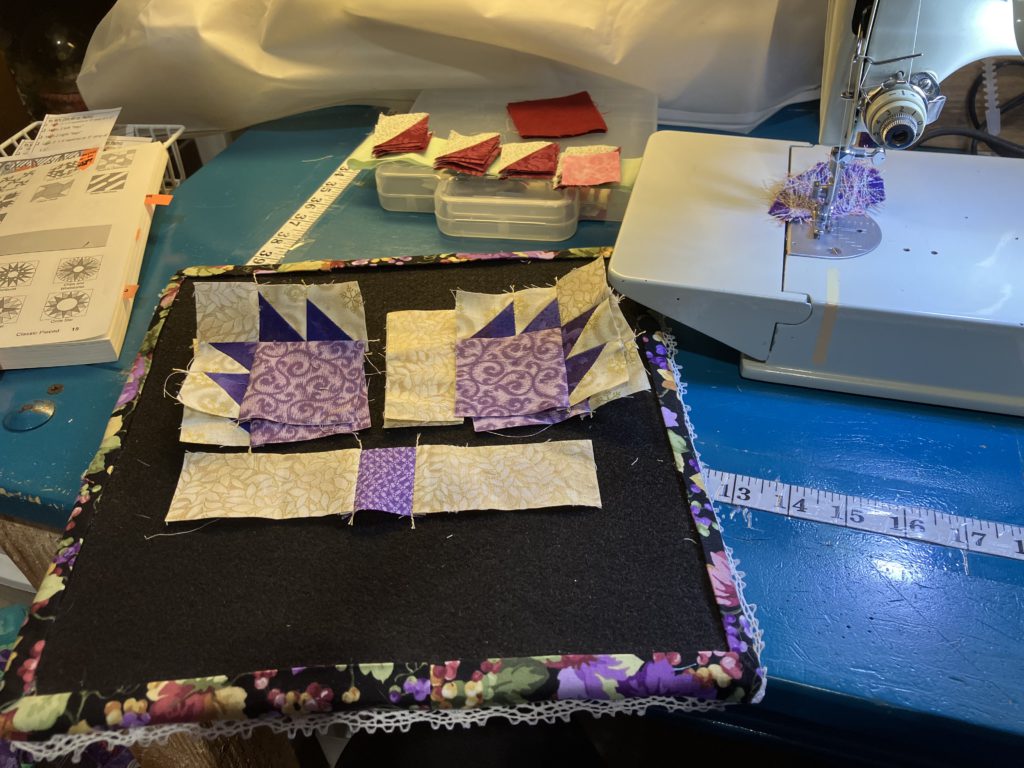
Bonus triangles: Sixteen 1 1/2″ bonus half square triangle blocks…8 on each side of the center strip…look closely at the placement below (both pictures are a little different…you decide it is your block!)
I sewed the half square triangle blocks in strips first. Then I pressed those seams open to reduce bulk. You could press then any direction you want. There are no points to match, so it is really your personal preference…as always. (I read in a quilt book yesterday…whatever you do is right…it is your quilt. Amen to that!)
I think this block would also look good as a six in block, using a 2 1/2″ strip in the middle and 1 1/2″ strips on the outsides and only 6 bonus half square triangles in those strips.
I can also envision this block as part of a row in a row quilt…with alternating blocks turned so one goes side to side and the next goes up and down. That would be a great way to use scraps and those half square triangle blocks, too.
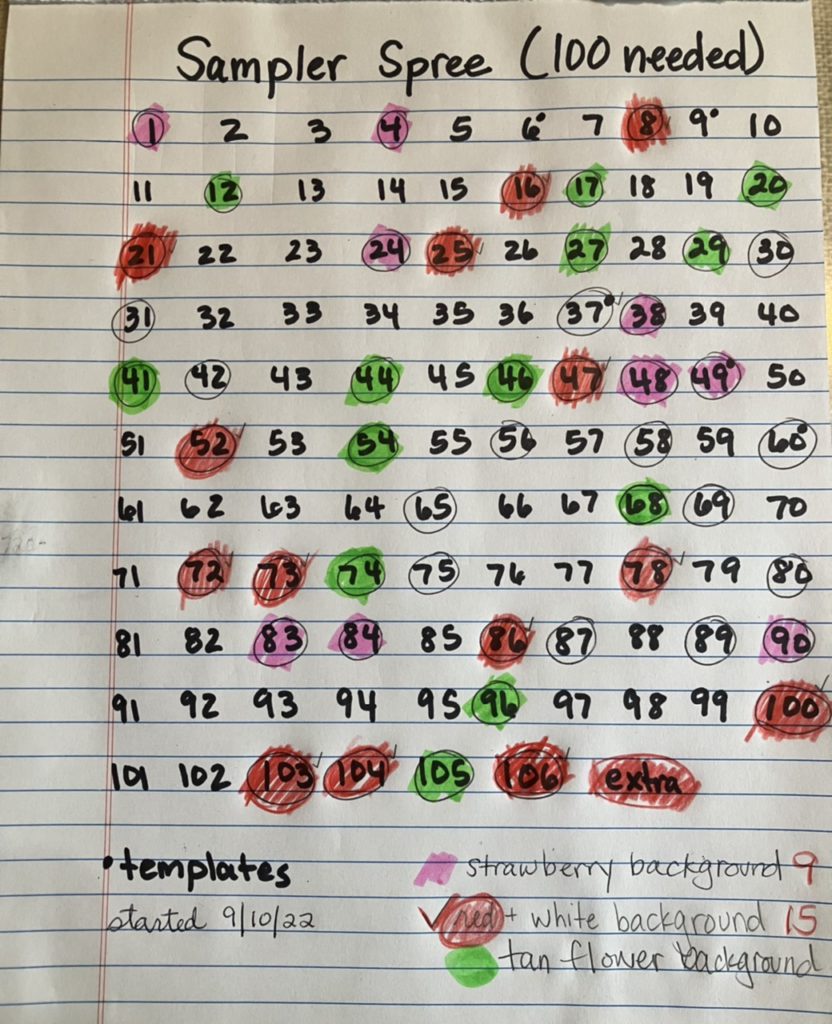
On a happy note, this is my 100th blog on this platform. (I had a blog on another platform before…it crashed and burned…time to start over in a new place with the help of my son. I appreciate his help more than he realizes!
I hope you have a great time making this easy block! As always, Enjoy!
This is yet another block to use up the bonus half square triangles. I made an quilt early on in my quilting experience using this block. It was a gift to my mother-in-law. Sadly, I do not even have a picture of it to share…maybe next time I visit I will have her get the quilt out!
I made two sizes today: 7 1/2″ and 14 1/2″. These blocks go together quickly, especially if you have the half square triangles already to use. The cutting chart is at the end of this post.
Here is the purple version:
You will notice in the picture above that I, ooops, forgot the background corner blocks!
Here is the corner block…layed out to sew four at a time…
Please notice the placement of the “claws”. They are sewn in opposite directions. You can NOT stack all 8 sets together and sew!
Here I have assembled the paws and have them ready for the final assembly. The center sashing is pressed towards the larger sashing pieces. When the paws are added to the sashing, those rows are pressed towards the sashing strip in the middle.
Here is the pressed block.
Ta-dah! Ta-done! This is the little 7 1/2″ block. Cute, eh?
Now for the bigger version. Here are my pieces:
It is assembled the same way…just twice the size!
Ta-dah! Ta-done!
Both blocks!
Another block snuck in there!
Please note the number of pieces in ( ) at the top of each column.
Here is the cutting chart:
I hope that you are enjoying the Build a Block blogs…especially for the cutting charts. They are PDF’s, so they should be printable.
I love hearing from readers and viewers, but unfortunately, I keep receiving unrelated comments…and inappropriate advertisements. So, consequently, comments are turned off for this blog. You can contact me through my YouTube channel or Facebook group. (I am sure you can figure out the name of those places, if you are here reading…hint, hint.)
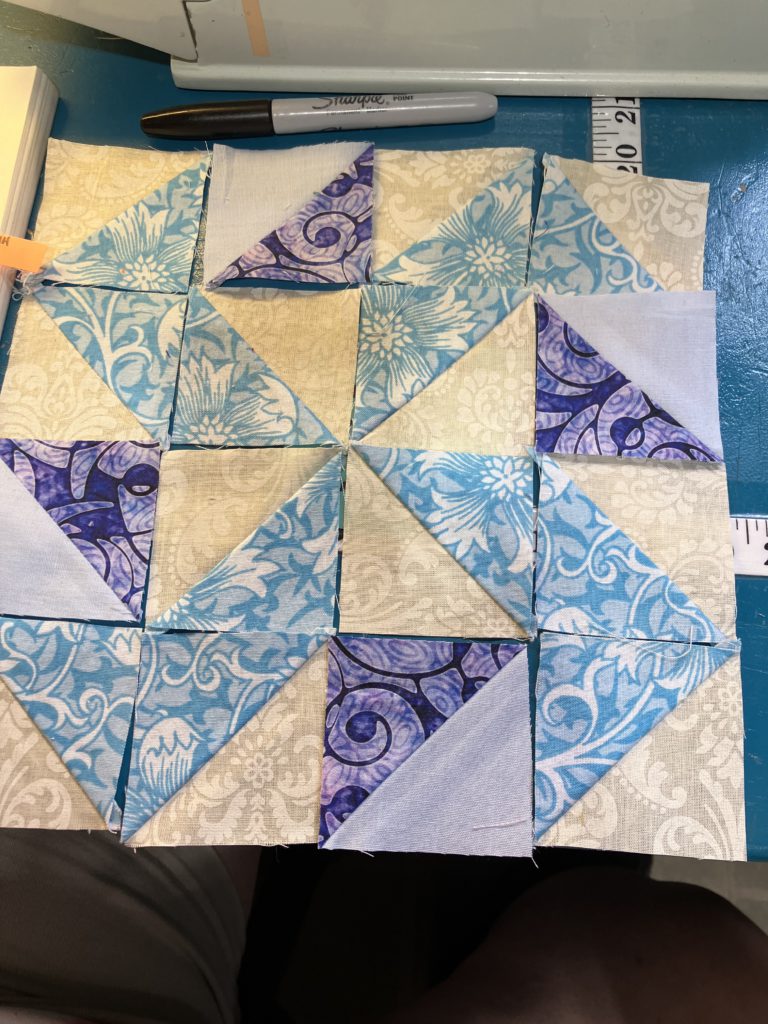
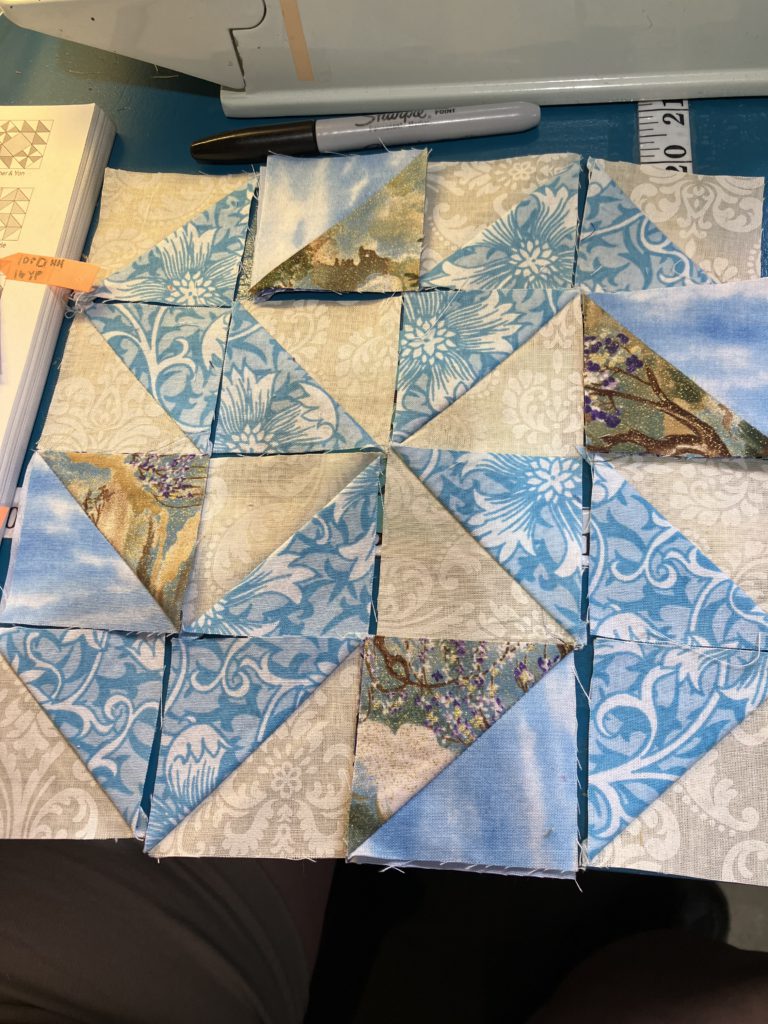
This week I am using bunches of bonus half square triangle blocks…20 to be exact! I am showing you this block in two sizes (12 1/2″ and 6 1/2″) and two different color ways (same pinwheels and scrappier pinwheels). Construction of both sizes and colorways is the same.
This block is constructed like a standard nine patch once you have made those swirling, little pinwheels. Did you realize that the pinwheels can swirl clockwise or counter clockwise? Somehow I did not realize this! That fact completely passed me by! For more information on making the pinwheels, please see the video above.
Here are the “organized” scrappy blocks:
Here is the 6 1/2″ super scrappy block:
Here is the 12 1/2″ super scrappy block:
Looking at the above picture, I realize that some of my scrappy pinwheels stand out a little better than others, but then again, I am using up my scraps. C’est la vie!
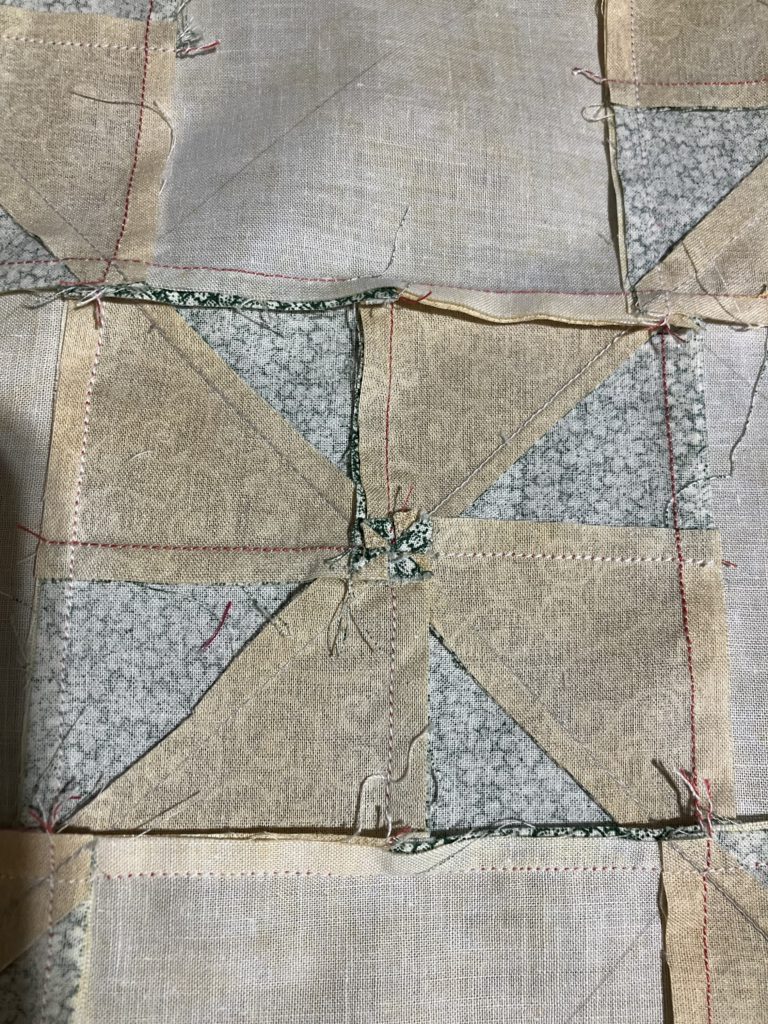
I can’t resist tempting you more about the flat pinwheel technique. Look at how flat this one is…yes, it really does lay flat. I did not pin or fuss overly much to get it that way.
Here is the back center of that block. Look at that little mushed mess of seams. That is what makes this all work!
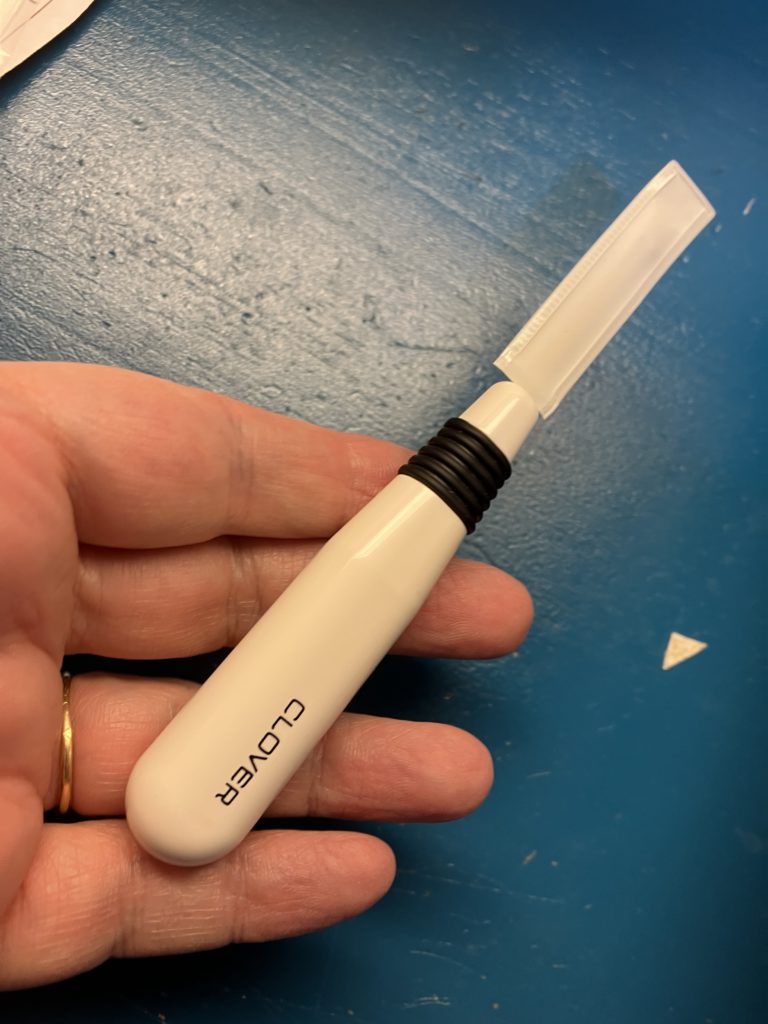
The video shows you how to pick out about 6 stitches (3 on each side of the connecting seam) to get this little pinwheel nest…three stitches! So worth it! This is coming from me…one of world’s biggest slackers!
If ever a product should sponsor me, this one is it! The “cadillac” of seam rippers!
Here are the cutting measurements for a variety of sizes:
Thank you for reading and watching! I am having great fun creating and sharing with you!
Just to let you know, I am turning off comments here on the blog. I am tired of the Russian manifesto and viagra comments…or just plain phishing comments. Please comment on my Facebook group or on individual YouTube videos. I do love hearing from you, but…
Have a wonderful day! Hope you are creating something fantastic from your scraps!
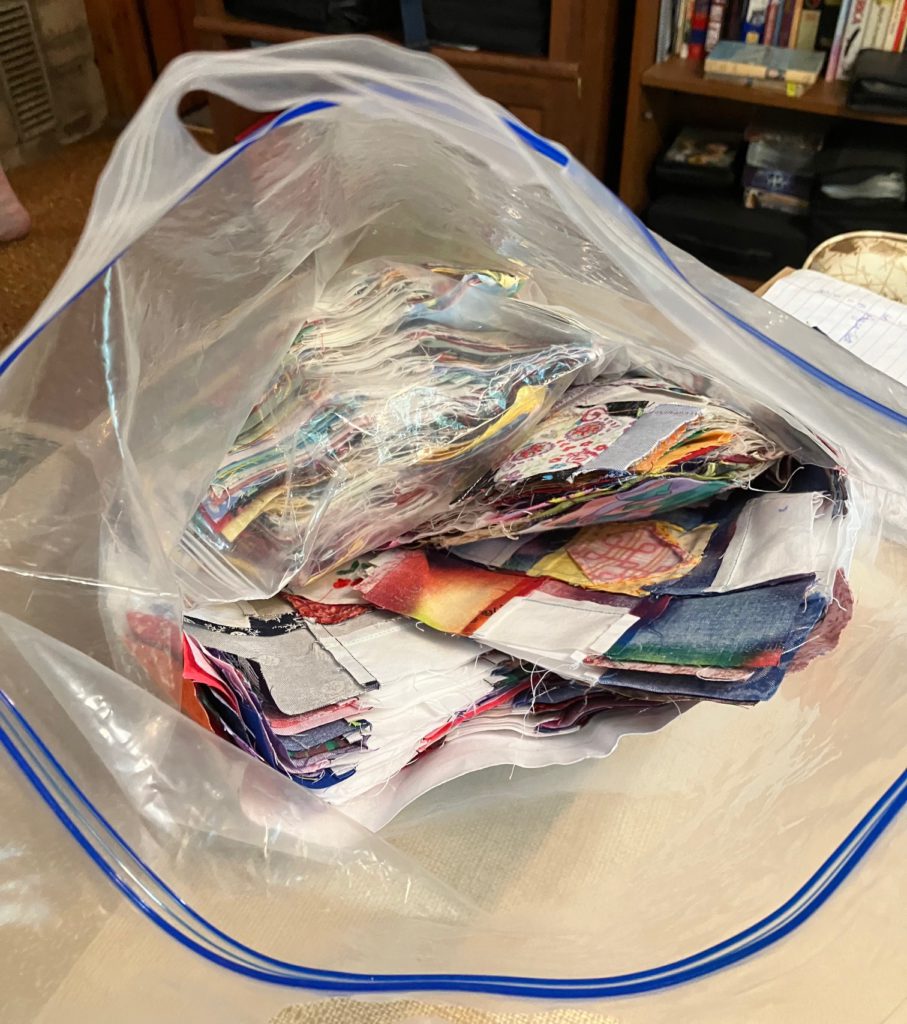
As you can see, I still have a large amount of trimmed bonus half square triangle blocks just waiting for a block.
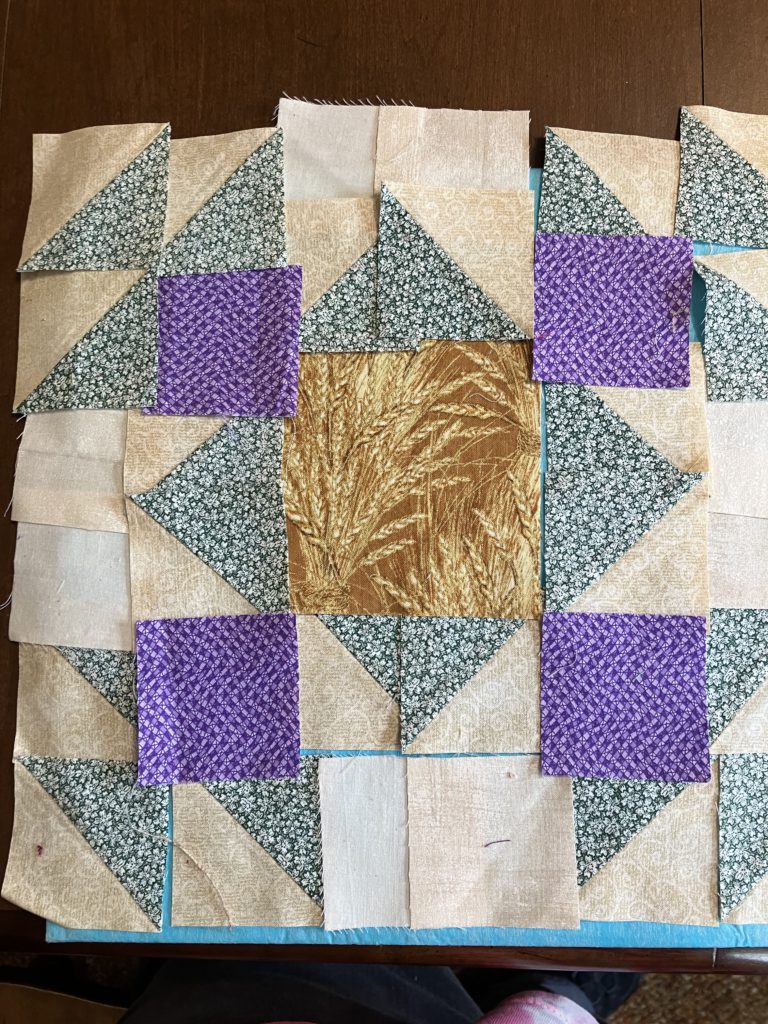
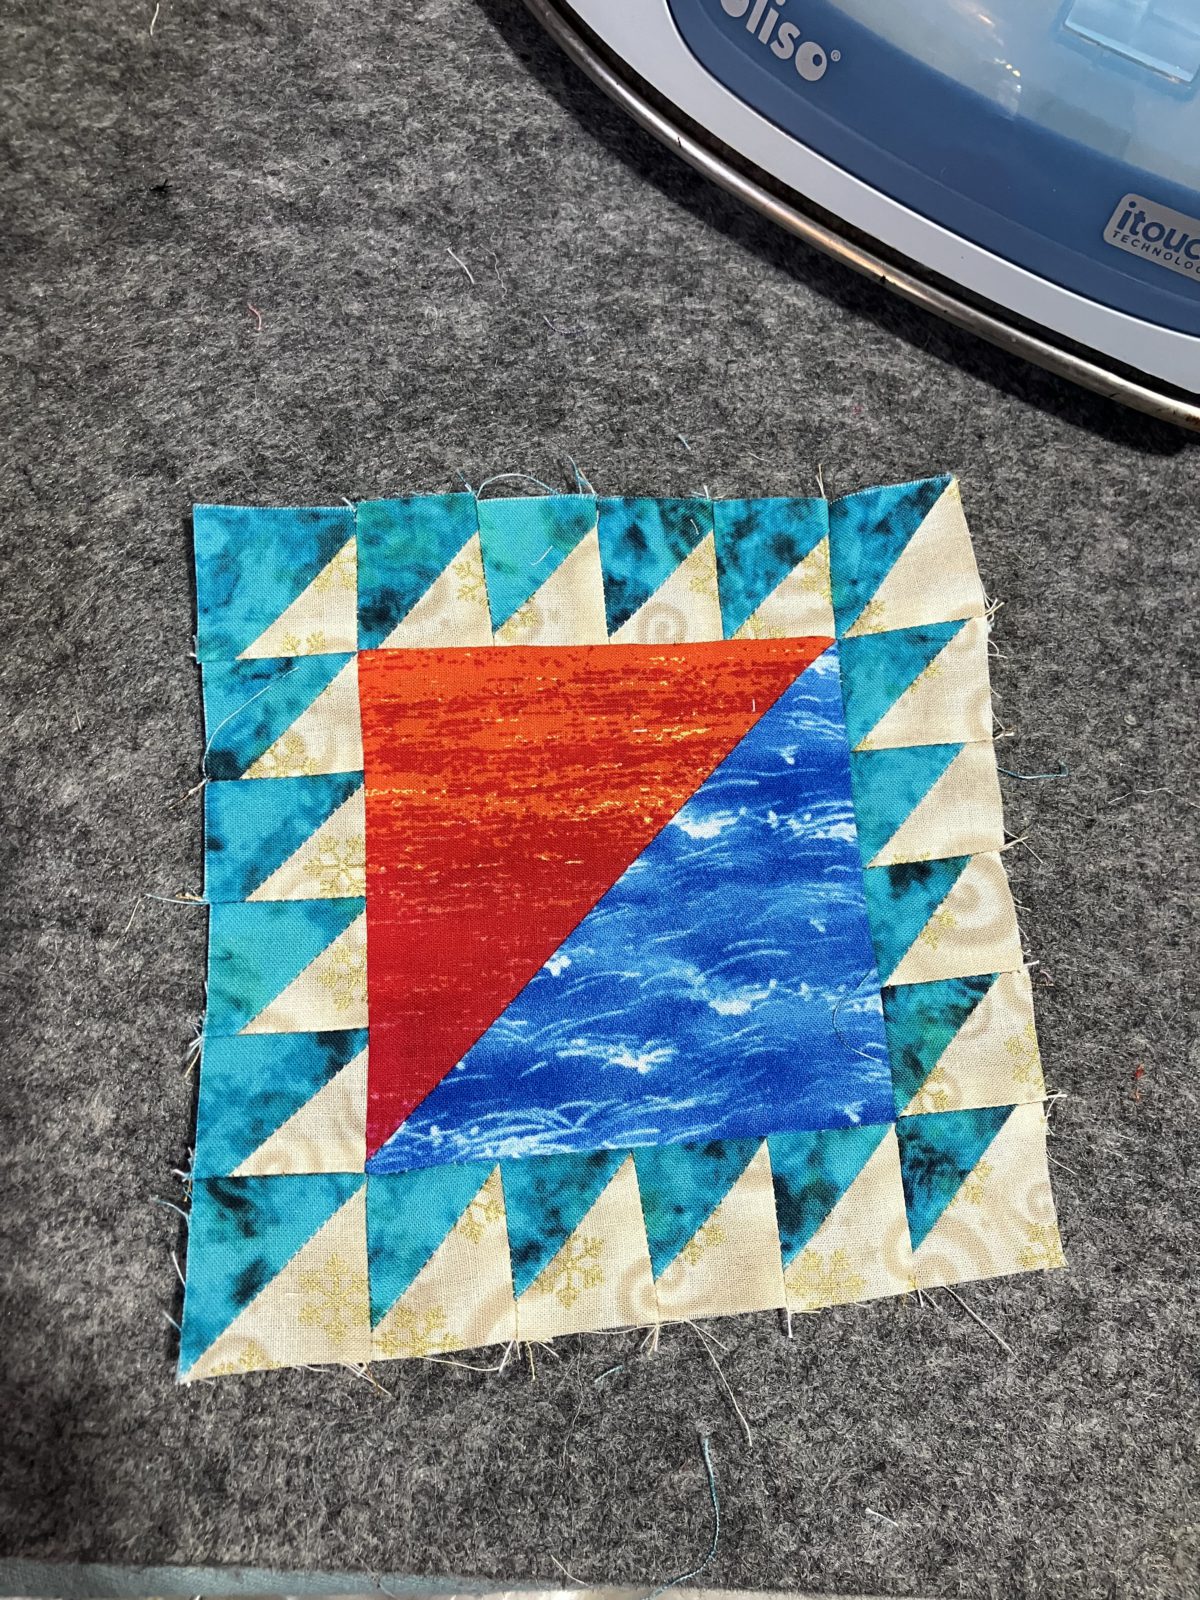
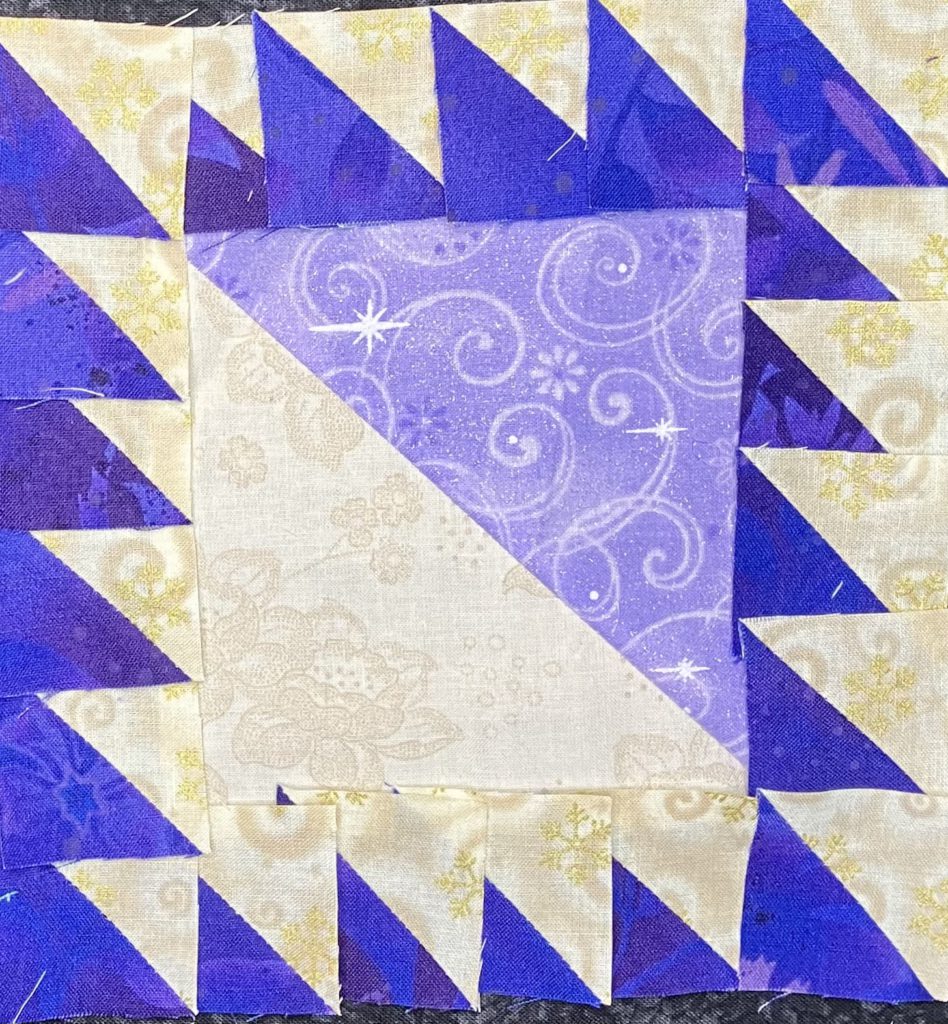
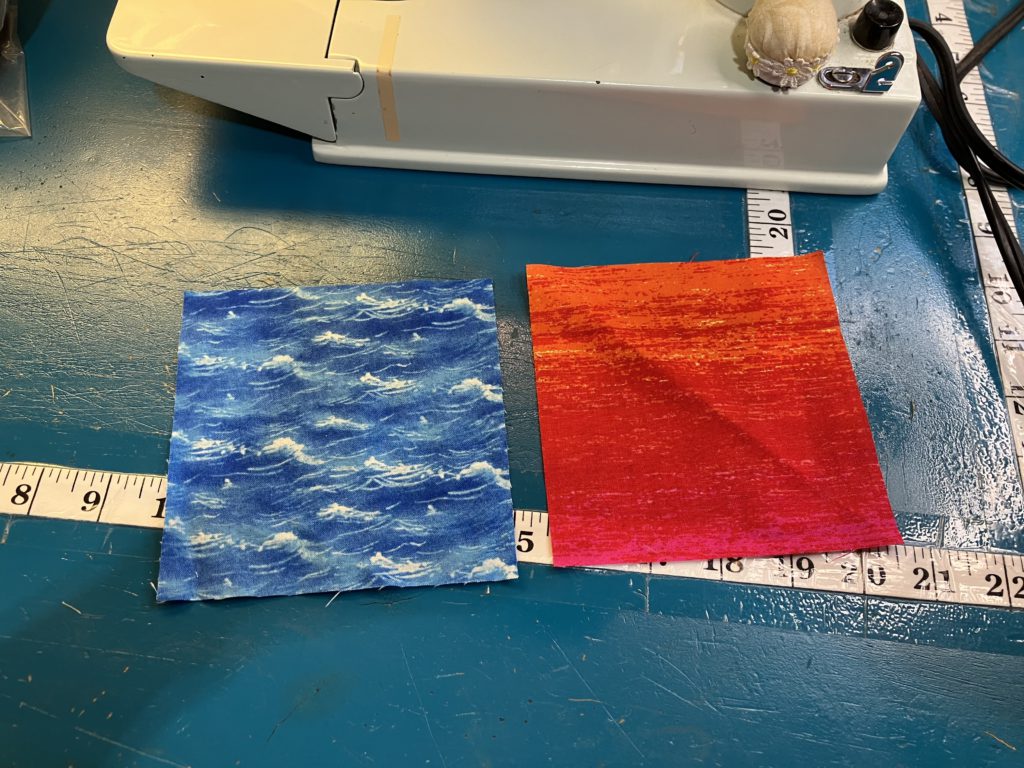
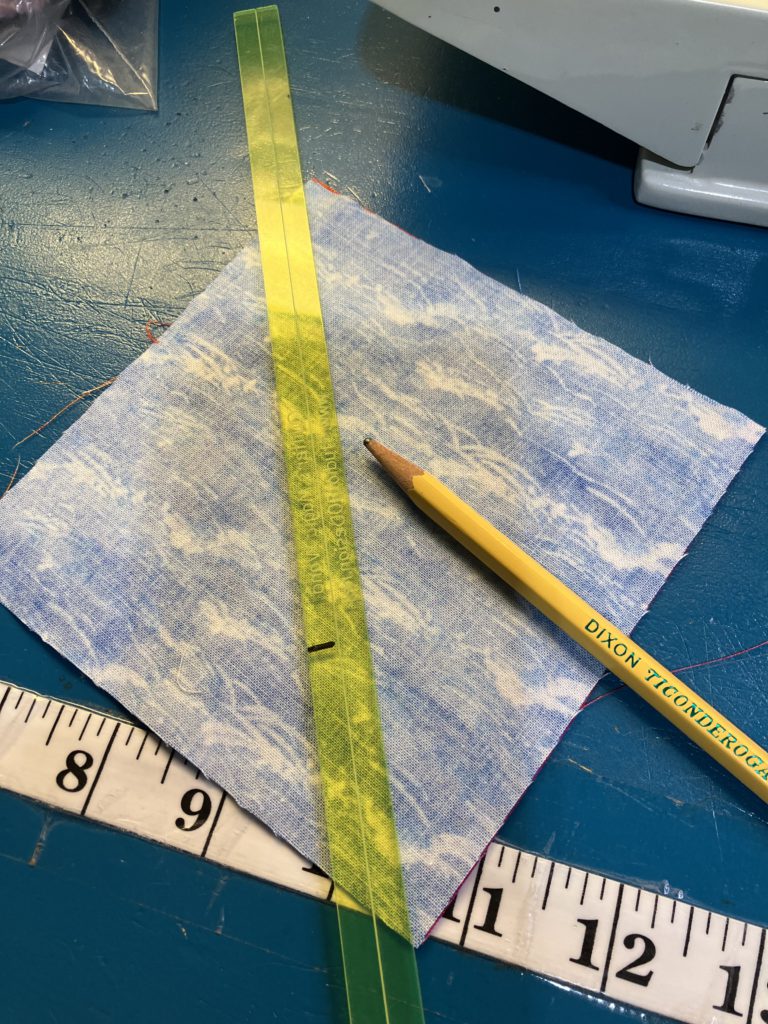
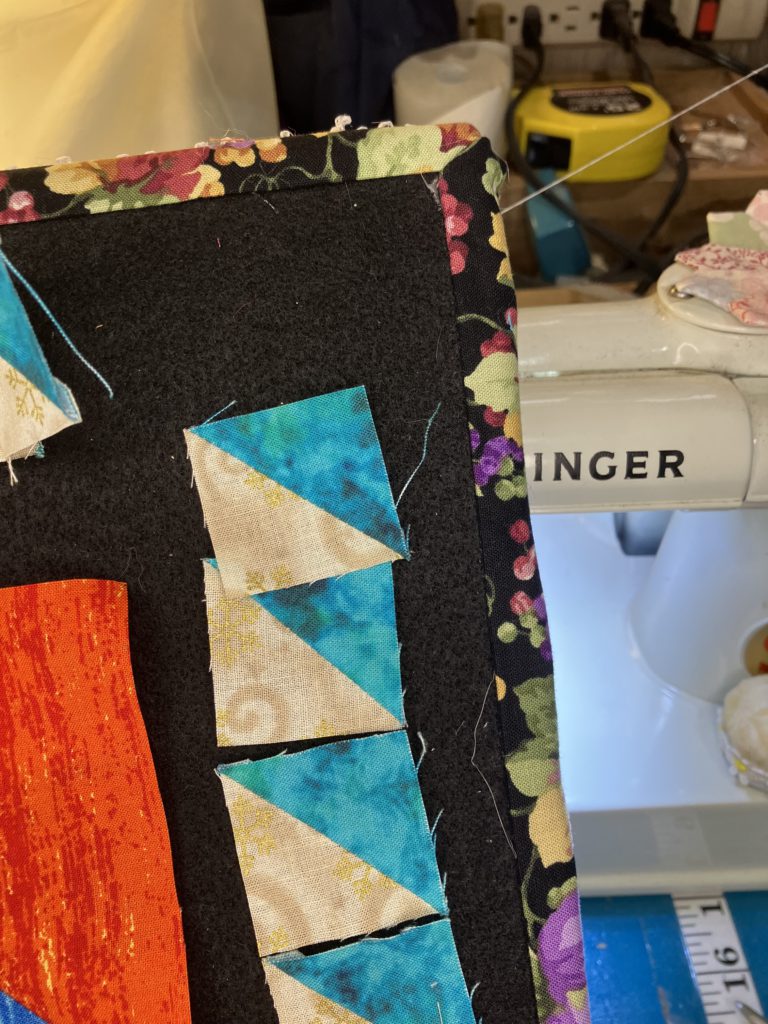
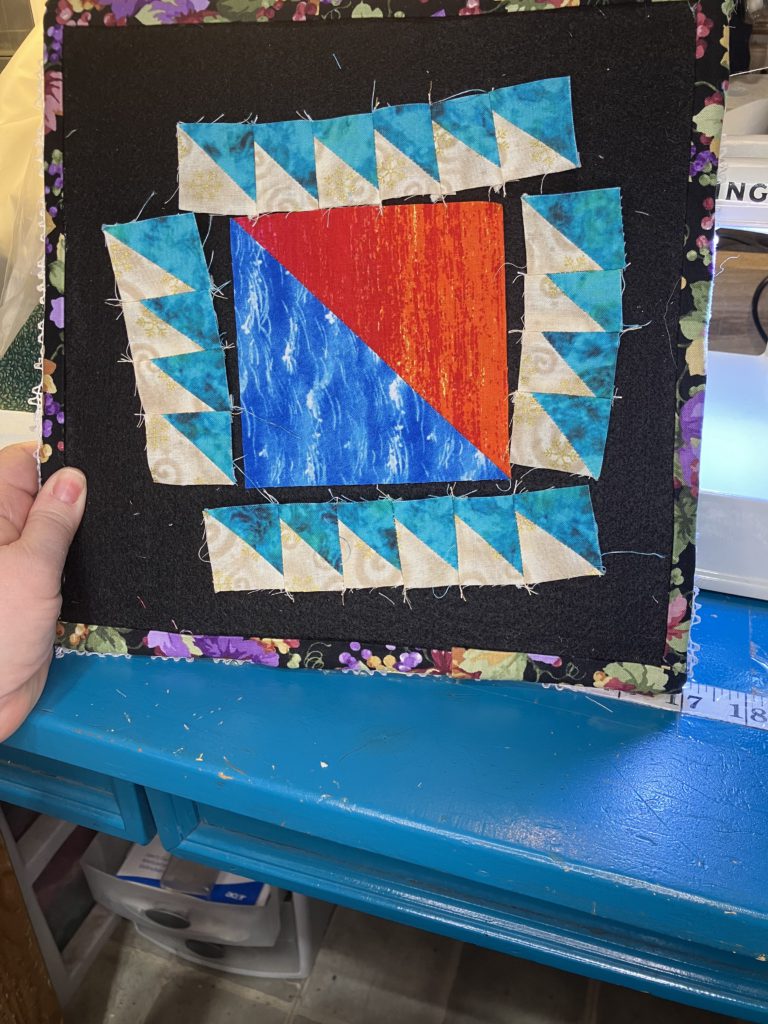
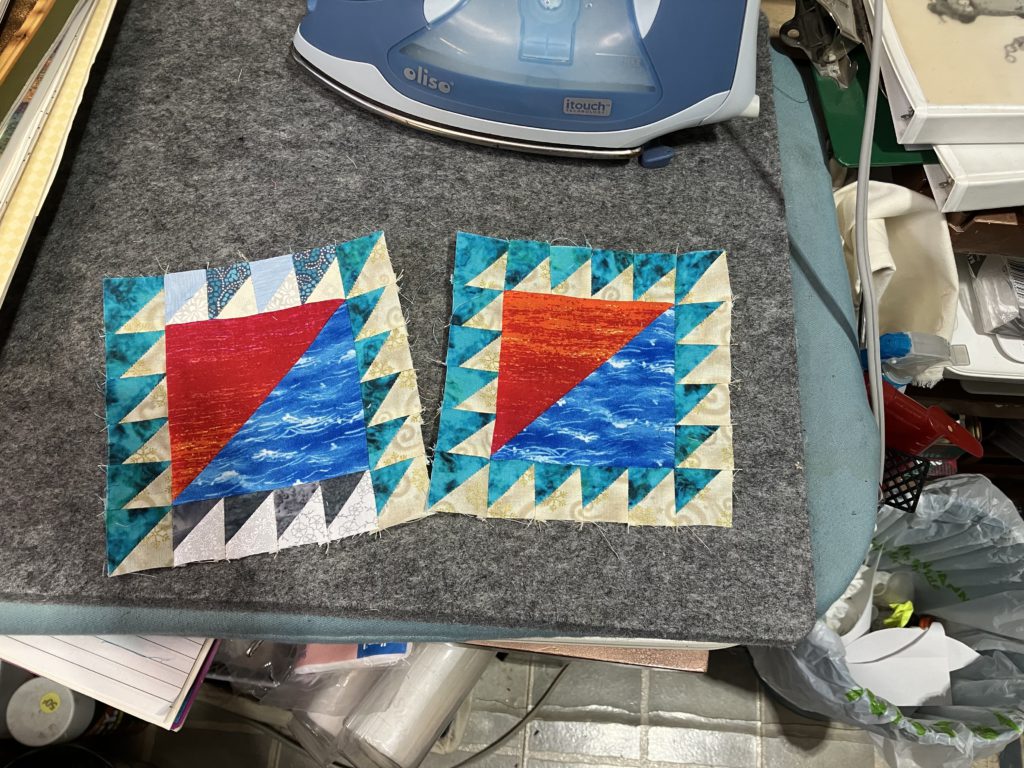
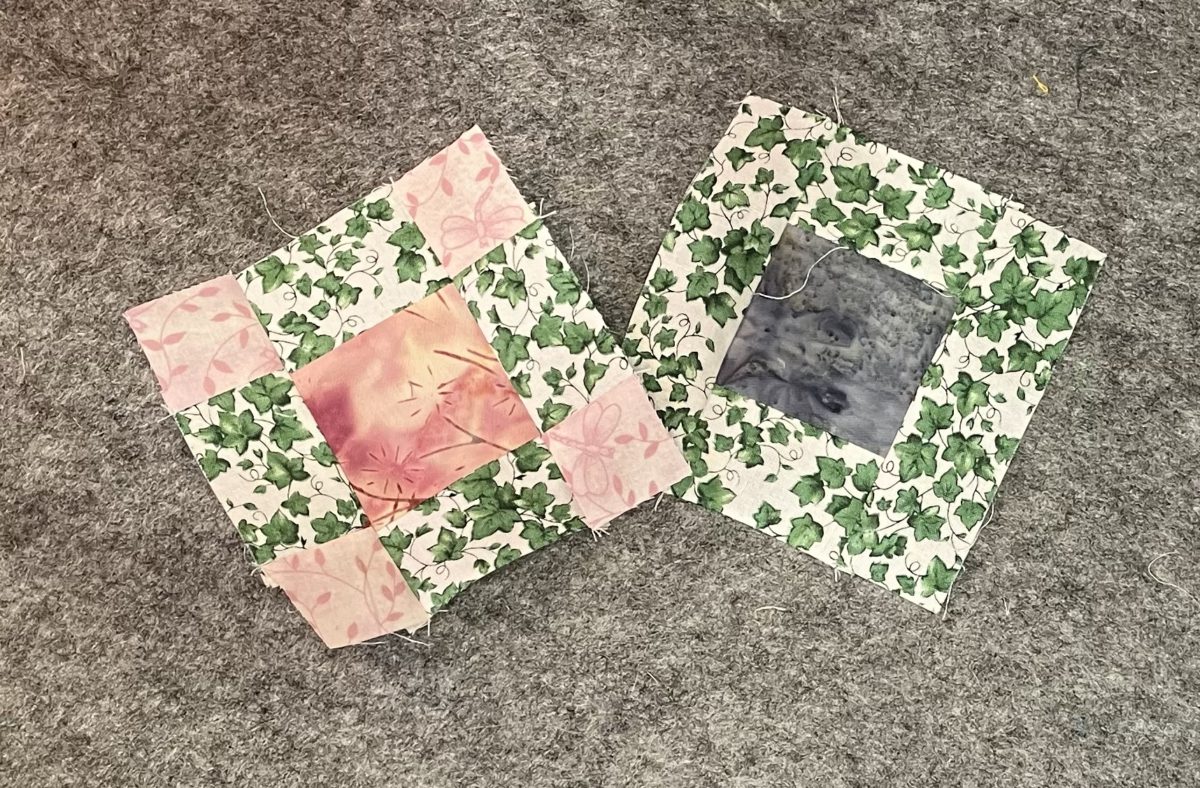
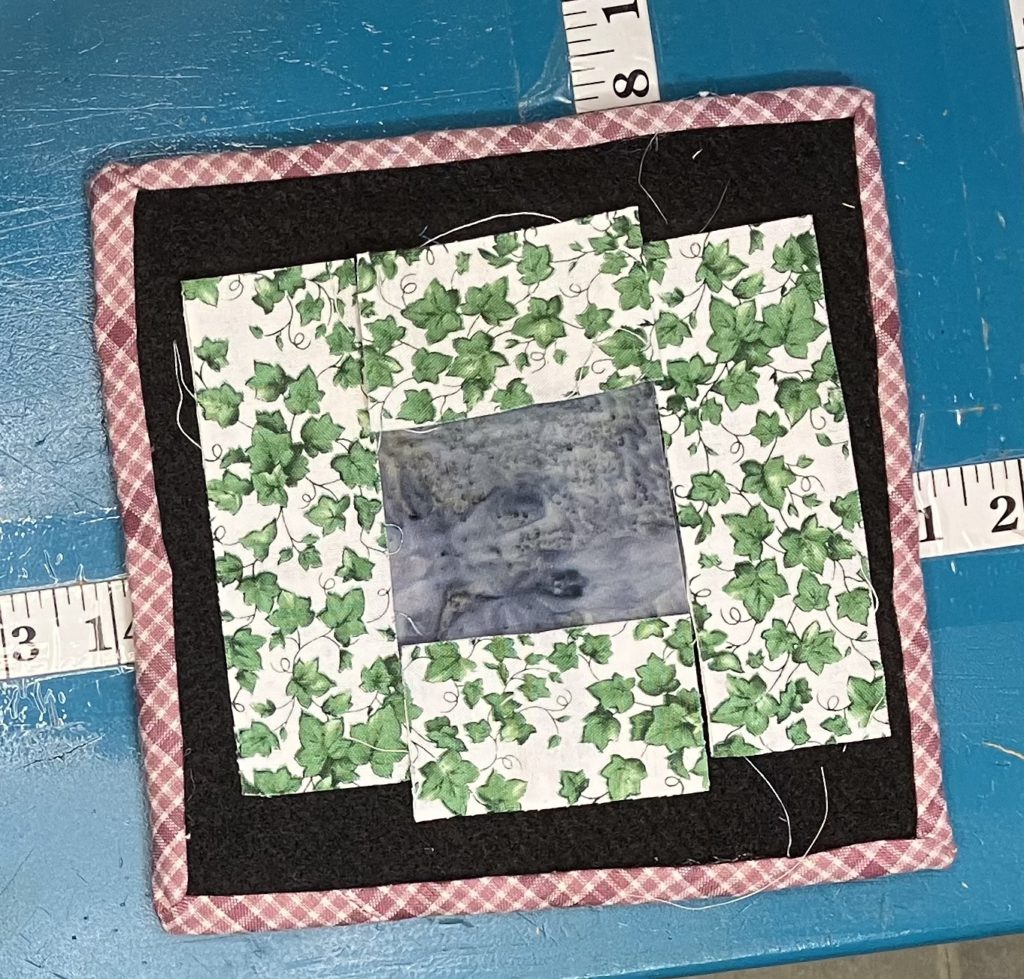
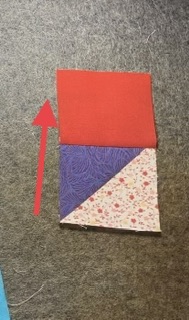
Today I am making a new center block. I have a project in mind for a Lady of the Lake block.
As you have seen in some of my YouTube videos, I love sunsets at the lake…any lake. The center of my block is going to be that! A sunset on a lake.
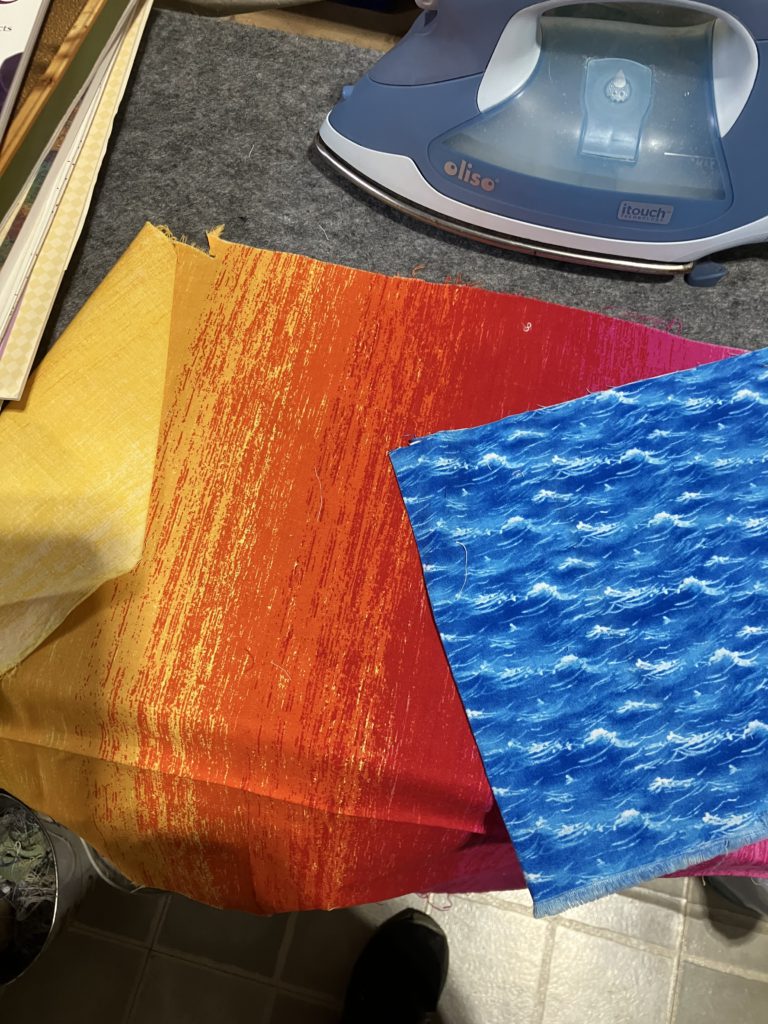
Both of these fabrics are directional. I want my sunset and my waves parallel to each other.
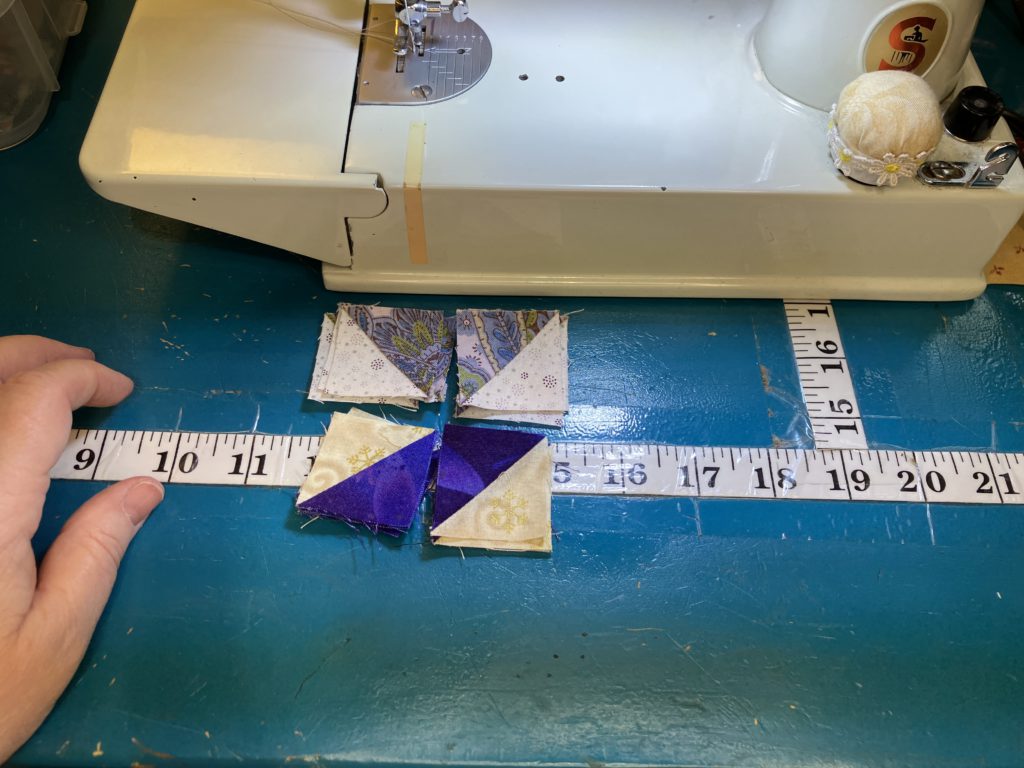
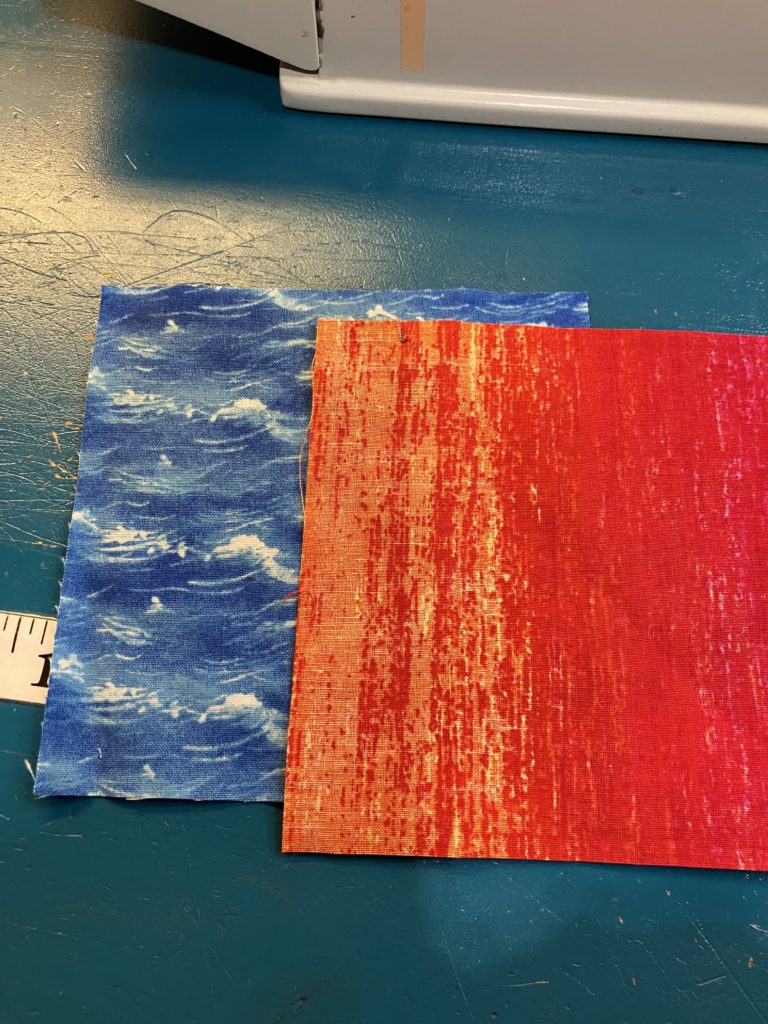
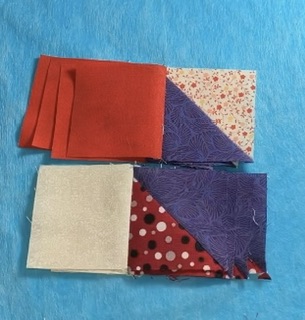
Perfect fabrics for my vision! These are 5 inch squares. My half square triangles will finish at 4 1/2 inches. I am making two blocks because I am making two of the same project that I have in mind.
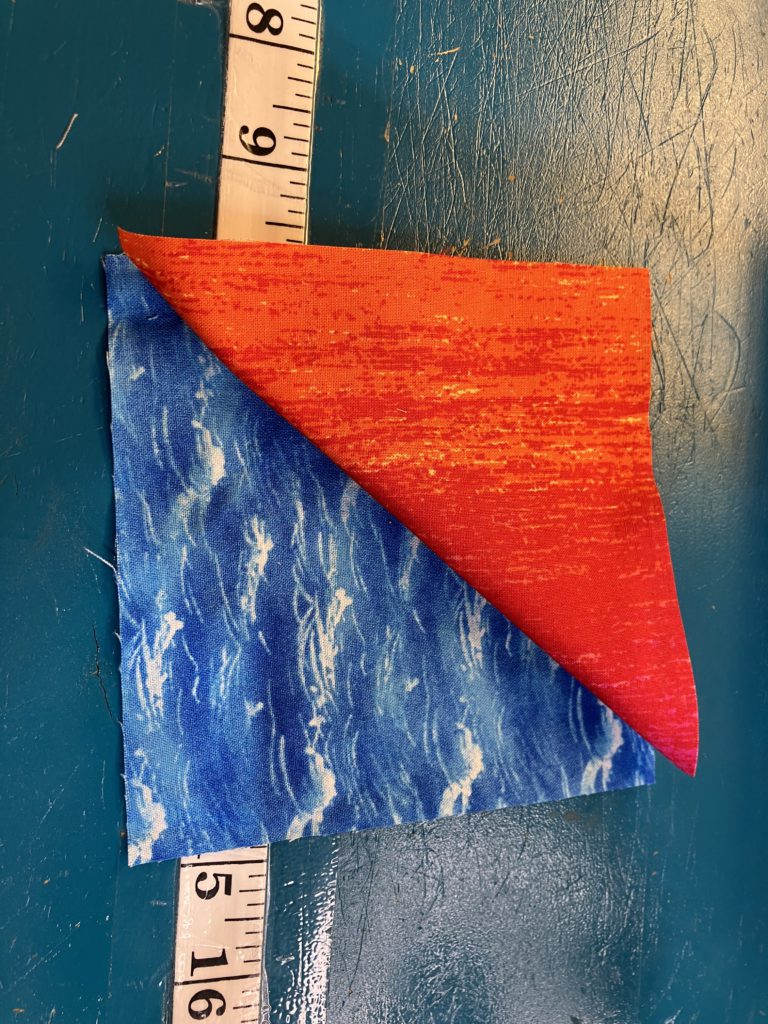
To make sure that my fabrics are going the correct direction, I audition them together…not quite it!
Perfect!
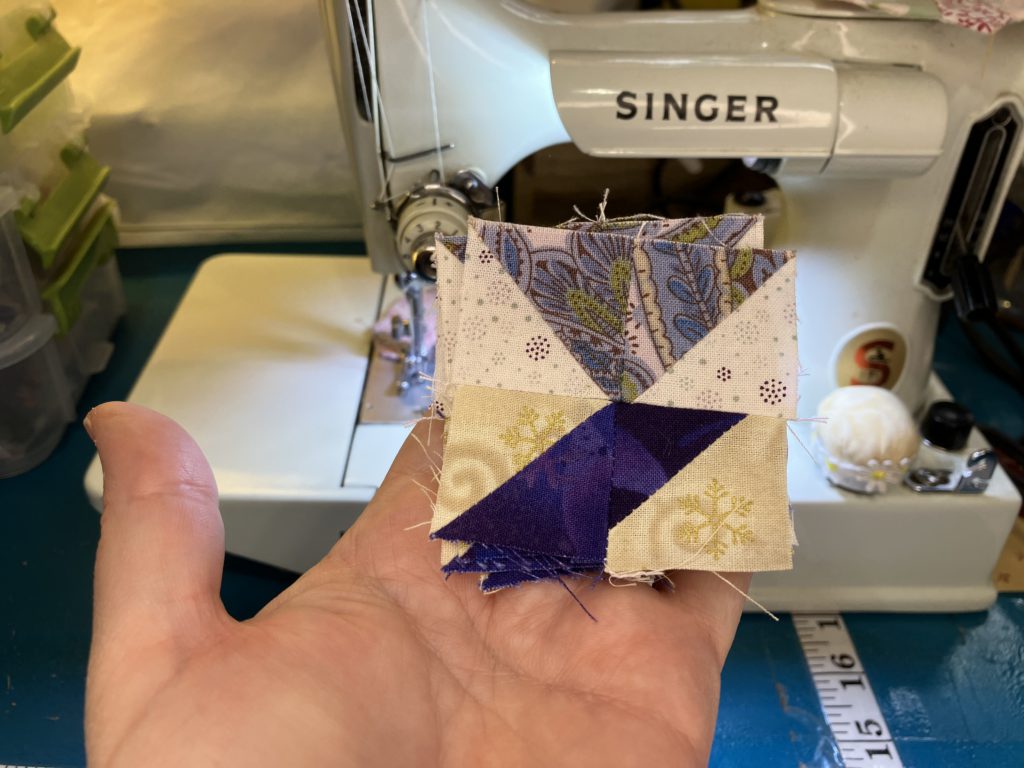
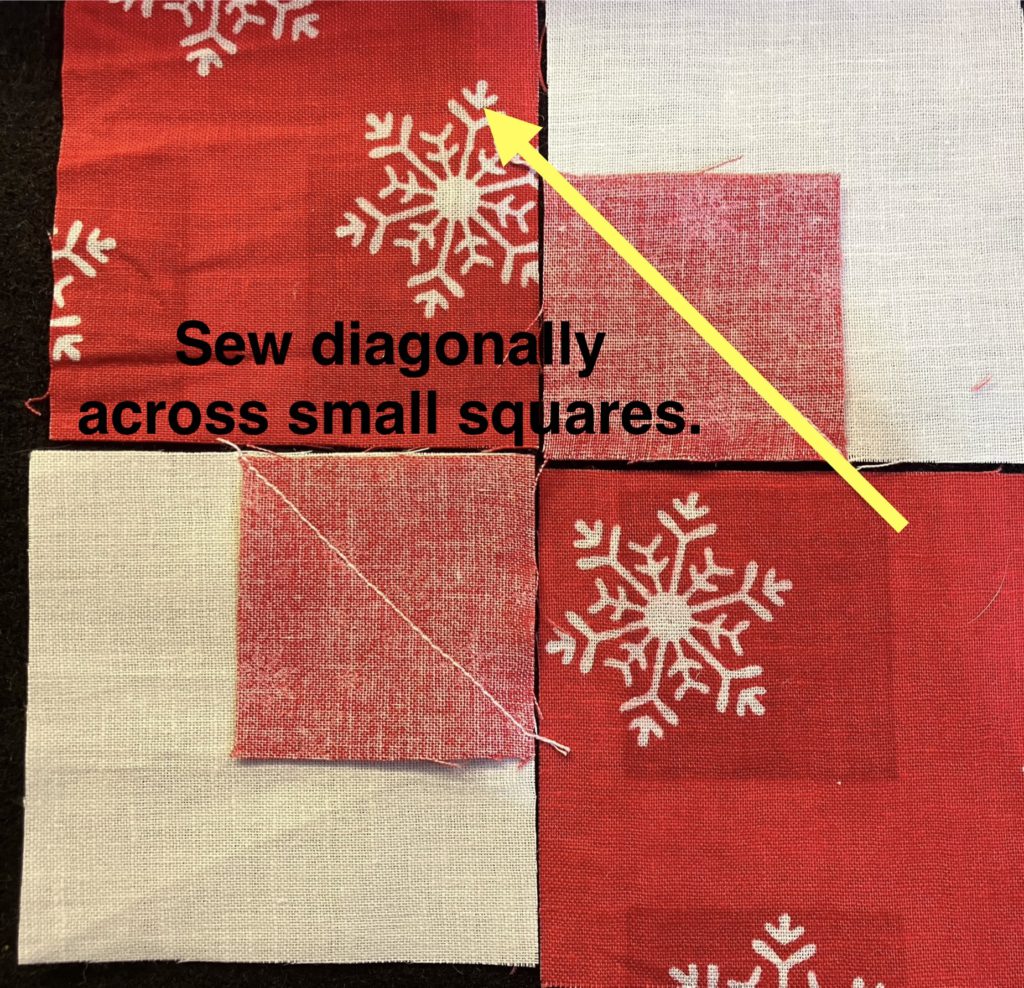
When I unfold the sunset fabric, I notice that it is perpendicular to the wave fabric. When they are sewn on the diagonal, they will be perfect.
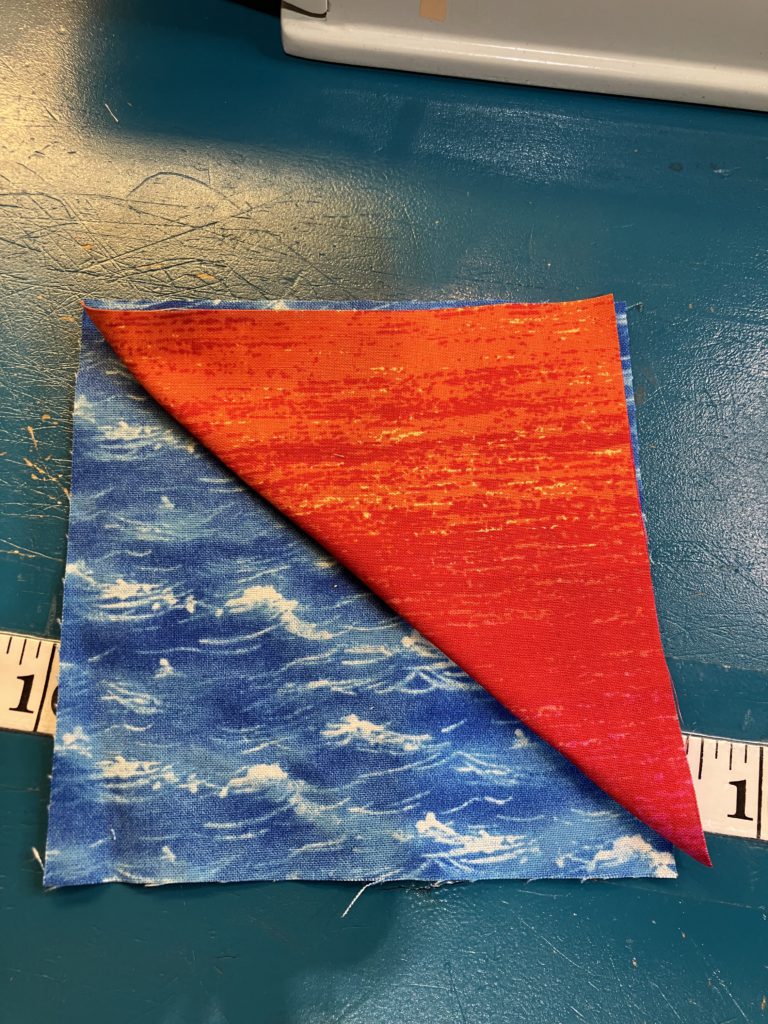
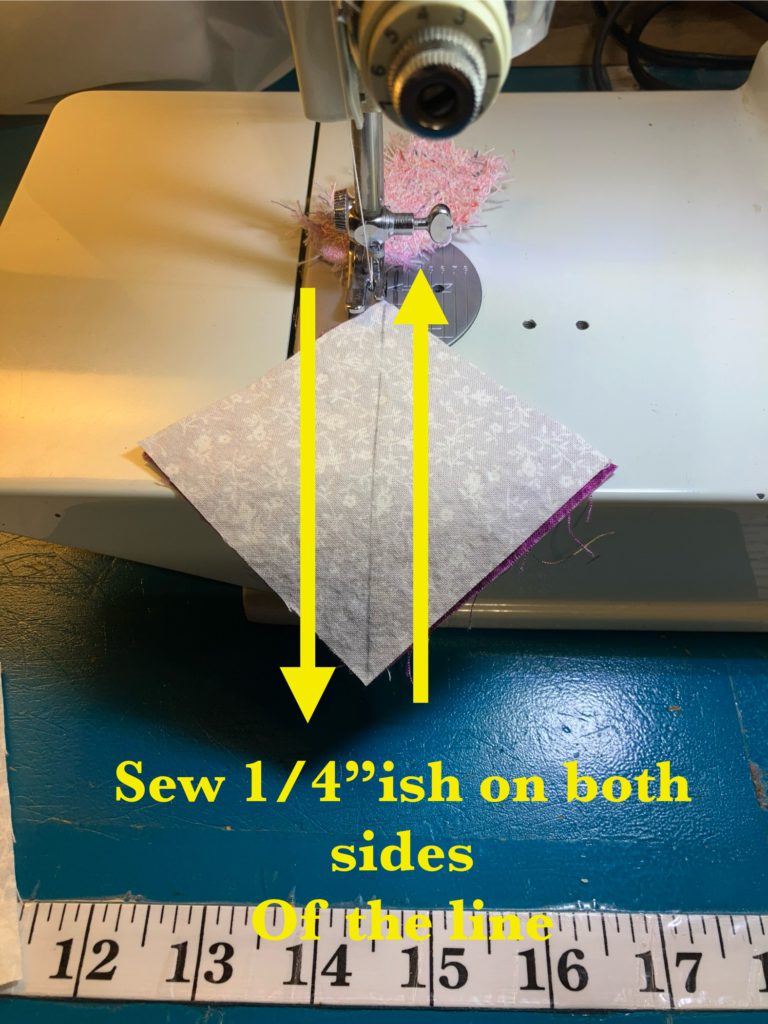
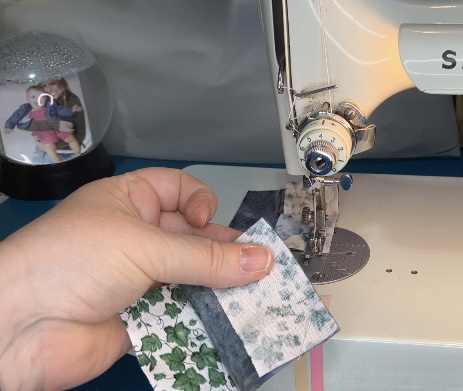
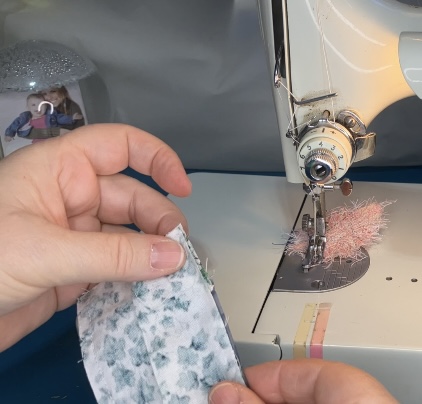
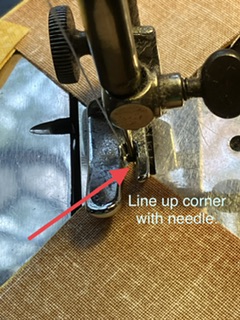
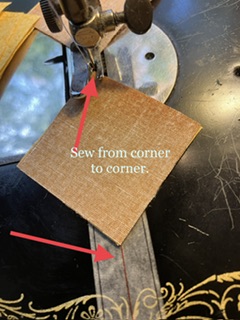
After I place the fabric right sides together, I draw my diagonal line. Sew a scant quarter of an inch on both sides of the line.
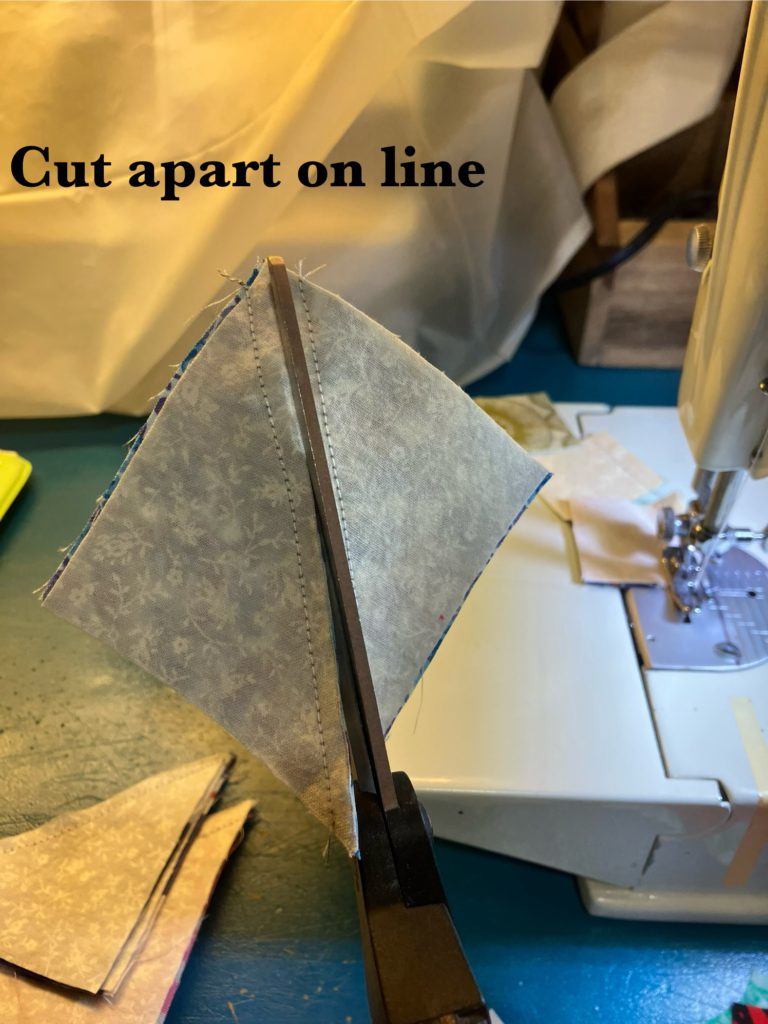
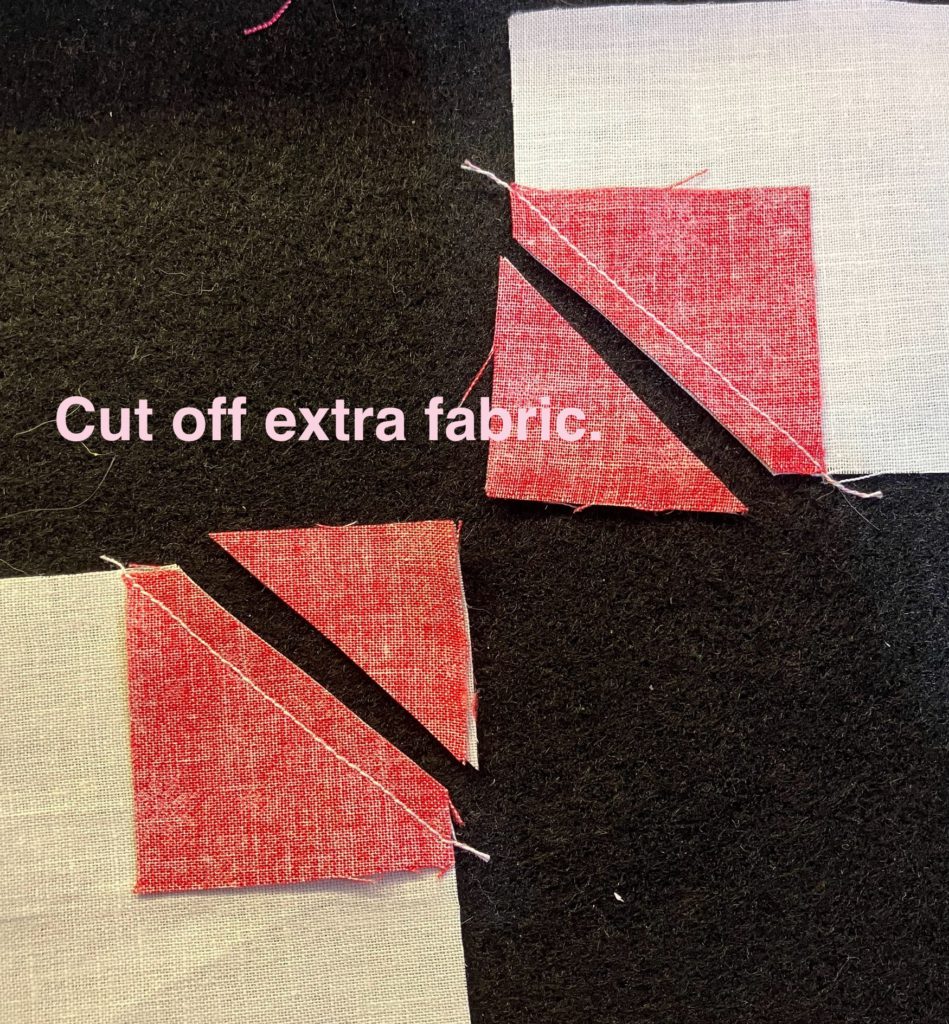
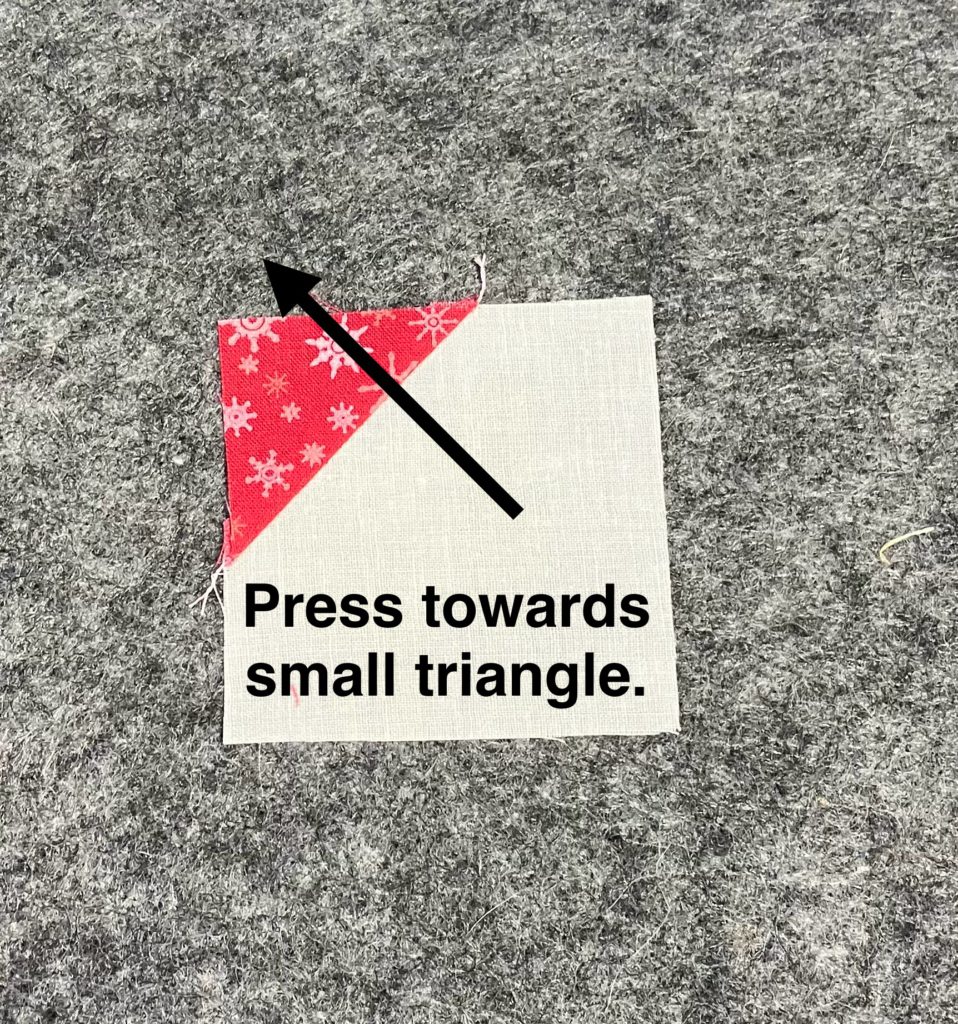
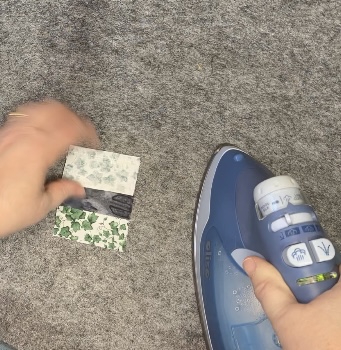
Cut on the line. Press to one side. Trim to 4 1/2″.
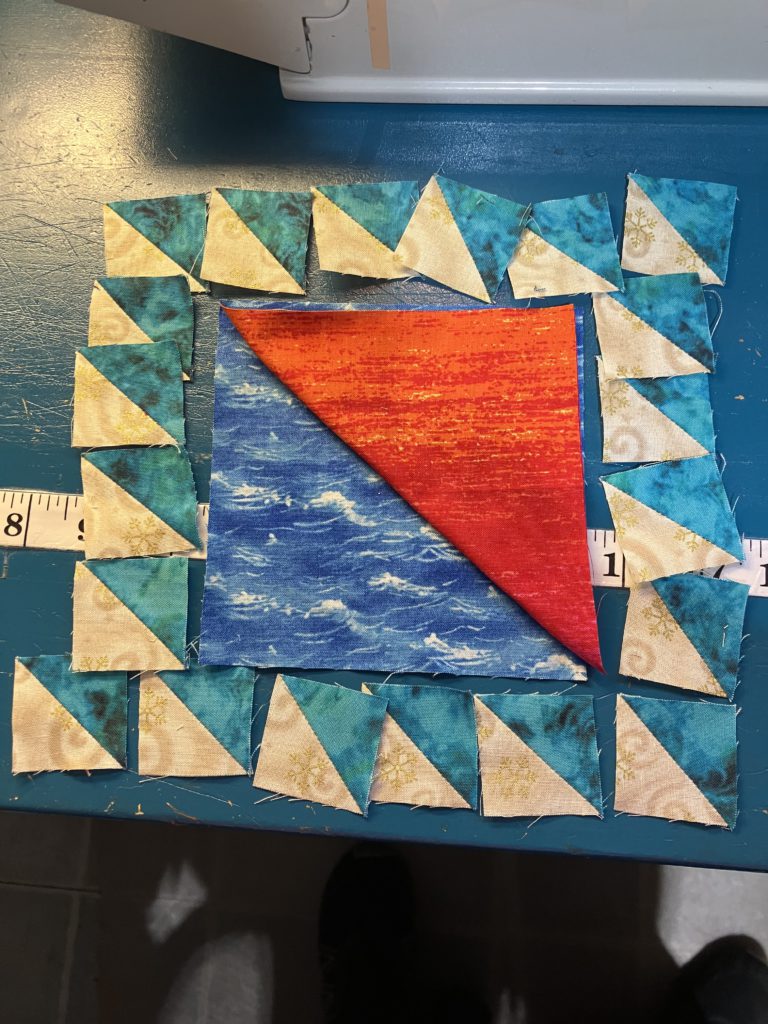
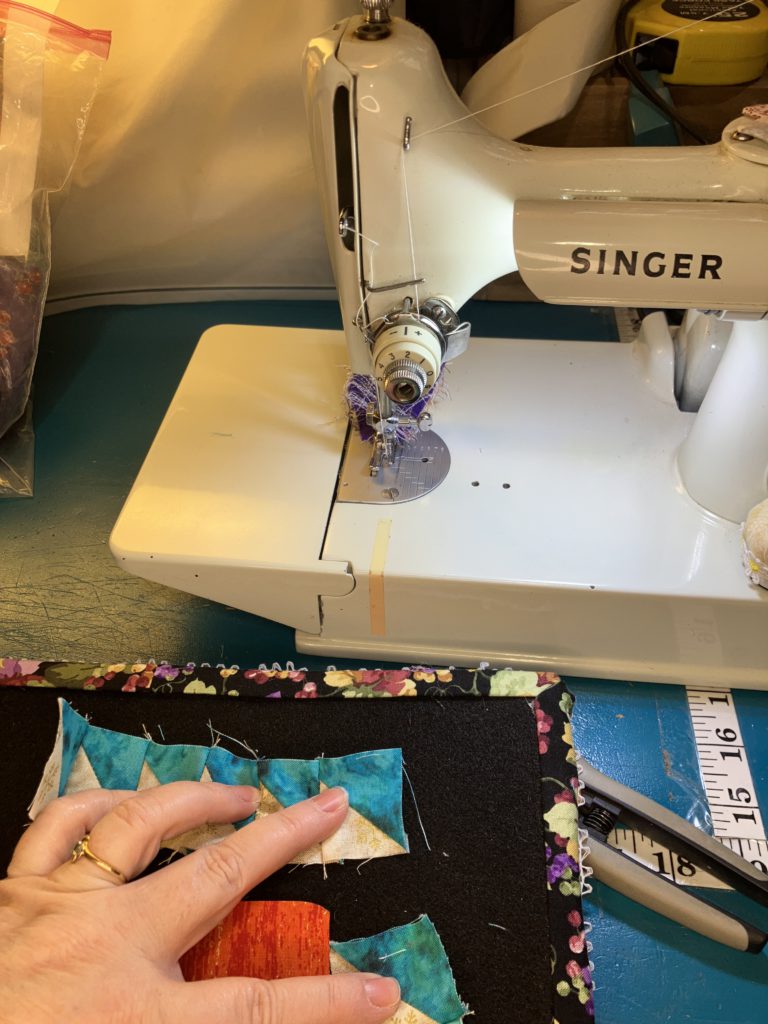
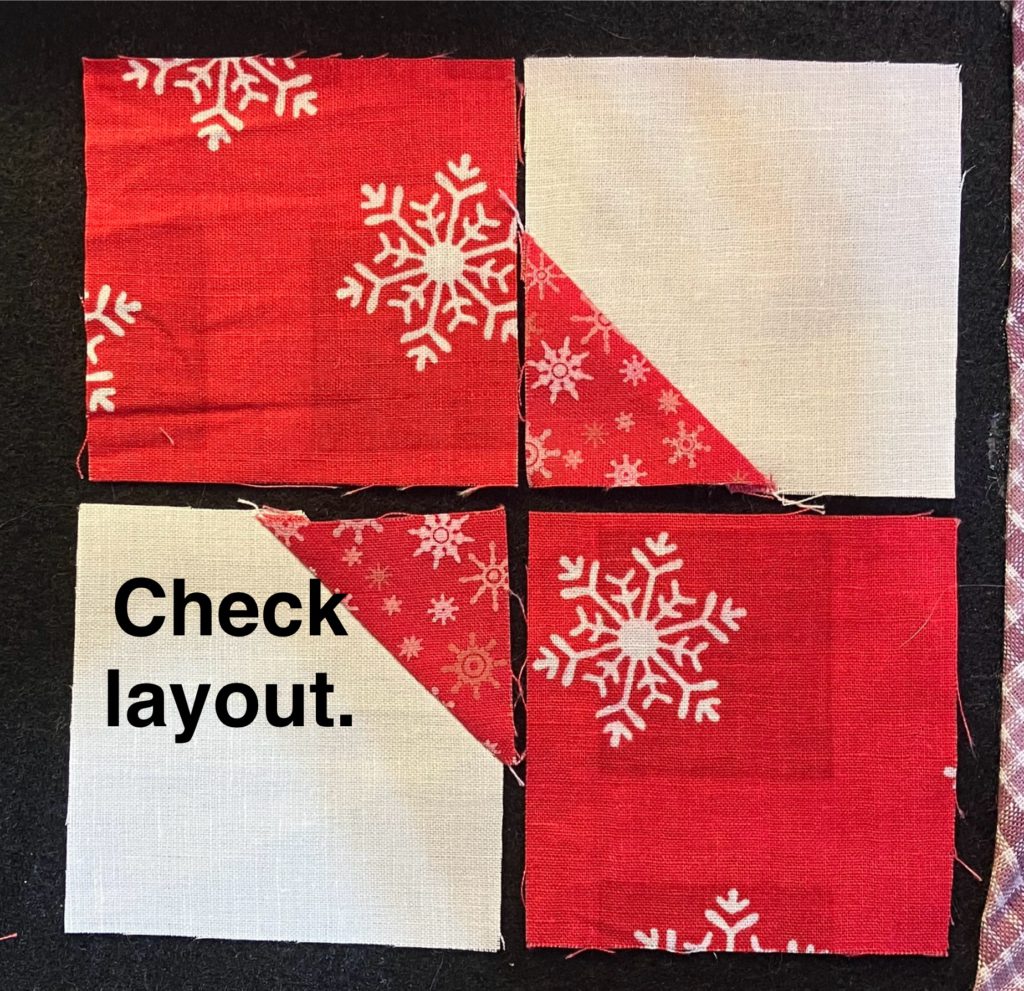
Lay out the block. Make sure that all of the small half square blocks are going the same direction. Notice the dark half is in the upper right corner the entire way around the block.
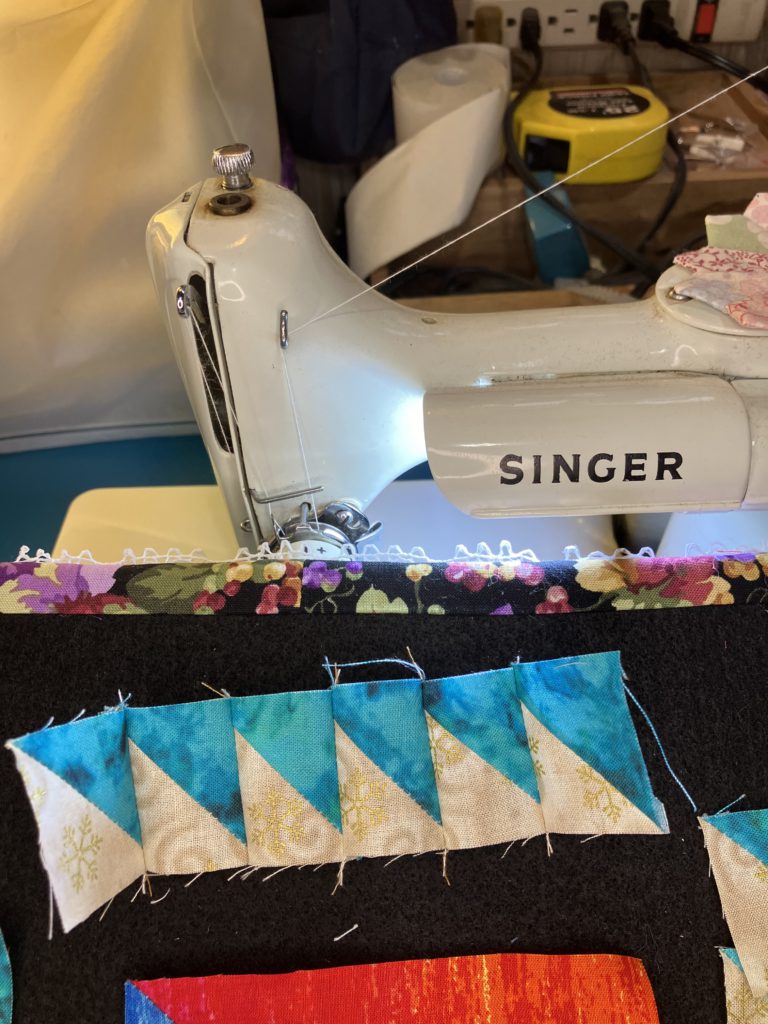
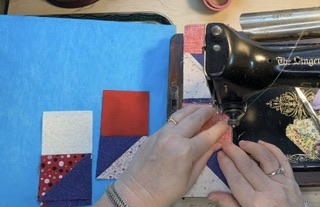
I sew the smaller half square triangles in rows…top and bottom first.
Then I sew the sides next.
After each section, I lay it back out on my design board. It is very easy to reverse pieces…so I double check after each section.
Holding this design board up to photograph it makes the sections look crooked, but they are not. Add the sides first, then the top and bottom.
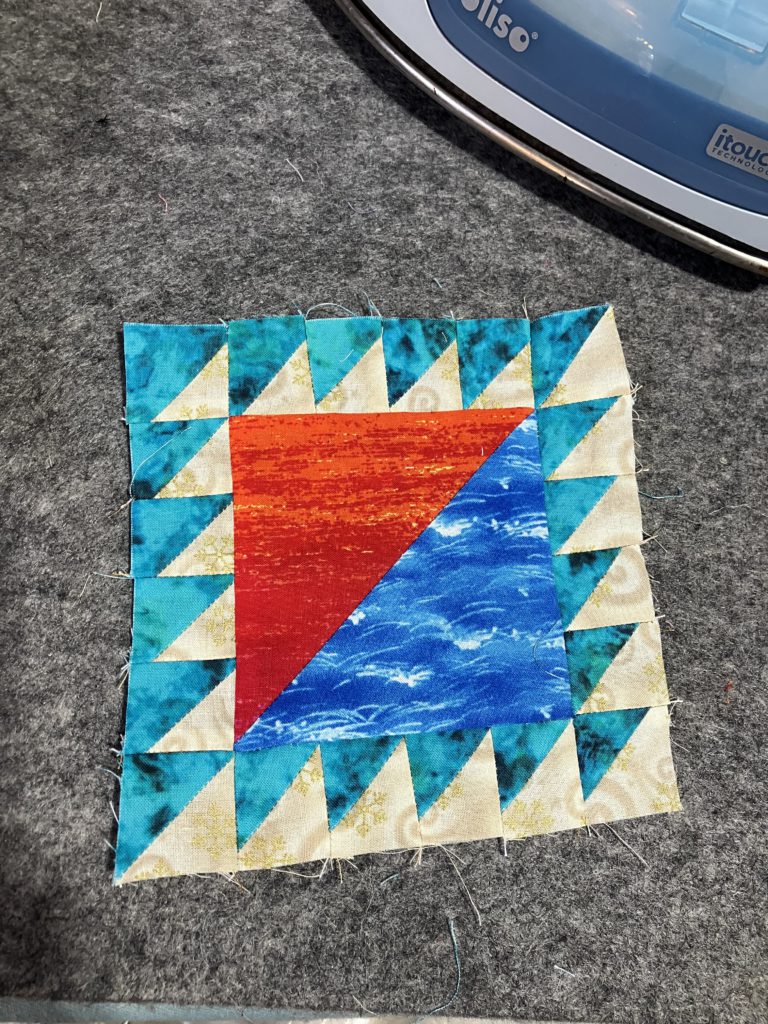
Here it is! One block finished! I think it is worth dealing with the smaller pieces to get this beautiful block, don’t you?
Here is the second version of this block. I didn’t have quite enough of the teal blocks, so I threw in some other blues and grays. It will work beautifully in the project that I have in mind!
Here are the cutting charts for this block. The top chart is for using trimmed and made bonus half square tringle pieces. The bottom chart is for construction of pairs of half square triangles before assembling the pieces. Please read carefully. Ask in comments if you have any questions.
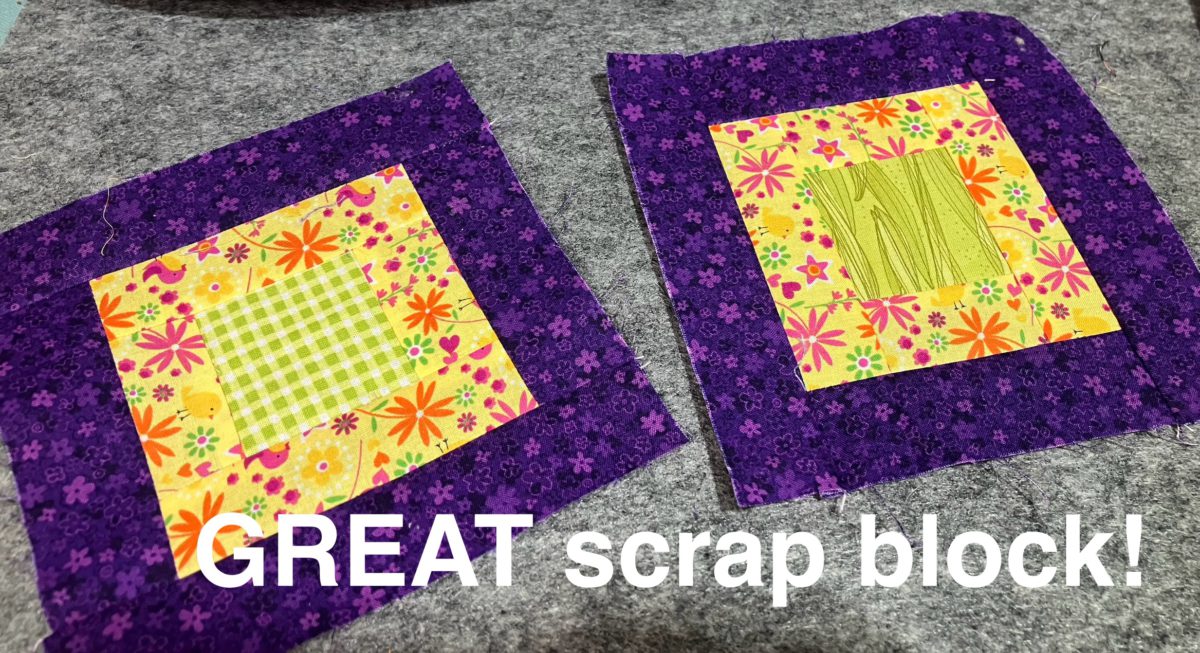
I love the boldness of this block. It is a great way to use up the smallest of the half square bonus blocks. Give it a try! You won’t be disappointed!
What blocks are you making to use those bonus half square triangles? I would love to see them! My Facebook group allows you to post pictures and share…Come on over!
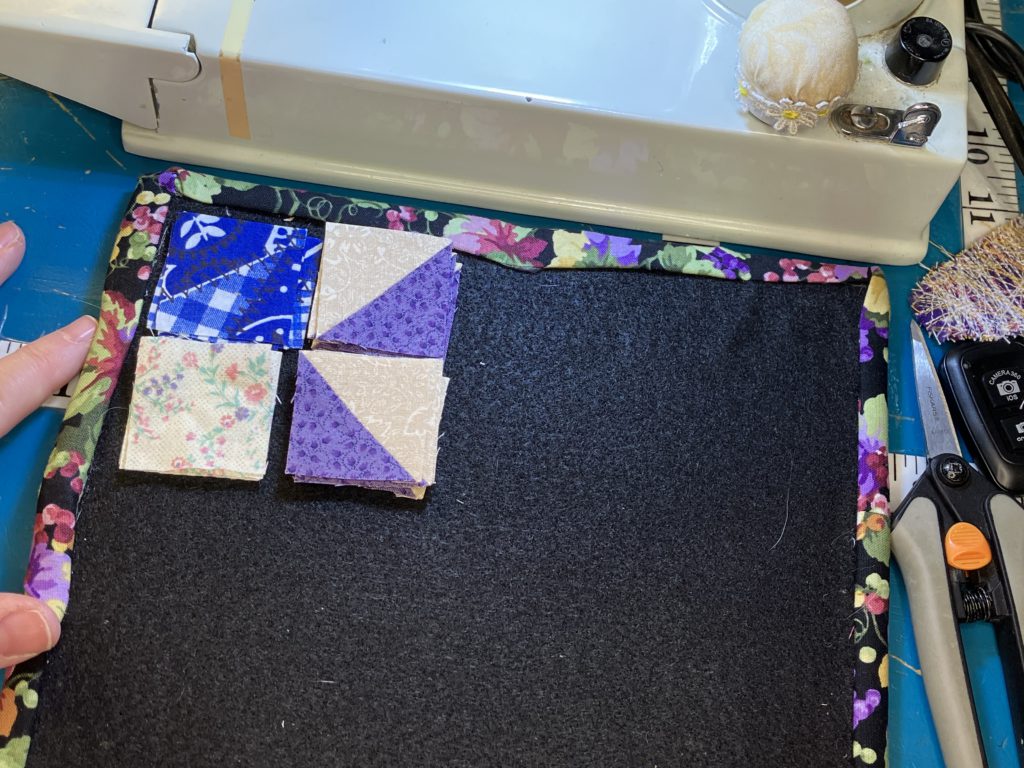
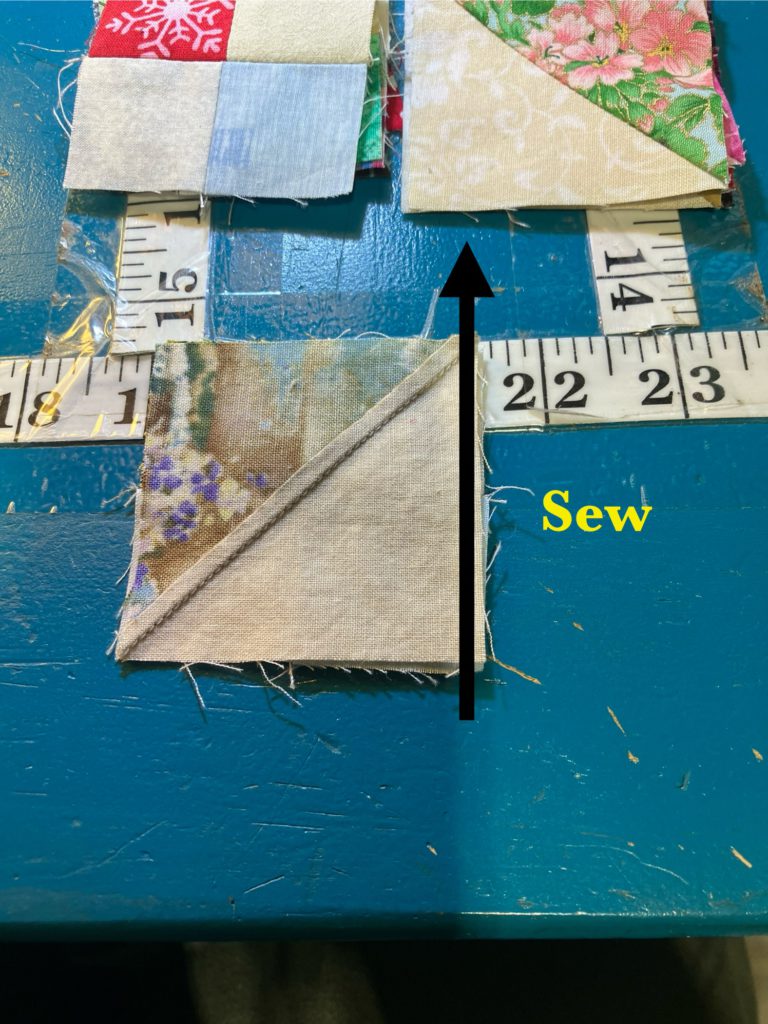
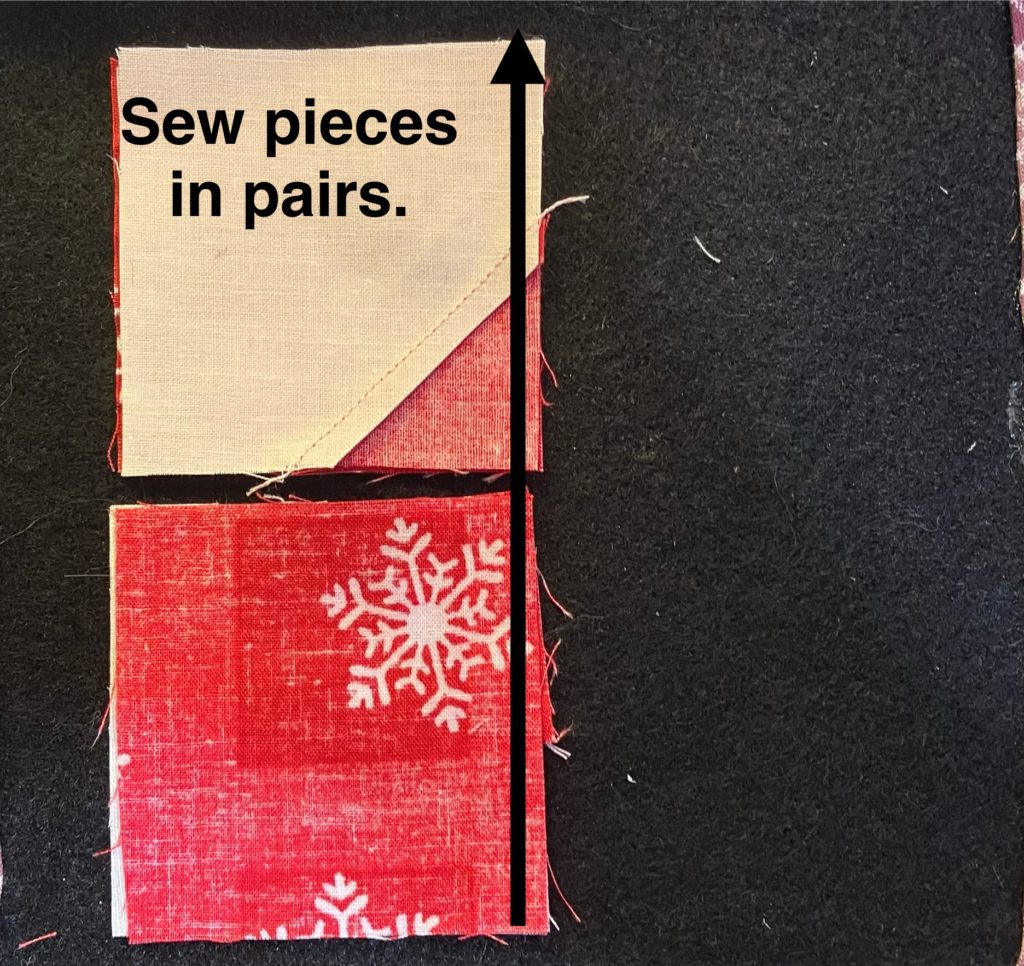
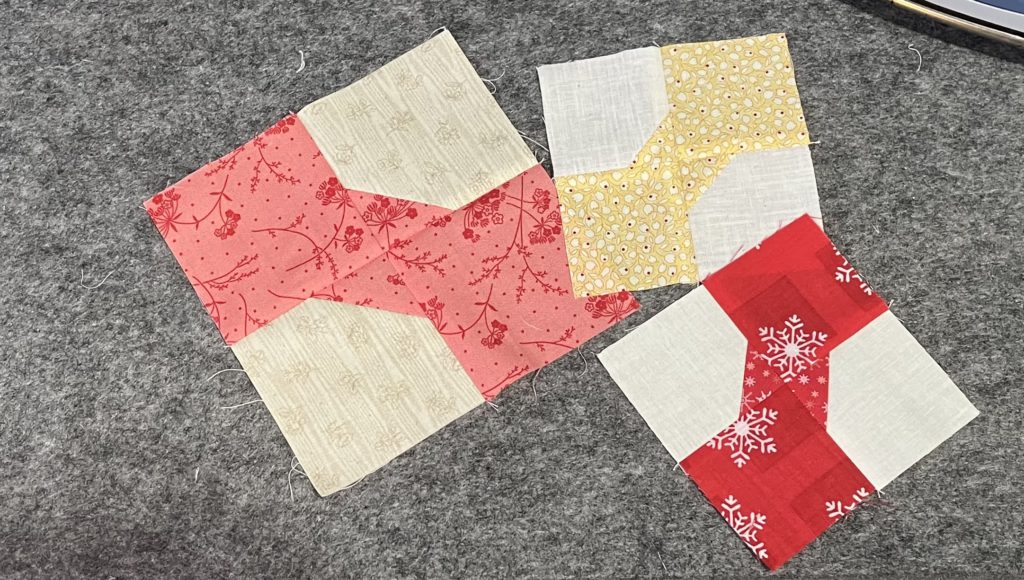
This is one of my favorite blocks to use up those bonus half square triangles. I am not sure that I am calling this block by its correct name. It is made up of 16 bonus half square triangle units. If you have a bunch of these hanging out in your sewing space, you will absolutely love this block. Grab a design board and let’s go!
I am starting my layout in the center. The half square triangle pieces must be made from a distinct light and a distinct dark piece to be effective in this block. Color is not an issue in this scrappy block…only light and dark.
In this center, light fabric points towards the center.
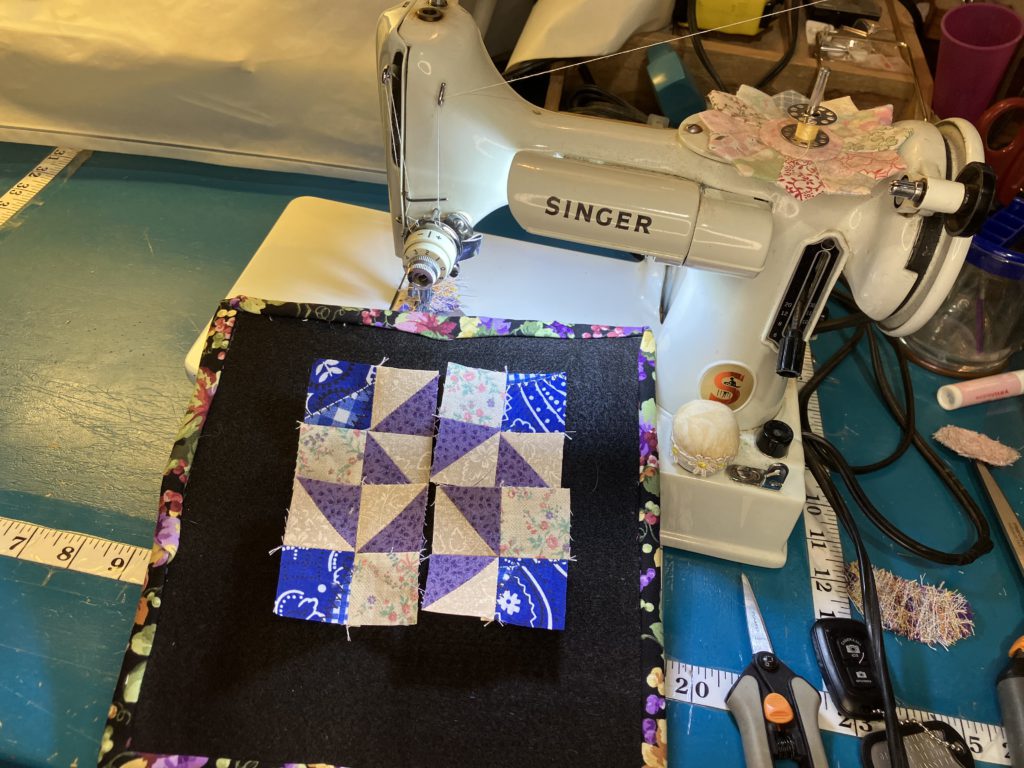
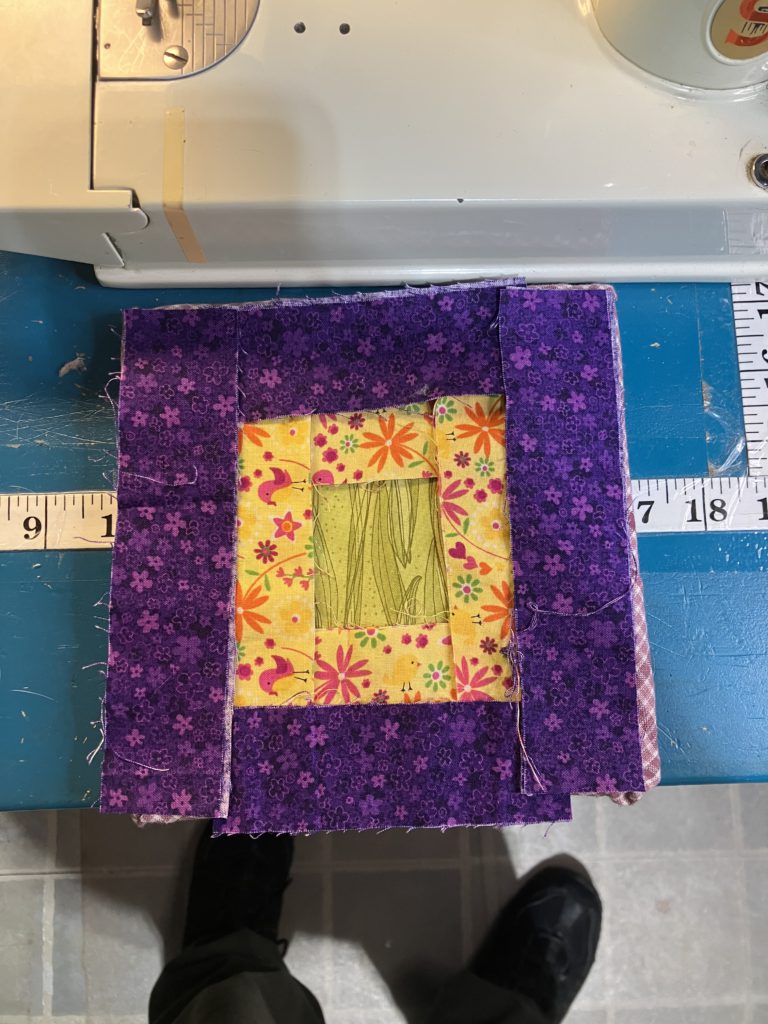
Next add more squares to create points going left and right. The “frame” is beginning to emerge.
Add top and bottom pieces to complete the frame.
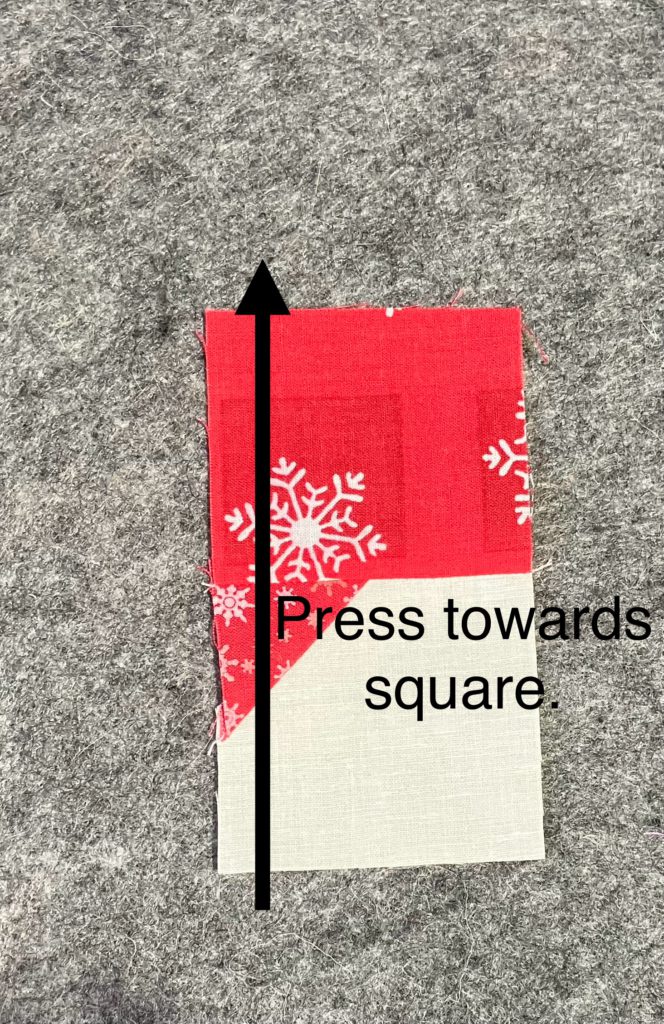
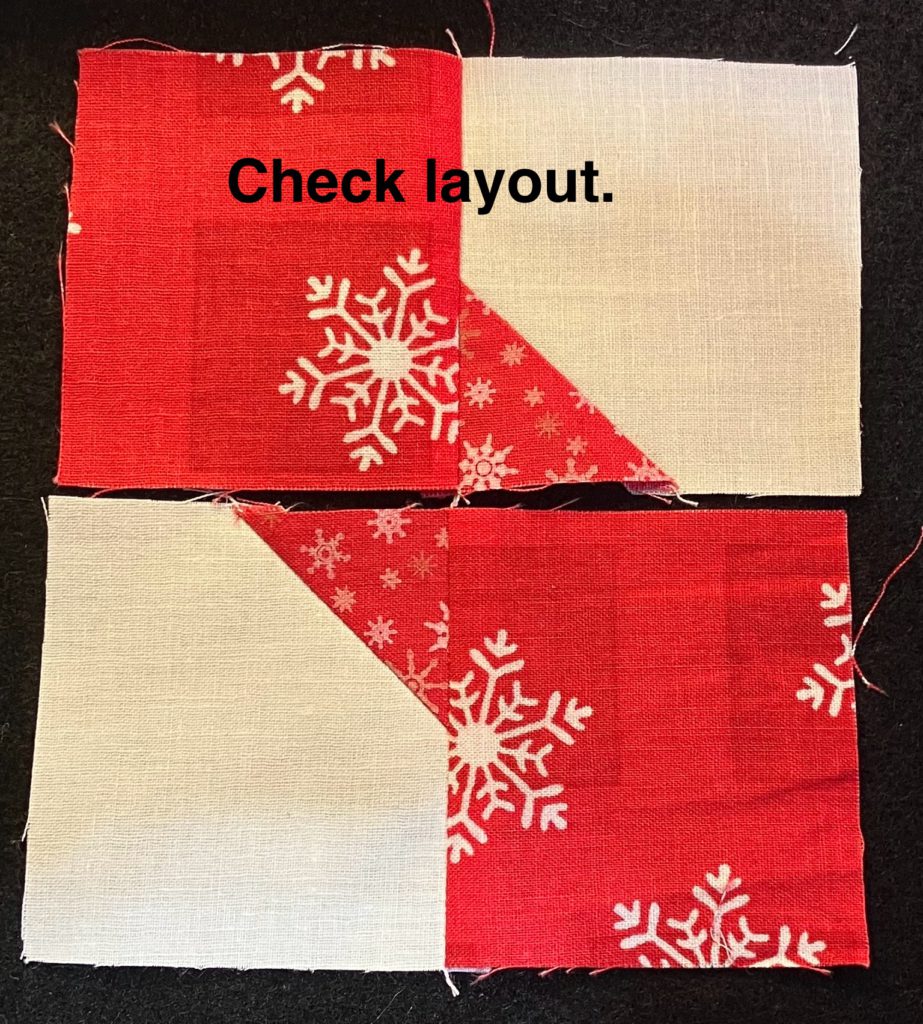
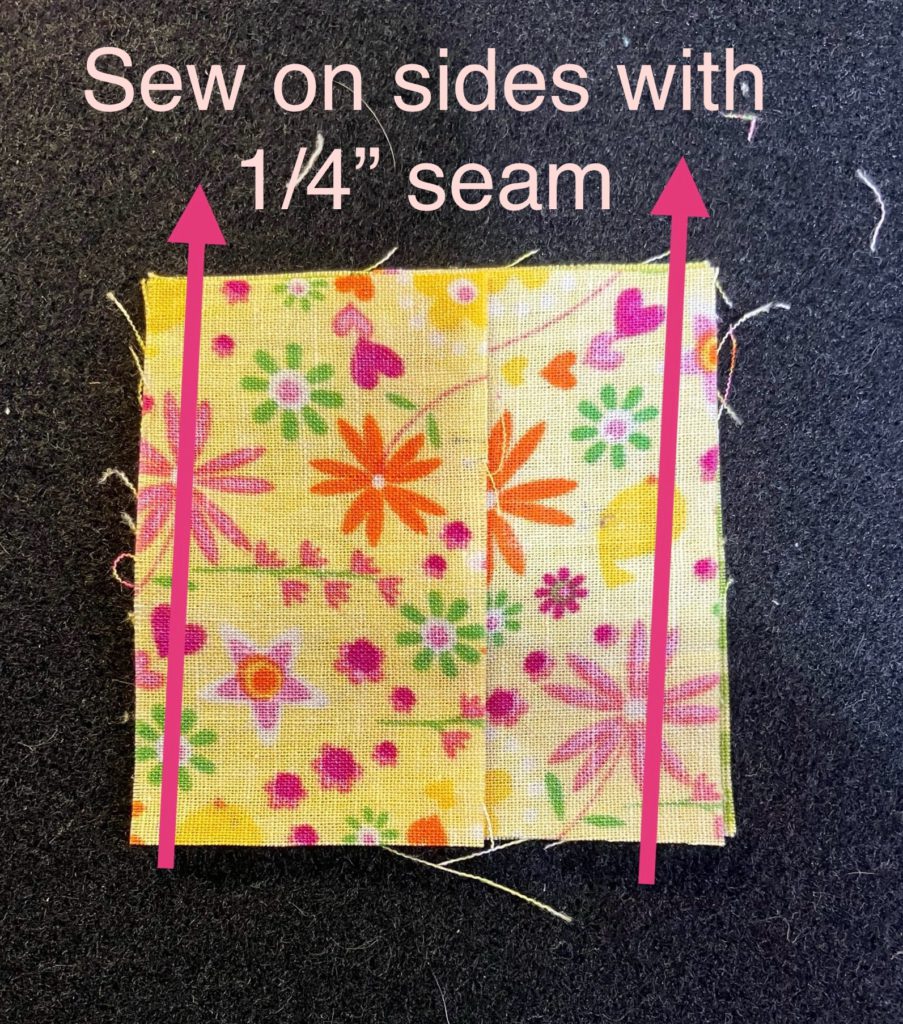
Add the outside corners to complete the block layout. In this case I used 4 matching corners, just because I could. Scrappy corners would have worked just as well…or better! Sew pieces together in pairs.
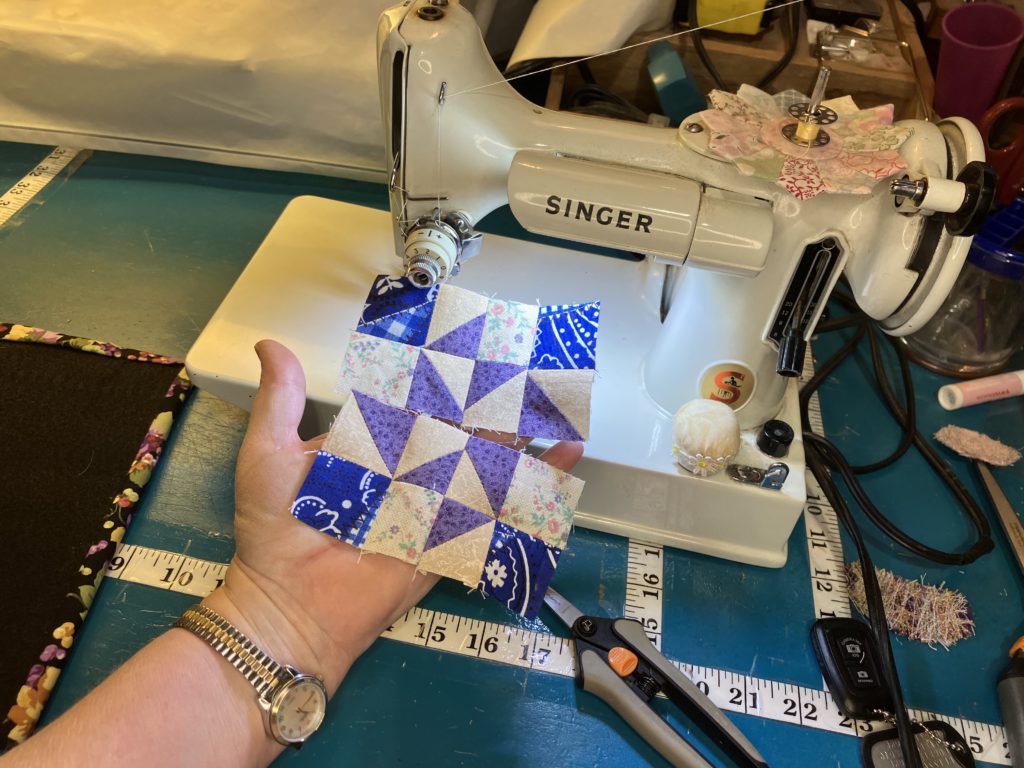
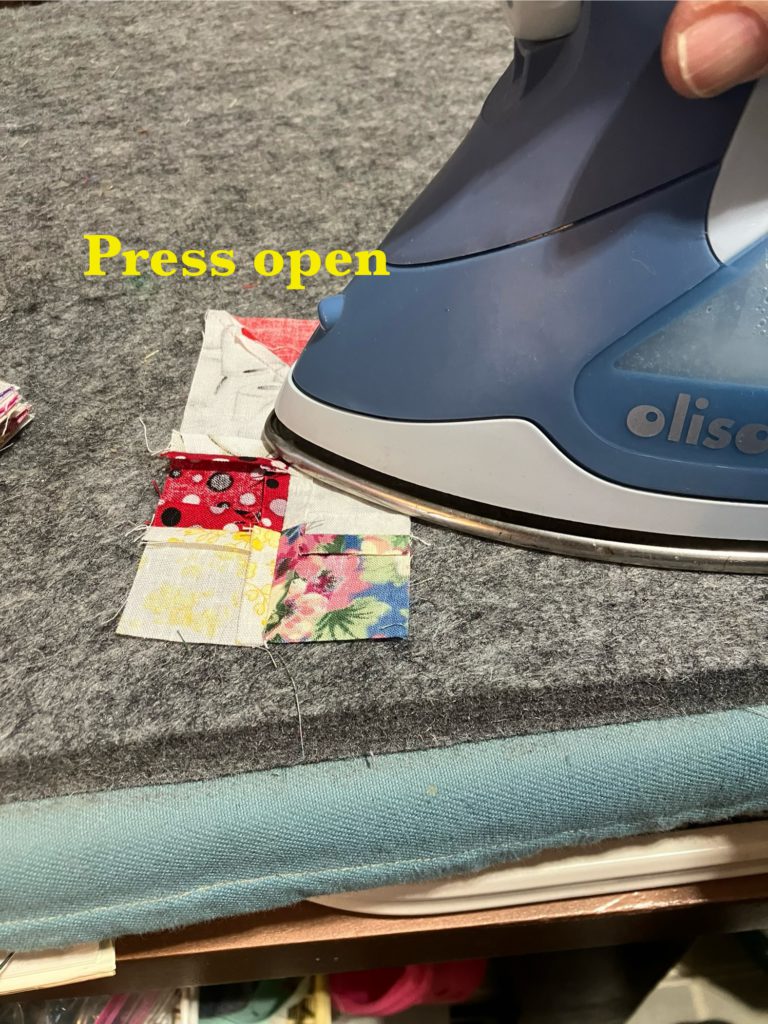
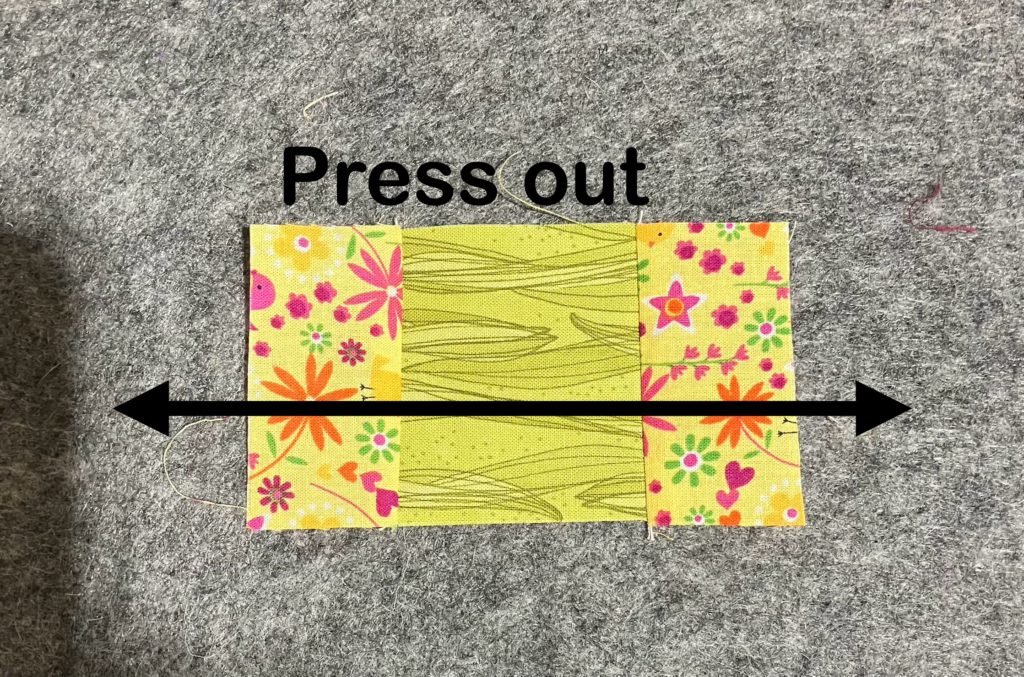
Now that you have pairs, lay your pieces out again. (I pressed seams open to reduce bulk.)
Join pair units into rows of four.
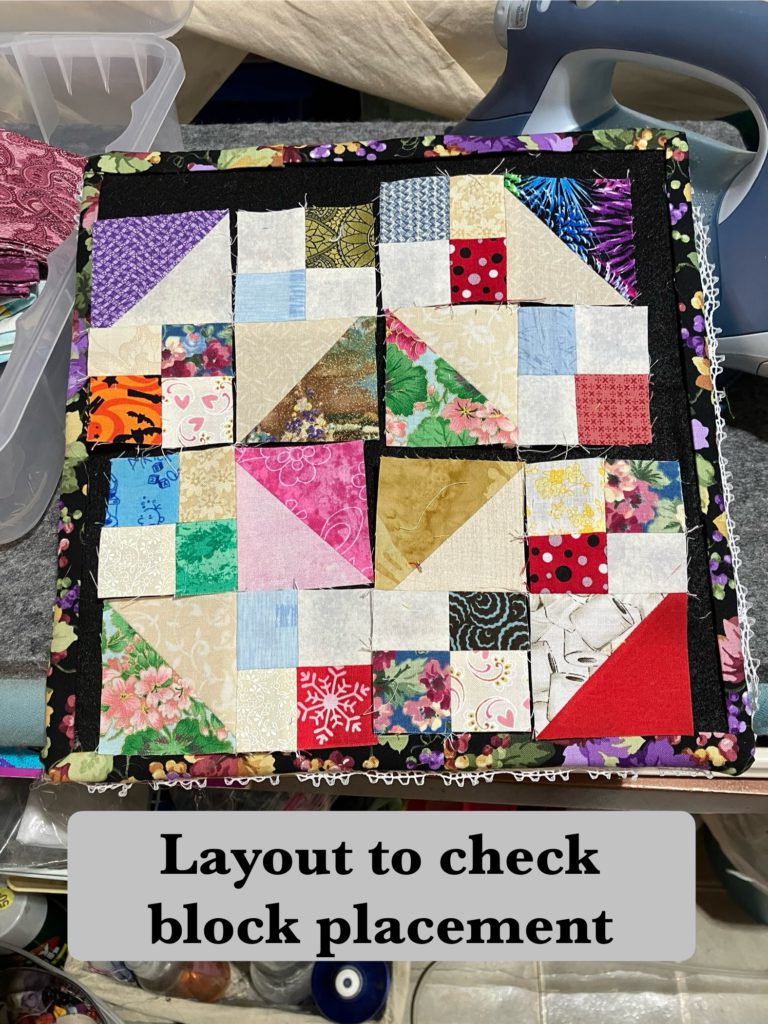
Lay your block out to check for correct placement.
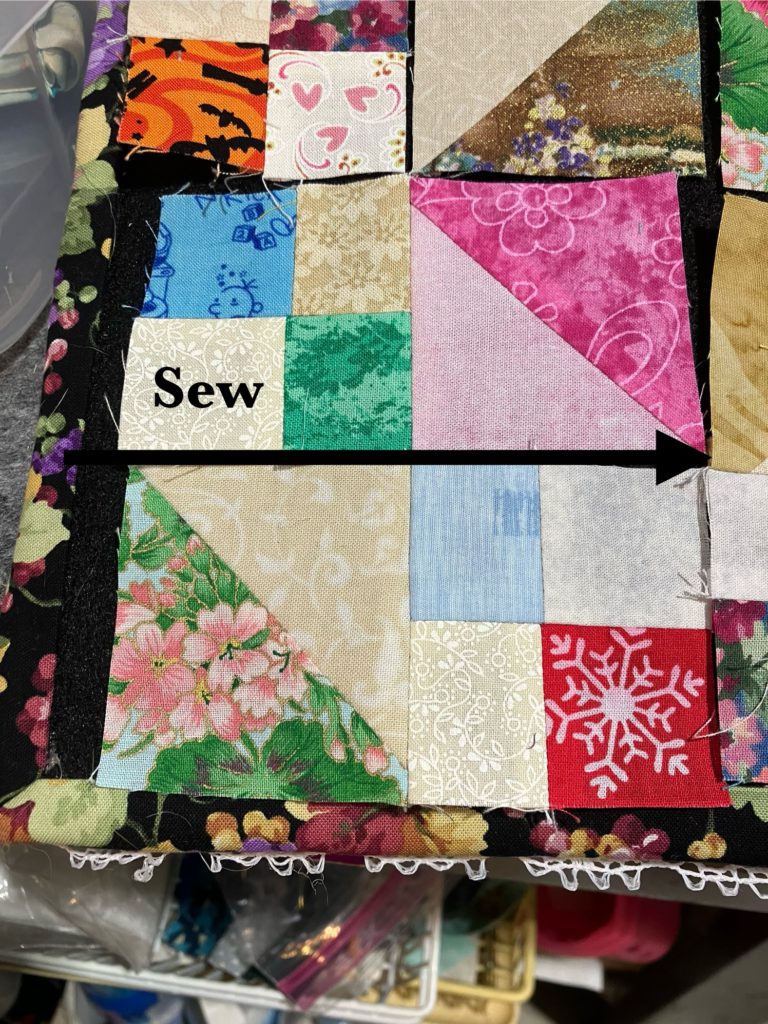
Join two rows to make larger units. Notice that the top and bottom halves are the same layout turned around.
Also notice that this block could be pieced in quadrants. This four patch unit makes up the entire block.
Join your larger units together to complete the block. Ta-done!
The jewel box block that we did a while ago also has the same “movement” as the frame in the economy block.
Here is the original version of this block from October in my YouTube series on Scrappy Blocks that use bonus half square triangle pieces. See the video here.
I hope that the cutting charts for this block are not confusing. They are presented in 2 charts…one for just using bonus blocks and the other for construction of half square triangles.
I hope you are enjoying this Build a Block series! Enjoy!
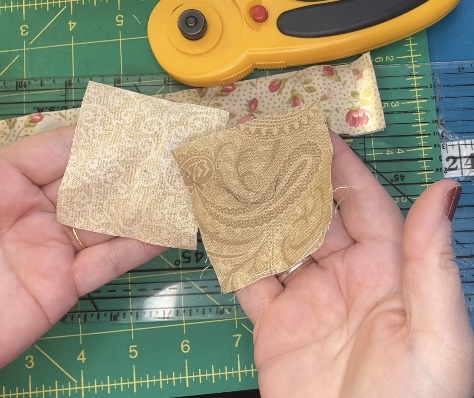
This is a great block to use up some of those bonus half square triangles. This block measures 6 1/2 inches for the purposes of this post. See the video presentation here.
I got the idea for this block from this book. I think I changed the color placement by the time I was finished…and that probably changed the block and its name! Fundamentally, it is the same block in the end.
A cutting chart for the block and other sizes is at the end of this post.
To make a 6 1/2 inch block, you will need the following pieces:
Note that the eight 1 1/2 inch half square triangles are bonus blocks from other projects. I have an abundance of these on hand…time to use them up. You could easily use the 2 at a time triangle method or whatever method you prefer. You could even use the four at a time flying geese method.
Here is my initial layout of the block:
I chose four 2 1/2″ squares for the corners from the scrap bin.
I found this great 2 1/2″ strip in that box for the rectangles.
I couldn’t decide which block to use for the center…what to do?
When I went to the cutting table to cut that nice tan background fabric, I found this strip right on top of my pile of scraps! Fantastic! Why didn’t I think about using a 1 1/2″ strip to cut?
I cut the strip into four 2 1/2″ pieces for the background…better.
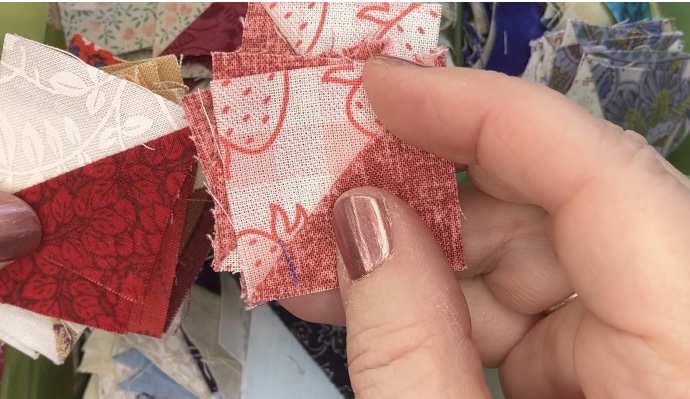
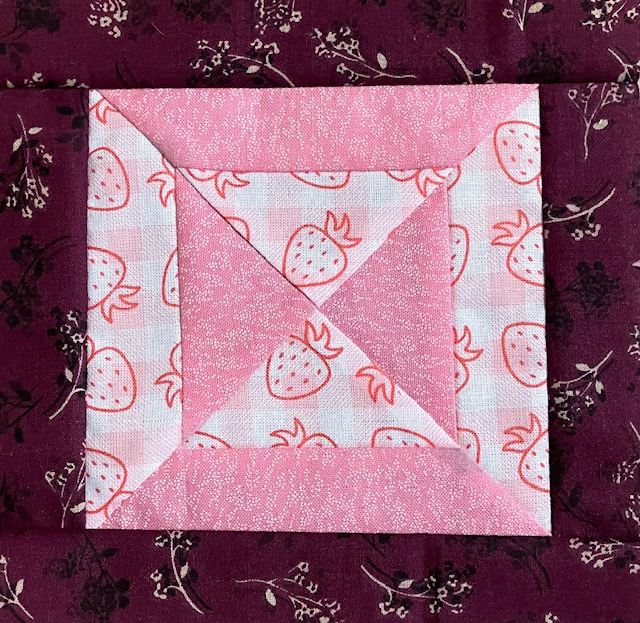
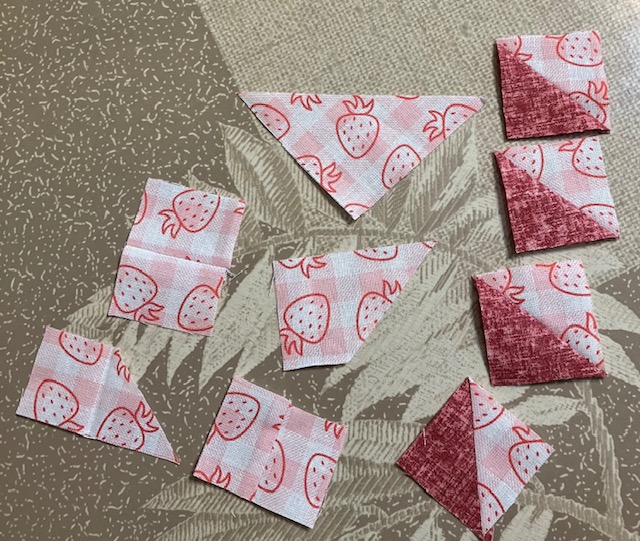
I was looking for four of one kind of half square triangle bonus block and four of another kind. I was looking for something with pink or red as dark colors in both. I was trying to follow the picture pattern. The strawberries are cute.
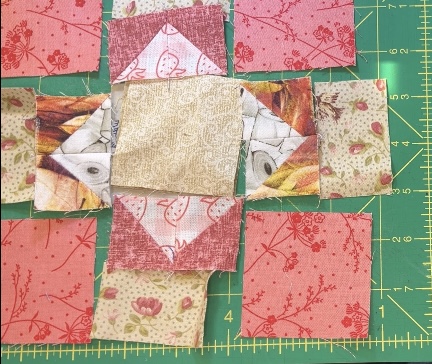
Here is what I initially came up with for the flying geese:
That looked so busy and disjointed to me. I keep looking at the box of squares sitting there beside the sewing machine. I decided to try these bonus blocks.
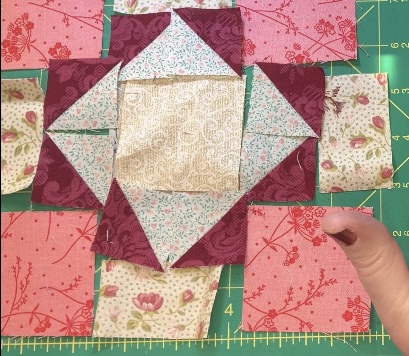
Much better for me! (The first one was okay, too, but I like this one just a little better…) Remember, make the block that you love! Now to choose the center!
Light swirl fabric with a touch of glitter is nice.
Slightly darker paisley looks good, too…a nice contrast…brings out the birds in the background a little.
Nice detail across the middle of this block, but the color isn’t quite right…and it looks flat compared to the first two choices.
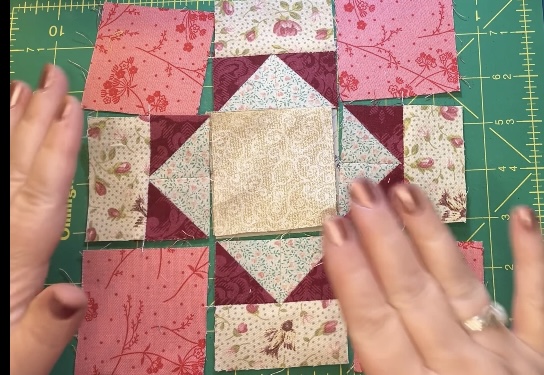
Here was my final decision in my finished block. (I probably should have pressed it so it was flat for its picture. It is straight, square, and true. I promise!)
I couldn’t help myself. I just had to make a 12 1/2″ block.
I have lots of these green and tan half square bonus blocks…lots.
Eight of them didn’t even put a dent in the pile!
I chose four corners and a center. I will use that 2 1/2″ strip now…ha ha!
This larger block went together even quicker than the smaller one.
Ta-dah! Ta-done! The measurement for the pieces is listed in the chart below. I think a 4 x 5 block quilt made from 12 1/2″ blocks would be quick and easy! There would also be a nice secondary four patch design where the blocks meet in the corners if you didn’t use sashing.
Here are both of the blocks that I made today. There is also a 9 1/2″ version in the chart below.
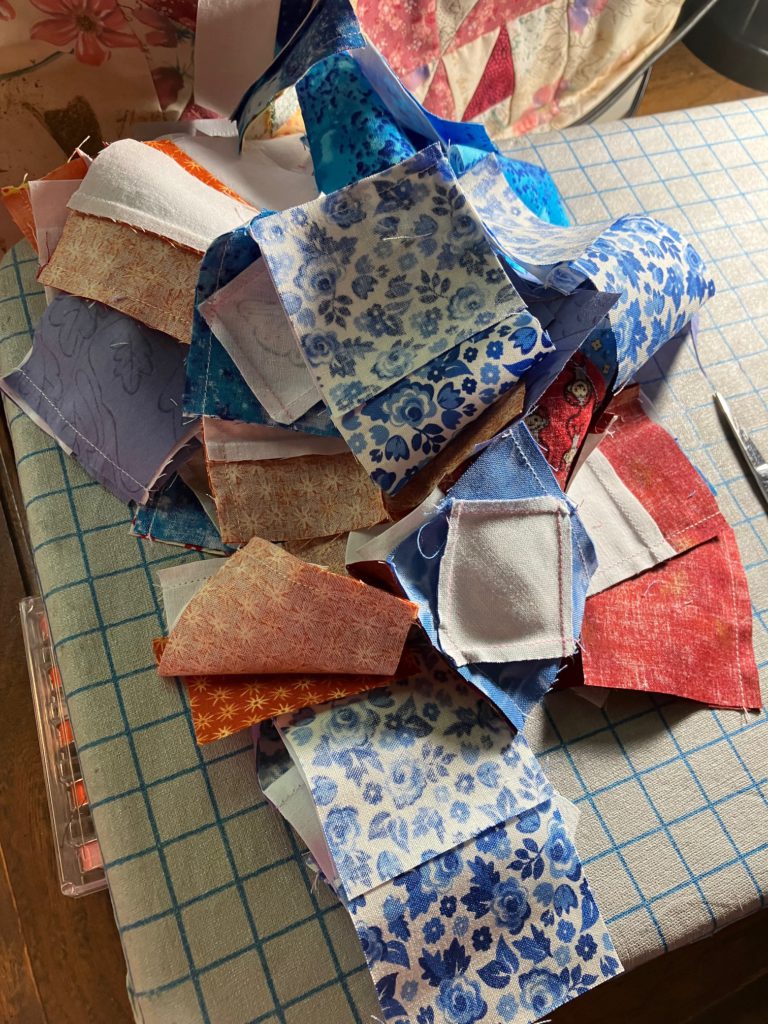
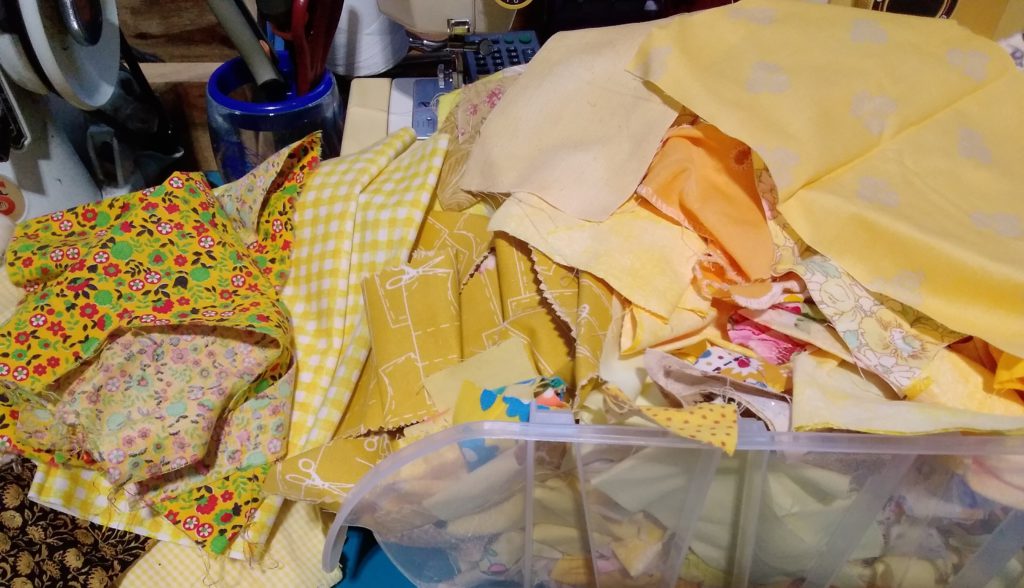
I hope you are enjoying this series on scrappy blocks. The blocks I have chosen for the next couple of months focus on using up those bonus half square triangle blocks. Time for me to go trim up some more of those!
What scrap blocks are you making? Please feel free to share your thoughts and pictures with me here or at my gmail account.
This book is my muse. It only offers templates to be cut. Thank you, but not today! For the video and below, I list the pieces needed for the 6 1/2″ block.
In the video, I take time to play in my fabric scrap bins. I created a blue version and a green version of this block. The bonus half square triangle blocks have been trimmed to the appropriate size. The half square triangles were pressed to the dark fabric before they were trimmed.
I do like the diagonal movement in this block. This would make a fantastic quilt all by itself. Hmmm!
I start by speed piecing those little four patches…zoom, zoom…and away we go sew!
I press the four patches open to reduce bulk. If I were making one of the larger versions of this block, I would probably press to one side or the other. Life is full of decisions…don’t spend too much time on this one.
At this point, some people like to “web sew” the block together. I seem to get tangled and frustrated with the joined threads, so I repeatedly lay the block out on a design board so I don’t make mistakes. (Unfortunately, I still make mistakes. I have become very proficient with a seam ripper!)
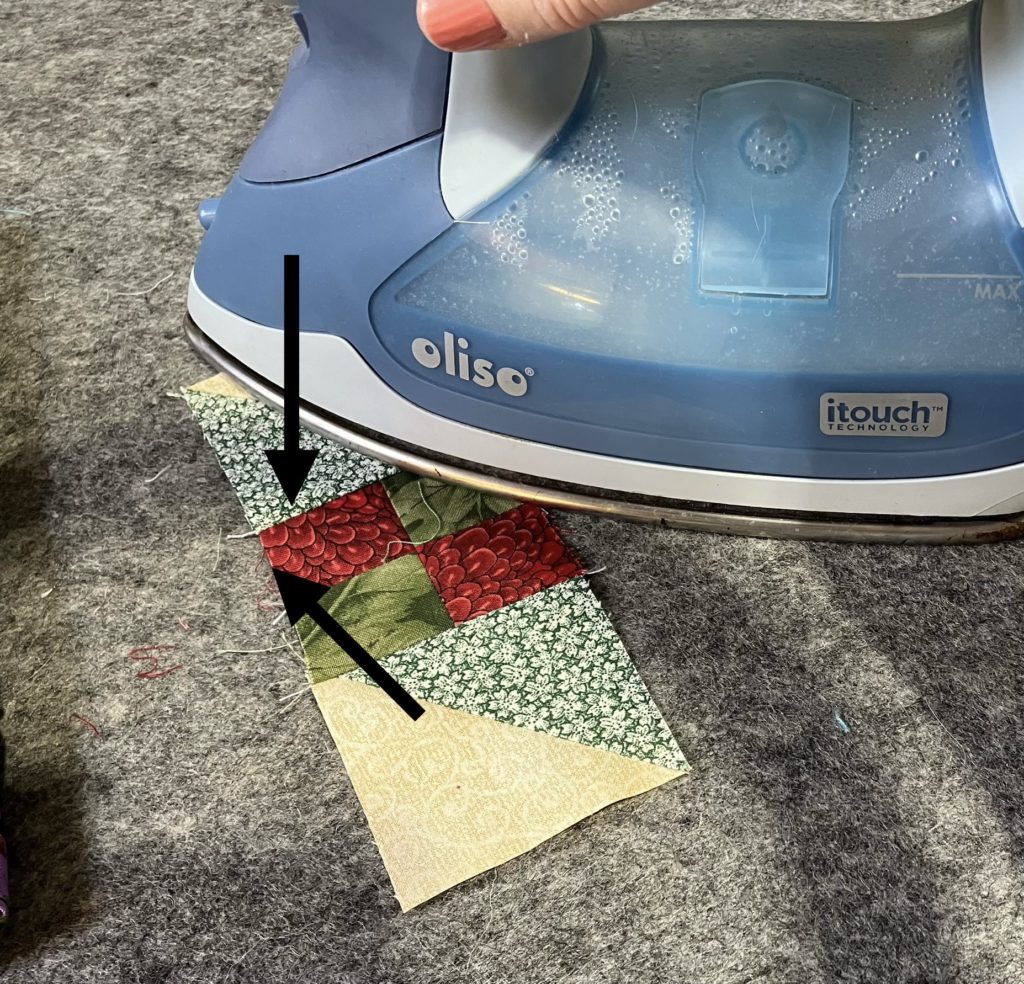
I press towards the four patches and plain squares. Pressing open is an option, too. See my illustrations below. (The arrows would not cooperate when I was editing the next picture…and I had had enough fun that day!)
If you pressed towards the 4 patches and/or the solid blocks, your seams will nest nicely as you finish assembling this block. Almost completed…just assemble the rows.
Ta-dah! Ta-done! It was that easy!
Here’s another possible layout. There are many ways you could layout a set of these blocks to make a beautiful quilt.
Here is the cutting chart for additional sizes of this block. If I were making an entire quilt, I would probably go for the 12 1/2″ size for starters. I would make the second version with 6 1/2″ blocks because that is the size I am fascinated with at the moment. Please share any quilts you have using this block. I love to see your work, too!
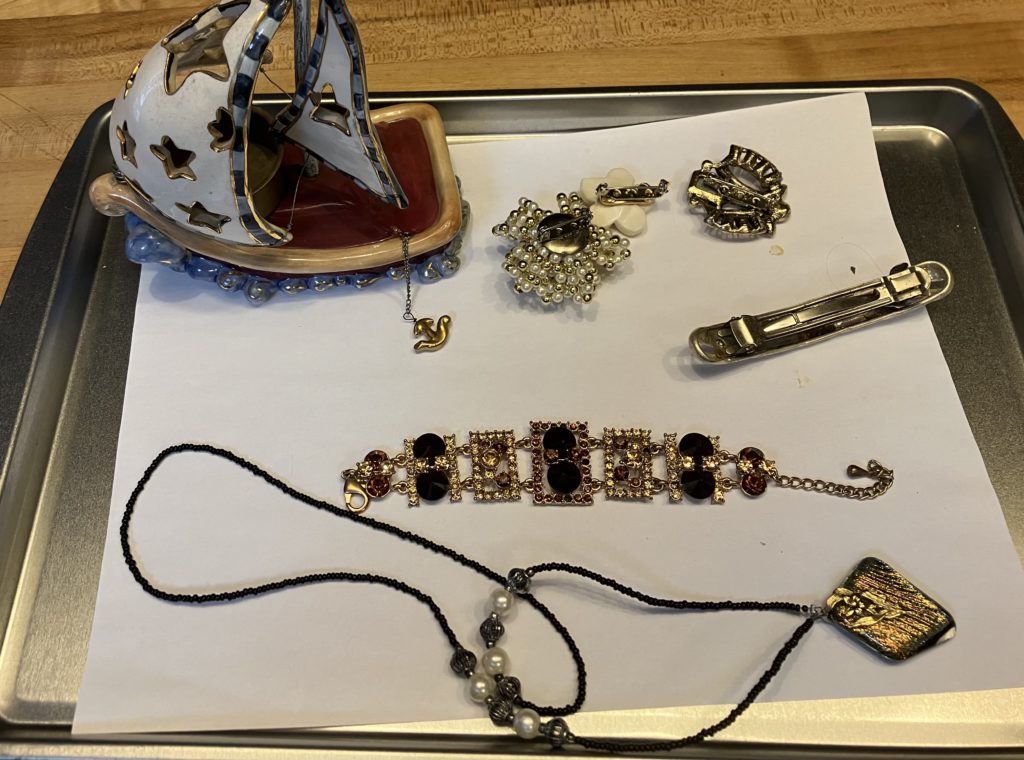
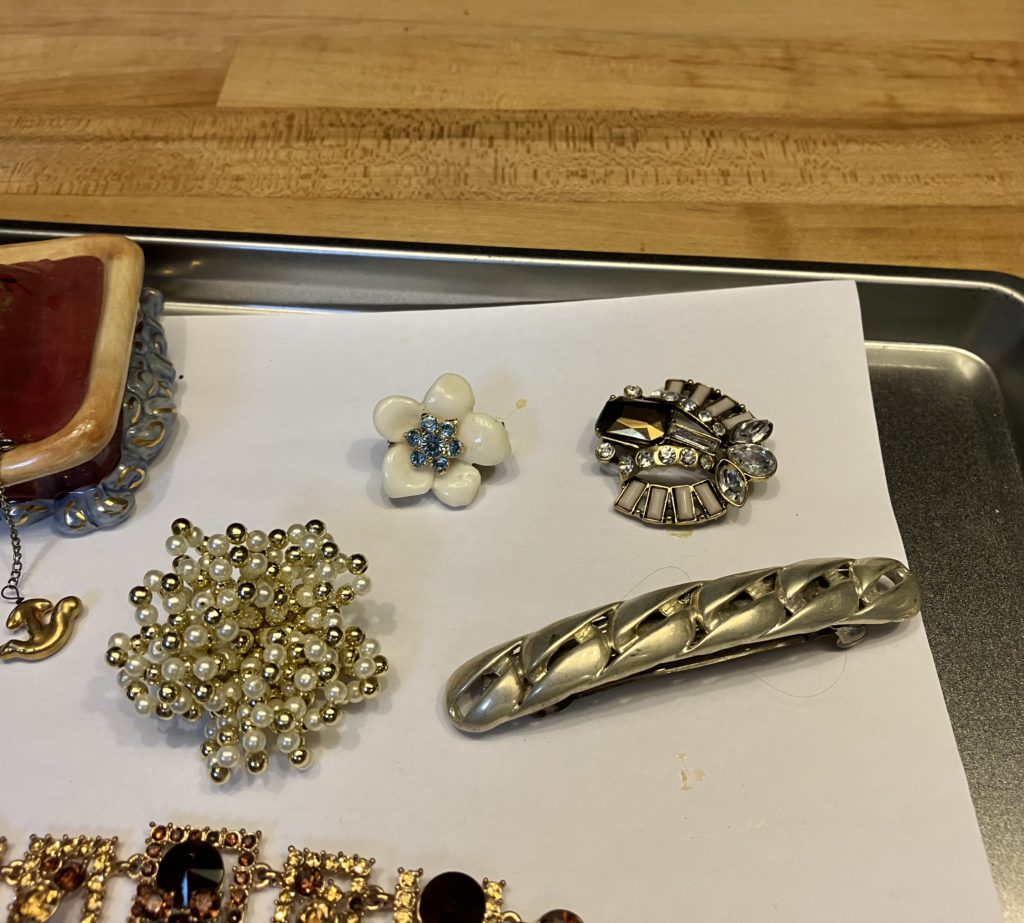
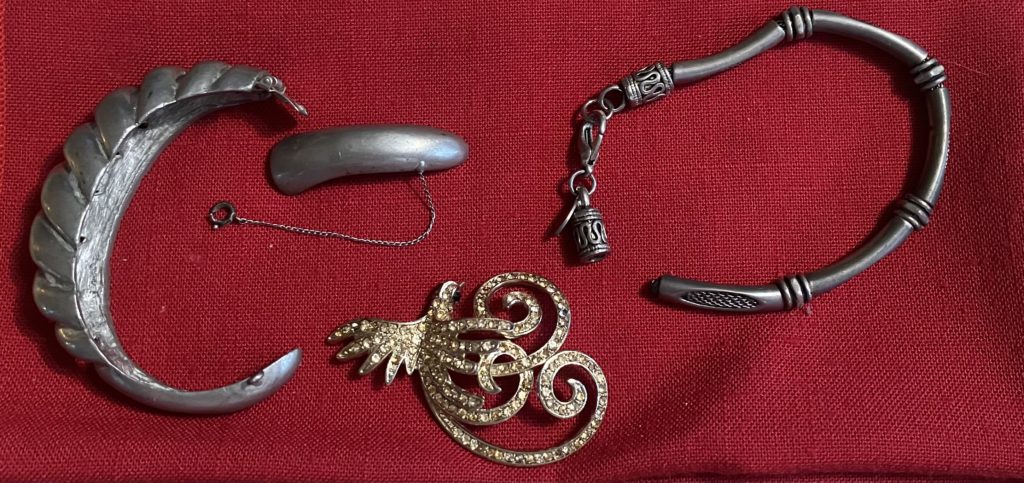
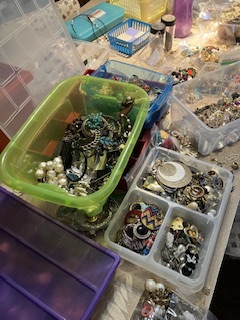
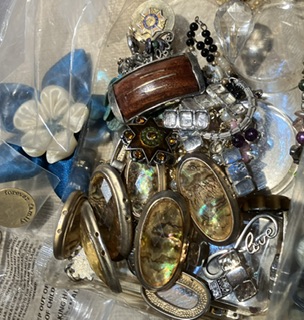
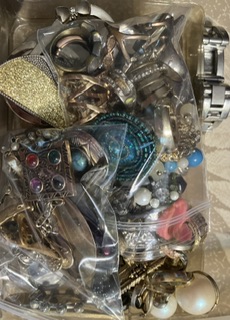
I took a short break today from quilting to fix some jewelry, etc. I played with glue…not the hot kind…
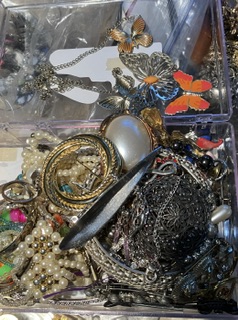
Some of this is very blingy. I think that bracelet in the middle is Sarah Coventry. The cat will be so impressed when I am wearing that to work in my sewing room.
I used to wear pins all the time. Maybe I need to impress the cat with those, too. That one looks like a scarab beetle…creepy and cool simultaneously.
The barette is sterling silver. It is incredibly heavy. The barette part had come off the decorative piece. I think I finally found the correct glue. Hot glue was not it.
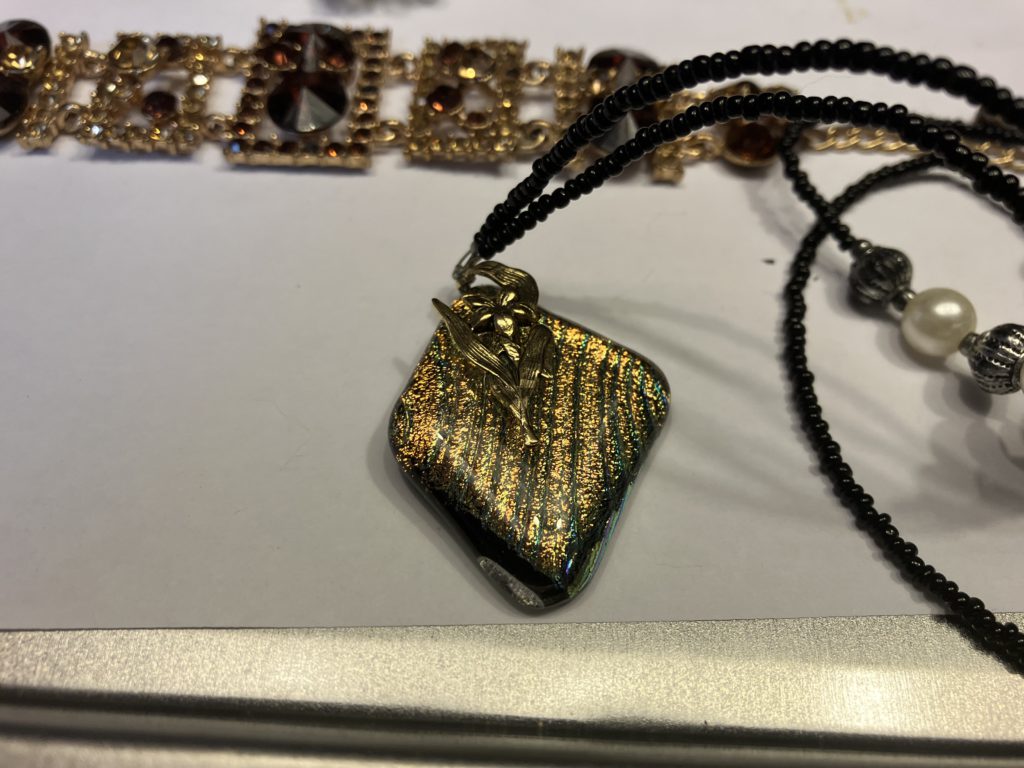
I used to work with a lady that would create and kiln her own glass pendant pieces. I added a charm and a beaded “chain” to this one so I could wear it. I love the foil in the middle of this one!
I hope you have enjoyed this week’s build a block presentation…and my other ramblings. What are you working on? We are quilters…and sew so much more!
This is an easy, scrappy block, especially if you sort your scraps by certain sizes like I do…It just makes it faster to choose the bits and pieces to sew together. Here is a cutting chart for the three sizes show below:
This 12 1/2″ block is made from all 4 1/2″ and 2 1/2″ blocks…all straight line piecing! No triangles on this block!
Here is the breakdown of my choices:
This block goes together SOOOOO quickly!
Make four 4-patch units. Please note the placement of the lights and darks in the picture below. All four units are identical. Zoom! Zoom! Speed piecing is a wonderful activity!
Normally, I show you an example of a small block with the seams pressed open. Since this is a bigger block this week, I pressed towards the darker fabrics in these 4-patches.
Now it is time to plug those beautiful and simple 4-patches into the main block.
Notice that all the dark blocks are towards the center block and radiate outward. Please note the placement of the blue and the background fabrics also.
Here is the 9 1/2″ example:
Here is the 6 1/2″ example:
Ta-duh! and Ta-done! This block would have a great secondary pattern if placed together. Easy…it would be great as a kid’s or baby’s quilt, too! Let me know what you think about this block. Have you tried it? If you have, please share pictures to my e-mail. I look forward to hearing from you.
I decided to add some pictures because this was such a short, quick post.
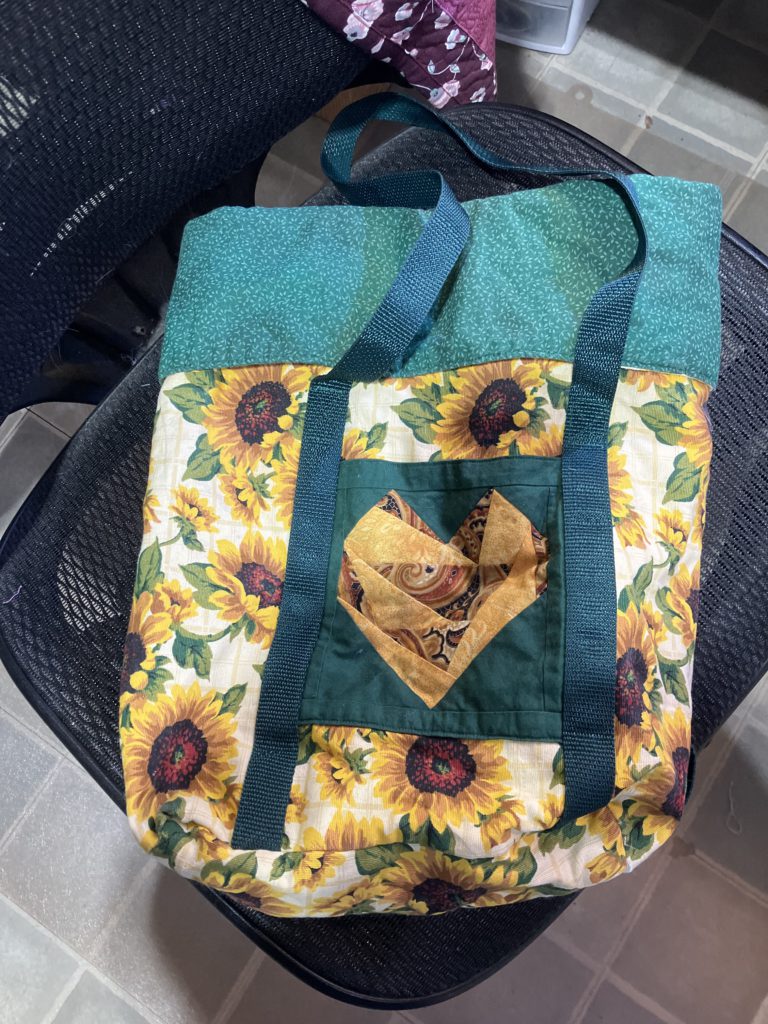
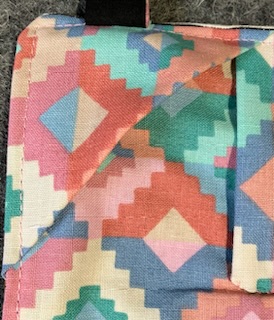
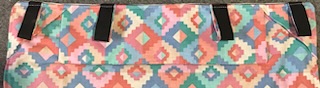
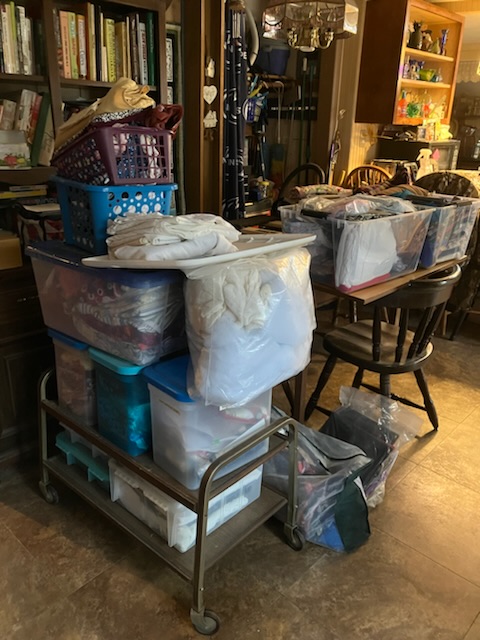
I found a stash of bags in my sewing room as I am zone organizing. I donated some. I washed the rest to repurpose.
This one was one that my friends and I made at quilt came with the Camp Frame Fireside quilters. The pocket is paper pieced and held on by the straps. It is lined. The top edge is a rolled down cuff, so the bag can actually be deeper if needed.
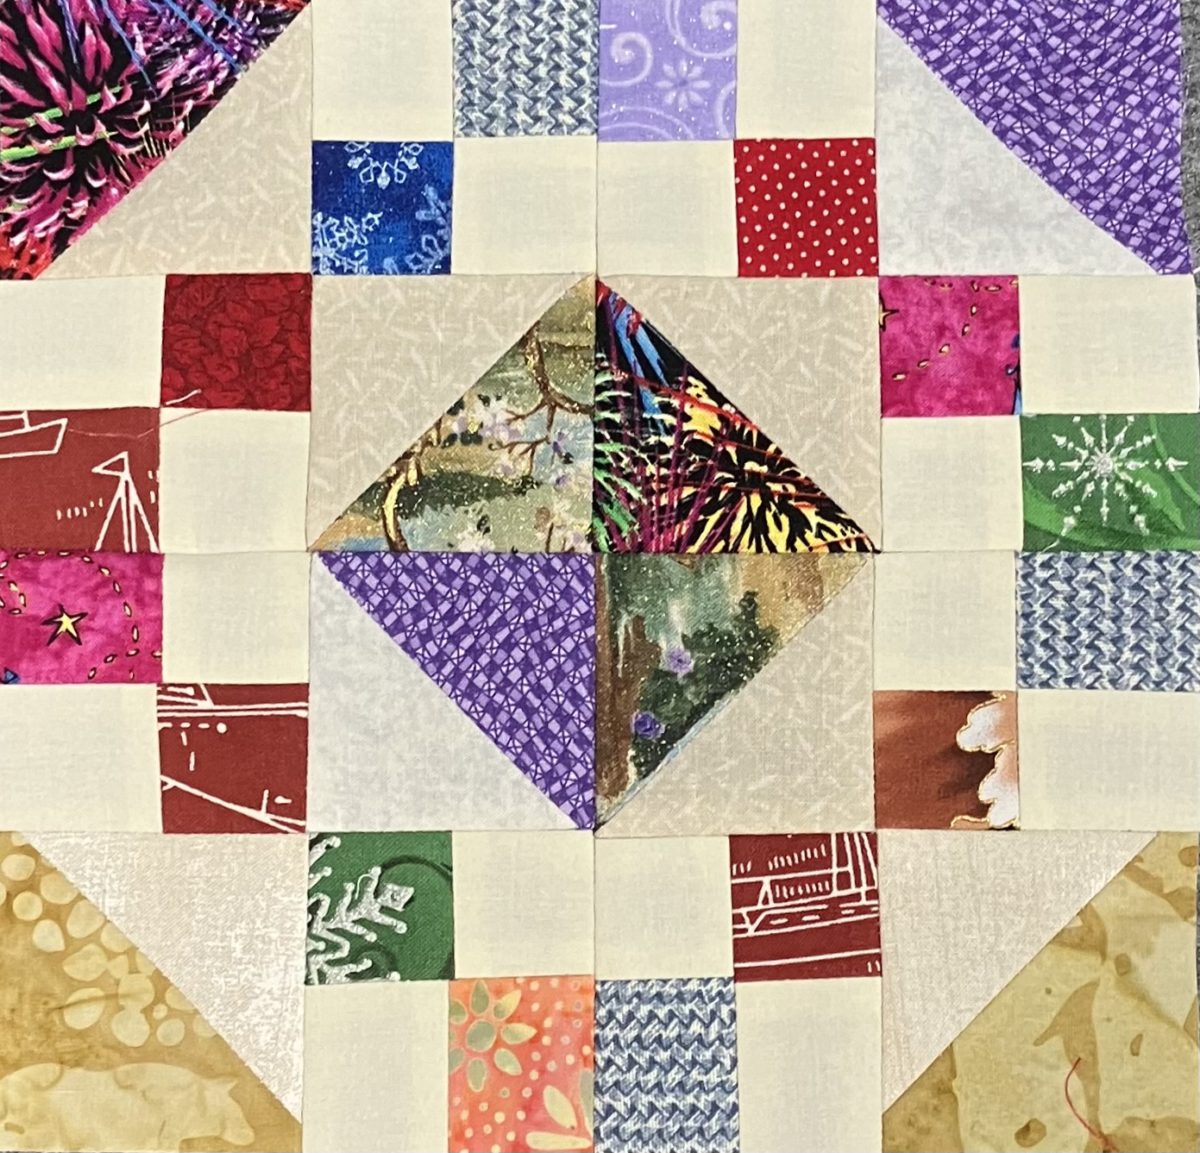
I am in love with this scrap block! After I made one, I just couldn’t stop. I still do not have these blocks out of my system. I love the contrast of the scraps in this block. When multiple blocks are assembled together, a fantastic secondary design appears. (I show four of these blocks together at the end of this post.)
If you would like to see this presentation in video form, please view it on my YouTube channel here.
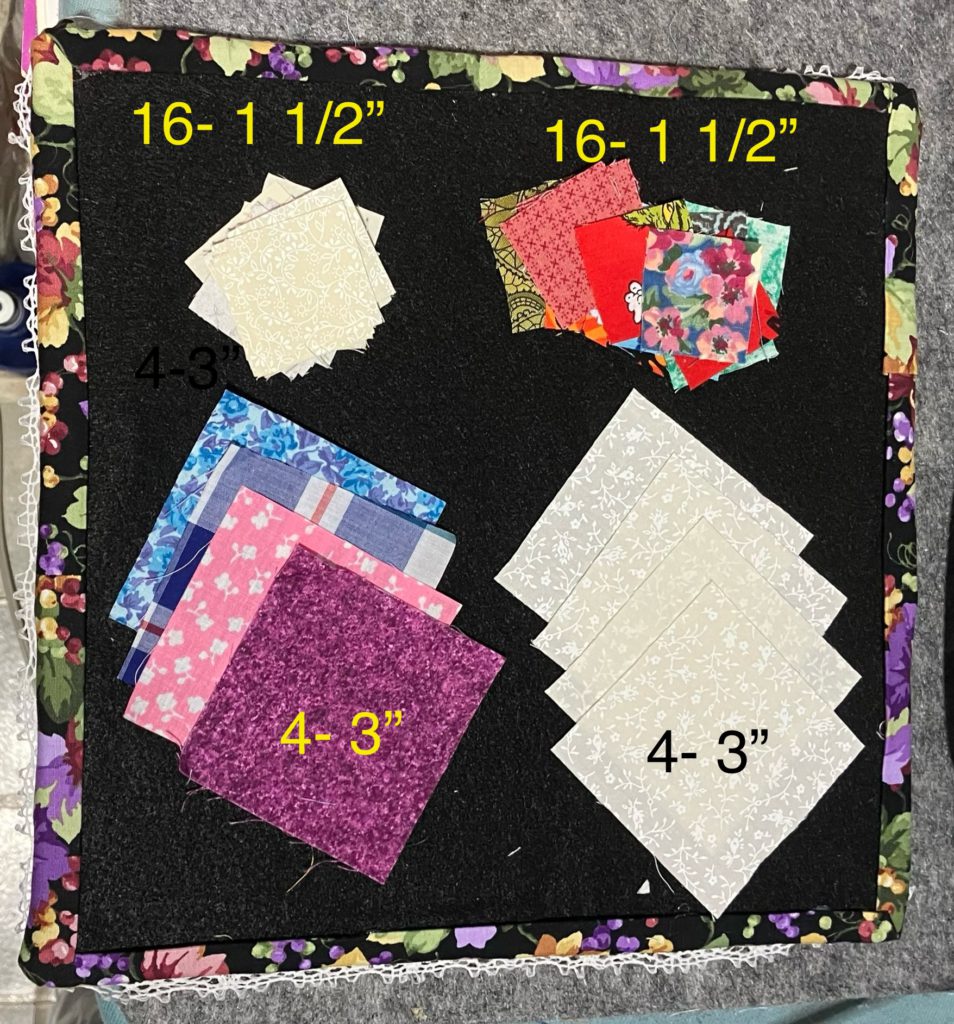
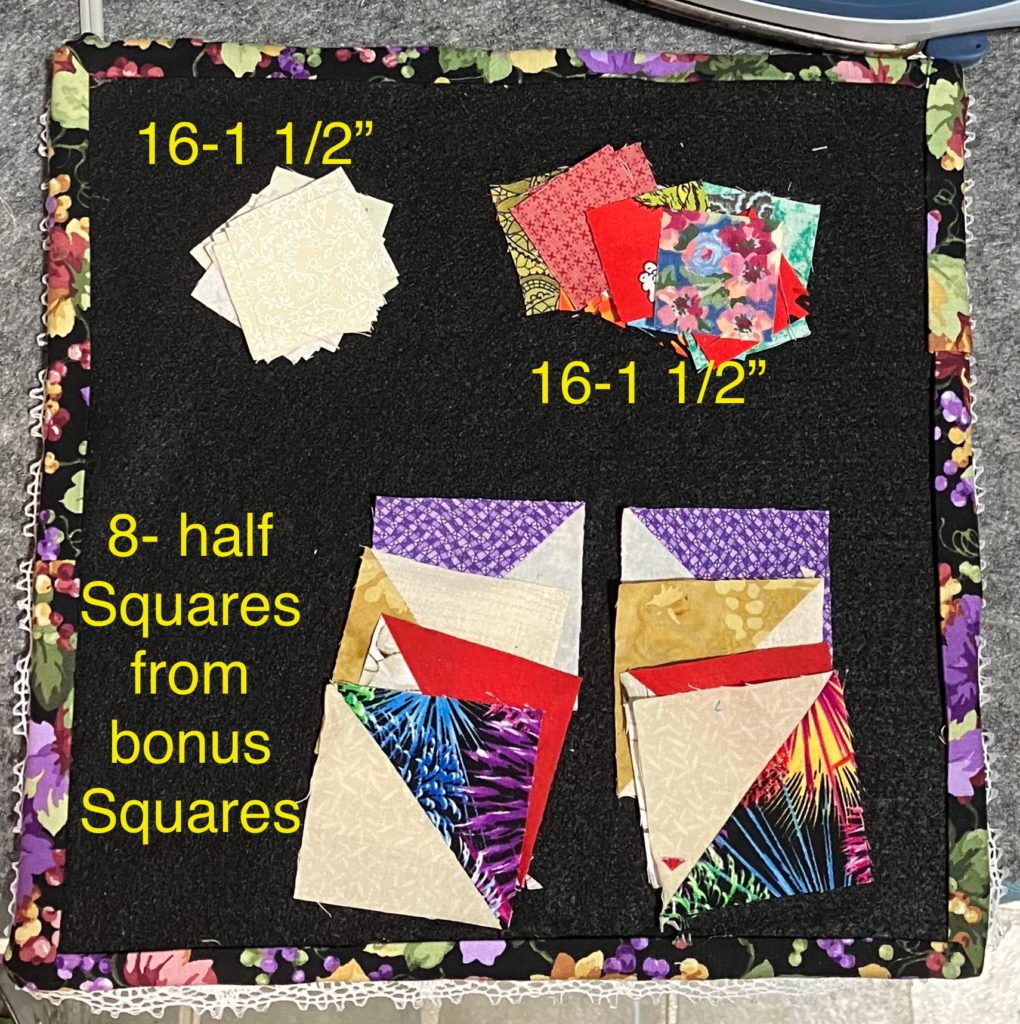
For this block, you will need: (alternate size chart is at the end!)
16- 1 1/2″ background squares
16- 1 1/2″ scrap squares
4- 3″ background squares
4- 3″ scrap squares
The pieces listed above uses the two at a time half square triangle method. That is a tutorial for another day.
OR if you have a bunch of bonus half square triangles, you can use 8 bonus half square triangle units that are 2 1/2″.
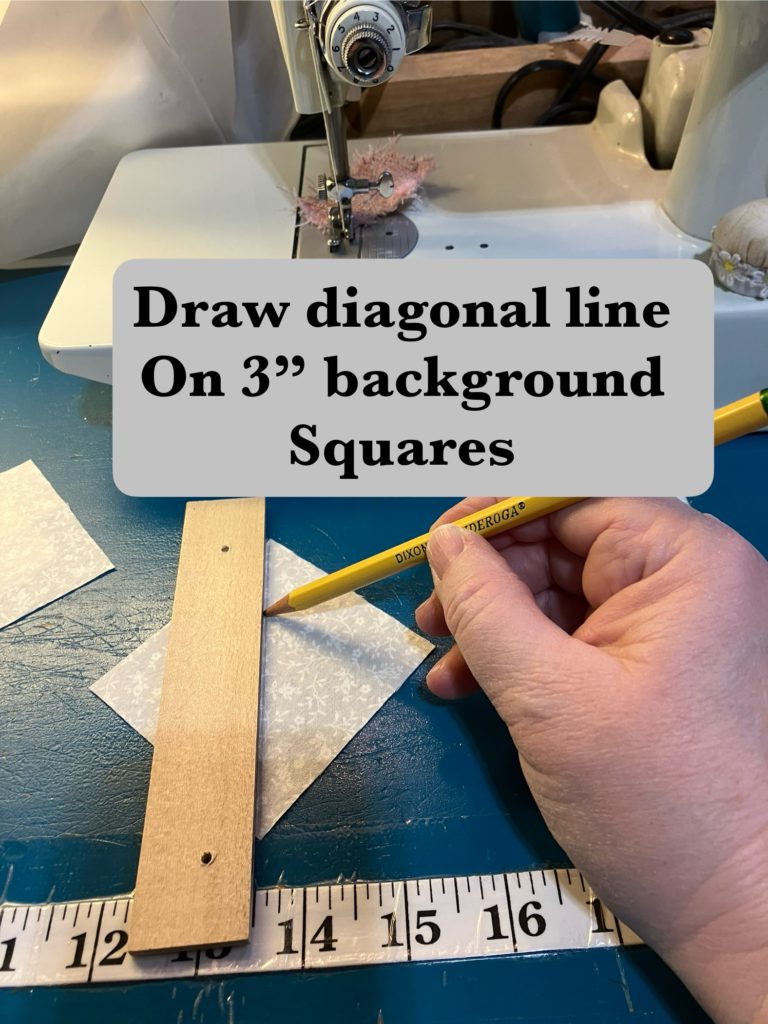
If you are using all squares, you will follow the next few steps to make your half square triangles.
More often than not, my sewing is a scant 1/4″ when I use this method. I would rather have a little extra to trim off than have a unit that is undersized.
You can use your rotary cutter and ruler for this part if you wish, but I always just cut the pieces apart quickly with my scissors.
Press to the dark fabric. If you are using this method, you will need to trim. Fabric stretches, sometimes a little…sometimes a lot…during this method. Accuracy at this step will make your life so much easier when it comes to final assembly of the block.
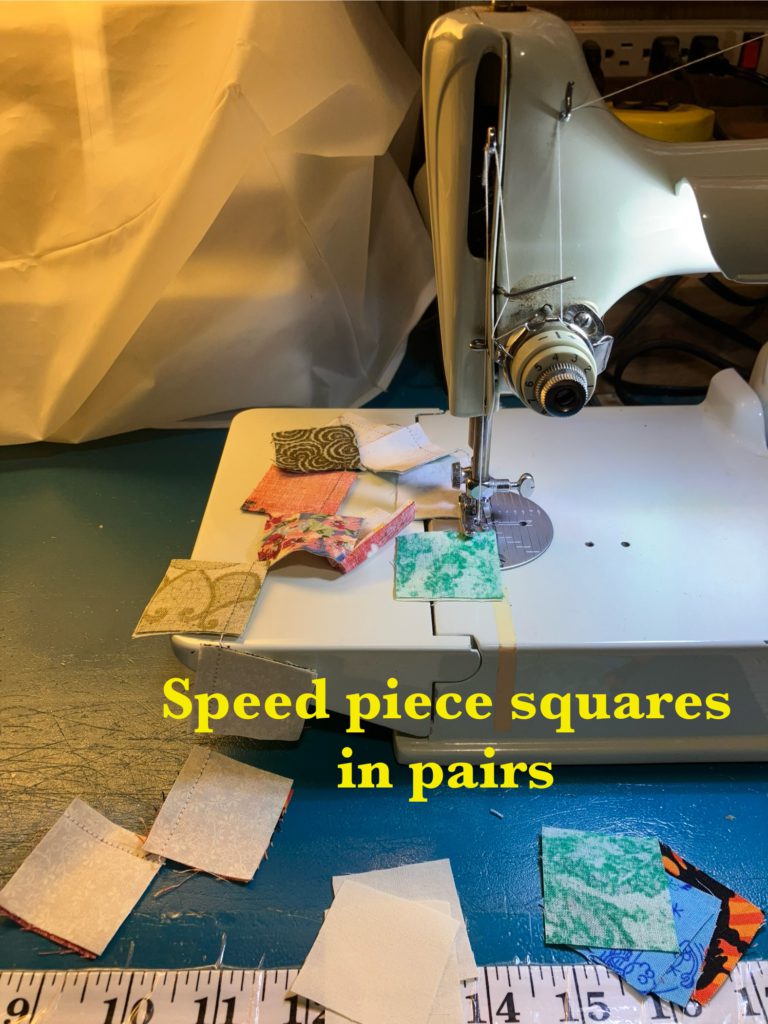
We are ready for the zoom zoom part of this block…speed piecing! Join all of the squares in pairs of 1 background to 1 scrap.
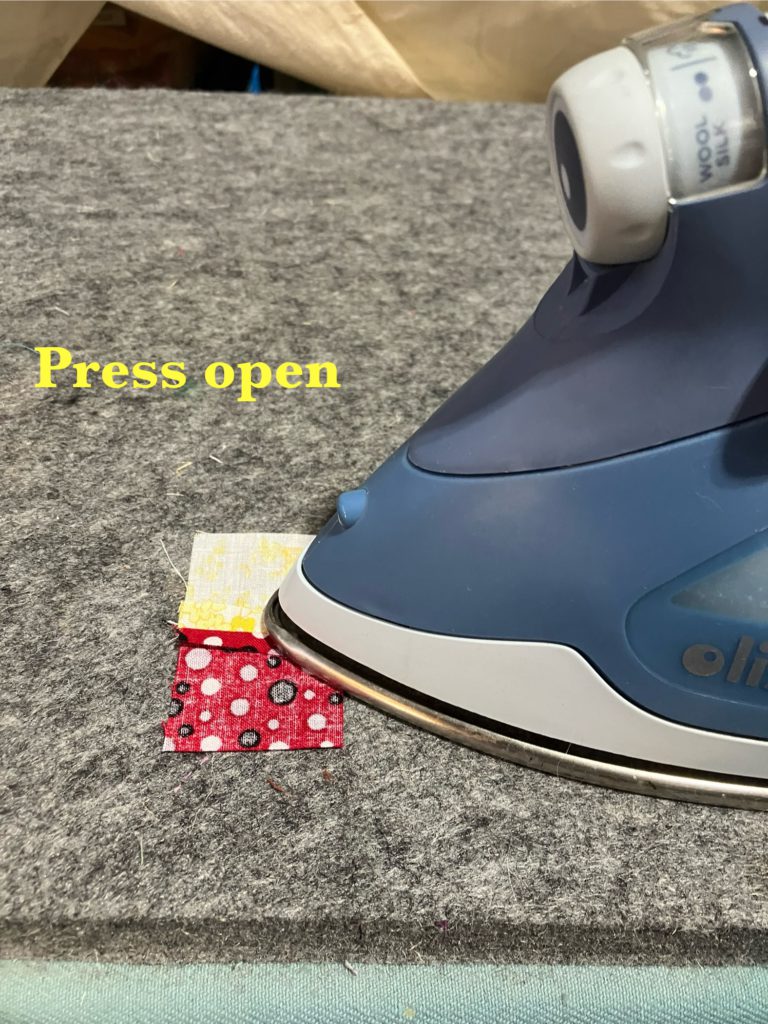
I am pressing open because I am piecing 1 1/2″ squares together. I want to reduce the bulk and chance of distortion. If I were making the largest size of block on the chart, I would probably press to the dark.
After you press all of you pieces to your heart’s desire, Match up pairs to make eight 4 patch units. If you pair them up before you start sewing, you can insure that you don’t have duplicates in any of your four patches…unless that does not bother you.
Sew pairs together.
Press to your heart’s desire.
Here is the only tricky part…just be a little careful! You are pairing up the four patches with the half square triangles in this step. Pay close attention to the orientation of the blocks when you lay them out. You can stack all of the pieces in two piles to get ready for speed piecing. All of the units are the same.
Zoom, Zoom! Flip one block right sides together and sew together with an accurate 1/4″ seam. Be as careful as you can to keep seams flat. (If one gets flipped underneath, it is not the end of the world!)
Press to your heart’s desire.
Layout your pieces. You will notice that some of the blocks will be turned horizontally and some will be turned vertically. It is all good!
Sew the units together to make a new and improved 4 patch.
Press to your heart’s desire.
You now have 4 units. You are so close to being finished! Lay them out again to make sure they are oriented in the right direction.
Sew them together in pairs. You now have halves!
Press to your heart’s desire…again.
Sew the final seam…
Press to your heart’s desire.
Give the front of the block a nice press. Beautiful!
Here are four blocks set together.
When I showed this block to my husband, he made a “meh” face. He didn’t really like the block…too busy. When I stepped back, across the room, he was much more impressed. When I showed him the four blocks together, he was even more impressed. These blocks are like moss…they grow on you!
Here is the cutting guide for the other size pieces:
I hope that you enjoy making this block. It is a great way to use up those bonus half square triangle blocks. It would be a great leader/ ender project.
I think that I am going to add a round of these blocks onto my son’s car quilt…but that is another story for another day, too.
Have you tried this block? Drop me a comment below…or send me a picture at gmail. I love to see your work!
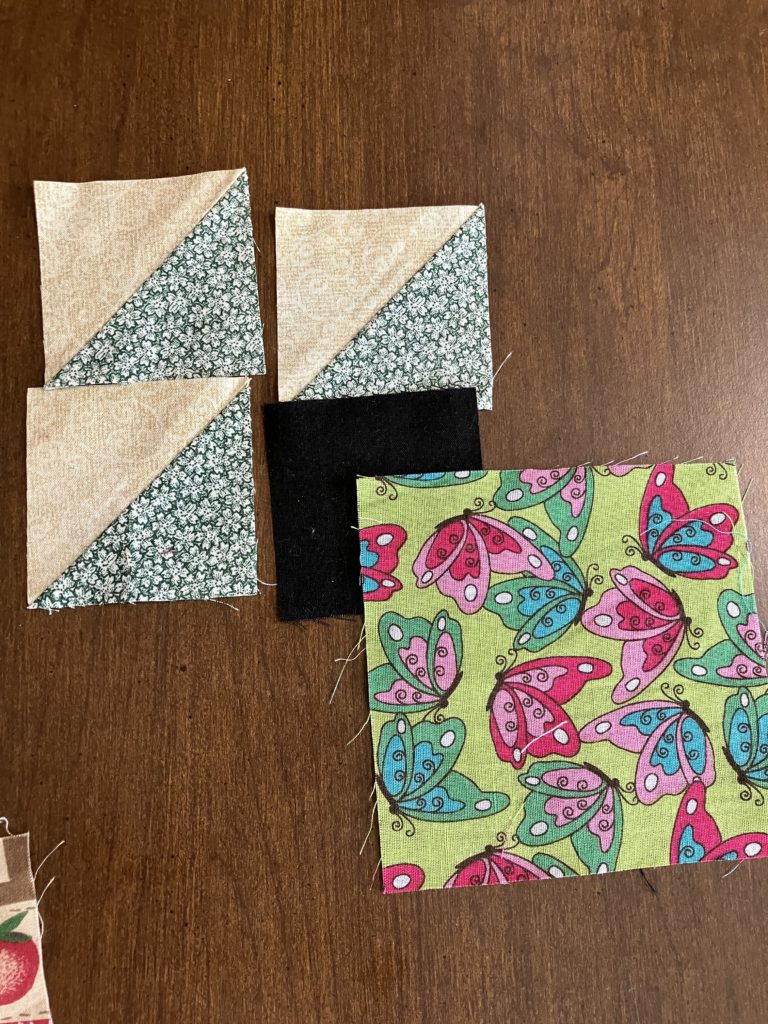
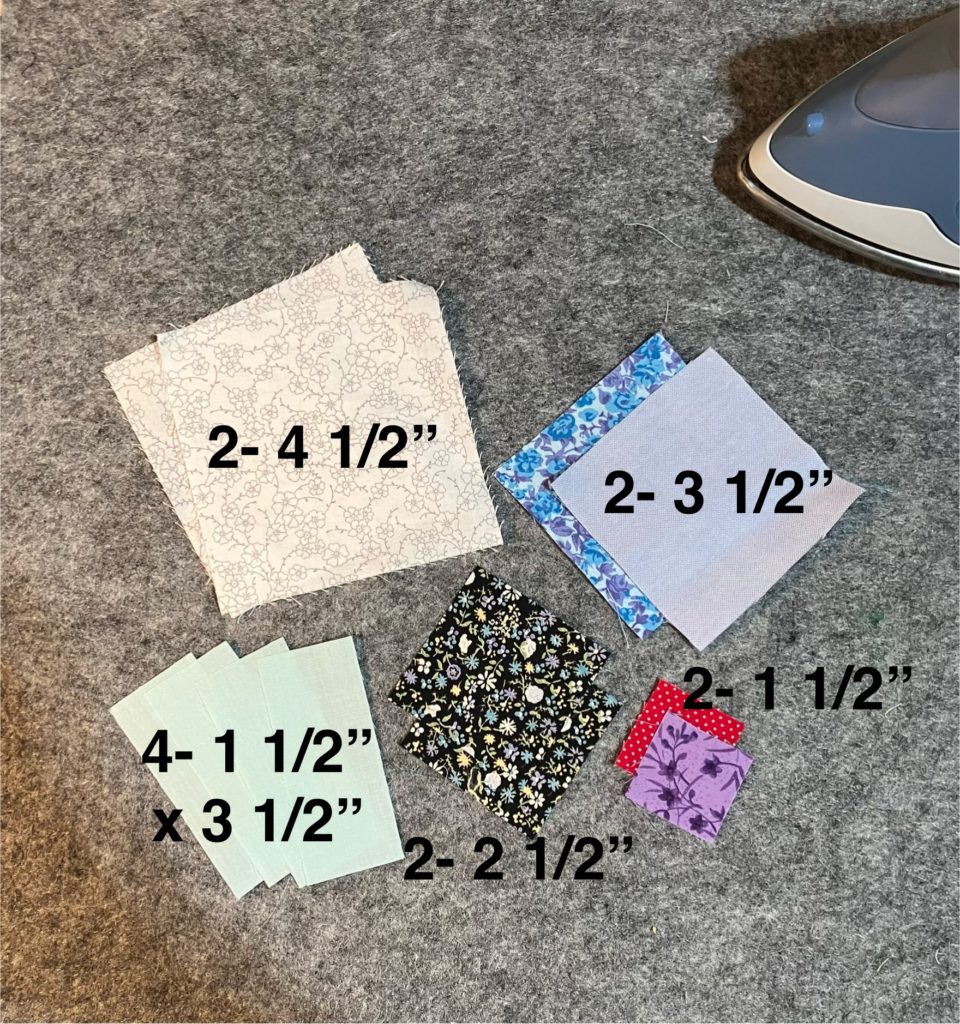
Welcome to another Build a Block post. If you prefer the video, less reading version, you can find it here on my YouTube channel. This makes an 8 1/2″ block. It has a wonderful secondary design as you can see at the end of this post.
Here are the pieces you need for the block:
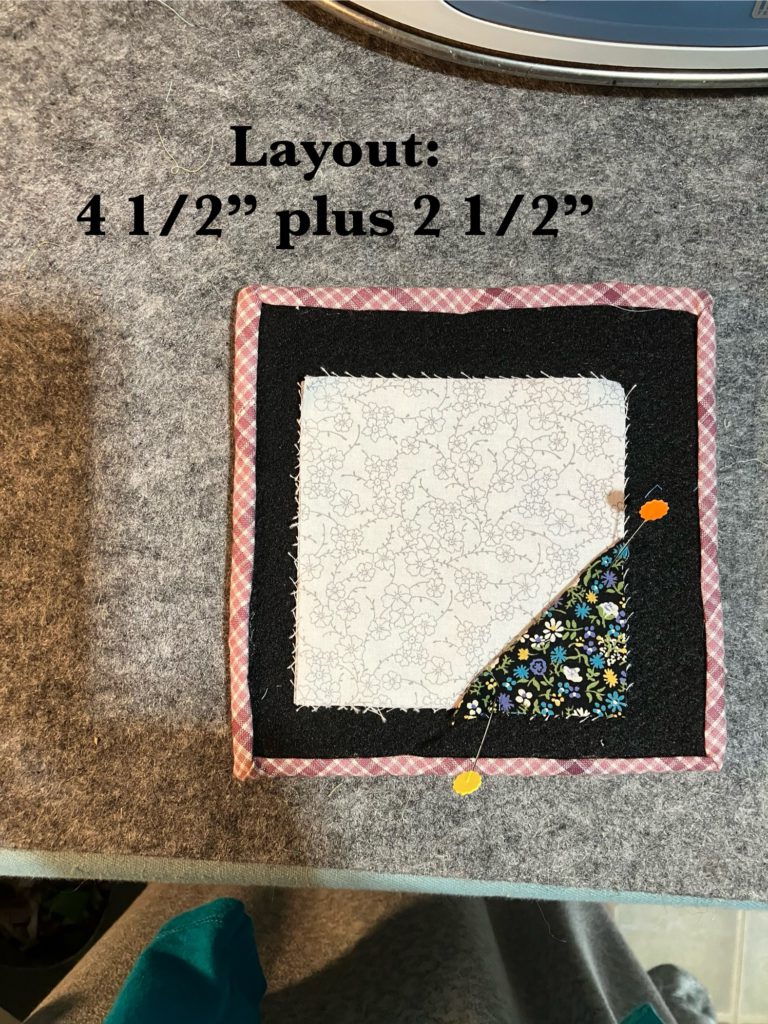
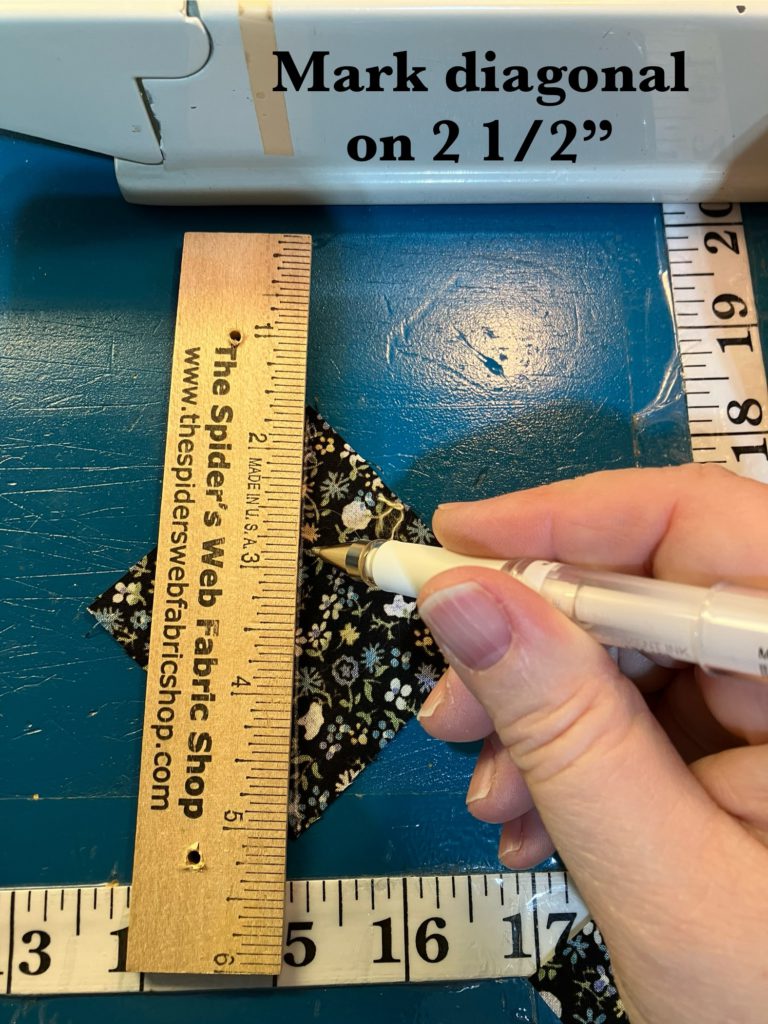
This block is assembled in two easy parts. First the butterfly pieces of the block. You will need the 2 1/2″ squares and the 4 1/2″ squares to create the two sections that make the butterfly at the end reveal.
There are many ways to make that diagonal so that it is sewn straight.
Mark the line with a pen or pencil and a straight edge, like a ruler,
press a crease into the 2 1/2″ block as a sew line or
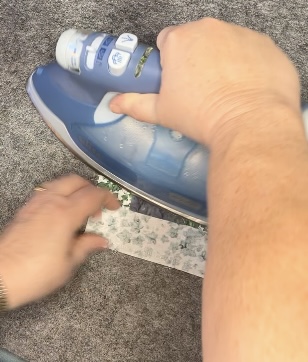
my prefered and very lazy method…the piece of tape to follow along with the corner of the square as I sew. You can see the tape in the picture below.
I always opt for the bonus block if the original square size is 2 1/2″ or bigger. That would be the reason I am being over run by half square triangles. I am working on fixing this little problem. There will eventually be a series of blocks on this blog that use up many of those bonus triangles! I promise!
I am a big fan of pressing pieces as you go, as you all know. Butterfly wing sections are now complete.
Now for the second section of the block. It is all straight line sewing for the rest. See the layout below.
Divide the layout into 2 sections…a big section and a little section. I show it in rows in the picture below.
Sew the 3 1/2″ square to the side of a lattice piece. Sew the 1 1/2″ square to the end of the other lattice piece.
Press towards the dark fabric on both of these units…unless you prefer to press open.
Join the two units you created into one bigger unit. The other part of the block is now sewn together.
It really was just that easy.
Press towards the straight lattice pieces…or open.
If you press towards the lattice, sewing the final seam will be easy!
Sew that last final seam. Sorry, no picture of that seam!
Ta-dah…Ta-done!
Here are a couple sample layouts. This block could be much scrappier than I made it. I tried to control the scrapiness for an aesthetic pleasing effect.
I decided to make an additional four blocks and use up some other orphan blocks, too. This is the beginning of a car quilt for my son’s family. Everyone needs a quilt, a flashlight, battery cables, and a small tool kit in their vehicle. Just a thought!
Those borders will fit when they are all sewn together. I, too, am always amazed at how much is eaten up in a 1/4″ seam allowance!
If you construct any of these scrappy wonderful blocks, please share with me through gmail. I look forward to see your work!
If you are interested in making this a larger block, please use the chart below to help you resize the block.
Welcome to the New Year: 2024! Here is my first build a block for the year. I am keeping it simple for starters! This block goes together quickly. It wins the race for fastest block in this series so far. Watch the short assembly video here on YouTube. There is a chart at the end if you would like to make this block in other sizes.
My favorite block size seems to be 4 1/2″ at the moment. That is the finished size of the block below. It is made from four 2 1/2″ squares (two bow tie color and two background) and two 1 1/2″ squares for the corners. Notice that I folded the triangles and pinned them to take the picture for this layout.
I finger pressed the small squares so I had a sewing line. I also have tape on my machine so I do not have to mark squares under 2 1/2″ when sewing on the diagonal. I am lazy and am willing to freely admit it!
These two blocks are exactly the same. They would be easy to speed piece for a larger quilt.
Since the small squares are sewn to a background piece, it is ideal to press towards the small triangle.
Never hurts to double check, right? We are almost done! Told you this would be quick!
Sew the pieces together in pairs. They are both the same!
This block naturally wants to be pressed to the tie colored square. The seams will lock together in the next step when pressed this way.
Tah-done! I show this in the 4 1/2″ and 6 1/2″ because I had to make sure the proportions were right for the parts chart at the end of this post.
If you have been watching my YouTube channel, I will show you my husband’s bow tie quilt in the Blabfest Friday video that will be live on January 5th, 2024. It is his “car quilt”. I think every vehicle needs its own quilt…just like it needs a flashlight and a toolbox.
I hope you are using up those scraps to make these easy blocks. Soon, I will have to start assembling yet another sampler scrap quilt from the pile I am accumulating! What do you do with your test blocks? I love hearing from you in the comments! Thank you for stopping by!
This block is just a few seams above cutting out a plain square! How is that for simple construction? I wish I had grabbed some brighter colored scraps for this block, but this was in my hand waiting to be used up!
You can view the short video here of the block construction. It shows both of the ways to create this block. The first one pictured has two fewer pieces. Neither one is difficult.
I will add the variety of sizes chart at the very end of the post…after my sign off and final comments, if you are interested. This should be a printable image.
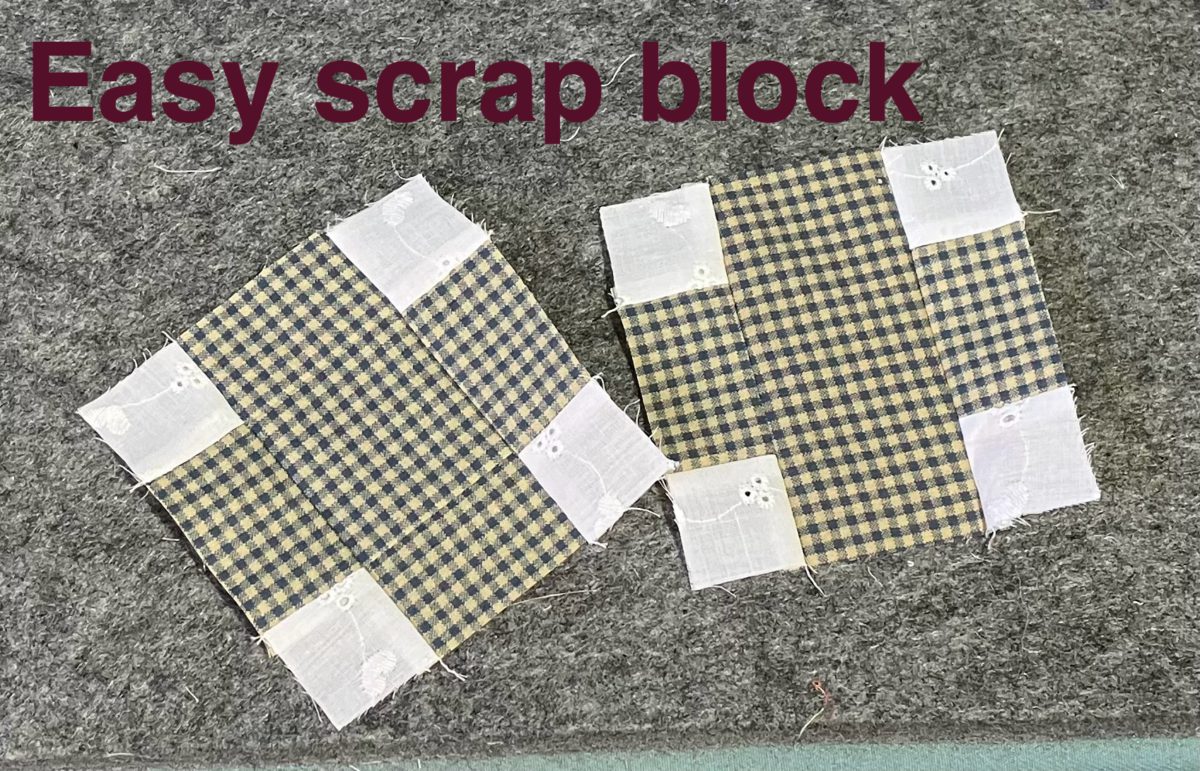
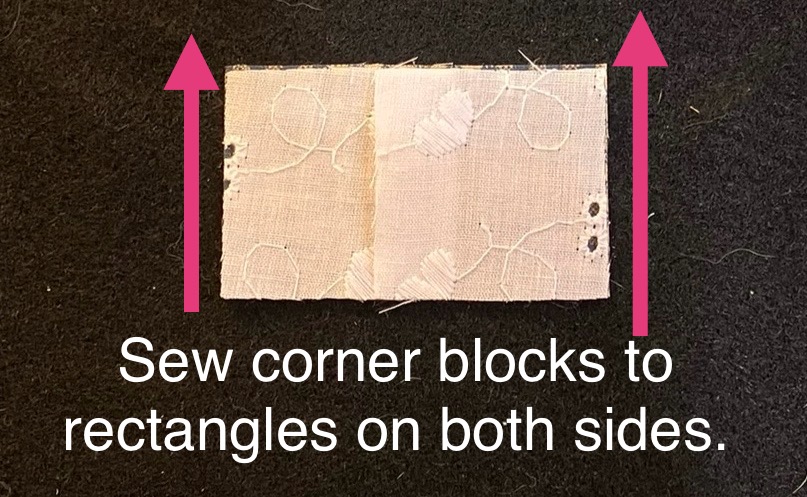
This example shows a 2 1/2″ x 4 1/2″ center. The top and bottom rows are made from two 1 1/2″ x 2 1/2″ pieces and four 1 1/2″ cornerstones. The block finishes at 4 1/2″ inches.
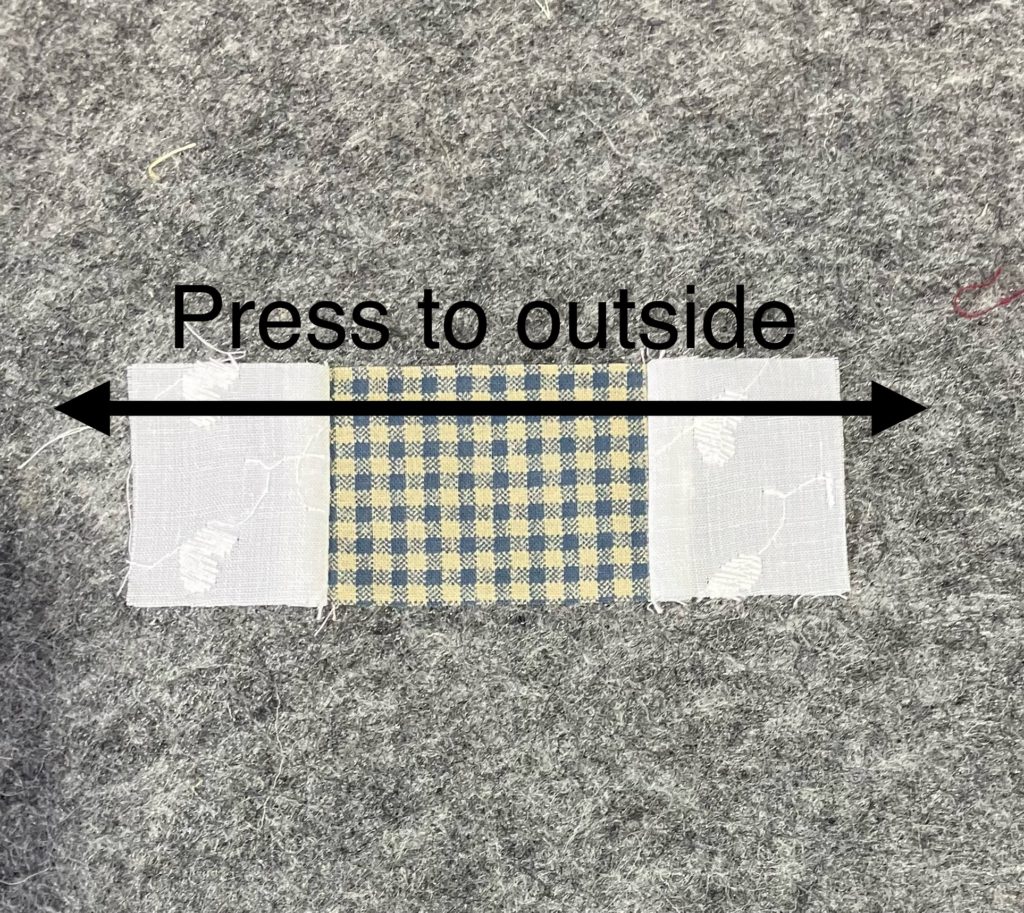
Sew the cornerstone squares to the rectangles on both sides. Use a 1/4″ seam.
Press to the outside.
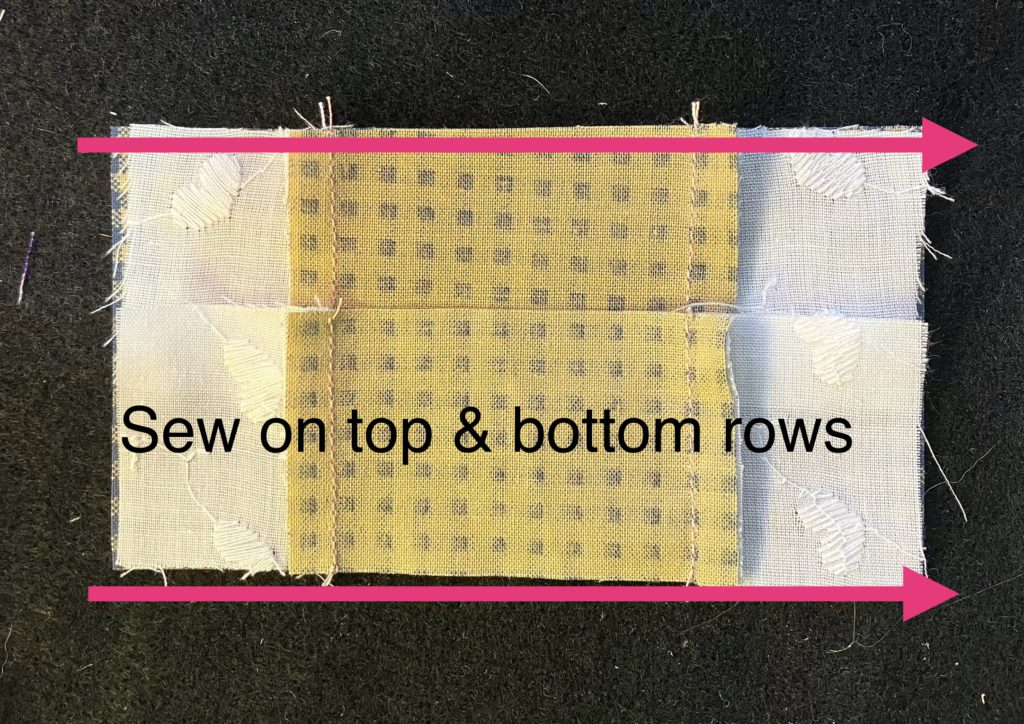
I always like to check my layout at this point, especially when I am speed piecing…just to make sure I haven’t lost any of those important pieces.
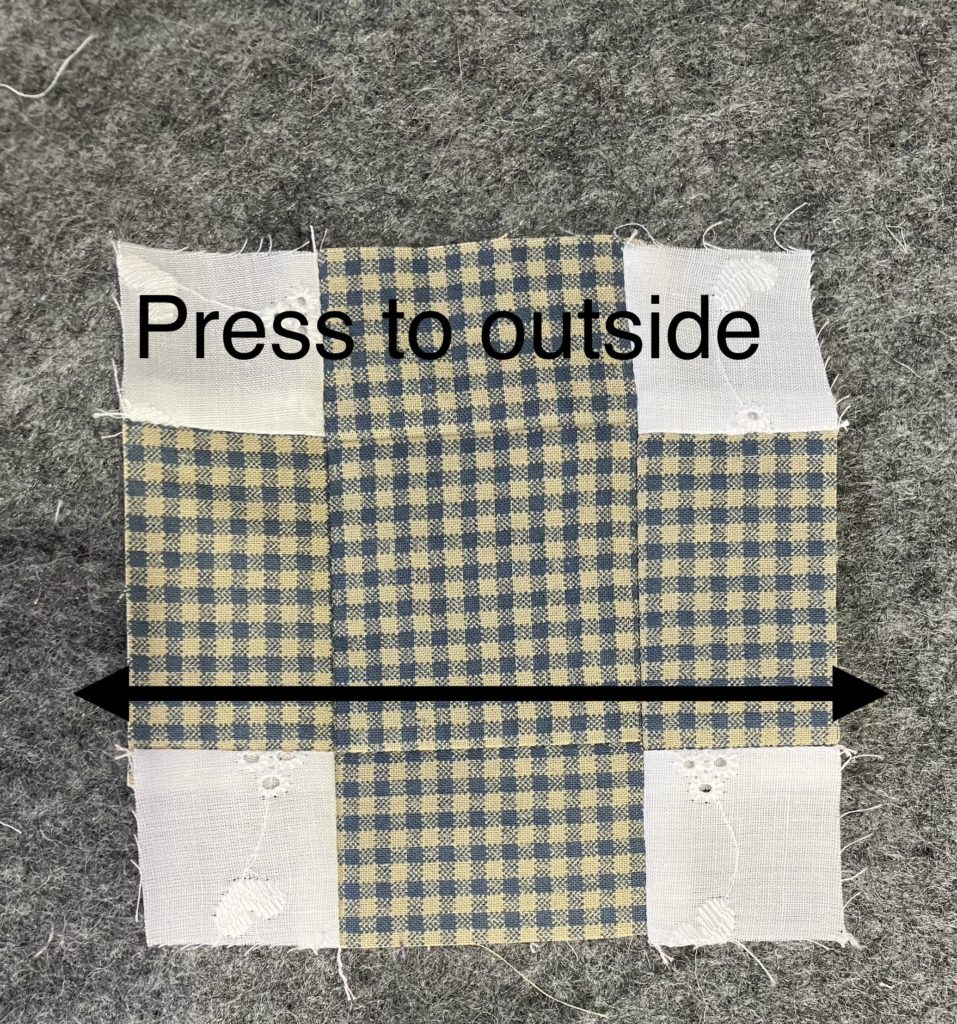
Sew on the top and bottom rows. Press to the outside. Tah-done!
Example #2: Same block, just a little scrappier!
This example shows a 2 1/2″ square center. The top and bottom rows are made from two 1 1/2″ x 2 1/2″ pieces and four 1 1/2″ cornerstones. The side pieces are two 1 1/2″ x 2 1/2″ pieces that match the center square. The block finishes at 4 1/2″ inches.
Make a center unit. (This matches the center in the first example when you are finished sewing the pieces together.) Press this unit towards the inside…towards the block.
Assemble the top and bottom rows by sewing the cornerstones to the rectangles.
Press to the outside like pictured below.
Add the top and bottom rows to your center unit. Seams should nest together to make construction easier.
Tah-done! Press to the outside.
These blocks are quick and easy to construct. This would make a great leader/ ender project. I envision it with bright colored scraps for the center and a variety of backgrounds for the cornerstones set together with NO sashing. What a great scrap quilt that would be!
I can’t wait to make an entire quilt with these blocks! It would make a great donation or kid quilt! Would you make a quilt with these? Let me know in the comments! (about this quilt…not interested in Russian viagra or manifestos!)
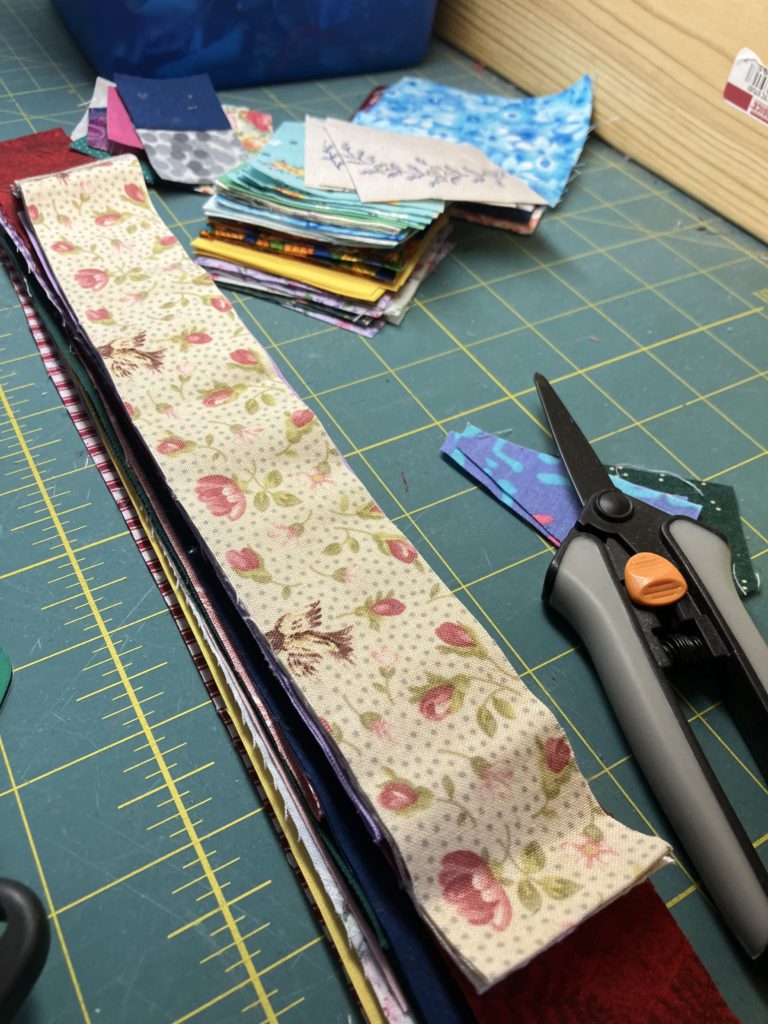
This block is quick and easy to construct! I know that I say that almost every week, but it is true every time I say it. Using contrasting scraps is the best way to make this block pop! I pulled strips and squares from my “pre-cut” bins to make this a faster finish.
A one minute video of this block construction is available here on YouTube.
Presenting a New Feature at the bottom of this post! I have added a fantastic size chart for pieces to cut. It contains a variety of finished block sizes. Check it out at the end of this post!
The version shown below is constructed from a 2 1/2″ square in the center and 2 different 1 1/2″ strips surrounding it.
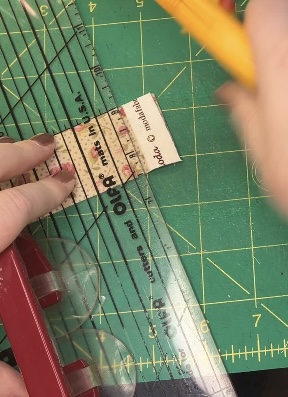
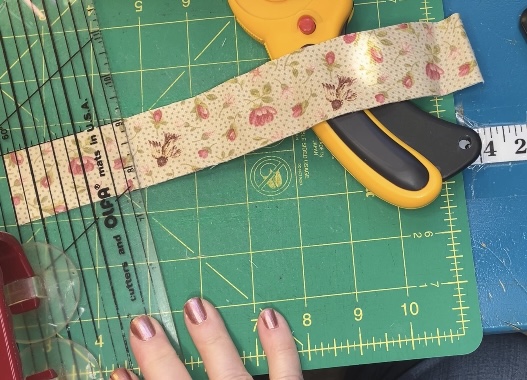
I did cut my strips to the following lengths:
2- 1 1/2″ x 2 1/2″ (inside round color)
2- 1 1/2″ x 4 1/2″ (inside round color)
2- 1 1/2″ x 4 1/2″ (outside round color)
2- 1 1/2″ x 6 1/2″ (outside round color)
This week I have words imbedded on the pictures, as well as arrows. This is a no brainer approach. Please remember to always use a good 1/4″ seam, no matter how crooked the arrows are in my photos.
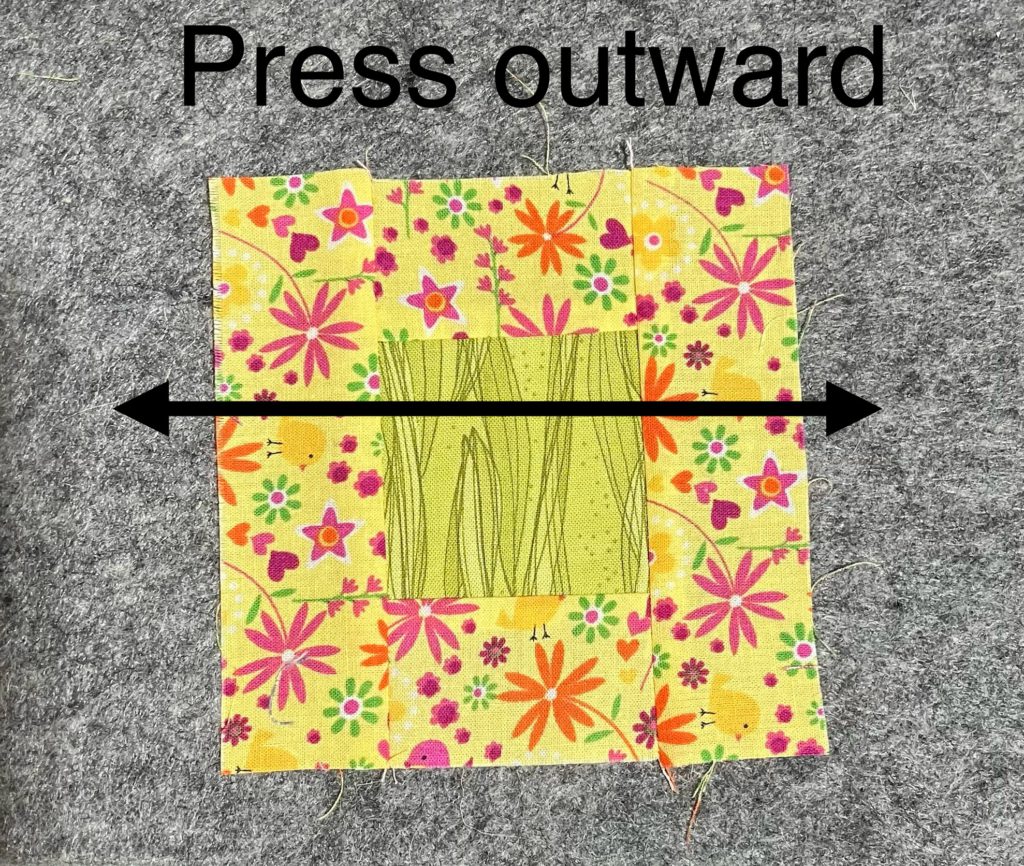
Please add the 1 1/2″ x 2 1/2″ pieces to the center here.
There are not a lot of bulky seams here, so I press out.
Add the 1 1/2″ x 4 1/2″ pieces to the sides here.
Now is a great time to press it flat, flat, flat. By pressing now, the block will be crisper and flatter for the next round of strips.
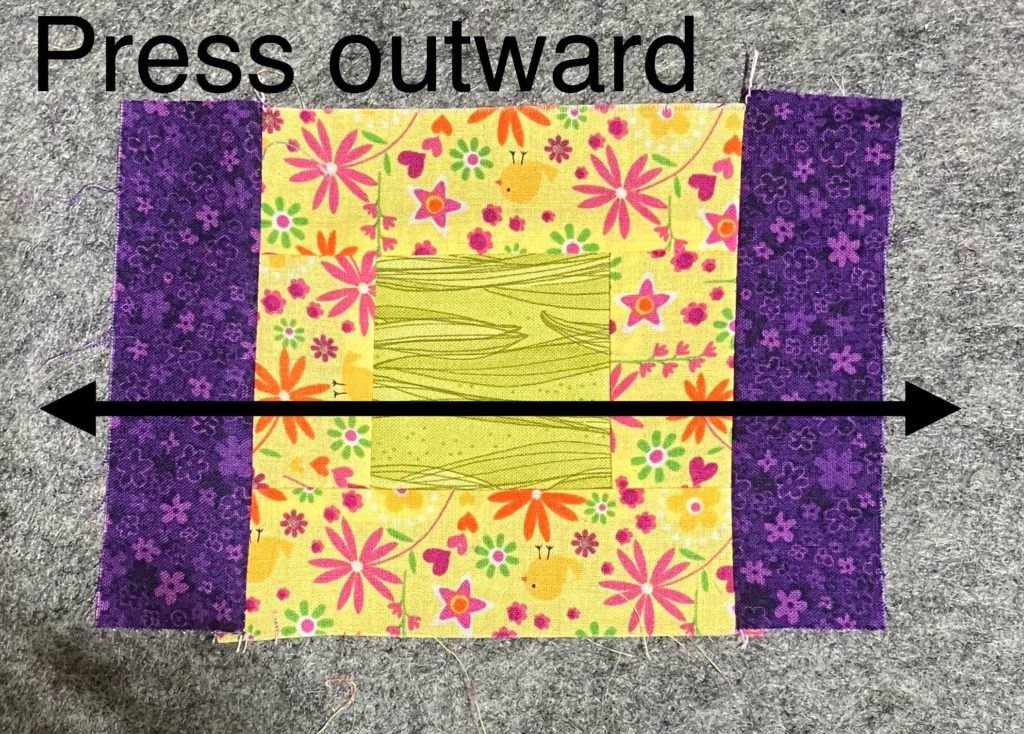
Please add the 1 1/2″ x 4 1/2″ outer round pieces to both sides. (I forgot to take the picture before I sewed one of the pieces… oopsy!)
Give the strips a quick press outward.
Add the final two 1 1/2″ x 6 1/2″ strips to both sides.
Press outward one last time. If you want the block to be even flatter, give it a little shot of starch or Best Press at this point.
Tah-done! I love this little block! I told you it was quick and easy!
Below is the new size chart! This took some work to figure out how to embed this in a blog post…making the chart was the easy part!
Please let me know in the comments if you like this new feature. I look forward to hearing from you.
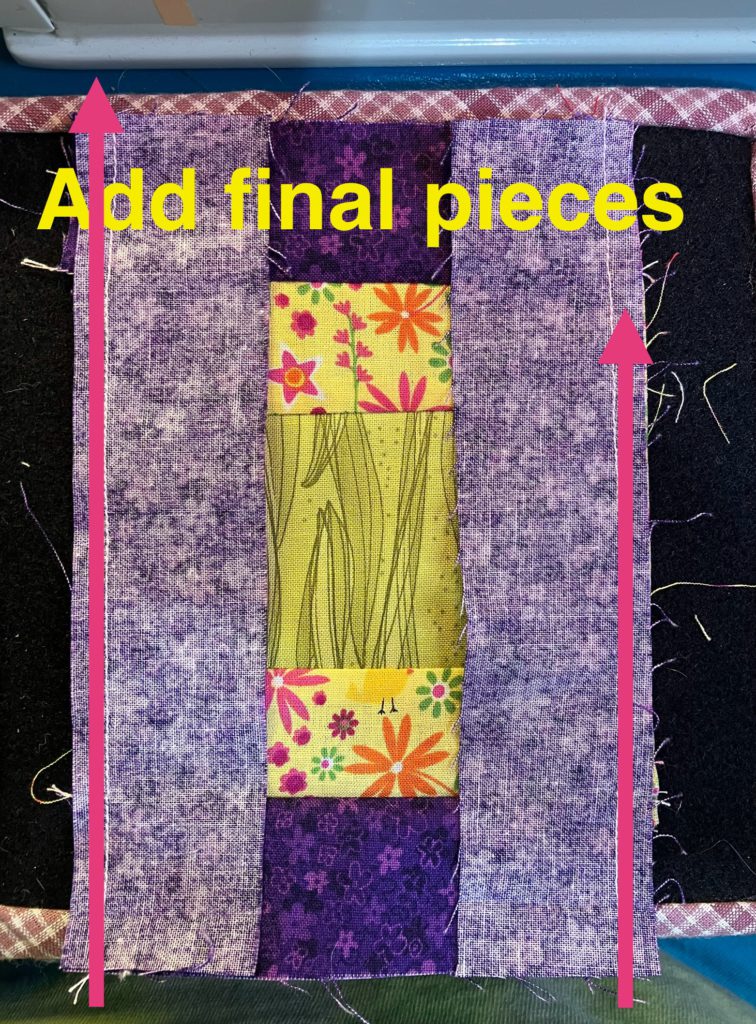
This lovely block uses up lots of little scrap blocks. It is easily adaptable to larger sizes, too. It would be a fantastic leader/ ender project. As it is shown, it finishes at 6 1/2″.
The center square is 2 1/2″. The surrounding rounds are made from 12- 1 1/2″ inner ring blocks and 20- 1 1/2″ outer ring blocks. I used pink and blue to make it easier to see the block rounds. This would be a great block made up in all scraps or other high contrasting rounds. My YouTube speedy Build a Block video can be found here.
I start by moving the outer round of blocks to the side. I can only focus on one task at a time these days.
If you were doing this as all scrappy you could easily sew all the blocks in sets of two and then make the necessary 4-4 block units and 2-6 block units without worrying about placement.
Sew blocks that touch the center into 4 pair units. Two of these units will be sewn to the center soon.
Add the corner blocks to two of those pair units to make 2- four block units.
To reduce bulk, press seams open.
Sew both pair units to the center square.
To reduce bulk, press open…or however you wish to press. No quilt police here!
Add the 4 block units to the new central unit.
To reduce bulk, press seams open.
Sew all of the outer blocks in pairs, then sew pairs together until you have 2- 4 square units and 2- 6 square units.
Press open to reduce bulk. (You knew I was going to say that, but that doesn’t make you a psychic!)
I always like to lay out the block at every step, just to make sure I have placement the way I intended it to be when I started. I am fairly quick with the seam ripper these days, but I still don’t enjoy that process.
Add both of the 4 block units to the sides of the center unit.
You know what I am going to say! Press seams open to reduce bulk.
Add the 6 block units to the last two sides of the center unit.
Not saying…you know!
Tah-done! Another beautiful scrap block! This one used up LOTS of little pieces.
I hope that you are enjoying this Build a Block series of simple blocks. I am starting to have a nice little pile of these blocks just by creating ones to picture in these tutorials. I hope you are, too.
Thank you for stopping in to look at my pictures and read my block making narrative. What are you creating today? I hope it is simple and relaxing! I would love to see pictures of your work over on my Facebook page. Come join my group!
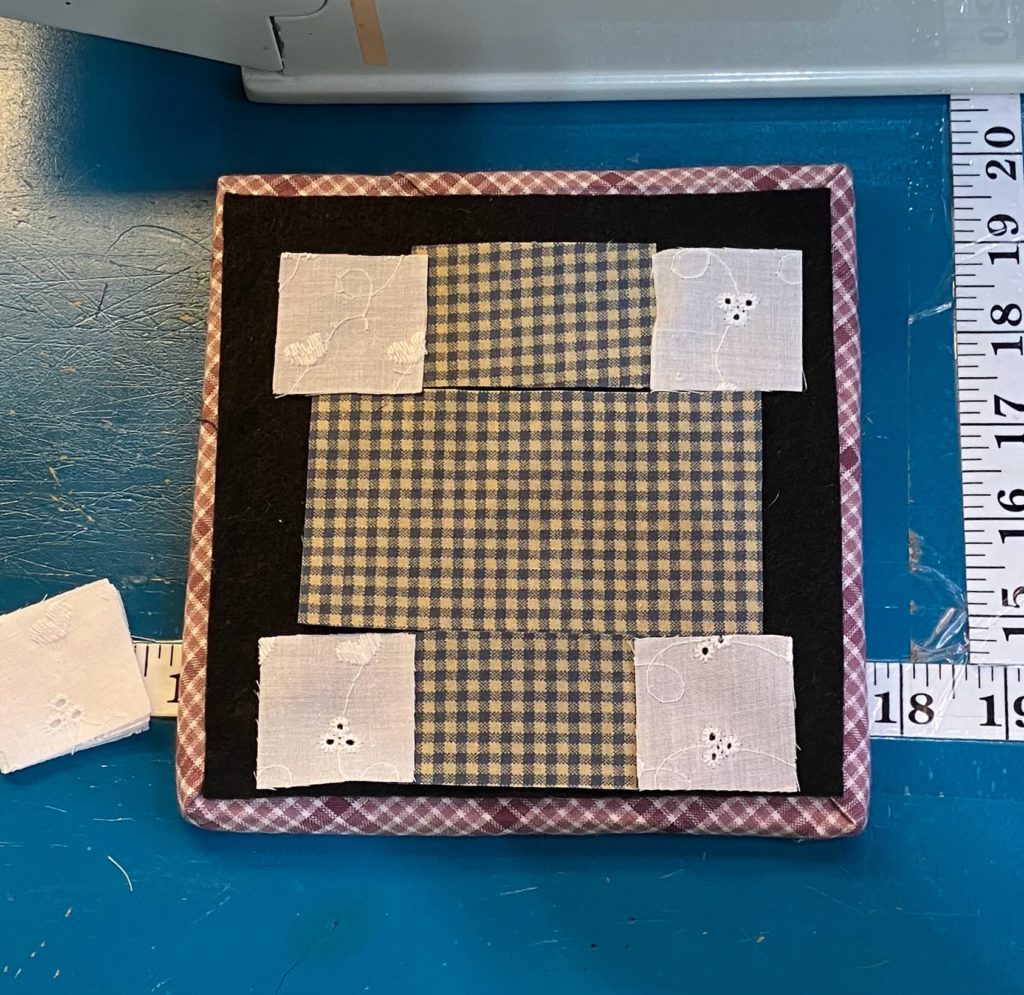
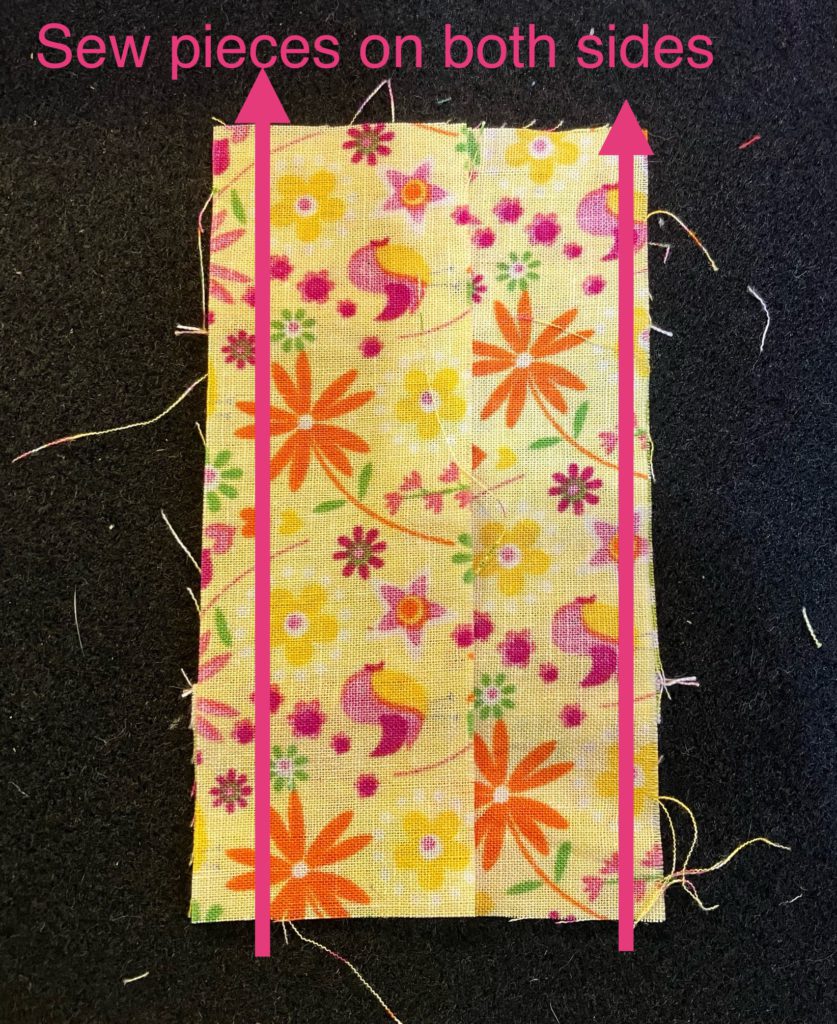
Welcome! Today I am constructing a simple block using a center square and strips…and for a second block, a center block with strips and cornerstones. I chose very simply constructed blocks for the next few weeks to get us through the “Silly Season” and all of the holidays. My head is spinning with all of the tasks that I need to complete before the new year. How about you?
You can also watch a 1 minute video that shows a very speedy version of the block construction…very speedy!
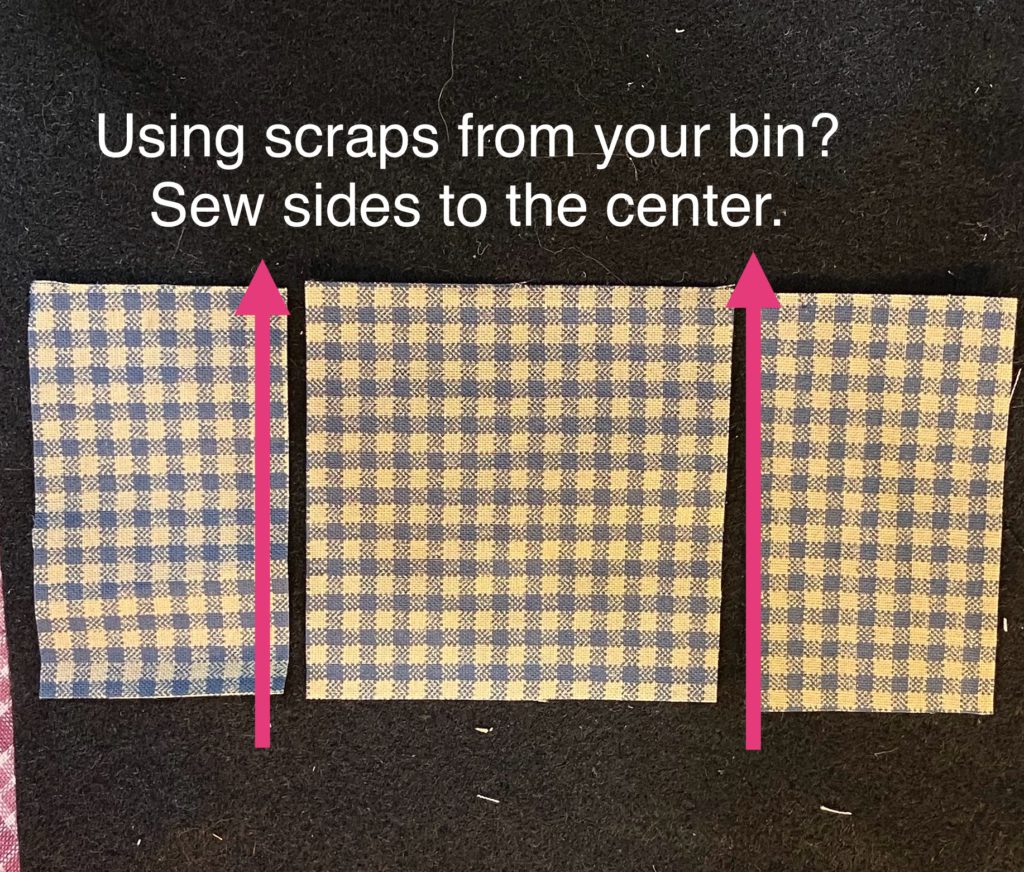
Let’s get started! The layout is simple. I chose a center block with good contrast from my scrap bin. I love to work small, so my center is 2 1/2″. You can make this any size you want. It is easily adjustable.
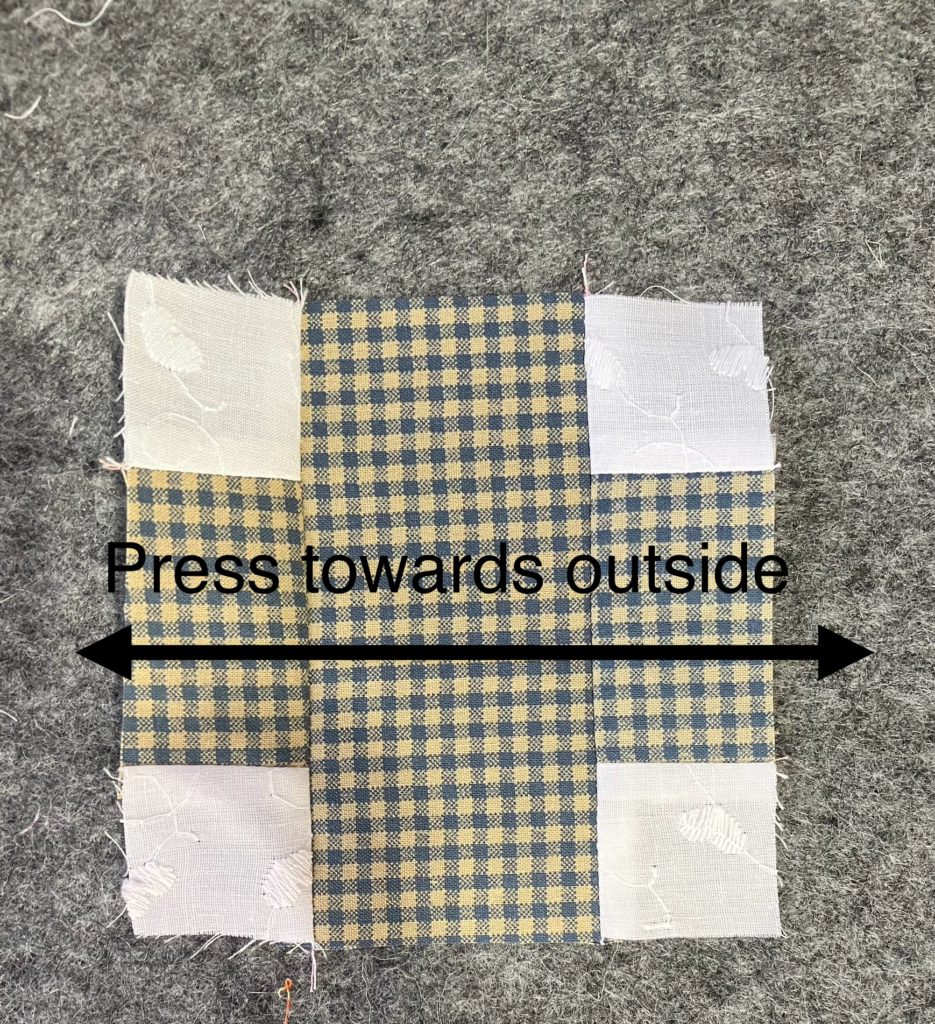
The outside strips are 1 1/2″ here. Again, with a larger center, you could easily use wider strips. I cut two of the pieces the same width as the center block to get started.
Join the cut strips to the center block on both sides.
Press however your little heart desires…I pressed the seams out on this block. There is not a lot of bulk in the seams like previous blocks made from a zillion little squares, so I did not press open.
Add the other side strips. You can cut these to the final length before or after you sew them on.
Again, I pressed the seams to the outside. The completed block is shown at the end of the post.
Ahhh! The second block…cha-ching! Bonus, Baby!
The center of the block shown here is 2 1/2″, but could be easily adapted to your favorite size. Strips and cornerstones are 1 1/2″ wide. I would change this if I were using a large center block to keep the proportions about the same. This could also be made in a scrappier version.
I assembled this block in rows. First, I assembled the top and bottom rows by adding the cornerstones to the center strips.
Next I speed pieced the side strips to the center. Doing all of the piecing at the same time makes the pressing easier.
I know that not everyone is a pressing fanatic like I am. I don’t like to wrestle with seams as I am trying to sew the units together, so I press between each step. You do you…press as you wish. No judgements here.
I pressed the top and bottom rows to the outside and the center row toward the larger center block.
When I added the top and bottom to the center, the seams locked together nicely…no pinning required.
I pressed to the outside on both sides.
Two little blocks…tah done!
I hope you are enjoying my build a block series. When my head stops spinning after the holiday season, I hope to evolve this into a printable pattern page with different sizes to make it easier to use with scraps of all sizes. What are you planning to make with your scraps? I love to hear from you…especially if you aren’t leaving comments about selling Russian viagra, etc!
This post is related to the YouTube short that shows a sped up version of the assembly of this block. See the YouTube video here. This block makes a great leader/ender project to use when assembling another project.
This block is made with 1 1/2 and 2 1/2 inch squares. It could easily be made from other sizes. Block construction is simple.
Using your smaller squares, make 4 sets of 2 squares.
Press open…or however you desire.
Join 2 of these sets to your center square on opposite sides.
Press towards the larger center block.
Add blocks to the ends of the 2 sets of 2 squares as pictured below. Then press seams open.
Add blocks to the center unit on both sides.
Press seams open or however you wish.
Ta-Dah! One little scrappy block!
I hope that you are enjoying this series of Build A Block! I am having great fun using up those scrapps while I share with you! I would love to see what you are up to today!
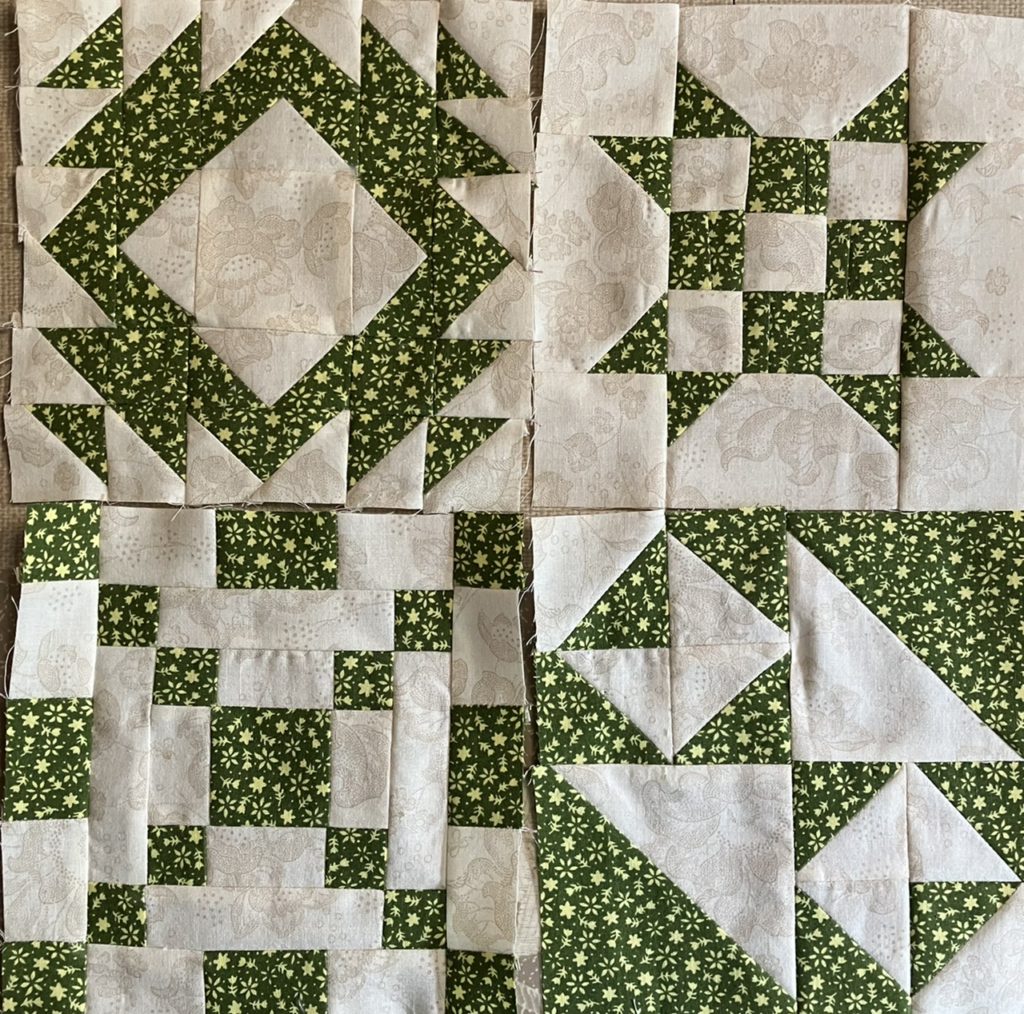
This block is made from 16 one and half inch squares. It makes a 4 inch finished block. It could easily be made using 2 1/2, 3 1/2, or 4 1/2 inch half square triangles to create an 8, 12, or 16 block. I made this block using all bonus pieces. You can see in the picture that I even used bonus triangles that are pieced pieces.
I start by laying out my pieces on a small design board. I actually had several similar bonus triangles to make a pattern…random is excellent and less stressful.
I sew the first to half square triangles from the left side of the block together, as well as the ones on the right. Speed piece is great…zoom, zoom.
I sew the units of two together to make rows of 4 pieces before I press. As a personal preference I press seams open. To the sides is okay, too, but open makes tiny blocks lay flatter. There are lots of seams there to squish.
I lay the pressed units back on the design board. If I am doing random pieces, I don’t really worry about this. If I have a design, I like to lay it out again to make sure I still have a design. (I am not going to pick these pieces apart if I have somehow reversed units though.)
Time to sew the rows together. Sew the rows together 2 at a time…so you can speed piece. Sew those two units together to complete the block. I do this before you press.
Press all seams open for a super flat block.
This is the easiest way to use bonus half square triangles into a completed block. These bonus triangles can be arranged into different shapes to be used for borders, etc. So versatile!
Now that I am trimming my collection of blocks, I am having lots of fun using these units.
Enjoy! One of these can be whipped up in 5 minutes, maybe less!
What bonus triangle blocks would you like to see me make? I look forward to hearing from you! Comments are open!
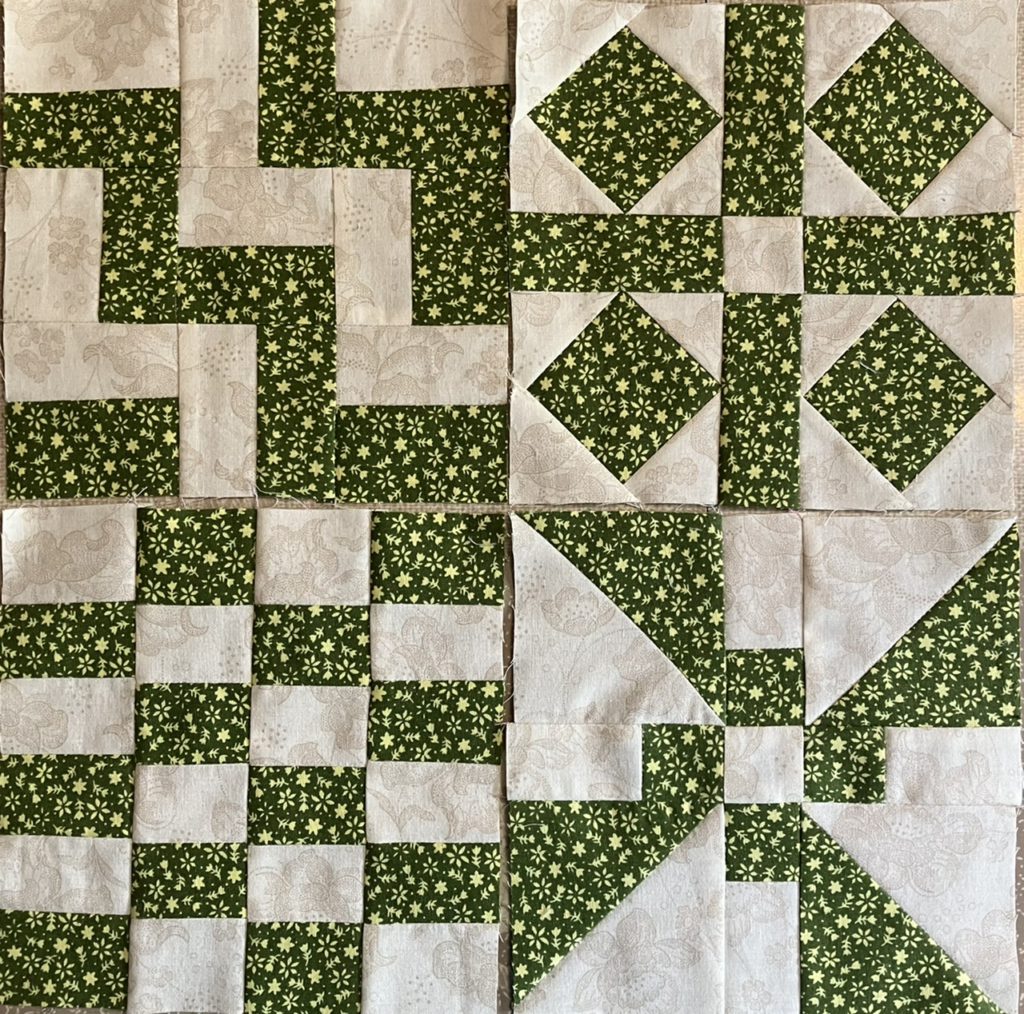
The version of this block shown below finishes at 8 inches. It could easily be a 4, 12, or 16 inch block, too.
As always, and because it is so easy to get a triangle moving in an unintended direction, I lay out the block before I sew.
This block is actually the same 4 sections turned in different directions. That makes it great for speed piecing! Zoom, zoom!
Here I have rearranged the block into a piles that are 4 sections to speed sew all at the same time.
I love the purple trapezoid made from the 2 half square triangles. These squares are much easier to deal with than a cut out trapezoid and 2 small triangle pieces. Trapezoids have some serious bias edges that stretch and distort the unit. Starching the fabric before cutting pieces like that is helpful, but using half square triangle units is even better!
Sew the units together in rows.
Press the top row towards the solid square on the left. It looks like up in this picture.
Press the bottom row towards the triangle square. I know that this seems counterintuitive, but will work out better when it comes to sewing the rows together and piecing the rest of the block. You could press the seam open if you wish for a flatter unit.
Again it looks like I am pressing upward, but I just turn the block so that I am pressing in that direction. I get flatter more accuate pieces when I press in that direction. It is a personal preference and the most comfortable way for me to hold the iron.
Here the blocks are laying in units by row…4 deep. Better safe than sorry!
Sew the rows together. Seams should nest together nicely to make block construction easy without pinning…unless you want to, of course.
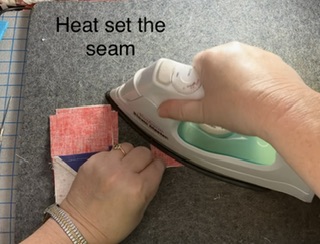
I always thought heat setting the seam was silly, until I tried it. It does make the seam press flatter in the end.
I press this unit towards the top row. Pressing the seam open is always a good option, too.
These units are nice and flat…ready to put together. Notice that the trapezoid shape has a little hitch on the right for the seam allowance.
Spin the units around to lay them out.
Sew the top 2 block units together. Then sew the bottom 2 block units together.
Press one unit to one side.
Press the other unit…which is identical…to the other side.
Turn the units to the correct layout. Sew the last 2 units together.
Press to one side…or in my case the top.
You now have a beautiful Clay’s Choice block.
As a note of warning, you will notice that my wool mat is a little discolored on the right bottom corner. That is what happens when you use starch and get it on the wool mat. To prevent this, use a pressing cloth underneath to prevent starch overspray.
I am enjoying the process of assembling blocks with the bonus triangle squares. Every time I look at quilt books I am noticing them. They are jumping off the pages at me!
What blocks are you making using these bonus pieces? There seem to be millions out there!
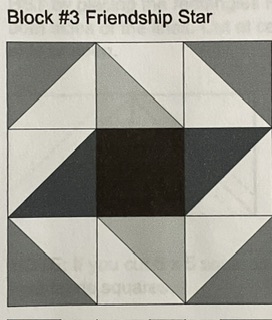
This post goes along with my YouTube short of the same title. It is part of my series on using up bonus half-square triangle blocks. I like friendship star blocks because they are simple. The asymmetrical aspect of the block makes me a little crazy. I always lay the pieces out ahead of time so I don’t have to pick them and fix them later.
I will practice a little more with this fish-eye zoomed in view. It is an interesting perspective.
After laying out the pieces, sew the pieces together like you would any old nine patch.
After sewing the first two pieces together in each row, I lay the pieces back on the design board. Better safe than sorry!
Add the rest of the blocks of the blocks to each row. Lay them out again….safety, safety, safety.
Press the top and bottom rows outward.
Press the middle row toward the center.
Sew the top and middle row together. Seams should nestle together.
Sew the bottom row to the unit you just created.
The little friendship star is assembled and ready to press.
I heat the block first to make it more willing to press the way I want it to go.
I pressed the rows towards the outside, but you could press the seams open or towards the inside. This was just my personal preference today and at the moment.
I also gave the block an extra little press from the back.
It is time to use up some more of those scraps! Let’s make another basic block…9 patches added to larger squares to create a 4 patch. These blocks are versatile. When set together, they make an adorable scrap quilt. See my YouTube short showing this same block. It is part of my series on using up bonus half-square triangle blocks.
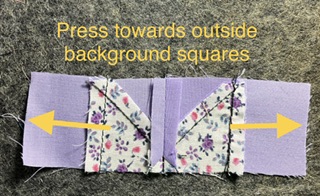
Here is a block waiting to be sewn. You will need the following pieces to make this 6 1/2″ block:
2- 3 1/2 inch squares
18- 1 1/2 inch squares to make both nine patch blocks
This block could easily be made in a variety of sizes: 12 1/2″, 18 1/2″, etc.
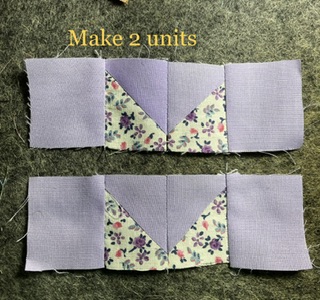
Start by speed piecing the rows of the nine patches.
Press the seams open…if you wish.
Sometimes I use my fingers to gently pull on the block so I can get the seam open to press it. Without burning my fingers, of course.
Look at those nice, little rows. Sew the rows together.
I press these seams open, too. It cuts down on the bulk and the blocks lay flatter.
Occasionally, I have difficulty getting those seams open. I have a stylus…actually it is a dental tool from the hardware department of a flea market…that helps me grab the seam.
You can see my stylus a little better here in this picture.
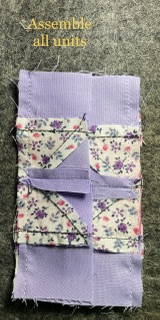
After the 9 patches are ready, sew the bigger blocks to them. Press towards the larger block.
When you turn the block pieces around, the seams will nestle.
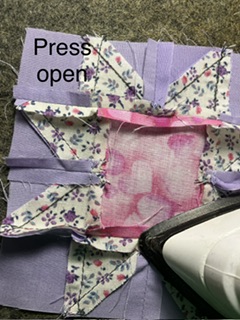
Press the seam whichever direction you so desire…or open if you want.
Tah-done! What a cute little scrappy block!
What blocks have you been making to use up your scraps? Please comment below. I can’t wait to hear from you!
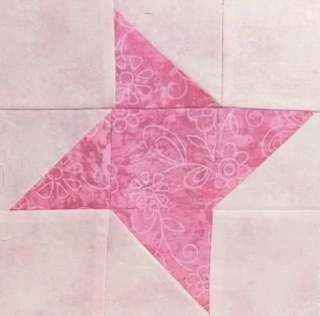
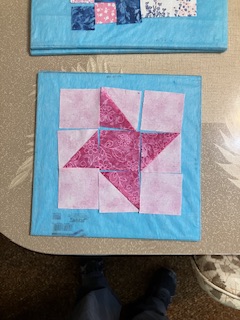
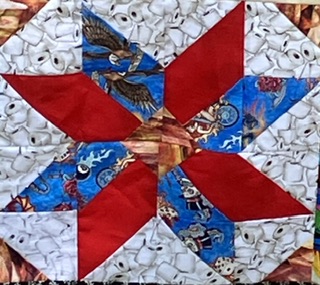
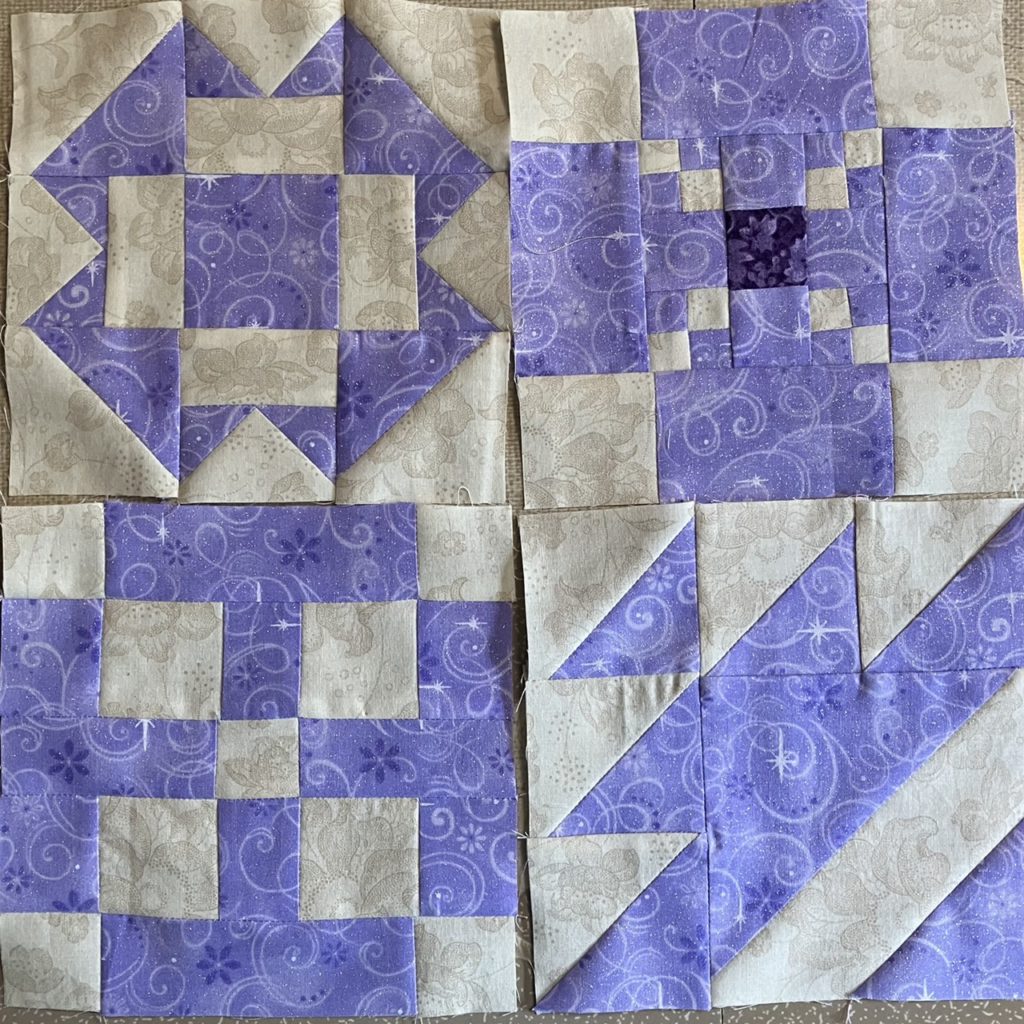
This week, I am adding a second block, the scrappy star. It is pictured here as a 4 1/2″ block. It could easily be made into a 8 1/2″, 12 1/2″ or 16 1/2″ block.
This tutorial reads like a picture book. I learned how to edit photos! Many of the directions are right in the picture. This also matches my YouTube short that shows how to use up some of those bonus triangles we all have. Most of the pictures are the same as those in the video, too.
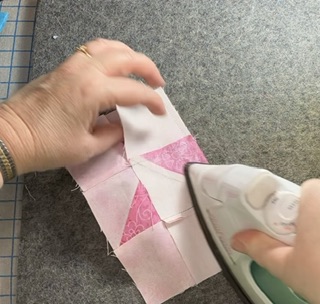
Here is the finished star:
I have been making these as leader/ ender blocks for the entire summer. I have a nice little pile going.
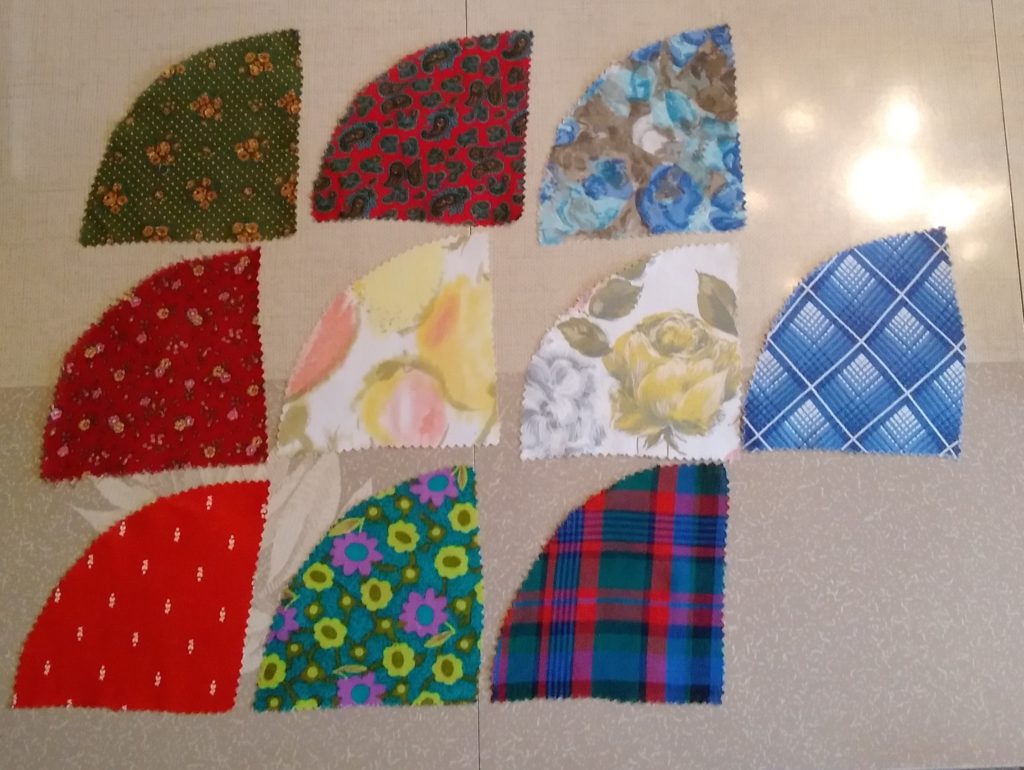
The first image is parts you need if you don’t cut triangles to make this block. The directions are in the pictures below to make the triangles from squares. Just look for the tan and yellow squares.
This second picture, with the lavendar background, is the number of pieces that you need if you ARE cutting the triangles. I use an accuquilt die to cut those little triangles, but it is not necessary to have one of those to cut pieces.
The easiest way to make any block, is to lay out the pieces before you start.
The first sewing step is to make the 8 half square triangles, whether you are using triangles or squares.
The images with brown fabric are constructed from squares.
I love the washi 1/4″ tape. It doesn’t leave a residue. It stays on for a long time. There is a lot of it on a roll.
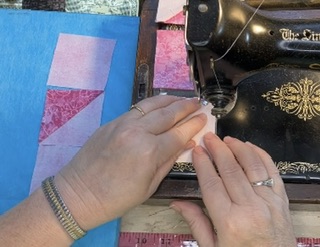
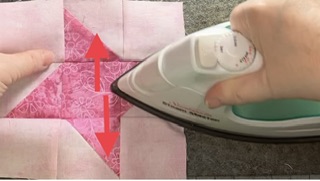
Now that your star points are sewn, it is time to press.
Background fabric should be towards the inside. Star points should be on the outside.
Sew the star point pieces together in pairs.
I prefer to press these seams open to reduce bulk. You can press the seams to the side if you prefer. I know this is a controversial topic in the quilting world. No judgements here!
Lay your pieces out again. This is a double check of your star points, etc.
You have the parts assembled for all 3 rows.
Time to finish the block. Sew the rows together.
Again this is to reduce bulk in these little seams.
Here it is again…the cute, scrappy star block.
I hope you are enjoying making little scrap blocks. There are many more blocks to come!
I am slowly making progress on this block of the month. Here is block seven, eight and nine.
Janice did a great job with the directions on this one! Thank you, Janice! I changed the color placement from the original pattern to make the red pop out a little more.
I changed the middle reds on this block so that they looked like hearts. The original block only had one red.
This block had a lot of little tiny trimming to make it fit perfectly. Once it was trimmed, it was easy to assemble. There is a lot of swirl going on there!
Are you working on any “installment” projects? Please share! I love hearing from you!
You will need 16 blocks of your choosing for this block. Choose one of the following sizes for the best results: one and a half inch, 2 1/2 inch, 3 1/2 inch or 4 1/2 inch. Block should I have a nice contrast between them.
Lay the blocks out in a 4 x 4 formation like the illustration above.
Sew the blocks in each row together. You will have four rows.
it is now time to press the seams of your block. There are two options. You can press the seams to one side or the other or you can press the seams open. I recommend pressing the seams open even though this seems counterintuitive. It creates a flatter block in the long run. I have never had any problems with weaker seams because of pressing seam allowances open.
Recently, I have been trying my best to catch up with the blocks of the month from Hale Country Quilters. Slowly, but surely, I am getting there! Whew!
I am loving the teal, purple and red combination in each block.
Block 4Block 5Block 6
I am going to take a little break before I start the next block. Block 7 has a bunch of small pieces…and I changed the color placement just a little bit…so I need to have my head in the game!
What project are you catching up on this weekend?
To help you relax, I am sharing a sunrise picture over Lake Huron from our recent trip to Mackinaw City, Michigan.
I am making slow, but steady progress on my BOM for the Hale Country Quilters group.
I would have more of the blocks completed if I hadn’t had an epiphany. Darn those epiphanies!
I decided to make a center big block from a Pat Sloan sew along. I like this big star block.
Then I saw a block on Pinterest. It was screaming at me to be 16” corner blocks.
Here are the first three BOM installments.
Are you participating in any BOM’s this year? They are a great way to build skills…and if you don’t love the top when you finish it, it can become a gift or charitable donation. Someone will love it for you! 💕♥️💕
Recently I joined Hale Country Quilt Guild. I have only been to 3 meetings, but I am enjoying this experience. At the last meeting, I shared my Sweet Childhood Memories quilt tops. The ladies made me feel so good!
Sheryl, my wonderful Up North neighbor, invited me to a meeting because she knows how much I love quilting and sewing. When we joined, the BOM was on the 10th out of 12 blocks.
Sheryl has several blocks completed. I love her colors! So pretty! I love the Autumn colors and earth tones with a touch of blue she chose.
I needed some time to make this project more complicated. Yes…that means I have not started the blocks yet. I am using teal, purple and a touch of red.
However, I have all the setting blocks completed for the quilt in my head. I am using the large center start from Pat Sloan’s Festivals and Fireworks quilt sew along.
I am using a block I saw on Pinterest for the four 16” corner blocks. Here is a link to the free, printable pattern. It is called Blue Ridge Mountain Star.
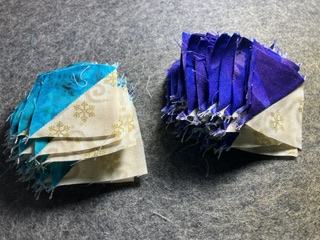
Just as a side note, look at all of these bonus half square triangles!
Here is a quick snapshot of the patterns:
I like that the patterns all use 1 background and a light and dark of two colors. The directions are well written thanks to Janice Berg. I love playing along with friends. Time to get to work!
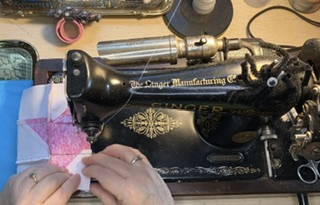
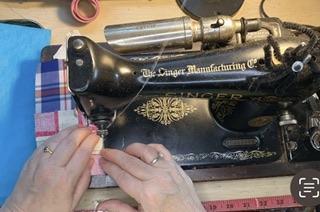
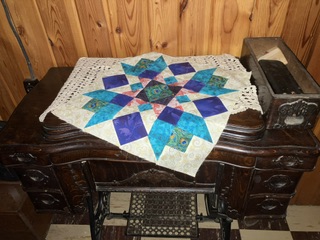
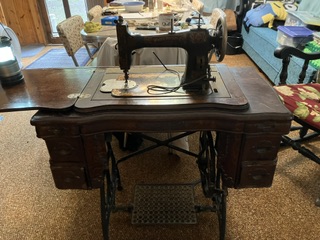
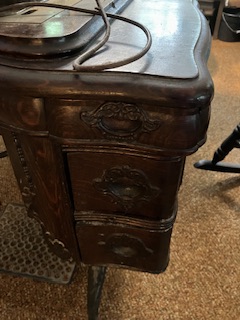
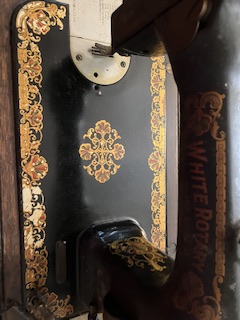
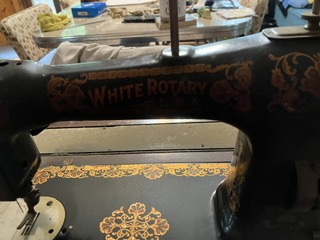
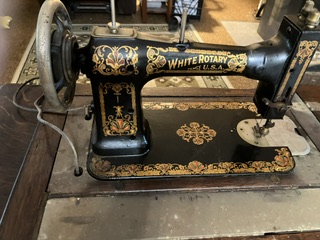
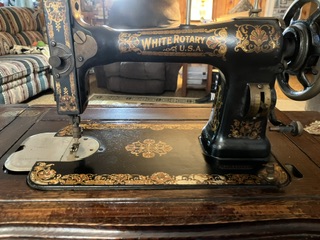
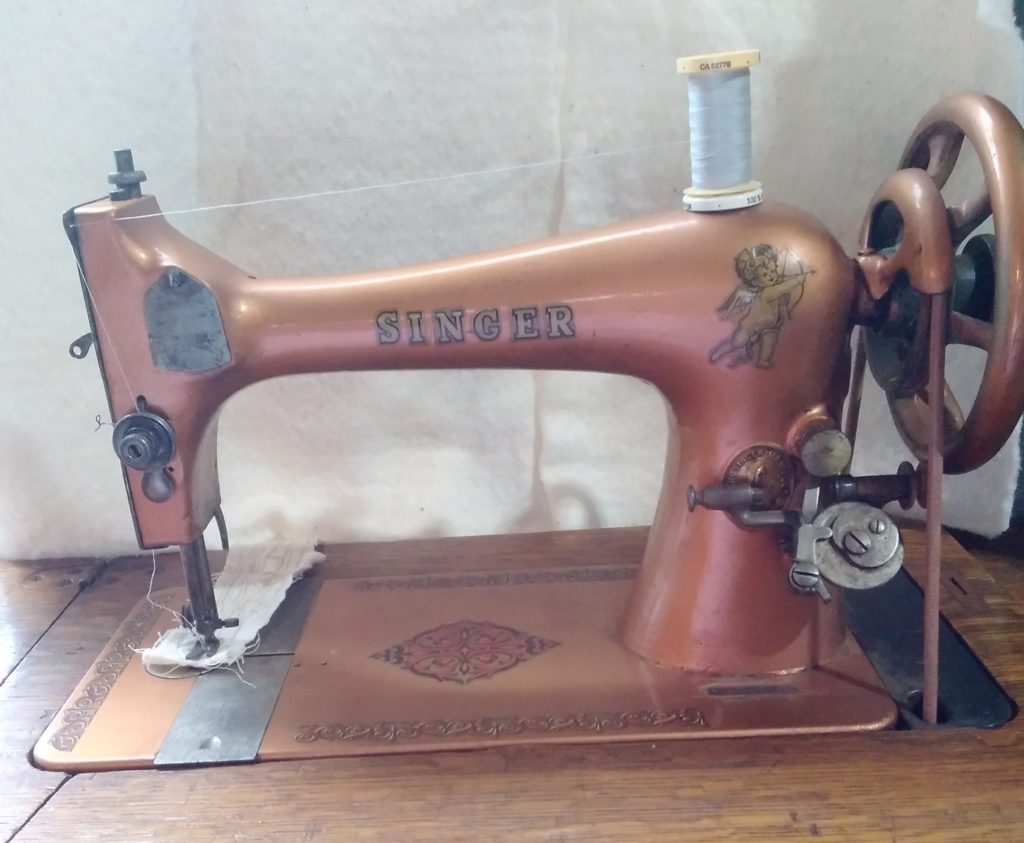
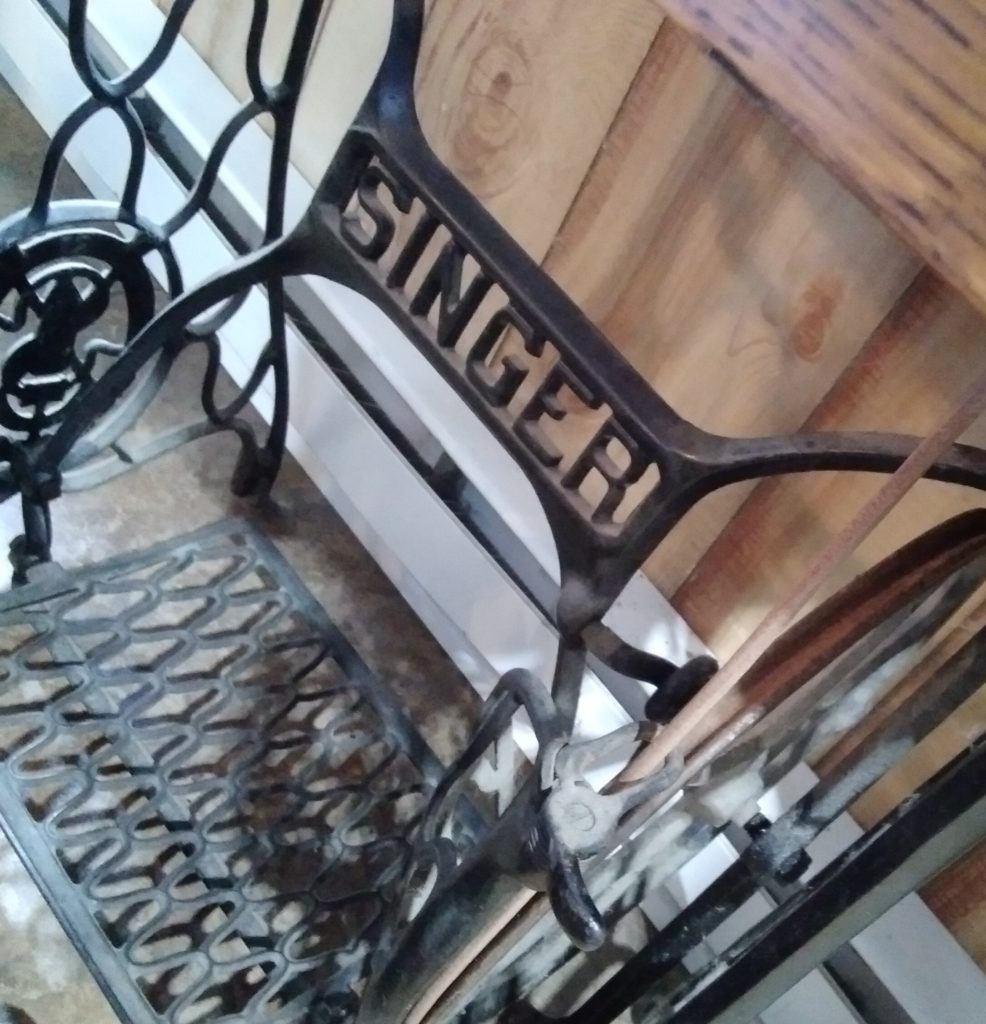
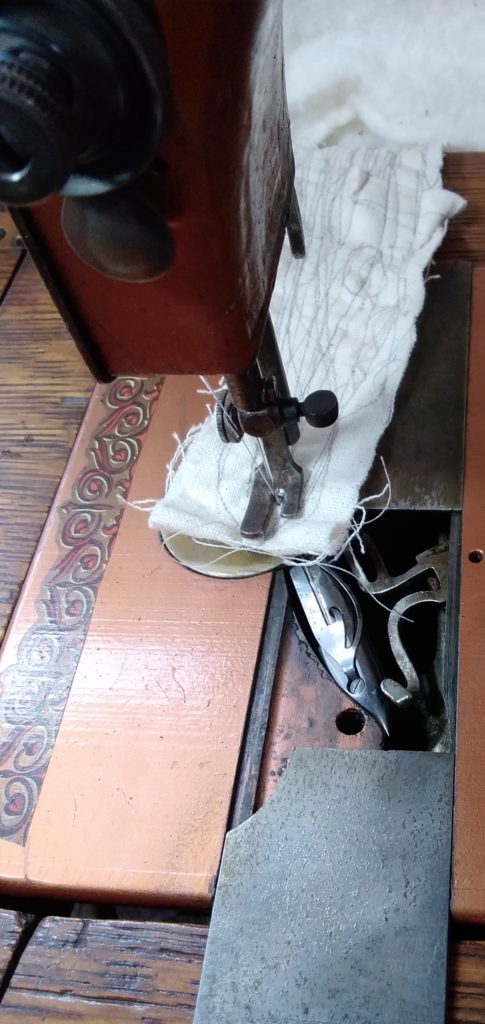
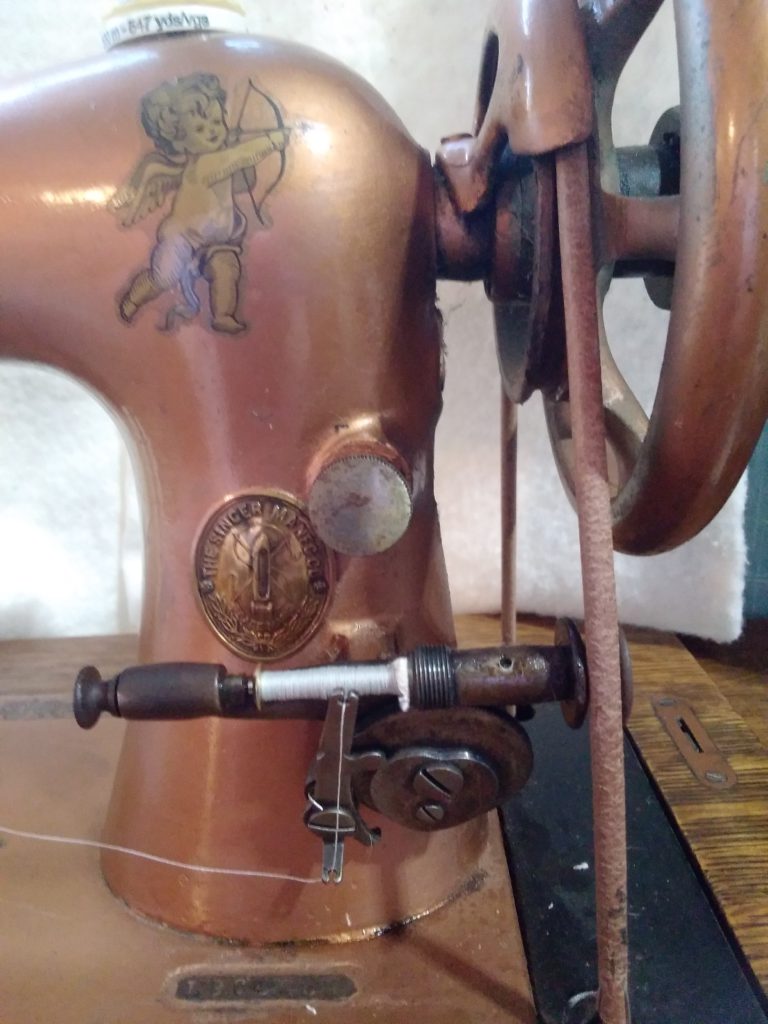
I love yard sales! Yesterday we found this for $20! The seller thought about making it into a table…oh, the horror!
It is a White. I don’t know much about this brand. All the mechanisms are loose…nothing frozen or locked up. There are many, many YouTube videos about them. Thank goodness!
The drawers are in good shape. Only one little spot of veneer damage.
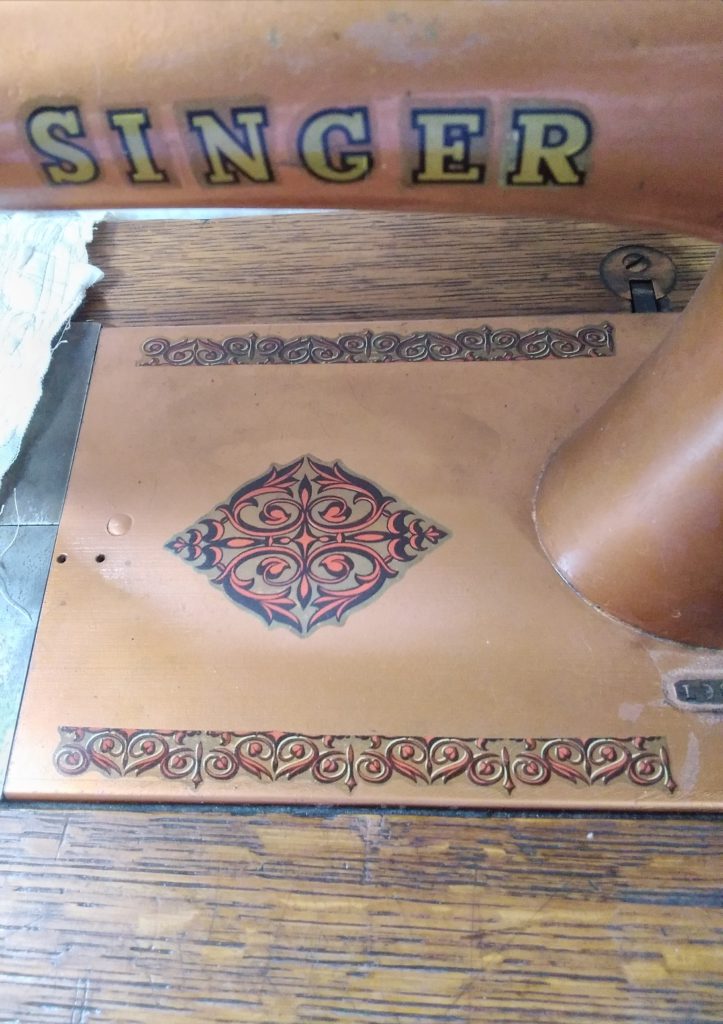
The decals are in good shape.
This is the back before I cleaned the wood. Beautiful!
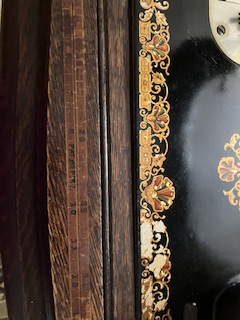
Do you see the ruler inlaid in the wood case? Fantastic!
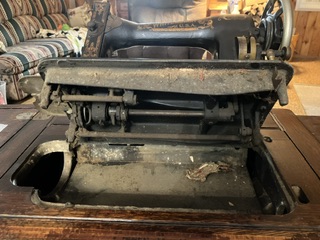
It was a little dusty underneath. It came with a nice ball of lint. It cleaned up easily.
I wiped it down with machine oil. What a beauty! I need to bring my treadle book back with me so I can put a new belt on it. (There is a new belt in one of the drawers.) I also need to watch some videos about threading it.
Oh, this will not be a table on my watch! What wonderful treasures did you find recently?
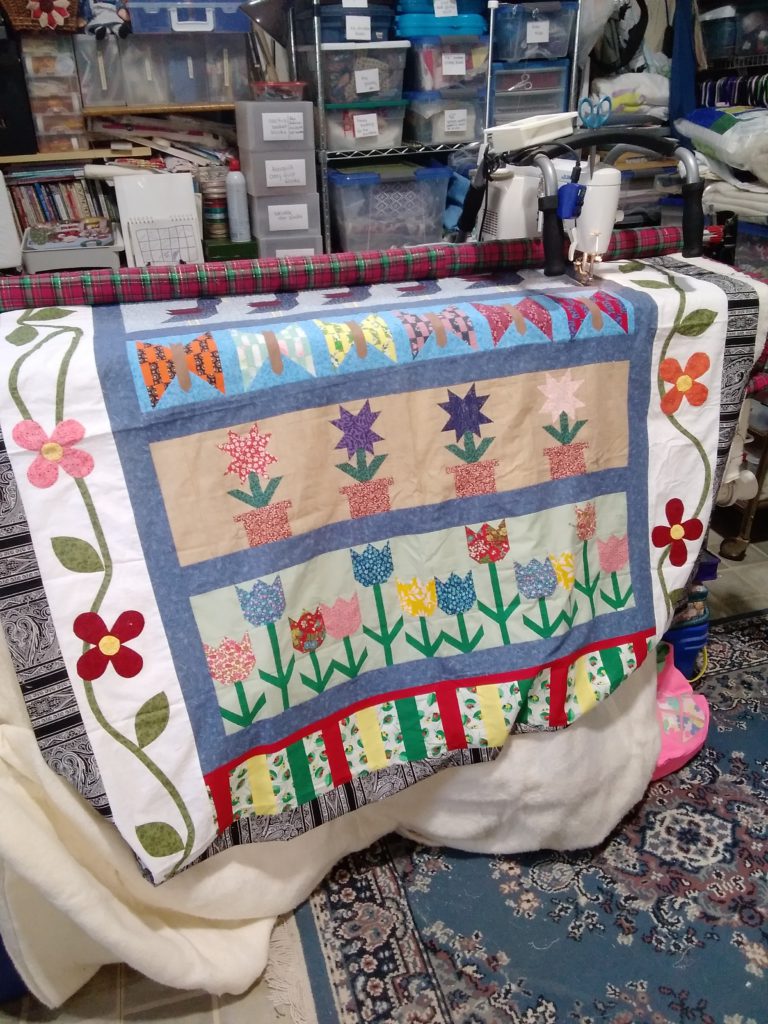
This week has been a travel week. I have worked on a few things…not much. Here are a few pictures of works in progress:
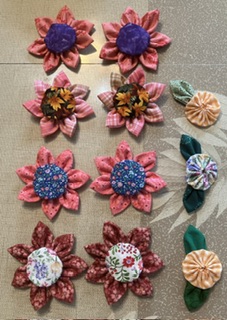
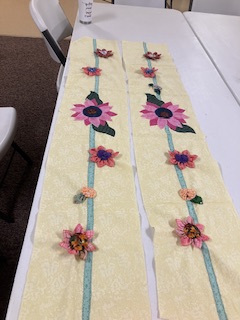
I made these pieces last summer in 2022. I am finally going to put them on the border where they belong.
I will add more of these flowers once I get these ones sewn down to the background. Oh, did I mention there are four borders, not just these two?
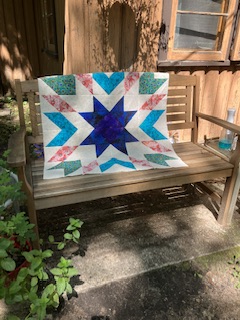
This block is from Pat Sloan. It is part of the fireworks quilt along that is just ending. It has this center square that I have decided to use in a block of the month quilt.
This picture has two outside borders on it. Next I will add the blocks for the month and big 16 inch corner squares. My colors are purple, teal, and a bit of red.
This is a practice block for the center of each cornerstone block of that same quilt. The section with the blue and purple square is actually made up of two triangles, which makes it a bit of a challenge.
Hope you are living your best life and doing things that bring you joy!
What are you working on during these last toasty days of summer?
I finally got it all together. Well, maybe not ALL, but this fourth and final version of the Sweet Childhood Memories quilt. This is the quilt that holds my memories. Ta-Dah!
In this quilt, Sweet Childhood Memories, designed by Pat Sloan, each block has a theme. I chose fabrics from my stash to represent the given theme of each block. Here is a detailed look at my fabric choices:
My favorite color is teal. Any shade of blue is great, too. Purple and red are great accents. The inner border that looks black is in reality a deep purple.
Block: Fairy Tales
When I was young, I had a Raggedy Ann doll that I loved to pieces. She had several surgeries to reattach her arm, her leg, etc. I also had a book about the adventures of Raggedy Ann and Andy. There are many of these books still available from Amazon, Etsy, etc. The dolls are also very collectable. I have several of the dolls decorating my sewing room, but not the poor original that was so well loved.
This block reflects the colors in the Raggedy Ann’s clothes. I even found some striped fabric…just like her socks.
Block: Best Friend
My best friends were all in the band. The fabric selection in this block reminded me of a John Philip Sousa march…that my friends would have been playing. Listen here.
Block: Bedtime Routine
Like I said, all four of these quilts had the printed background. Story time or reading was an important part of the bedroom routine. Brushing teeth and taking a bath was important, too.
Blocks (from left to right): Easter Sunday, Outdoor game, and Summer Break
Easter Sunday was the time to visit with grandparents. My grandmother loved to color Easter eggs with us. My grandparents had 200+ chickens, so eggs were never in short supply. They also had rabbits. One always left tracks somewhere in the house for us to find.
I had an basket that I used year after year. A Gardener’s solid chocolate rabbit always appeared in it. I always got a new Easter dress and dress shoes.
As a teenager, our youth group was always in charge of the breakfast after the sunrise service. Someone from the Ladies Auxillary group usually supervised us. That poor lady!
The middle block represents outdoor games. I used to love to play hide and seek with my brother. I would hide and he wasn’t good at the seek part…because I was in the hay loft in the barn where we weren’t supposed to be. I didn’t fall and break my neck…no harm, no foul, right?
Ahhh! Summer! This block goes well with the block above it. I loved playing outside…or reading a book outside. I spent a great deal of time in the hay loft of the barn or up a tree, hiding and reading a book.
Block: Ride a Bike
The Christmas that I was six years old, I got a bicycle. It had a purple and silver paisley seat, that my dad immediately changed to a more comfortable plain, white one. The body of the bike was purple sparkles. It took me forever to learn to ride, because I was so afraid of crashing! No helmets back then!
Blocks (from left to right): Books, Sing a song, and Movie Time
My favorite book was Charlotte’s Web. When the movie came out, I was thrilled, but as always, it was not as good as the book. I used web fabric in memory of Charlotte and pink fabric for Wilbur. Sorry, Templeton, no rat fabric was available.
The middle block is for Sing a Song. Senor Don Gato was a favorite song from elementary school. Listen to it hear. The fabric speaks for itself.
The last block in this row was for favorite movie. I would have to say Cinderella. She did have to clean up a lot of cobwebs!
Blocks: Nursery Rhymes on the left, Fun School Memory on the right
Ring Around the Rosie was my favorite nursery rhyme. We would join hands and spin around like maniac, then all fall down. I used as much flower fabric as I could. The contrast in this block is not the best, but it is still a pretty block.
When I was in high school, I did a term paper on nursery rhymes. I was appalled to find out it was about the black plague.
The tulip block is the fun school memories block. My greatest school memory was a school wide trip to Philadelphia, PA for the bicentennial celebration. Our school did fund raisers for two years to make sure that every student got to go on this trip. It was a five hour bus ride from central PA to get there. We left at 4 AM, but I got to touch the Liberty Bell. I still have the miniature version on a shelf in the sewing room. We got to see the mint in action making money. I was in 4th grade. Don’t waste time on calculations…I am old.
The flower body was cut from red, white, and blue calico. I probably have some Liberty Bell fabric in the tub of American fabrics, but I was content with the red.
Block: Childhood Home
This block is so appropriate for my childhood home. That whirling shape in the middle…someone was always coming or going…Mom, step-mother, etc.
The purple in the center is for a great patch of irises that were beside the house. There was wild garlic mixed in with the irises, so when it was time to mow them off for the fall, it had a wonderful garlic aroma.
My parents had beef cattle and milk cows, thus all the cow fabric. My mother used to make butter in my Grandmother’s antique barrel churn to sell. She also sold pastuerized milk, too. When my parents divorced, dad sold the cows.
The house itself had gray tar paper siding on the outside. At one point, the house had belonged to my great-great-aunt and uncle…maybe more greats. Then it was sold and turned into a hunting camp for a while before my parents purchased it.
Blocks: Toy Box on the left, and Favorite Teacher on the right
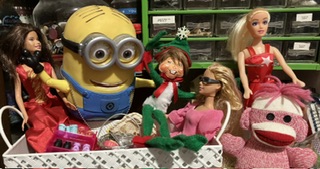
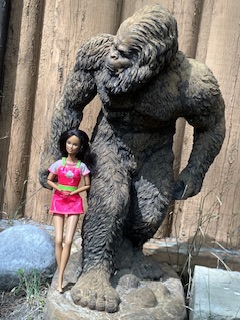
My favorite toys were Barbie dolls…and, yes, I still have some. They are friends with my elf and sasquatch statue.
I have two favorite teachers. In high school, Mrs. Neary was a wonderful teacher. She had my dad as a student when she was a brand new teacher. From the stories he told, it is no wonder she became strict and scary. She was wonderful!
My other favorite teacher was Miss Richards in 6th grade. She was sweet and kind. She taught me a lot about being compassionate…that carried over into my own teaching career.
I chose the fabrics for this block because I liked them. I am not sure when I learned to be the recycling “hippy” that I am. Maybe it was on that walk in 6th grade when we didn’t get to go camping…
Blocks: Favorite Bedtime Toy on the left, Holiday Memory on the right
On the right, the block represents bedtime toy. Again, Raggedy Ann.
The block on the left was favorite holiday memory. For years, my grandparents had a big Christmas party. All the aunts, uncles, cousins, great aunts, great uncles, etc. came to this party. I hated it. I whined about it. My dad said that someday I would miss that stupid party. I hate to admit it, but he was right. He was so right.
Block: Something You Learned
This block is about something I learned. There is not enough space here…Let’s just say I survived, I adapted, I overcame and here I am! Now I am old enough to wear purple and red anytime I want!
All four quilts pieced and ready to be quilted. I hope to have these ready to give as Christmas gifts (this year, smarty pants!).
I am already working on my next two projects. I need to keep busy so that Dan doesn’t think I have time to substitute teach. I am having way too much fun being retired!
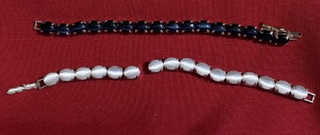
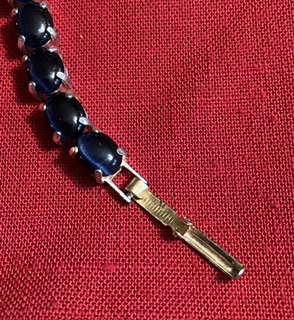
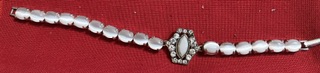
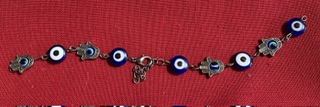
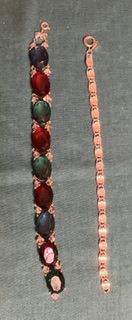
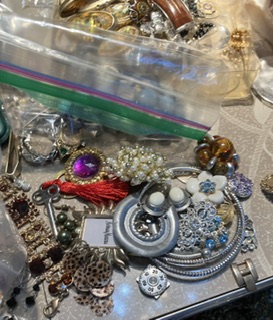
Here are the first two pieces to be repaired. The blue bracelet on top needs a clasp. The white bracelet is missing a part that holds a joining link.
I found a link on a different, not repairable, bracelet. It is not the correct color, but it works.
My solution for the white bracelet was more elegant. I found a “bead” on a broken necklace that could be fastened to the bracelet pieces with jump rings. It is a little longer, but beautiful!
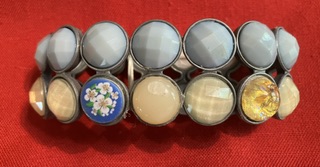
I showed you this bracelet in the original post, but I forgot to post about it with a follow up.
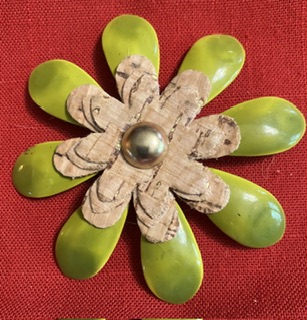
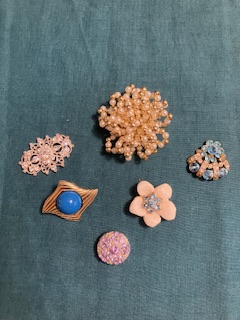
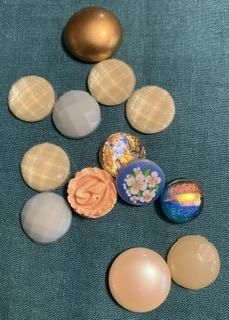
Most of the original cabochons were in the bag of pieces, but they were still a few missing. I improvised.
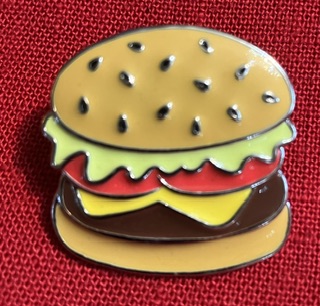
This cute little pin was in the bag .
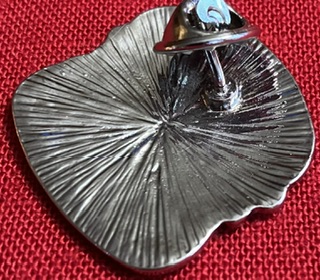
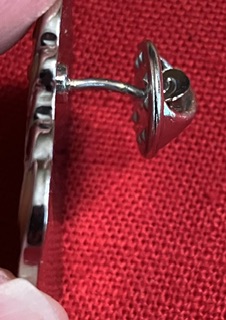
I am not quite sure what someone did to bend the back like this. Oh my!
I straightened it as best I could with a pair of jeweler pliers… Not perfect, but functional.
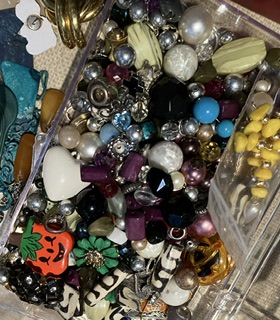
These items need a little bit of glue or jewelry cement. The middle piece is a pin.
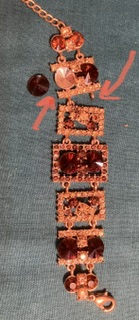
The two bracelets below just need a jump ring inserted to make them whole and useable again.
This pin was actually in two pieces. I glued one on top of the other to make it usable again. It measures 2 inches across…welcome back to the 60s or 70s.
I hope you’ve enjoyed the update on the bling from the scrap bag of jewelry pieces. There are many more of these to come.
I did finish the final quilt today and will be showing you that later this week…
When I started making these childhood memory quilts, my purpose was to get to know our new daughter-in-law, Tracy. I also thought that she might like to get to know us a little better as well. I actually learned some things about my husband as well, which surprised me after being married to him for almost 38 years!
In this quilt, Sweet Childhood Memories, designed by Pat Sloan, each block has a theme. I chose fabrics from my stash to represent the given theme of each block. Here is a detailed look at my fabric choices:
Dan’s favorite color is purple, but I also used as much nature fabric as possible. At home and cabin, he likes to feed the deer, turkeys, and squirrels. We have traveled to Yellowstone National Park many times to watch the wildlife, too. He likes to fish with friends and family.
Block: Fairy Tales
This block is based on Dan’s favorite stories: Davy Crockett and Daniel Boone. He loved watching Fess Parker as Davy Crockett on Sunday evenings on The Wonderful World of Disney.
The center of this block is a majestic moose. I also used the last of the Alaskan batik fabrics throughout this quilt.
Block: Best Friend
Dan’s best friend is also my cousin, Todd. Todd is a great fisherman. The fish seem to know he is around and beg to be caught on his hook! (Dan claims that he has been on trips when there were no fish caught, but I don’t know if that is really true.) Dan also hunts with Todd and his family at their fantastic camp. It is a beautiful, peaceful place in the wilds of Pennsylvania.
I used camp and nature fabrics in the corners. I used water fabrics for the background. I had some great fish and fishing panels that I fussy cut for the triangles in this block.
Block: Bedtime Routine
All four of these quilts have newspaper print for the background in this block. Everyone reads or has been read to at bedtime in our family.
Dan didn’t remember much of a bedtime routine when he was growing up. He remembers brushing his teeth every night. Everyone uses some water when brushing their teeth.
The striped fabric is green forest with birch trees. It fits the outdoor theme of the overall quilt.
Blocks (from left to right): Easter Sunday, Sing a Song, and Summer Break
Easter Sunday was the time to visit with grandparents. Dan’s family colored eggs. The Easter bunny brought a basket with delicious Gardener’s chocolates. He usually got a nice peanut butter filled egg…ohhh, yummy!
The middle block is for Sing a Song. De Camptown Races was a favorite song from elementary school. Listen to it hear. The brown fabric represents the dirt race track.
Ahhh! Summer! Dan spent a couple of summers in Canada with his grandparents. He did a lot of fishing for Walleye with his grandfather. The fabrics in this bottom block are mostly about fishing. I snuck a piece of Alaskan batik into the center.
Block: Ride a Bike
Dan used his Uncle Randy’s orange and purple bike with tiger handle bars until his grandparents got him his own for Christmas. It was blue-purple with orange highlights, too.
Blocks (from left to right): Books, Favorite Outdoor Game, and Movie Time
Dan’s favorite book was loaded with stories. He read the Disney Big Book of stories until it fell apart. We still have this copy, fixed with duct tape, in our library. We also have a copy in perfect shape that we bought at a yardsale. The book cover was red and colorful, so is the block.
Wiffle ball was a favorite outdoor game for all the kids in the neighborhood. That reminded me of the movie Sandlot, when they play baseball at night under the fireworks.
101 Dalmations, the cartoon version, was a favorite movie. Notice the paw print fabric. Movies were not available on VHS, DVD, or even on TV at that time. It was a special occasion to go to a movie in a theater.
Blocks: Nursery Rhymes on the left, Fun School Memory on the right
Here it is. The nursery rhyme:
Mary had a little lamb,
And when she saw it sicken,
She sent it off to packing town
and now it’s labeled chicken.
You will notice the sheep and chicken fabric.
The tulip block is the fun school memories block. At the end of sixth grade, the school district Dan and I attended took students on a week long camping trip to Bald Eagle State Park. His class had a great time. Those poor teachers! By the time my class got there, this trip had been permanently cancelled. I got to go for a day trip…basically a walk in the woods…whoopie.
The flower body was cut from a postcard block. It looks like a camping trip to me.
Block: Childhood Home
Dan’s childhood home had dark brown siding. It was on the mountain above Port Matilda, Pennsylvania. I loved to go to visit there when we were in college…lots of trees, deer, and peace and quiet.
I snuck in more of the Alaskan batik with the mountain at the top…not the same mountain, but a mountain nonetheless. There are also trees and more earth tones.
Blocks: Toy Box on the left, and Favorite Teacher on the right
Tonka trucks are used to play in sand and dirt. I used Tonka colors.
Mr. Hoak was Dan’s favorite social studies teacher. I used Americana fabrics to represent him in this quilt.
Blocks: Favorite Bedtime Toy on the left, Holiday Memory on the right
On the right, the block represents bedtime “toy”. I used mushrooms, castle towers, and balls to represent this. Enough said…you figure it out.
Dan’s favorite holiday memories were of hunting after Thanksgiving. I used fabrics that looked like the big woods.
Block: Something You Learned
Dan’s lessons from childhood seem to be related to nature and the peace and serenity that can be found there.
Three quilts down and only my version to go! I hope to have that assembled and ready to show you by next week sometime.
I started this sew along to get to know my new daughter-in-law better. We are glad to have her in our lives. She makes our son happy. She also seems to like my sense of humor. I enjoyed hearing stories about her childhood and where she grew up. This quilt gave us topics to talk about and share. She also got to hear stories about our family, too. She didn’t run away screaming, so that’s a good thing.
In this quilt, Sweet Childhood Memories, designed by Pat Sloan, each block has a theme. I chose fabrics from my stash to represent the given theme of each block. Here is a detailed look at my fabric choices:
My daughter-in-law’s favorite color is green. I used as much green as possible with yellow and pink as accent colors.
Block 1: Fairy Tales
Rumplestiltskin was a favorite childhood story. I used straw fabric for the center and golden threads fabric, too. Straw spun into gold. The pink flames just happens to be the sashing between the blocks.
Block: Best Friend
Tracy had a great story about the best friend theme. When she was little…6 or younger…she spent the night at a friend’s house. In the middle of the night, they prepared breakfast for her friend’s parents. They made toast and raw eggs! She said that she didn’t ever remember staying the night with that friend again. Hmmm!
I used egg yolk and toast colors in this block. I had some scraps of fabric that had lace fused on top. I am certain that these scraps came right out of the 1970’s!
Block: Bedtime Routine
All four of these quilts have newspaper print for the background in this block. Everyone reads or has been read to at bedtime in our family.
The water fabric represents bathtime before bed every night. Bathtime was an important part of bedtime routine at Tracy’s house. She remembers playing a game called, “You are a washcloth” with her mom to help her identify items around the room. The center of this block is made with textured fabric to represent the washcloth.
I modified this block with a green sashing because I cut the squares incorrectly for the half square triangles…oops!
Blocks (from left to right): Easter Sunday, Sing a Song, and Summer Break
Tracy said that one of her favorite Easter things was getting a basket. We talked about egg hunts and coloring eggs, too.
The middle block is for Sing a Song. Tracy loved the Alphabet Song. The small black blocks have the alphabet in print on them. The pig fabric was extra from a previous block…storytime. Tracy introduced me to the story, Perfect the Pig. It is a great story. It is out of print, but you can listen to it here.
Ahhh! Summer! I used colors that reminded me of climbing trees. Tracy had a yard and neighborhood full of great trees to climb.
Block: Ride a Bike
Tracy had a bike that was glittery pink and white. I added the pink flames just for fun!
Blocks (from left to right): Books, Favorite Outdoor Game, and Movie Time
Tracy’s favorite book was Perfect the Pig. I didn’t find that great flying pig fabric until after I made this block. I used sky fabric and butterfly wings to represent the story. Eventhough this story is out of print, she did find a copy for baby.
Freeze Tag was a favorite outdoor game that Tracy played with the other kids in her neighborhood. I used sky fabric to represent the outdoors and snowflakes for freezing.
Tracy loved Cinderella, Snow White…any Disney movie as a little girl. I had some very small scraps of Minnie Mouse…perfect. I used green spider web fabric to represent all the cobwebs that Cinderella cleaned up.
Blocks: Nursery Rhymes on the left, Fun School Memory on the right
Little Miss Muffet sat on a tuffet and had to put up with a lot of spider webs. I have an amazing amount of spider web fabric. I HATE spiders. I know that in crazy quilts they were added for good luck.
The tulip is for a trip to the planetarium. I love this fabric, but never found a use for it…until now!
Block: Childhood Home
After I made this block, based on Tracy’s description of the house she lived in, she found a picture. Her house was red brick. The yard was full of big trees to climb. There was ivy growing everywhere. I found fabric for all of those elements.
Blocks: Toy Box on the left, and Favorite Teacher on the right
Tracy loved playing with Barbie dolls. I had a great collection of these, too. The dancers in this block remind me of Barbies in elegant gowns and cute shoes.
Tracy’s favorite teacher was Mrs. Baney, an English teacher. I used more alphabet fabric…and the great Perfect Pigs.
Blocks: Favorite Bedtime Toy on the left, Holiday Memory on the right
Since bathtime was an important part of her bedtime routine, Tracy said that her favorite toy was stacking cups that she played with in the tub. I used colors that represented stacking cups. I also found a set of these at a yardsale that I gifted to her.
The fabrics in the Holiday Memory block represent Easter…lots of bunnies and baskets.
Block: Something You Learned
Tracy’s lesson learned was, “Never burn bridges.” One of the star points has a bridge on it. You will notice it is not on fire.
I am happy to assemble another one of these quilts after months of work. Hopefully, the third one will be ready for viewing soon. I hope you enjoyed this quilt narrative.
So much potential in just a few pieces! I like the necklace, but rarely wear them. With a little snip of a link, it will become a bracelet. With some extra hardware, it will make three more!
By combining the large jewel beads and the crystal rosary pieces, I made this fantastic blinged out bracelet. Now I just need a party to go to…
The citrine pieces from the broken necklace were pulled off the pins on the chain segments. There was enough to make a bracelet on .7 mm elastic cord.
Glue time! These lovely pieces need a pin back glued on to them.
This bracelet is mostly intact. One gem needs reattached with some cement or glue. It also needs an o-ring to reattach the sections.
This bracelet has elastic in fantastic condition. Most of the missing cabochons were in the huge parts bags. Glue time!
What progress are you making on your latest project? I love hearing from you!
I am adding a new category to my blog…jewelry! I have been making jewelry for more than two decades. I don’t make jewelry often, but I do enjoy this as a hobby, too.
I like to fix pieces of jewelry so that I can continue to wear some of my favorite pieces, usually bracelets or earrings. Harbor Freight sells a set of 6 jeweler’s pliers to make this easy. Lots of big box stores carry findings for making earrings, bracelets, etc.
Last year, when our friends came to visit, I discovered that my friend enjoys making jewelry, too. I started stocking the cabin with jewelry making supplies, too.
I found a yard sale that had HUGE bags of scrap jewelry…parts, pieces, some unusual, but functional pieces. Again this year I bought another HUGE bag…I sorted for two days! I wish I had taken a picture of the huge bags…I probably only paid about 50 cents per pound! Here are a few pictures:
The table in the cabin seats six! It was covered with parts containers and all sorts of bits and pieces. I love using repurposed tackle boxes for parts containers. The lids close tight enough to keep the contents in the divided parts…no resorting required. I have four large containers: glass beads/shell beads, wooden beads, and assorted beads, and one for findings. Seed beads are bagged and kept in a separate box.
This bin contains jewelry that is usable as is…no fixing required. In a future post, I will lay out the pieces in categories, like bracelets, necklaces, etc. to share with you. Some of these I will gift to friends/ family…or wear myself…or donate to charity.
This is the small bits container before I sorted it. It contains all sorts of beads, findings and cabochons (things that need to be glued onto something else). The baggie to the right contains pairs of parts suitable for earrings.
The container in the picture shows larger beads that were once upon a time rather large and chunky bracelets. One bead at a time, with smaller beads to make up most of a bracelet, these will be beautiful.
Behind this container, to the left, is a silk flower pin. It has a glued on center made from seed beads. That flower now decorates a basket in my sewing area. It was too gaudy for me to wear, but looks great on a basket.
This pile has an interesting bunch of bits…some of them are clip on earrings. Look at those amber ball creations…and those silver “horseshoes”! Woo-wee! There are also blingy thingys that I will be turning into pins.
This basket is full of things that need a little bit of TLC (tender loving care)…a little glue here…an o-ring there…as good as new. I will post pictures of these reformed pieces later, too.
This is full of pendants…anything that can be put on a chain or choker. Look at that fabulose gold pendant. It is as big as the palm of my hand! There are some others buried under there, too.
These bags contain several other sorted items: Rings, button covers, tie clips, purse hangers, cuff links and a watch! I will picture these in a future post, too. Some of the rings are right out of the 1970’s. Oh, baby!
I also have a bin that I did not picture above. It is full of things to take apart and repurpose. I plan on decortating my world with all of this “junk”. I will share my repurposing adventure with you later, too!
What “new” craft or hobby have you tried recently?
After months of working on four of these quilts at once, the first one is finally assembled into a top! This is our son’s version.
In this quilt, Sweet Childhood Memories, designed by Pat Sloan, each block has a theme. I chose fabrics from my stash to represent the given theme of each block. Here is a detailed look at my fabric choices:
My son’s favorite color is red. I used as much red as possible.
Block 1: Fairy Tales
I also included legends and other stories in this fairy tale theme. This block reflects a love for the story of Robinhood. The fabric has a forest theme: browns that look like bark, green leaves, and snowy cold nights.
Block: Best Friend
This block is for Henry. Henry makes the best chili con carne in the world. He and Jeremiah also brewed homemade beer at one time. Chili and beer colors are represented in this block.
Block: Bedtime Routine
All four of these quilts have newspaper print for the background in this block. Everyone reads or has been read to at bedtime in our family.
The water fabric represents bath time before bed every night in this block. I modified this block with a maroon sashing because I cut the squares incorrectly for the half square triangles…oops!
Blocks (from top to bottom): Easter Sunday, Favorite Outdoor Game, and Summer Break
The Easter Bunny was a crazy creature. He one time brought a swing set. Another time he brought a turtle sandbox…represented by the cross fabric. It looked like a turtle shell to me. He loved dyeing eggs. After Easter we always made a big batch of pickled beets and eggs to enjoy…and to use up those hardboiled eggs.
One of our son’s favorite outside activities was riding his bike. He also mentioned playing a game that was similar to Lord of the Flies. I don’t even want to know.
Ahhh! Summer break was always a great time for our family. As teachers we had time to spend traveling, etc. The red and blue fabric represents favorite popsicle flavors. I used the bullfrog fabric because we used to sing “Jeremiah was a Bullfrog”.
Block: Ride a Bike
Jeremiah had two bikes that I remember. The first was a push bike…the kind you push with you feet. He rode that up and down the sidewalk of our little fenced in yard for hours. It was orange and white with some black highlights.
When he graduated to a full size bike, it was red with white pin stripes.
Blocks (from left to right): Books, Sing a Song, and Movie Time
I was not surprised when he chose The Land Before Time and/or Jurassic Park as his favorite movies. He has always loved dinosaurs. The background fabric has dinosaur footprints and skulls.
Blocks: Nursery Rhymes on the left, Fun School Memory on the right
Jeremiah couldn’t think of a nursery rhyme that he absolutely loved. He did think about a song: “Cats in the Cradle”. Songs are poetry set to music. I love the cat fabric in this block!
The tulip colors represent parachute day in gym class as a favorite school memory.
Block: Childhood Home
The house that we lived in had red T111 siding. It looks a lot like a barn. (red fabric) It is a wooded setting. (green leaves) We also used a firepit and fireplace frequently. (red-orange leaves look like flames).
Blocks: Toy Box on the left, and Favorite Teacher on the right
The red blocks were the closest thing in the fabric stash to lego blocks.
Jeremiah’s favorite teacher was Lisa Wright as Musselman High School. The fabric was chosen to represent her cultural heritage.
Blocks: Favorite Bedtime Toy on the left, Holiday Memory on the right
Can you see the Gloworm colors in the block on the left?
The fabrics in the Holiday Memory block represent the legos that my son got as Christmas gifts for many consecutive years. Life was easy then!
Block: Something You Learned
Jeremiah shocked me when he said: “You were right” can prevent a lot of problems. He is sooooo right, but that is a difficult thing to admit sometimes.
I love the fabrics even though they do not really reflect his answer. The blue fabric has some cool tatoos: eagles, skulls, etc.
We have an ongoing family discussion about toilet paper. Some like it soft like a fuzzy bunny, others of us like it like sandpaper. I had just enough of this fabric to work it in as a background. I found it as I was getting ready to cut this last block.
I am happy to finally assemble one of these quilts after months of work. Hopefully, I will have another one to show you soon! I hope you enjoyed this quilt narrative.
As you know, I am working on the blocks for the Sew with Me 2023 by Erica Arndt. I am slowly getting caught up on this sew along. This is only block #2 and #3. I have decided to use purple and red as my main colors for these blocks.
There are now 5 patterns available. Remember…She also has YouTube versions of these blocks to help or to keep you motivated.
What ongoing projects are you working on today? I would love to hear from you!
I am also completing the blocks for the Sew with Me 2023 by Erica Arndt. I am a little behind on this one! This is only block #1. The pattern read as if only 2 colors were used. I guess I should have watched her tutorial video on YouTube. There are 4 patterns available.
Here are my blocks:
What sew alongs are you still participating in? I would love to hear from you!
As you know, I am not the only maker in our family. My husband completes many cross-stitch projects. He has been given many kits, floss, and fabric. At the price for a skein of floss today, he is sitting on a million dollar collection of the stuff.
He also has oodles of books and patterns, too. The book and pattern section of the library still needs to be organized.
Today’s post is about the finishing touches that I am adding to a kit that DH completed a short while ago.
The kit was a gift from our wonderful daugher-in-law. My son created a Southwest area in a hallway of their new house for her. Dan finished this kit to be a wall hanging in this area. Shhhhh! It is a surprise!
Here is the finished stitching.
I am adding 2 borders. The first one is very thin to give the viewer’s eye a rest. The second border is to contiue the Southwest theme.
The backing fabric is more Southwest fabric.
I used the pillowcase method instead of a traditional binding to finish the edge. The edge is topstitched to hold the layers steady.
I am adding 3 possible hanging mechanisms to the top…
Corner triangles
a hanging pocket and
hanging tabs.
Corners…
Voila! C’est fini!
Hanging sleeve and/or tabs…
What project are you finishing today? Hope to hear from you soon! I love to hear about your projects…
Last week we decided to take a short trip away. Now that we are home I can tell you all about it.
Our first stop was in Williamsburg, Virginia for a night. The flowers and trees were blooming in all there splendid glory.
Next we traveled to Myrtle Beach in South Carolina. The weather was perfect.
We drove to Sunset Beach, North Carolina. It seems to be a nice little tourist town.
Our next stop was Ocean City, Maryland. We visited with my sister’s family for Easter…then we headed home to West Virginia. The sunset ended our last day of travel.
When we walked around our yard the next morning, we discovered that the bleeding heart plants were in full bloom.
Hope you have enjoyed my photos from our trip! Where are you planning on traveling to in the near future? I would love to hear from you!
I rarely buy kits, but while we were visiting our son in Colorado my husband picked this one up at Holly’s Quilt Cabin. It is a simple design. The fabric is the “star” of the show. Here it is…ready to put on the quilt frame:
Ready to quilt…
My husband loved the wildlife fabric. It matches several of the decorative elements at the cabin.
Wildlife close up
I had several fabric finds and leftover pieces to use for a backing. It is pieced and ready, too.
The central piece of fabric has cabins with moose, fishing equipment, etc. The bark looking fabric was another find. I bought both of those fabrics at yard sales for about $1 a yard…new yardage at bargain basement prices.
I bought the small woods motif fabric somewhere in our travels…maybe that same year…maybe not. I have been saving it for this project. The rest of the fabric was leftover from the kit.
Here are some more spring pictures:
First dandelion in the yard.Pansies…Pansies…and more pansies…planted in yard sale pots.
I hope you are finding projects to work on and beautiful flowers to admire. Happy spring!
I told you a couple of weeks ago that I would share my participation progress in some sew alongs. To find this block of the month, google “Quilting Life 2023” or click here. This block of the month is run by Sherri McConnell.
Blocks for this year are available in 12 inch and 6 inch. So far, the pattern is on one page (for those of us who like a paper pattern to look at). Video tutorials are also available on YouTube.
The pattern is available on the first Monday of every month. Please check the website for availability after the fact.
I am making both size blocks.
Progress so far…
I am using as much scrap fabric as possible, especially since I organized!
I also have a few spring pictures to share:
Forsythia in neighboring yardVolunteer white peach blossoms…growing in the compost
Now on a sad note…I am tired of deleting spam for pharmaceuticals, porn, and whatever is being sold or talked about in Russian etc., so I am turning off active comments. Please e-mail me directly. I love to hear from you!
To wrap it up this week, I hope you are having fun making…maybe participating in sew alongs. Hope you weather is making spring flowers appear! What are you working on/ seeing in nature this week?
I finally got the sashings and cornerstones on the blocks to finish the top for a quilt. I used a lovely gray batik. It does make the bright colors of the scrappy blocks pop.
Finished top
…and there is more!
While I was cleaning and organizing my sewing room, I found a box of scraps. This box was given to me by a substitute teacher that frequented the building I taught in. I have had these scraps for a while…since sometime before March 2020 (when Covid lockdowns began).
Scrap box…medium clear box
All of these scraps are around 2 inches…some are a little smaller. They are perfect to trim to 1 1/2 inch squares or triangles to make 1 1/2 inch half square triangles.
Accuquilt dies to trim scrapsLots of pieces…more to come4 1/2 inch star
I now have enough little pieces to string piece bonus blocks between all of my other projects! 😁
Have you unearthed any projects recently? I would love to hear from you!
I am participating in several quilt alongs this year. I will share some pictures and information for all of them here over the next few weeks and months. I am using a notebook and calendar to keep track of my progress in each one.
My notebook is getting full!
This week marks the beginning of the Bountiful Quilt Along for 2023. Fabric suggestions and a coloring page can be found here. New blocks are posted on the first Friday of every month from March until August. This Quilt Along is posted to collect charitable donations for the Make-A-Wish Foundation. The Fat Quarter Shop posts the patterns. There is also a YouTube tutorial available. At the end of the sew along, there is a quilt auction of donated Bountiful Quilts…made by Pat Sloan, Corey Yoder of Coriander Quilts, etc. A cross-stitch pattern is also available on the The Fat Quarter Shop site, but I am not interested.
The first block pattern can be downloaded here. This pattern makes two 24.5″ square blocks. It does take a while to assemble the many parts and pieces (98 pieces to be exact). They are large pieces that assemble easily. The directions are well written.
I watched 2 episodes of Midsomer Murders on Prime as I sewed up my blocks. I am using up scrap or fabric that I have on hand for this quilt. I did find a very interesting basket weave fabric. The first pink border looks like a color right out of the 1980’s…it might be…I bought it at a yardsale mixed in with some other scrap fabric. The star in the center of the basket also looks like it crawled on of the 80’s.
Here is a picture of my block(s):
First block 🥰
The center basket star is cute:
Star on basket
This makes a very cute quilt. Won’t you join in the fun?
This week I have been organizing my stash of fabric. I have been collecting for 30+ years…just waiting until I could retire and play! Mwahahaha! The time for leisure is here!
Here are my before pictures:
Fabric is in pilesI moved a bunch of containers of fabric and projects to the dining room to sort and straighten.Notice the middle pile is 3 totes high.
Here are areas that I improved:
The dress form is looking over the room.
What did I find when I took a good, deep dive into things that I have stashed away?
Labeled and organized binsMore organized binsMy childhood dresser now has organized fabric.Schematic 24 organized drawers!Quilts and more quilts….
Well…5 queen size quilt tops that were out of sight, out of mind, plus a table runner, a wall hanging that is pinned together but needs assembly, and 2 sets of blocks that have been kitted up for assembly.
Looks like I am going to be busy for a little while! I will not be bored, now that I am “retired”…and working harder than ever!
What have you been working on recently? Have you found any hidden treasure?
Normally, my idea of a fire starter is a crumpled piece of newspaper with sticks on top. Apply flame with a lighter, match or torch.
Our wonderful Michigan neighbor, Sheryl , made us some of her special fire starters. Got damp sticks or slightly wet firewood? These are the answer!
They are made using a cardboard, dryer lint, finely chopped up fabric scraps, and melted ugly or broken candles. Combine in layers. I put a piece of foil or a cookie sheet under it until the wax sets, to protect my countertop.
Fire starters in a chunk
To use these, I will simply rip off one “egg cup” at a time. I place this on top of the newspaper…between the sticks, then light.
WV fireplace Michigan cabin fireplace
This is the best use for those garbage fabric scraps ever!
Have you ever tried making or using these? These are the best! I love hearing from you in the comments.
Recently, my sister sent me a family quilt to repair. Restore really isn’t the correct word. It can not be brought back to its original form with the pieces that are left.
It was most likely made by our great grandmother, Mettie Marie Cole McCullough. She lived most of her life in the rural farming village of Pine Glen, Pennsylvania. She was a farmer’s wife and mother of 10. Her quilts were utilitarian…the original weighted quilts.
This quilt was at my grandmother’s house.
utilitarian weighted quilt
This quilt is constructed from anything and everything that was at hand. It has wool patchwork. Straight seams were not important in construction. Warmth was the goal. Sashings are tan denim or duck, wool, and flannel. It is tied with green yarn. The batting is a badly deteriorated wool blanket. The backing looks like piece goods. It was seamed together in the middle of the back. The dark blue backing fabric is severely dry rotted. The binding is a rolled around portion of the backing. There is no label of any kind.
Back and batting
I need to do more documentation as I work on this quilt. I do have wool and denim fabrics in appropriate colors available. Some of the patches are in poor condition…falling apart at the seams or other holes.
Complete block
This quilt should be an interesting project. I think I will try to have it refashioned into a useable quilt as a Christmas present for my sister this year.
Have you ever tackled a project like this? Please share your projects and your thoughts on mine.
Our house is a modified A-frame. The loft above the living room is our “library “. Years ago, we built in bookcases on wheels (so there is storage behind the shelves, if needed). We added books…and then more books. Until it looked like this:
A miracle has happened!
Notice the shelves are hidden by bins, baskets and bags of books. Nothing was accessible. What a nightmare! It was no big deal…we were both so busy teaching that neither one of us had much time to read for pleasure. That all changed when we retired in June.
While we are awaiting the arrival of our first granddaughter, we are trying our best to stay busy. It took 3 days to transform this space. That kept us busy. Always be careful what you wish for!
First step, bring all of the stuff blocking the shelves downstairs to the living room…and sort, sort, sort.
Large bins are by author of multiple books. Small bins (not pictured) are sorted alphabetically by author.Small bins are on the counter.Look at the beautiful shelves!
To finish this project, we bought 3 mighty mover dollys (from Harbor Freight) for under the large, now sorted, bins. They can be easily moved from place to place to access any book in the room.
Example dolly…12” x 18”
What project have you been putting off? I am so glad this is finally completed! No more shame over this space ! 😁
I started the blocks from the Sampler Spree block in September 2022. I finished all but 1 block on January 4, 2023. (That unmade block needed templates…uh, no…never.) Here is the final tracking sheet:
Tracking sheet helped move this project forward.
Here are the final blocks:
And the last few:
I love that little star!
I am planning to use the layout in the book to assemble the top. I am going to sort the blocks a little differently though.
Recently I started watching Pat Sloan on her YouTube channel every morning. It is a nice relaxing way to start my day. I participated in the Snapdragon quilt along. Well, I made the blocks anyway. They are currently on my design wall.
Snapdragon quilt blocks
Finishing the top is a job for next week…or maybe a little later in the month.
What do you have on your design wall? What project are you working on next?
After my last post evaluating the goals from 2022, I have decided on the goals for this year. I am continuing to use my little green book. I am expanding my sewing days into a tiny calendar with specific tasks that are completed listed on the dates. That way I can feel like I am accomplishing more. I am also using a 3 ring notebook to keep track of sew alongs, reorganizing challenges, etc.
Time to finish up some tops that I have made for people that I love. I printed off a “list” organizer for just this purpose…maybe that will help. This step always seems like work to me.
Goal: Turn a quilt top into a finished product every month…or at least 12 for the year.
On the machine…
Goal 2: Blog more
Last year I had a goal of 2 blogs a week. Sadly, I did not meet this goal. I would like to write more patterns. I think my blog will help me do just that. By setting this goal so low, I will feel that I have accomplished great things if I write more!
Goal: Publish 1 blog articles a week.
Goal 3: Sew for my own happiness
Last block from book
I am keeping the same goal. I did not meet the goal last year, but I was working from January until the end of May, plus cleaning my classroom out getting ready to retire. I think that I can easily meet this goal this year.
Here are my revised list of tasks that I count as sewing:
hand sewing (applique, binding, English paper-piecing)
machine sewing (quilting, piecing)
hand embroidery
machine embroidery
writing patterns
reading patterns and/or quilting related books
ironing/ pressing
cleaning/ organizing my sewing area/room
cutting fabric (Accuquilt or other)
sorting fabric (scraps or other)
Goal: Complete a sewing activity from the above list at least 80% of the days in the year…that is 292 days.
Goal 4: Read to self
I met this goal easily last year. I am not ready to increase it just yet, but I think I can meet it again!
Goal: Read at least one book a month…or 12 books in the year.
Goal 5: Read Aloud
I am keeping this goal. We are currently reading Love and War by John Jakes. This book should keep us busy for quite a while. This is the second book in the series. We usually only read a chapter or two during a read aloud session…15 to 30 minutes a day.
Goal: Read to each other at least 2 days a week.
Accountability
I am going to continue to use my little green book. It is numbered and set up. I also have a small calendar from the dollar tree and a notebook. Writing information down keeps me accountable.
So what do you want to accomplish this year? What habits help you maintain some calm in your life? I love to hear your thoughts!
I set 5 goals for this year…and I did manage to keep track for most of the year. If you would like to read my original post, it is here: Jumping on the Resolution Bandwagon. After our spring break in April up to the end of May, my head exploded as my husband and I were preparing for retirement for both of us. I had 32 years worth of elementary teacher crap that I had been using, keeping and hoarding that I had to share with others. I found a home for all of my treasures…not just in a trash can. The people who accepted my gifts may have trashed them, but I don’t care. I left my classroom vacant and ready for the next teacher. Here is my synopsis of my 2022 goals:
Goal 1: Quilt top finishes
I love making tops. I have made more of these this year! Somehow the quilting seems like work. I know that I could outsource this part, but as a new retiree, I can’t afford to do that. This goal should have been easy to meet. I started out so well…then nothing.
An example of a new top…made with 6 inch blocks…256 blocks to be exact!
Goal: Turn a quilt top into a finished product every month.
Summary: I finished a quilt in January 2022. One quilt for the whole year finished. That is 8%. I can do better than this!
Goal 2: Blog more
In 2021, I wrote 5 blog articles.
Goal: Publish 2 blog articles a week.
Summary: I wrote 37 articles. If I count weeks that I published twice a week, I met 27% of my goal. I did a better job writing, but need to rework this goal.
Goal 3: Sew more for my own sanity
Goal: Complete a sewing activity from the list at least 80% of the days in the year…that is 292 days.
Here is my list of activities:
hand sewing (applique, binding, English paper-piecing)
machine sewing (quilting, piecing)
hand embroidery
machine embroidery
writing patterns
ironing/ pressing
cleaning/ organizing my sewing room
cutting fabric
sorting fabric (I have been collecting fabric for retirementl and I am a scrapaholic.)
reading something related to quilting
Summary: I completed some “sewing” on 220 days this year. Remember that I temporarily lost my mind for 6 weeks while preparing for retirement. I met 60.2 % of my goal for the year. I was working from January until the end of May while I worked towards this goal. I think I can increase the amount of time sewing based on the list of tasks.
Goal 4: Read to self
My library still looks like this picture…maybe worse. I have added new books. Some from school, more from my wonderful mother-in-law.
Goal: Read at least one book a month.
Books, books, and more books…I need a librarian miracle to organize this mess.
Summary: My goal was 12 books this past year. I read 16! That is more books than I have read to myself in any given year in the last decade. I have been reading a lot my entire life…articles, aloud to children, to teach reading to children, etc., just not entire books or novels. I met this goal 133%! I do have to admit that I read extras on some months and part of a book one month and finished it the next. Life does not always operate by the calendar!
Summary: Out of 52 weeks, we read aloud twice at least 40 weeks. That is 77% of the weeks this year. I don’t know what happened during the retirement preparation weeks. We did read some, maybe. The even better news is that 56% of the weeks we actually read 3 or more times.
This is one of my favorite activities. It is one of the best ways to “unplug” that I know about. Going for a walk is another way. It would be great to combine the two, but the seating is not always good when you are out and about.
Rainbow Scrap 2022
I have started the rainbow scrap challenge for the last 4 years. Yes, I said 4 years. Because I was working, and traveling, and life sometimes ran me down, especially during shut downs, etc., I never made it more than 2 or 3 months.
This year I completed the color challenges for January, February, and March. I chose fabrics for April…but we know that life interfered. In retrospect, I completed more this year, but still fell short of my goal. I used the crazy quilt 6 inch block from Accuquilt. I made 10 of each color.
Red example block
Accountability
I used this great blank book to keep track.
I calculated and tabulated. Now it has 2023 added!
Have you evaluated your goals from 2022? Are you revamping those goals for 2023? I will be back with my new goals, slightly modified and updated, soon!
I am still working on the 100 blocks from the Sampler Spree book. Only 18 more blocks to go!
Here are the 35 blocks that I created during the month of October. I was incredibly productive. We were at the cabin in Michigan on Long Lake. I made most of these blocks while my DH watched football. I am loving retirement!
Here is my tracking sheet. There are fewer and fewer plain white numbers left that have not been made. I am a little late getting started on November blocks…only one so far.
I had a serious brain glitch when I put this block together. The picture on the right is the correct assembly for the Buoy block. I incorrectly 1) added the corners and 2) assembled the block on the left. I think it looks like a butterfly or a beacon. I am embracing my stupidity and counting it as a bonus block!
I REALLY like the shape of this block. I think I will translate it into a larger size and make another scrap quilt. I am drawn to weathervane and quatrefoil shapes.
I also like these blocks. Who knows…maybe they will show up in some future scrap quilts, too.
This one has that four pointed shape that I am drawn to, but it doesn’t actually have the points. It was not an accident…they are not part of the block. This block would be fantastic for a fussy cut center.
Time to get back to making on this blustery last day of November! I have enjoyed making these blocks, but I am ready to be finished!
What are you making today?
Later,
Lorrie
If you would like to review the first installments, here are some links to follow:
Here is the fourth installment of Splendid Quilt sampler blocks! This time I started with off-white solid scraps and a small piece of tan with taupe print. These were squares and chunks…not worth measuring.
Here is my tracking sheet. I got 10 blocks out of the background pieces. There may be more coming, but there were only 10 blocks that had a background and 1 other color of fabric. These block numbers are highlighted in blue. Please be tolerant of my sideways picture. I could not get it to load with the correct orientation! Aarrrgh!
Here are the 10 blocks. Some of these had 1″x 1″ pieces! That is a challenge, even for me…the lover of small pieces of fabric!
I did add a piece of black to the lightening bolt block. I wanted to use up that piece of purple paisley swirl, but did not have quite enough. I like the way it turned out with the extra color added.
I am to 48 out of 100 blocks! That is 48 percent of the blocks are made. Time to go plan which blocks to make next!
What are you planning to do today? (Nothing too devious, I hope!) Have a great day!
This batch of Sampler Spree blocks has an off-white background with a tan rose outline on it. It was a quarter yard piece width of fabric, plus a chunk that was 9″ x 12″.
I made 13 blocks using this background and scraps. Here is my graphic list.
I started with this olive green calico as the scrap.
Then I switched over to purple sparkling princess fabric.
I finished with green batik.
Here are the scraps that were left to add to my bin.
That is my eye candy for this week. Hope it inspires you to work on a project that you love.
This one time at quilt camp, I assembles 256 blocks into a quilt. When I finished the block set, I posted about them here.
During a weekend quilt retreat at Camp Frame in Hedgesville, WV, I assemble the complete quilt top. It is 96” x 96”. My friends tell me that it is in the bright colors that I always gravitate towards.
Over the winter, I will assemble the quilt and bind it. I think I am going to gift it to our wonderful West Virginia neighbors…and then borrow it back to show it off at quilt camp in May. I will add another post when it completed…until then don’t hold your breath!
While waiting for a new toilet to be installed and the septic tank to be pumped, I had to do something to keep my mind off wanting to use the bathroom! Being a teacher for many years was good training for this sadly.
I started with this pile of red and white scraps from a baggie of yard sale goodies.
These are from the Splendid Sampler book:
I made fifteen blocks.
Fourteen from the book and one from bonus half squares…
Here are the leftover red and white scraps…quite a reduction to the original pile!
Here are some other scraps. I think I will use them to make a placemat for Meals on Wheels.
This week I am challenging myself to make something different. I have made sampler quilts before but not one that had so many blocks. This quilt has 100 six inch blocks.
I have used this book before now. I constructed 256 Coxey’s Camp blocks that are waiting to be assembled into a rather large one block quilt.
This book features directions for 106 blocks. I don’t want duplicates. I want an assortment of background fabrics and dark scraps. I made myself a lovely grid to keep track of my progress. I decided to start with the two color blocks. I circled all of those on my chart.
Handwritten tracking chart
Time to pull a background fabric to begin…a strawberry covered light peachy pink fat quarter. How many blocks can I make from one FQ? The answer is nine!
Here are my blocks. Can you tell which one I had to “fix”?
These are all pinkish fabrics. The dark is a plum color.The strawberries are easier to see in this picture. A frame is a great fix!
Here are the left over small scraps and 4 bonus half square triangles. Yes, those little bonus pieces are only 1 1/2 inches. I will admit that I pieced some of the backgrounds in the blocks. My grandma would have done that.
Over the past two years, I have made 11 lovely dresden blocks from scraps…lots of scraps! Here is the last block, before it is trimmed out on my accu-quilt cutter:
This one looks a little more distinctive than the others. I was going for a high contrast compass rose look.
Here it based onto its background square, just waiting to be appliquéd on:
To finish it, I am thinking about using a lattice setting with organic shapes…vines, flowers, etc. as a contrast to the sharp points on the dresden blocks.
This week I am trying my best to finish a quilt camp flower challenge project. I showed the huge rose covered center of the quilt in a previous post. It will add to the suspense and mystery if I do not repost that picture today.
I will be adding these three dimensional flowers to the outside border.
I made the petals using a clover device:
This is incredibly easy to use. I wish I could invent a simple gadget like this.
I also used a clover yo-yo maker:
Both of these products are available on Amazon and a variety of other fabric / craft stores.
I found many goodies this weekend. Let me share a few of them with you:
99 cents at a thrift store
This book is interesting for a variety of reasons. I always look at all of the pictures first. Then I start to read patterns, like they are a story. I know this is weird, but true. The measurements are written in inches and centimeters….hmmm. Wadding? What? That must be batting. Sometimes the fabrics aren’t cotton…Use silk for the yellow blocks? Then I looked for the copyright…London, Australia, New Zealand in 2002. Ah, ha! That explains it! I have many quilt books, but none from so far away.
49 cents at local thrift store…from 2008
This has a couple of nice star quilts that will make great patriotic themed quilts. Much better price than the original one!
Fabric! In a free bucket!
All this for a dollar! A yard and a half of Nightmare Before Christmas fabric, seven uncut fat quarters, four uncut handkerchiefs, and some other scraps. Score!
On Saturday we found organizers and kitchen treasures. Nothing that I can share…Some of them are surprises for other people who love treasure, too!
I started these six inch blocks last summer. It takes a little while to make 256 blocks…just a little while. They are made from scraps, scraps, and more scraps. Each block has 17 pieces. That is a lot of little scraps. You can do the math.
Here is the heap of completed blocks, just waiting to be assembled:
Large stack…a small mountain, really…
I was inspired by several blocks in this book: Sampler Spree by Susan Ache. You will see more blocks in the future. (I retired from 32 years as an elementary teacher. I will have lots of time to sew…finally!) Directions are well written and easy to follow. Sometimes simple sewing is just what is needed. All the blocks in this book finish at 6 inches. I made 256 Coxey’s Camp blocks out of scraps to make a 96″ square quilt, if I don’t add any borders.
Here is a sample of a completed block:
As I worked, I stored my finished blocks in a large storage bag from the Dollar Tree. The bags come in various sizes. (L…3 to a box, XL…2 to a box, and XXL…1 to a box…it is the size of a pillow). They are heavy ply. They also have a convenient handle. They are a bargain at $1.25.
I usually assembled 20 or so blocks at a time to maintain my own sanity. I parially assemble them and press them. Small steps that can be completed in about an hour are my best work sessions. Sometimes I get called away and let all the pieces on the ironing board. (The sections for an individual block are attached so there will be no problems picking up right where I left off.)
Time for dinner…or I’ve just had enough fun for the moment!I love little trays for blocks that are waiting for the last 2 seams to complete the them…
I am taking this block set to Quilt Camp to assemble the top in September. I have lots of other projects to work on in my retirement. What will be next?
What big project have you been working on…even if it is taking a year or so? Leave a comment.
There is no better way to learn the roads in an area than garage sales. Today, we only found four sales. How sad! I think that people are not having sales because less people are traveling due to exorbitant gas prices. Oh, the prices have come down a couple of cents a gallon this week. Unfortunately, prices went up all most $3 a gallon before this decrease. Last year at this time gas costs $2.85 a gallon. Today’s low price: $4.39. Let me step off my soap box and apologize. Sorry for my venting.
I had great fun at two of the sales. At one sale, the hostess was selling her mother’s and great aunt’s fabric stashes. I got two grocery bags stuffed full of fabric. Most of it vintage. We had a great chat while she helped me pick out quilting cottons and items to make doll clothes. I passed on the wild polyesters. My grandmother would have used those, too, especially the purple polka dots. Those 2 bags filled an entire tote box. It needs to be washed before it is integrated into my stash. (I always pre-wash yard sale fabric, just to be safe.)
Included in the bags were these “pre-cuts”. They were in a stack that was basted together with a price tag that said 10 for 25 cents. Were these for Rob Peter to Pay Paul set of blocks? What a great assortment of 60’s to 80’s fabrics!
10 for 25 cents
She also had several blocks that were started. This is a basted and marked block. It has some very nice hand quilting started on it. The seller couldn’t remember which of her relatives had started this. She only remembered Grandma and Aunt tying quilts. My grandmother always tied her quilts, too, with the brightest colored yarn she could find. Red was her favorite yarn color. Speaking of colors, this block has classic 80’s colors and fabrics. I am going to finish it to decorate one of my sewing areas and honor the quilter that started this block.
Goose tracks
Love this! Nothing like a sock monkey to make me smile. This kit, which is still available from the company, sells for $19.99 plus shipping and handling. I paid 50 cents! Score, baby!
Where have you found your best deals lately? Enjoy life!
The color for the Rainbow Scrap Challenge for March was yellow/ gold. Sadly, I was not as productive this month.
10 accuquilt yellow blocks
I only need one more of these scraptastic blocks to make a quilt.
This picture shows the basted block…
This was an experiment with hollow cubes…my measurements were a bit off. Notice the crooked bottom right corner. I know where I went wrong and need to fix it next time.
Hollow block with a twist…
I did not get a feathered star block made this month. I picked out fabrics, but it didn’t get cut out. Such is life!
April is pink. Time to dig into the scraps and get busy.
My wonderful mother-in-law gifted me this 1901 Singer sewing machine several years ago. I think it was in 2016. (That was the date on the receipt for the new belt.) At the time, I couldn’t get it to stitch. I gave up. My husband said that he has not seen this machine being used since before we were married…over 37 years ago.
127 model?
It has the original treadle. Everything moves freely…squeaky, but moving. Did you know that the treadle gets oiled, too?
It makes me sad when people turn these into a table base.
Someone painted the machine a lovely copper color and added new decals. They did add a layer of clear coat over the decals to protect them.
DecalsMy favorite!
This weekend I bought a book to help me get my iron lady stitching. The timing for the bobbin was WAY off. It only took two hours or so to figure that out.
Book of wisdom…lots of models…enough information for me…Bobbin case …could use some cleaning, too.
Now she is stitching like a dream!
The bobbin winder…humph!
The bobbin winder is still being a little difficult. It turns and spins, but the bobbin doesn’t…hmm. I added a small scrap of cloth under the spinning end. Voila…temporary success.
Last evening, I used temporary 1/4″ marking tape on the throat plate to mark the seam allowance. Now I am ready to sew.
Everything is blooming yellow here in West Virginia.
These are at peak this week.In front of my house, along the road. These keep the dust down in summer.driveway…behind the fenceTiger lillies are emerging.
Well, not everything is yellow…
Our volunteer compost peach tree is blooming.A close up of some peachy volunteers
I meant to post this yesterday, but my motivation got lost along the way. Oh, well, it gave me something to do today!
This is block 11 of 12 for my dresden crumb block quilt.
Also works as part of this month’s rainbow scrap challenge…
I pieced this block last week. It was not a total success, but it was not an epic failure either! I thought I could piece this using shapes cut with an accuquilt die. You will notice that it is no quite square. I wish I could blame it on something…drunk quilting, maybe…but I can’t.
Wonky 3-D square…
This is what I have learned about basting. Sometimes the prep work is well worth the time it takes to get it done. Thread basting is much less painful than pinning with applique pins. It is also quicker and easier than glue basting…no glue to wash out later.
I have been waiting for the time change. More daylight during my waking hours!! Hallelujah! The birds are singing. The spring flowers are starting to pop.
Along the back garden path…
I know it is not officially spring yet…but it’s on the way.
I was hoping that the RSC color for the month of March would be green. Not my lucky month. The color for March is yellow/ gold…hopefully, that is what I will find at the end of the rainbow!
A fluffed up bin of yellow pieces
My scrap collection does not have much yellow/gold. So I dug in the tubs of yardage to find more…still lame. I seem to have a lot of solids.
Not much better!
Look what I found mixed in with the scraps!
Cute 2 1/2 inch blocks…a little baggie of them!
Hopefully, I will be able to get as many blocks as I have for the past two colors. We shall see!
This time of the year drives me crazy. I want to dig in the garden and play in the dirt, but I know in my heart that it is too early. If I uncover those tender plants, they could freeze. I am fairly certain that the groundhog was wrong about an early spring.
Daffodils have a good start…“Daisies” have leaf buds…glad I didn’t trim the dead looking stalks! Tiger lilies are poking throthrough, too.
The time change is next week. I am eagerly anticipating the change…more daylight for being outside in the evenings!
My husband saw the first robin in our yard on February 8th, a good two full weeks early. Spring is coming…hope Springs eternal.
Finish a quilt top every month…didn’t happen this month.
Post to blog twice a week…almost…I posted three times one week and 1 time the week before. I am counting that as on track, because it averages out to twice a week.
Sew 80% of the year…still on track for this.
Read to self…one book a month…more like half a book this month.
Read aloud twice a week…we are crushing this goal. This is much better than the crap that is on TV. We just finished an Agatha Christy mystery. Now we are reading John Jakes.
Scrap to treasure…Accuquilt crazy quilt blocksAccuquilt feathered star
Remember, I said that I was not the only maker. My DH made this for one of my sister’s co-workers, who just lost her 30 something son unexpectedly. Tragic. He graphed out a poem that she had written and added butterflies from another pattern. He is amazing.
How are your resolutions shaping up this month? or for the year so far?
We woke to ice in the trees and bushes on Friday. Thank goodness the temperatures were in the 60’s on Thursday, so the roads were still warm enough to not be super slick. The trees looked like they were encased in glass. Thank goodness it was a still day and the sun appeared to melt the ice with only a little damage to trees and branches…no power outages in our area.
Not enough to get school delayed or cancelled…beautiful!
We did have quite a bit of fog. The mountain was beautiful shrouded in ice and fog, but I did not get a picture of that.
I am working on block number 9 of my paper foundation dresden blocks. I need 12 to make the size quilt that I want. I have not decided what setting I will use for these blocks yet. They are approximately 14 1/2 unfinished.
Number 9 of 12
I also have a couple of other teal/aqua blocks to make for the RSC. They are cut and ready to be sewn. February is quickly becoming history. I need to buckle down tomorrow and get blocks made.
2/22/22 was a great Twosday. I won’t remember the twin theme at school. I won’t remember the two minutes of crazy dancing we did at 2:22 in the afternoon. What will I remember? It was our first day in school in almost two years with no mask covering our faces.
I realize that masks were used to keep us healthy, but I think they were more to keep us silent and take away our identity. There has been no science to prove that masks work, but there is science to prove that they don’t. Enough ranting for now.
Lots of stretchy stuff…
Let me say that even though I now possess roughly a mile of 1/4″ white and the same amount of black elastic, I hope to NEVER have to make another mask.
They were not difficult to construct. I used two rectangles of fabric and two pieces of elastic. I pleated the sides twice to make it fit over the face better, but not too tight. Everyone needs to be able to breathe and communicate. Do you know how hard it is to read aloud or give directions to a 10 year old with your face covered and your voice muffled all day? I did not want it sealed tightly to my face. (I did buy a microphone that picks up sound and could be worn on top of a mask. Add in reading glasses and feedback from the speaker and you have a whole new nightmare of existence!)
These will stay in the car for awhile…
The state that I live in did away with mask mandates in public places a long time ago. The only places that were mandated were schools and some medical facilities. I had 1/6 of my students wearing their masks yesterday. One that constantly had his on his chin when it was mandated wore it more yesterday than he did in the last week! My husband is a high school teacher. His unofficial tally of mask wearers was about 1/3. Some, he said, were wearing them on their chin. Maybe for comfort and personal security reasons? Some of our colleagues wore masks also. Only a few.
Fabric for masks that will now be repurposed.
It was great to see the smiling faces of the children and our co-workers. Let’s hope the masks never come back. I hope to never construct another one!
How many masks did you make for family and friends?
Over the weekend, I made 10 teal foundation crumb blocks to share with you. A little eye candy is better than no eye candy!
I always make these in sets of 10…watching Monk while I sew.
Hey! I think I saw Elvis!
Years ago, back in the days of Hancock Fabric, I bought several yards of this Elvis fabric in teal, pink, gray. I love having him show up in scrap quilts and blocks in random places.
I made it to the second month! Wahoo! Are you working on RSC blocks?
I am not the only maker in our family. My wonderful husband does some fantastic cross stitch. He is currently working on heirloom stockings. He has finished the stitching on the one for our sweet daughter-in-law.
My favorite colors! I should have a LOT of scraps in these colors, right? Uh, no! I had to dig scraps from the green bag and the blue bag to find something to work. This is a much smaller selection than the red basket in January.
Scraps…I will have to make more!
I started with some Dresden plate blades this morning. They always look better when they are trimmed. I foundation piece these to scrap paper that is trimmed on the accuquilt cutter.
Untrimmed pieces
I have been home today with an ear ache. I have never had an ear ache before…now I know why small children cry when their ears hurt! OMG! While I was sewing and recooperating, I could hear a turkey. One of the neighbors has a tame turkey. It spent a considerable amount of time on my porch…and being stalked by another neighbors’ cat!
Notice the mighty hunter in the background.
Turkeys are not smart, based on the amount of time he spent on the porch. I am really glad it is the neighbor’s turkey and not her rooster!
What RSC project are you starting for this month? Turkey dinner anyone?
I have been working…working…working…then life stepped in and slowed my progress. I am pleased that I felt well enough to measure and then cut binding strips.
This will work nicely…
I think the red will blend nicely with the red in the plaid on the back and contrast nicely with the top.
Nice gold thread…I hope it stands the test of time! Top has a black and white striped border
What project are you finishing in the near future?
For several years, I have made it through the first few rounds of the Rainbow Scrap Challenge. I have several of those box in a storage box. Unfortunately, I never made it to a month with red blocks.
Here is a list of the blocks for this year:
10- 6 inch crazy quilt blocks made with the accuquilt die
Did you know that most snowflakes are hexagonal. I do LOVE snowflakes. These hexies could be in star formation, I guess.
Two years later…
I have been working on these for a while. I have another new star to add, then this row will be complete. I think the next row is going to be an extra large flower or a diamond.
Last star for this row…
The filler blocks all have a minion!
Bello!
I do love the minions. They misbehave, but everyone still loves them.
I do have the accuquilt cutter to cut the fabric and paper shapes for this hexagon project. Hexagons finish at 1″ at the outside edges. I recently bought the box set for other shapes, too. I haven’t made any blocks from those smaller pieces yet.
Making quilt tops…piecing..is my favorite part of the quilt-makeing process. Several years ago, my husband bought me a Juki sewing machine on a Mini Pinni quilt frame from the Gracie company. My friend, Diane, has quilted more tops on it than I have. My goal this year is to change that statistic. I have lots of tops to work with.
On the frame…
This is my project for January. I found this top buried in my quilting room while I was organizing. I think I can finish it by the 31st, especially if we get more snow.
The quilting always looks better after a good washing. It puckers up and looks comfortable and old. My goal with this section was to make the background look like wooden boards. It will look better when washed.
Wood look…will look even better when washed
I haven’t quilted on the machine for a while. I had forgotten that practice makes any skill better. By the bottom edge, I was feeling much more relaxed and confident. I tend to tighten my hands on the handles and hunch my shoulders tightly. I took more breaks and found the process much more relaxing.
I will share more pictures after this is completed, bound, and laundered.
This beauty is about 14 inches in diameter. Love the little monkeys!
I love turning scraps that would be destined for the trash into a beautiful block. I have 8 of these dresden plate blocks already made. I only need 12 for the quilt I have planned. This is the first red block. I am using red scraps because of the Rainbow Scrap Challenge color for January.
I use scrap paper cut to a size that is 1/4″ larger than the finished cut out size on the Accuquilt Dresden die. I foundation piece the scraps onto the paper. That way I can use smaller scraps to crumb piece my Dresden blades.
In the early morning on weekends, when I cannot sleep in, I get up and turn on You Tube to watch quilting videos on the big tv in the living room. My husband bought it so he could watch sports on the big screen. Quilting shows look pretty good on the big screen, too.
Recently, You Tube has been suggesting studio tour and make over videos. Ugh! Sometimes life is like a train wreck and you can’t turn your eyes away!
Some of these ladies are not quilters, but clothes makers. That is how I started sewing at the age of 6…making clothes for dolls and my Grandmother’s Dog. Some have many hobbies, like cross-stitch, embroidery, or using a cricut.
I did not make my first quilt until I was in my mid-twenties. My grandmother got me interested in quilting, but she was not really into quilting and piecing. All of her quilts were heavy, tied, practical creations.
My first sewing area was a sewing machine table in our laundry room. When we moved, I graduated to a desk with a hutch top in the corner of our bedroom. After my son moved out, I graduated to the entire room and we moved into his bedroom. I now have the largest room in the house as a sewing room. (My husband really likes to watch football in peace! And I am his queen!)
That leads me to my title for this post. Recently, the ceiling fan/light in my room died. I have lots of task lights around the room, because the ceiling fan light has never been spectacular. Now I have a new light fixture with one of those bladed shop lights in it. WOW! My room is now brighter than the sun…and I can clearly see all of the mess. Time to organize. Yuck!
Here are a few before pictures:
This is all scrap fabric. At one time the bin was all sorted…needs to be sorted again!This counter area needs to be straightened and sorted. It will never be neat, but it could be better.This is my ironing area. The pile of foundation papers needs to be moved permanently.My long arm is a catch-all. This needs to be clear!
Here are some after pictures:
Fabric…labeled and sorted.These are projects in cases…now labeled…and where I can see them.
I don’t hide things in cabinets, so my space will never be as cute and organized as some of the ones in the videos. I like to see my stuff…right out in the open!
I can only stand to work on this a little at a time, so as with everything in my life, it is a work in progress.
Once a year, I go to “Quilt Camp”. It is organized by a wonderful retired teacher who is on the board of the local 4H camp. We meet in the dining hall to sew, socialize, and sew some more. Some of us stay in the dormitory…aka the “bunk house”. We have a challenge every year. A few times in the last couple of years, I said I would participate and then totally crapped out. This year, however, we are using a challenge that was posted a few years back by another on-line group, Raincross Quilt Guild. This challenge was used by them in 2015-2016. I am having a great time amping up the blocks they made!
BOM challenge so far..
My most recent hand sewing has been on these cut dresden plate flowers. In my quilt these are corner blocks for the next round.
Cute little Dresden…measures 10 1/2 inches.
I still have several more blocks to make. This quilt just keeps growing!
Even when I am not making resolutions, I try to participate in the Rainbow Scrap Challenge. Every year, soscrappy.com hosts this wonderful challenge. I make it through the first couple of months…and then life gets in my way. Some years, the author of soscrappy designs a quilt. Sometimes she suggests a block to be made in many colors. Sometimes it is just the color, like this year.
January is the color red this year. I have started by making 10 crazy blocks using the Accuquilt block on board die.
Block on board 6 inch crazy block from Accuquilt
She always shares her work and posts a link so everyone can share.
I also made 10 paper foundation pieced crumb blocks to get me started. I have a small bin of red scraps to work with…enough to keep me busy.
Just a baggie full…
Many of these are strips.
Strips…
I use pages from old Reader’s Digest magazines. I can cut them to a convenient size square for my foundation. I sew the crumb pieces to the paper…trim…flip…and stitch some more.
Recycling Reader’s Digest…
They look rough.
Then I use my Accuquilt 4 inch die to trim them to the exact size. It is amazing what trimming and squaring up can do! Now they look like usable blocks. (I love those little monkeys!)
I will remove the paper while I watch TV this week. I have a bin of hundreds of these finished blocks…and I have designed a quilt made from them. More on that later this year. I will also do a red RSC update at the end of the month…maybe I will even find some of the previous RSC blocks!
After thinking about my needs and/or wishes for the new year, I came up with 5 goals…and a plan to keep on track.
Goal 1: Quilt top finishes
My husband says that I am not a quilter. I am a topper. I have created many, many tops. A few years ago, I donated several tops that I decided were never going to be quilted by me to a friend to turn into charity quilts. She was happy to have them…I was glad to share, but I still have a good size pile of tops to finish. Some of them have a backing with them, some don’t. I think I easily have enough to keep busy If I quilt at least one project a month. I have a Gracie frame with a Juki machine on it. It does take up a sizeable amount of real estate in my sewing room. Time to put it to more use.
Goal: Turn a quilt top into a finished product every month.
Just 3 of the many…these were closest to the sewing machine.
Goal 2: Blog more
I have not been a very productive author during the pandemic. Last year I only wrote 5 blog articles. This year I am setting the bar a lot higher.
Goal: Publish 2 blog articles a week.
Goal 3: Sew more for my own sanity
I have been reading articles about reducing stress and increasing your self-care. One of the suggestions was increasing the time you spend on activities you enjoy. Sewing entails a long list of activities when you break it down. Here are my qualifiers:
hand sewing (applique, binding, English paper-piecing)
machine sewing (quilting, piecing)
hand embroidery
machine embroidery
writing patterns
ironing/ pressing
cleaning/ organizing my sewing area…okay…room (I am a spoiled princess…my husband likes to watch football in peace!)
cutting fabric (Accuquilt is a gift that keeps on giving…)
sorting fabric (I am a scrapaholic.)
Goal: Complete a sewing activity from the above list at least 80% of the days in the year…that is 292 days.
Today’s little stack of fun…cut with accuquilt crazy block die…finishes at 6 inches.
Goal 4: Read to self
My mother-in-law loves to read. When she finishes a book, she gives it to me. I have been stashing books in bins in our “library” loft for more than 5 years…getting ready for my own retirement. I love to read, but I sometimes have a problem putting down my tablet to read a book. I also have conditioned myself to fall asleep while reading…not good for reading an entire book in a timely manner.
Goal: Read at least one book a month.
Books, books, and more books…I need a librarian to organize this mess.
Goal 5: Read Aloud
I admit that I would never have read the Lord of the Rings trilogy on my own…or Winds of War…or War and Rememberance. My husband never would have read Gone with the Wind on his own. We started turning off the tv and reading together when our son was in high school. It drove our son crazy. Now he and his wife do this, too. Mwahahaha! Recently, we are drawn more to the enticing, mind numbing glow of the television after a long day of wearing masks. Time to get back to entertaining ourselves.
Goal: Read to each other at least 2 days a week.
Accountability
I found this great little blank book to keep me on track. I have set up a section for each goal to keep me going. All I have to do is add titles, dates, etc. Since I invested some time to get this little book set up, I think it will help me keep going.
My free blank book to keep my goals moving forward…
So what habits do you want to form? What soothes your soul when you are stressed? Share in the comments. I love to hear your thoughts!
Last year was challenging for many reasons…and wonderful for many reasons, too.
We lost some dear friends and family members.
Fraidy…who jumped at her own shadow, but could be a fearless, little bully, too. She was part of our journey for 14 years. Bandit was our sweet, traveling buddy for 14 years. He traveled to 49 states and 8 Canadian provinces. What a dog!
Now on to the wonderful additions to our family! My son bought a beautiful new home and got engaged on the same day…why not have all the big changes in life at one time? He got married on Veteran’s Day to a wonderful woman. We are glad to welcome her to our family…she doesn’t know what she got herself into…I hope she doesn’t figure that part out…
Our son and beautiful new daughter-in-law…Our nephew has a new baby girl. That makes me a great aunt…What a cutie!Simba is still with us…watching over us…trying to figure out how to use the can opener and order her own treats from Amazon. (If she figures those things out, we are doomed!)
For the record, I am still working on the bibs that I posted about last year. I need to think about some goals for this year…some things to help me get through to retirement…maybe I should learn how to create a go fund me page!
I will think about my list and get back to you shortly…
Until then, what are your goals for 2022? (When I was graduating from high school in 1984, I couldn’t envision 2000…and here we are 22 years after that!)
Our Christmas stay in Myrtle Beach, SC…our first time there. It was beautiful and relaxing. The locals said that we were fortunate to be there for such beautiful weather.
Good morning or day…whatever the case may be. 2020 was a hell of a year. We are coming up on the year anniversary of all of the craziness that we have had to accept as the “new normal”. (I personally HATE that term, and refuse to accept anything! HA!)
Hopefully, we are starting to emerge from our confinements, quarantines, and isolations to a healthy world. There are many new quilters and sewists among us. (I am not using the term “sewer”. That is spelled just like the underground lines where poop goes…so…uh…NO!)
I have a Sunday morning ritual. I get up to have a cup of coffee and watch some quilty things on the big screen TV that my husband bought for himself…to watch sports, of course. I have a long standing argument with a family friend that quilting should be considered a sport, just like Nascar. I say, “You have to push a pedal to make it go.” He says that is not the same. He has obviously never been on a deadline to get a quilt finished for a graduation, wedding or baby arrival. He says, “No, it is hot in the cars.” Well, I don’t have air conditioning, so sometimes it is hot in the sewing room, too. Maybe I just need some sponsor stickers for on the sewing machine and a nifty sponsor outfit! So when I am watching quilty things on the tv, is that the same as watching sports?
Put that pedal down…and zoom, zoom, baby!They look the same to me…fast…and pedal controlled!
Back to this morning’s discovery…I am a big YouTube fan. I am fairly certain that I could google anything and find a video to do it, fix it, etc. I recently did this at the parts store. The person working “wasn’t allowed” to help. I have a word for that…lazy. Thank goodness for free wifi to their parking lot. Fixed it myself! I digress…this morning’s discovery is all about quilty inspiration. It looked wonderful on the big screen, just like a sporting event, but better…because it was quilty and there was no fear of losing! Enjoy my find! Road to California quilt show 2020…filmed by Jolly Molly TV.
Remember…sometimes it is good to take a deep breathe and enjoy life as it comes to you. Have another cup of coffee!
Nothing like a snowy, and very icy day, with no where to go and no one to teach. Our first true snow day from school! Unfortunately, it is not mostly snow. Yuck!
Here is my first and most ambitious project for the day:
This is the 5th dresden scrap plate…only 7 more to go! I do have the next one ready to be basted onto to the background fabric. That might get done today…or maybe not.
I also have a nice pile of ironed scraps to cut with the accuquilt cutter. I found a scrap that is older than my 31 year old son. That is a topic for another day, too.
That just looks like a scrappy mess! Maybe I will just close the sewing room door and do what I do best on a snow day…procrastinate and hibernate!
Here is the original quilt layout in McCall’s quilting magazine from March/April of 2018. This version is a little smaller than my version. It contains odd size blocks. I prefer to use pieces that I can cut with my accuquilt cutter. My finished quilt will also contain 9 blocks, but it won’t need sashing because the blocks are much bigger than these in the picture. I’m spending Martin Luther King Jr’s birthday relaxing as our nation prepares for the inauguration of a new president. This project is to take my mind off of all that is in the news that I don’t even want to contemplate.
Here is a picture of my third out of nine blocks. The first two were peach with the same dark green. This one is a lovely teal and purple. The entire quilt is cut from stash and scrap fabric. It took about 2 hours to assemble this large block.
Hopefully as the long, cold winter continues, I will be able to finish the other six blocks to make the quilt top complete. Here’s to keeping busy and out of trouble.
Welcome to 2021! This has got to be better than last year. I am glad that hindsight is 2020. It would be better if 2020 could be a type of amnesia.
I am writing a quick post…just to get back to blogging.
Last summer, I found this cute little embroidery kit at a Michigan yard sale. What a great bargain for 50 cents! I am sure the original price was lots more.
There are two bibs in this kit. It also included embroidery floss and a gold plated needle. Ooooooh! Awwwww!