Categories
Build a block

Build a Block: Hovering Hawks

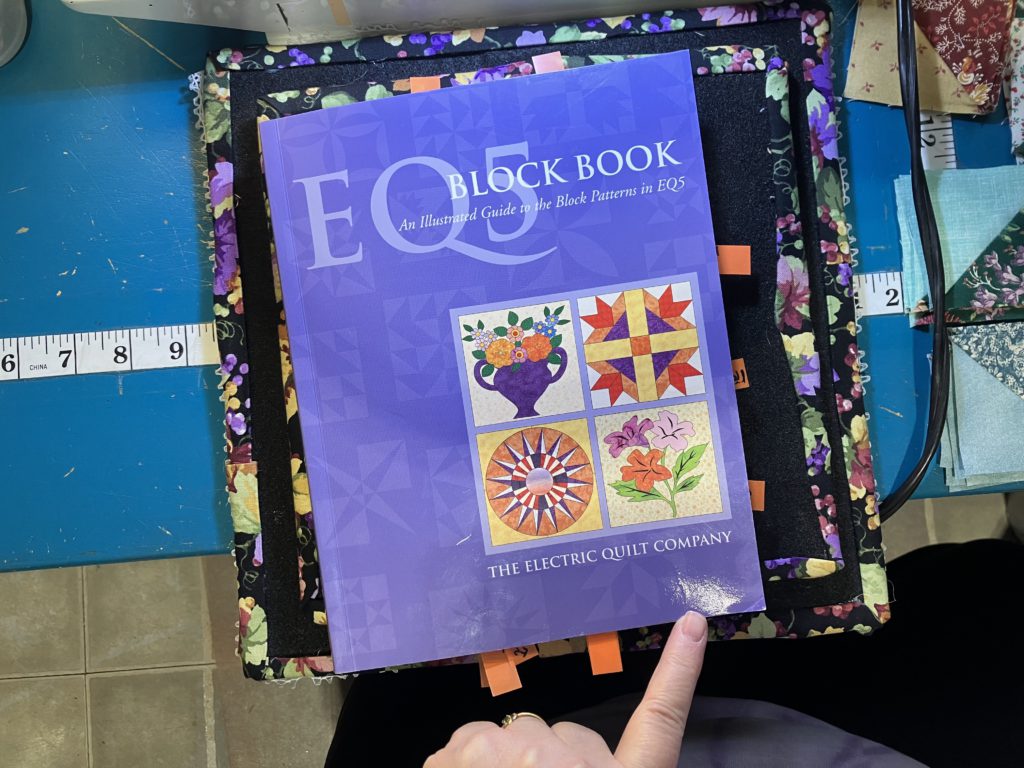
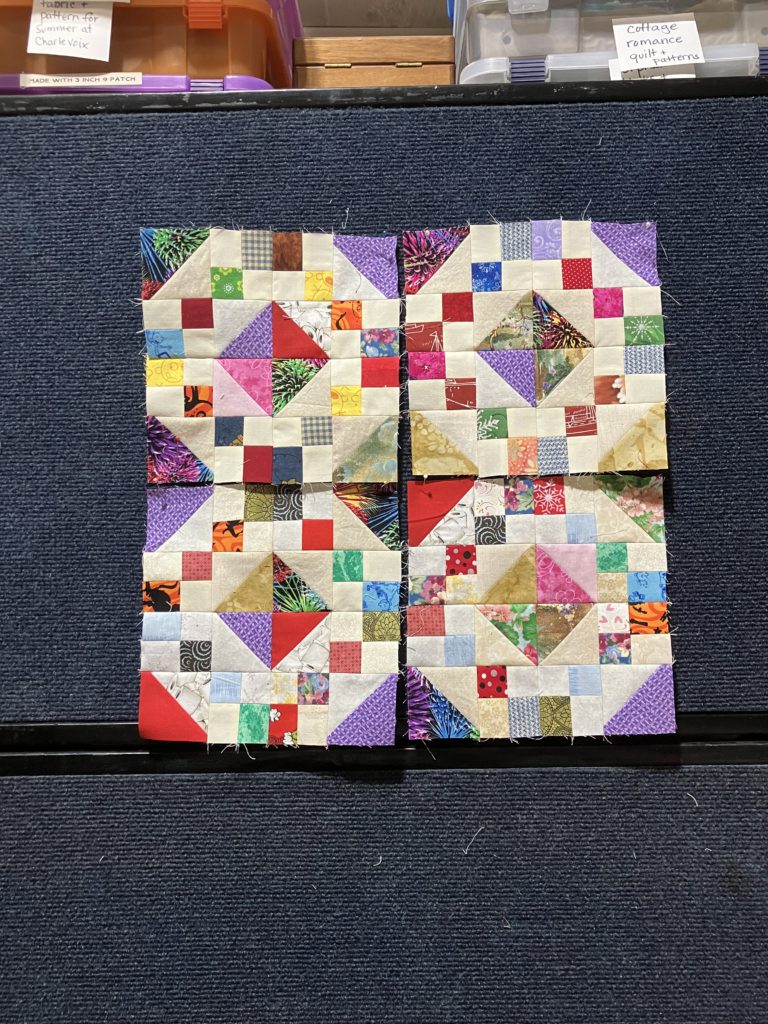
Just a few more weeks of inspirations from this book, I promise! This week I am presenting the Hovering Hawks block. This block has interesting diagonal movement. Four of them together would look fantastic…maybe for a future scrap quilt. It would also look good in a barn raising setting, if you are familiar with log cabin block setttings. Let’s get to making, shall we?

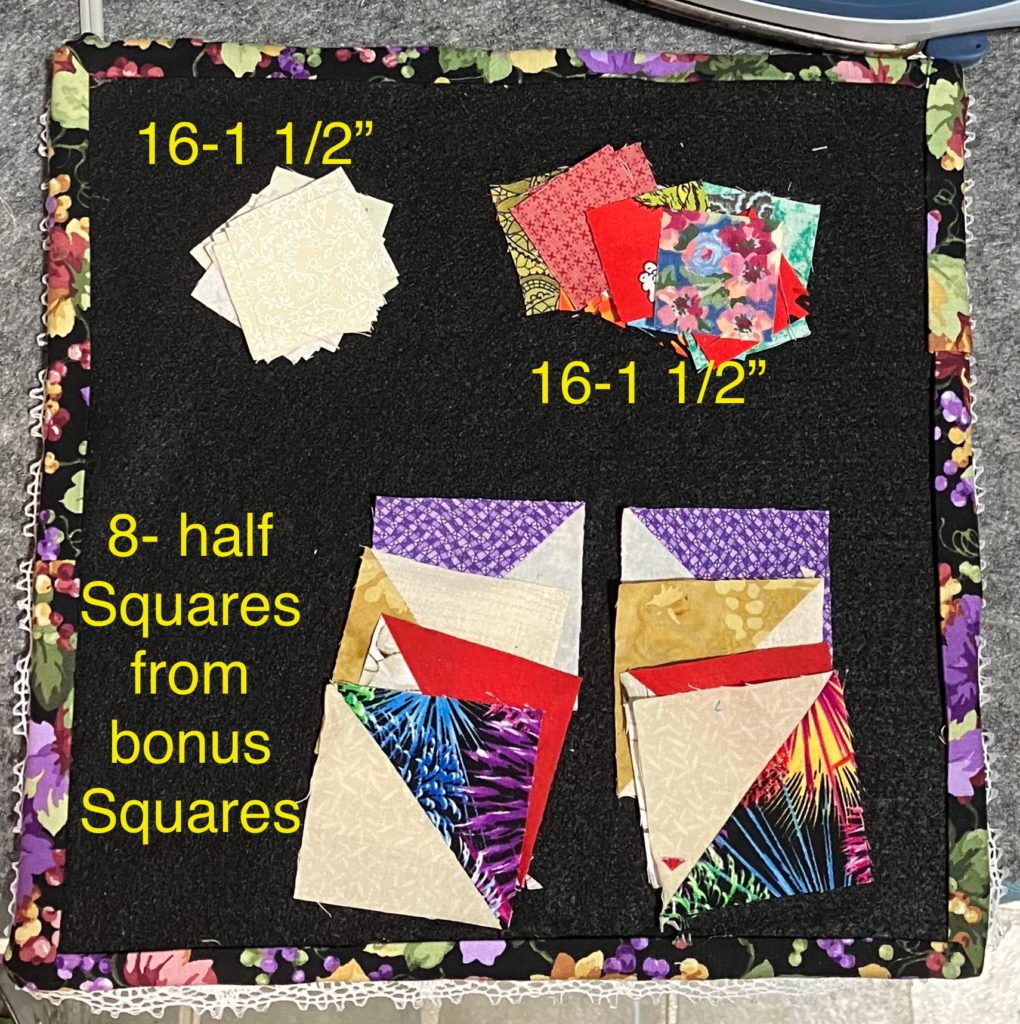
This block is really all about the contrast of light and dark fabrics. It is great for scrap busting! I am still using up those bonus half square triangles. Here is the link to the related YouTube video on my channel. Also, the printable cutting chart including various sizes is at the bottom of this blog.

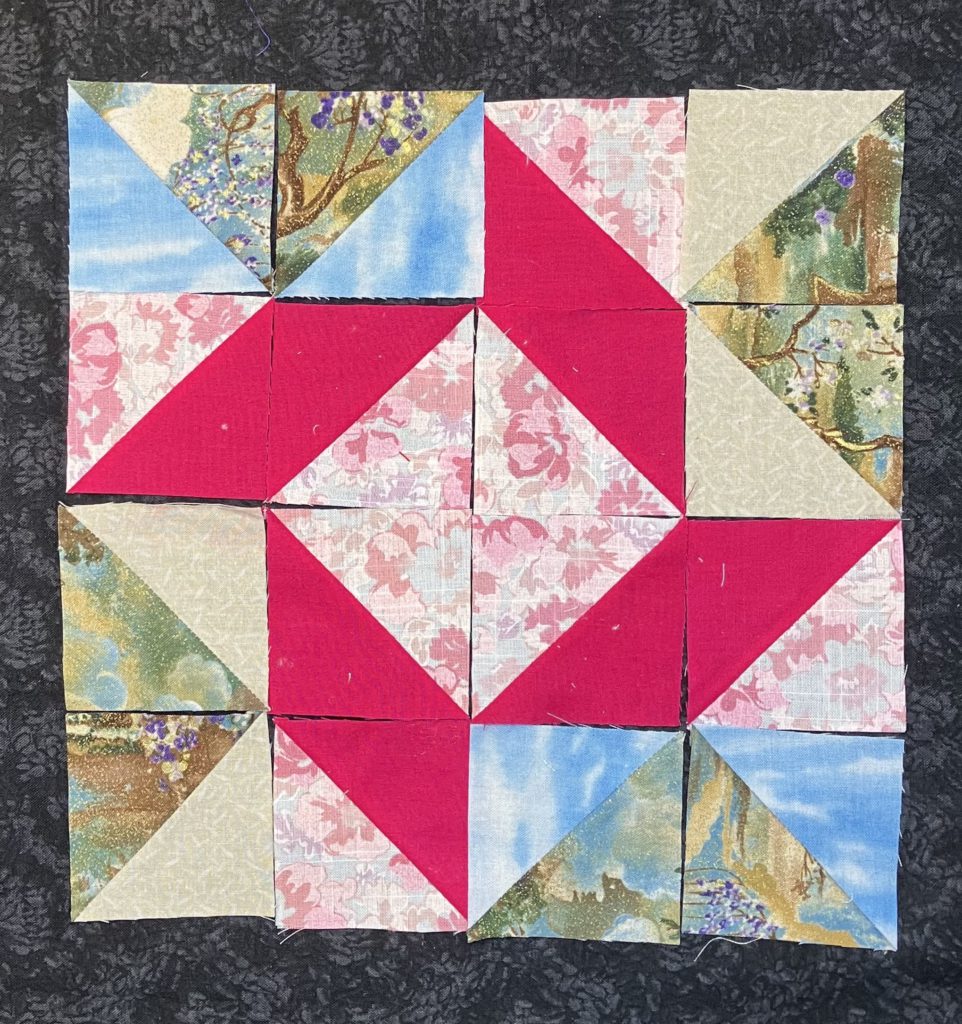
This is the version of the block that I originally layed out in my YouTube video back in October of 2023. I tried to cram so much into that episode!

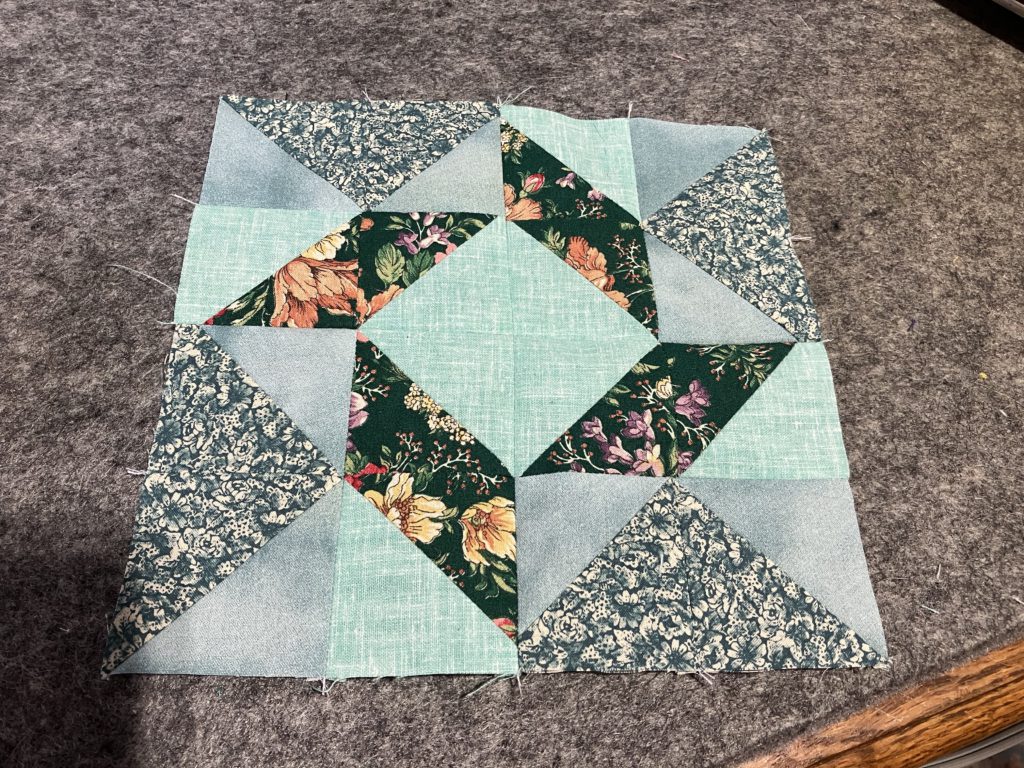
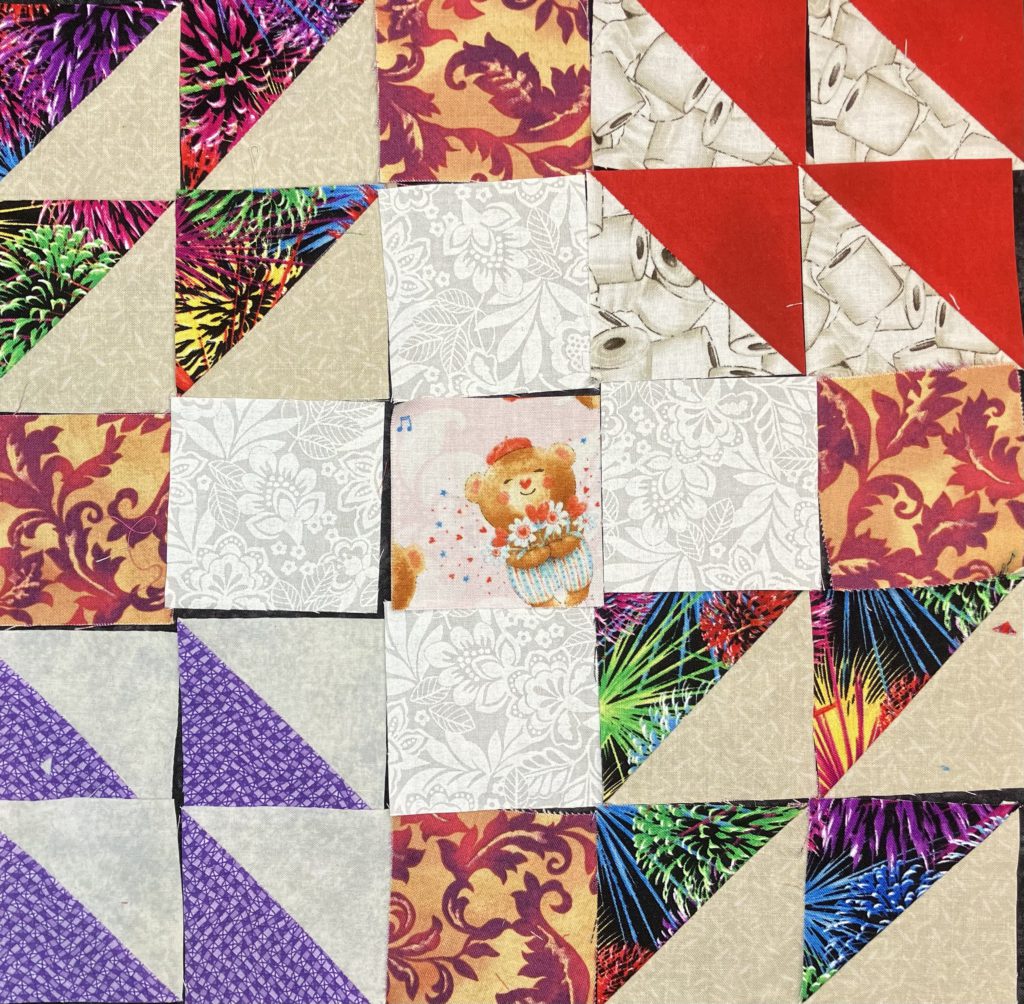
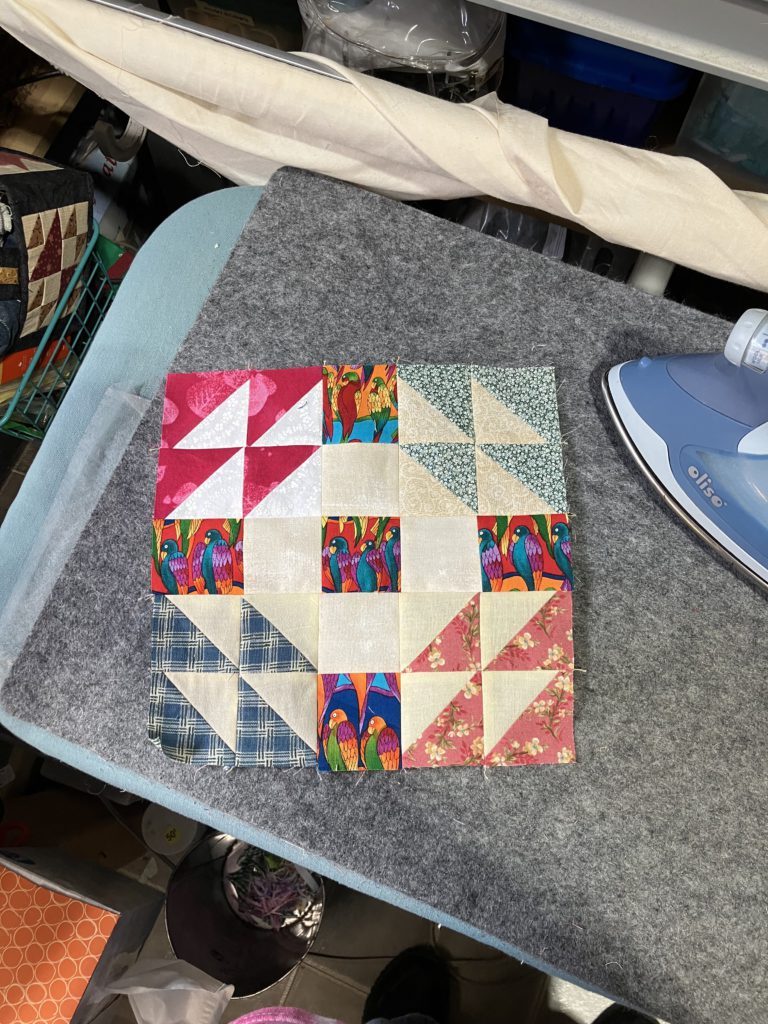
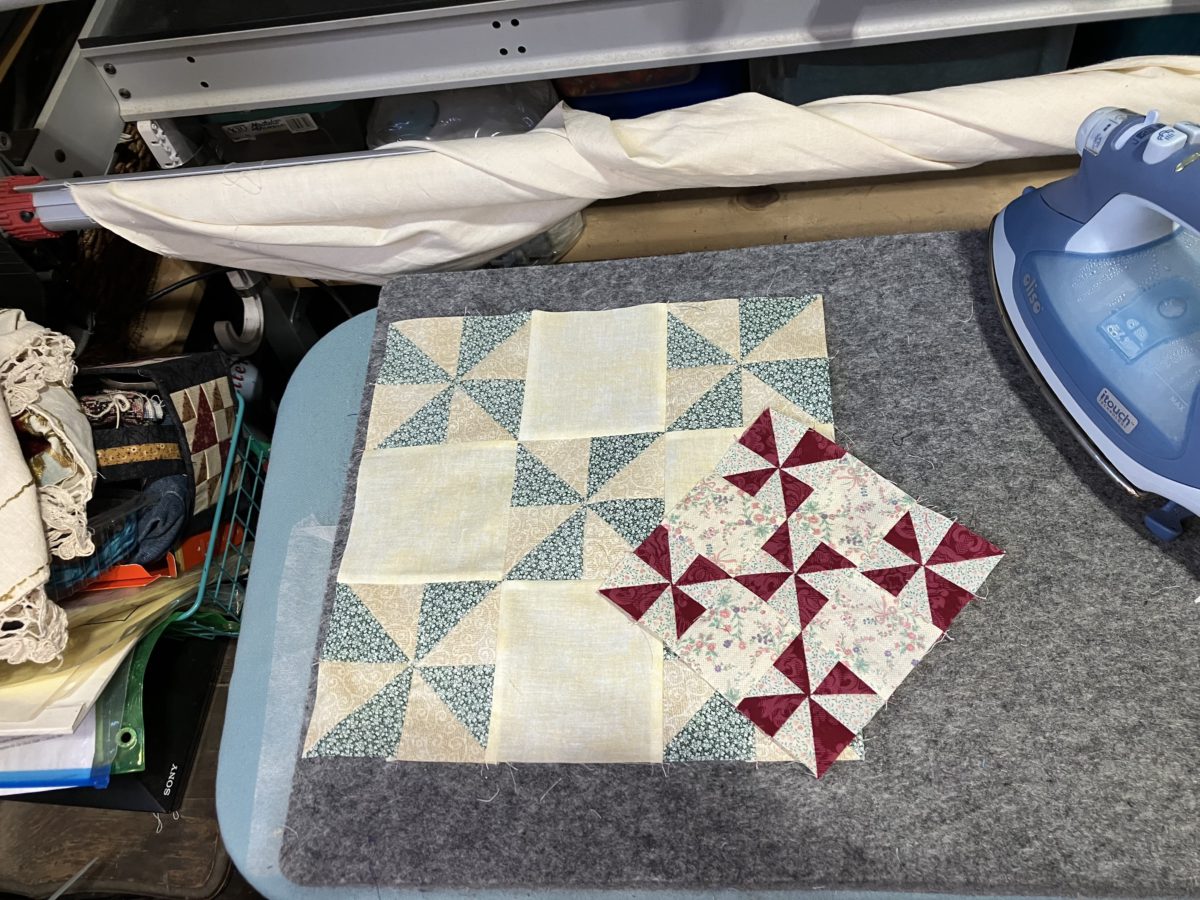
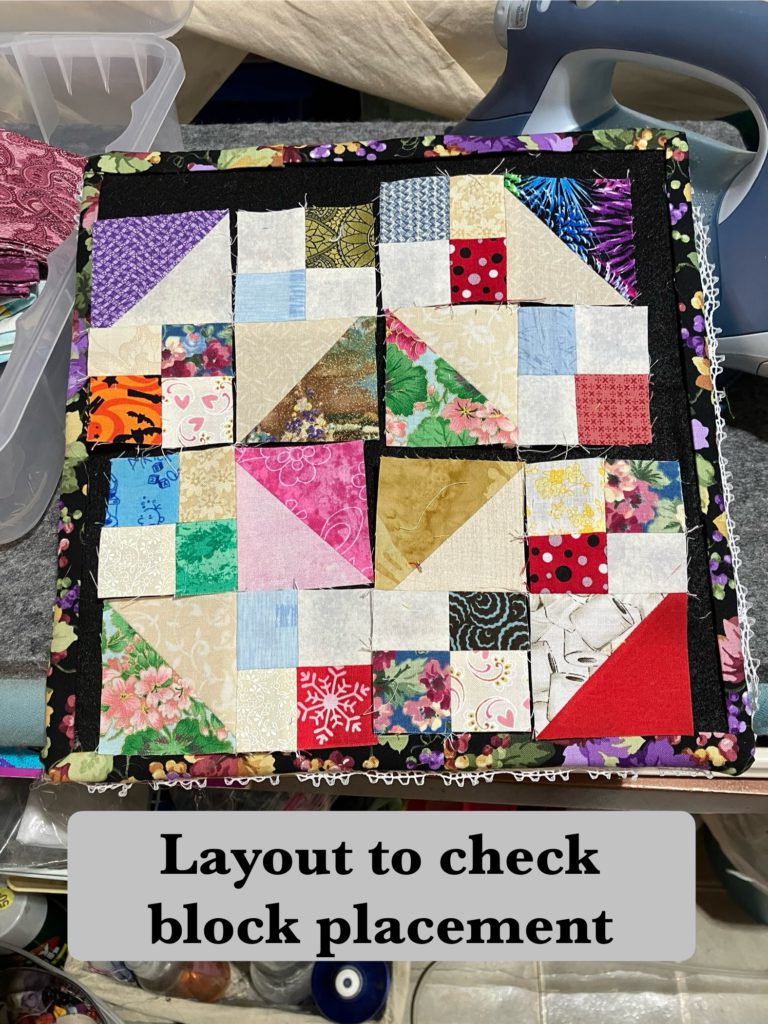
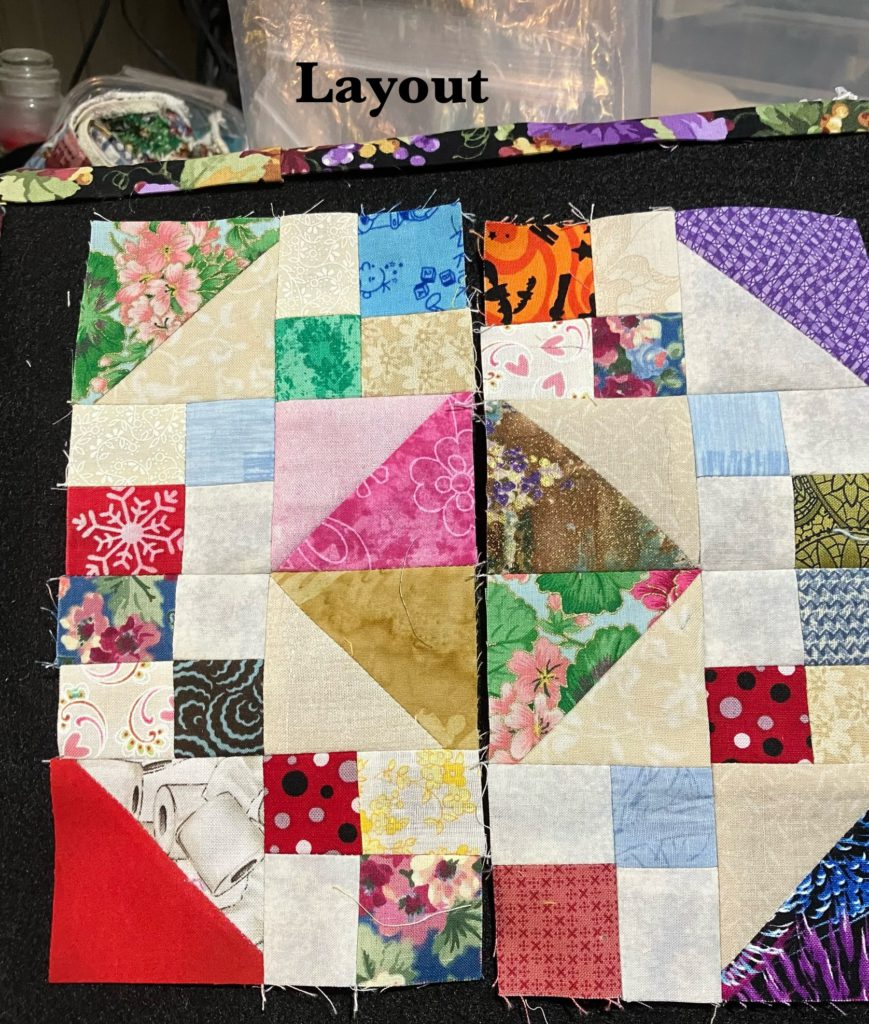
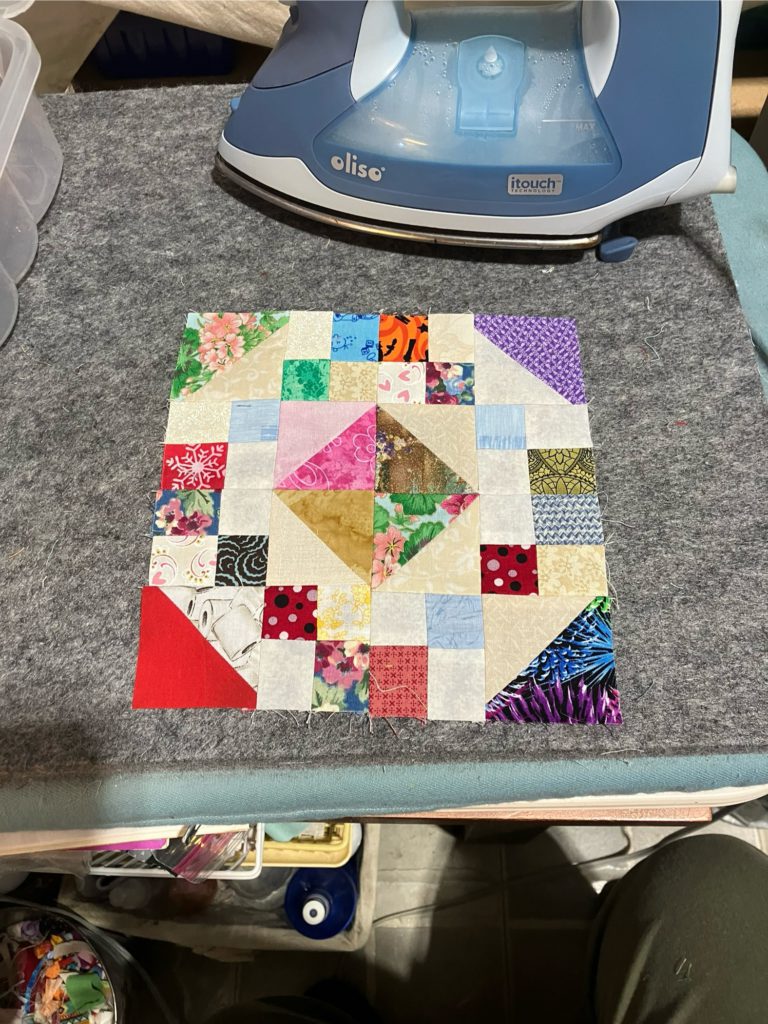
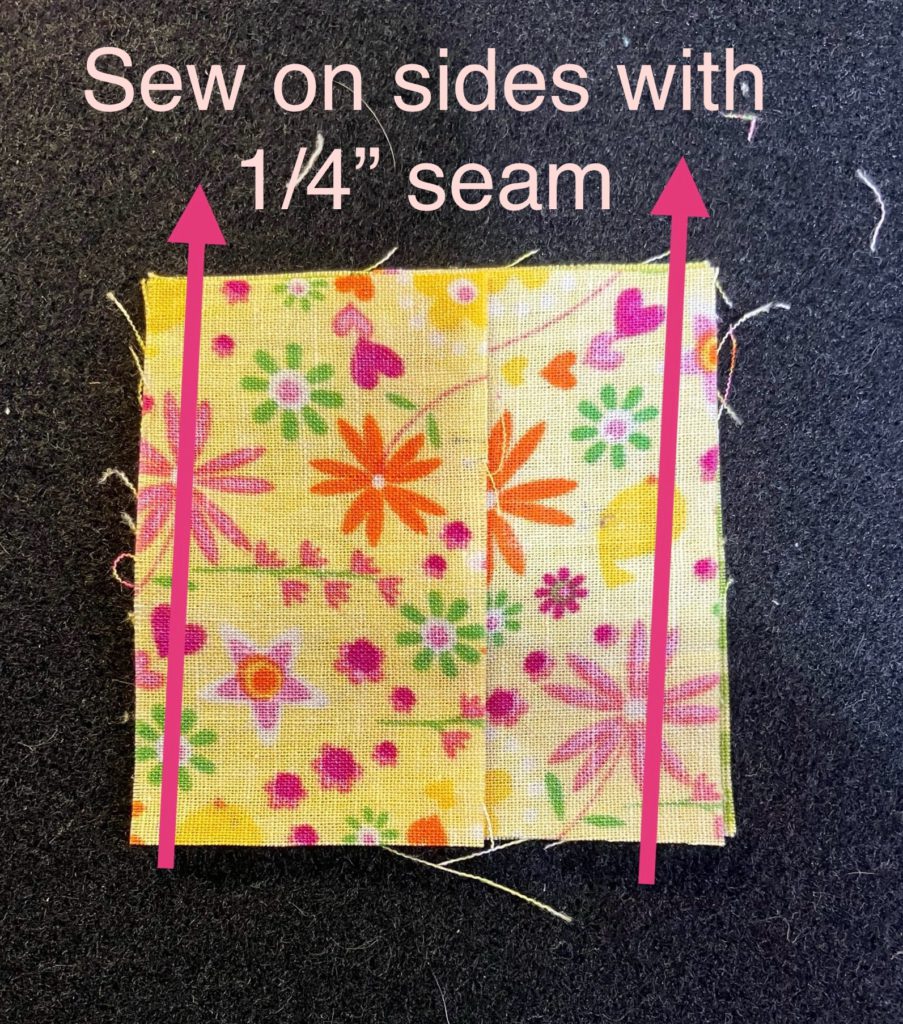
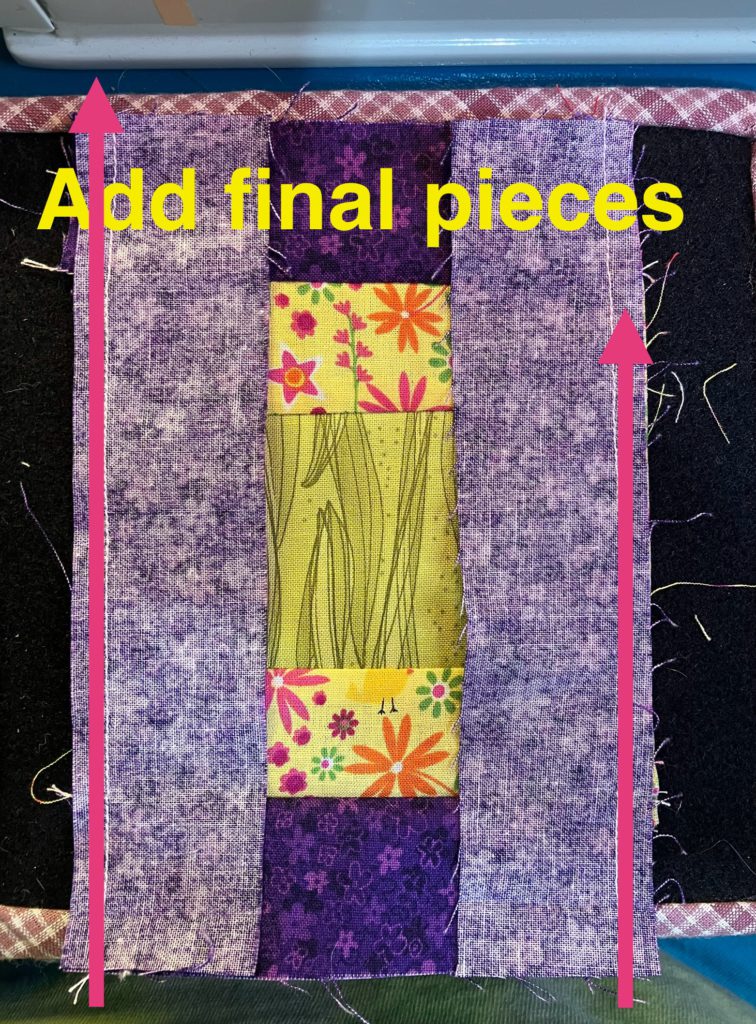
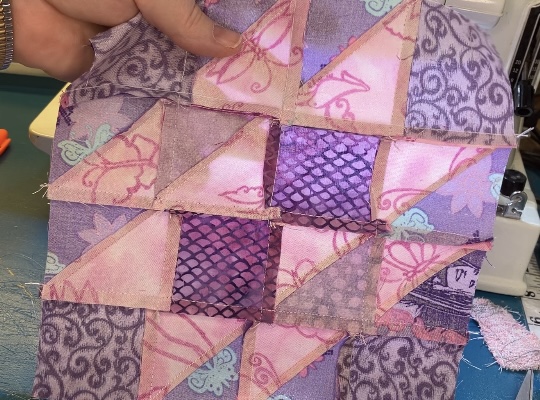
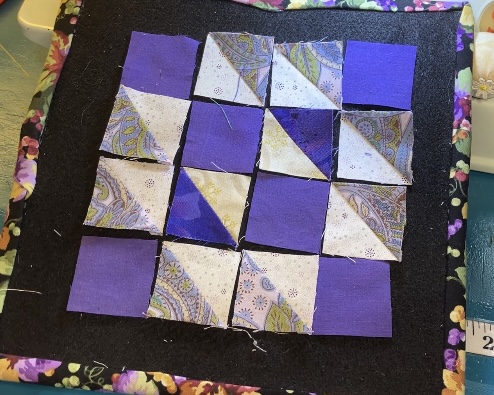
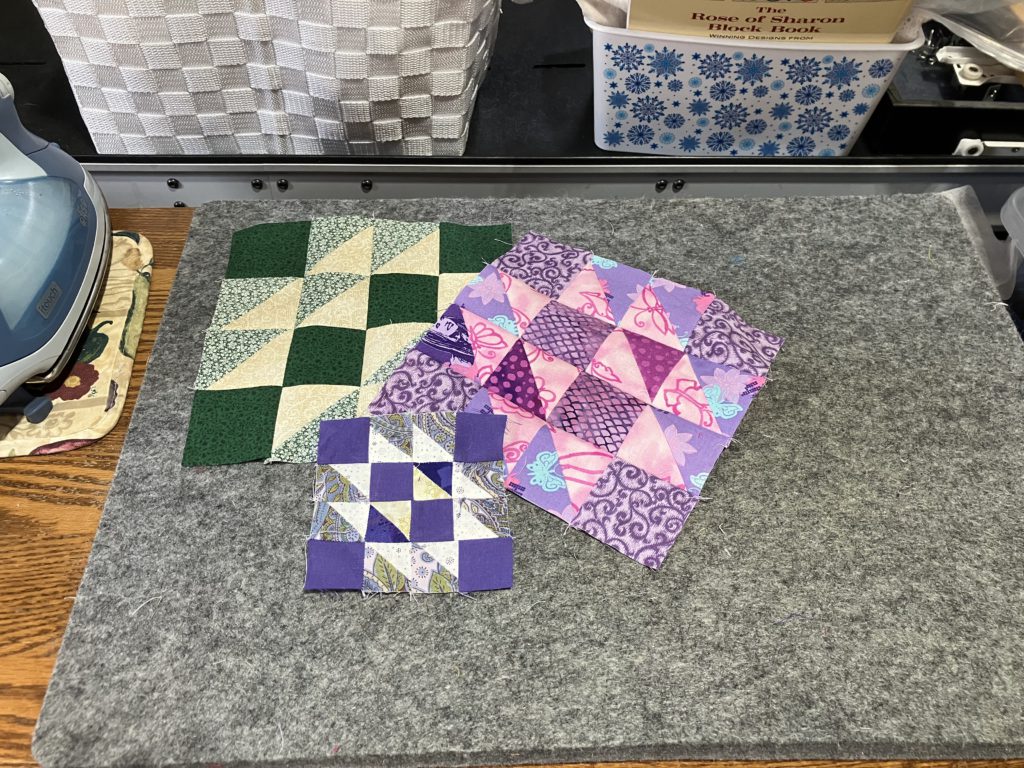
This version uses 2 1/2″ blocks: 6 dark blocks and 10 light/dark half square triangles. The block finishes at 8 1/2″. I start by laying out the dark blocks like pictured below:

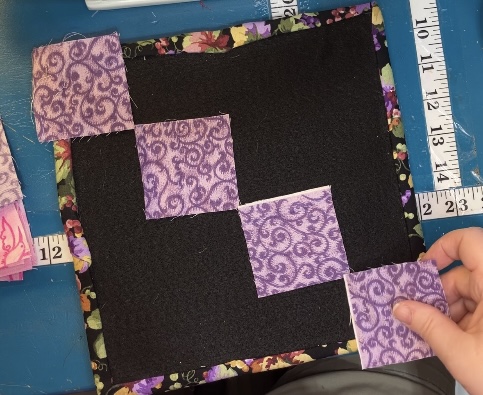
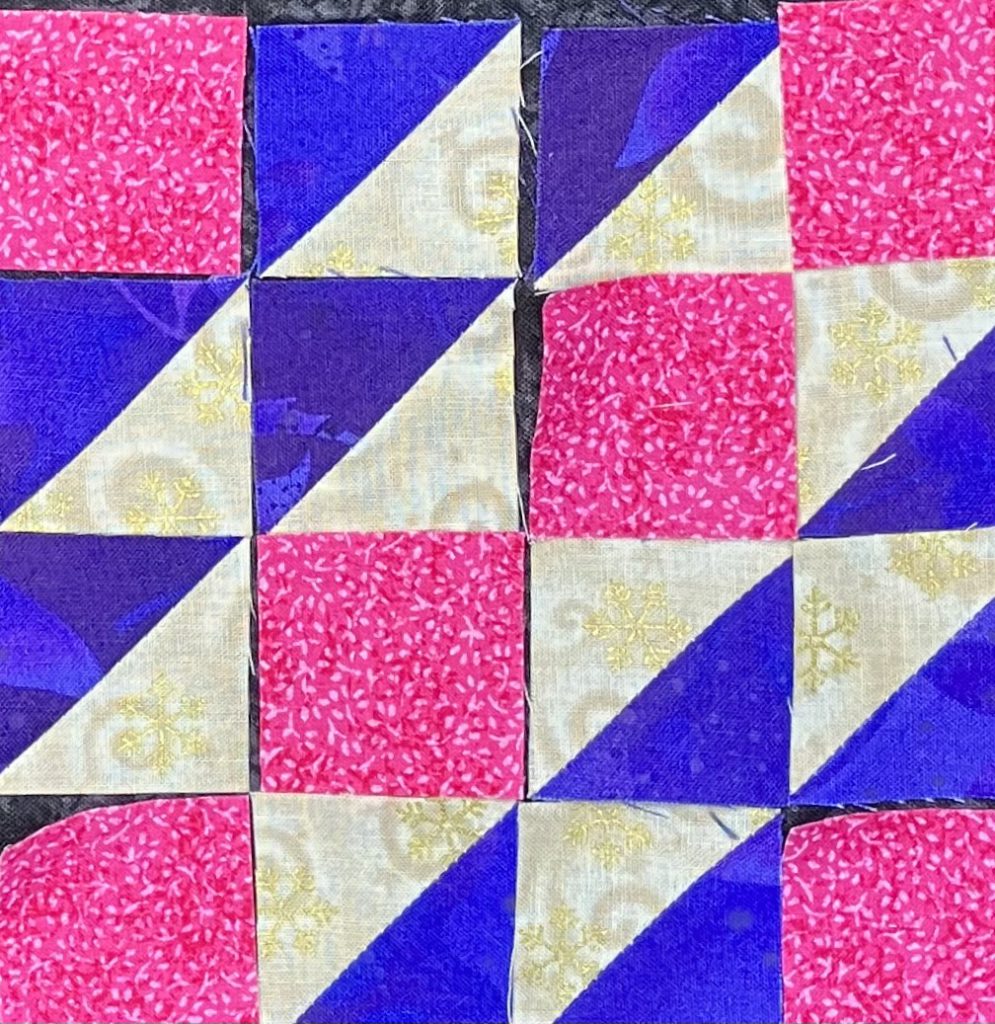
Then I add in the half square triangles in the correct orientation. Half of the units (looking at the light part of the block), point to the lower left of the block. The others (again, looking at the light portion of the block) point to the upper right.

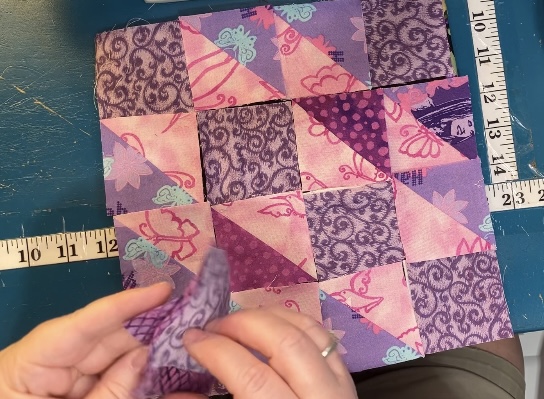
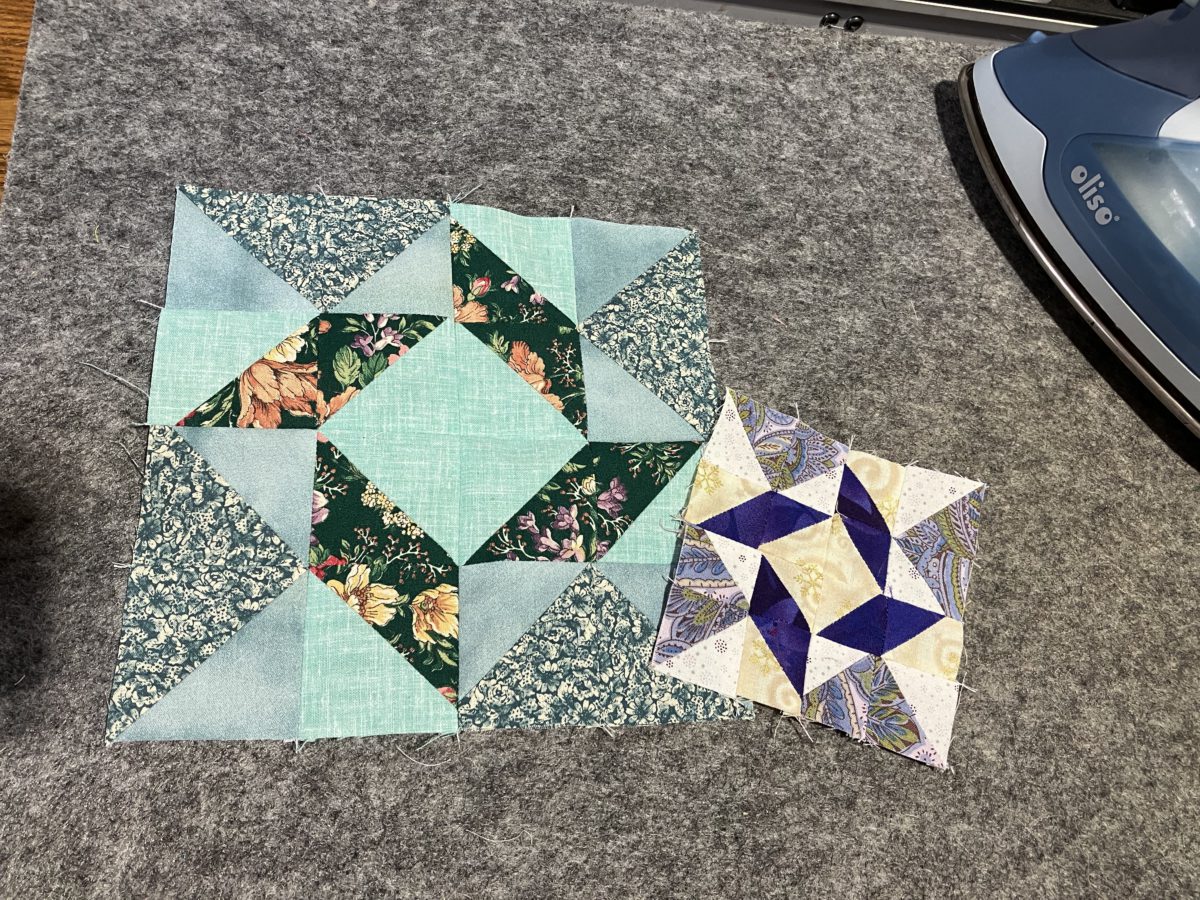
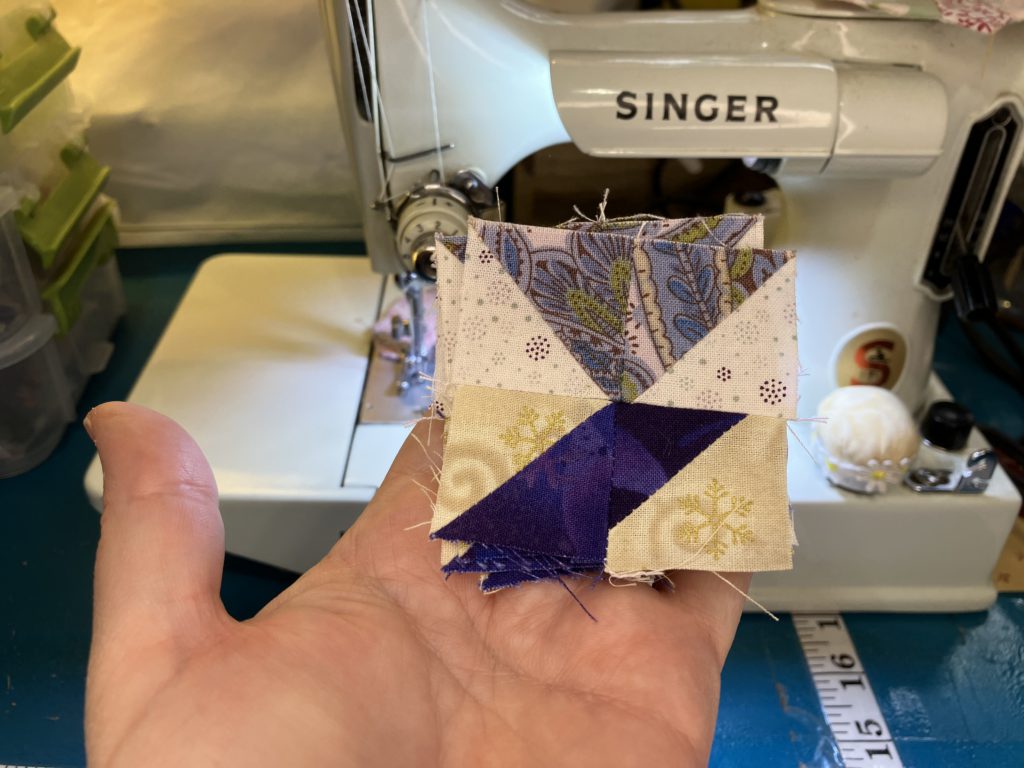
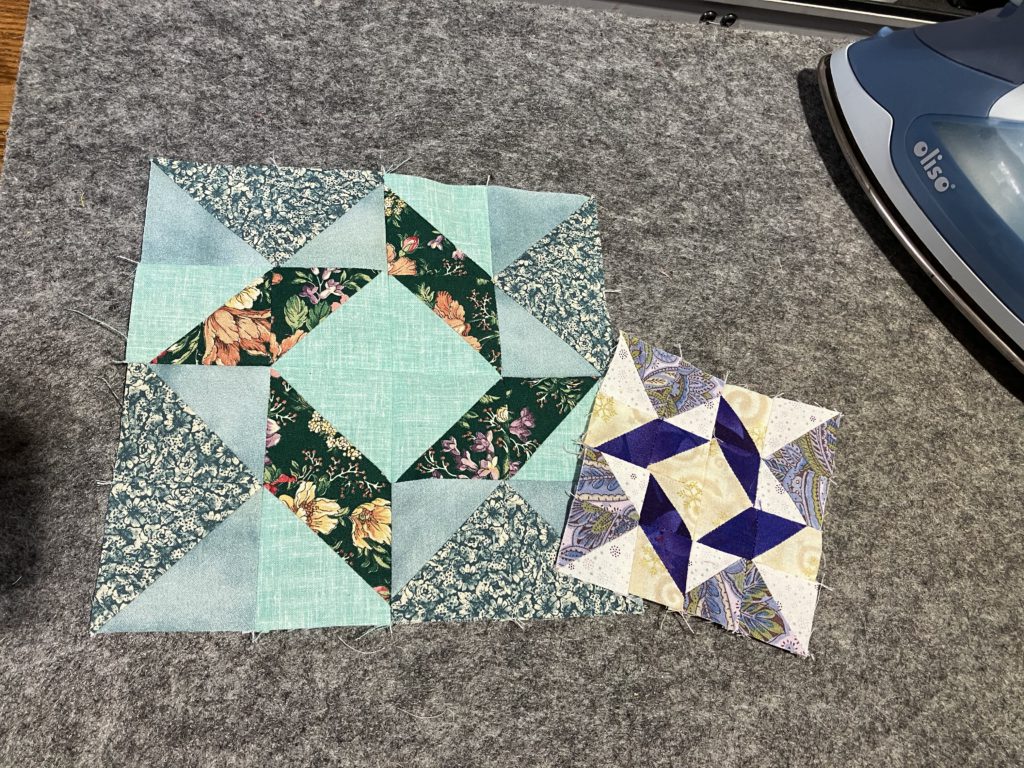
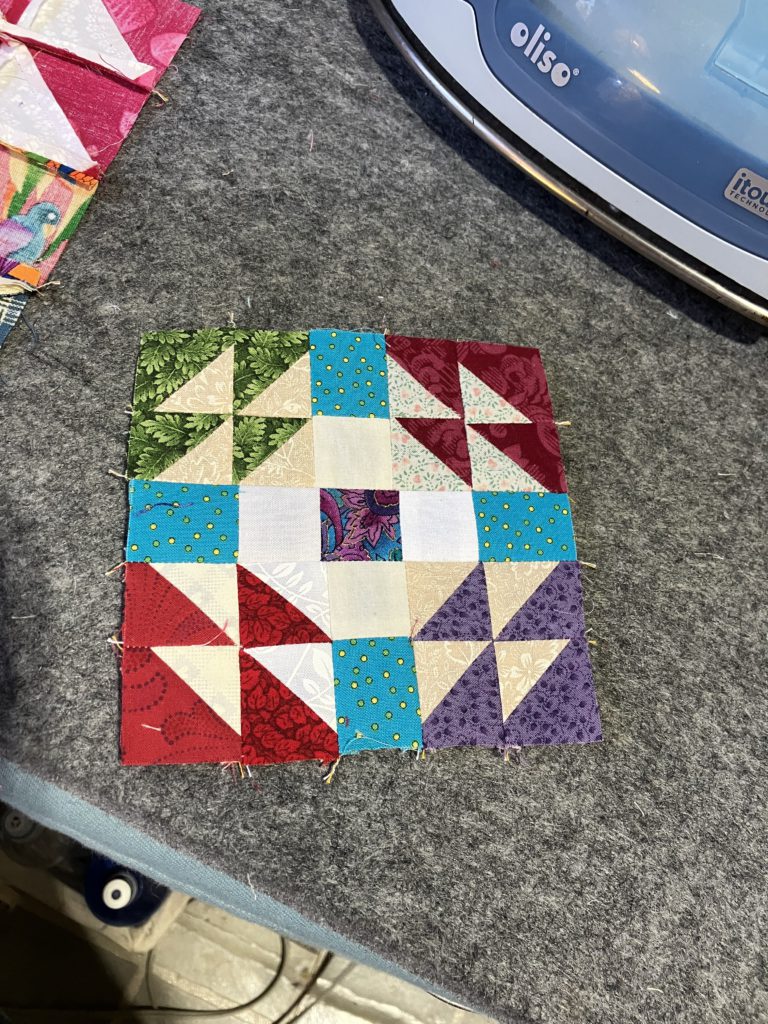
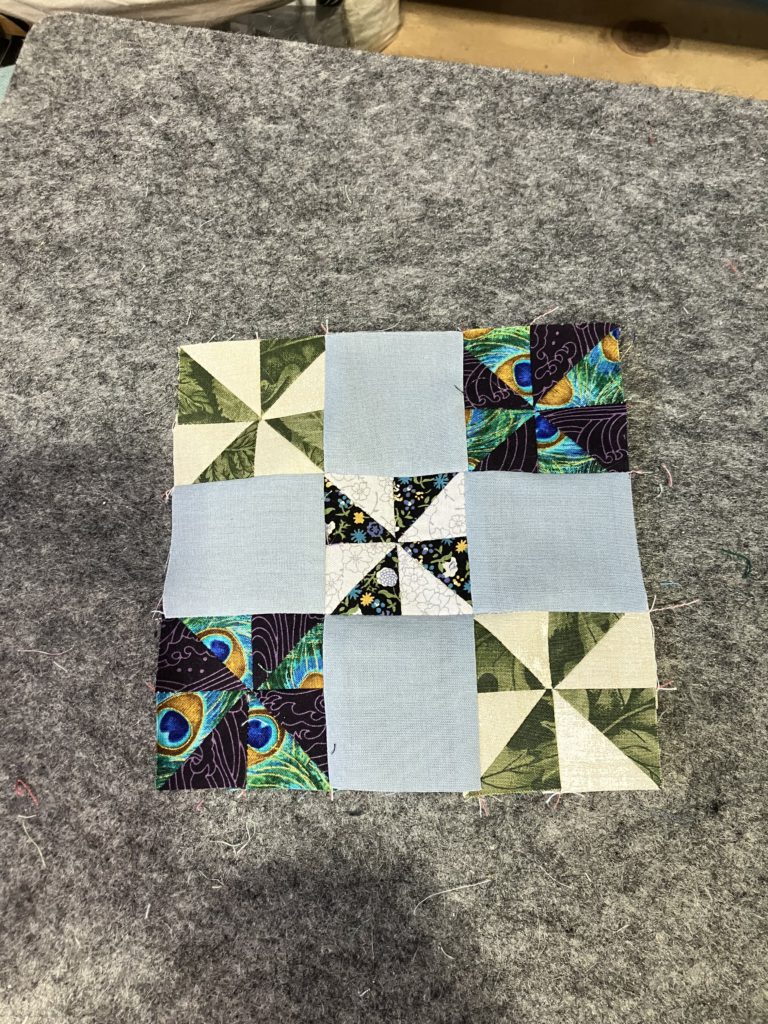
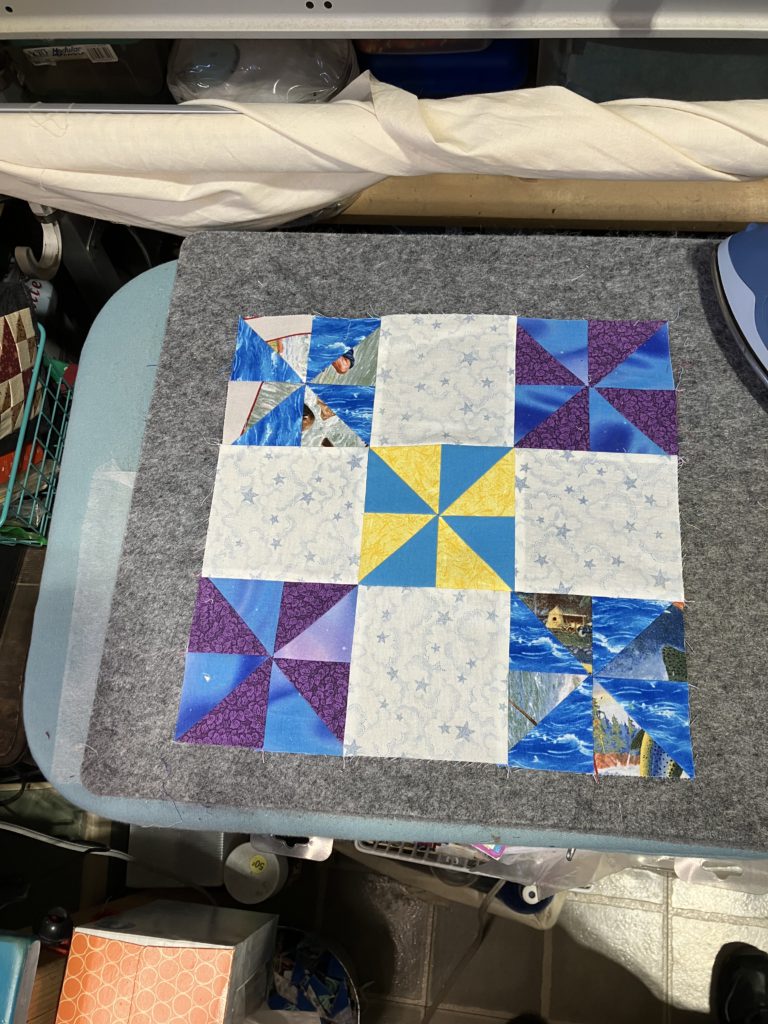
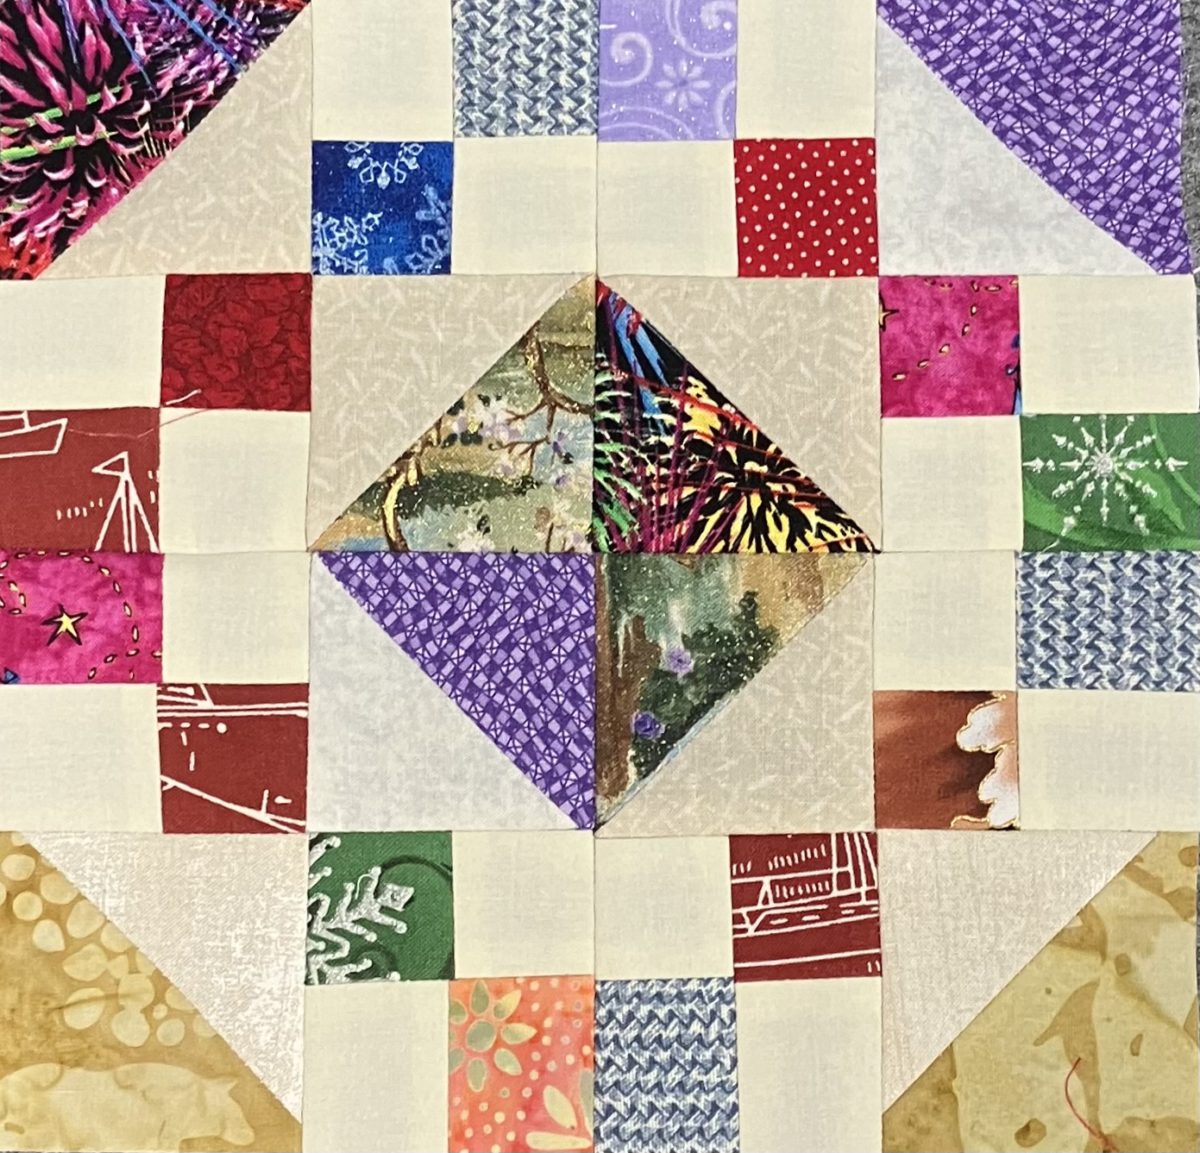
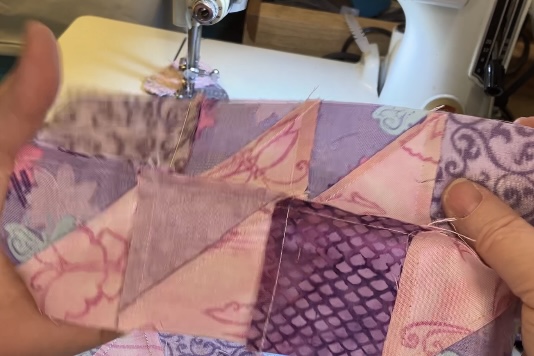
Here I changed the center two blocks with some beautiful batik fabric scraps. I think the visual interest here is better.

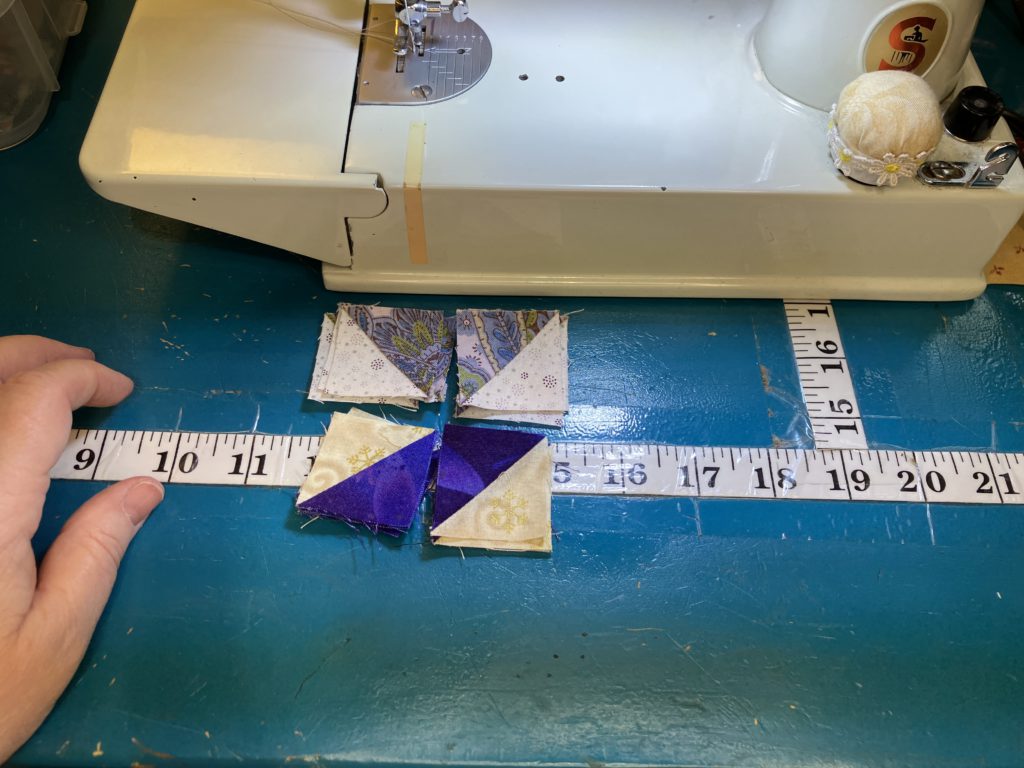
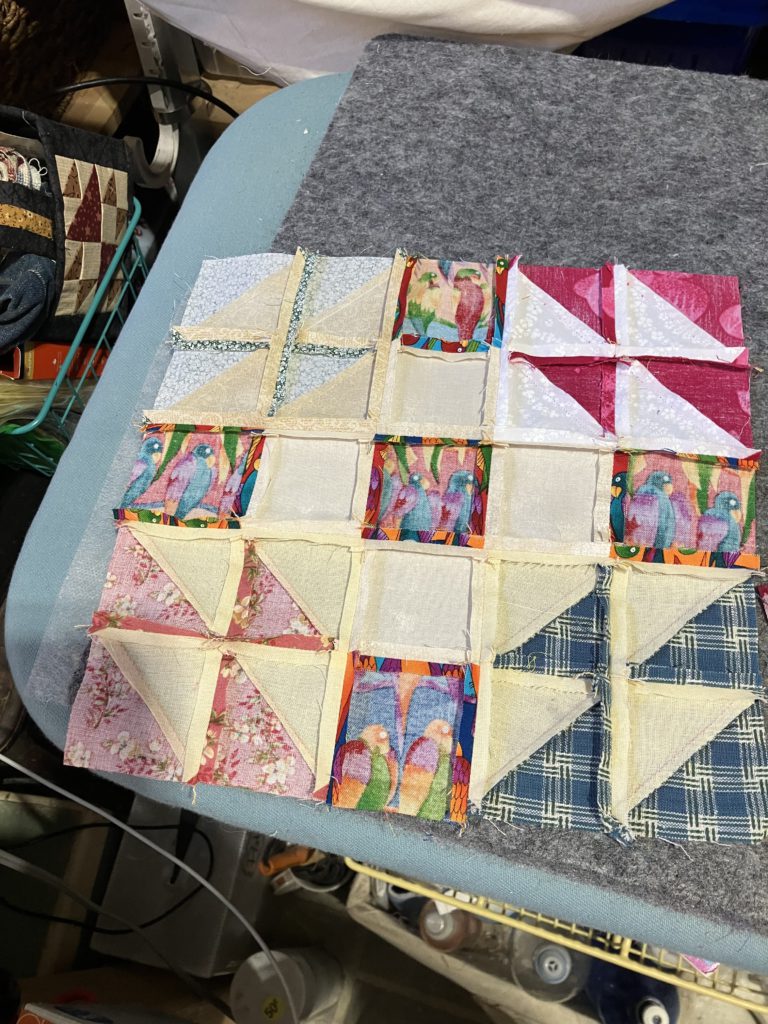
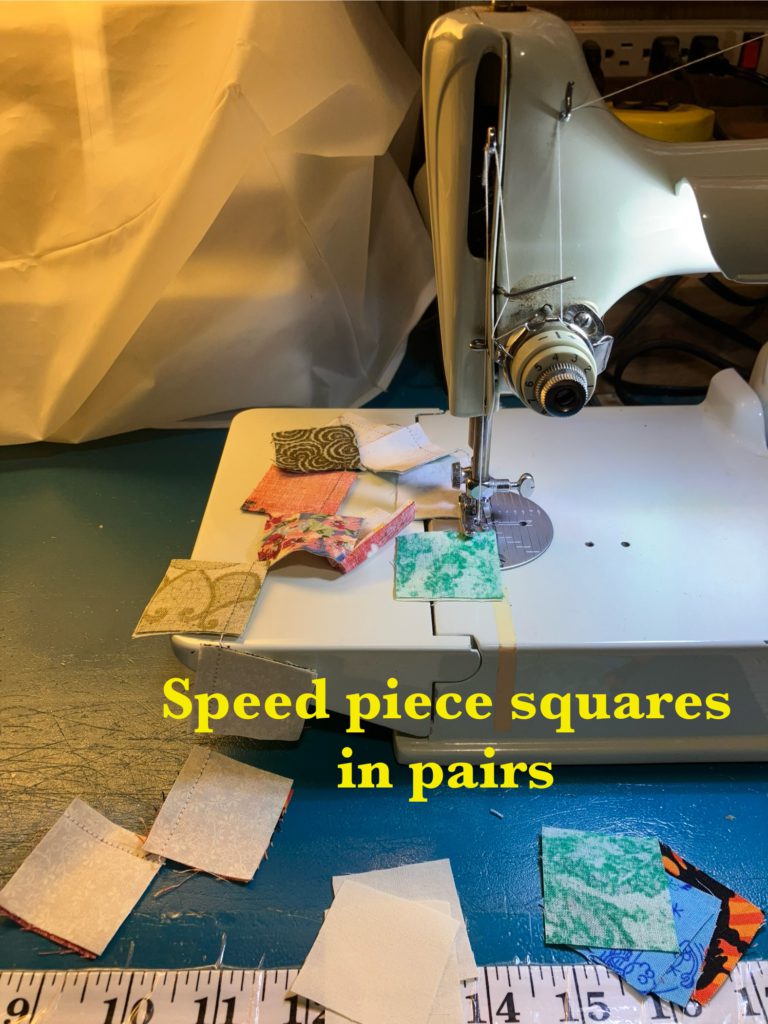
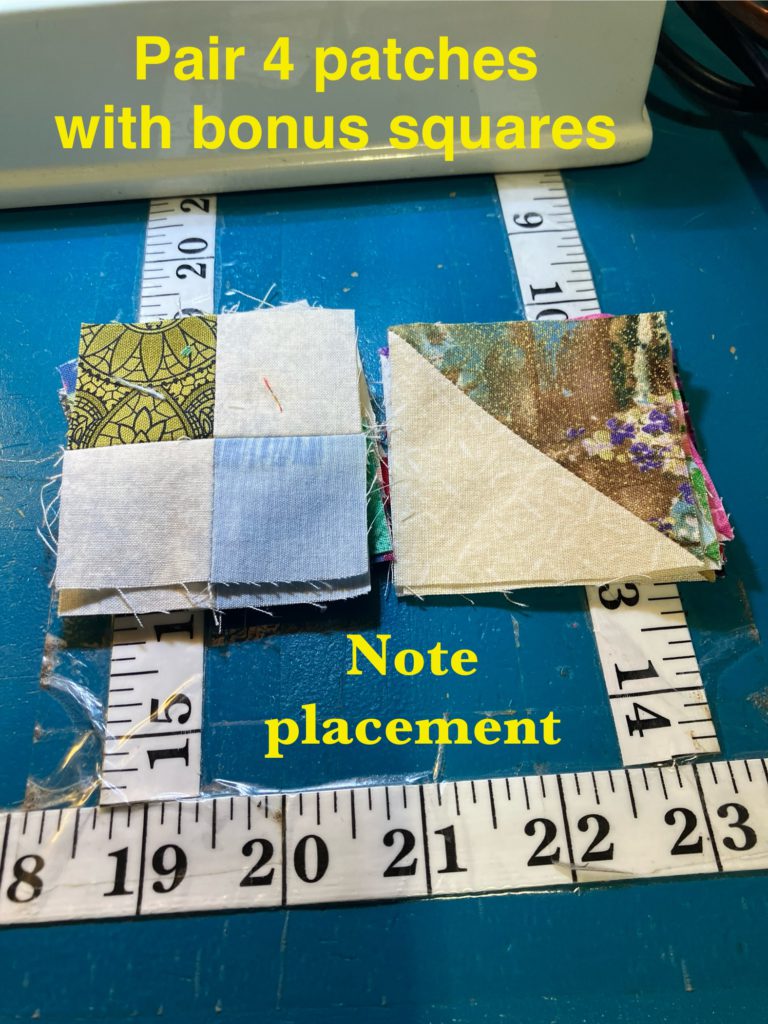
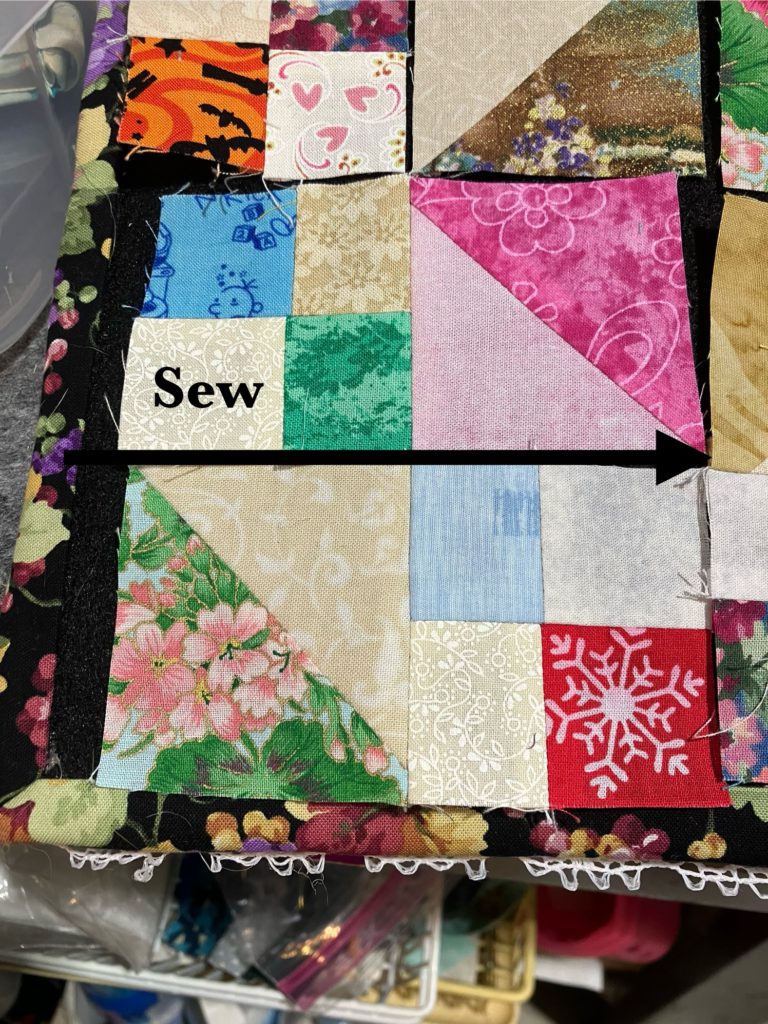
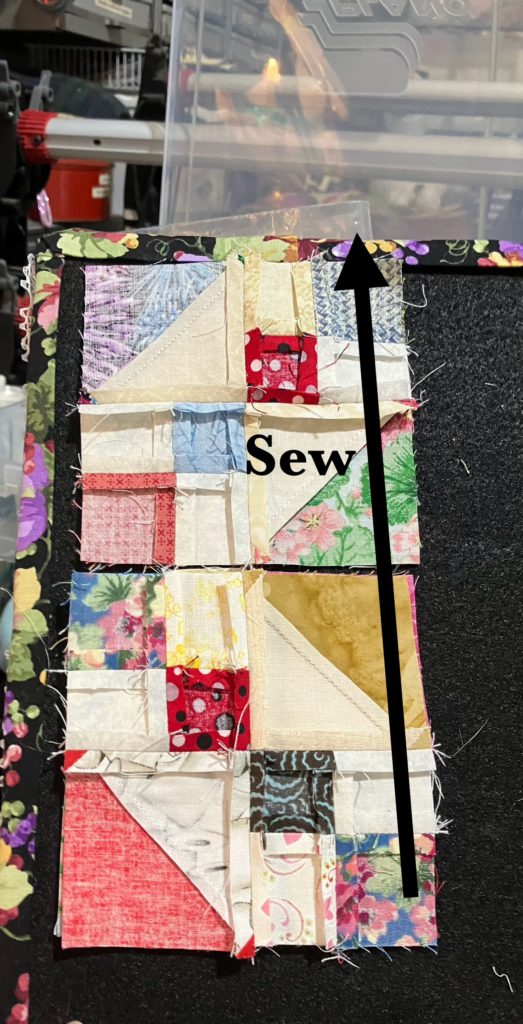
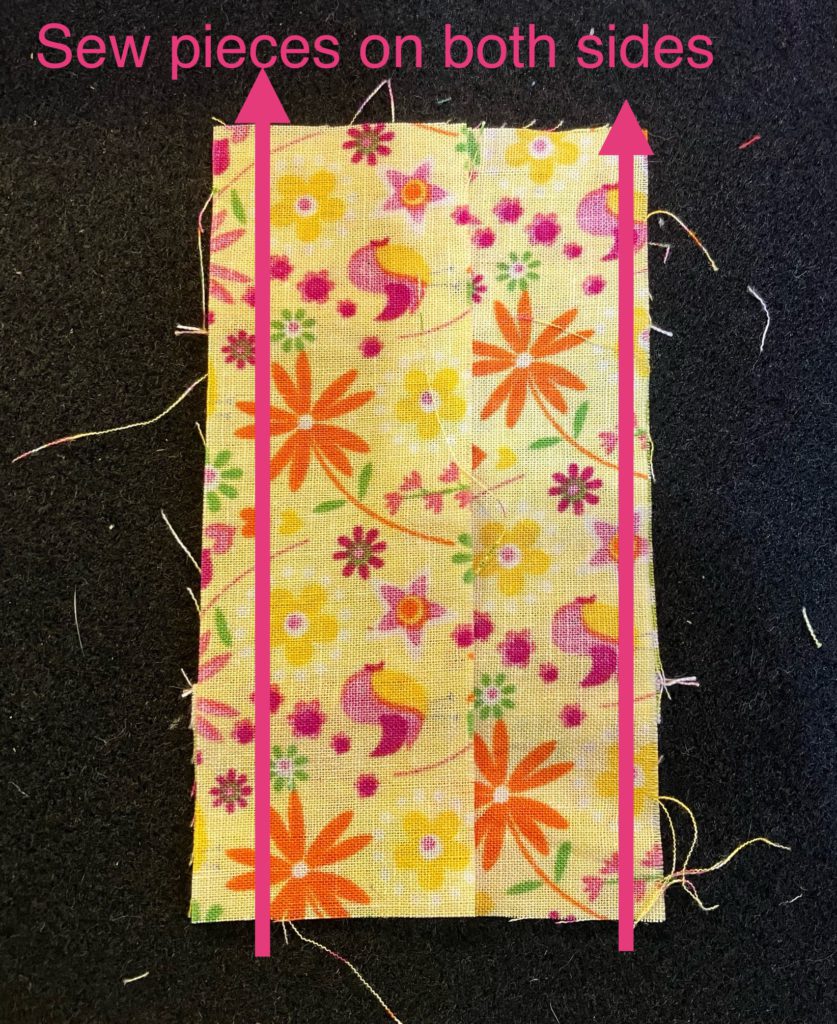
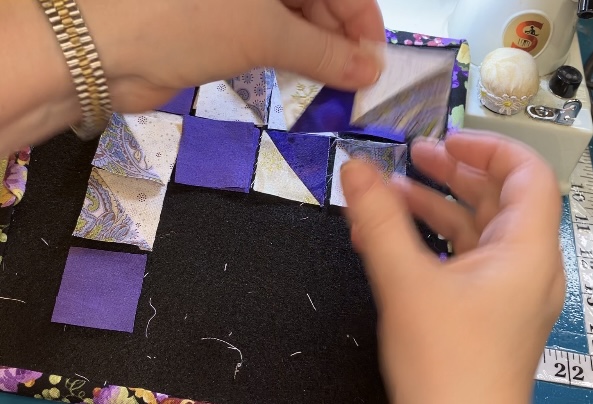
Recently, I have been sewing blocks in quadrants or fourths. This block does not work for that method…but it does work for assembling by halves! Here the halves are stacked and ready to speed sew:

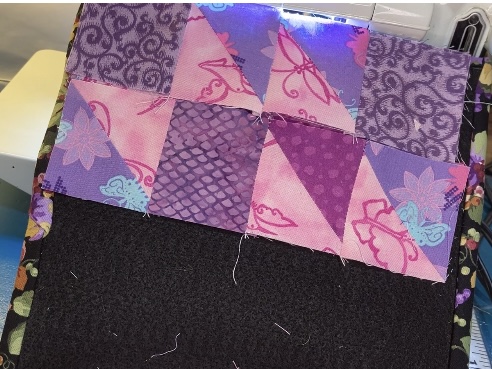
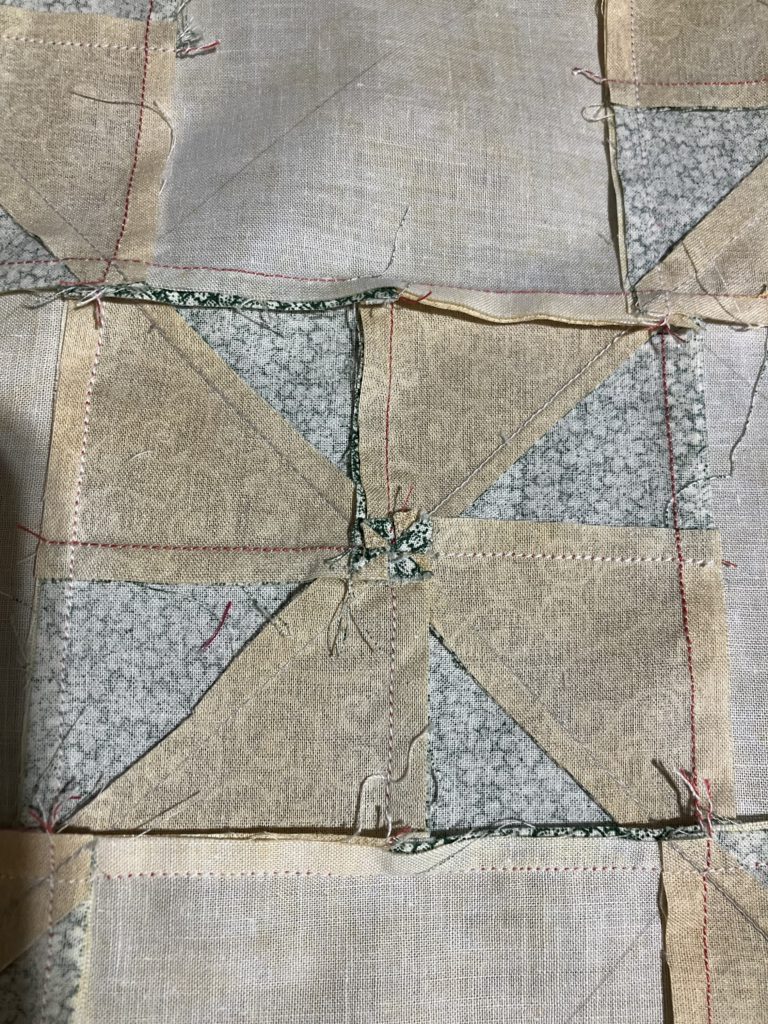
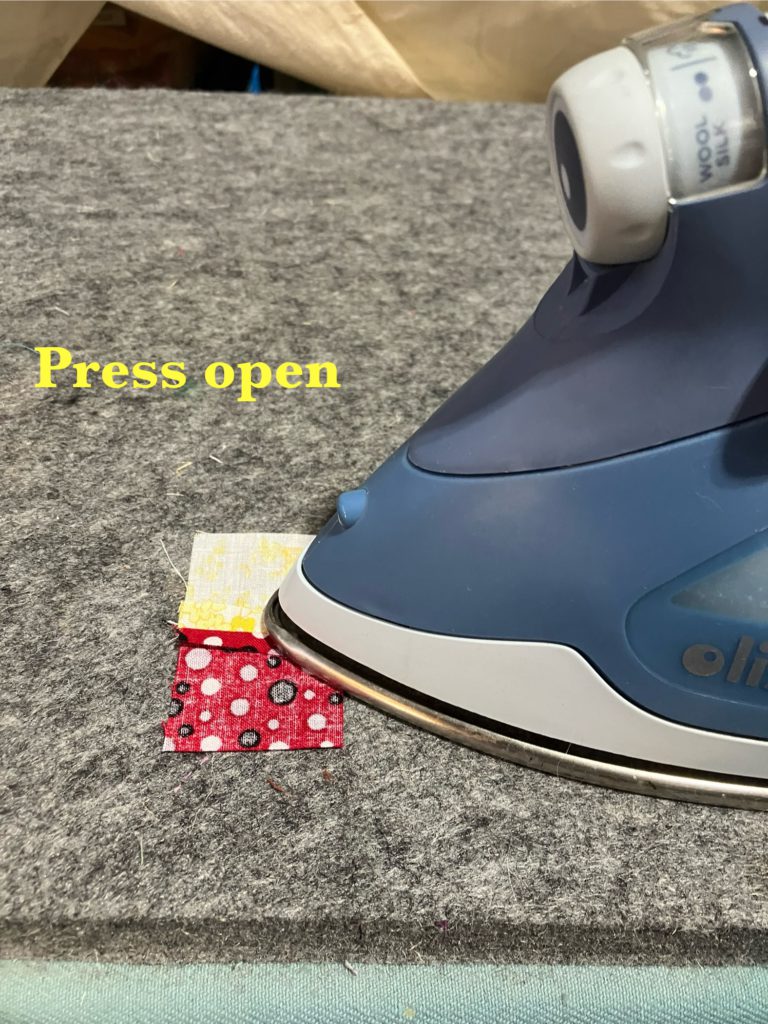
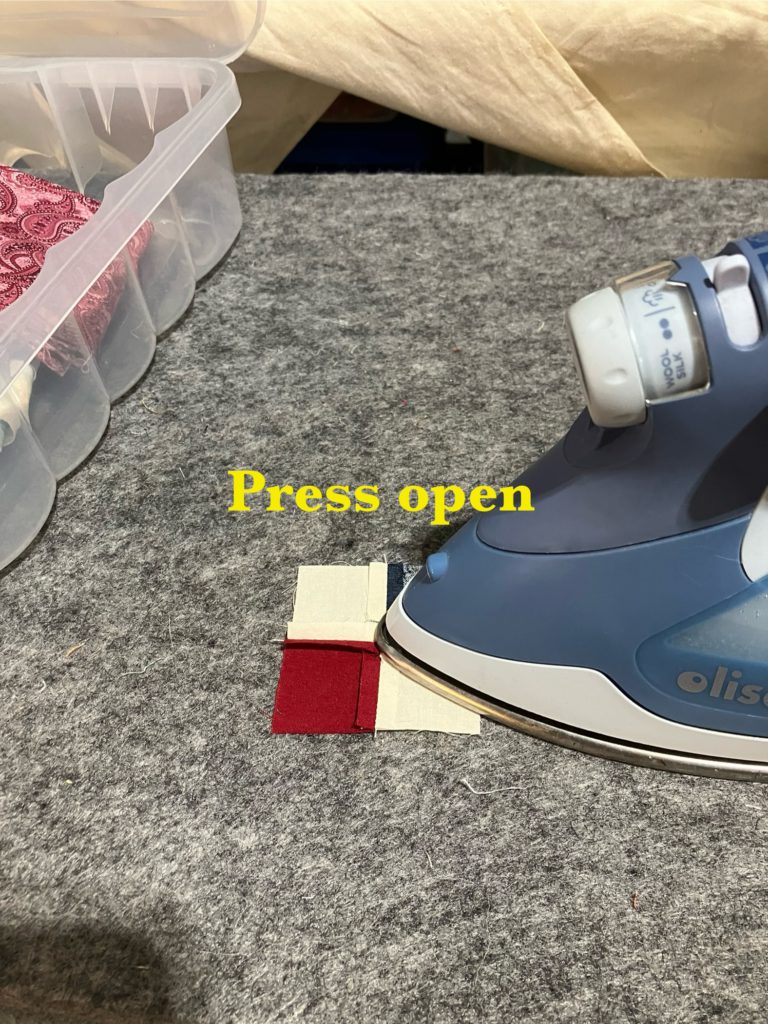
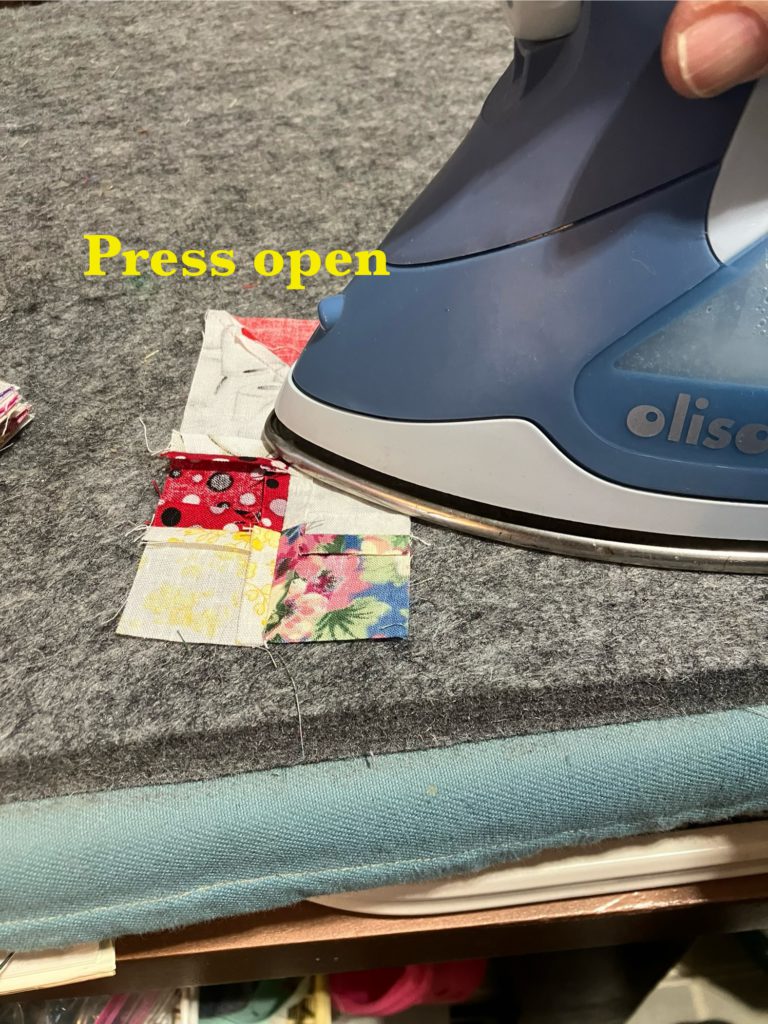
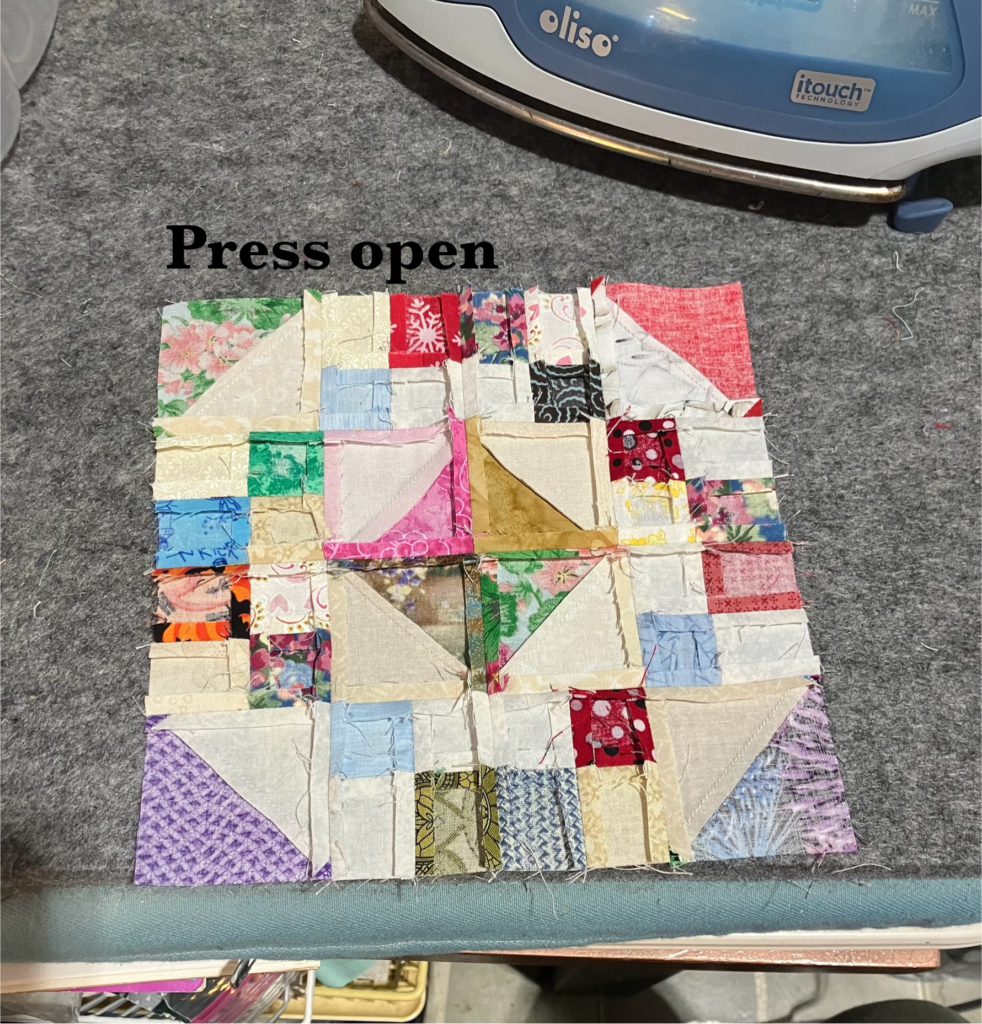
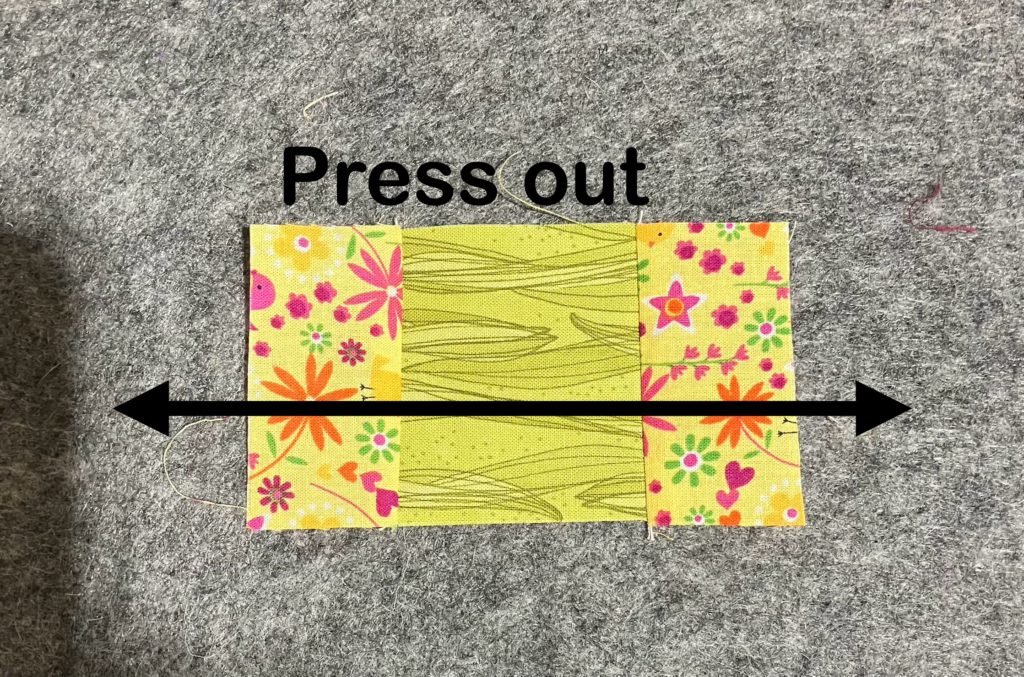
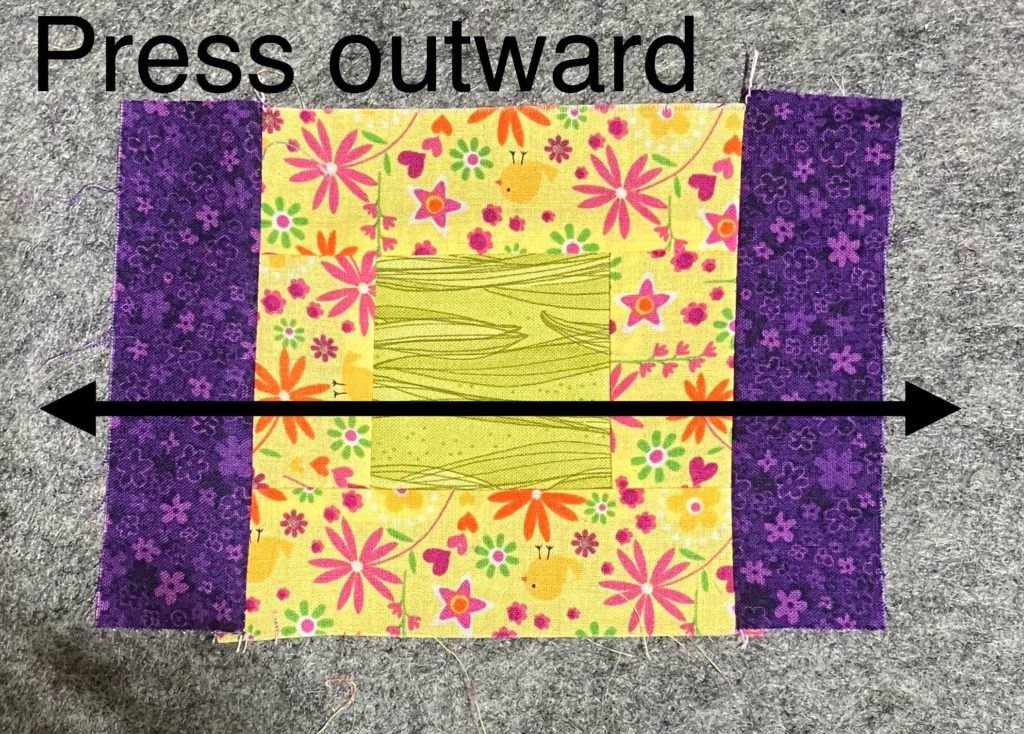
In each row, I pressed to one side. The following row, I pressed in the opposite direction. Pressing open is always an option, too. You decide.
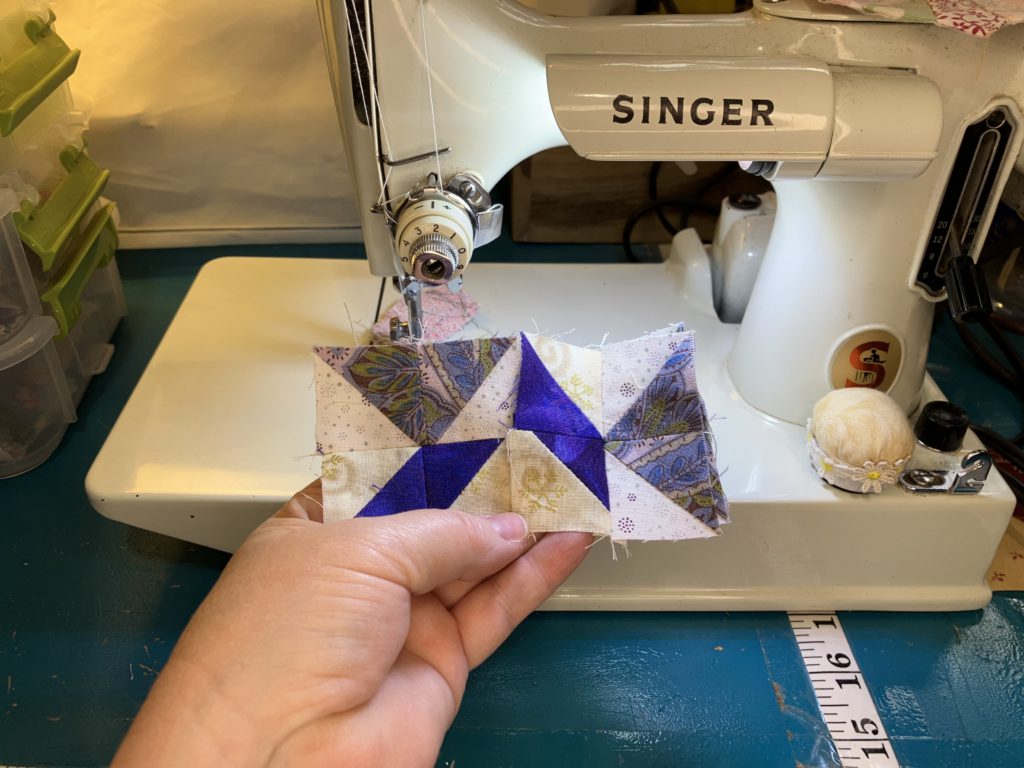
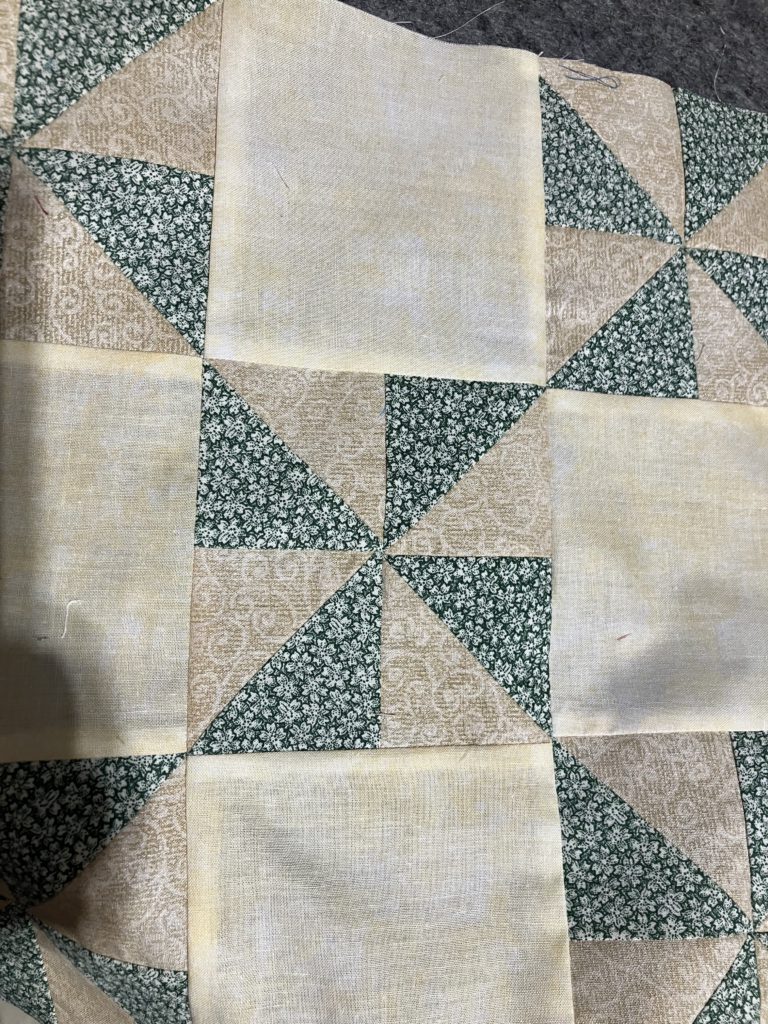
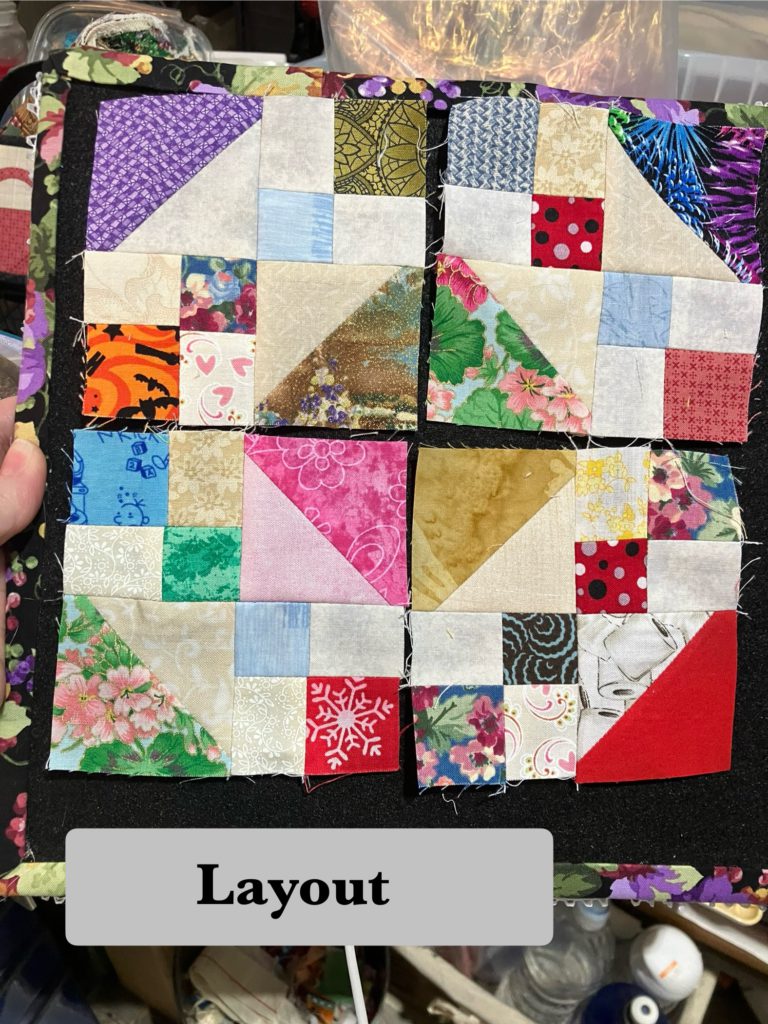
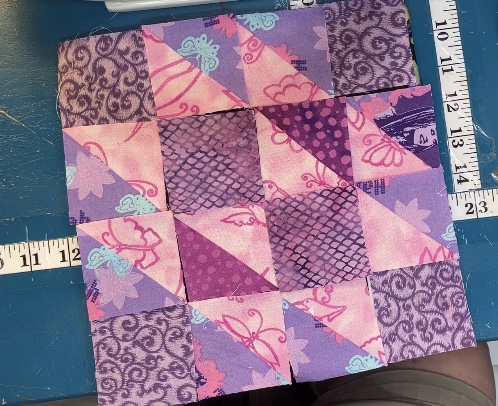
Half block reveal!

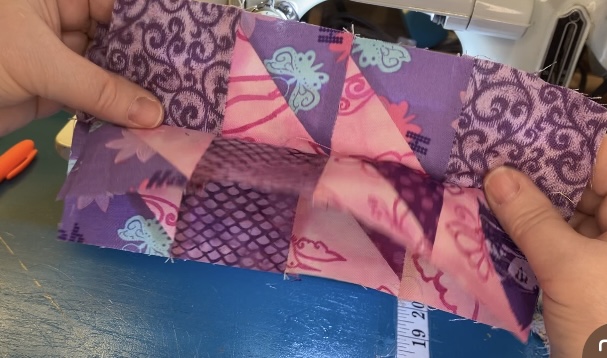
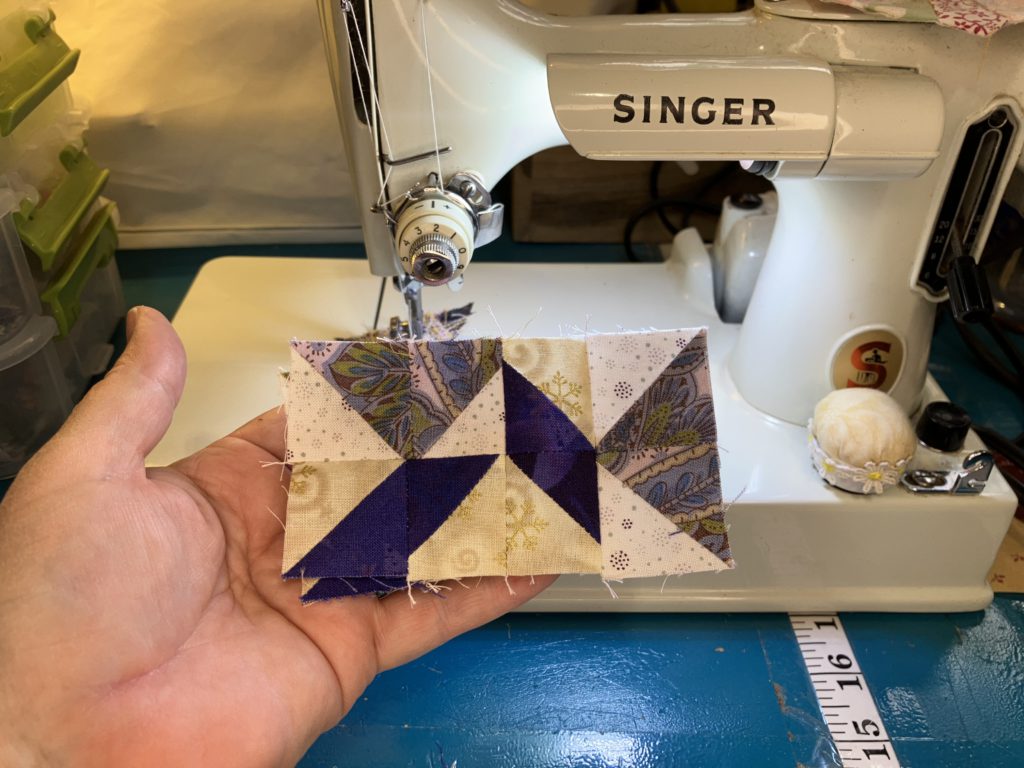
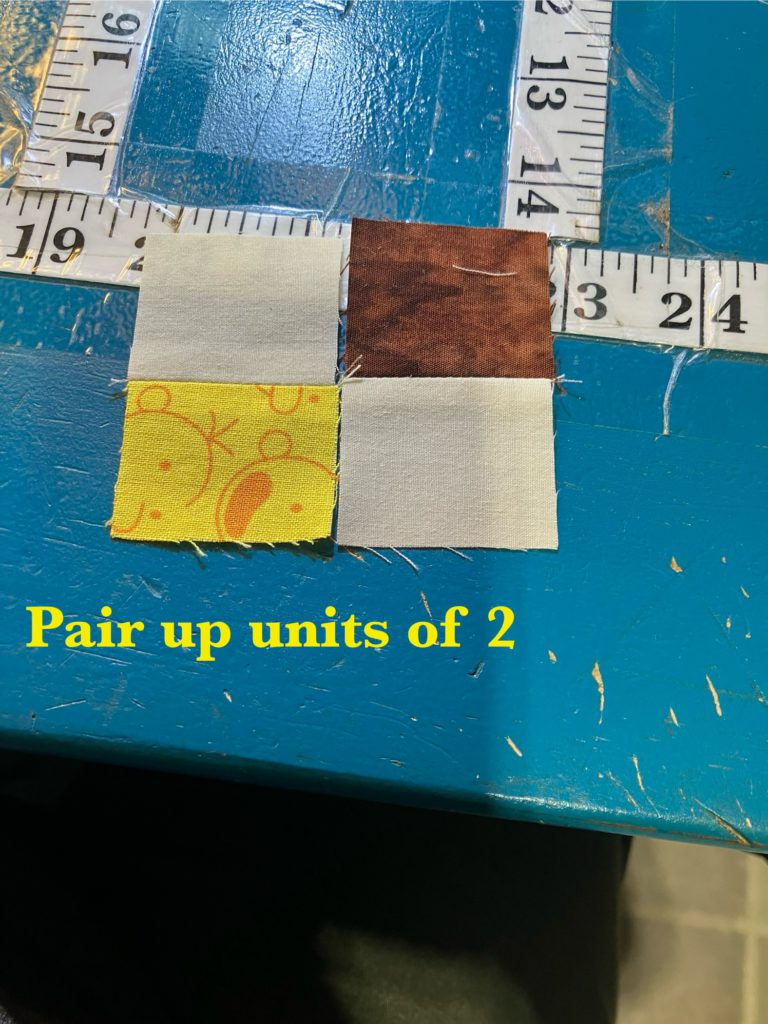
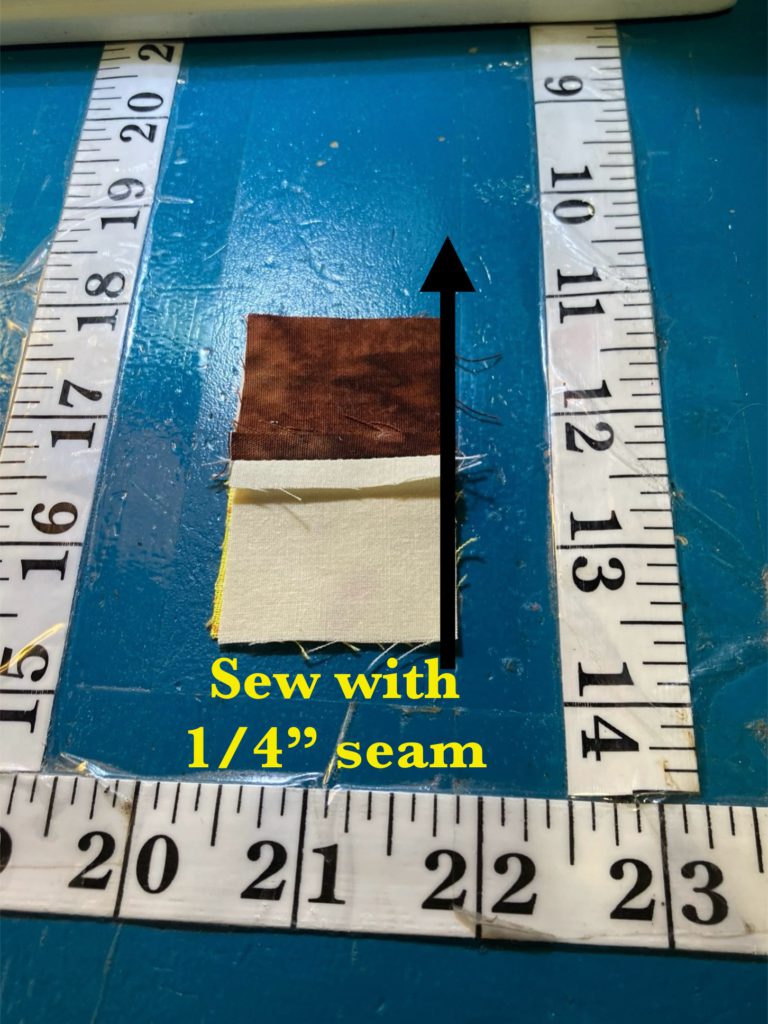
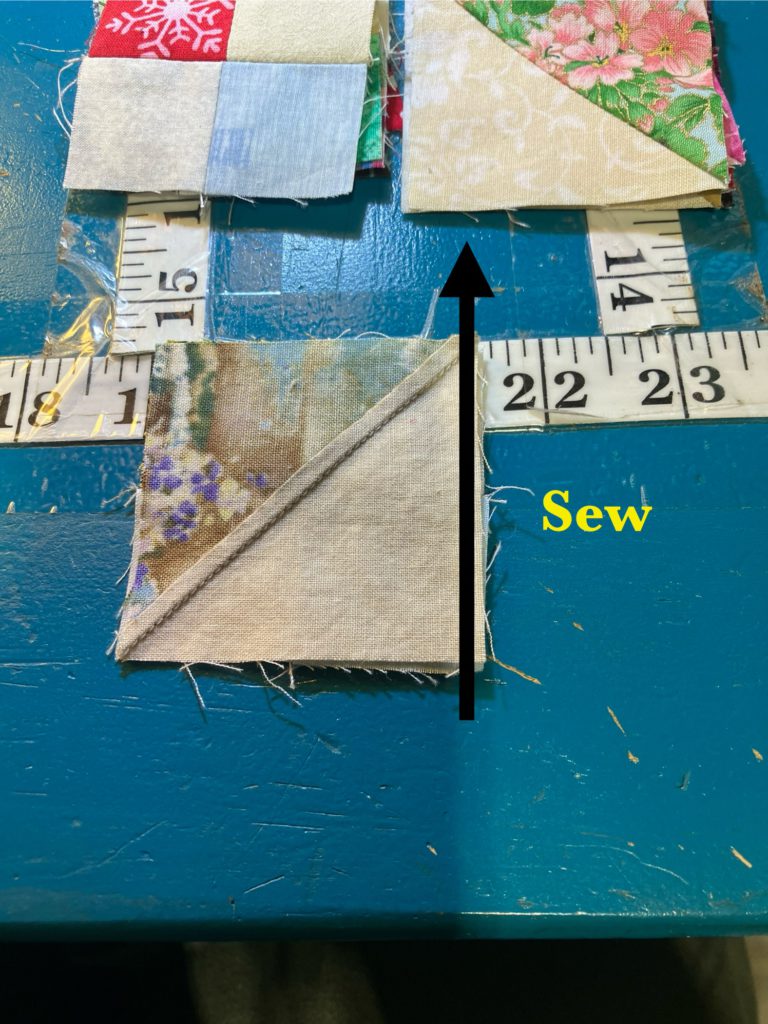
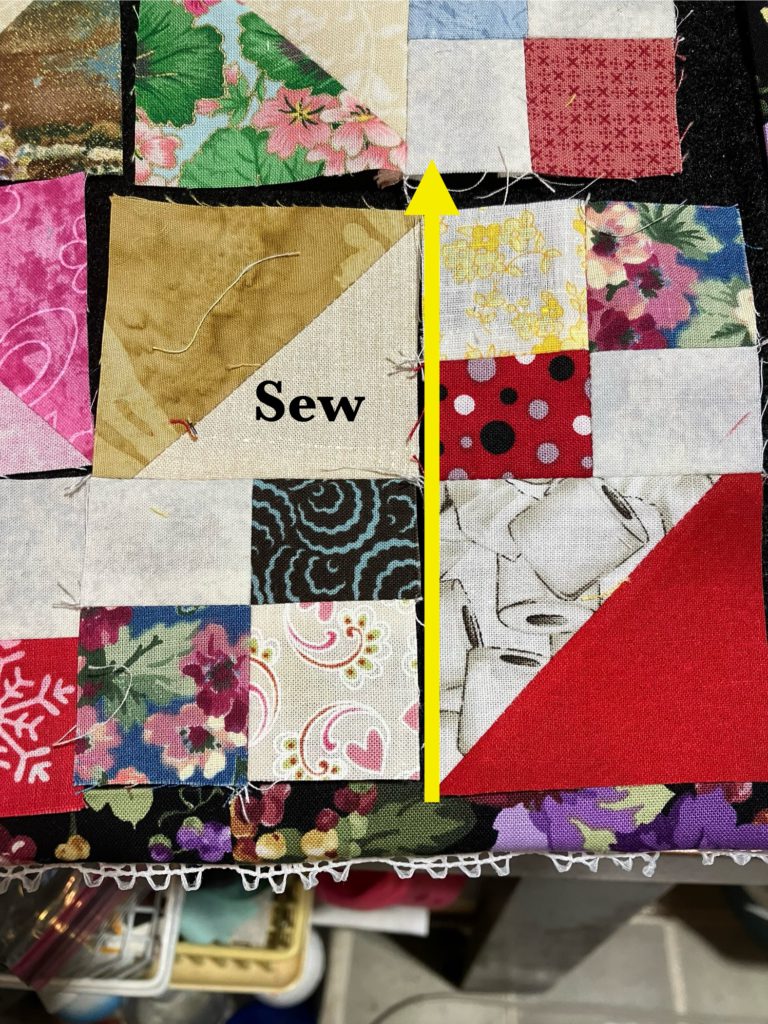
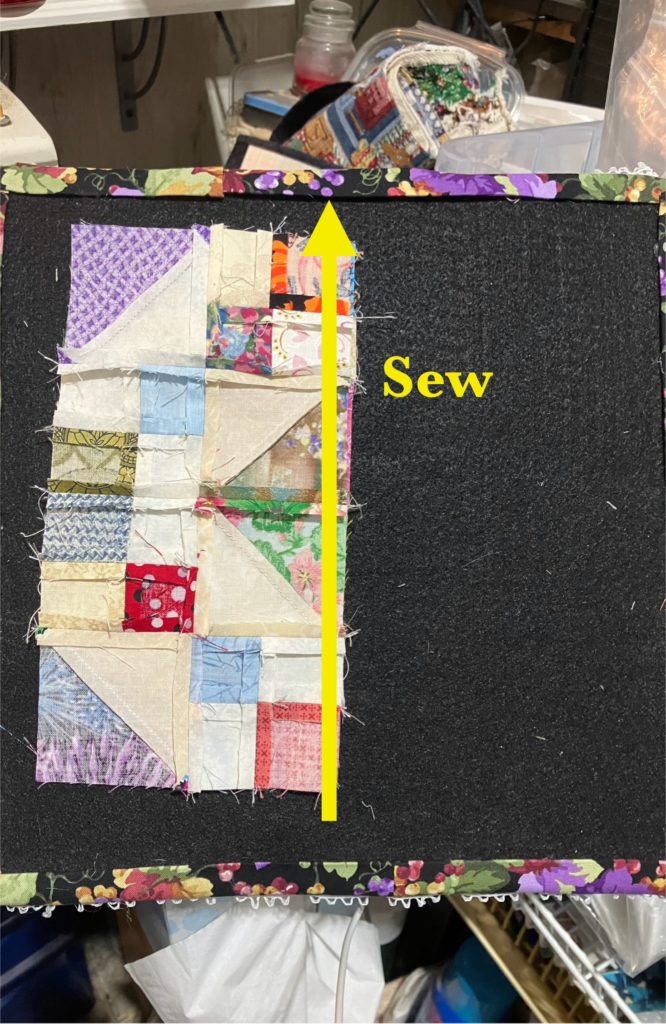
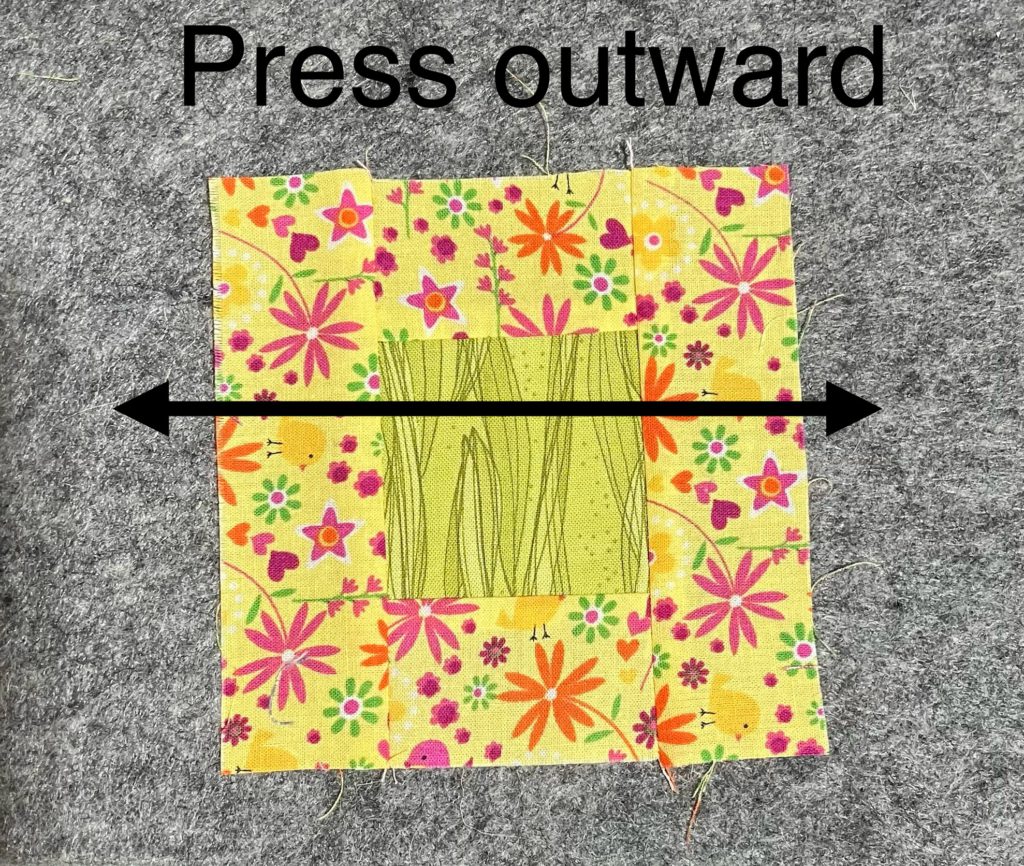
Turn one of the halves in a 180 degree turn…sew together. Yes, it is just that easy.

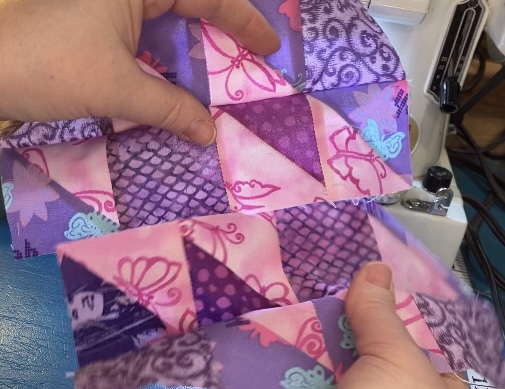
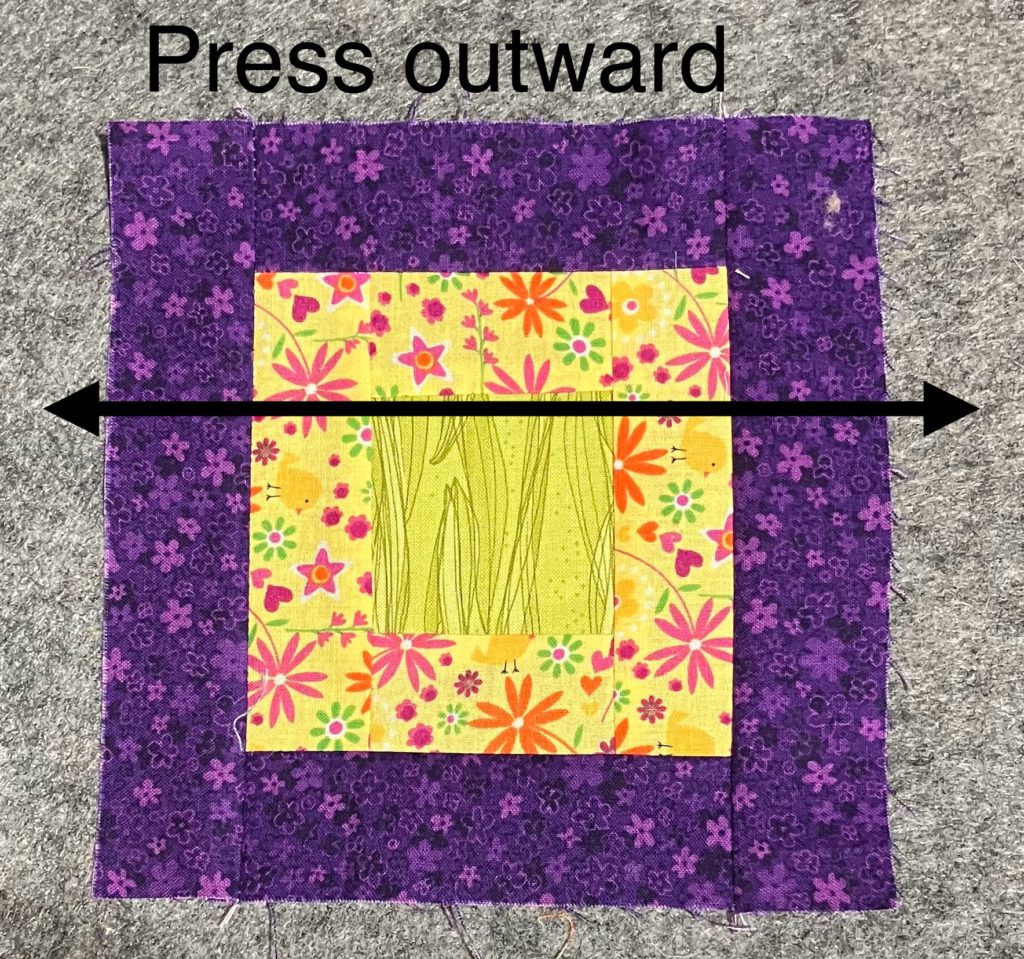
I pressed all the rows going in the same direction after I assembled the rows. Life should always be this easy!

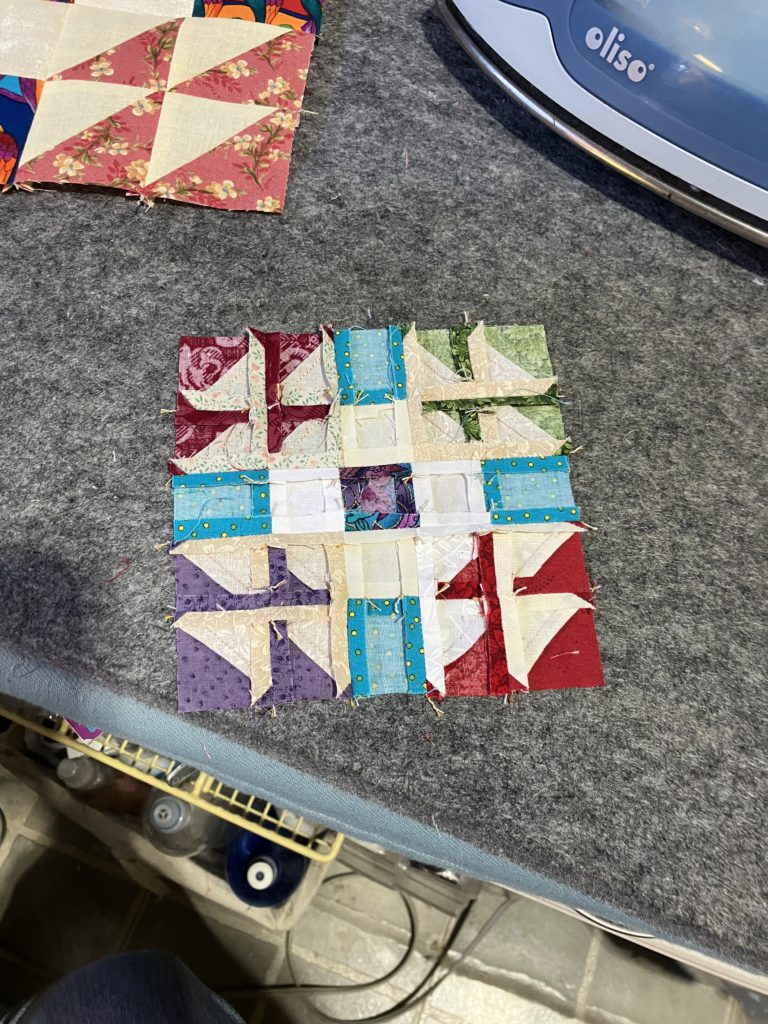
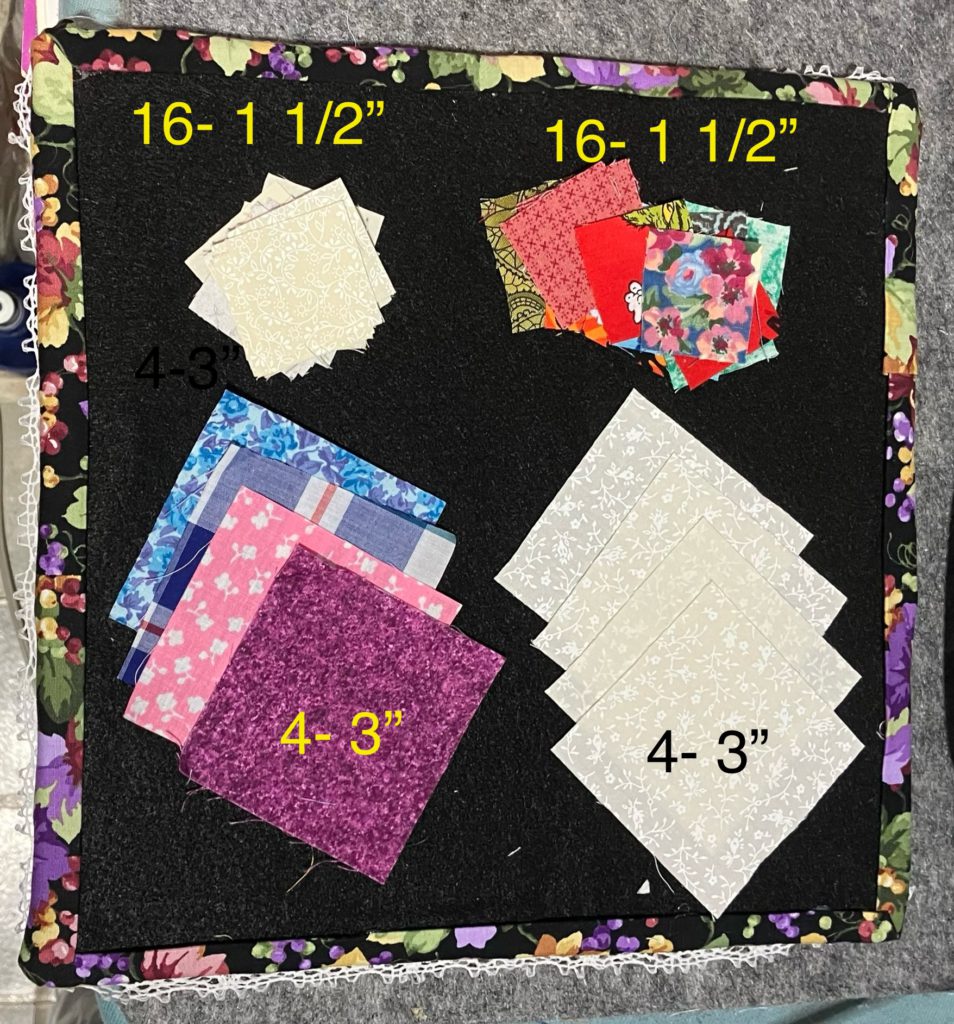
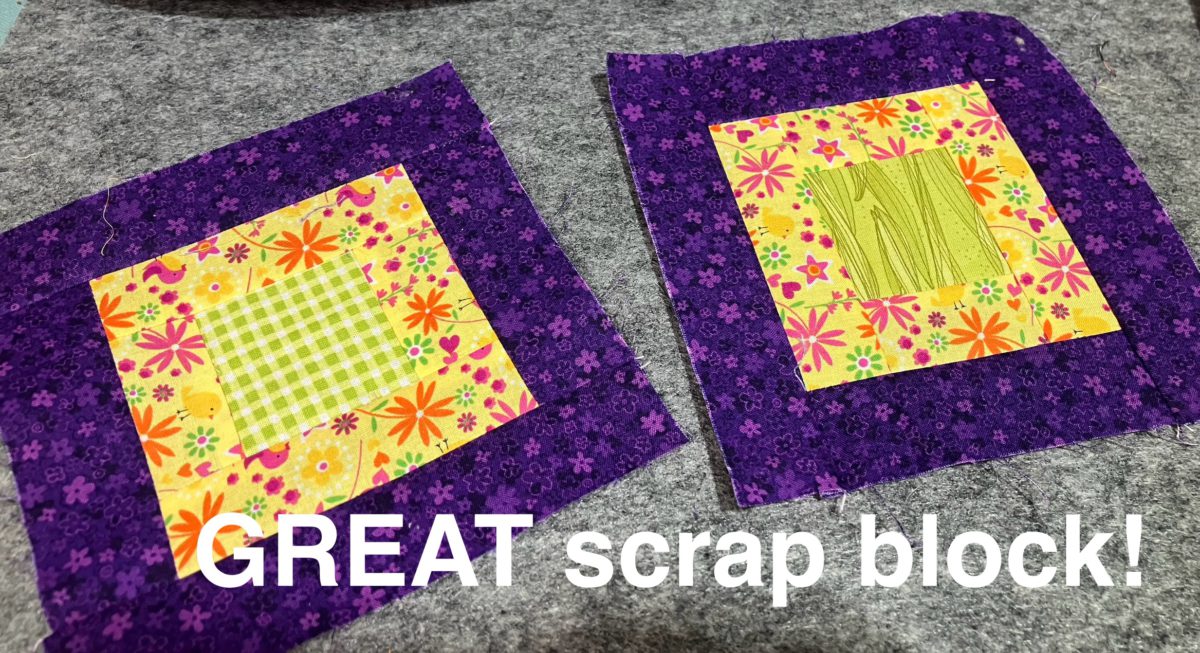
Here is the version using 1 1/2″ blocks:

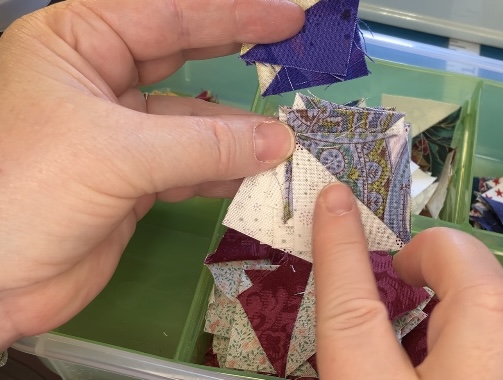
I love these little things!

Same layout!

Now with the half square triangles!

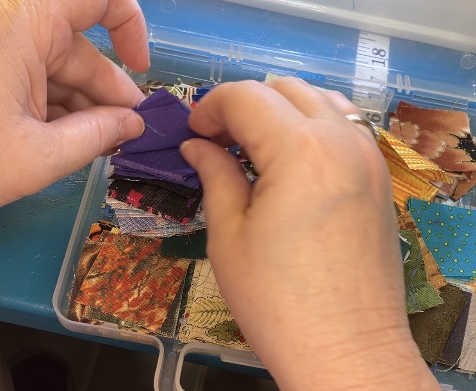
Stack to speed piece as half blocks…

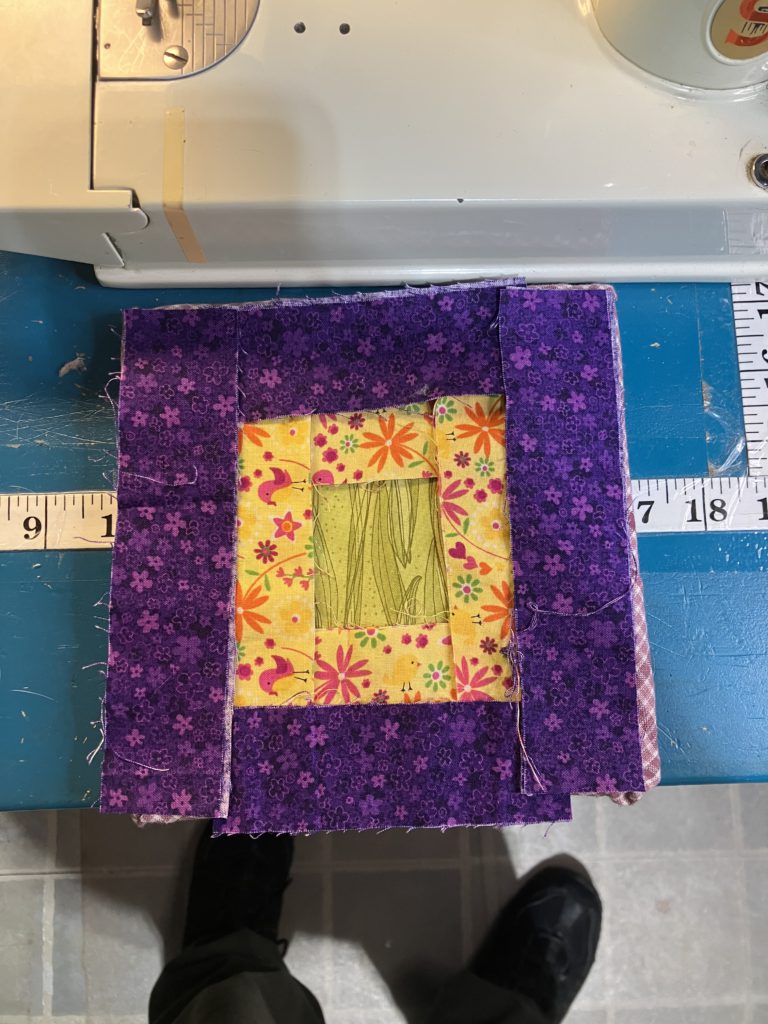
Assemble like the bigger block.

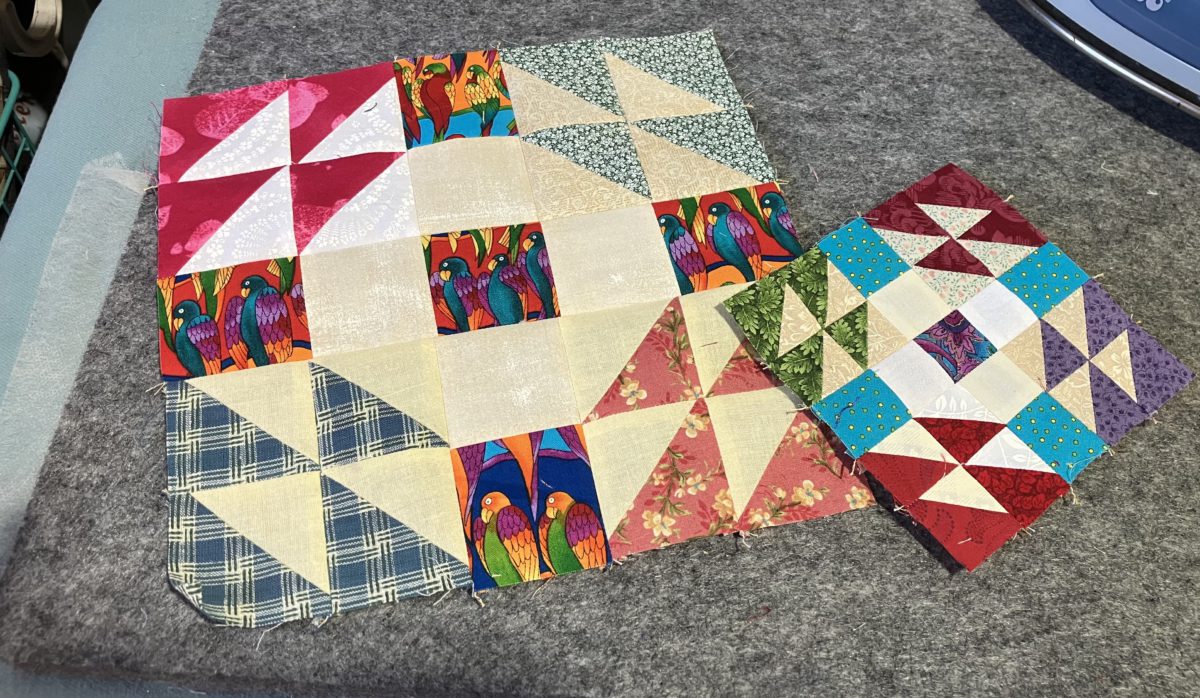
Here they are…tah-da…tah-done!

The contrast in this one is so good…I just have to admire it for a moment longer! AAAhhhh! So cute!

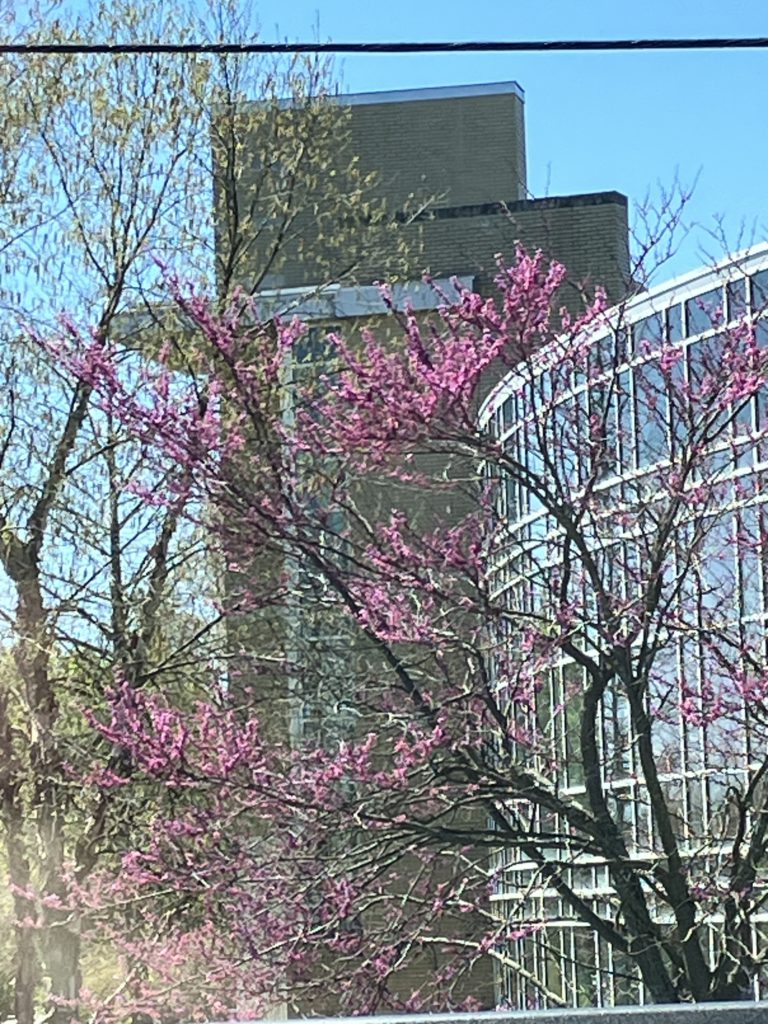
I just have to share a nature picture. I do love redbud!

I hope you enjoy making this block. If you have comments, please go to the video mentioned at the top and leave comments there. When I turn on comments here I get adds for Russian viagra and other “stuff”…Oh, my!

Here is the cutting chart I promised. It should be printable…and it is FREE!

Have a great week! Thank you for reading my blog! The next blog will be a mini quilt show with my commentary! (At least you will get some eye candy! I will mostly tell you why I was compelled to take a picture of those quilts…see you then!)

Later,

Lorrie

Categories
Build a block

Build a Block: Whirlpool

I am still using this same, old book.  There are lots of good blocks in there! The video that shows this block construction is here.  The cutting chart for four sizes is at the bottom of this blog.

This week I am using up 16 more bonus half square triangle blocks…two sets of eight blocks. Look at the lovely, swirly whirlpool in the center. I used darker half square triangles for the center swirl.

This block can be speed pieced into quadrants or fourths. Notice the layout below for placement…a flying goose and a “blade”.

Make the goose and the blade units. Press open to reduce bulk. Assemble into a four patch as pictured below.

Make two units of two four patches. Note the layout below.

Turn one of the units…sew the final seam to complete the block.

Tah-dah! Tah-done! This is a 4 1/2″ version.

This is the 8 1/2″ version.

I love the swirling movement in this block…almost like a frame.

And look what I found! More blocks to trim! Yeah!

Here is the cutting chart with various sizes:

These are the base blocks for next week…shocker…more bonus half square triangles.

See you next week for more blocks!

Later,

Lorrie

Categories
Build a block quilting scraps sewing

Build a Block: Wedding Ring

It’s that time of the week! Time to make another block!

I know this block as Wedding Ring, but the EQ5 book that inspired me called it Odd Scraps Patchwork.  It is a 5 by 5 block.

The video that shows step by step assembly can be viewed here on YouTube. 


Here is the “rough copy” from my video from back in October. I showed the block layed out, but never sewed it.

For this block, you will need:

16 (bonus) half square triangles, 5 darks, and 4 lights. These blocks should all be the same size. The ones shown below are the 2 1/2″ blocks. The picture below shows all seams pressed open for ease of assembly.

Here is the completed block. It finishes at 10 1/2″. Love those colorful birds!

Here is a smaller 5 1/2 inch version made with 1 1/2″ blocks.

Again, all seams are pressed open.

Here are both examples the 10 1/2″ and the 5 1/2″. As you can see in the picture below, it changes the look of the block when it is on point. (I didn’t notice this until I sat down and started typing the text than went with this post!)

Now for the cutting charts I have been promising:

The cutting chart above is printable, but you will need to download it and save it in your downloads file first.

I hope you enjoy making this great scrappy block! Please contact me on facebook or at my gmail account. Comments have been turned off because I am not interested in black market viagra!

Have a great day!

Later,

Lorrie

Categories
Build a block quilting scraps sewing

Build a Block: Border Block

Glad to see you here for my weekly Build a Block post! This one is going to be short and sweet because this block is so easy to make…and has so few pieces!

The video for block construction can be found here.

This block finishes at 8 1/2″ square. It is constructed from the following pieces:

Center: 2 1/2″ x 8 1/2″,

outside strips: Two 2 1/2″ x 8 1/2″

Bonus triangles: Sixteen 1 1/2″ bonus half square triangle blocks…8 on each side of the center strip…look closely at the placement below (both pictures are a little different…you decide it is your block!)

I sewed the half square triangle blocks in strips first. Then I pressed those seams open to reduce bulk. You could press then any direction you want. There are no points to match, so it is really your personal preference…as always. (I read in a quilt book yesterday…whatever you do is right…it is your quilt. Amen to that!)

I think this block would also look good as a six in block, using a 2 1/2″ strip in the middle and 1 1/2″ strips on the outsides and only 6 bonus half square triangles in those strips.

I can also envision this block as part of a row in a row quilt…with alternating blocks turned so one goes side to side and the next goes up and down. That would be a great way to use scraps and those half square triangle blocks, too.

On a happy note, this is my 100th blog on this platform. (I had a blog on another platform before…it crashed and burned…time to start over in a new place with the help of my son. I appreciate his help more than he realizes!

I hope you have a great time making this easy block! As always, Enjoy!

Later,

Lorrie

Categories
Build a block quilting scraps

Build a Block: Pinwheel 9 Patch

This week I am using bunches of bonus half square triangle blocks…20 to be exact!  I am showing you this block in two sizes (12 1/2″ and 6 1/2″) and two different color ways (same pinwheels and scrappier pinwheels). Construction of both sizes and colorways is the same. 

There are a few tricks in my YouTube video that show how to make the pinwheel part of the block lay a little flatter. I used to avoid this step and struggled with a big lump in the middle.  It is worth the extra little bit of work!  Very worth it!

This block is constructed like a standard nine patch once you have made those swirling, little pinwheels. Did you realize that the pinwheels can swirl clockwise or counter clockwise?  Somehow I did not realize this! That fact completely passed me by! For more information on making the pinwheels, please see the video above.

Here are the “organized” scrappy blocks:

Here is the 6 1/2″ super scrappy block:

Here is the 12 1/2″ super scrappy block:

Looking at the above picture, I realize that some of my scrappy pinwheels stand out a little better than others, but then again, I am using up my scraps. C’est la vie!

I can’t resist tempting you more about the flat pinwheel technique. Look at how flat this one is…yes, it really does lay flat. I did not pin or fuss overly much to get it that way.

Here is the back center of that block. Look at that little mushed mess of seams. That is what makes this all work!

The video shows you how to pick out about 6 stitches (3 on each side of the connecting seam) to get this little pinwheel nest…three stitches! So worth it! This is coming from me…one of world’s biggest slackers!

If ever a product should sponsor me, this one is it! The “cadillac” of seam rippers!

Here are the cutting measurements for a variety of sizes:

Thank you for reading and watching! I am having great fun creating and sharing with you!

Just to let you know, I am turning off comments here on the blog. I am tired of the Russian manifesto and viagra comments…or just plain phishing comments. Please comment on my Facebook group or on individual YouTube videos. I do love hearing from you, but…

Have a wonderful day! Hope you are creating something fantastic from your scraps!

Later,

Lorrie

Categories
Build a block quilting scraps sewing

Build a Block: Jewel Box

I am in love with this scrap block! After I made one, I just couldn’t stop. I still do not have these blocks out of my system. I love the contrast of the scraps in this block. When multiple blocks are assembled together, a fantastic secondary design appears. (I show four of these blocks together at the end of this post.)

If you would like to see this presentation in video form, please view it on my YouTube channel here.

For this block, you will need: (alternate size chart is at the end!)

  • 16- 1 1/2″ background squares
  • 16- 1 1/2″ scrap squares
  • 4- 3″ background squares
  • 4- 3″ scrap squares

The pieces listed above uses the two at a time half square triangle method. That is a tutorial for another day.

OR if you have a bunch of bonus half square triangles, you can use 8 bonus half square triangle units that are 2 1/2″.

If you are using all squares, you will follow the next few steps to make your half square triangles.

More often than not, my sewing is a scant 1/4″ when I use this method. I would rather have a little extra to trim off than have a unit that is undersized.

You can use your rotary cutter and ruler for this part if you wish, but I always just cut the pieces apart quickly with my scissors.

Press to the dark fabric. If you are using this method, you will need to trim. Fabric stretches, sometimes a little…sometimes a lot…during this method. Accuracy at this step will make your life so much easier when it comes to final assembly of the block.

We are ready for the zoom zoom part of this block…speed piecing! Join all of the squares in pairs of 1 background to 1 scrap.

I am pressing open because I am piecing 1 1/2″ squares together. I want to reduce the bulk and chance of distortion. If I were making the largest size of block on the chart, I would probably press to the dark.

After you press all of you pieces to your heart’s desire, Match up pairs to make eight 4 patch units. If you pair them up before you start sewing, you can insure that you don’t have duplicates in any of your four patches…unless that does not bother you.

Sew pairs together.

Press to your heart’s desire.

Here is the only tricky part…just be a little careful! You are pairing up the four patches with the half square triangles in this step. Pay close attention to the orientation of the blocks when you lay them out. You can stack all of the pieces in two piles to get ready for speed piecing. All of the units are the same.

Zoom, Zoom! Flip one block right sides together and sew together with an accurate 1/4″ seam. Be as careful as you can to keep seams flat. (If one gets flipped underneath, it is not the end of the world!)

Press to your heart’s desire.

Layout your pieces. You will notice that some of the blocks will be turned horizontally and some will be turned vertically. It is all good!

Sew the units together to make a new and improved 4 patch.

Press to your heart’s desire.

You now have 4 units. You are so close to being finished! Lay them out again to make sure they are oriented in the right direction.

Sew them together in pairs. You now have halves!

Press to your heart’s desire…again.

Sew the final seam…

Press to your heart’s desire.

Give the front of the block a nice press. Beautiful!

Here are four blocks set together.

When I showed this block to my husband, he made a “meh” face. He didn’t really like the block…too busy. When I stepped back, across the room, he was much more impressed. When I showed him the four blocks together, he was even more impressed. These blocks are like moss…they grow on you!

Here is the cutting guide for the other size pieces:

I hope that you enjoy making this block. It is a great way to use up those bonus half square triangle blocks. It would be a great leader/ ender project.

I think that I am going to add a round of these blocks onto my son’s car quilt…but that is another story for another day, too.

Have you tried this block? Drop me a comment below…or send me a picture at gmail. I love to see your work!

Later,

Lorrie

Categories
Build a block quilting scraps sewing

Build a Block: center surrounded by 2 strips

This block is quick and easy to construct! I know that I say that almost every week, but it is true every time I say it. Using contrasting scraps is the best way to make this block pop! I pulled strips and squares from my “pre-cut” bins to make this a faster finish.

A one minute video of this block construction is available here on YouTube.

Presenting a New Feature at the bottom of this post! I have added a fantastic size chart for pieces to cut. It contains a variety of finished block sizes. Check it out at the end of this post!

The version shown below is constructed from a 2 1/2″ square in the center and 2 different 1 1/2″ strips surrounding it.

I did cut my strips to the following lengths:

  • 2- 1 1/2″ x 2 1/2″ (inside round color)
  • 2- 1 1/2″ x 4 1/2″ (inside round color)
  • 2- 1 1/2″ x 4 1/2″ (outside round color)
  • 2- 1 1/2″ x 6 1/2″ (outside round color)

This week I have words imbedded on the pictures, as well as arrows. This is a no brainer approach. Please remember to always use a good 1/4″ seam, no matter how crooked the arrows are in my photos.

Please add the 1 1/2″ x 2 1/2″ pieces to the center here.

There are not a lot of bulky seams here, so I press out.

Add the 1 1/2″ x 4 1/2″ pieces to the sides here.

Now is a great time to press it flat, flat, flat. By pressing now, the block will be crisper and flatter for the next round of strips.

Please add the 1 1/2″ x 4 1/2″ outer round pieces to both sides. (I forgot to take the picture before I sewed one of the pieces… oopsy!)

Give the strips a quick press outward.

Add the final two 1 1/2″ x 6 1/2″ strips to both sides.

Press outward one last time. If you want the block to be even flatter, give it a little shot of starch or Best Press at this point.

Tah-done! I love this little block! I told you it was quick and easy!

Below is the new size chart! This took some work to figure out how to embed this in a blog post…making the chart was the easy part!

Please let me know in the comments if you like this new feature. I look forward to hearing from you.

Later,

Lorrie