Categories
Build a block scraps

Build a Block: Road to the White House (Patriotic Series)

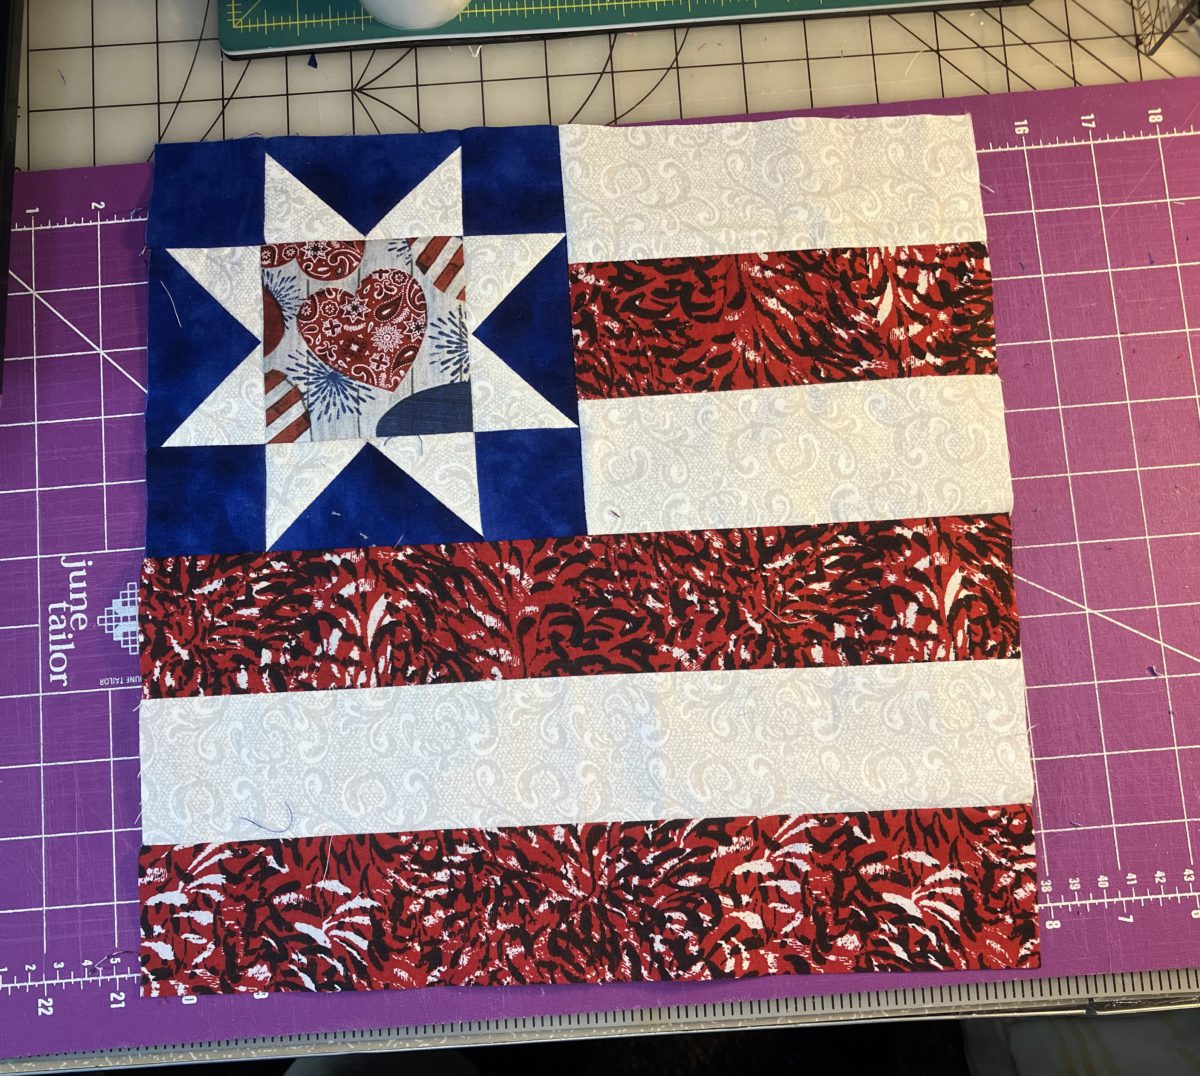
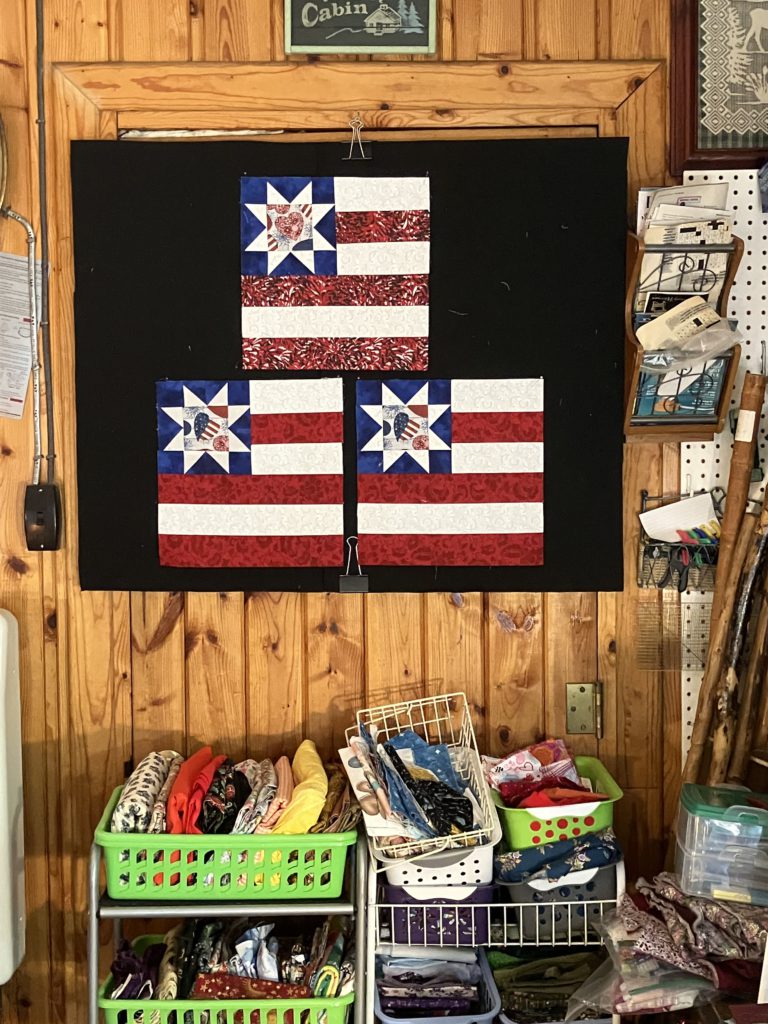
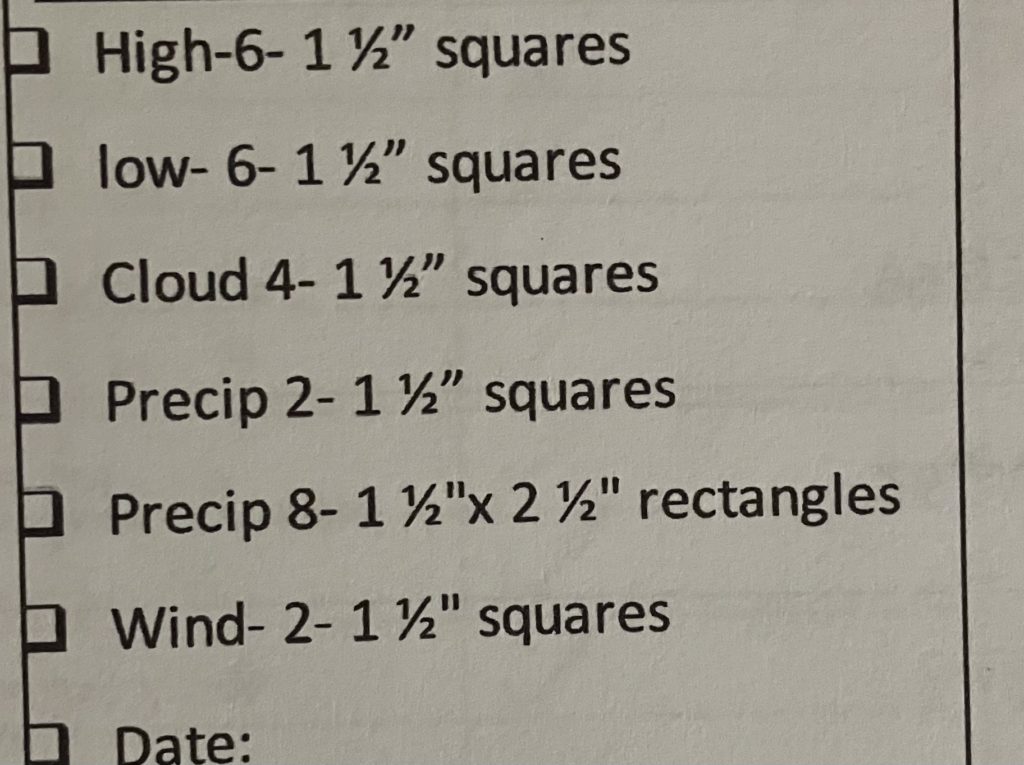
This is the third block in my YouTube Patriotic quilt block series. This block is quick to assemble because it contains only a few pieces. (See the cutting chart at the end of this post.)

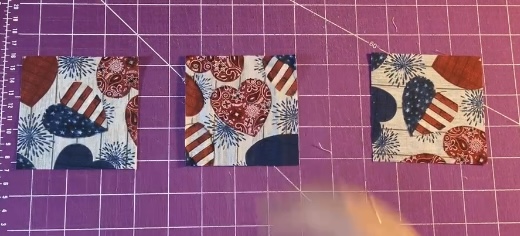
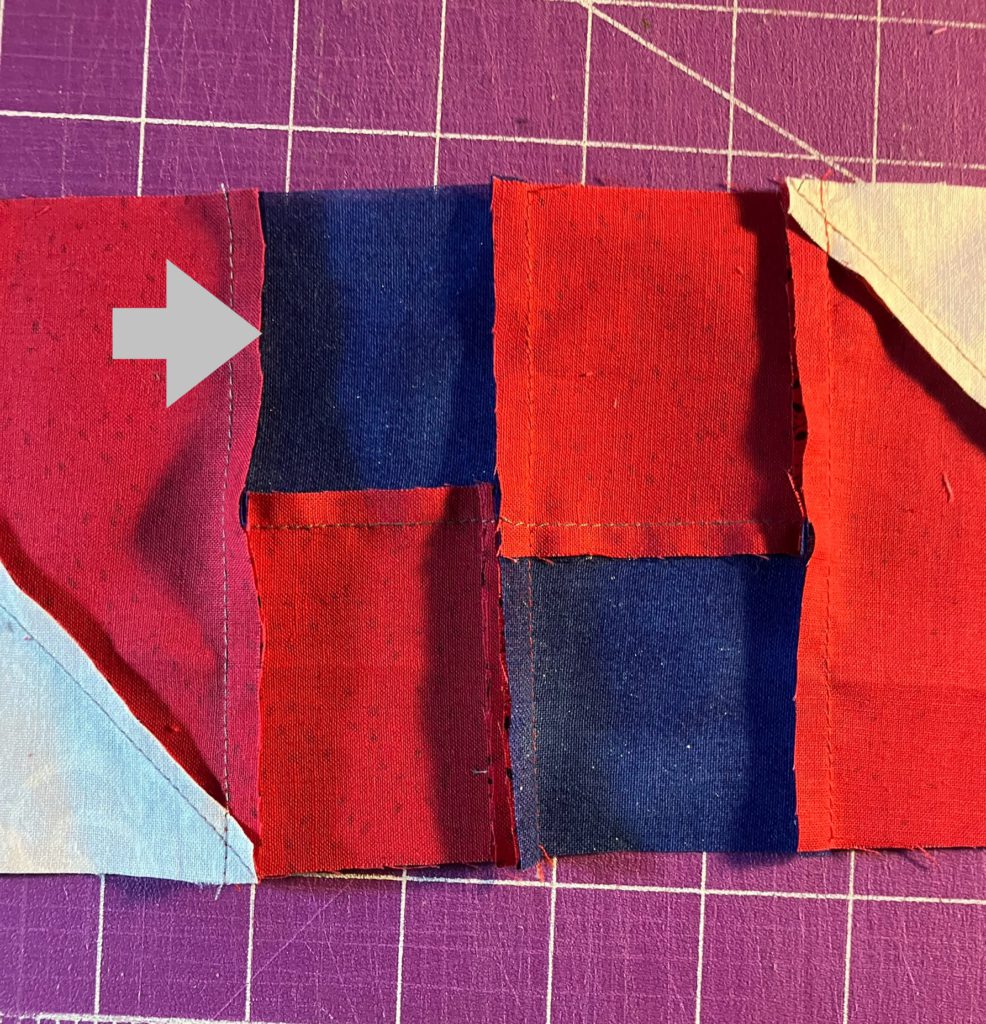
I started by speed strip piecing the three 4-patch blocks.

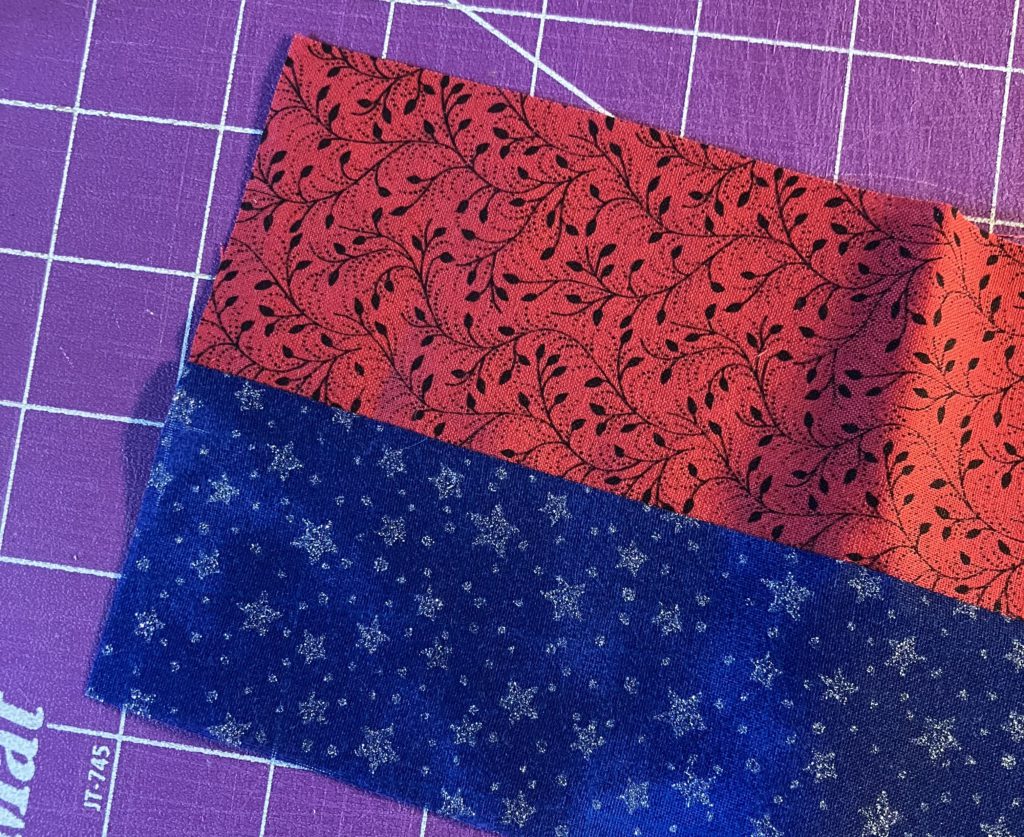
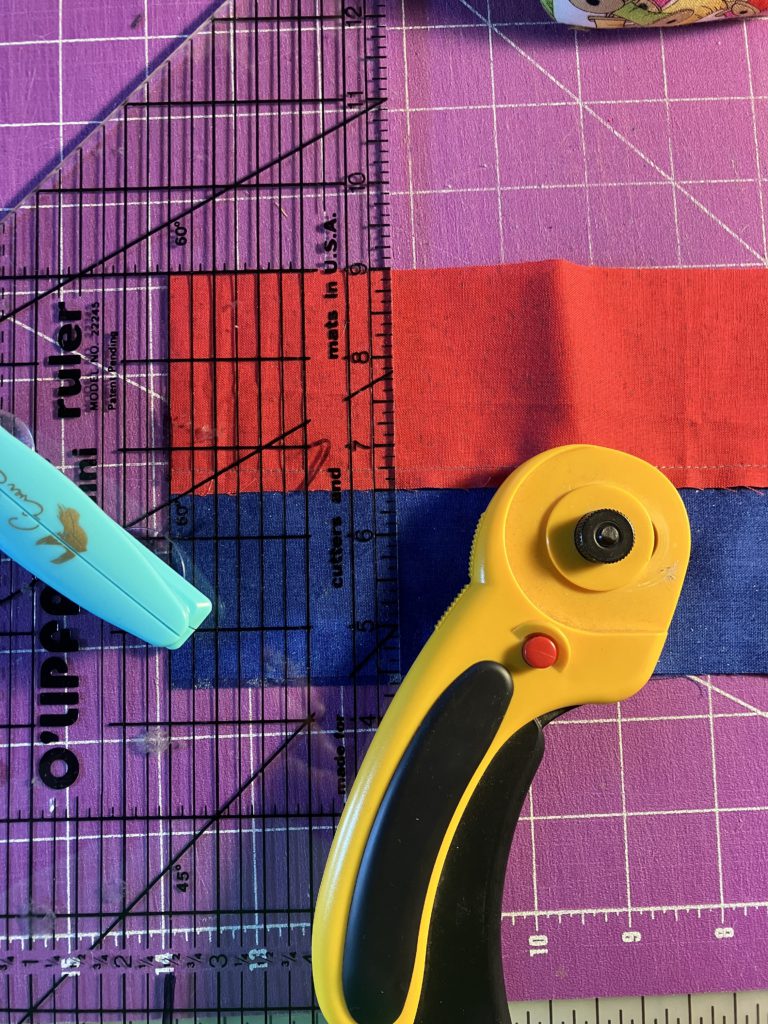
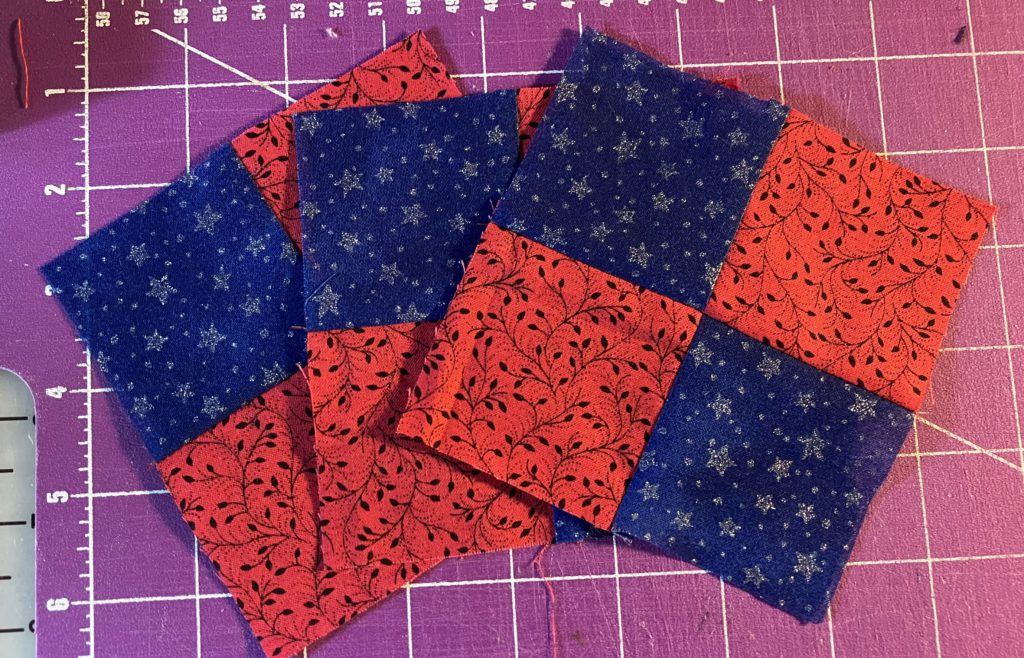
These units are quick to sew, cut and reassemble into 4 1/2″ blocks…three of them.

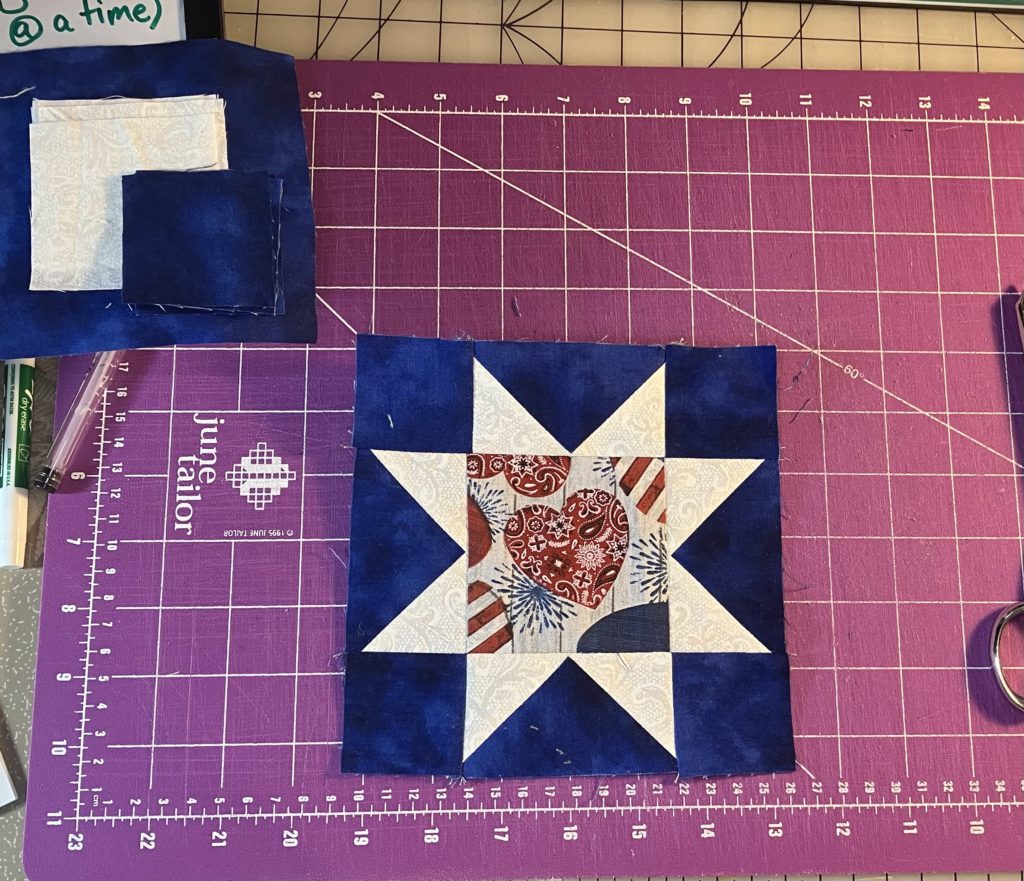
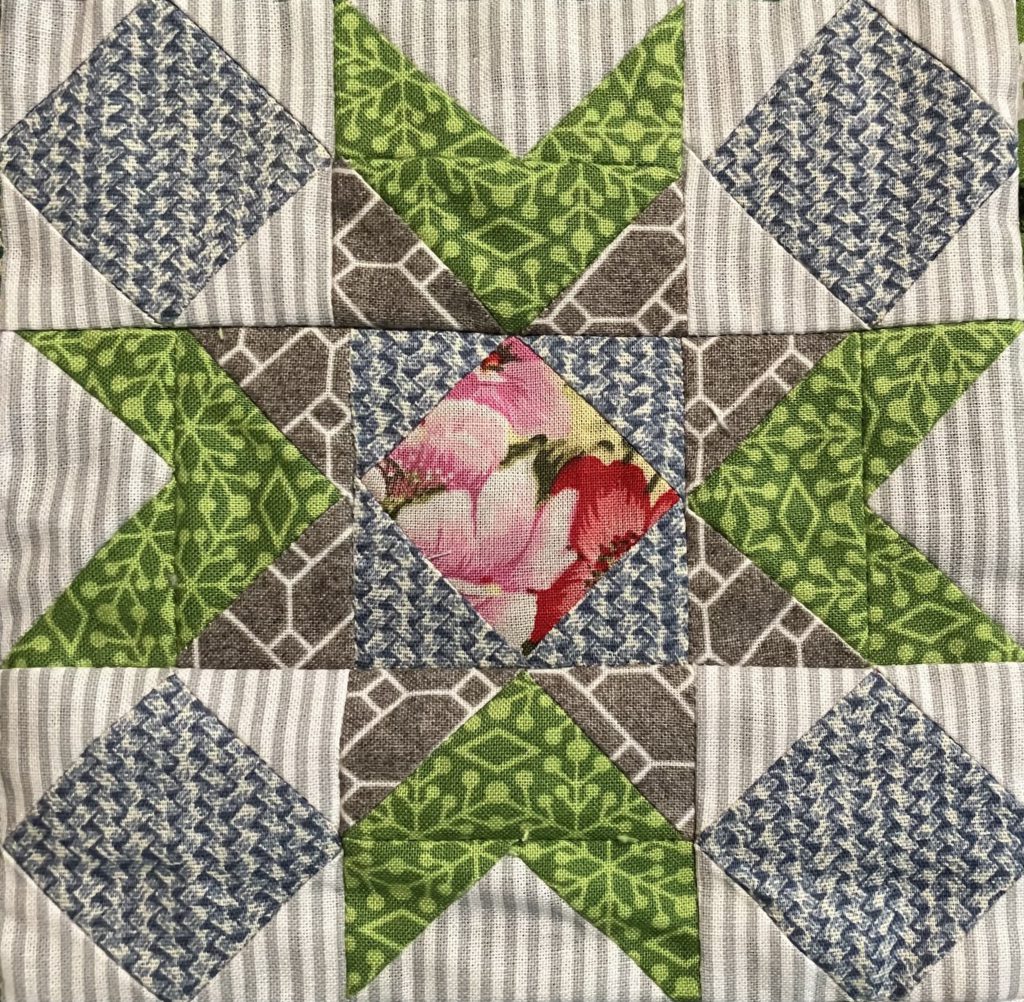
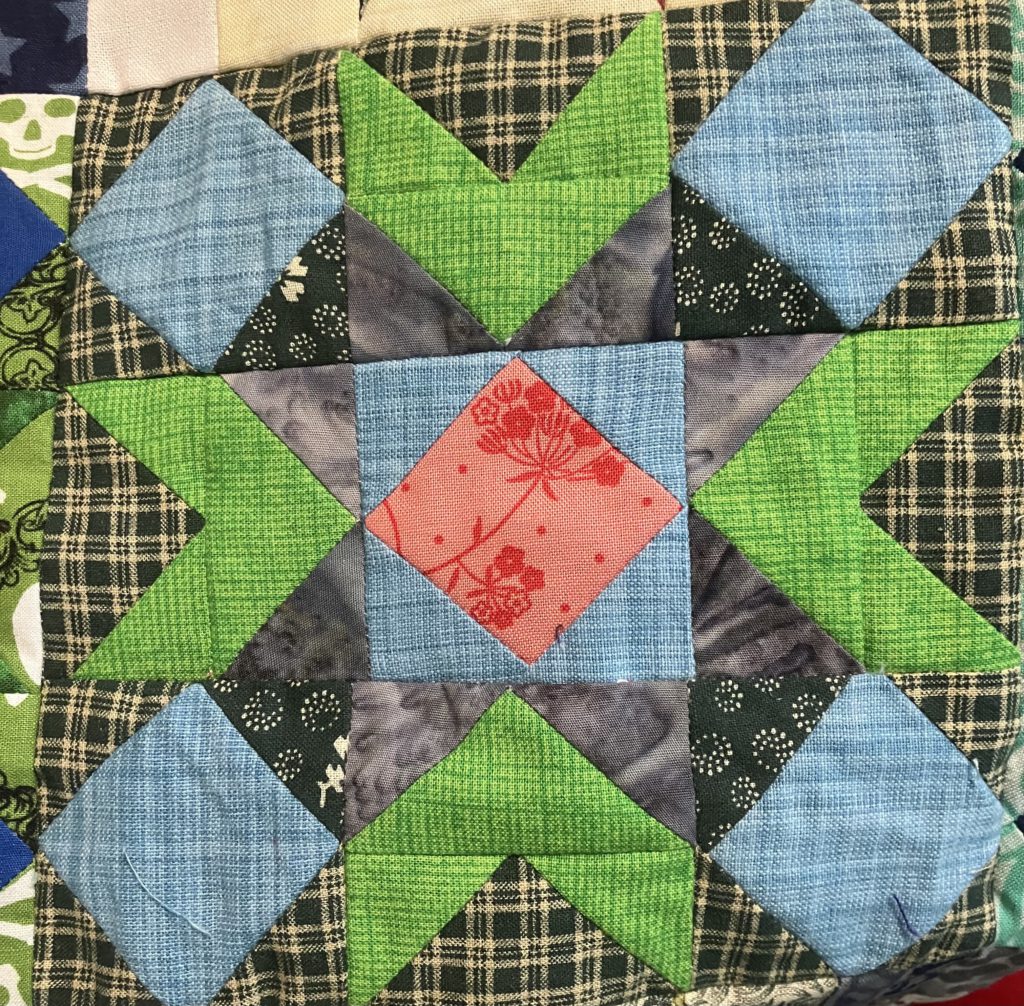
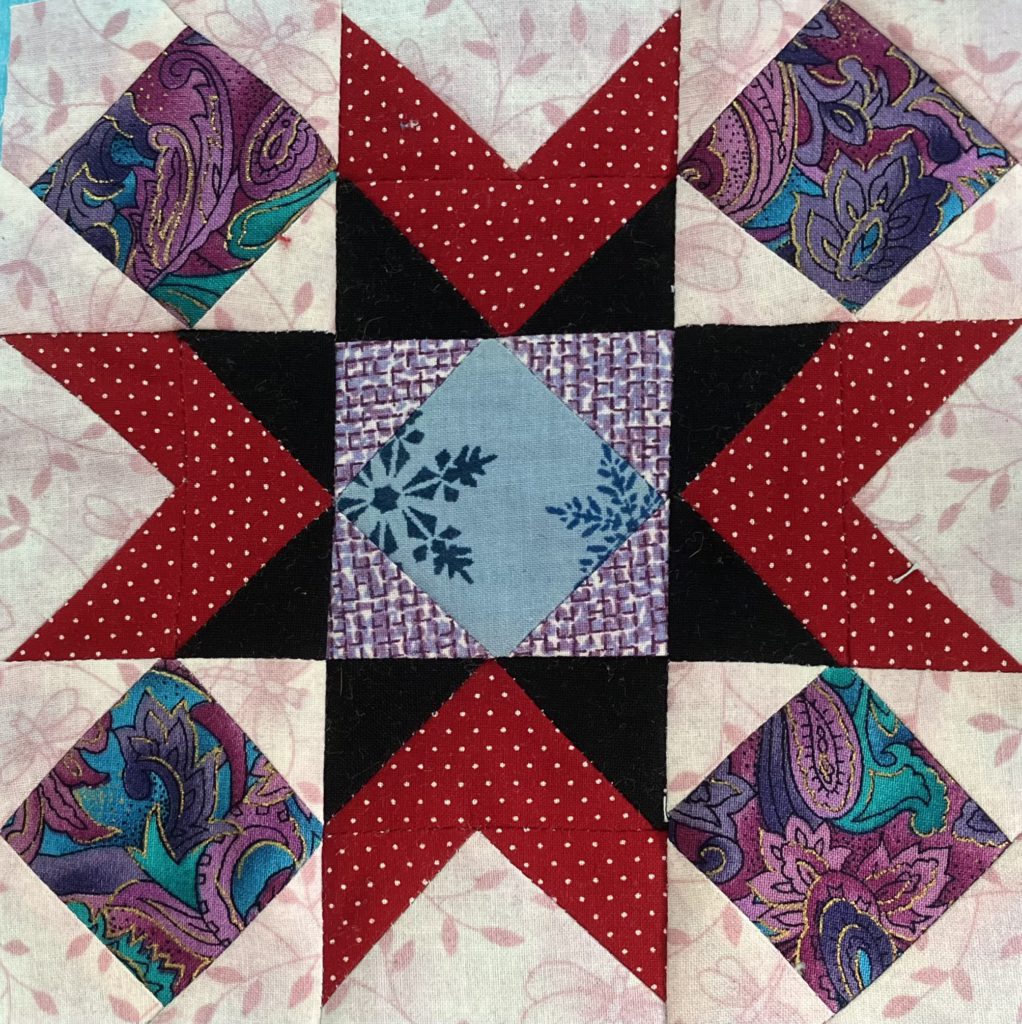
I chose to make these blocks in red and blue. The blue squares will line up on a diagonal in the finished block.

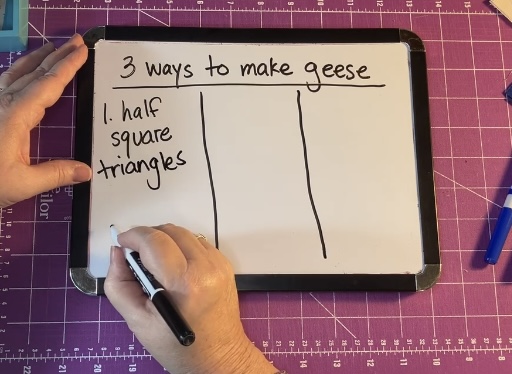
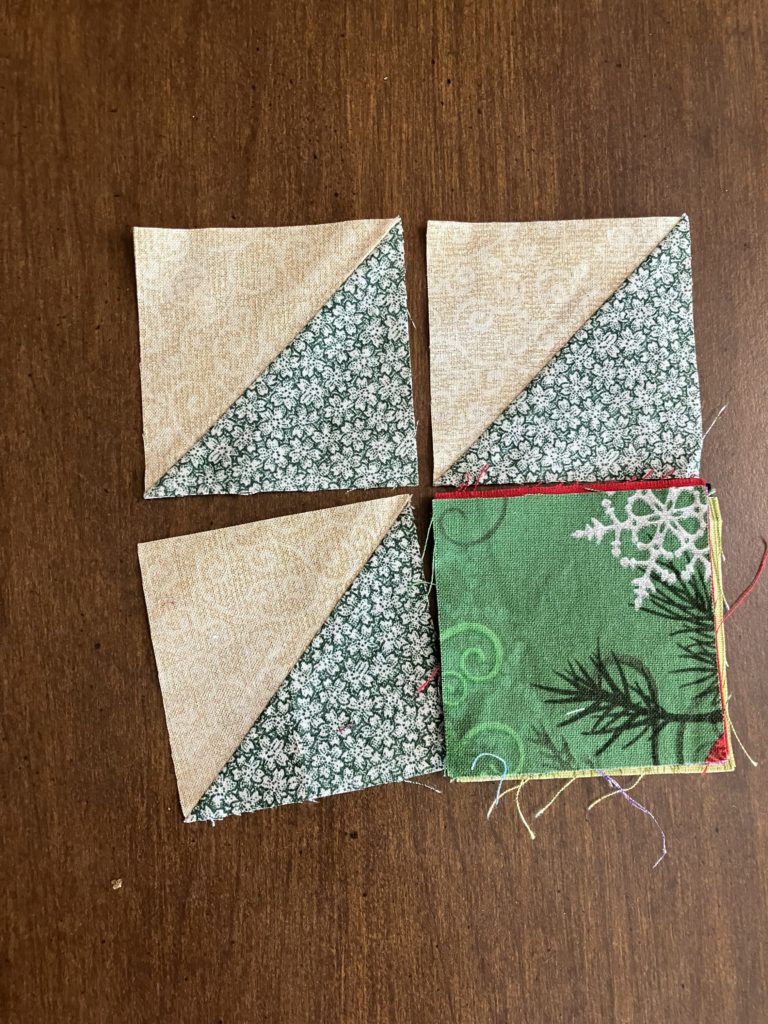
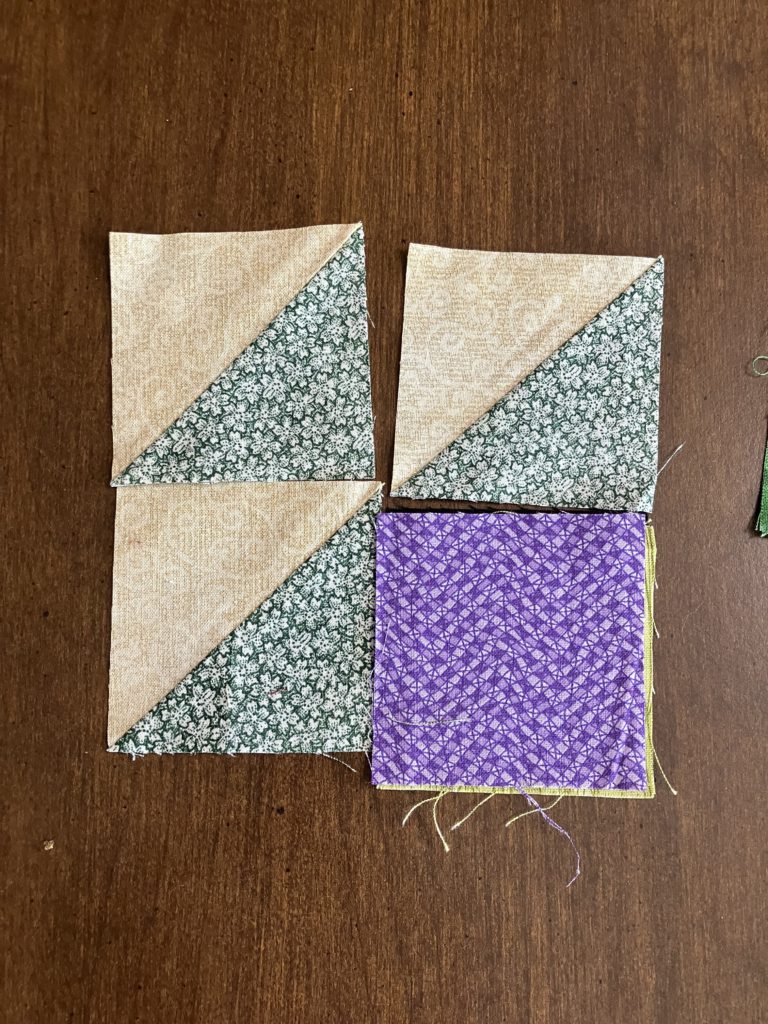
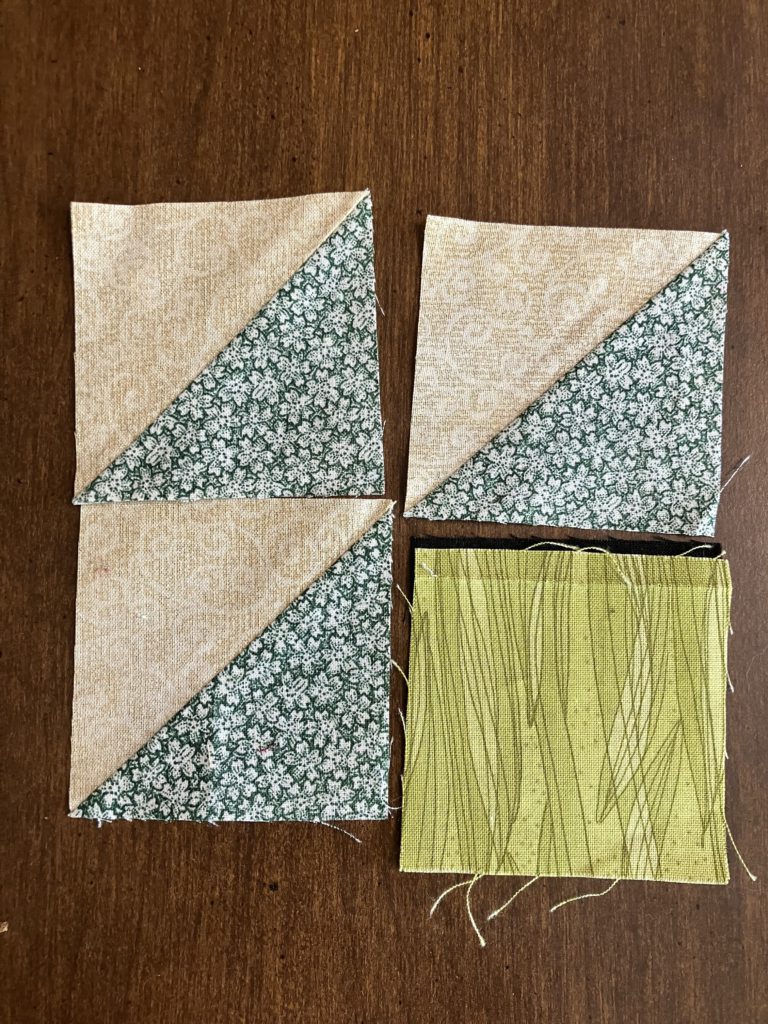
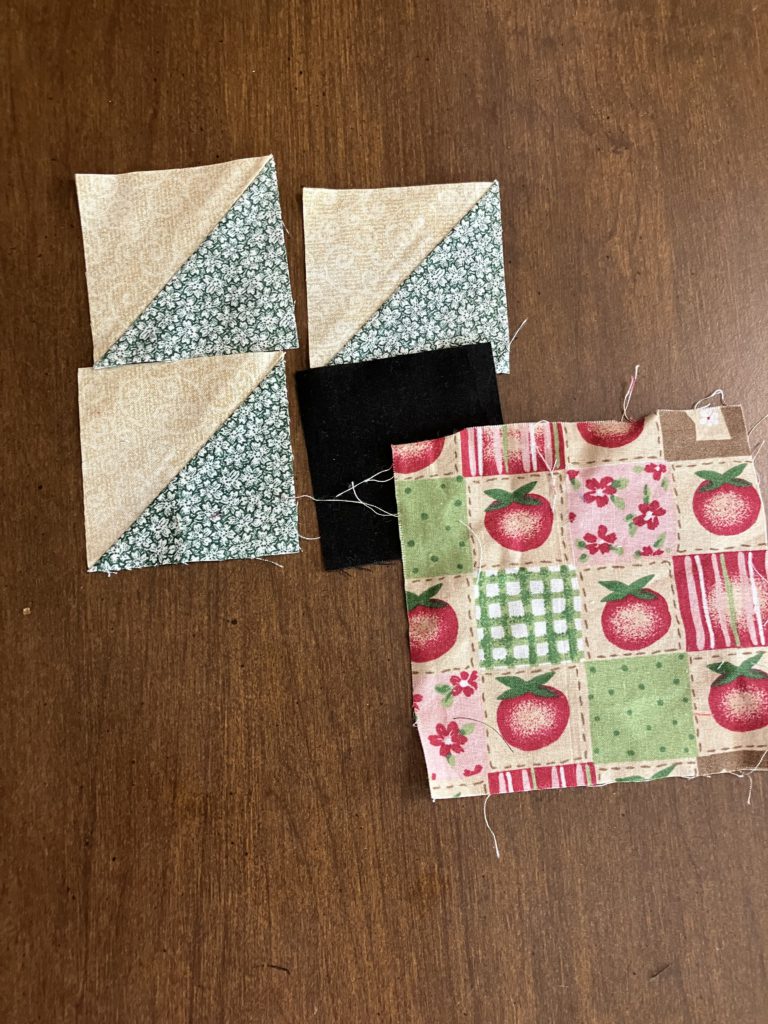
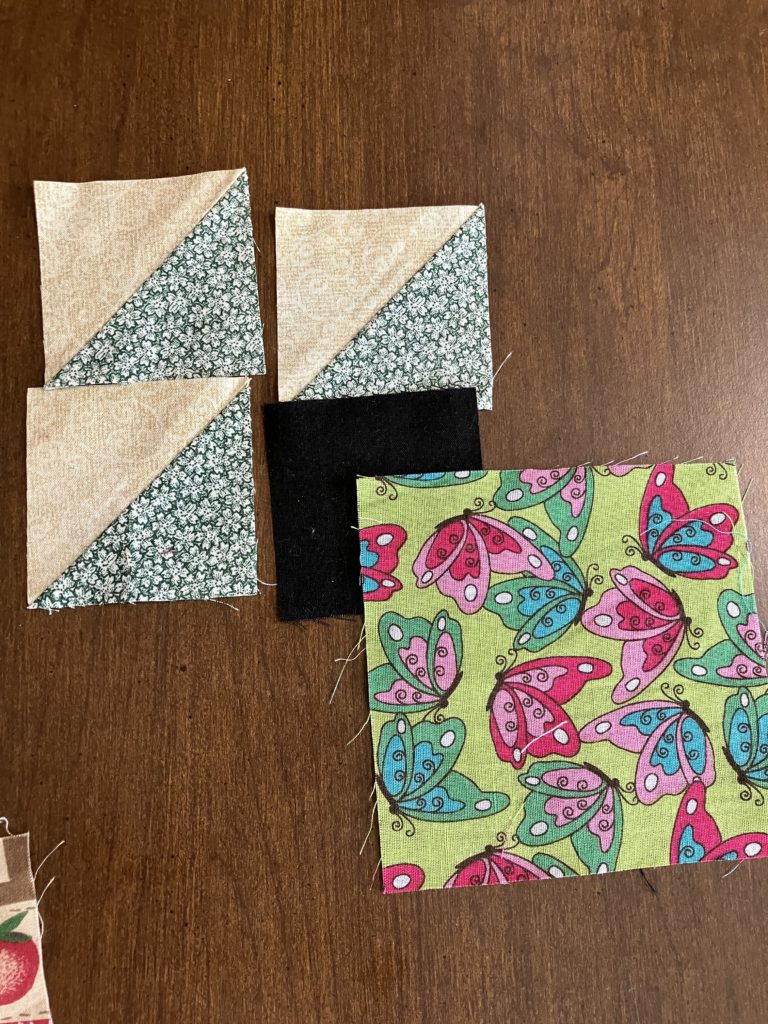
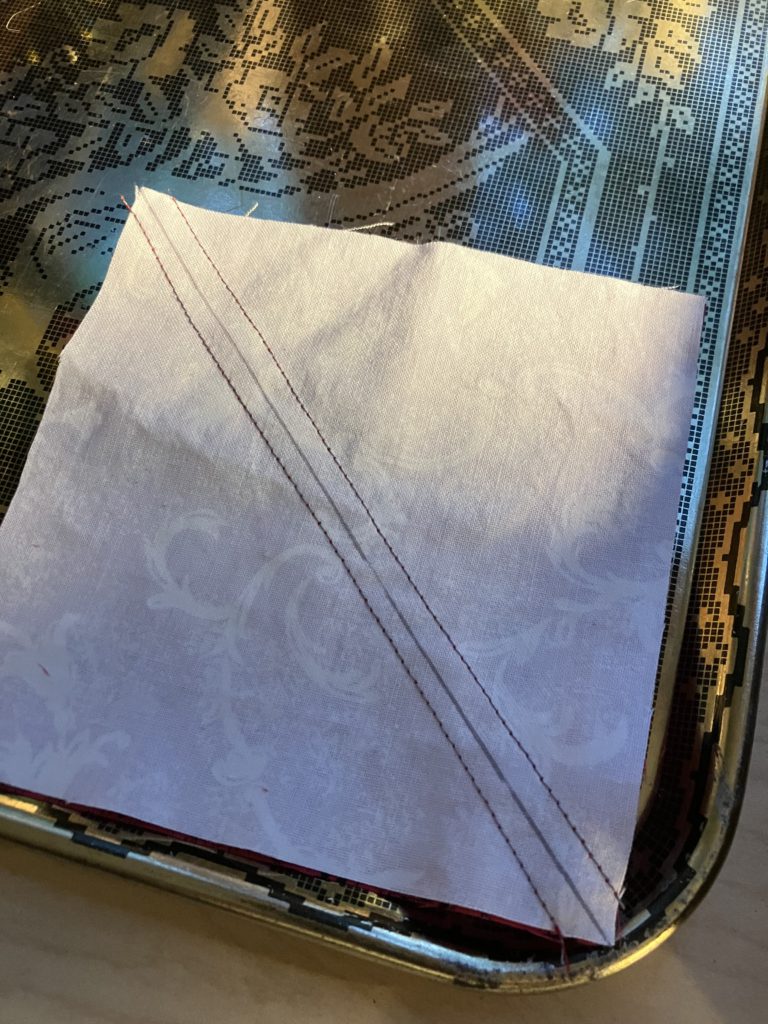
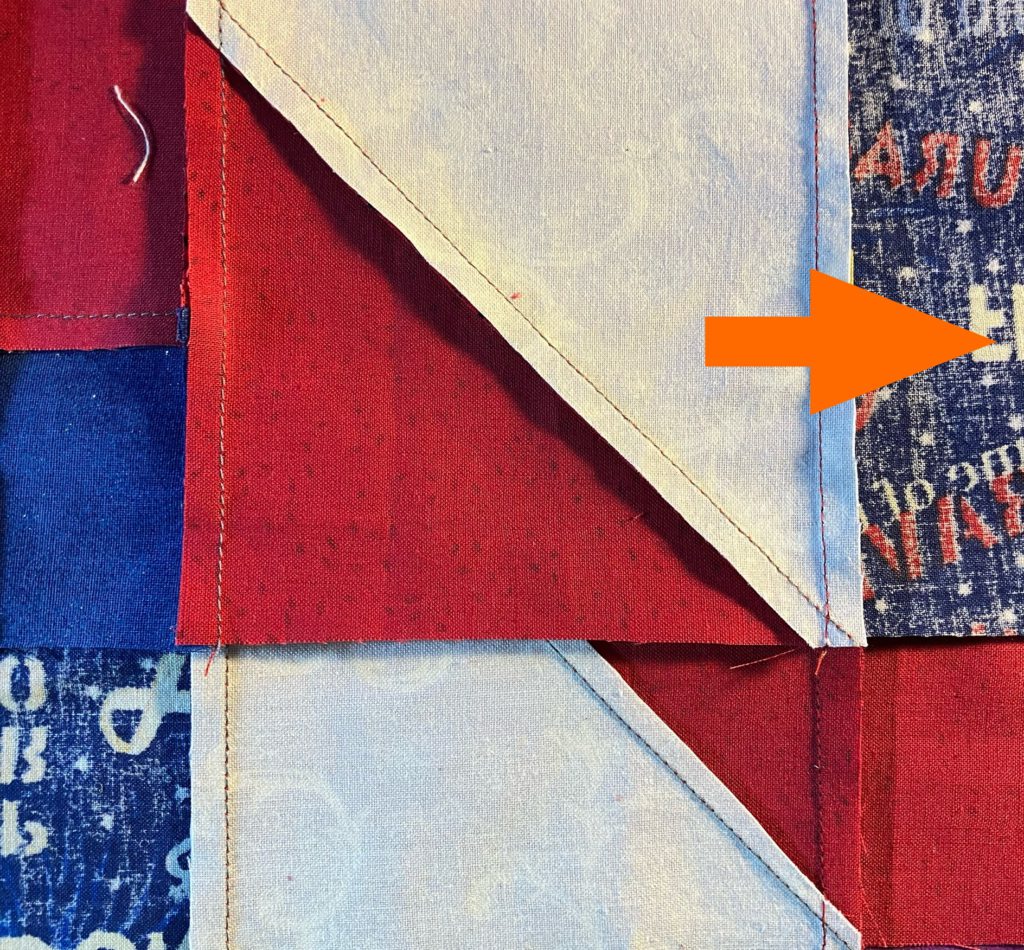
Now for the four half square triangles. I use the two at a time method. I draw a line on the back of the background square.

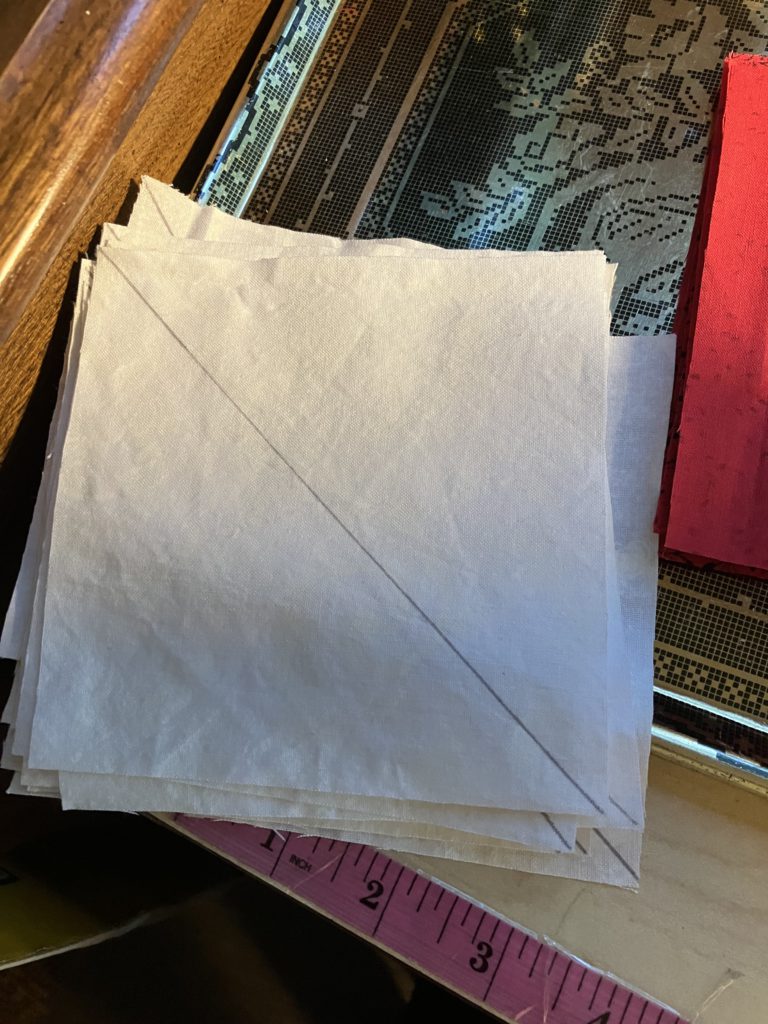
I sew a scant quarter inch seam on both sides of my drawn line.

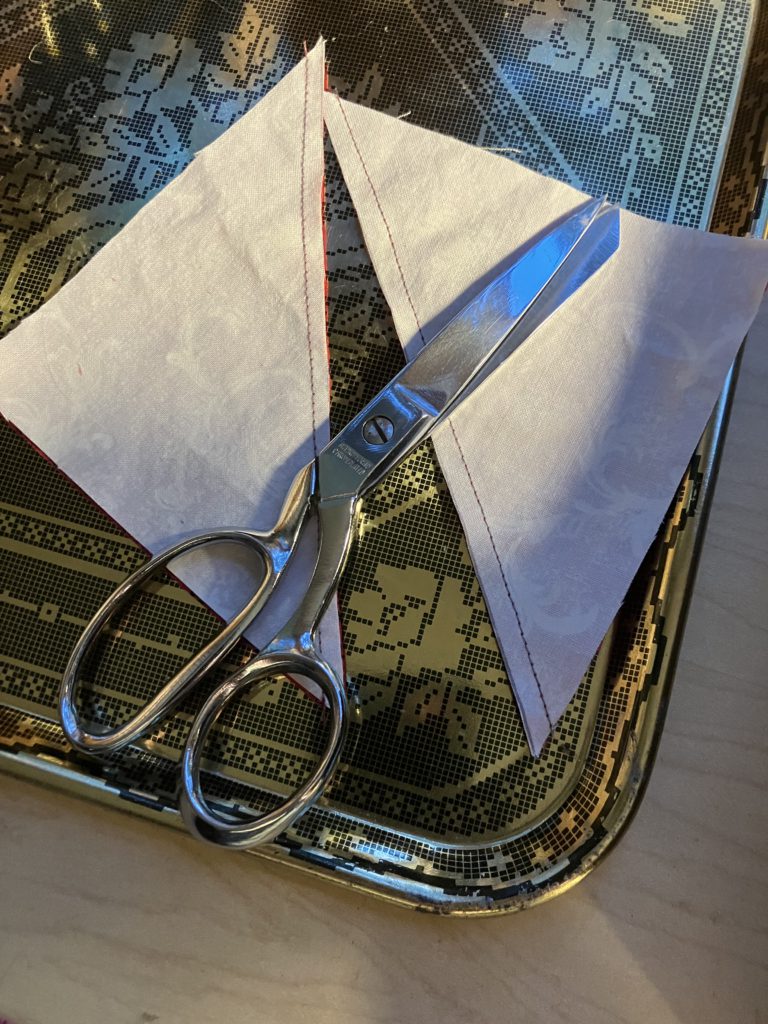
I use scissors to cut blocks apart. You can use a ruler and rotary cutter if you wish.

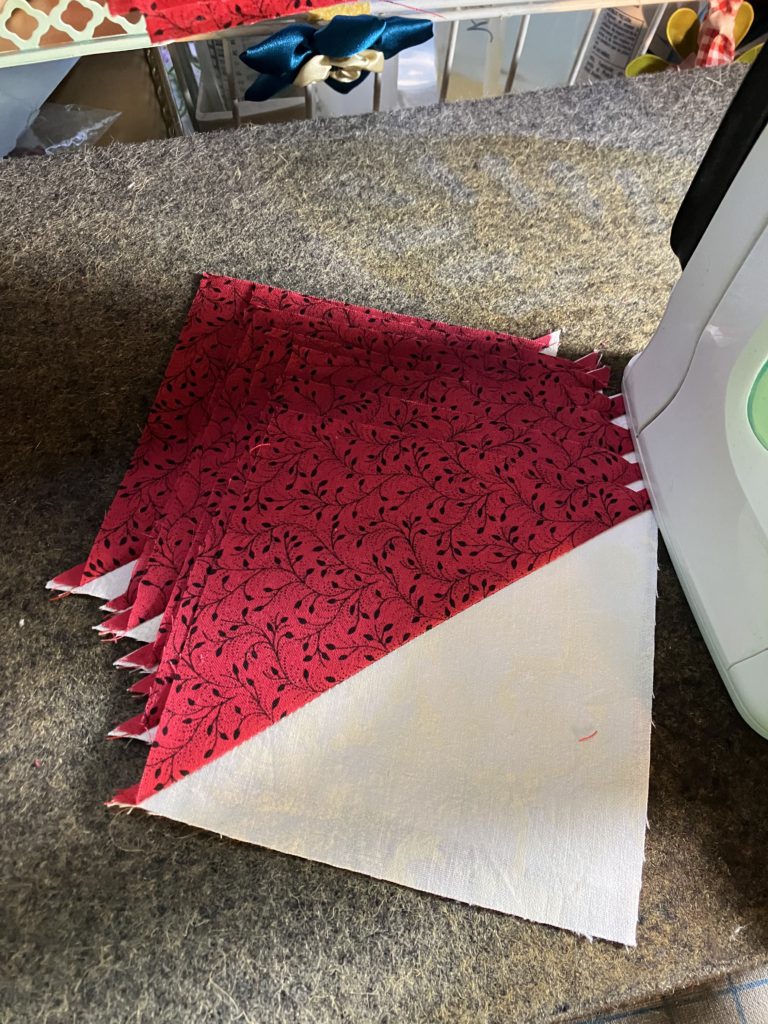
I am incredibly lazy. Not only do I speed piece, but I speed press, too. (I am making the 12 blocks for the layout all at one time!)

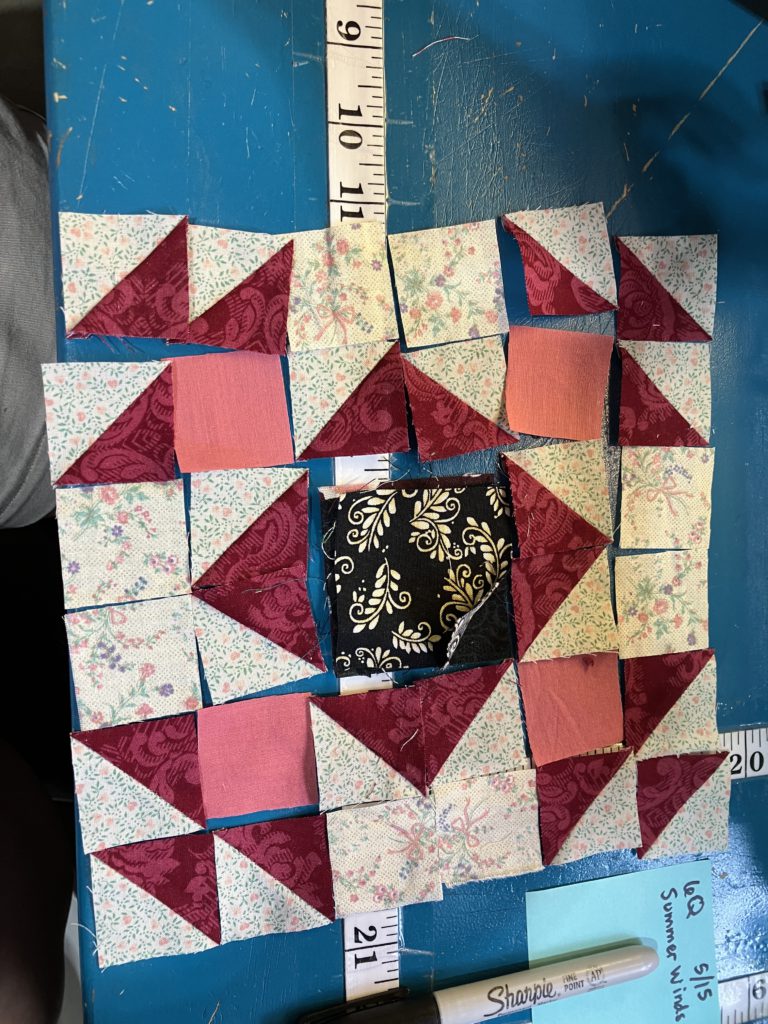
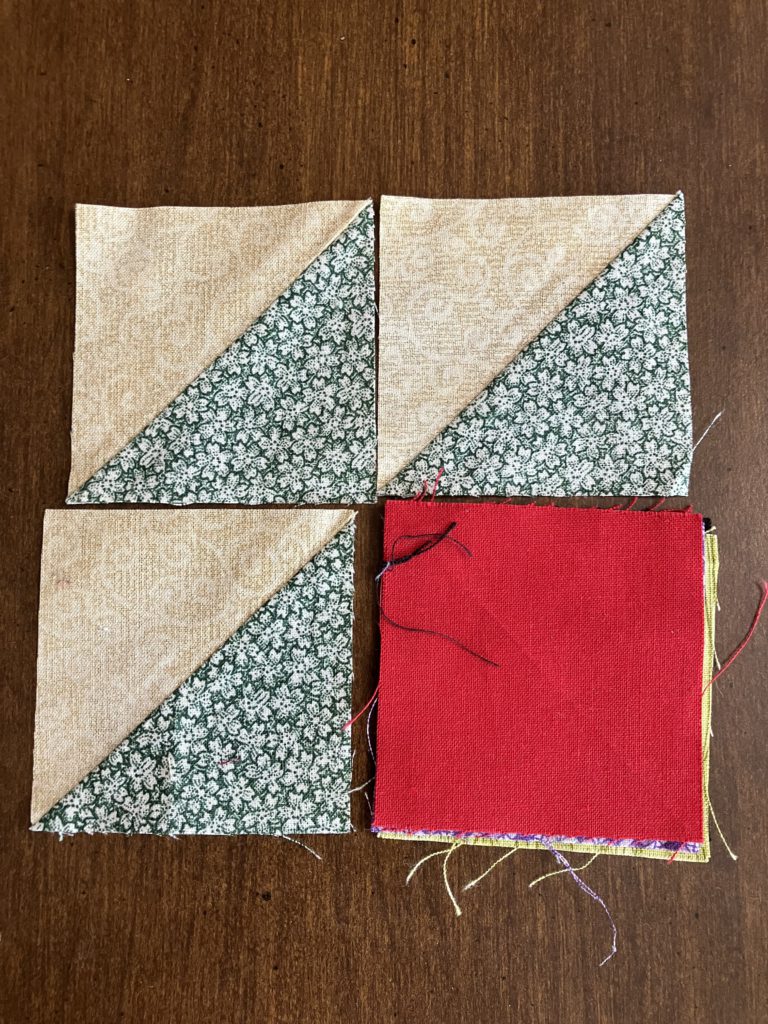
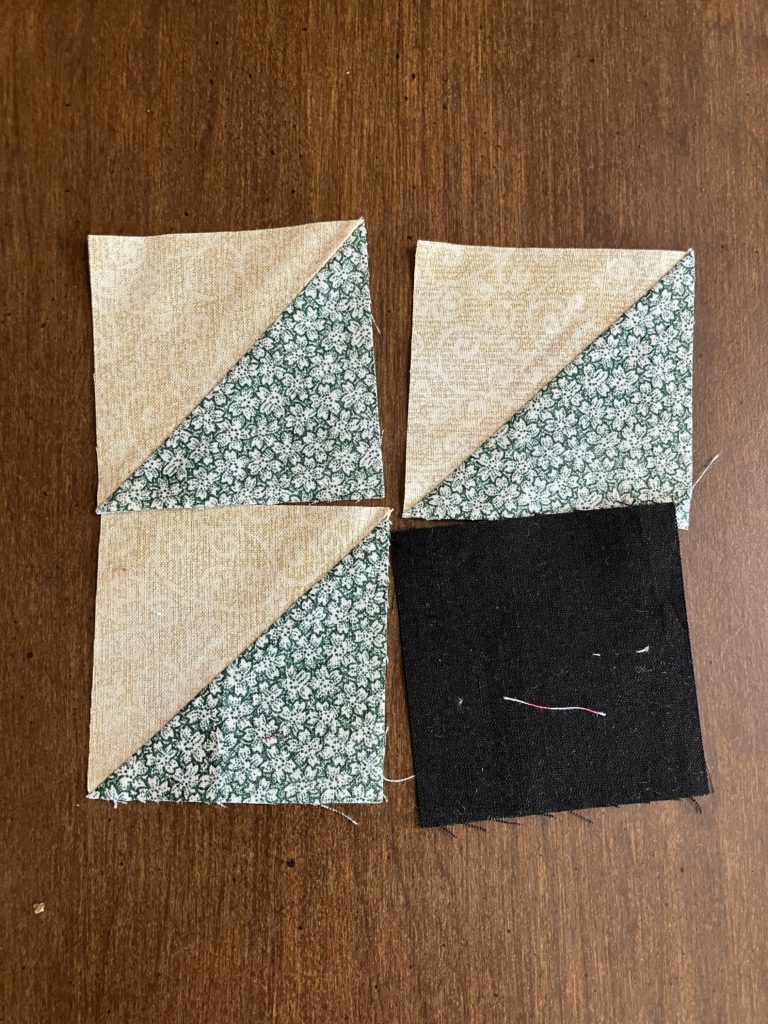
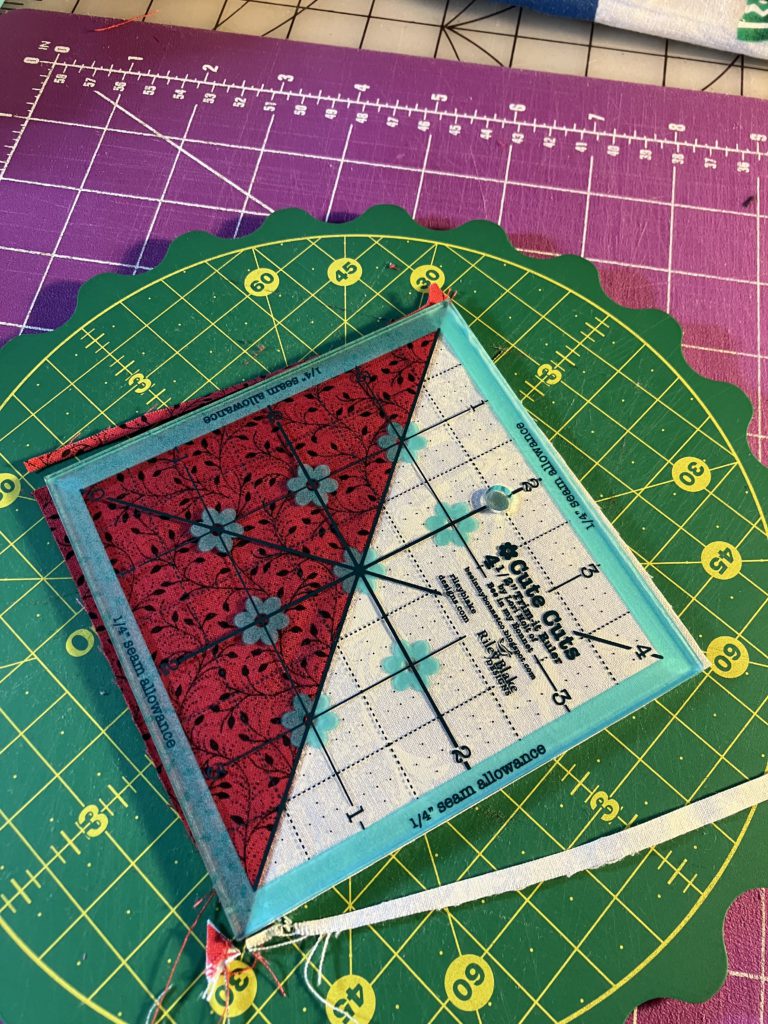
Trim blocks to 4 1/2″ for a perfect fit!

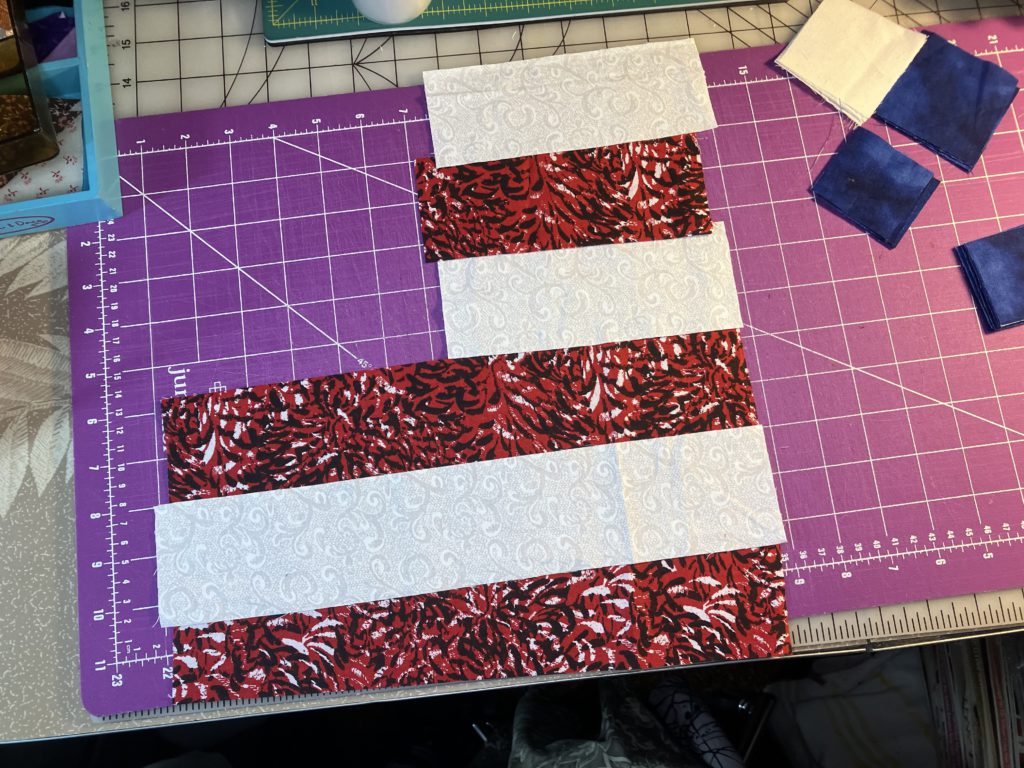
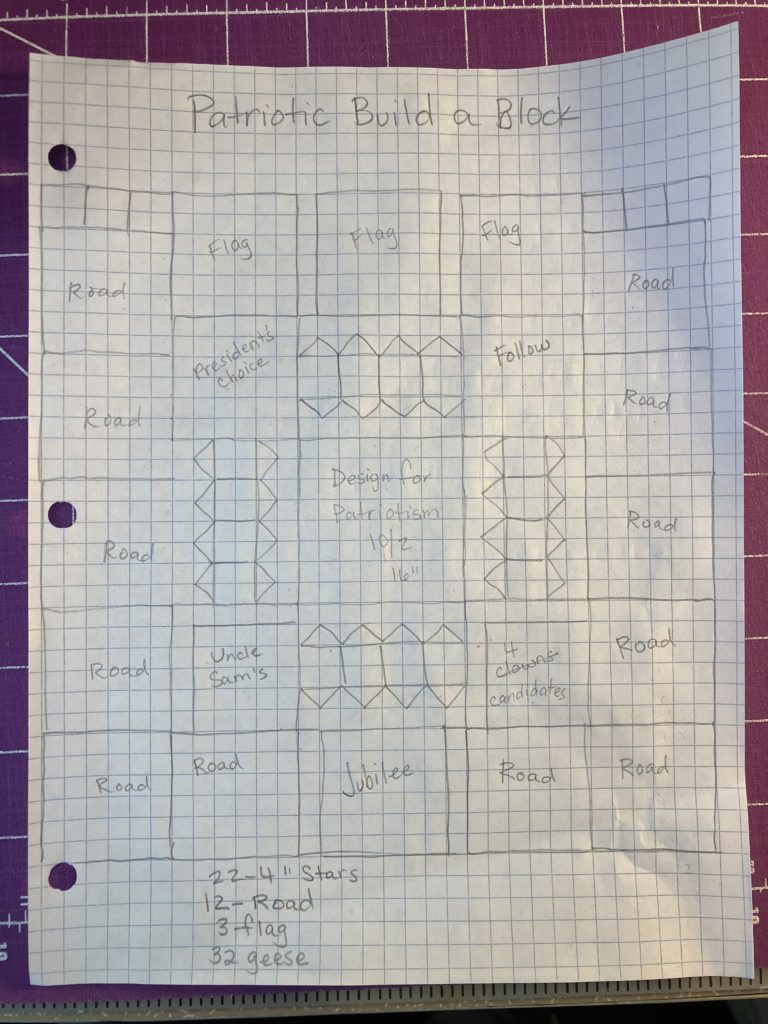
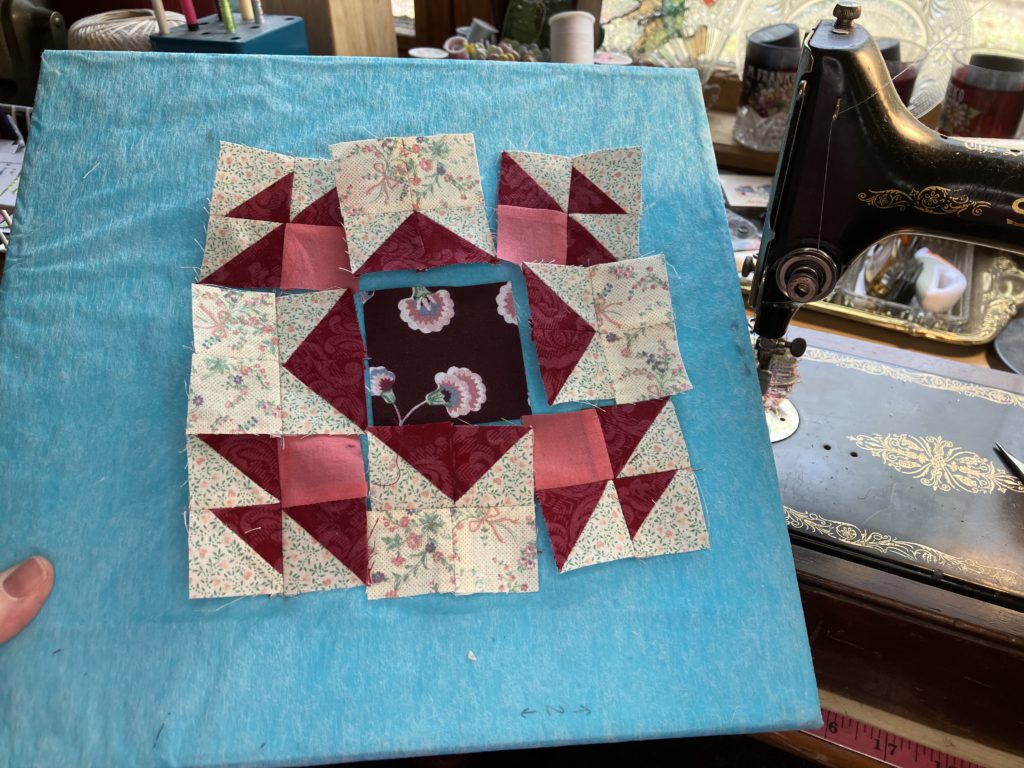
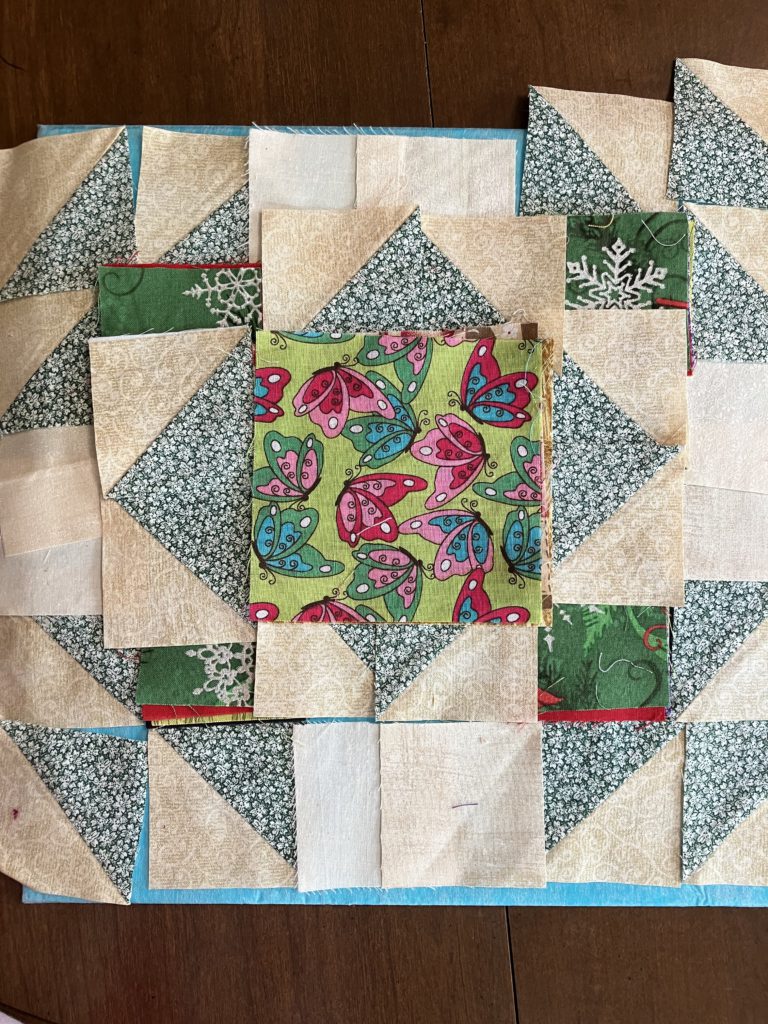
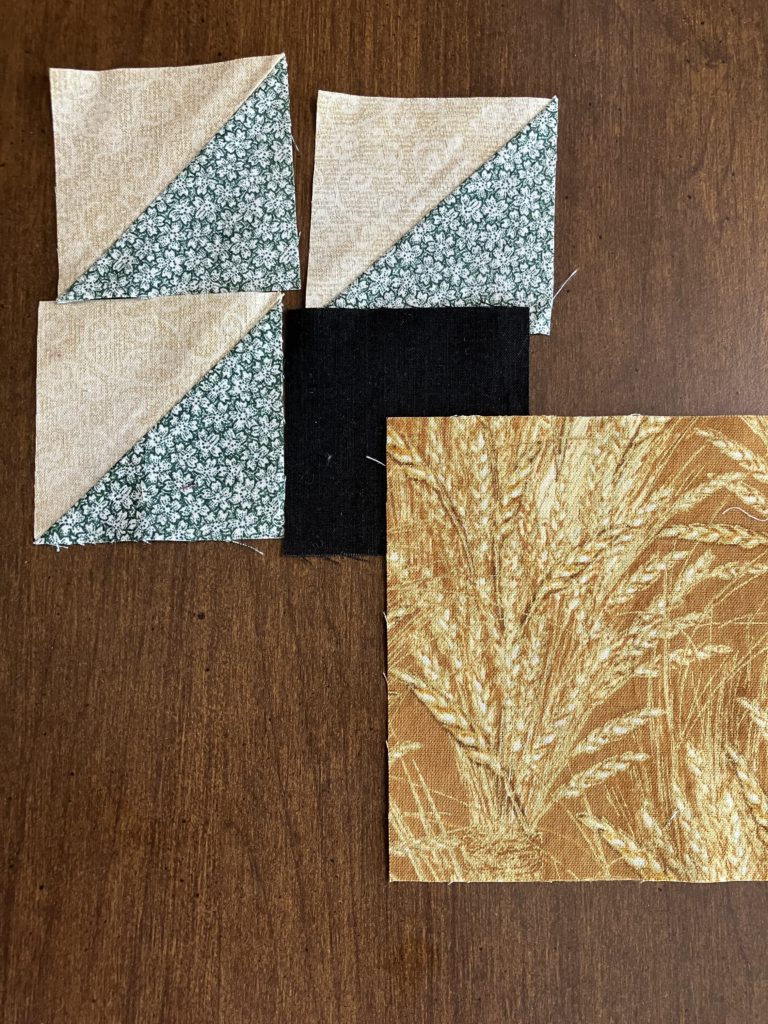
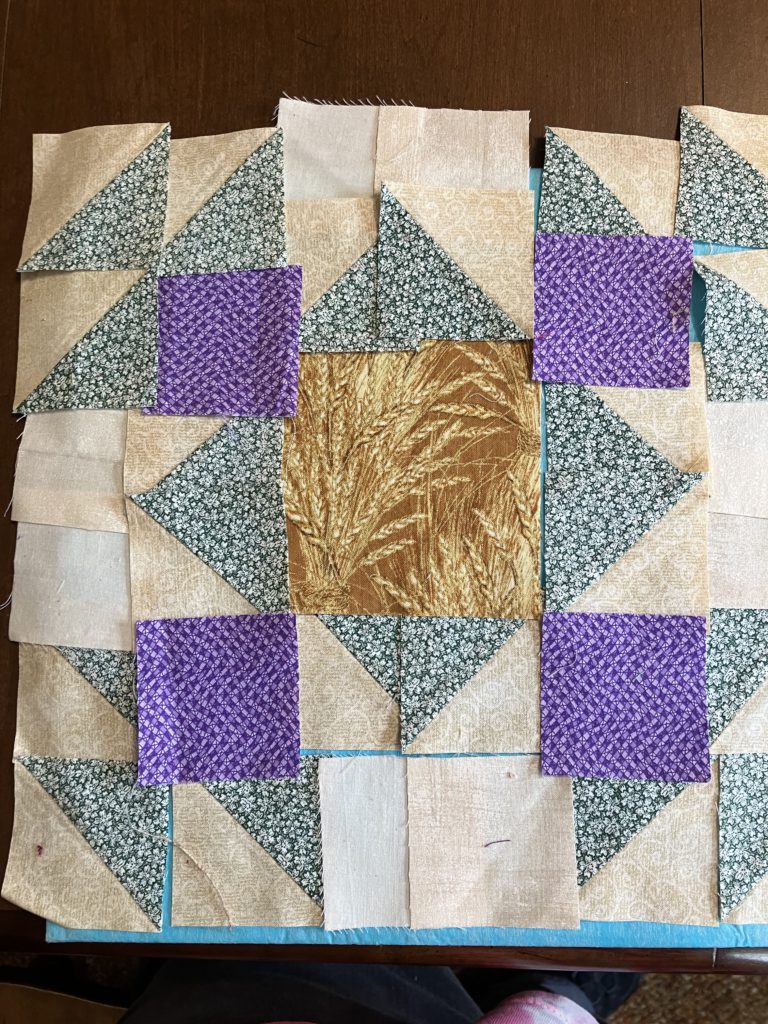
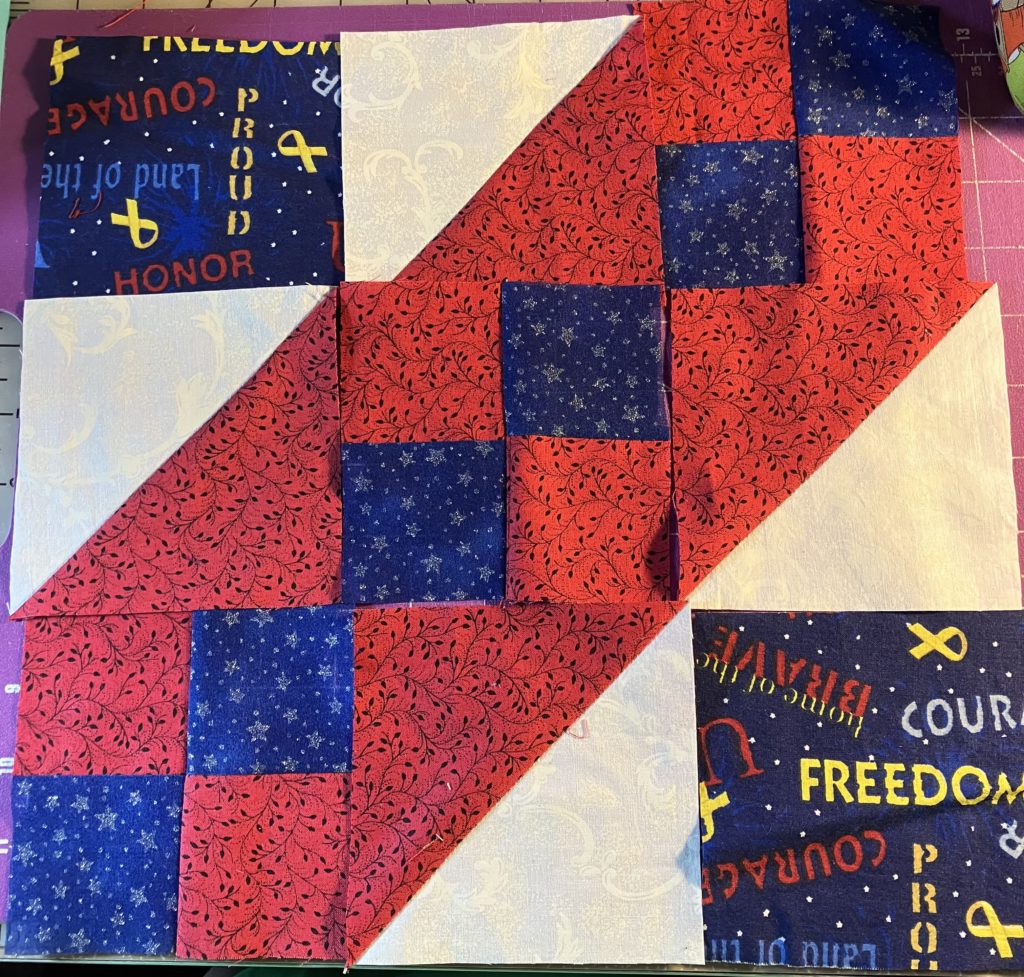
Lay the block out. Assemble in typical nine patch fashion…a row at a time.

Top and bottom rows are pressed outward.

Center row is pressed inward.

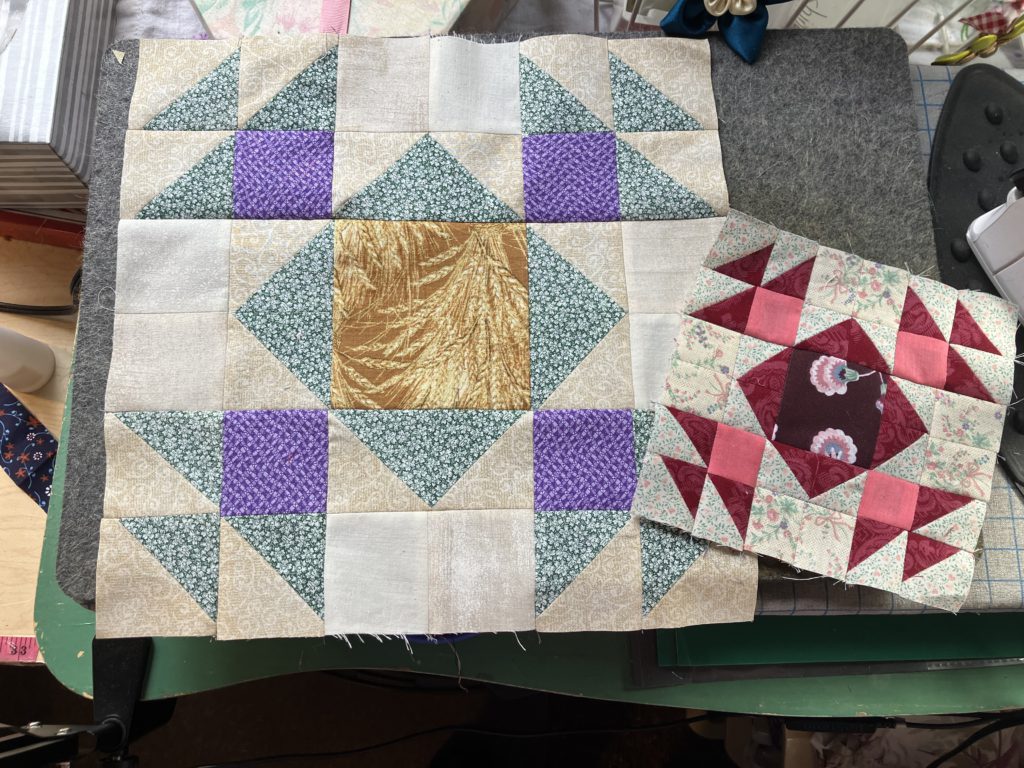
Assemble, press and enjoy!

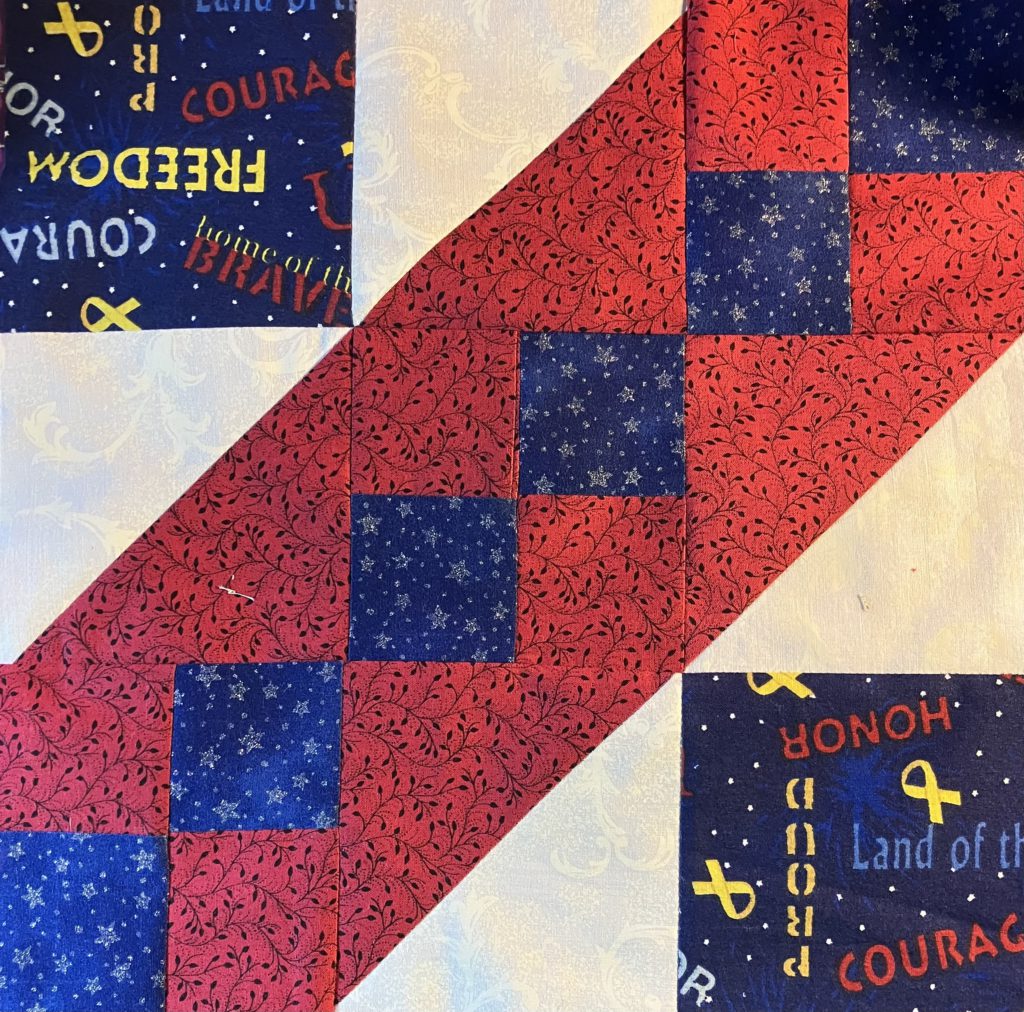
I hope you are enjoying this series of blocks!

Later,

Lorrie

Categories
Build a block

Build a Block: Flag (Patriotic Series)

Here is the first of the eight blocks in this series. Please enjoy the pictures below. This block finishes at 12″ (unfinished at 12 1/2″).

In my YouTube presentation, I show you three different ways to create the flying geese for the star. I just couldn’t resist the educational opportunity. You can take the teacher out of the classroom, but you can take the teaching out of the teacher!

The striped part of the block is made from red or white 2 1/2″ strips. See the chart at the bottom for lengths.

The empty corner in the above picture is filled by a 6 1/2″ star. I am making three blocks for my layout. What a great opportunity to make flying geese for the stars three different ways. You can choose your favorite method after giving them all a try. Keep in mind, the more you practice, the better your skills will become.

Here are the three methods:

Making two at a time half square triangles, that are combined to make geese, are probably easiest for beginners who might be intimidated by the flying geese block. I always make blocks oversized and trim to make them perfect. It does take a little extra time, but the results are much better for me.

The second method is sew and flip.

Sew and flip is great because it starts with the finished size block as a base. There is some waste unless you make bonus square triangles. (I only do this if the starting blocks are 2 1/2″ or bigger.)

The third technique is the four at a time method. I am calling it the flock o’geese method.

This method requires cutting less pieces. It is a technique to consider if you have adequate fabric pieces. I always make pieces larger so I can trim to have perfect pieces. I think this technique is the fastest and wastes the least amount of fabric.

Here is the geese fabric (plus corner squares) for each method. All three of these methods are worth perfecting!

Oh, I almost forget! Here are the centers of the stars…3 1/2″ squares.

Here is the finished block:

It is so cute!

Here are all three for my quilt layout:

Here is the printable PDF pattern sheet:

I hope you enjoy making these blocks!

Please remember to leave comments and feedback on my YouTube channel or Facebook page. Comments for this page are turned off because of spammers.

Later,

Lorrie

Categories
Build a block

Patriotic Quilt Series

As we are listening to commercials for presidential candidates here in the United States, I have decided to make a patriotic quilt. We will not be discussing politics…everyone is entitled to their own opinion. I am not sharing mine…sorry.

During this series, I will be making red, white, and blue blocks. I chose the blocks because of the names of them. We will be making blocks for 8 weeks. We make the last block the day after the election. Then we will work a bit on the final layout…especially those little filler blocks.

This picture is fairly clear above. I am not so sure that the same picture is clear on the print out below:

I hope you enjoy this series! Let’s build some blocks and make a quilt!

Please remember that if you would like to comment, you need to watch related videos on YouTube and comment there…or on my facebook page. Comments are turned off on this blog because of spam issues.

Later,

Lorrie

Categories
Uncategorized

School Daze: School House block

When I decided to do a series in celebration for my friends that are not retired, and who are returning to school on August 12, 2024, I started searching for a good pattern for a school house block.

I found many blocks. Many had complicated angles…or there were pictures of school house block quilts, but no pattern. I finally found an idea that I could work with in this book, but still no pattern for cutting…just an outline.

I drafted this pattern just for you!

Here is the printable PDF pattern:

If you enjoy this pattern, please drop me an e-mail at werquilters@google.com. (Comments are turned off on this blog, because I am not interested in buying Viagra from Russia.) I would also love to hear from you if I need to correct any mistakes.

Have a great time with Build a Block!

Later,

Lorrie

Categories
Calendar

August 2024 tentative YouTube Calendar

Here are pictures of my August calendar for my YouTube channel:

Sorry this is in picture format, but I decided to add this at the last minute…

Hope you are enjoying my content!

Later,

Lorrie

Categories
Build a block

Build a Block: Salem

Here are some examples of the Salem block from the weather quilt:

This block finishes at 6 1/2″. It is constructed from all squares and rectangle pieces, using the sew and flip method to create corner triangles and geese.

Please view the video at YouTube to see basic construction.

Once the corner/center units and “V” units are constructed, this block is assembled like a basic nine patch.

Here is the cutting chart:

This block is so cute and irresistable that you have to give it a try! Don’t be intimidated by the sew and flip units! That makes complicated block construction easy to do!

I hope you are enjoying this block series…happy scrap piecing!

Later,

Lorrie

Categories
Build a block

Build a Block: No Room at the Inn

If you have been watching my YouTube channel, you have seen me mention my 2024 weather quilt. A subscriber recently asked if I would do a tutorial on the weather quilt blocks. What a fantastic idea!

This quilt has five different blocks in it…based on the place where the weather data is collected. This first block represents data that is collected while we are staying somewhere away from home(s) or our son’s house. This is the “away from home block”…not to be confused with the traveling block. I will define that more clearly when we make that block.

Here is the block that I made for the YouTube video. You can watch that presentation here.

All of the blocks have a color that represents these five weather elements: high temperature, low temperature, cloud cover, wind and precipitation. What does that mean for someone who is making this block but is not tracking the weather? It has five colors…of your choosing!

Here is the diagram that I used to layout the pieces for this 6 1/2″ block:

Here is my cutting diagram:

Let me explain how to read the above chart. In the placement diagram, H represents high. You would cut six 1 1/2″ squares… in the picture, these are yellow squares.

I hope you enjoy making this block. It would be great as a regular, old scrappy block, too!

I can’t wait until it is time to share next week’s block!

Enjoy!

Later,

Lorrie

Categories
Build a block

Build a Block: Shortcut to Arkansas

I had an epiphany in the shower. The Road to Kansas block could be remade using larger block pieces…and a little more organization. Yeah…Let’s do that!

It is assembled in the same manner as last week’s block, but the cutting is different…actually more complicated.

Here is the video link for assembly.

Please use the picture above the chart to help with placement. I will work on a repeat pattern at some point, but not today. A repeat would work if you put a 4 block unit under the one shown, but not to either side. Hmmmm! I will have to think this out some…

Here is the cutting chart:

Hard to believe these are the same blocks!

I enjoyed turning this block into a simpler, but yet somehow, more difficult version of its former self! I hope you are enjoying, too!

Later,

Lorrie

Categories
Build a block

Build a Block: Road to Arkansas

This block was not inspired by the EQ5 book!

It is an excellent scrap buster. Do not be intimidated by all the pieces that make up this beauty. I constructed 3 of these blocks as leader/ Enders between the blocks in my weather quilt.

This is the 8 1/2 inch version:

The four 4 patches and 4 x 4 patch are made from 1 1/2 inch blocks.

The eight hatchet units are made from light 2 1/2 inch squares with 2 of the corners ( opposite one another) snowballed to create the shape.

The video presentation for block assembly is here.


I love the way two or more of these blocks look together!

I think I will make a center for a quilt using this block. I love the illusion of movement that it creates!

Here is the cutting chart:

Hope you enjoy this scrappy happiness!

Later,

Lorrie

Categories
Build a block

Build a Block: Summer Winds

This is the last block from EQ5 inspiration for a little while! Don’t worry, I have many other inspirational sources so that I can continue to make blocks with you!

Here is the first summer winds block that I layed out for you in October of 2023:

It is great in super scrappy. I did keep the center half square triangles the same color.

Here is the 6 1/2″ version that we are constructing today:

I changed the center block. I also pieced the block in units, so I could assemble it like a classic nine patch to finish it. I pressed most of the seams open to cut down on the bulk.

You can watch my YouTube video here.

A cutting chart is also at the end of this blog for you piecing pleasure.

For the 12 1/2″ version, I had many choices to make.

Which corner blocks did I like best with the green and tan half square triangles?

Christmas green with snowflakes?

Vibrant, solid red?

Wavy purple?

Grassy green?

Solid black for a classic accent?

And then there were three different center choices!

Golden wheat (blowing in the summer wind)?

Apple and square cheater fabric?

Or butterflies on the wind?

With my friend Diane’s help, I chose to construct this version.

It is constructed in units and then like a classic 9 patch, just like the smaller version.

These blocks are easy to construct and great for using scraps. They would be great in a one block wonder quilt or as part of a sampler quilt.

Here is the printable cutting chart:

I hope you are enjoying this scrappy block series! Join me next week for another block!

If you have any special requests, please comment on the YouTube video above in this post.

Later,

Lorrie