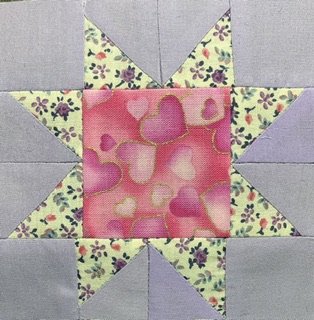
This week, I am adding a second block, the scrappy star. It is pictured here as a 4 1/2″ block. It could easily be made into a 8 1/2″, 12 1/2″ or 16 1/2″ block.
This tutorial reads like a picture book. I learned how to edit photos! Many of the directions are right in the picture. This also matches my YouTube short that shows how to use up some of those bonus triangles we all have. Most of the pictures are the same as those in the video, too.
Here is the finished star:
I have been making these as leader/ ender blocks for the entire summer. I have a nice little pile going.
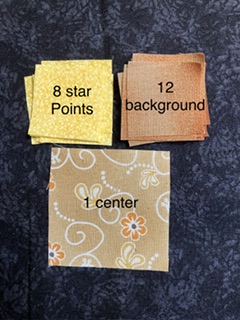
The first image is parts you need if you don’t cut triangles to make this block. The directions are in the pictures below to make the triangles from squares. Just look for the tan and yellow squares.
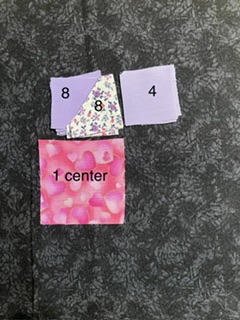
This second picture, with the lavendar background, is the number of pieces that you need if you ARE cutting the triangles. I use an accuquilt die to cut those little triangles, but it is not necessary to have one of those to cut pieces.
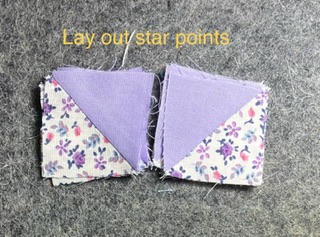
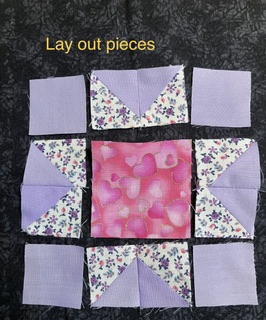
The easiest way to make any block, is to lay out the pieces before you start.
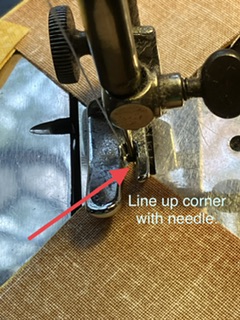
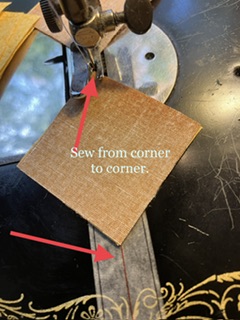
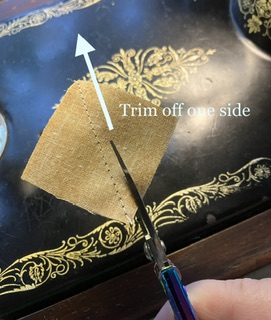
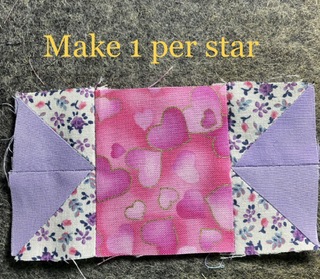
The first sewing step is to make the 8 half square triangles, whether you are using triangles or squares.
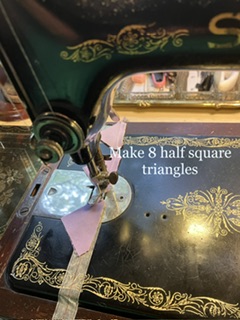
The images with brown fabric are constructed from squares.
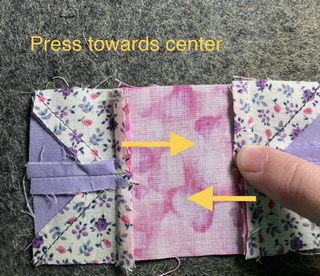
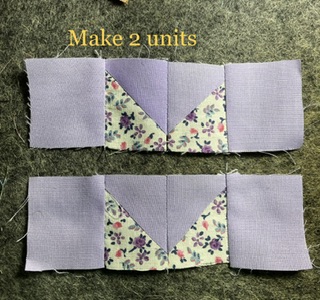
Now that your star points are sewn, it is time to press.
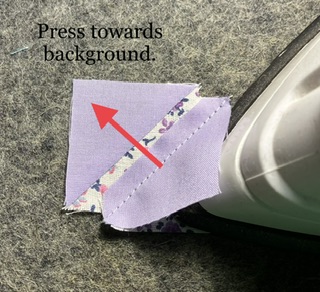
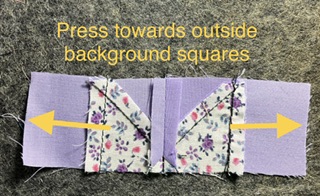
Background fabric should be towards the inside. Star points should be on the outside.
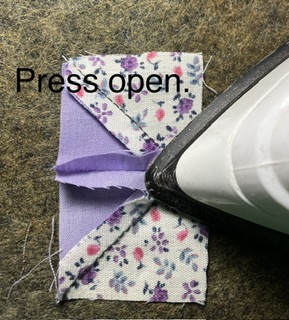
Sew the star point pieces together in pairs.
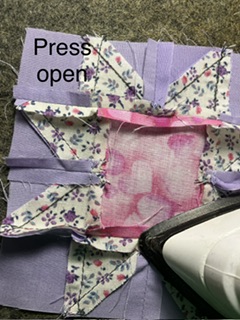
I prefer to press these seams open to reduce bulk. You can press the seams to the side if you prefer. I know this is a controversial topic in the quilting world. No judgements here!
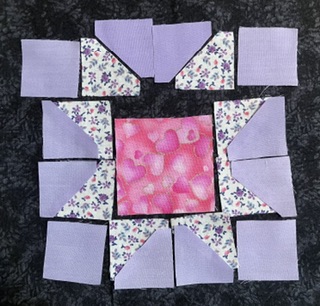
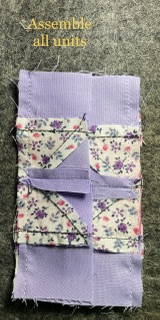
Lay your pieces out again. This is a double check of your star points, etc.
You have the parts assembled for all 3 rows.
Time to finish the block. Sew the rows together.
Again this is to reduce bulk in these little seams.
Here it is again…the cute, scrappy star block.

I hope you are enjoying making little scrap blocks. There are many more blocks to come!
What is your favorite scrap block to make?
Later,
Lorrie

3 replies on “Werquilters: Build a Block Scrappy Star”
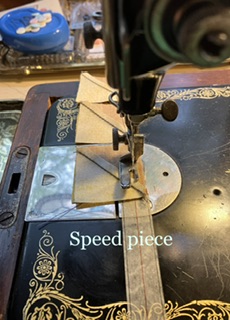
I love speed piecing! It was you who introduced me to that technique. I will never forget the kite tail you were working on at MCI.
I admire your old Singer 221! I have a 1954 201-2 and a 301a from the same year. Both are amazing. The 201 can sew over thick and thin seams without seeming to notice. Unlike the expensive new machines that growl and have to be begged and pleaded with.
I agree! I always joke with my family that if anyone ever severs a limb that I have the sewing machine to fix it!