Categories
Build a block quilting scraps sewing

Build a Block: Hidden Butterfly

Welcome to another Build a Block post. If you prefer the video, less reading version, you can find it here on my YouTube channel. This makes an 8 1/2″ block. It has a wonderful secondary design as you can see at the end of this post.

Here are the pieces you need for the block:

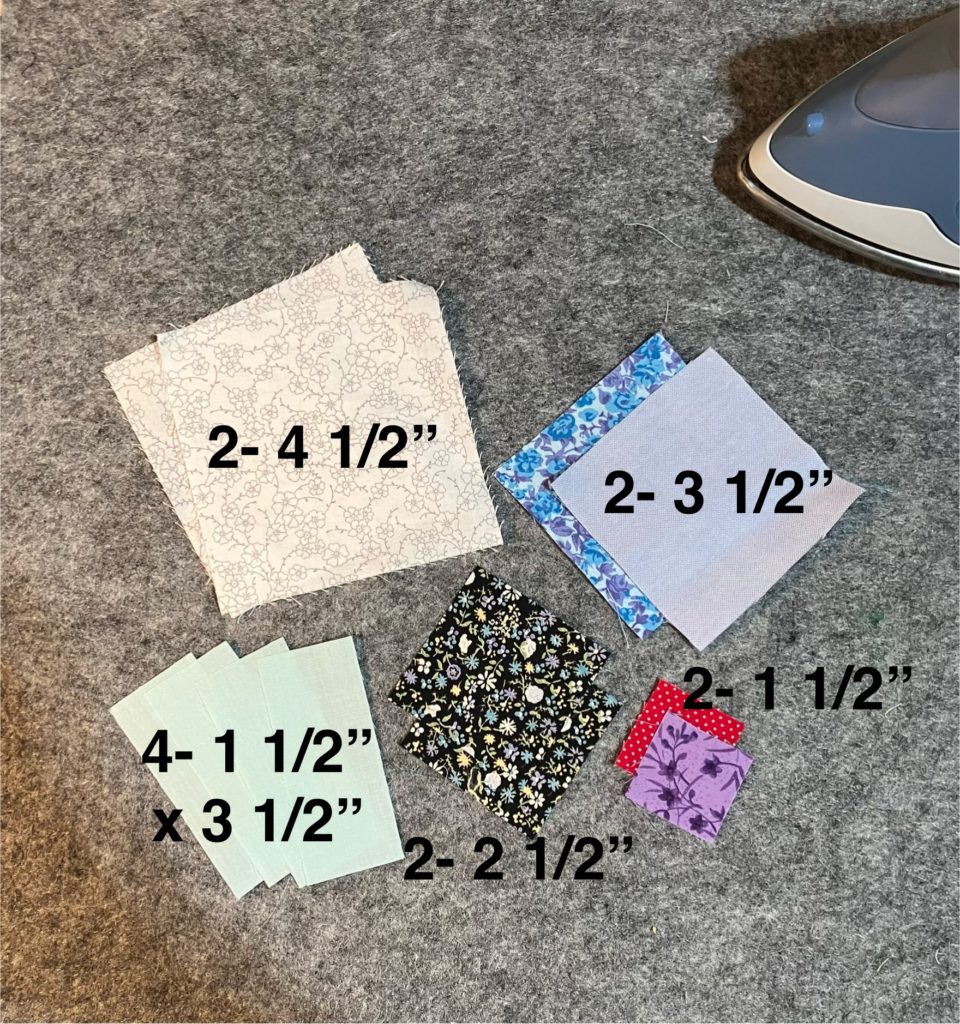
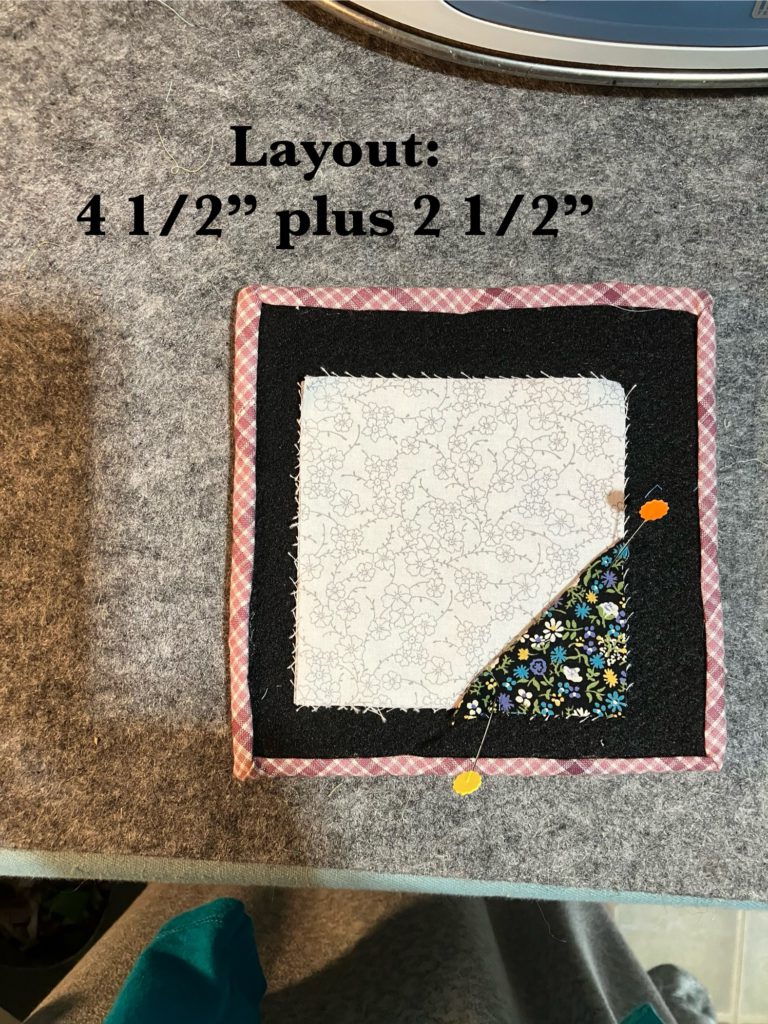
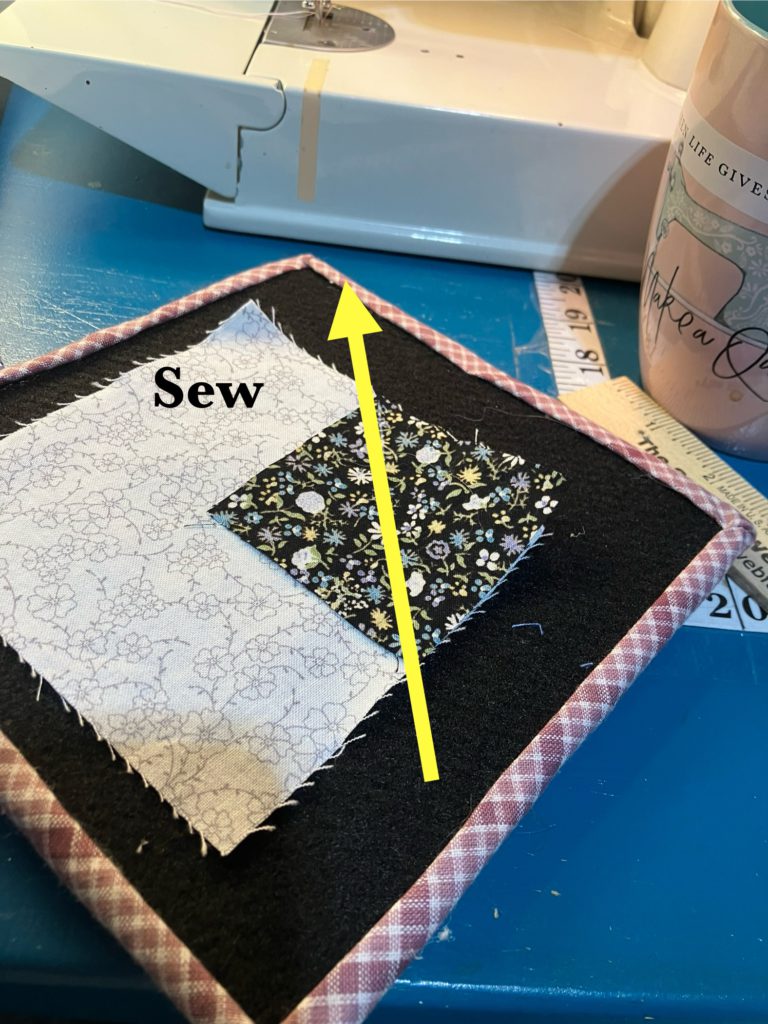
This block is assembled in two easy parts. First the butterfly pieces of the block. You will need the 2 1/2″ squares and the 4 1/2″ squares to create the two sections that make the butterfly at the end reveal.

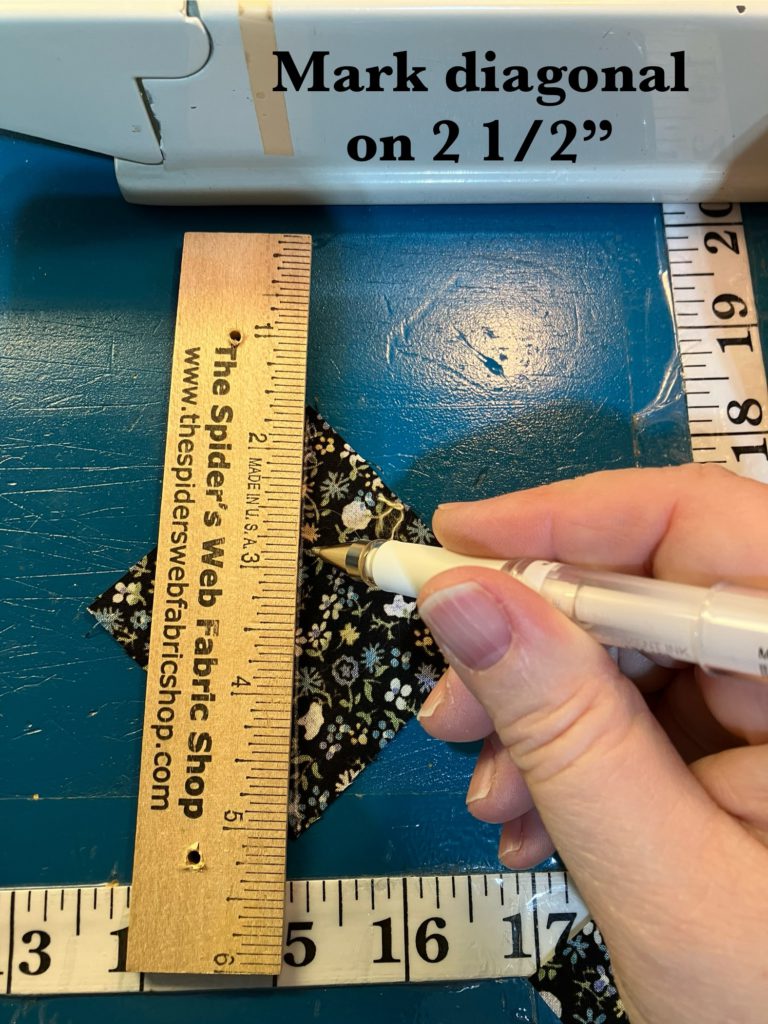
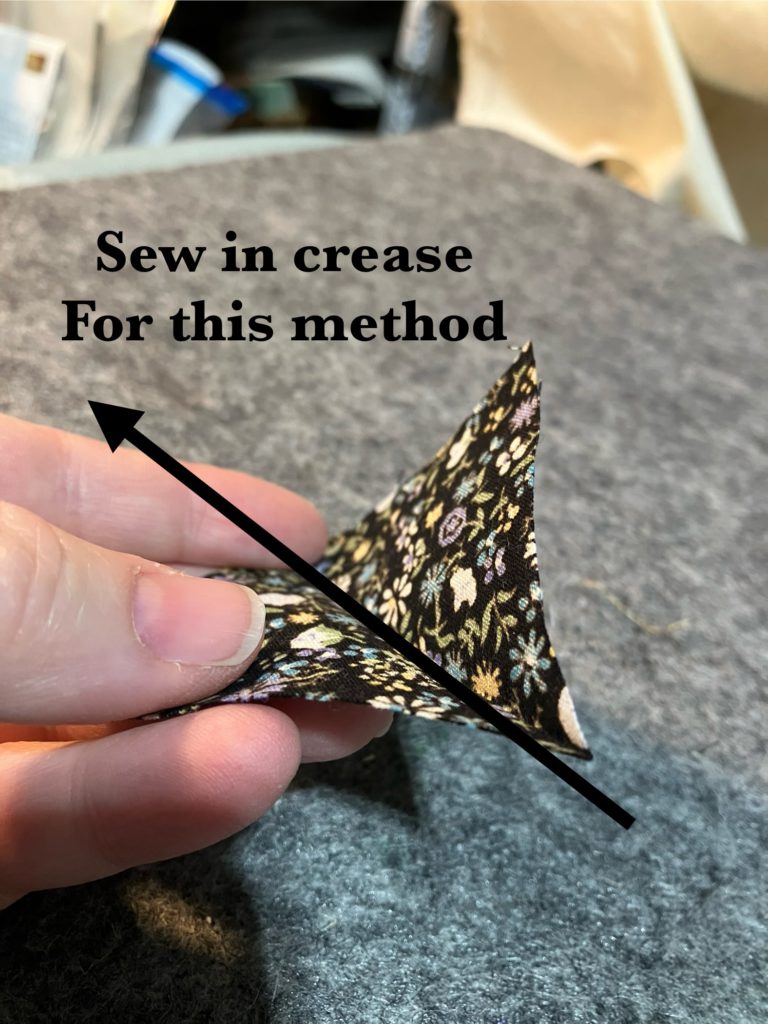
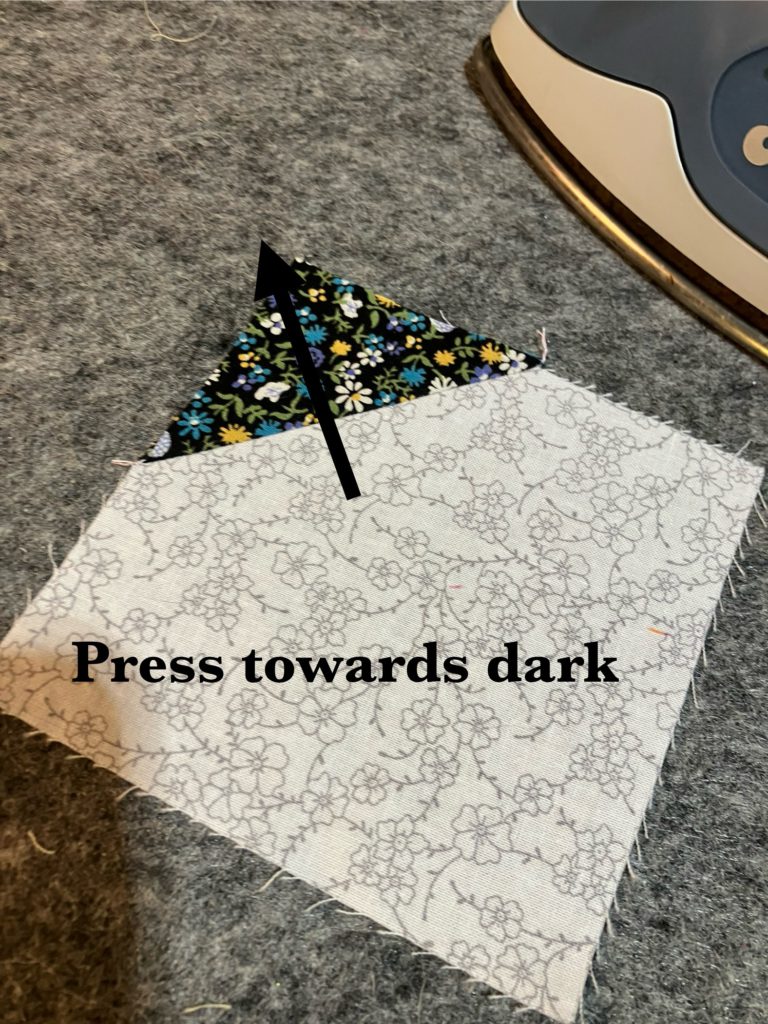
There are many ways to make that diagonal so that it is sewn straight.

  • Mark the line with a pen or pencil and a straight edge, like a ruler,
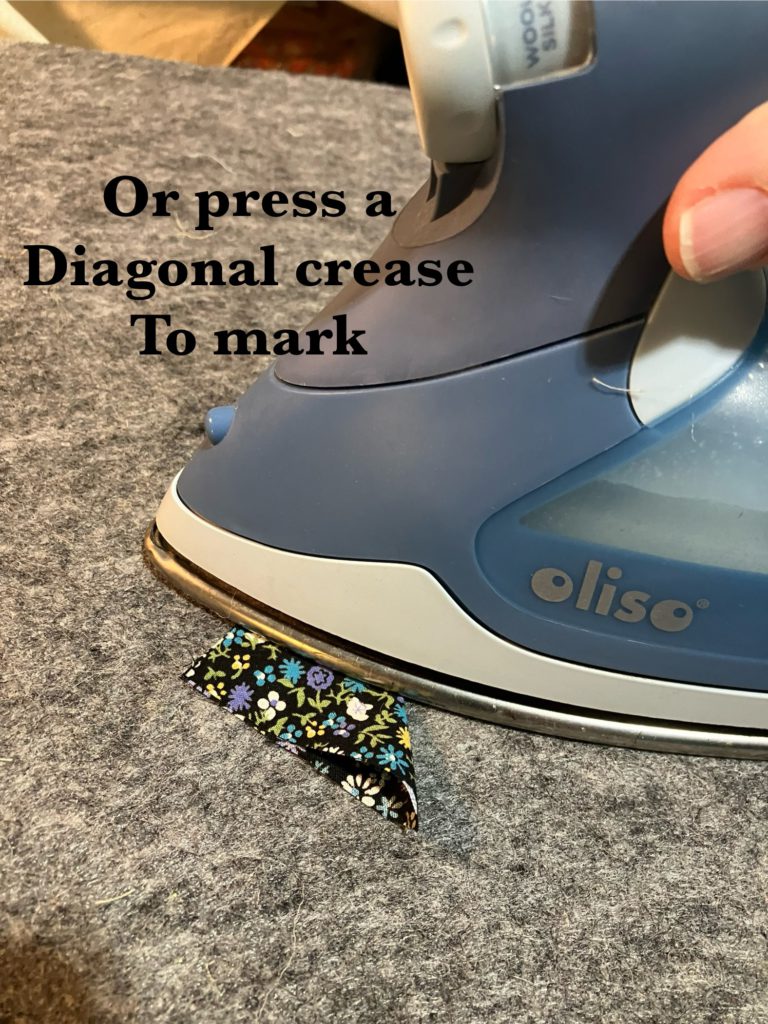
  • press a crease into the 2 1/2″ block as a sew line or
  • my prefered and very lazy method…the piece of tape to follow along with the corner of the square as I sew. You can see the tape in the picture below.

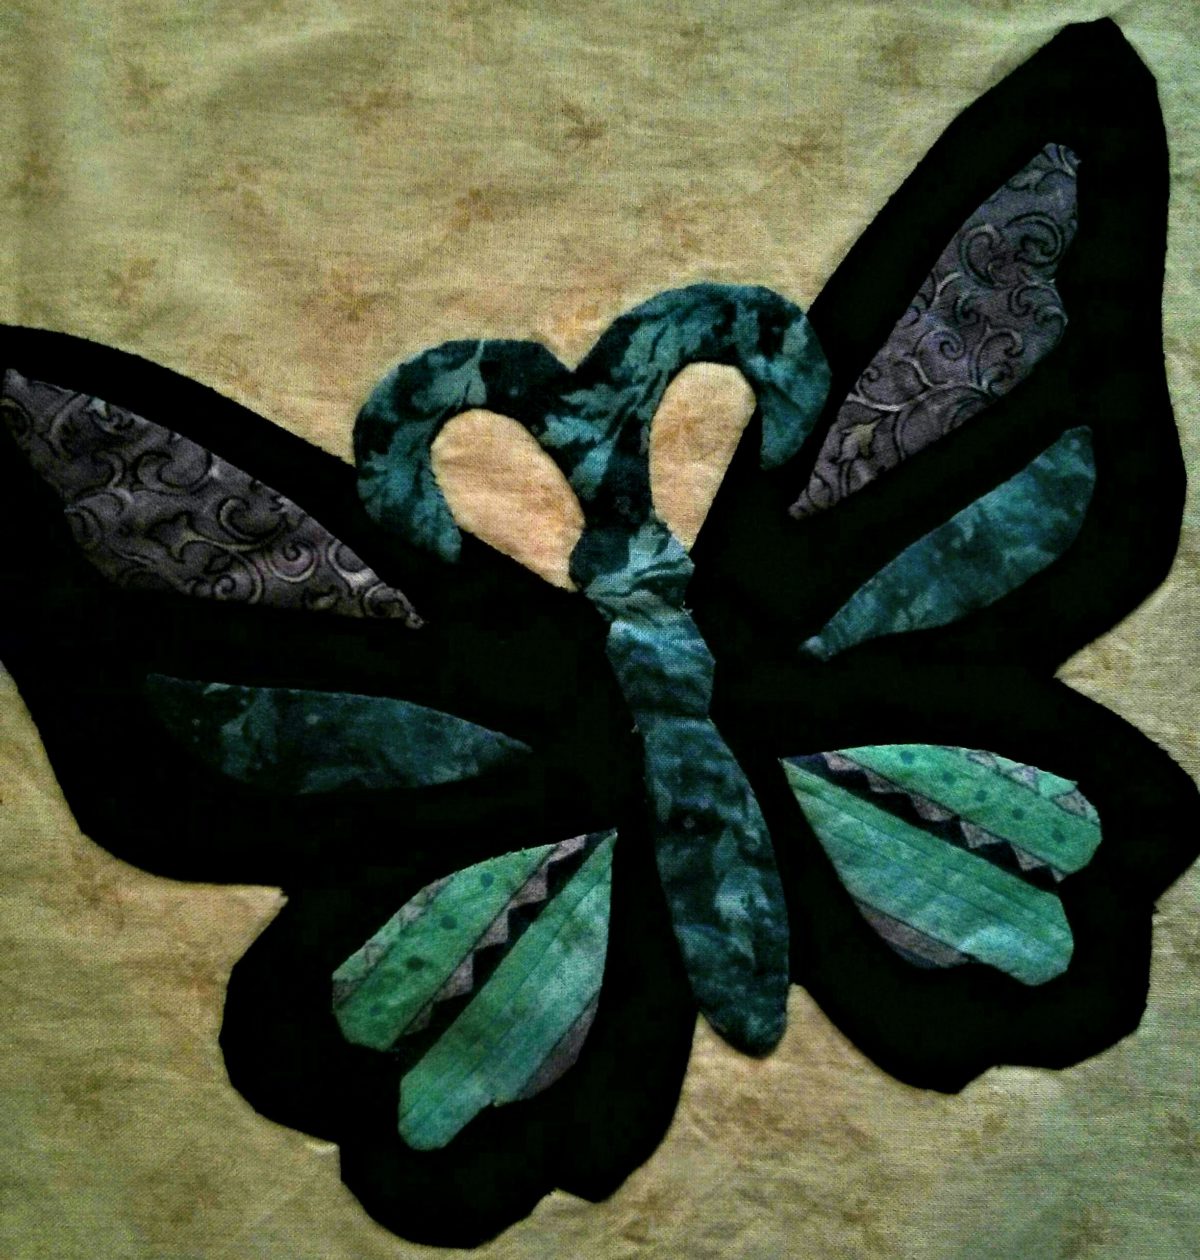
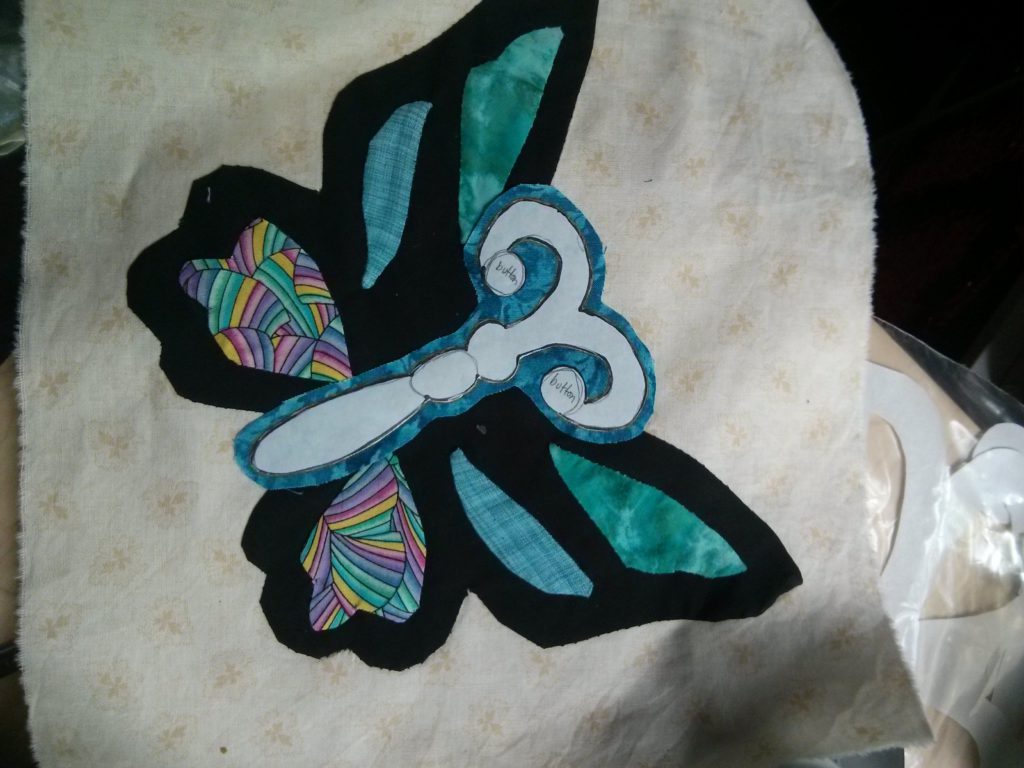
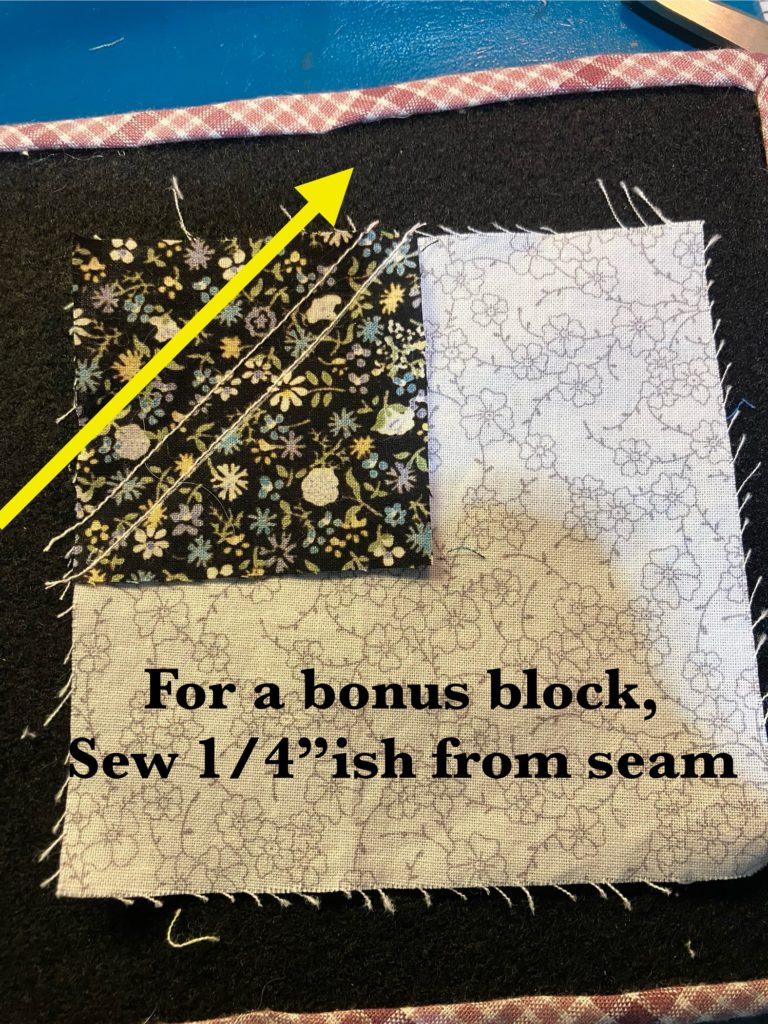
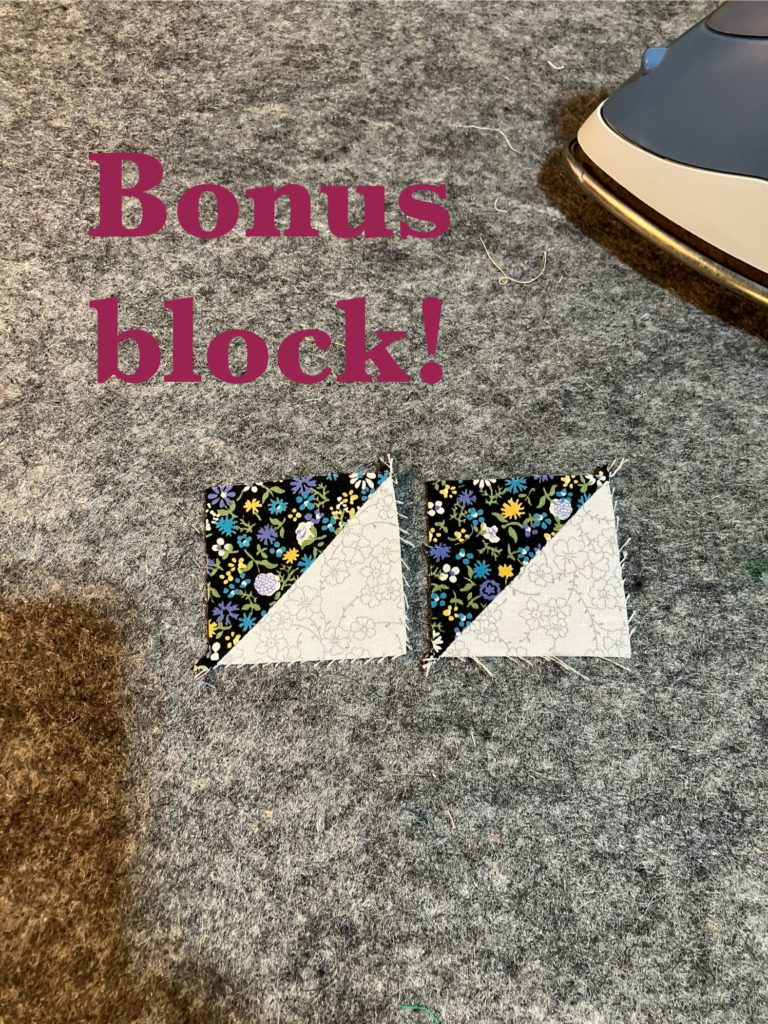
I always opt for the bonus block if the original square size is 2 1/2″ or bigger. That would be the reason I am being over run by half square triangles. I am working on fixing this little problem. There will eventually be a series of blocks on this blog that use up many of those bonus triangles! I promise!

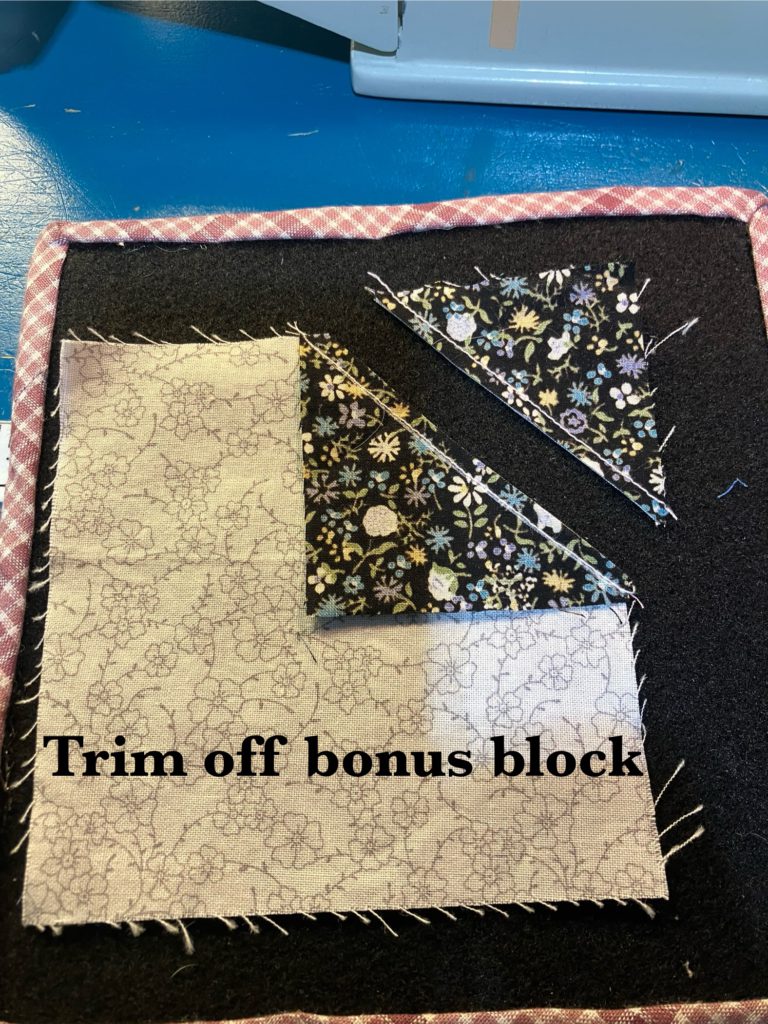
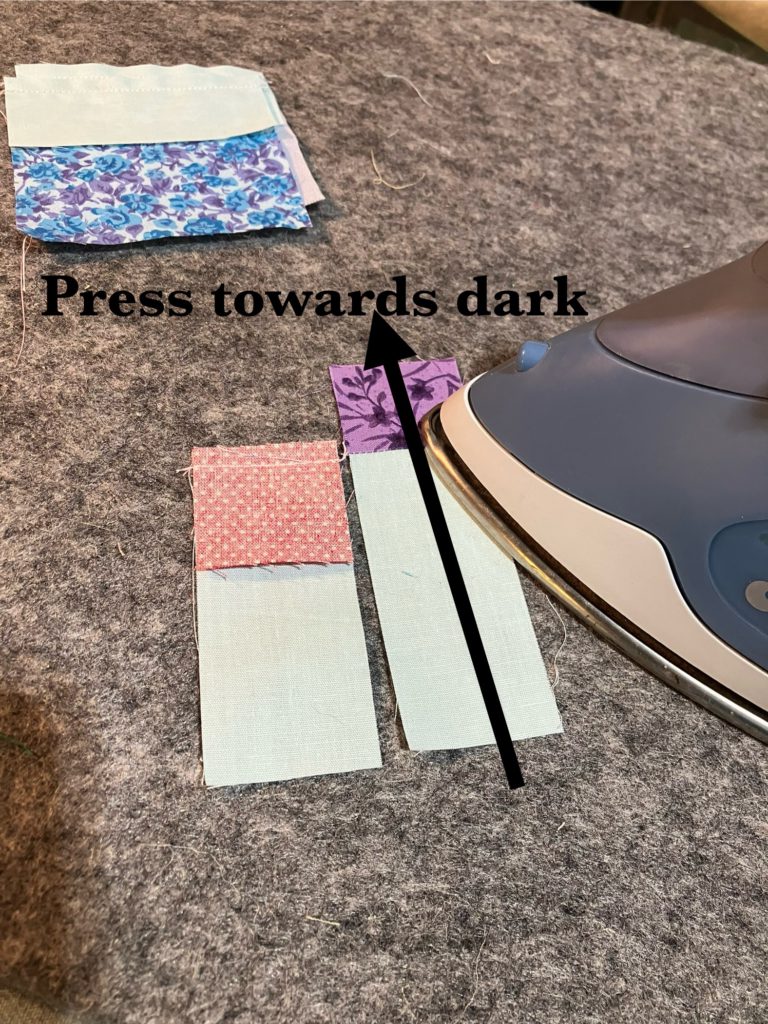
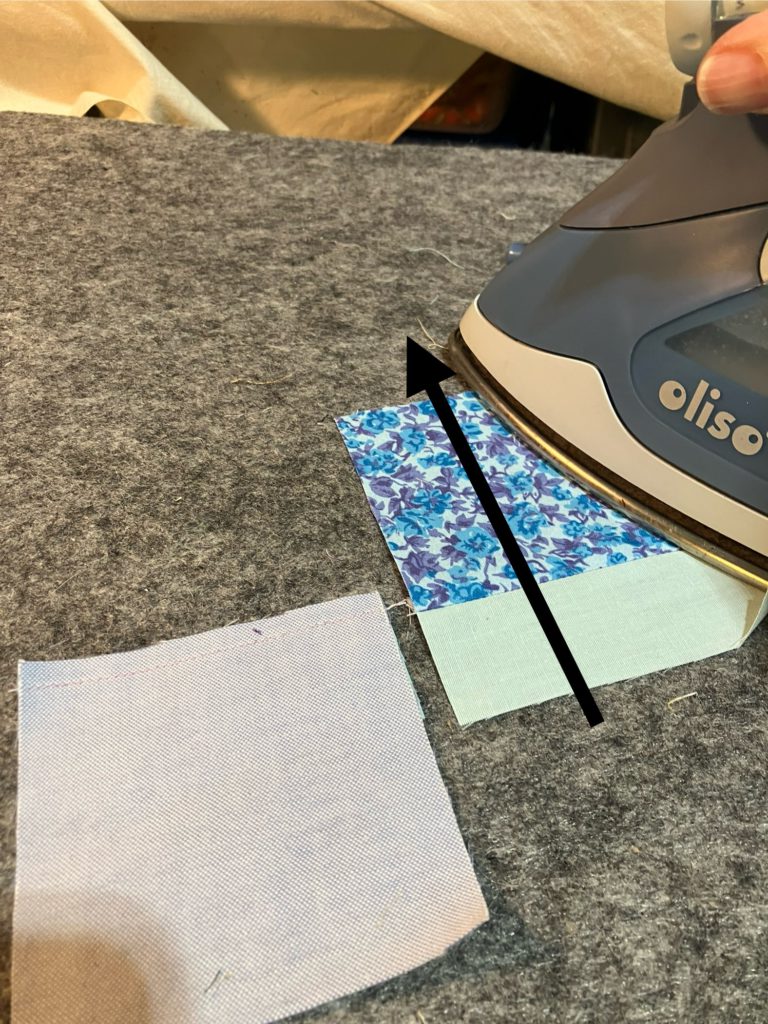
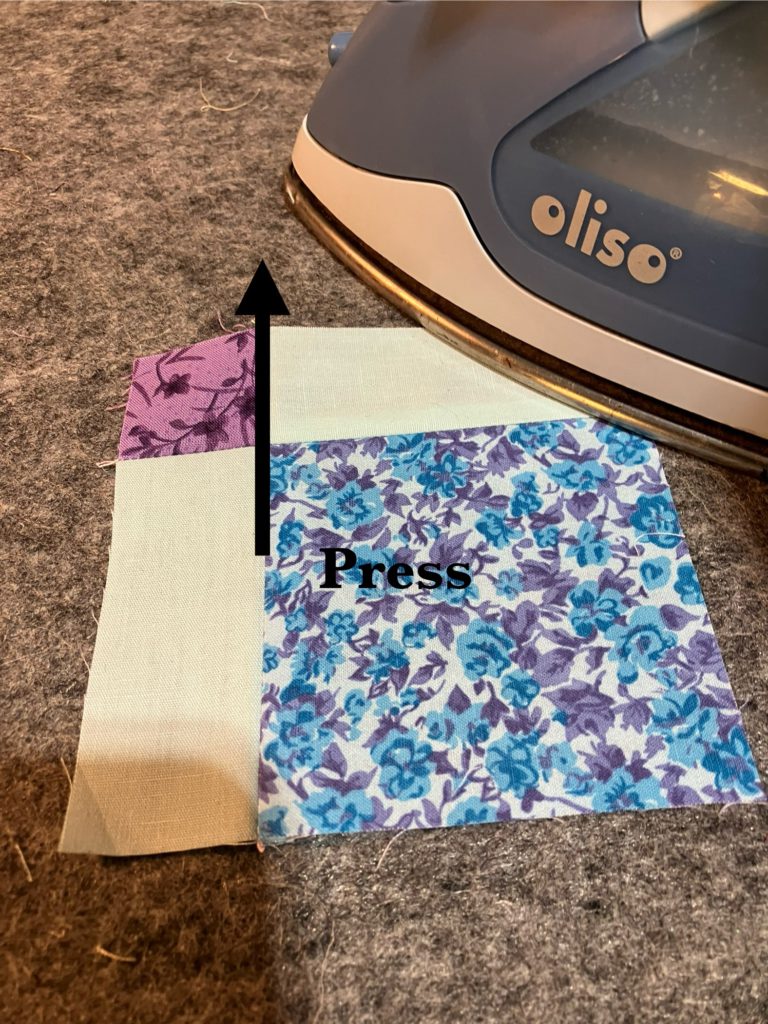
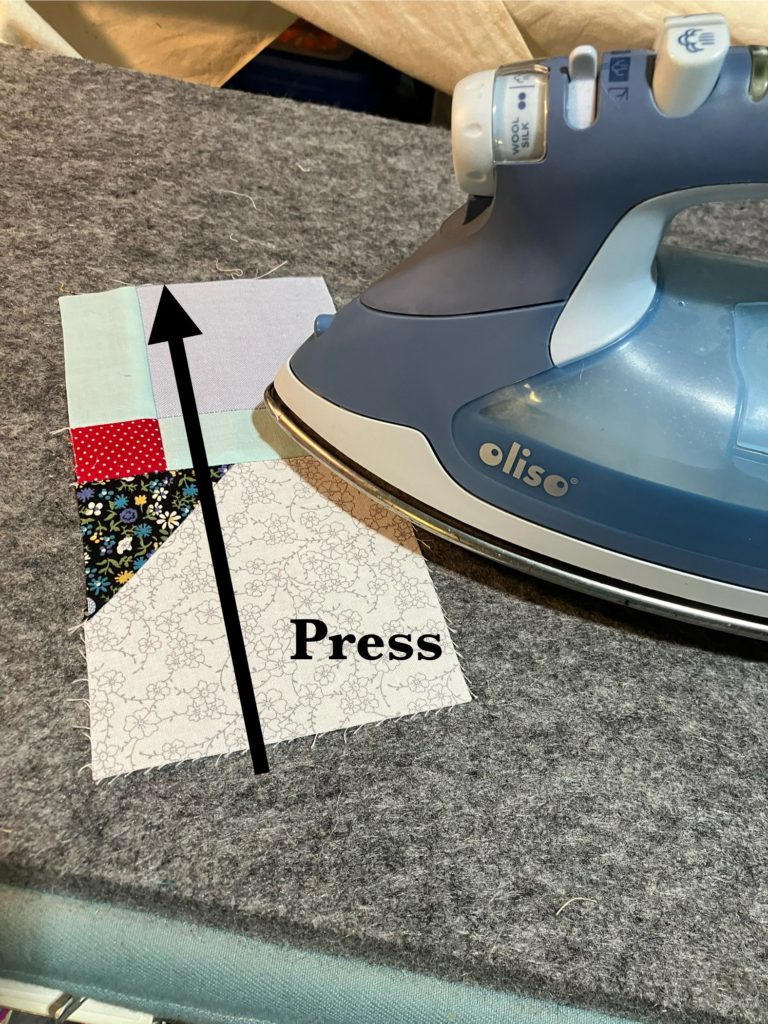
I am a big fan of pressing pieces as you go, as you all know. Butterfly wing sections are now complete.

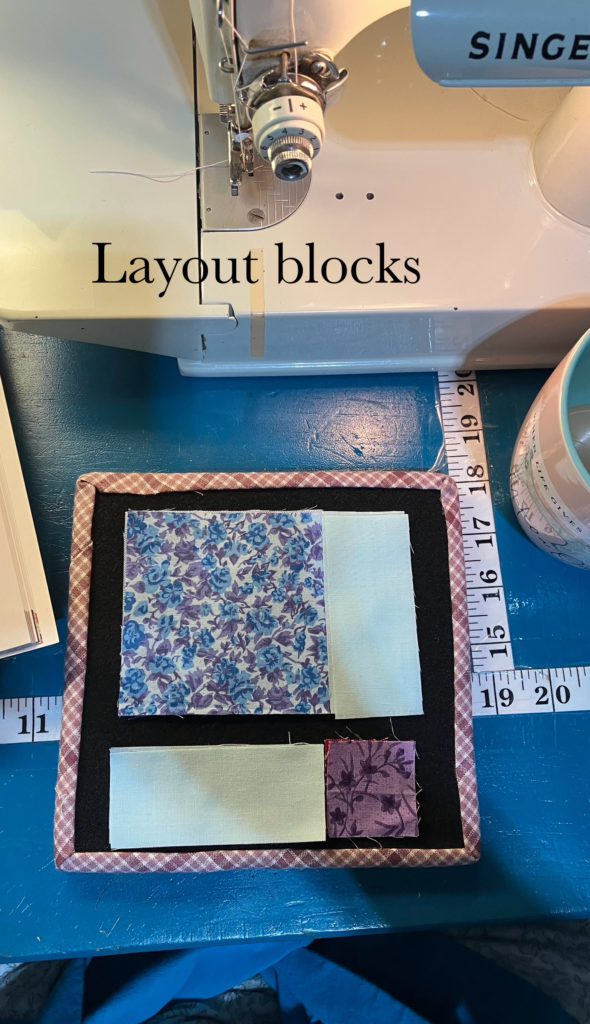
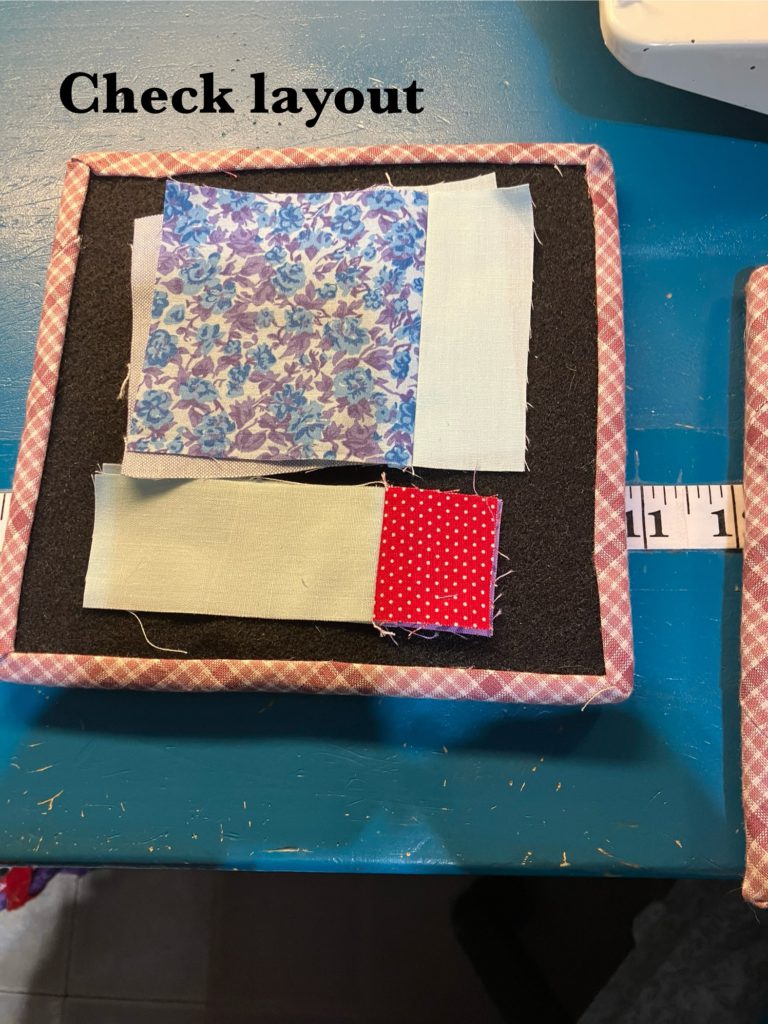
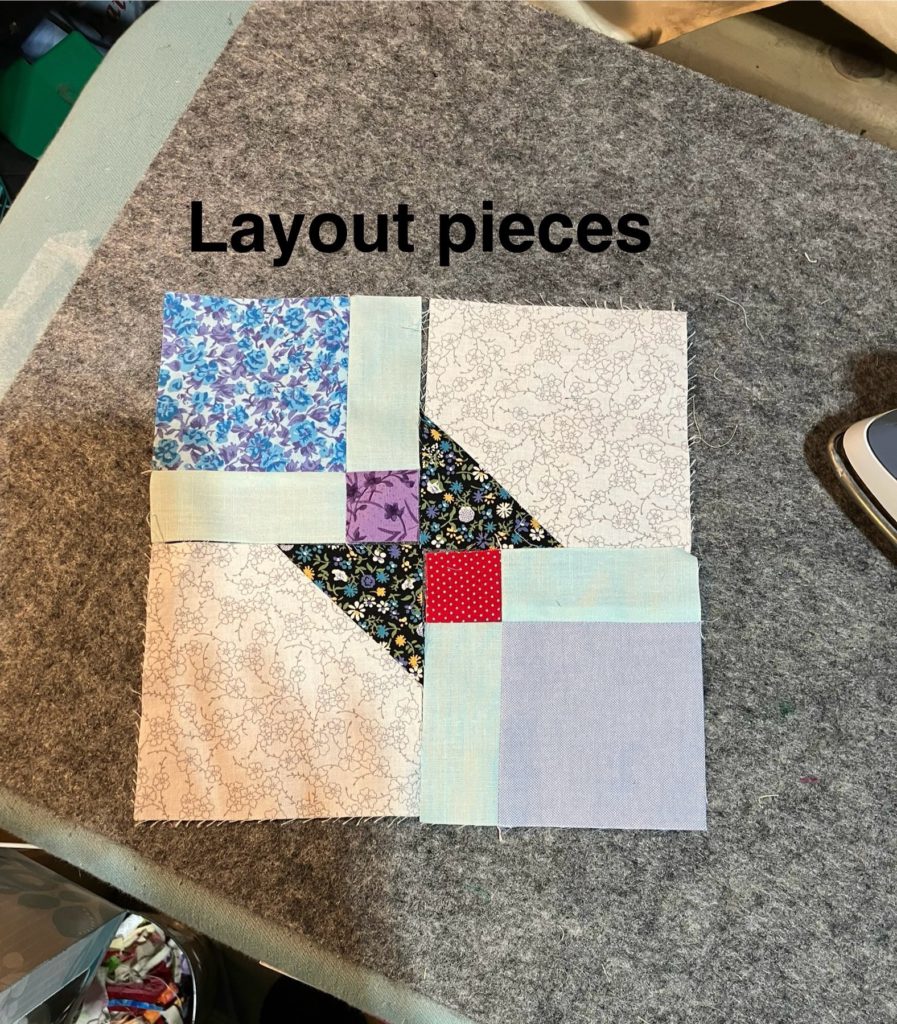
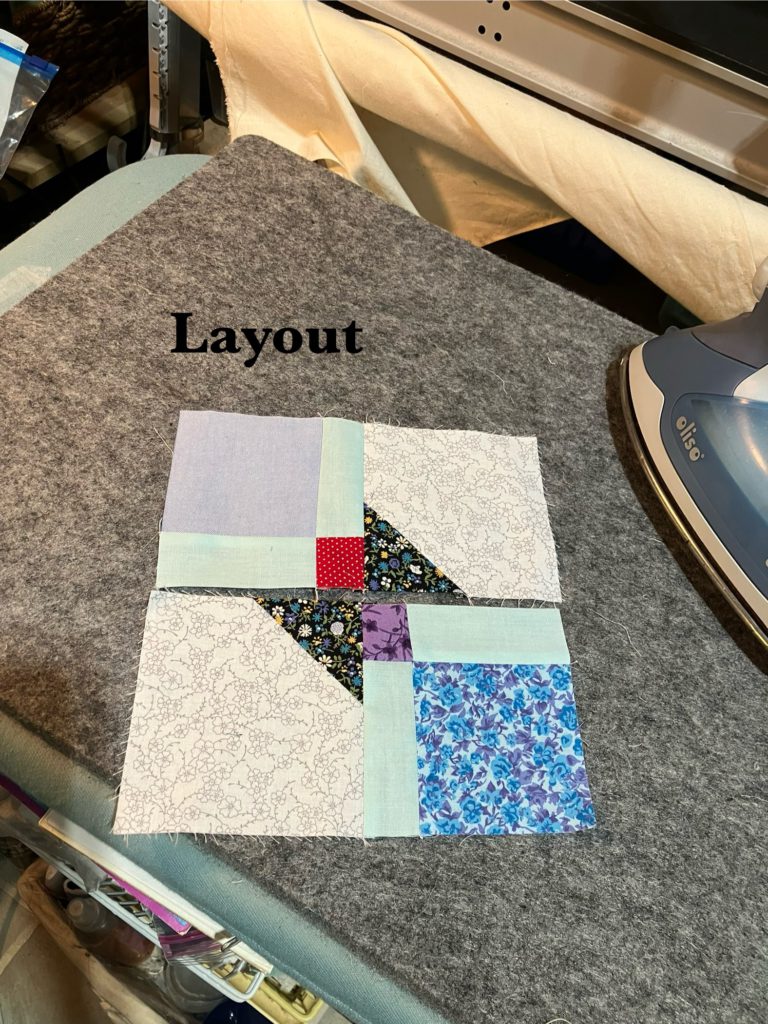
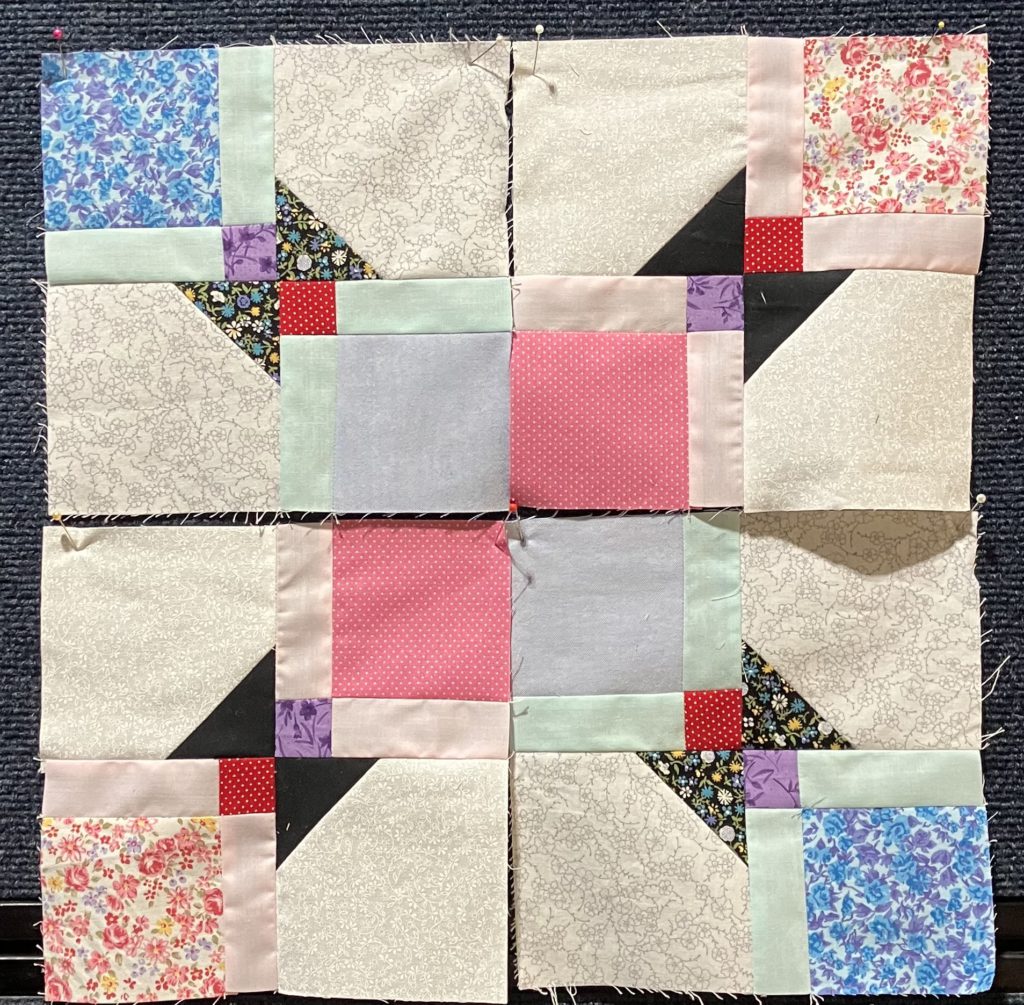
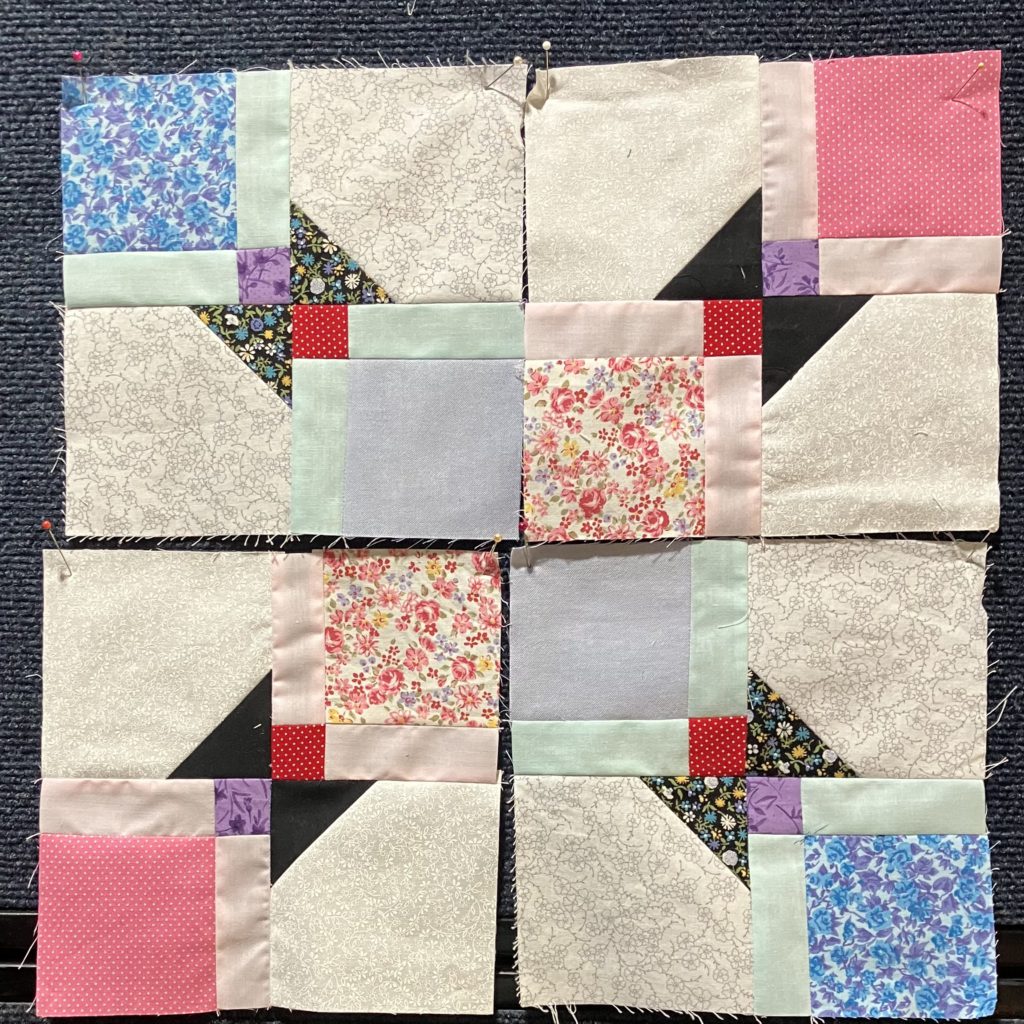
Now for the second section of the block. It is all straight line sewing for the rest. See the layout below.

Divide the layout into 2 sections…a big section and a little section. I show it in rows in the picture below.

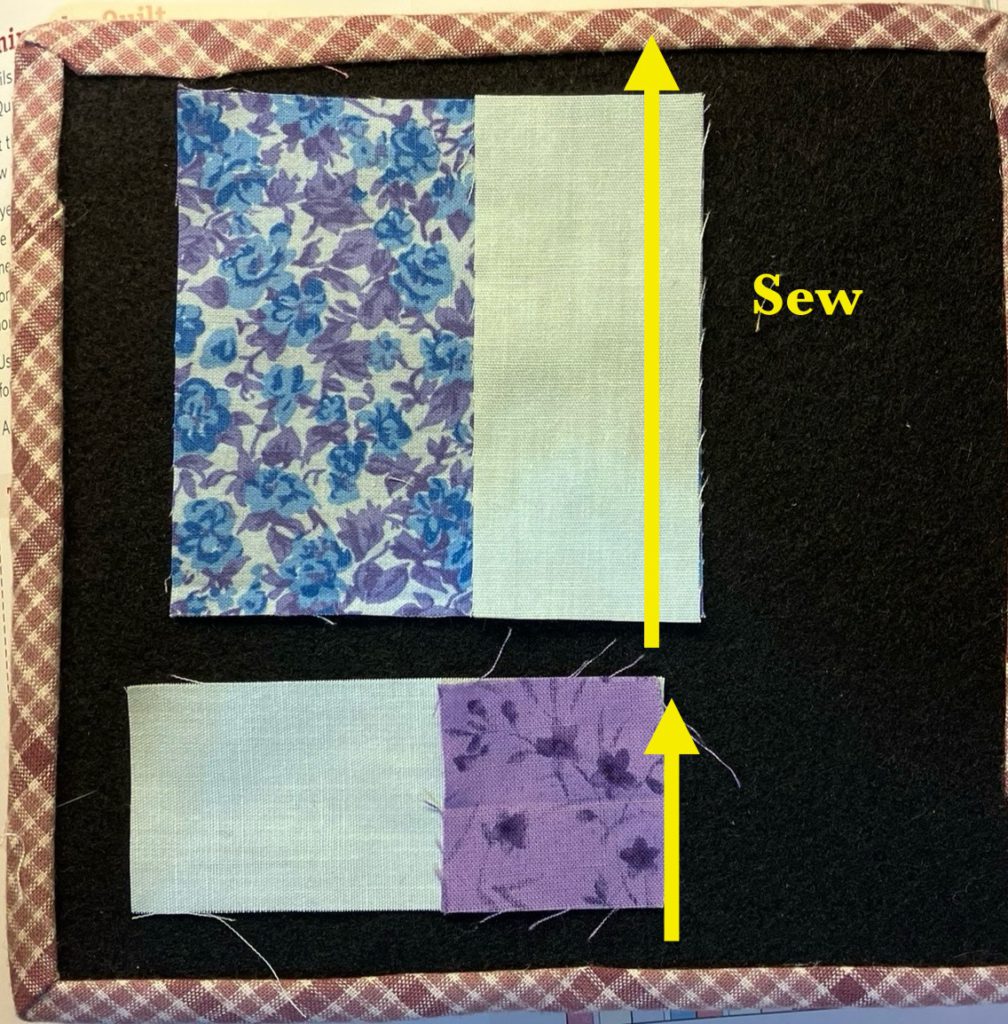
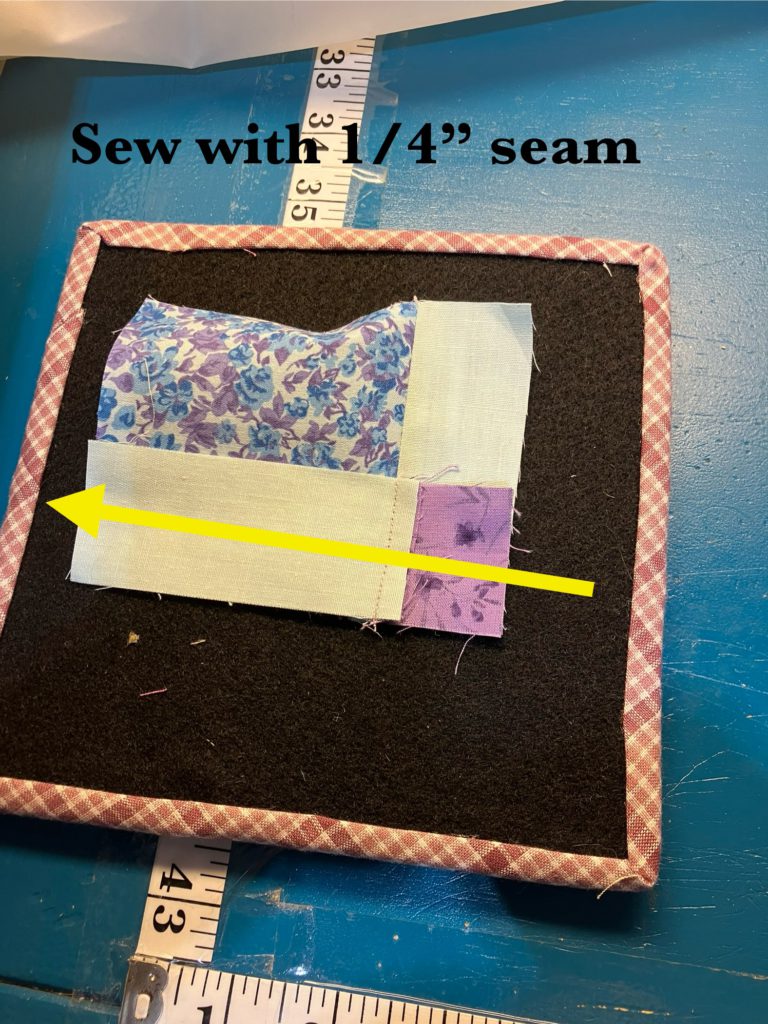
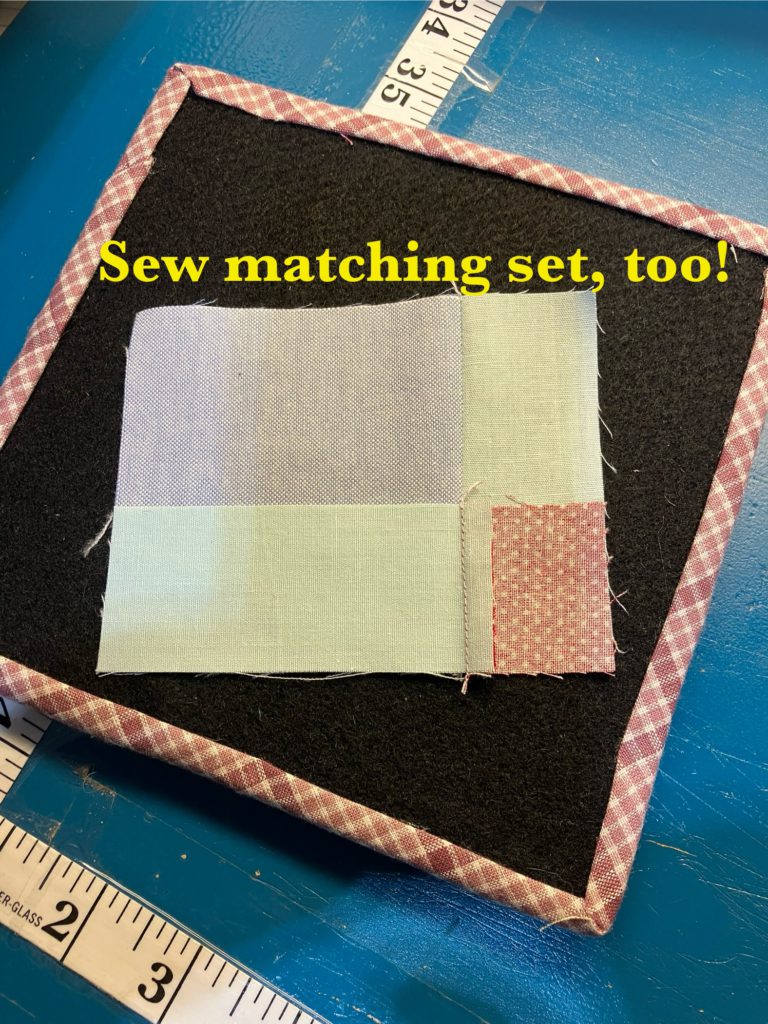
Sew the 3 1/2″ square to the side of a lattice piece. Sew the 1 1/2″ square to the end of the other lattice piece.

Press towards the dark fabric on both of these units…unless you prefer to press open.

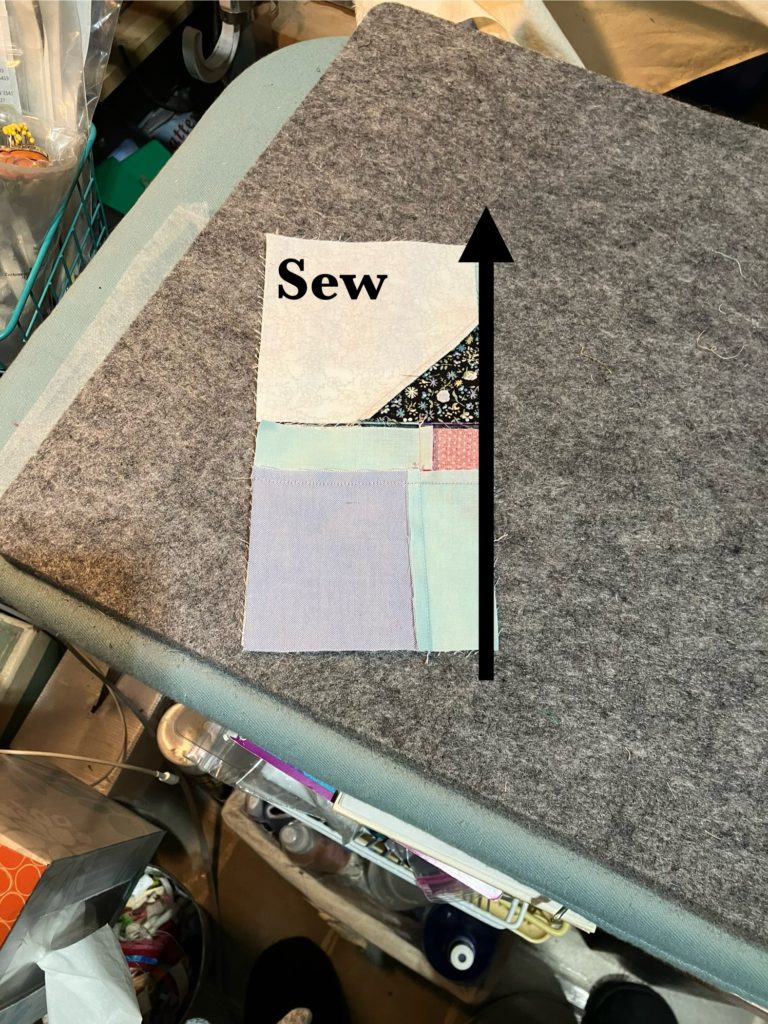
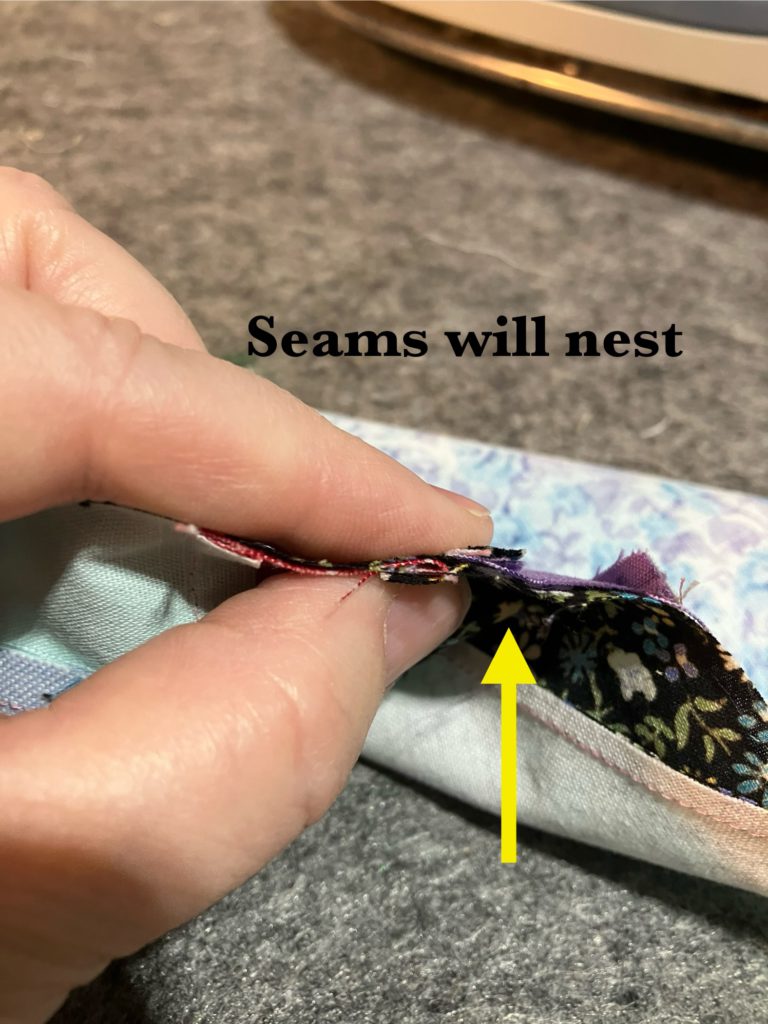
Join the two units you created into one bigger unit. The other part of the block is now sewn together.

It really was just that easy.

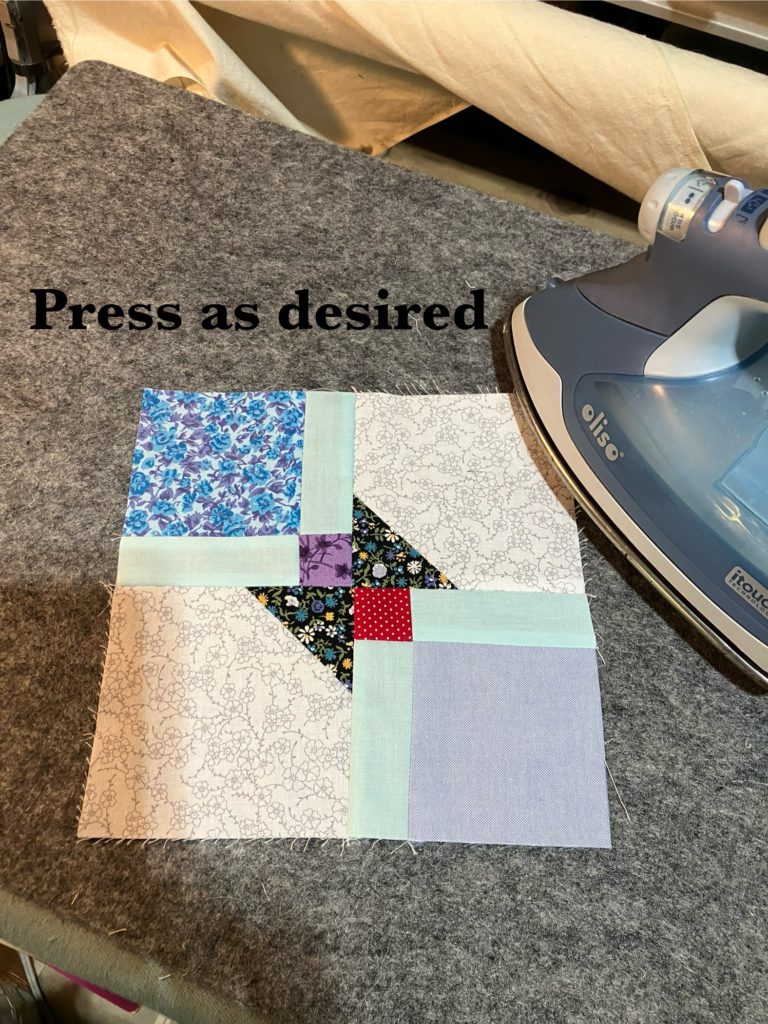
Press towards the straight lattice pieces…or open.

If you press towards the lattice, sewing the final seam will be easy!

Sew that last final seam. Sorry, no picture of that seam!

Ta-dah…Ta-done!

Here are a couple sample layouts. This block could be much scrappier than I made it. I tried to control the scrapiness for an aesthetic pleasing effect.

I decided to make an additional four blocks and use up some other orphan blocks, too. This is the beginning of a car quilt for my son’s family. Everyone needs a quilt, a flashlight, battery cables, and a small tool kit in their vehicle. Just a thought!

Those borders will fit when they are all sewn together. I, too, am always amazed at how much is eaten up in a 1/4″ seam allowance!

If you construct any of these scrappy wonderful blocks, please share with me through gmail. I look forward to see your work!

If you are interested in making this a larger block, please use the chart below to help you resize the block.


Later,

Lorrie

Categories
quilting

Butterflies flutterby

Sometimes inspiration comes from the most unlikely places, I mean yard sales. I have been avoiding applique for many years. Now that I have lots of time on my hands and a need to keep myself occupied, I have decided that this technique can be soothing. It is actually meditative. I decided to dive right in…

The butterfly is made of wood. It was in rough shape, so I sanded and spray painted it.

Inspiration…now wall art

To make a pattern, I had to go buy some freezer paper. Unfortunately, it only comes in a huge roll. Last time I bought this, it was available in smaller rolls, too. I now have enough to last me the rest of my lifetime. I traced around my wooden butterfly with a sharpie marker. Some of the parts (where there are dashed lines) are cut from other fabric and added on top later.

freezer paper pattern ironed onto black background fabric

I have been using this pattern to try out different ways to do applique. At first I tried appliqueing the colorful shapes onto the top of the butterfly wings. I used a template and starch to make them the right size and shape. Here is a tutorial of this applique technique.

This method has some positives. All the pieces are prepped before you actually start sewing. You can use hand or machine applique.

This method also has some drawbacks. You have to have matching thread for each applique piece (unless you are using invisible thread…that has its own set of worries). Small pieces are sometimes difficult to iron, even when you use a skewer or other instrument to save your fingers. Placement of pieces onto the background can also be a challenge.

I used regular needle turn applique and a simple version of reverse needle turn applique. I decided that for this butterfly project I liked needle turn the best.

This butterfly is close to completion with the body placed on top. I used a basting glue (just a couple of dots), then I remove the pattern. The outline has been traced onto the fabric with a silver gel pen.

Here is a finished block:

This is an excellent scrap buster. My blocks finished at 11 1/2 inches. This would be easy to adapt and make it your own.

I have decided to make 20 of these! Three done and one more on the way! I have an idea about embroidering inspiring words on each block like “hope”, “peace”, etc.

I hope that you have a chance to check out the applique links above. I wish these tutorials had been available to me when I was 20 and could see without bifocals or reading glasses. Give it a try! If it doesn’t turn out well, tell everyone you were going for the rustic look!

Looking for other butterfly projects to make with your children? Here is a great link to a list of crafts you can do with young ones. (This is one of my favorite sites to get ideas about all kinds of crafts.)

Later,

Lorrie