Categories
Build a block quilting scraps sewing

Build a Block: Ladies Aid Album

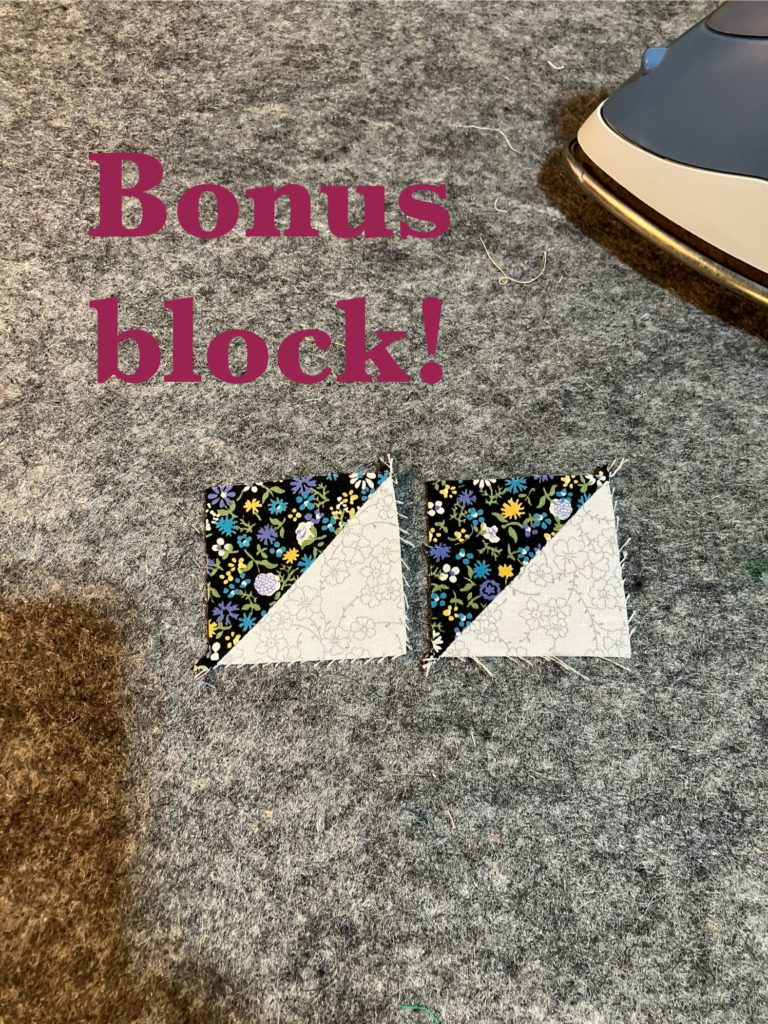
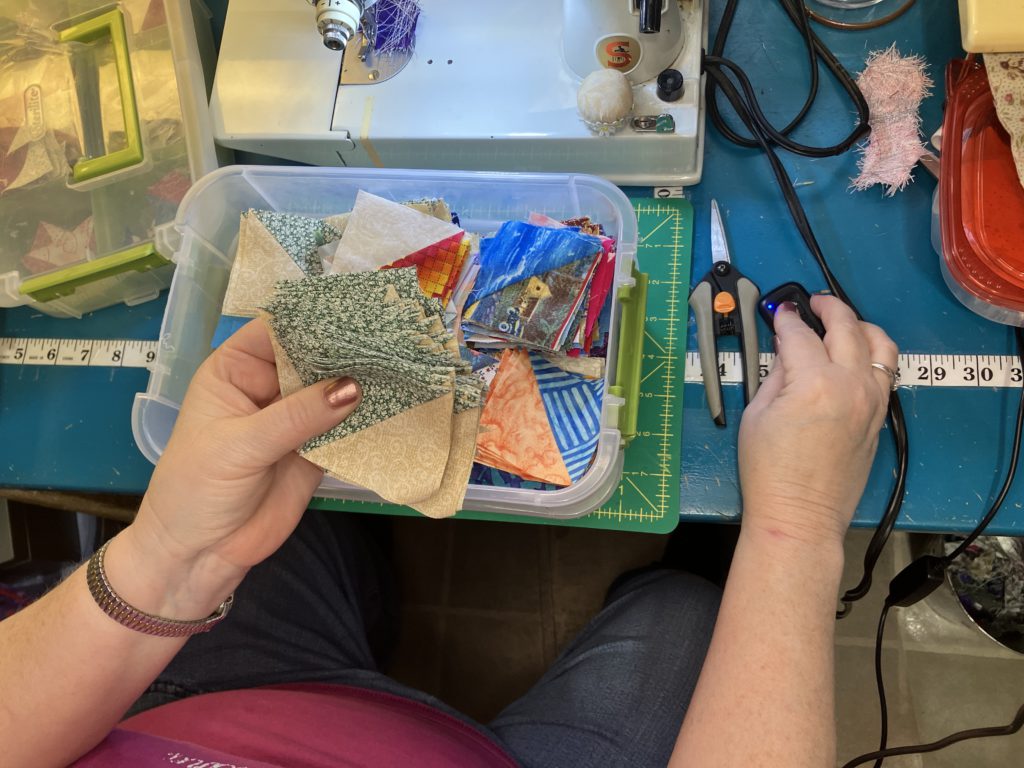
This is a great block to use up some of those bonus half square triangles. This block measures 6 1/2 inches for the purposes of this post. See the video presentation here.

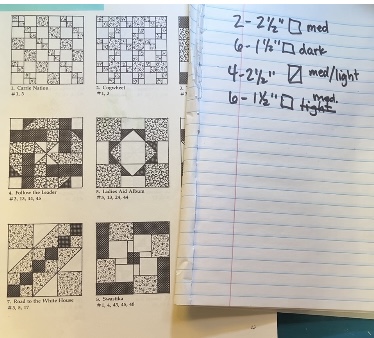
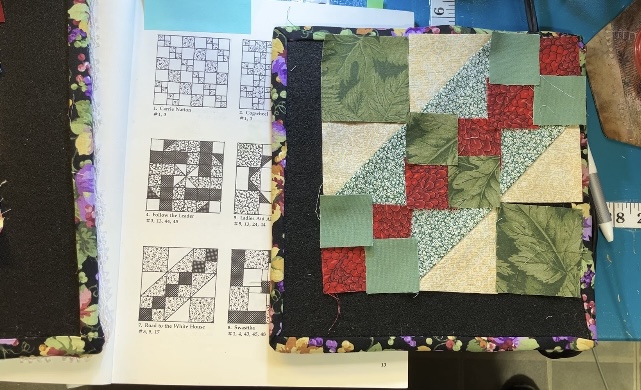
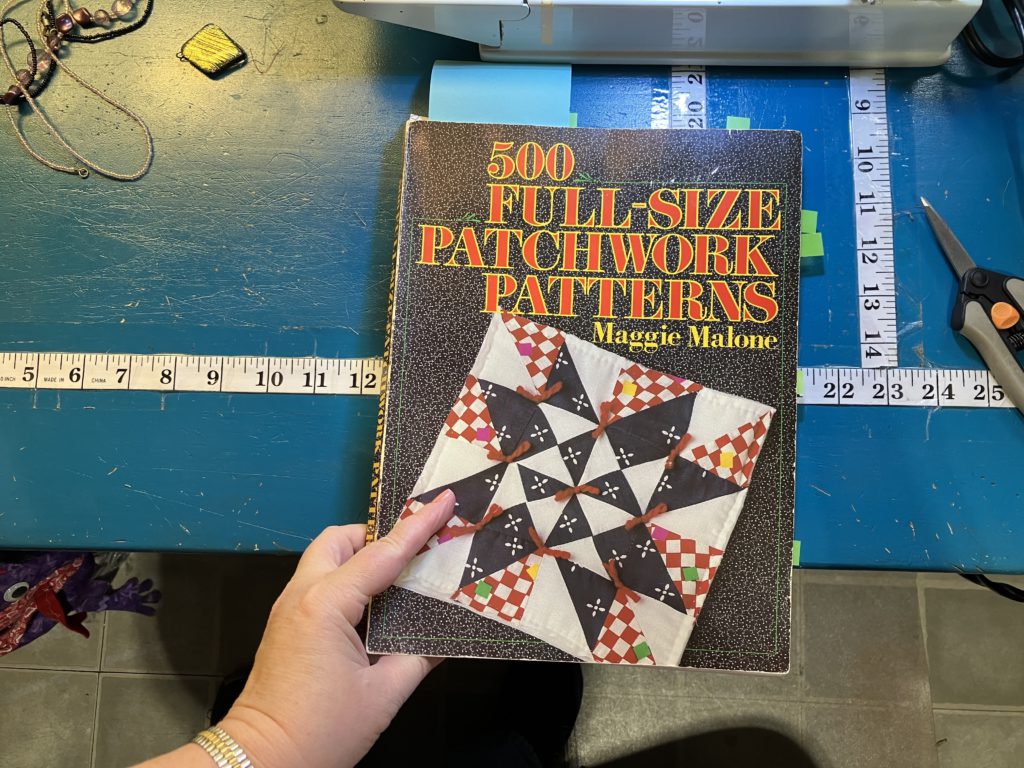
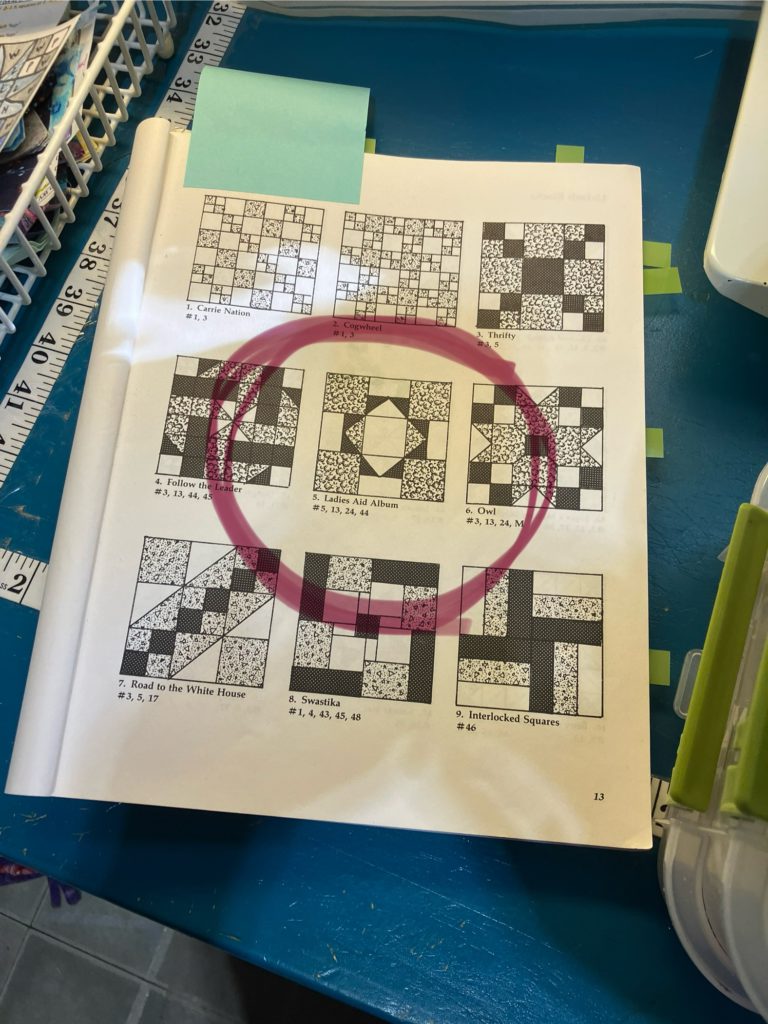
I got the idea for this block from this book. I think I changed the color placement by the time I was finished…and that probably changed the block and its name! Fundamentally, it is the same block in the end.

A cutting chart for the block and other sizes is at the end of this post.

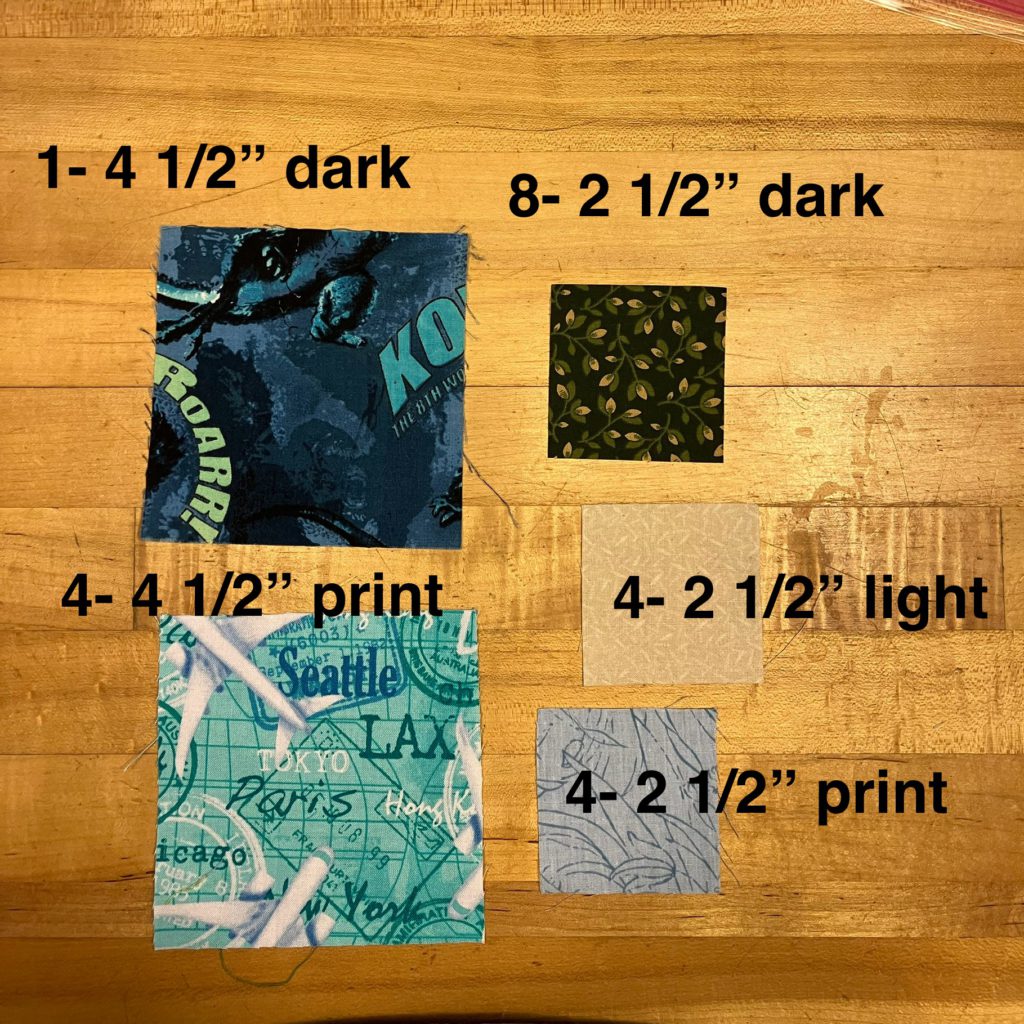
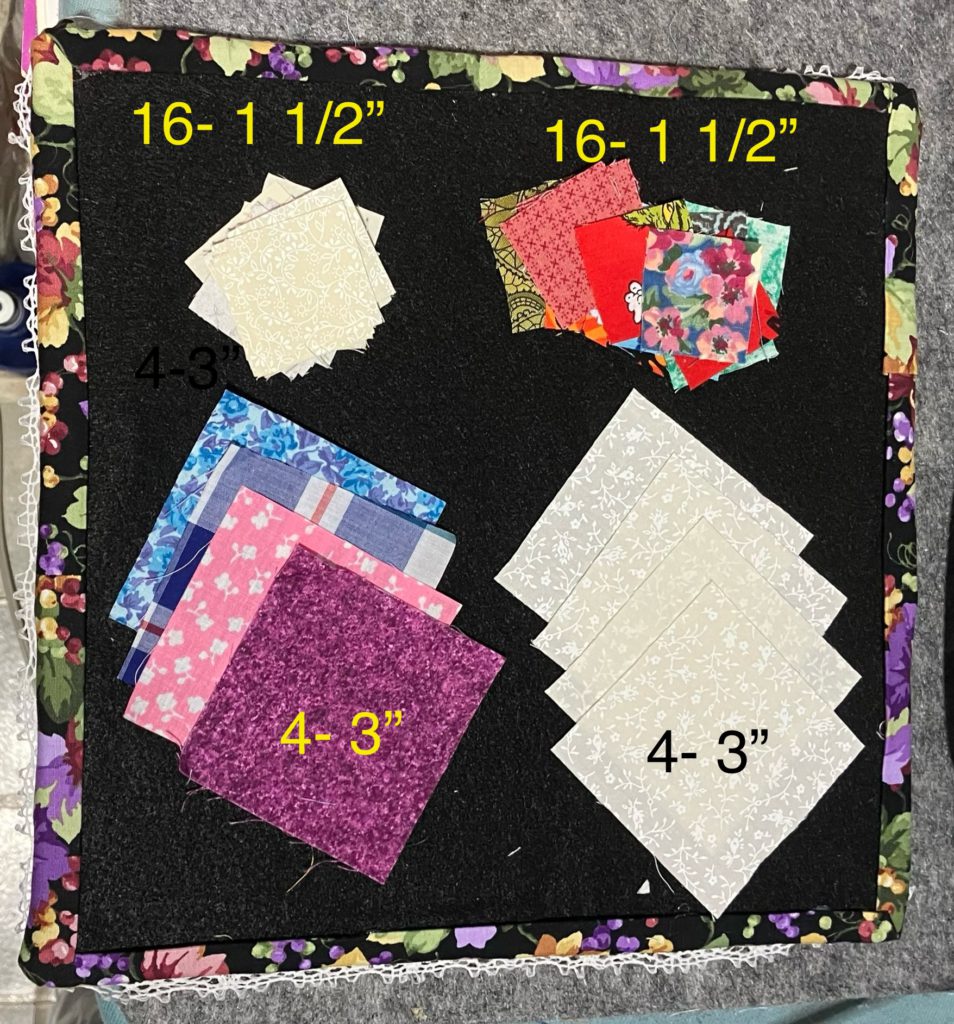
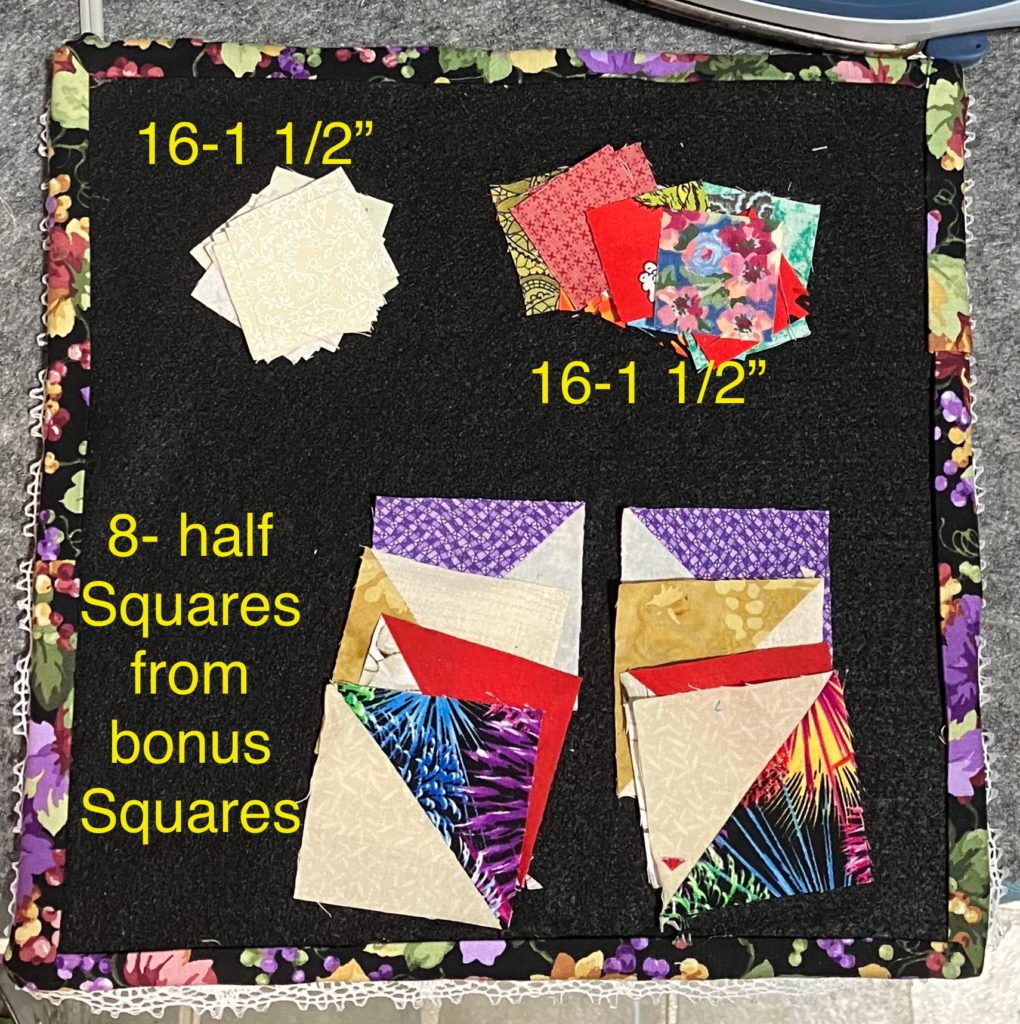
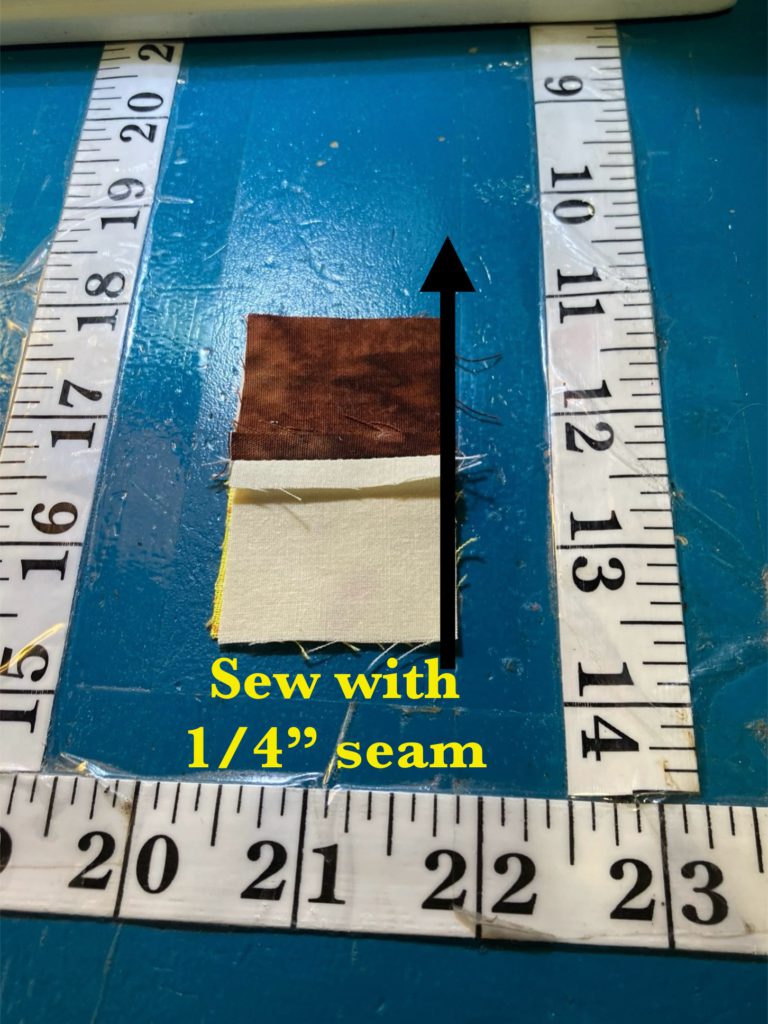
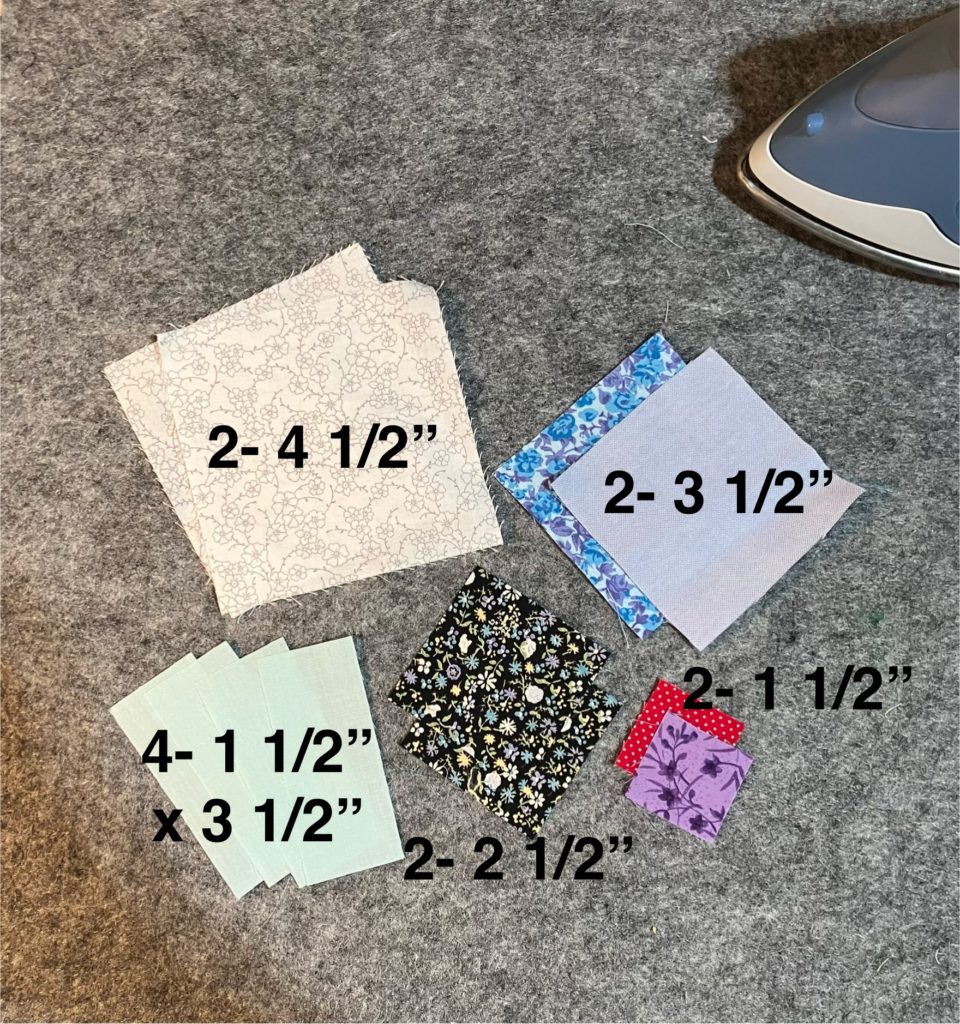
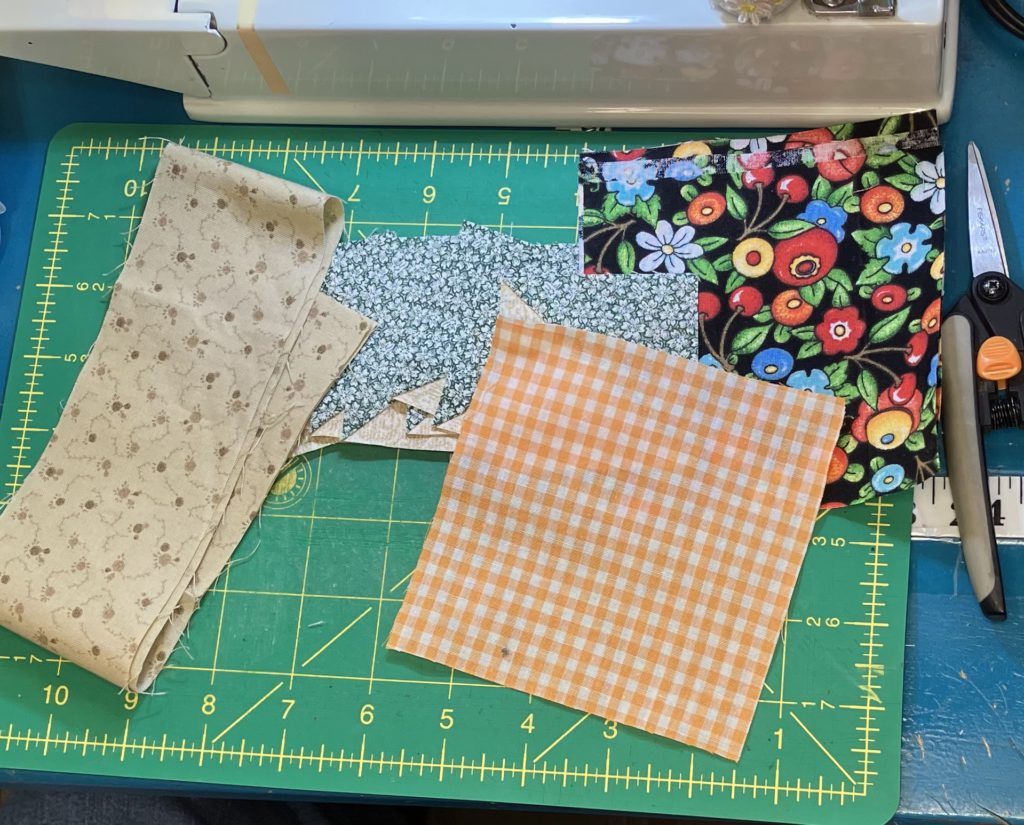
To make a 6 1/2 inch block, you will need the following pieces:

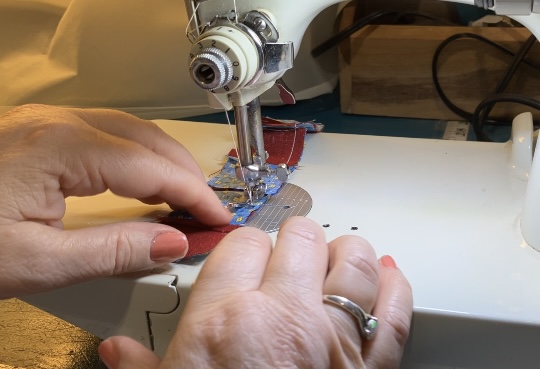
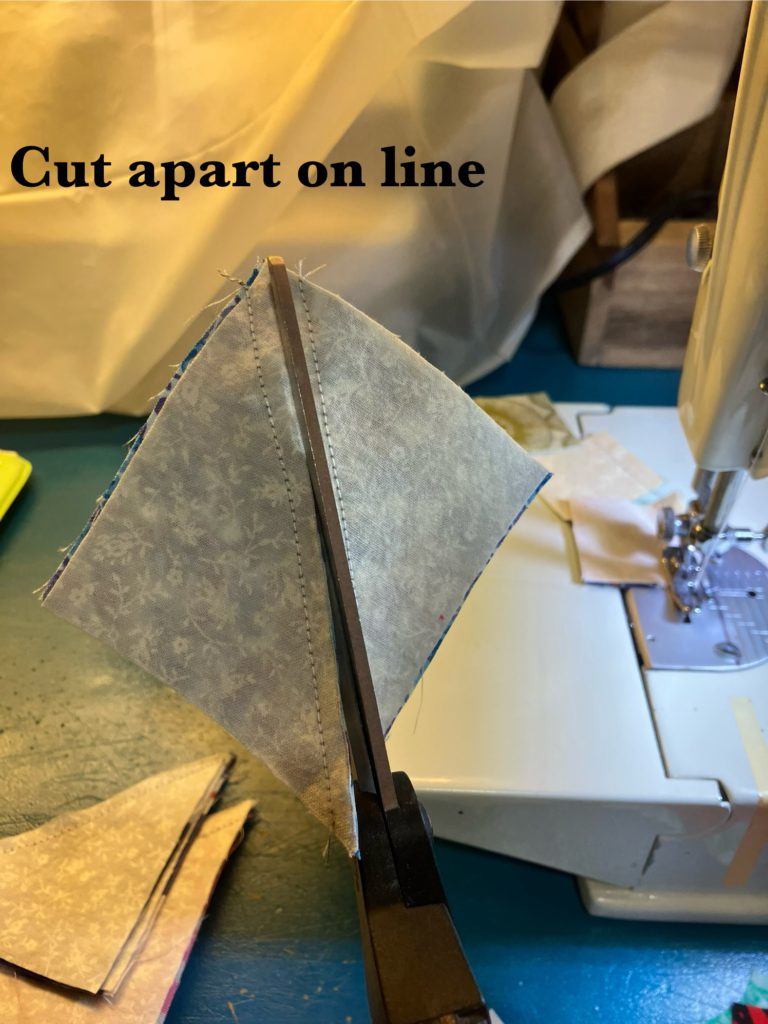
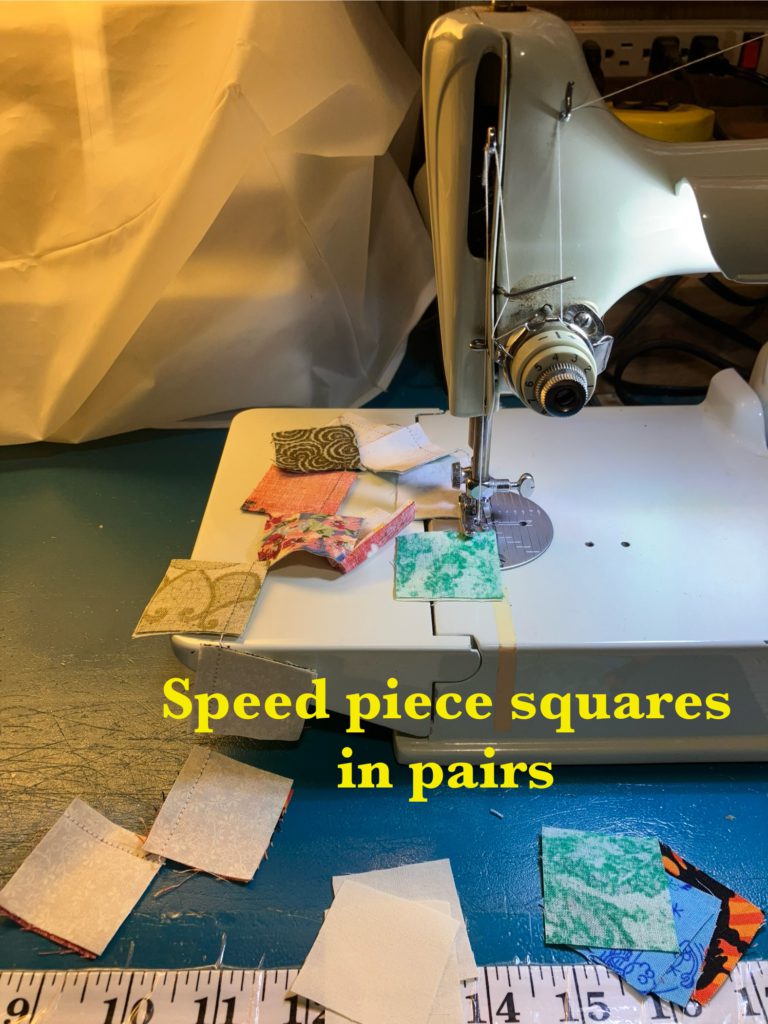
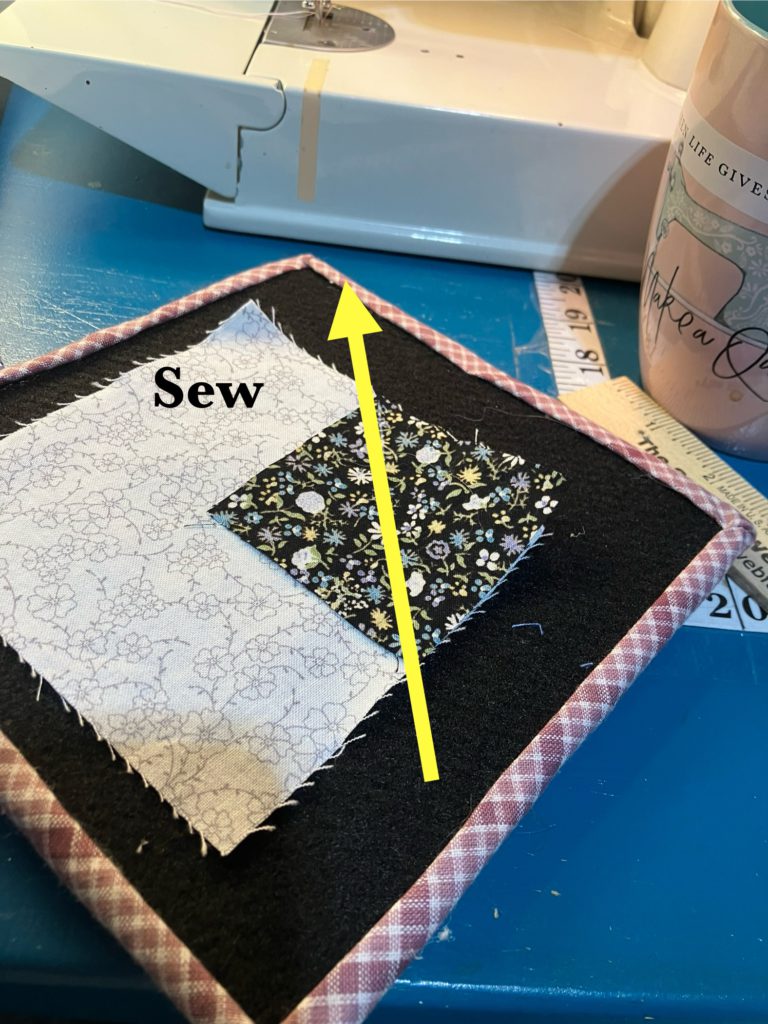
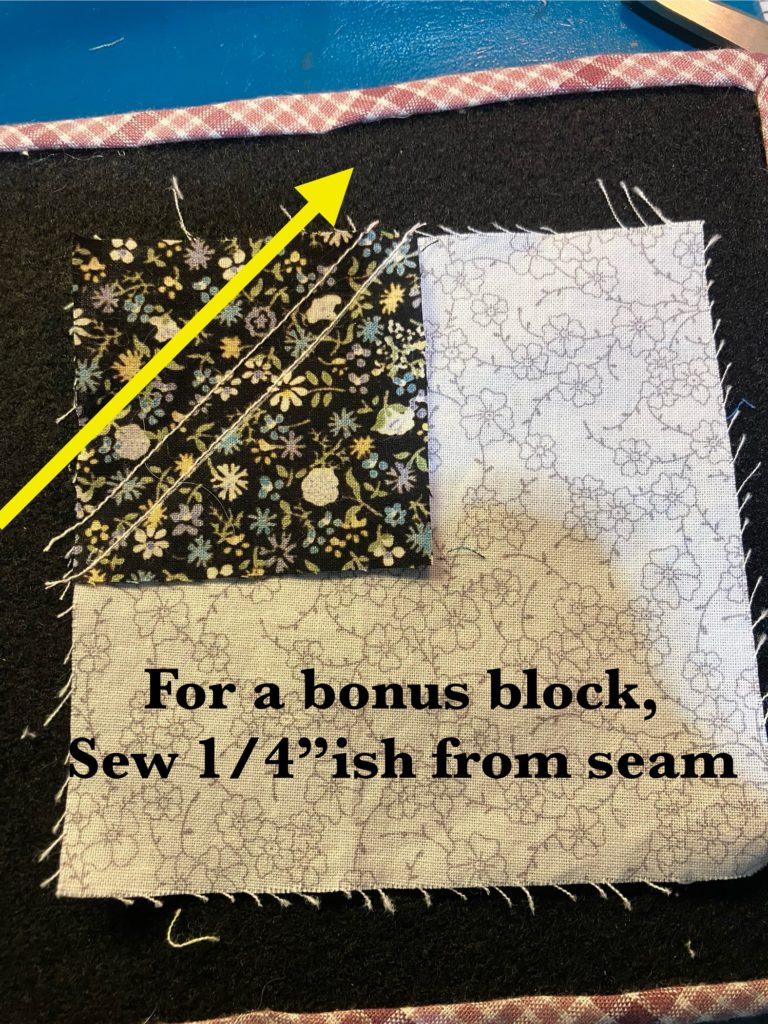
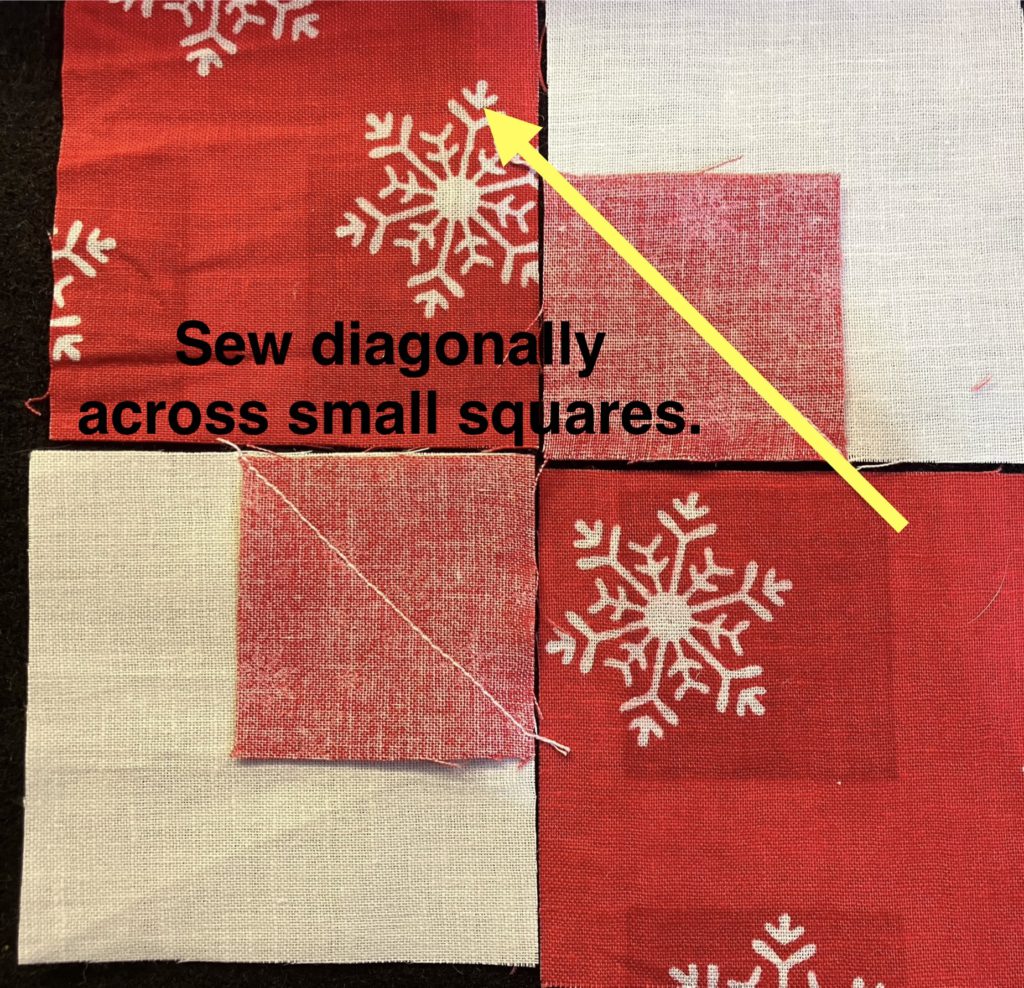
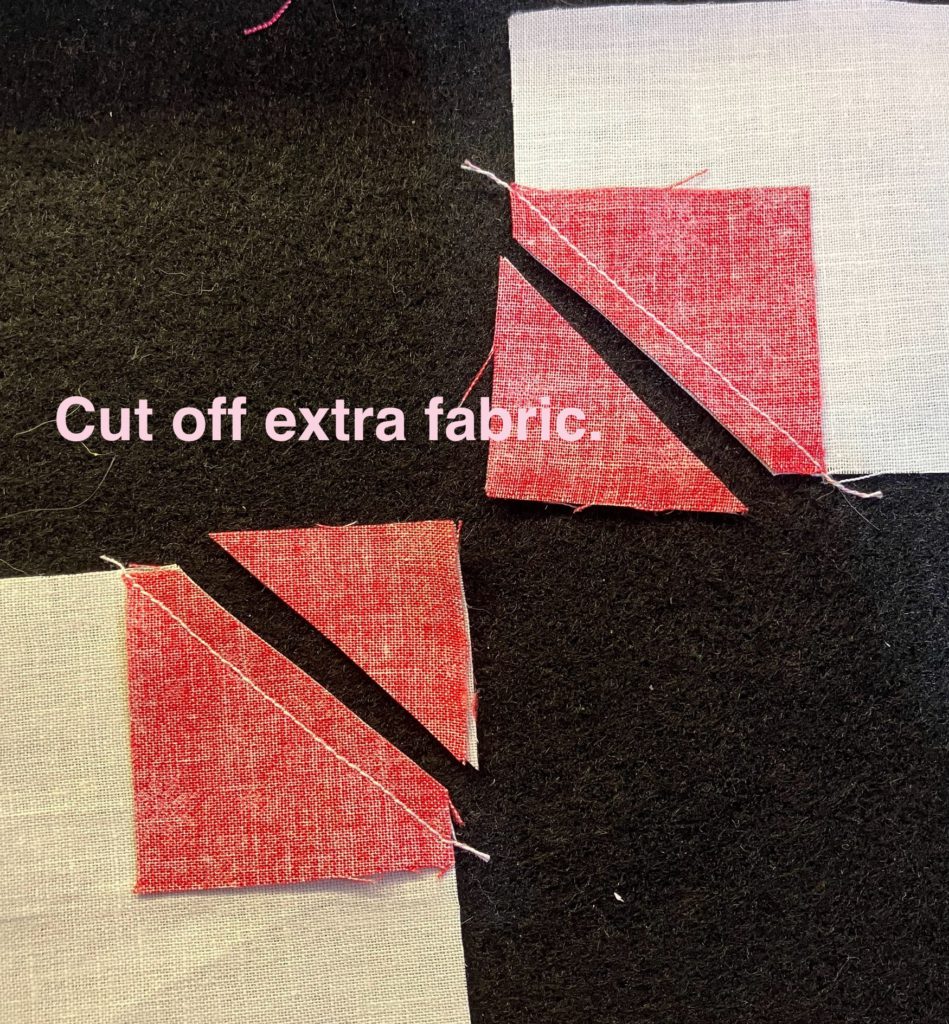
Note that the eight 1 1/2 inch half square triangles are bonus blocks from other projects. I have an abundance of these on hand…time to use them up. You could easily use the 2 at a time triangle method or whatever method you prefer. You could even use the four at a time flying geese method.

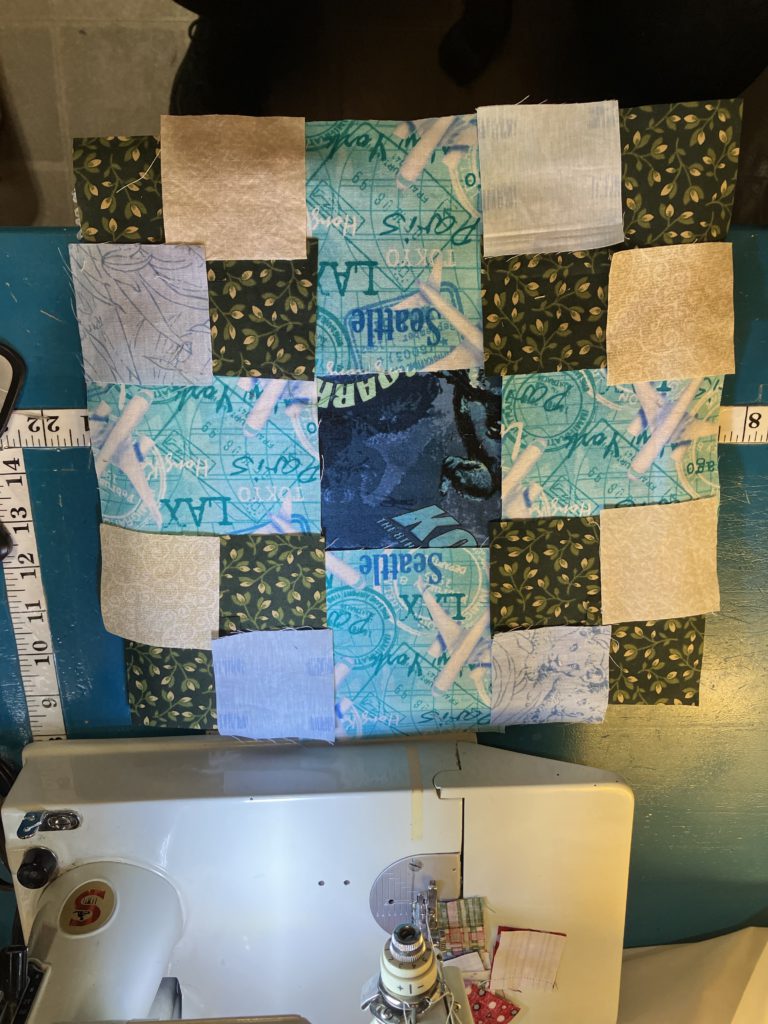
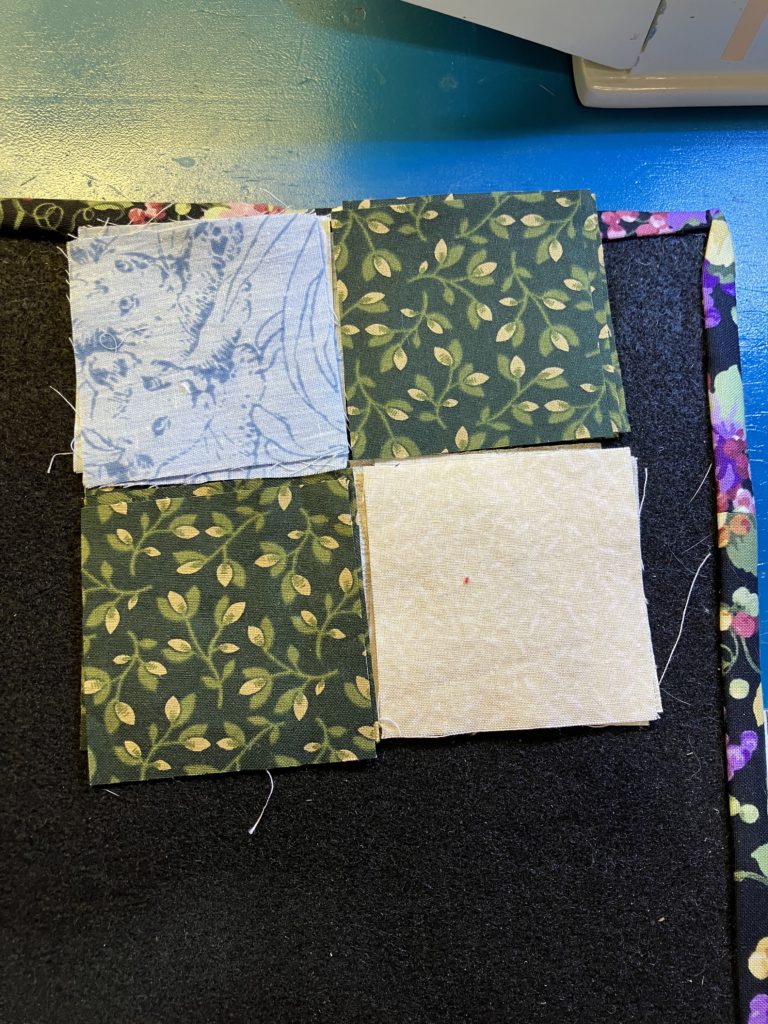
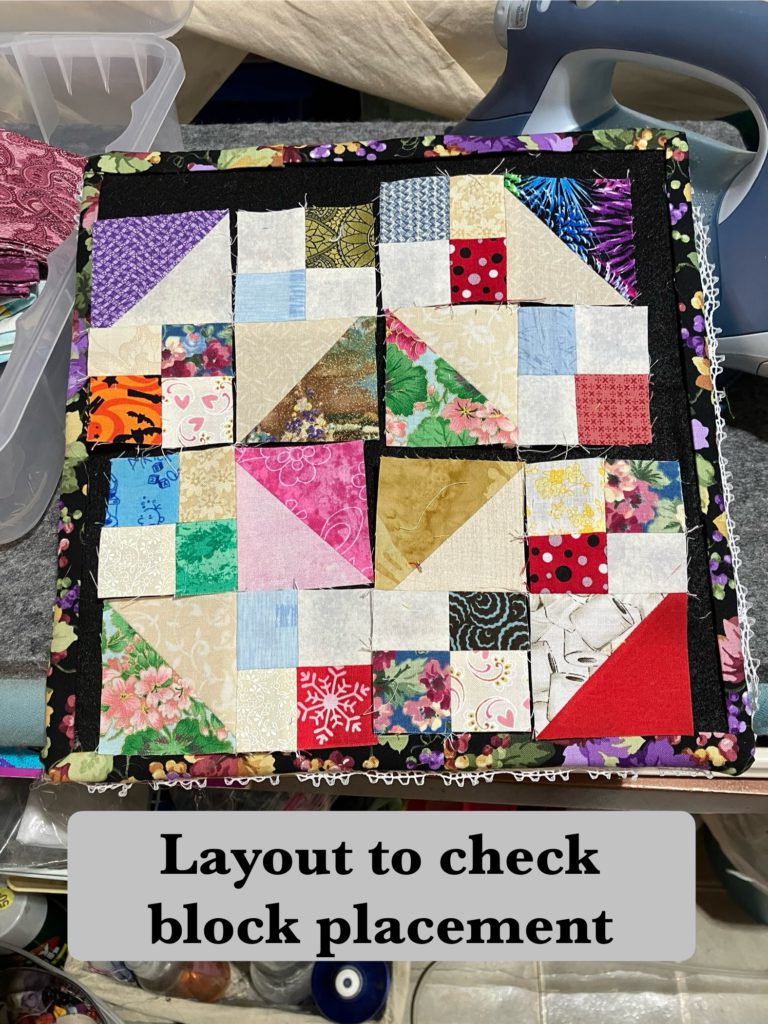
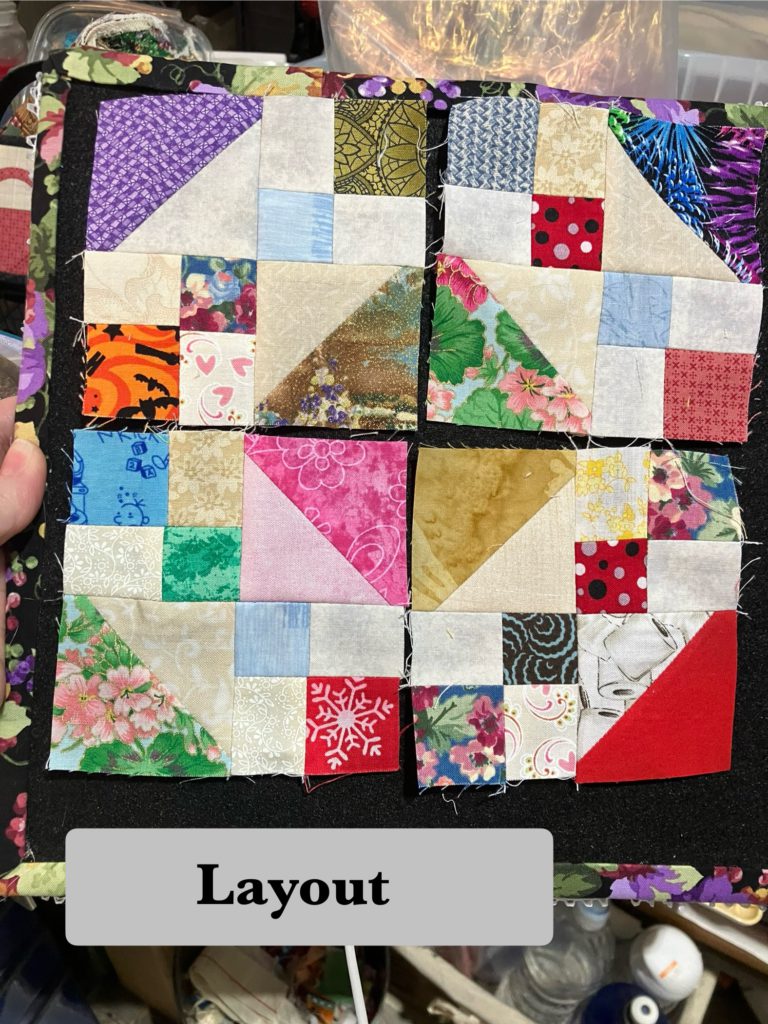
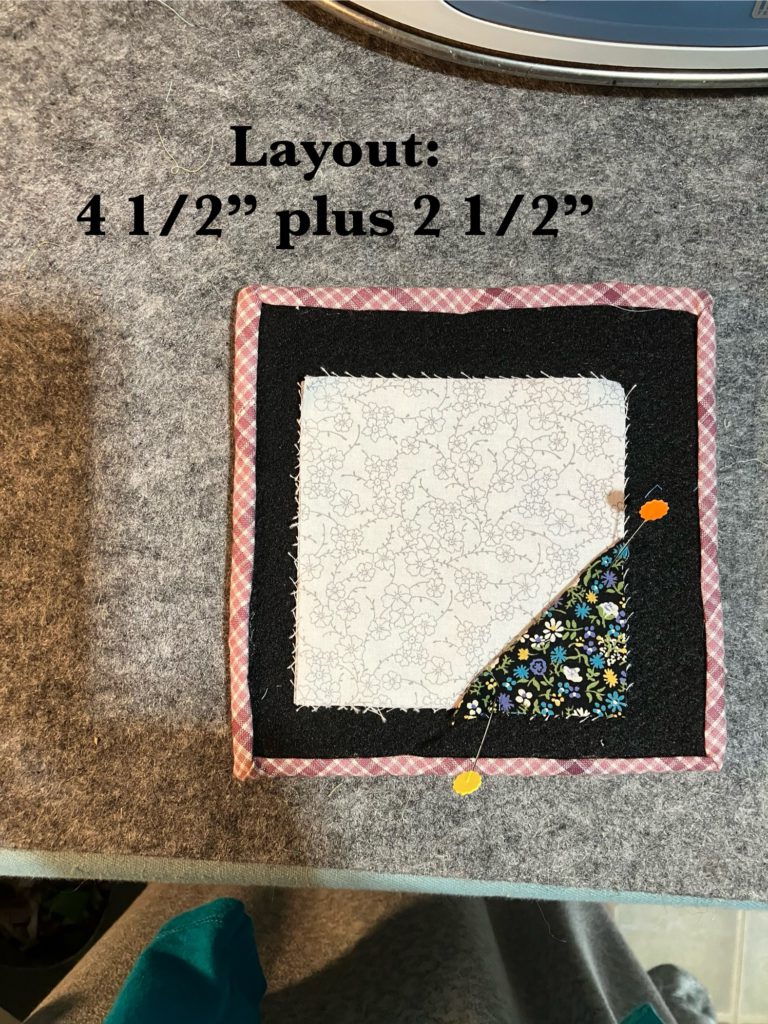
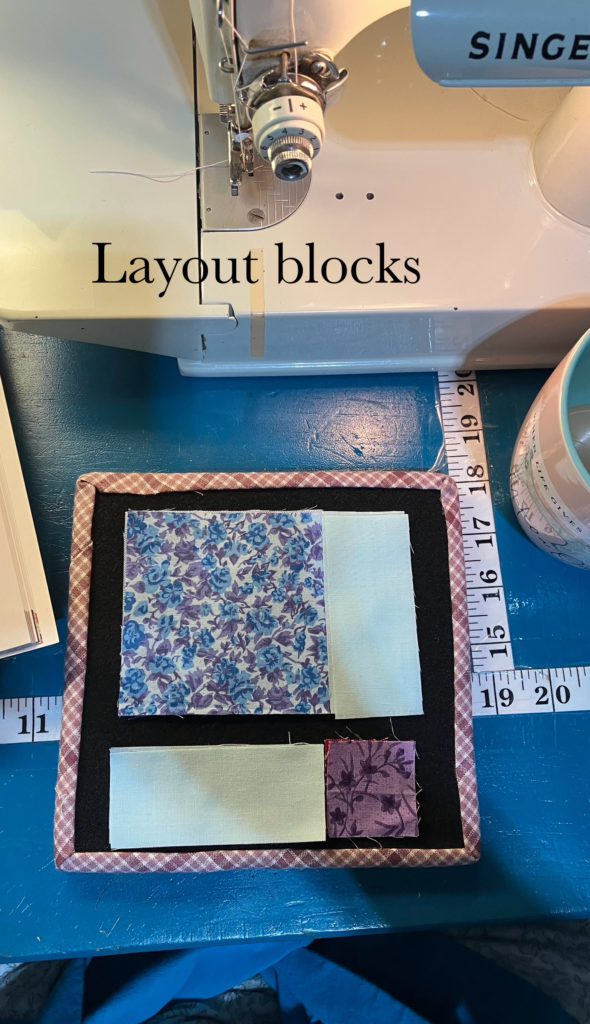
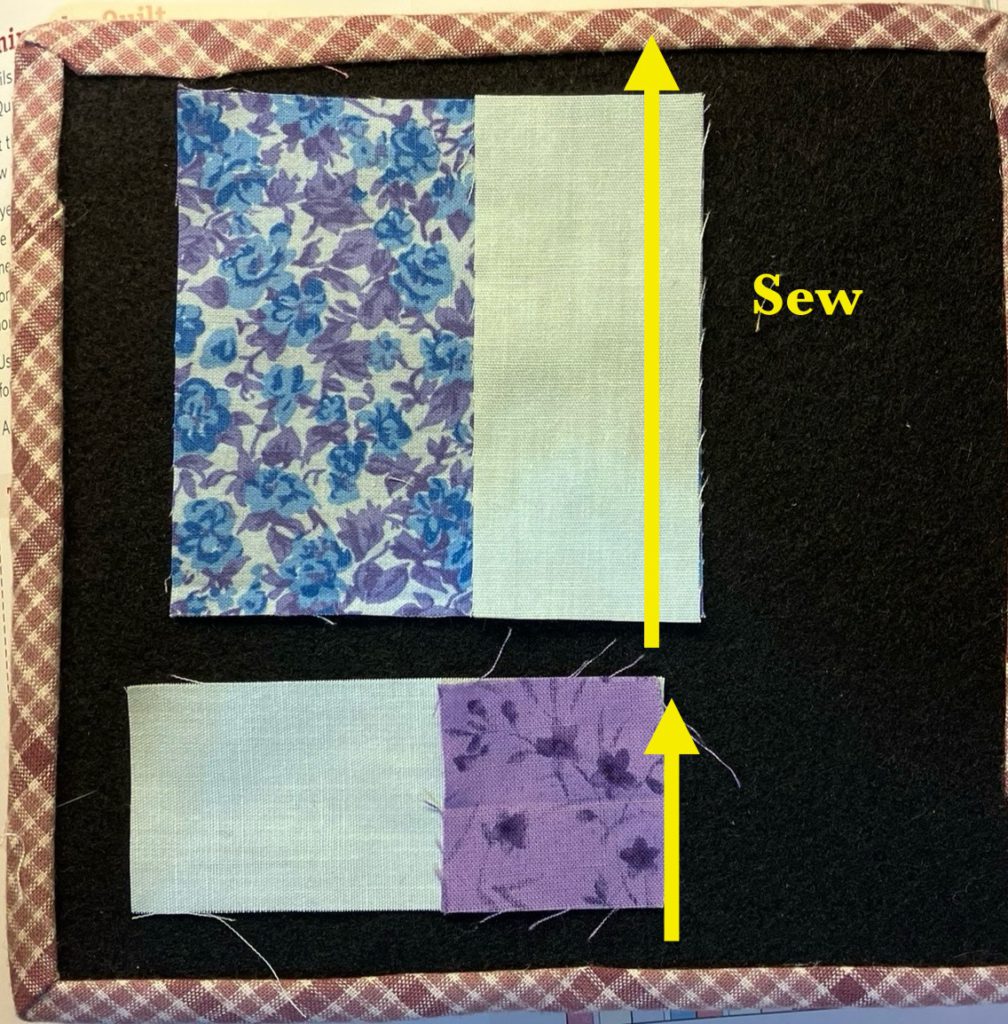
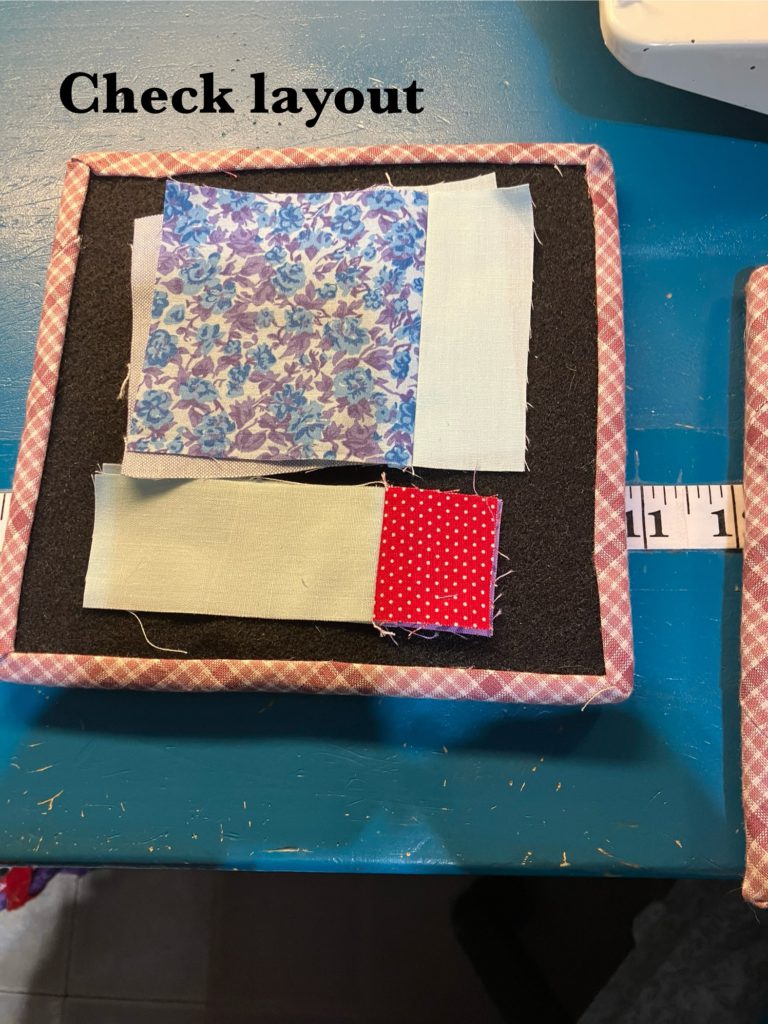
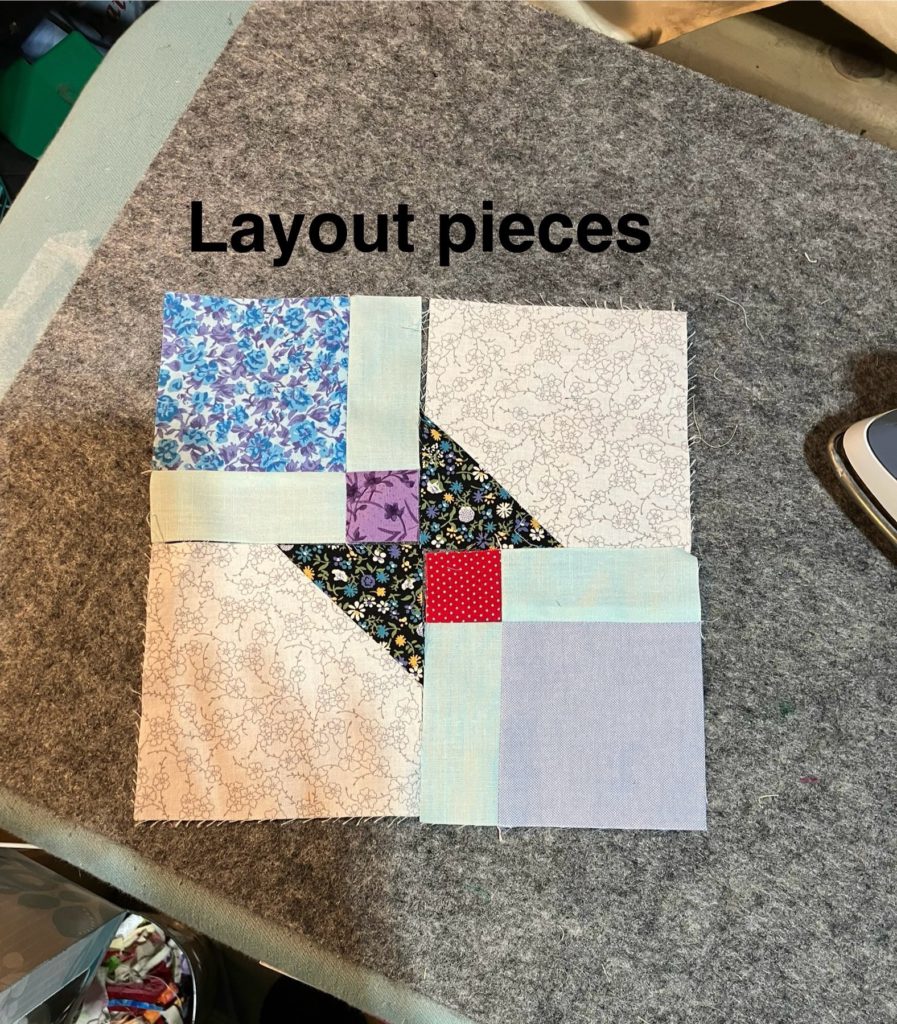
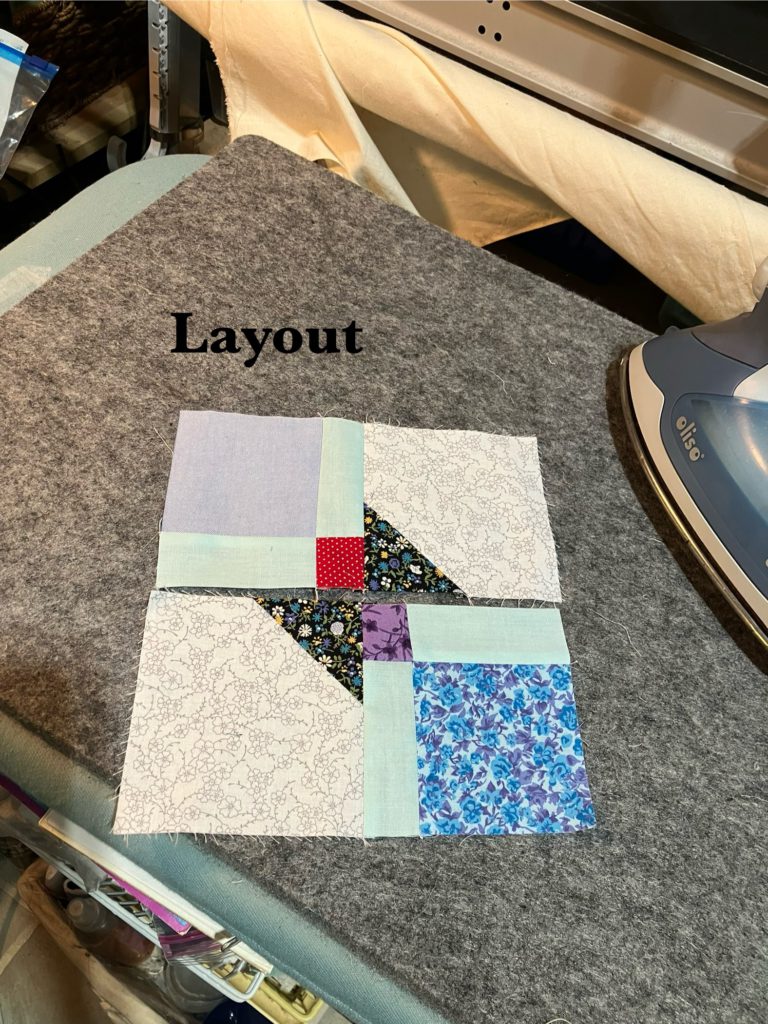
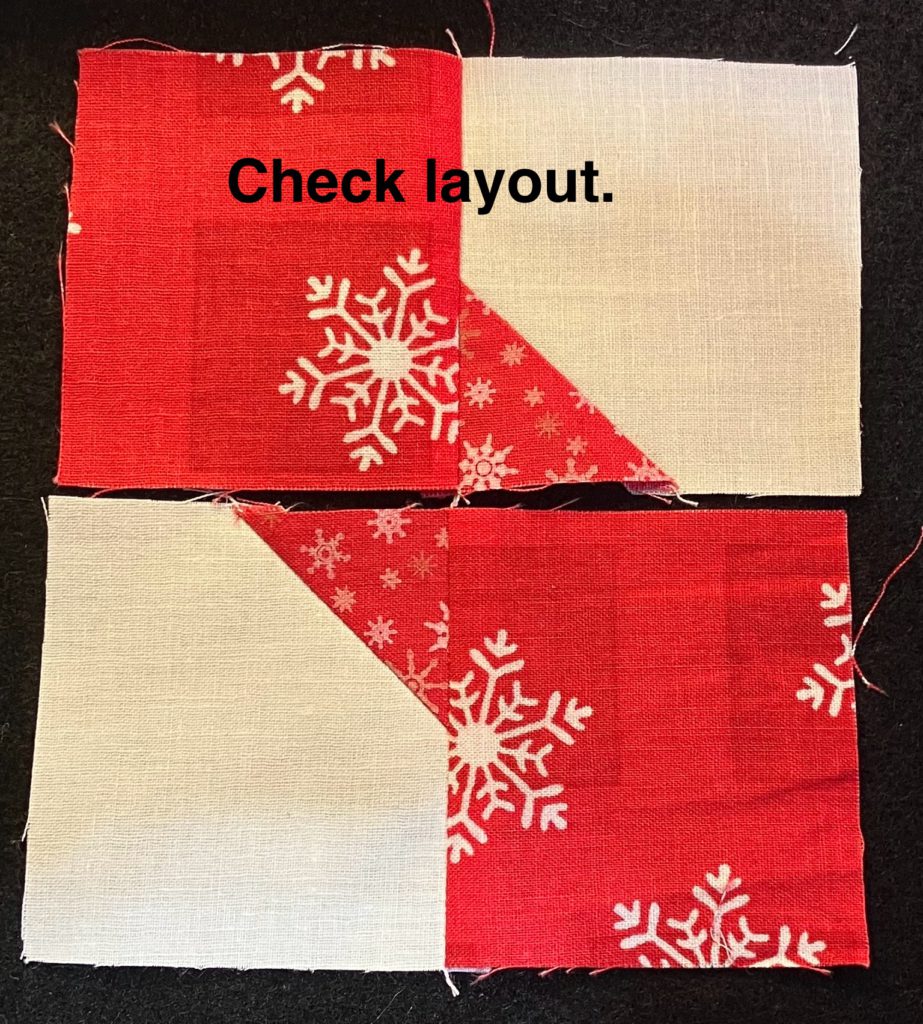
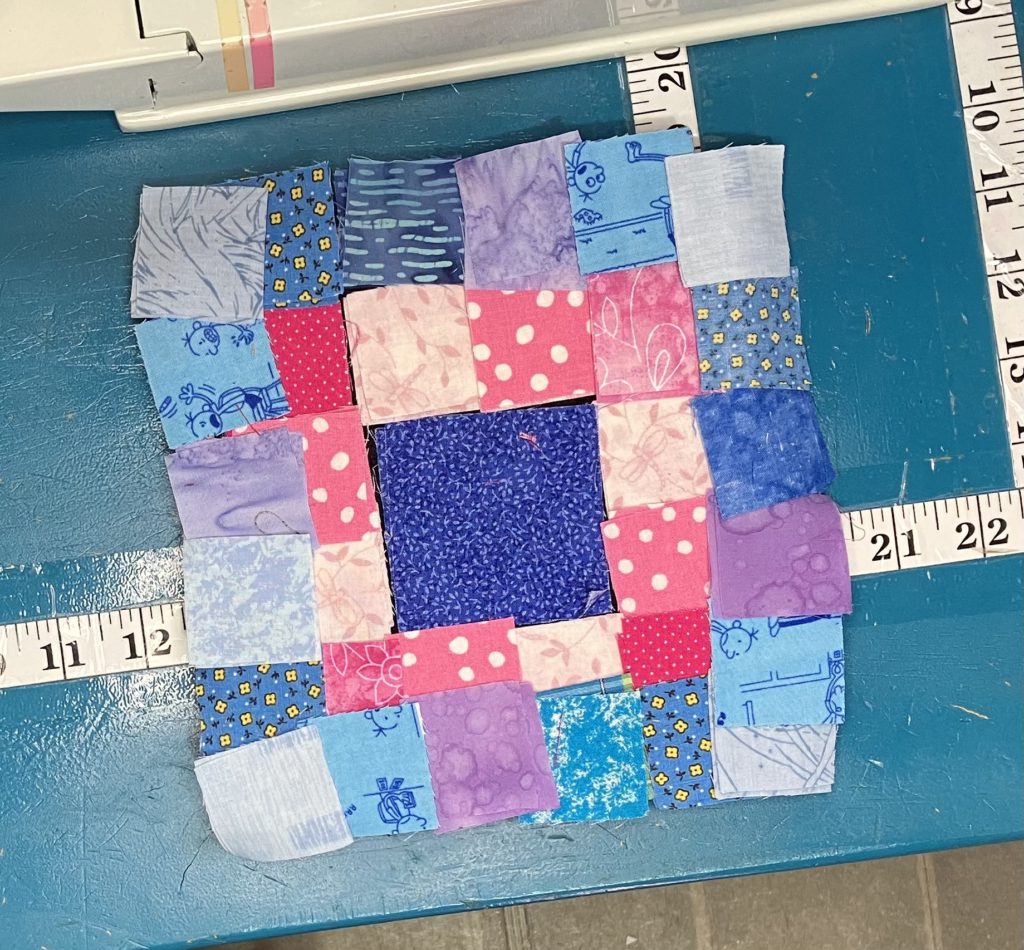
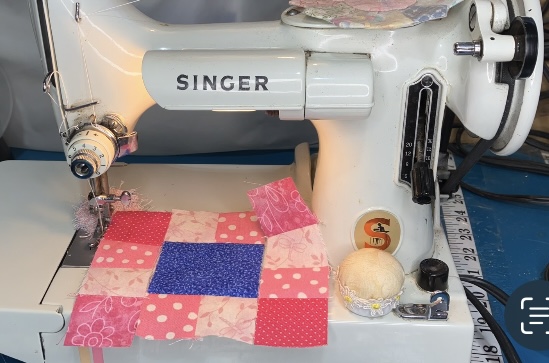
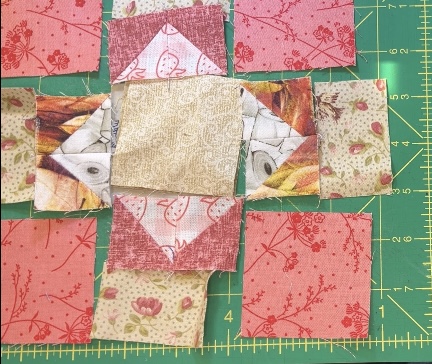
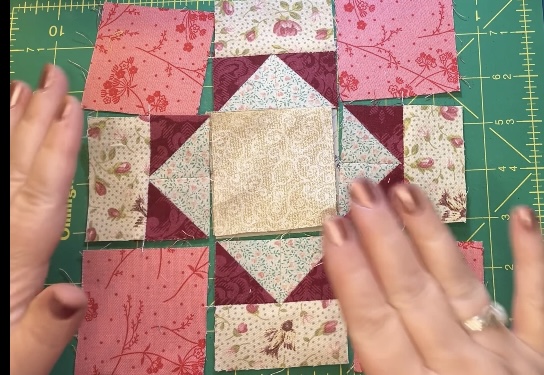
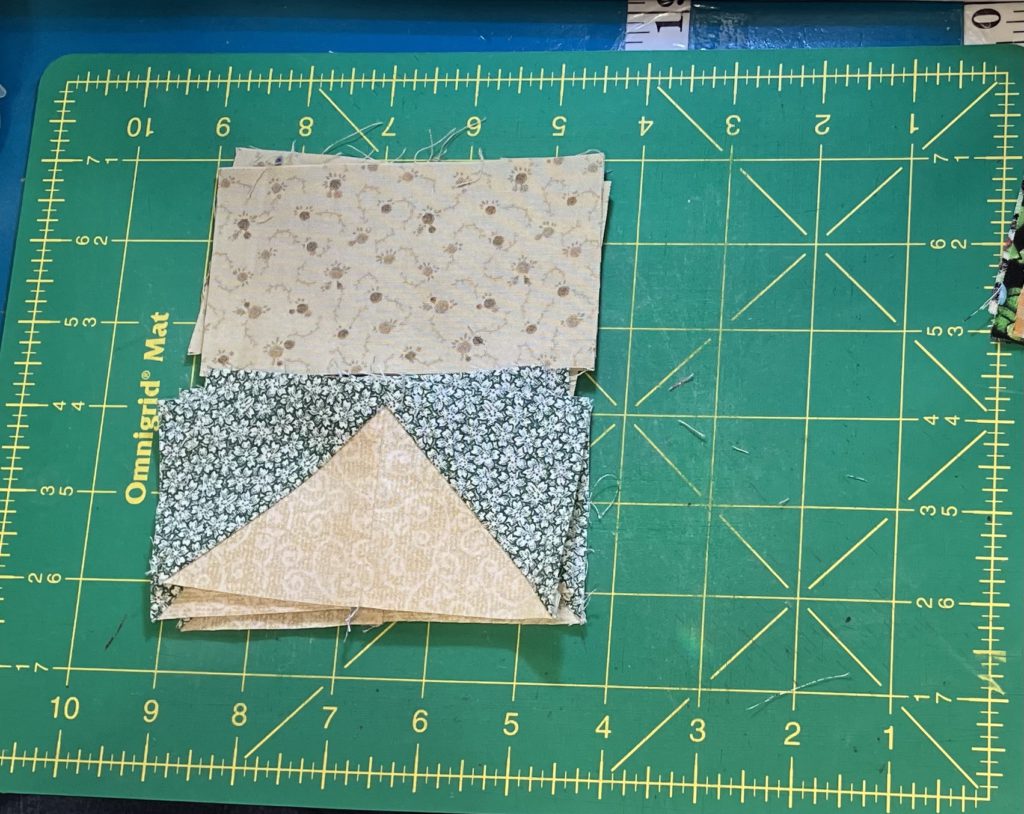
Here is my initial layout of the block:

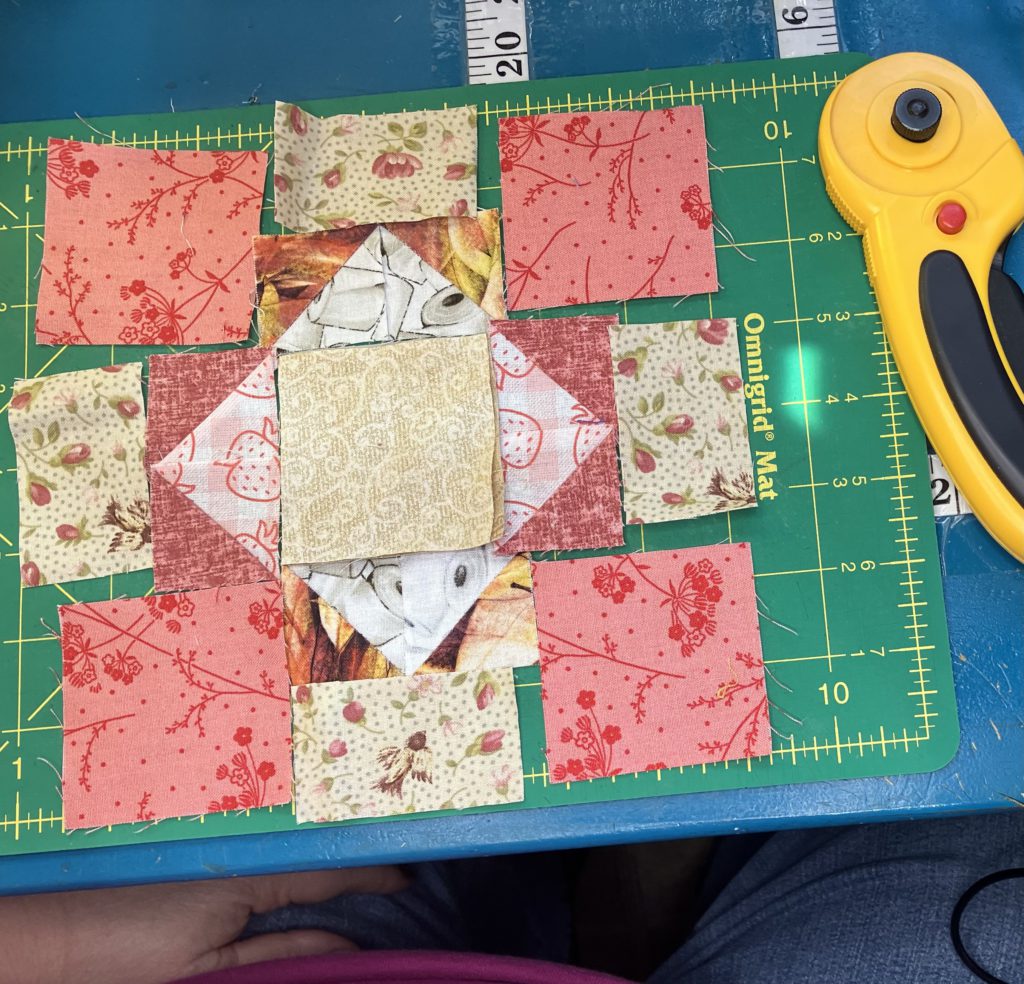
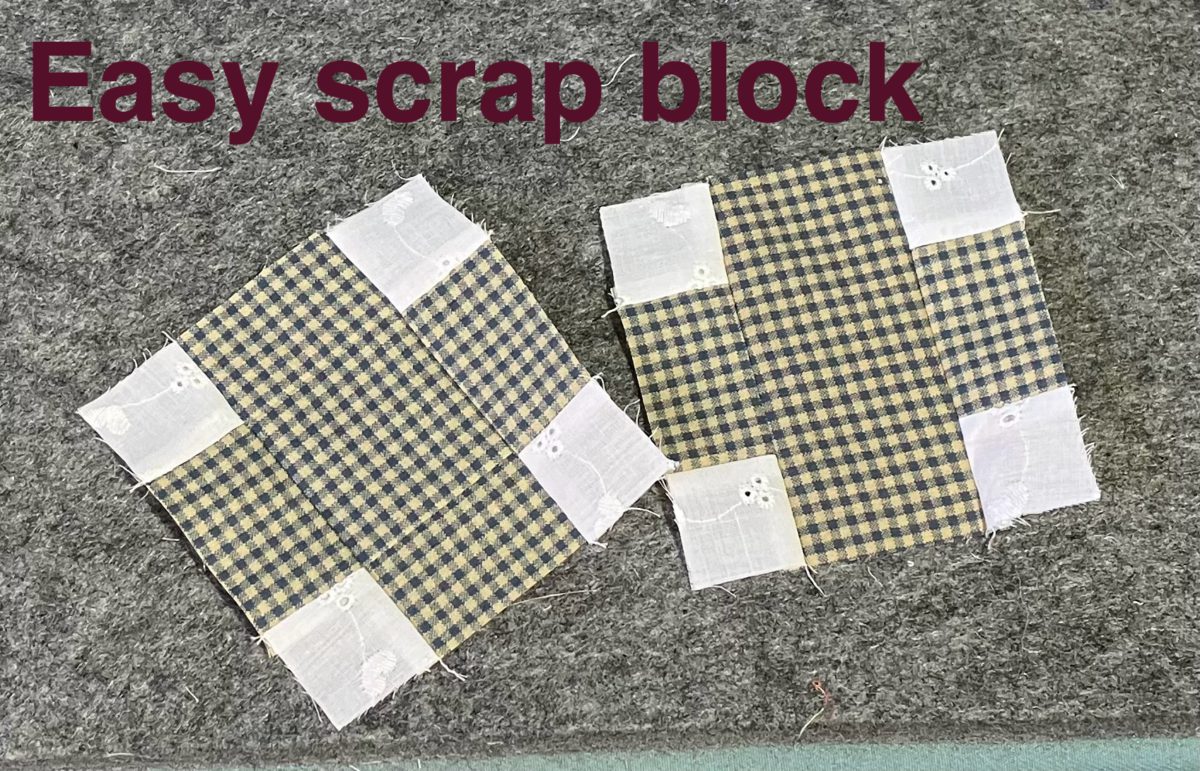
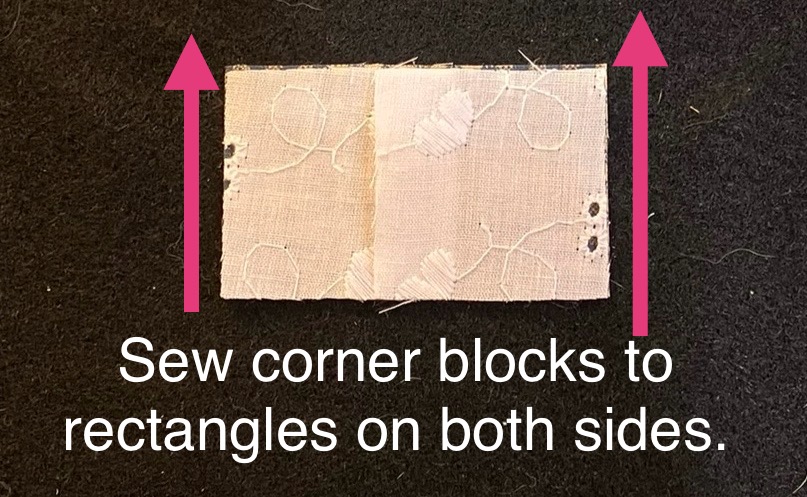
I chose four 2 1/2″ squares for the corners from the scrap bin.

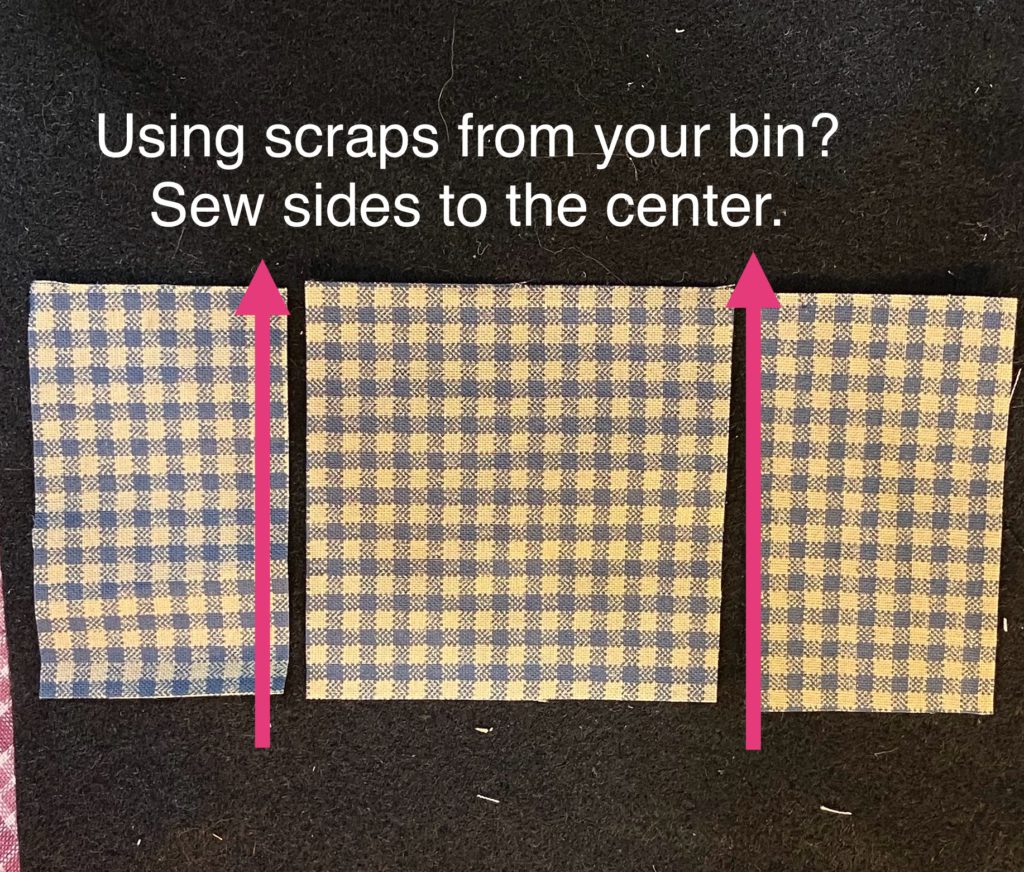
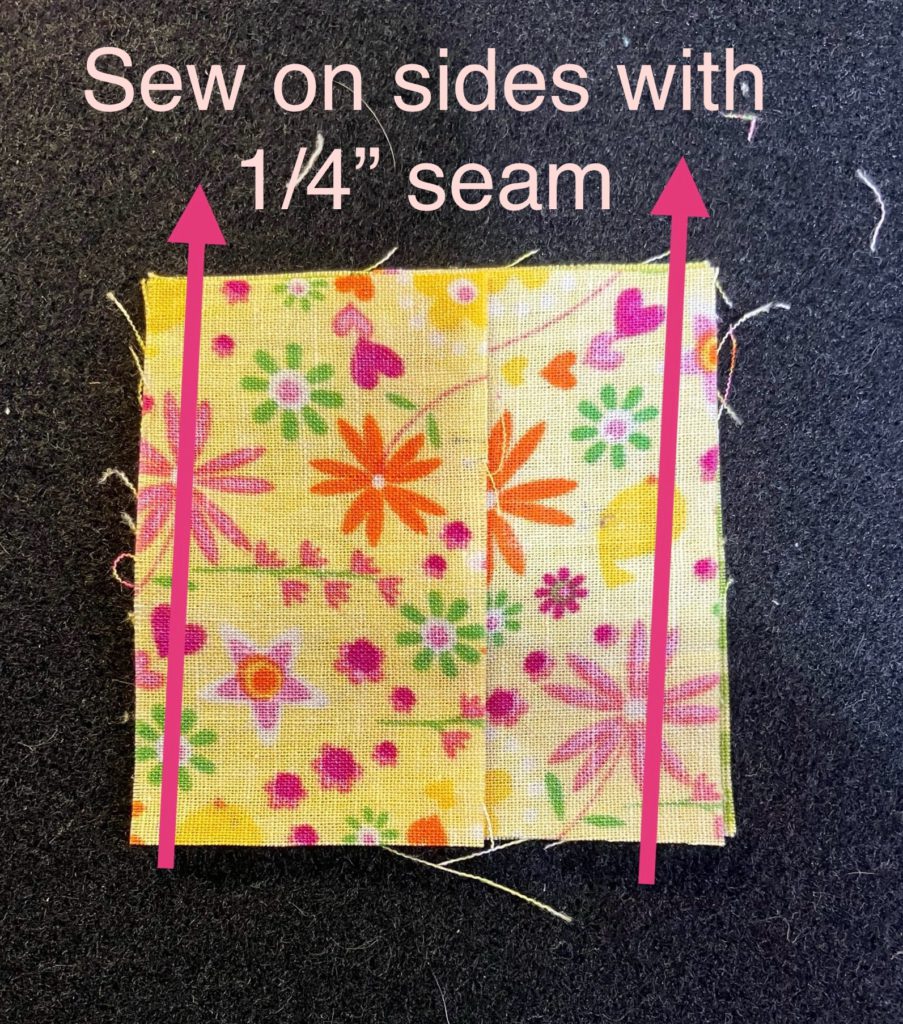
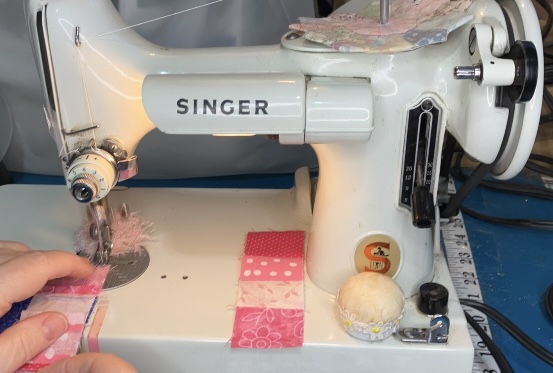
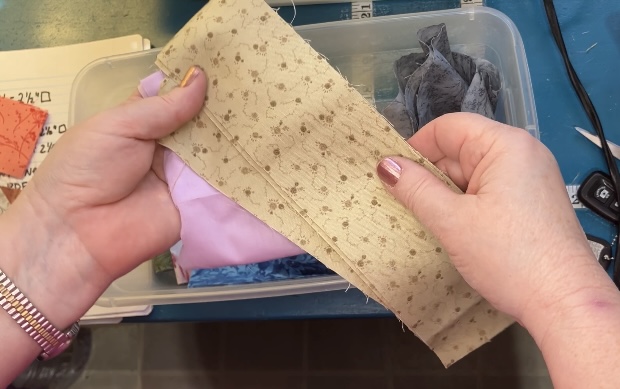
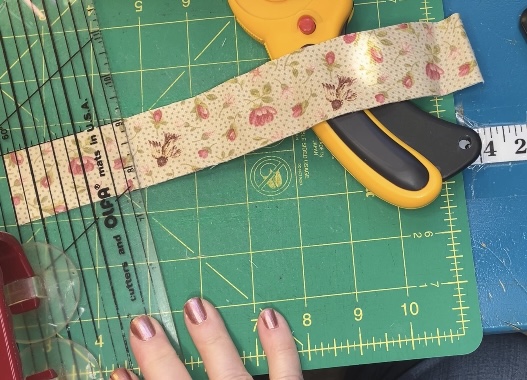
I found this great 2 1/2″ strip in that box for the rectangles.

I couldn’t decide which block to use for the center…what to do?

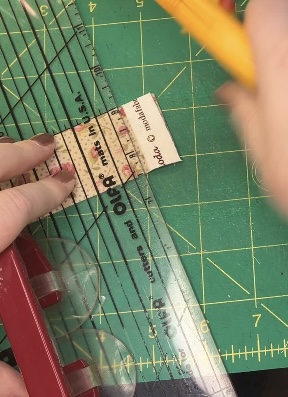
When I went to the cutting table to cut that nice tan background fabric, I found this strip right on top of my pile of scraps! Fantastic! Why didn’t I think about using a 1 1/2″ strip to cut?

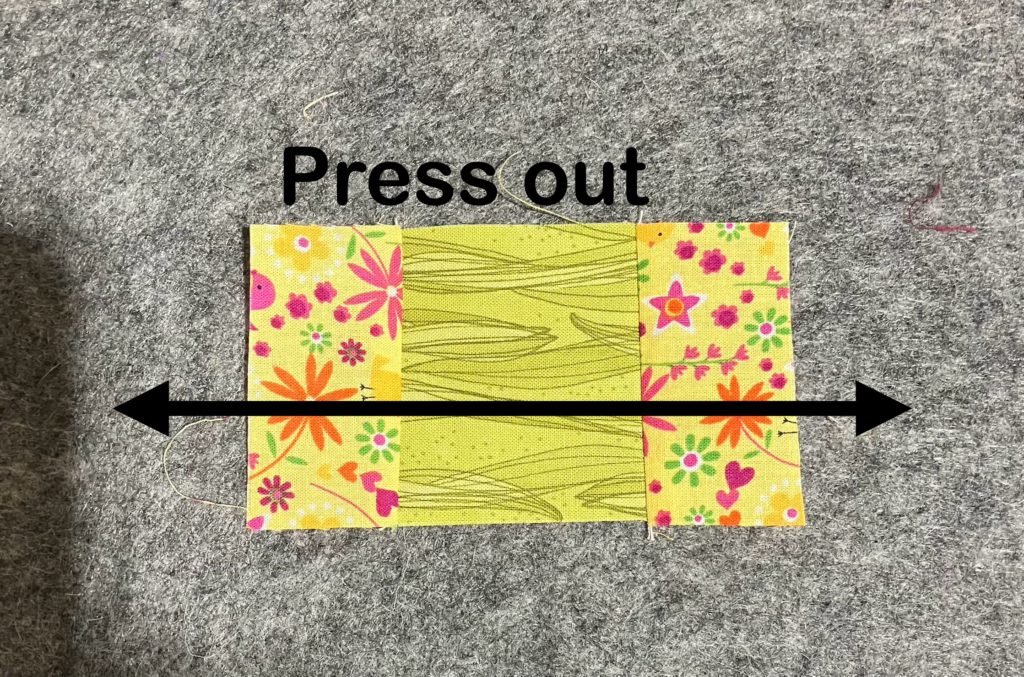
I cut the strip into four 2 1/2″ pieces for the background…better.

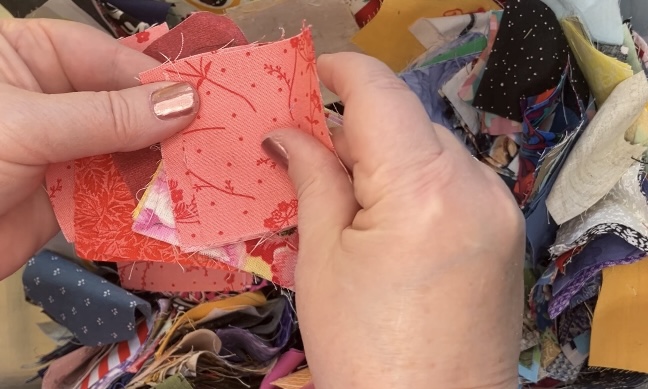
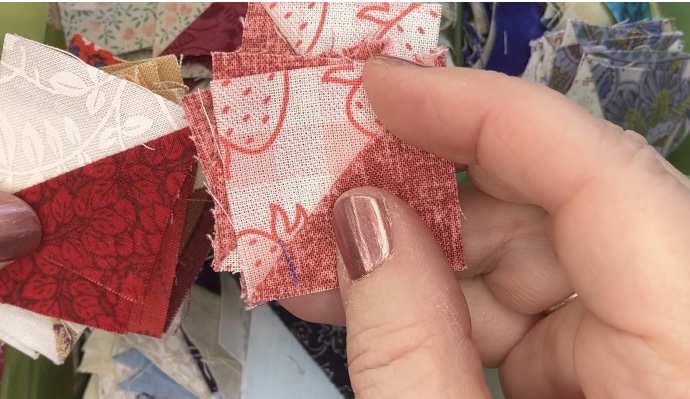
I was looking for four of one kind of half square triangle bonus block and four of another kind. I was looking for something with pink or red as dark colors in both. I was trying to follow the picture pattern. The strawberries are cute.

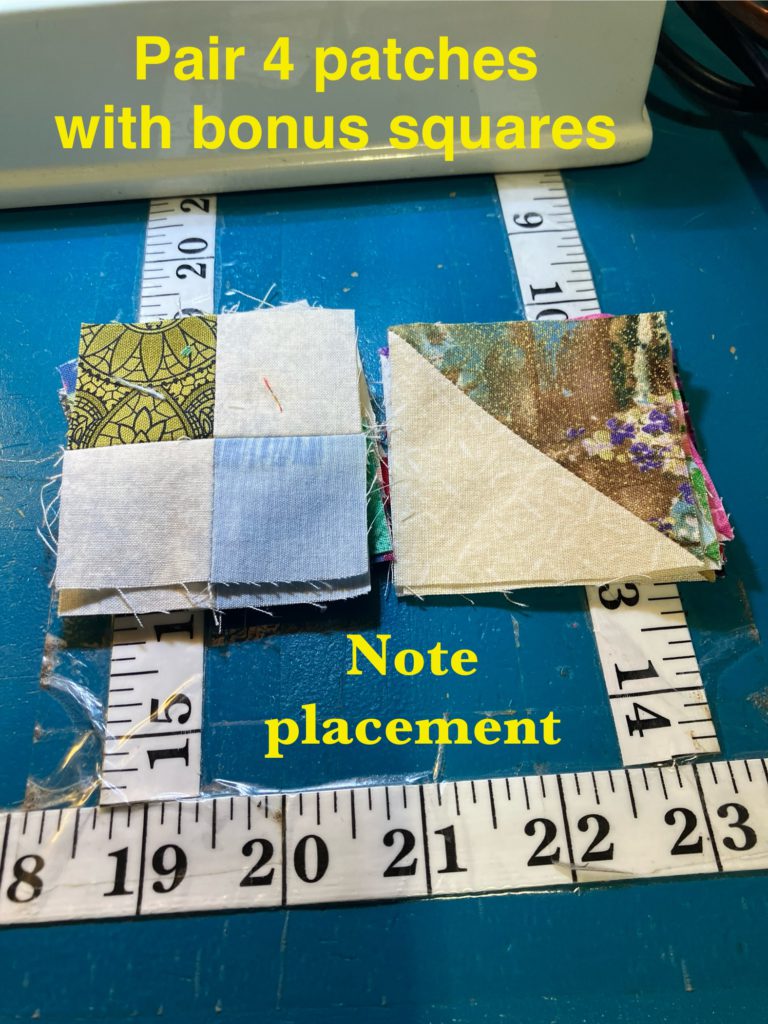
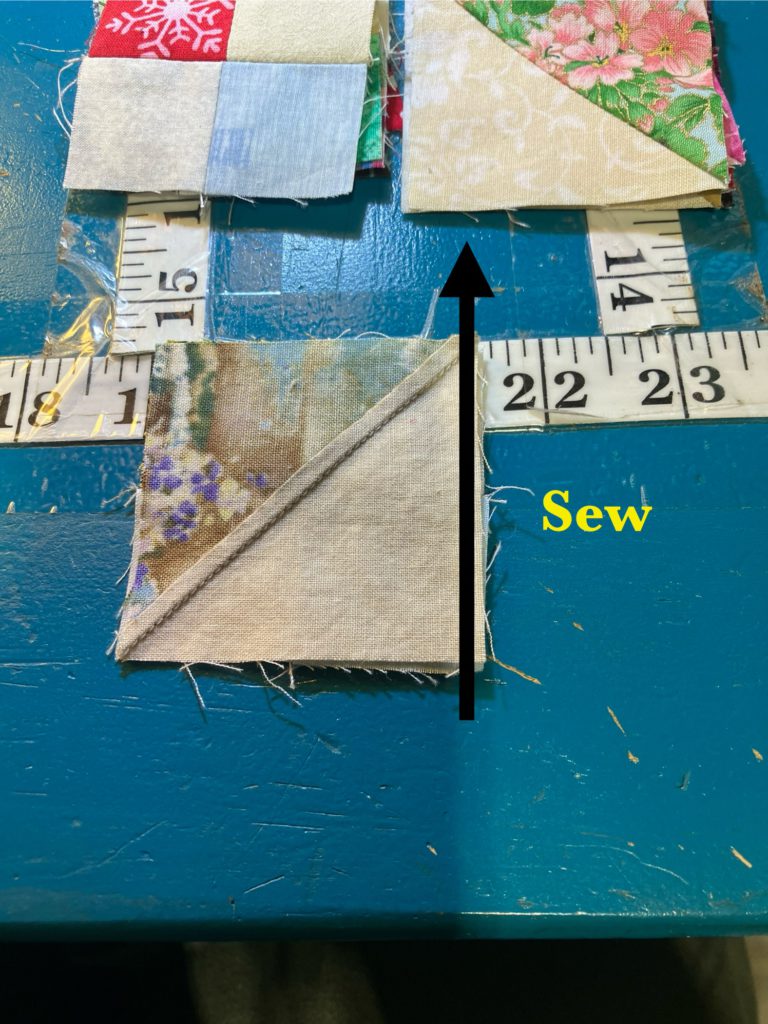
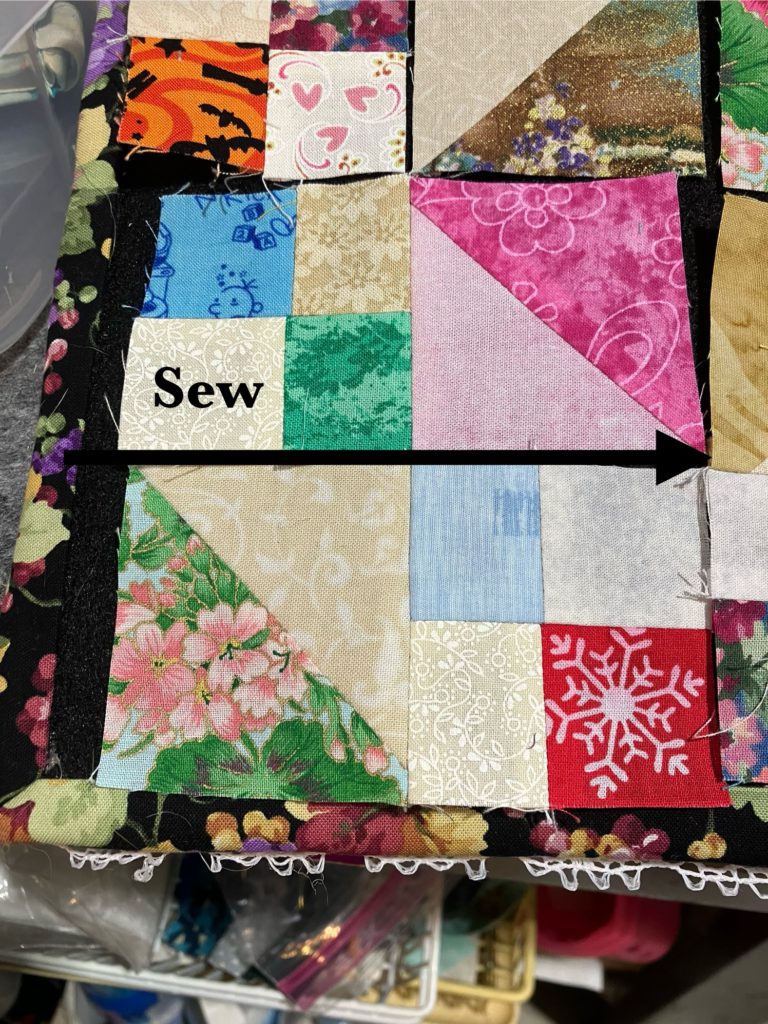
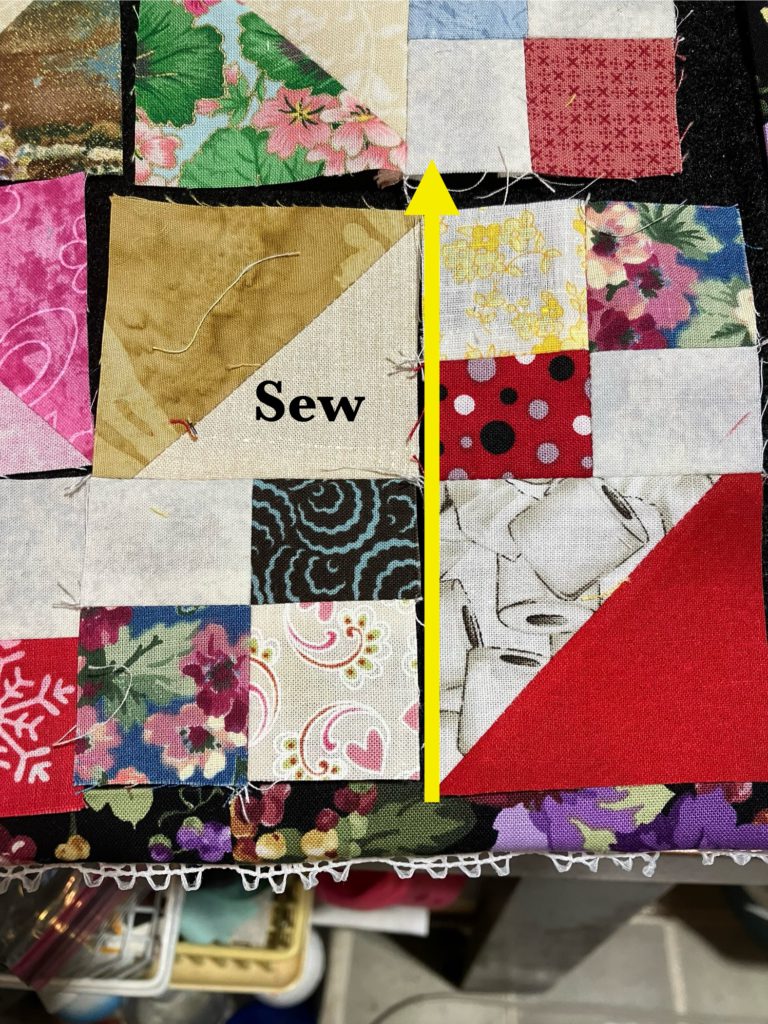
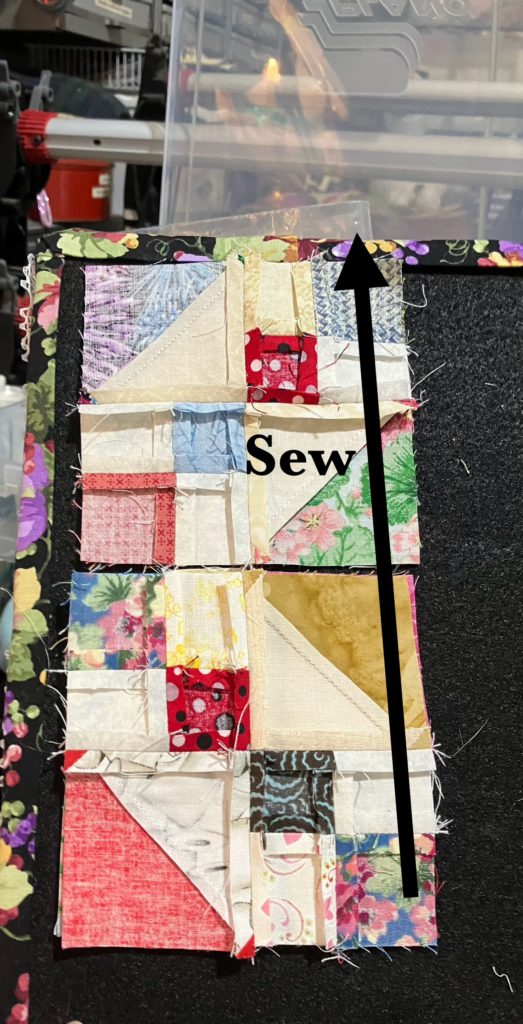
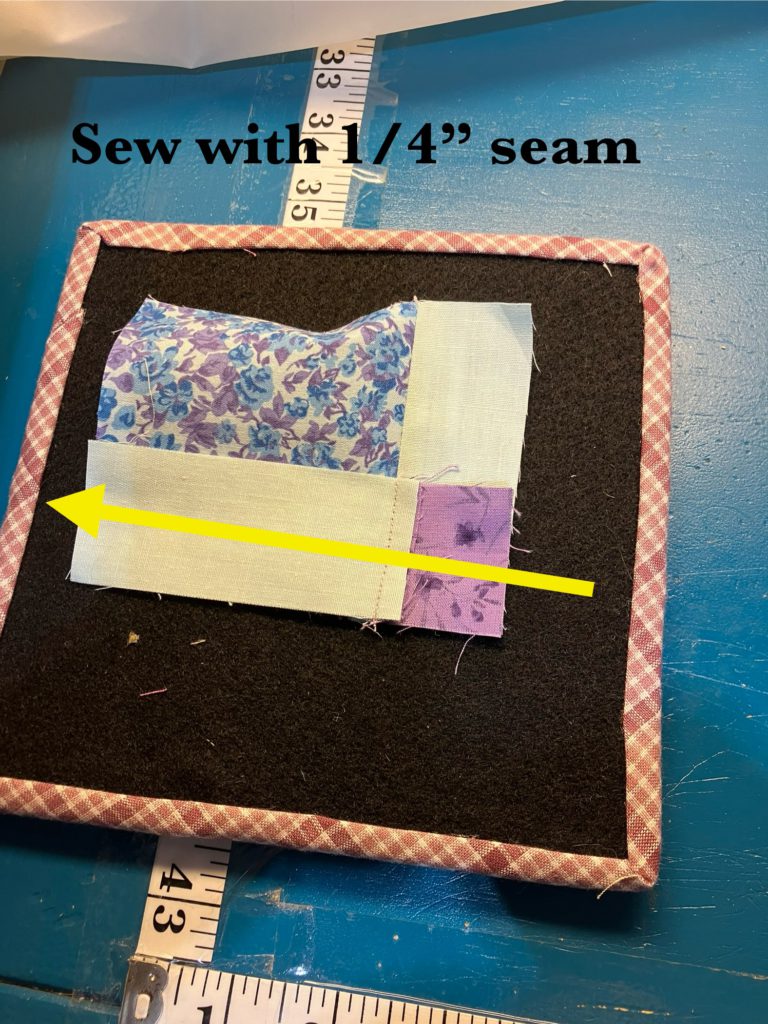
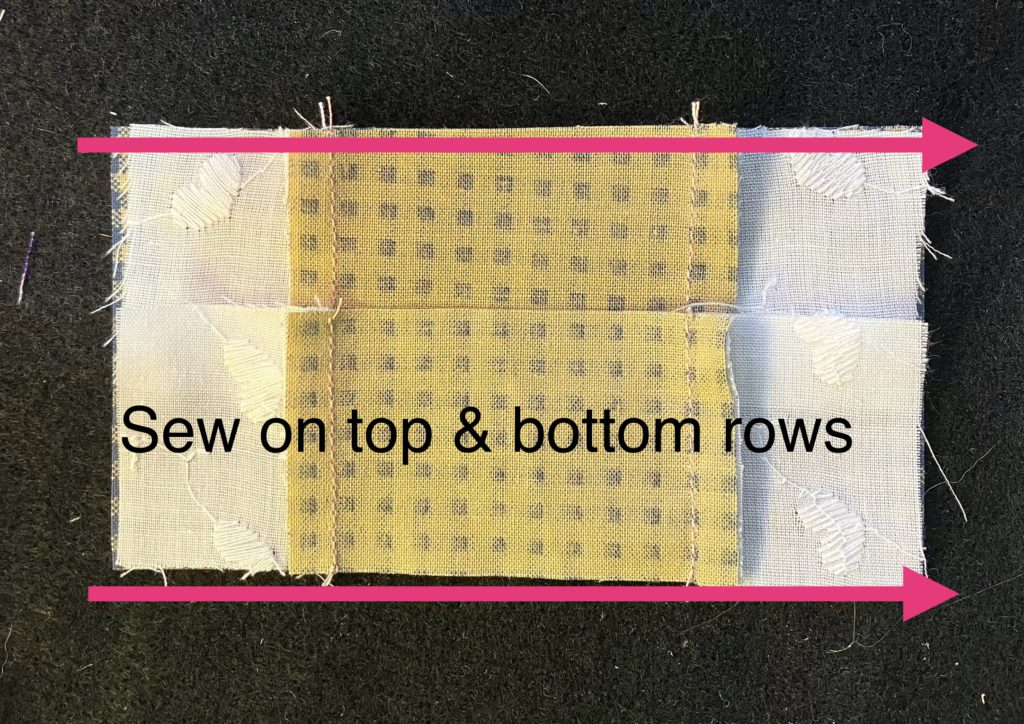
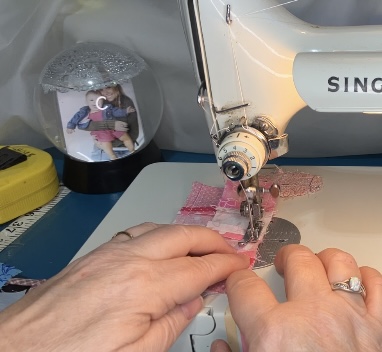
Here is what I initially came up with for the flying geese:

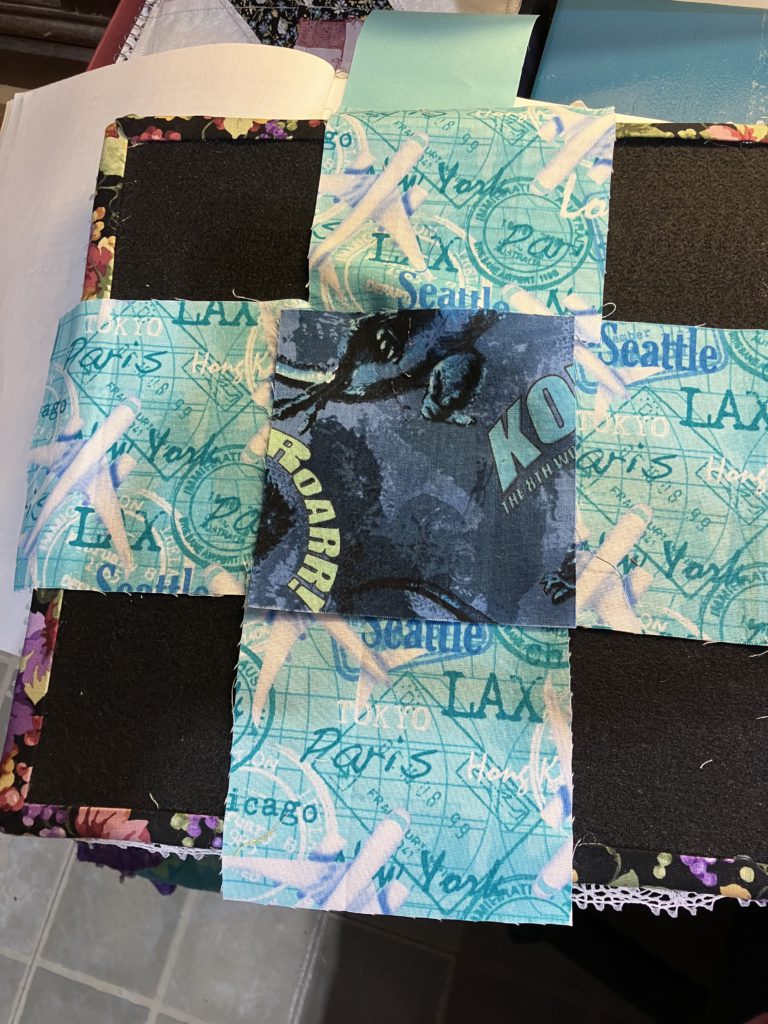
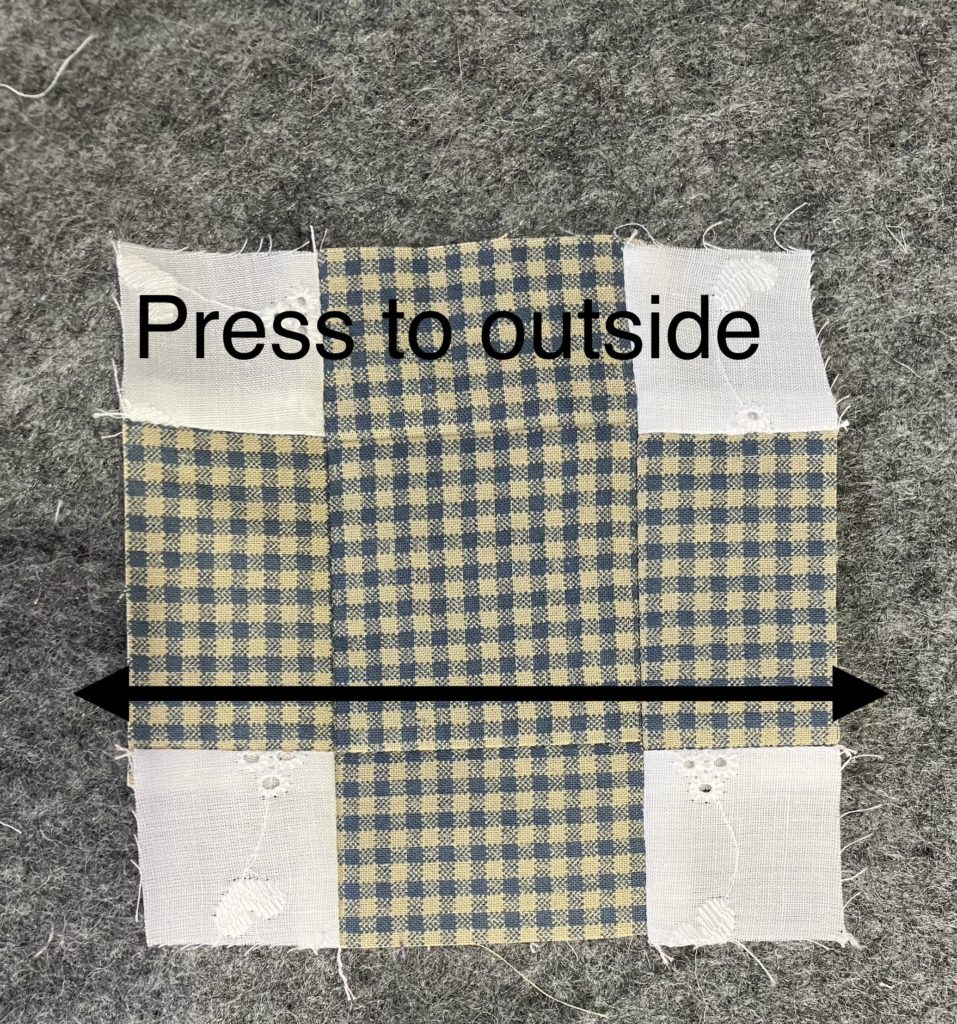
That looked so busy and disjointed to me. I keep looking at the box of squares sitting there beside the sewing machine. I decided to try these bonus blocks.

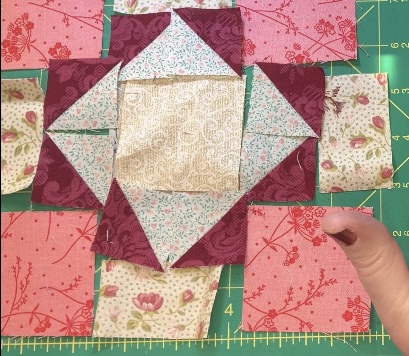
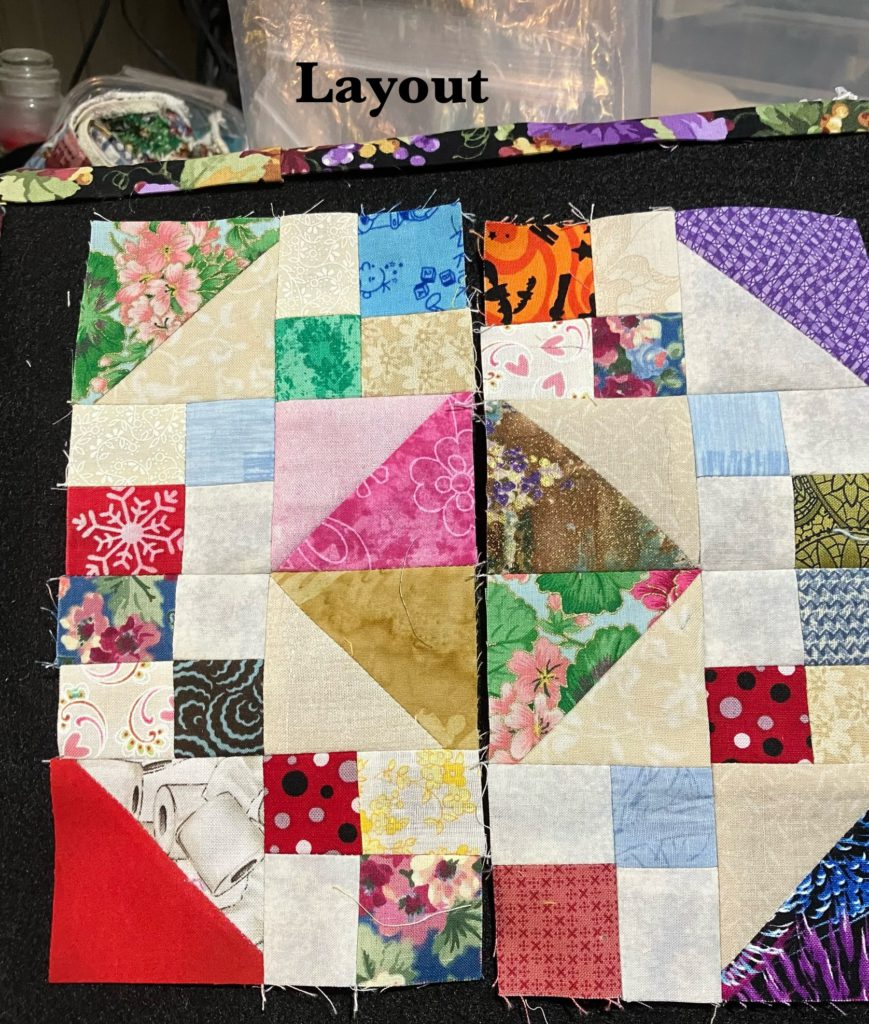
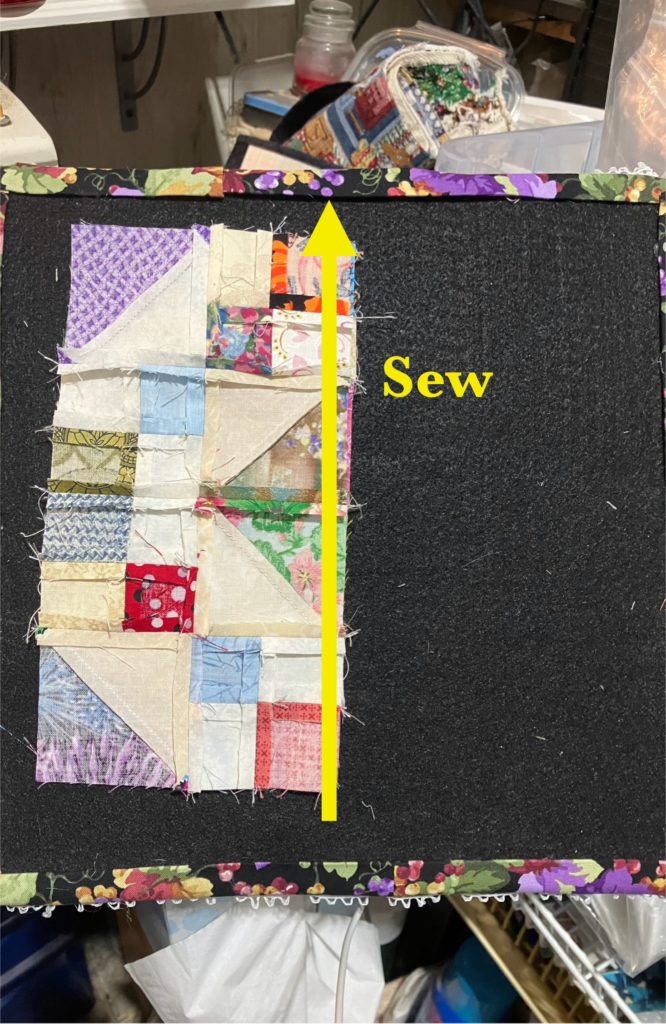
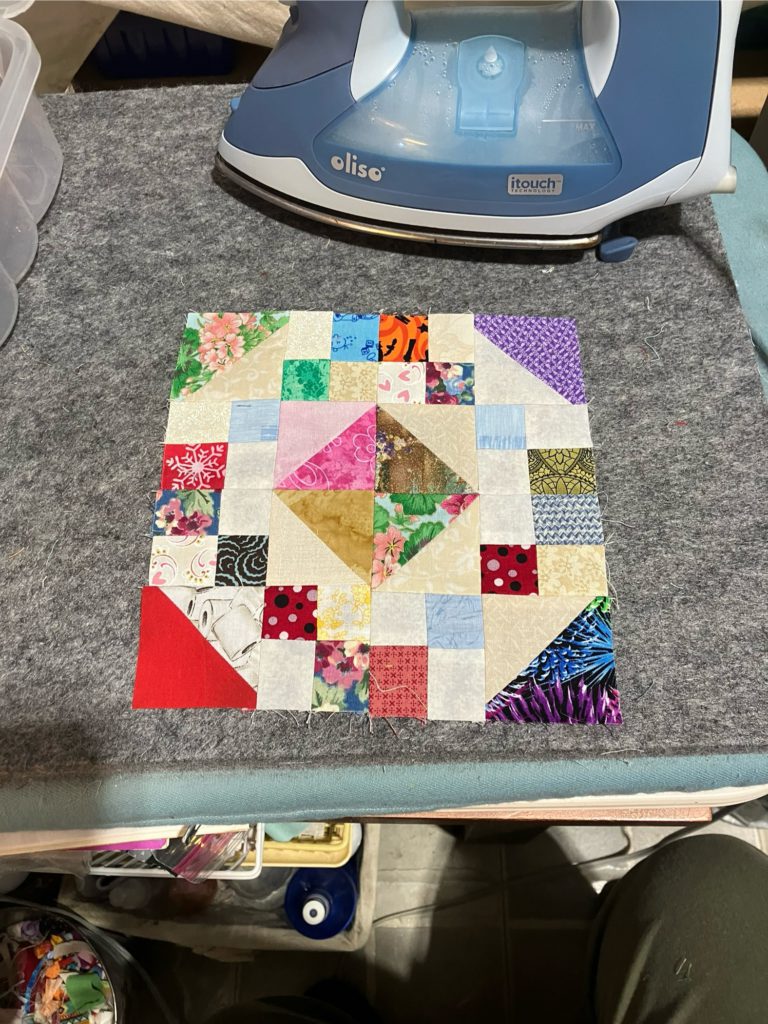
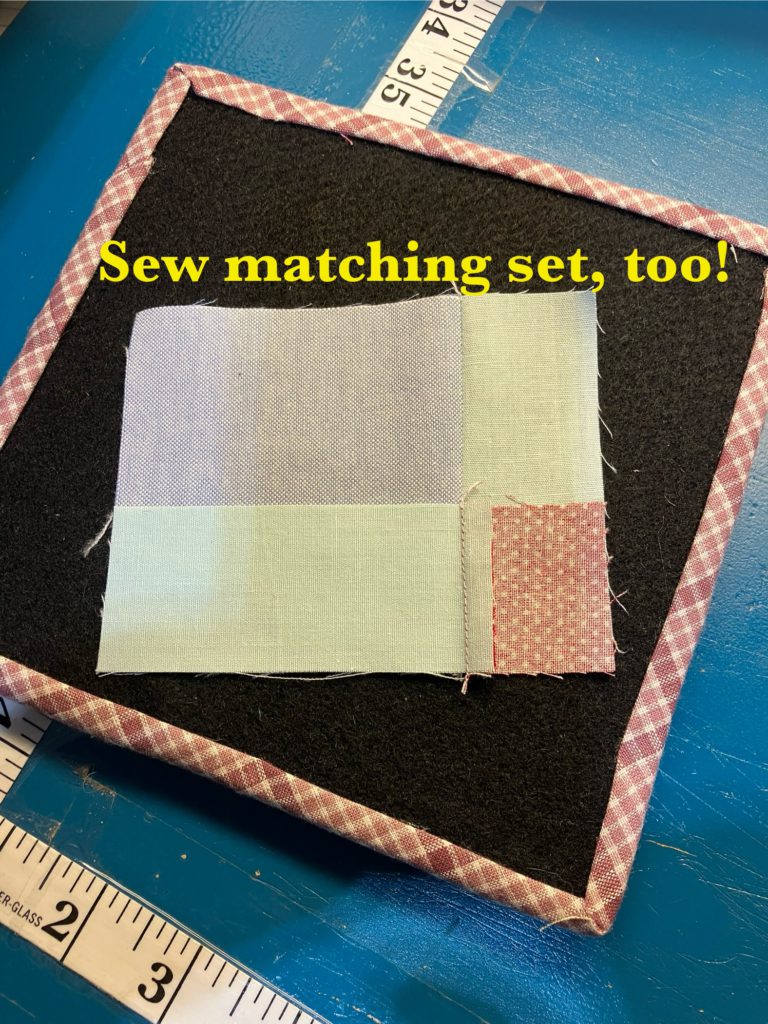
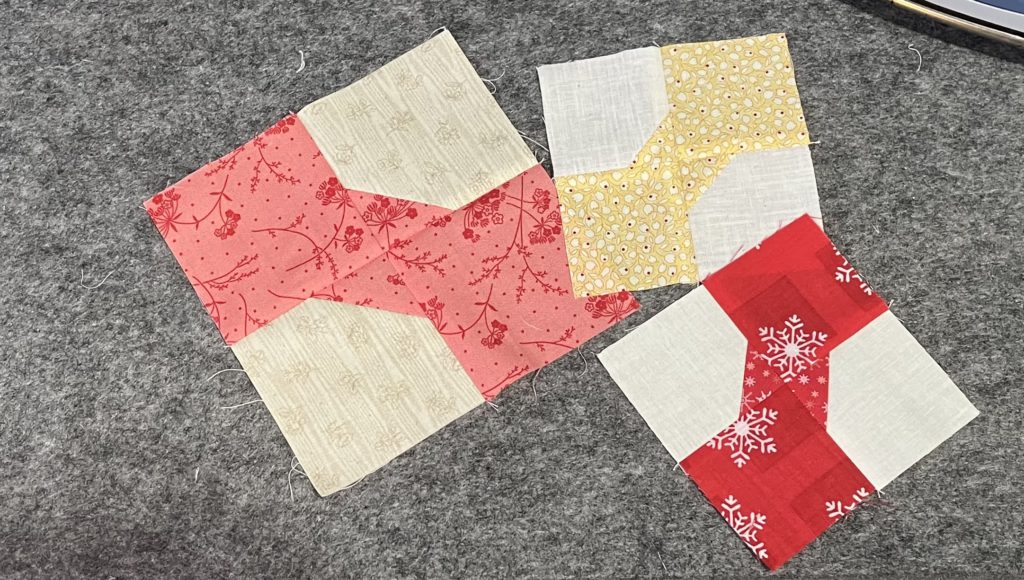
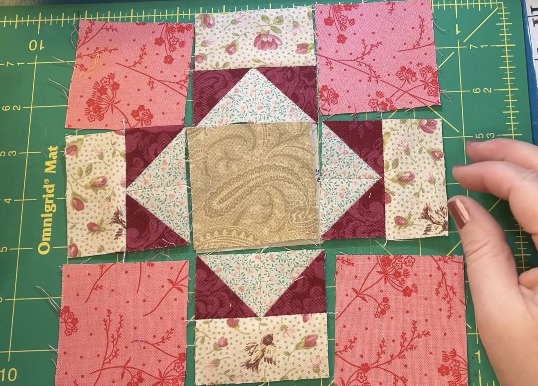
Much better for me! (The first one was okay, too, but I like this one just a little better…) Remember, make the block that you love! Now to choose the center!

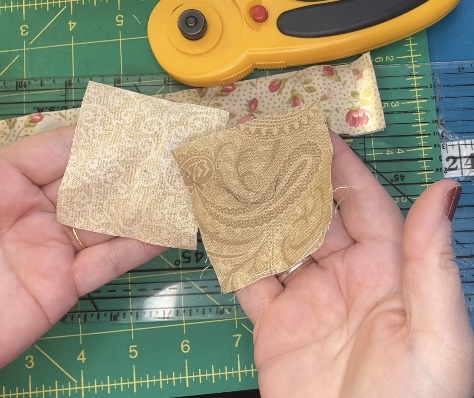
Light swirl fabric with a touch of glitter is nice.

Slightly darker paisley looks good, too…a nice contrast…brings out the birds in the background a little.

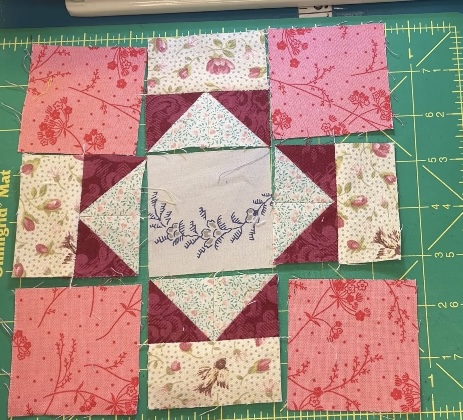
Nice detail across the middle of this block, but the color isn’t quite right…and it looks flat compared to the first two choices.

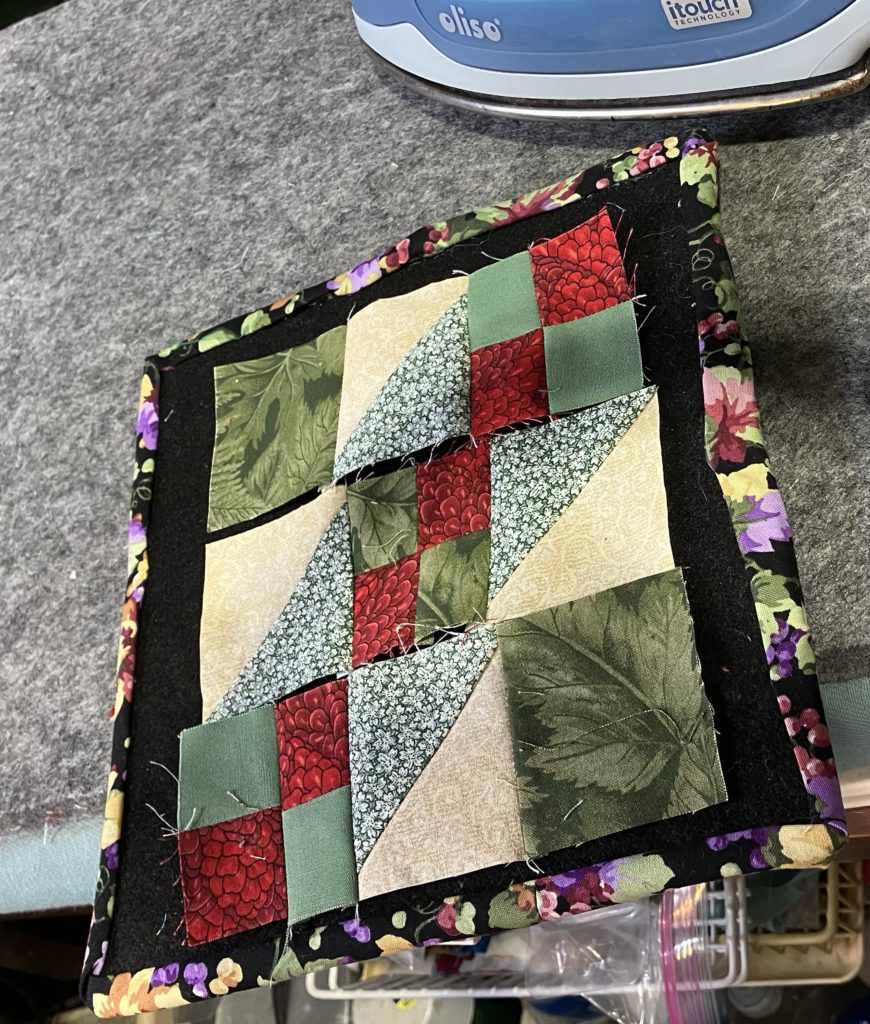
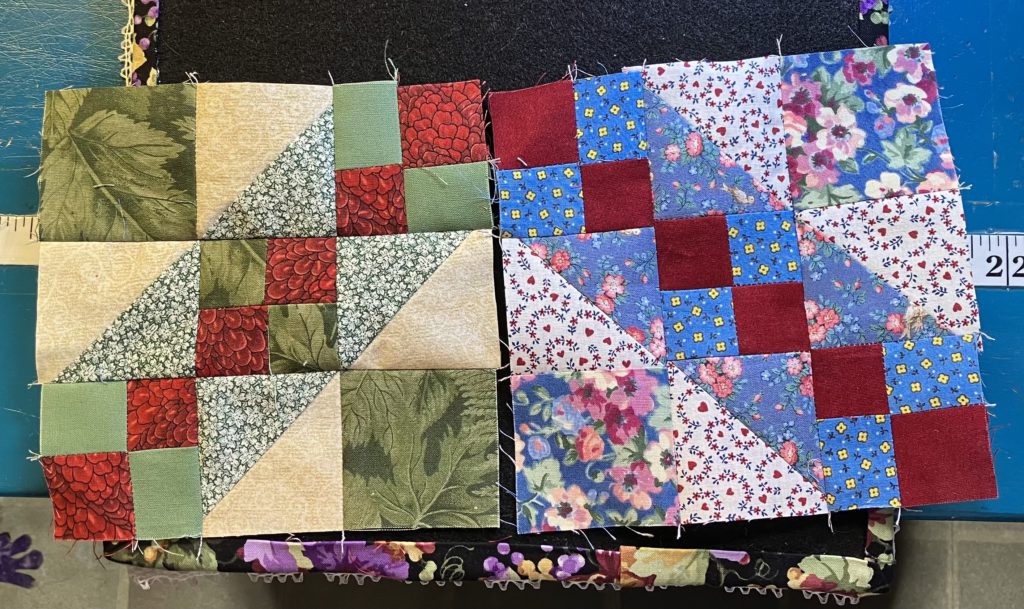
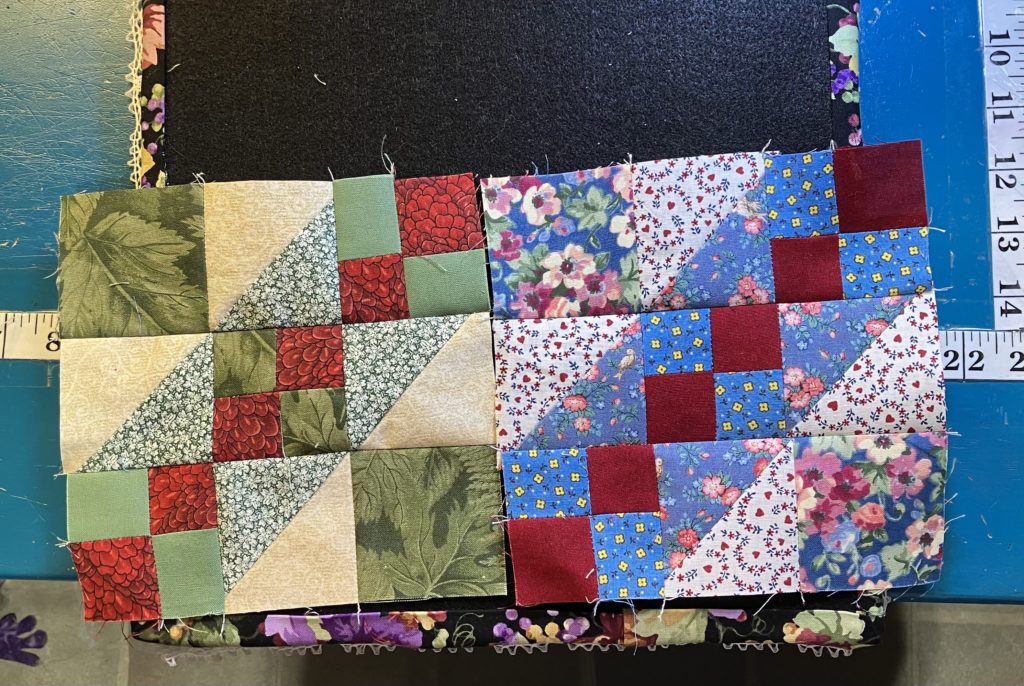
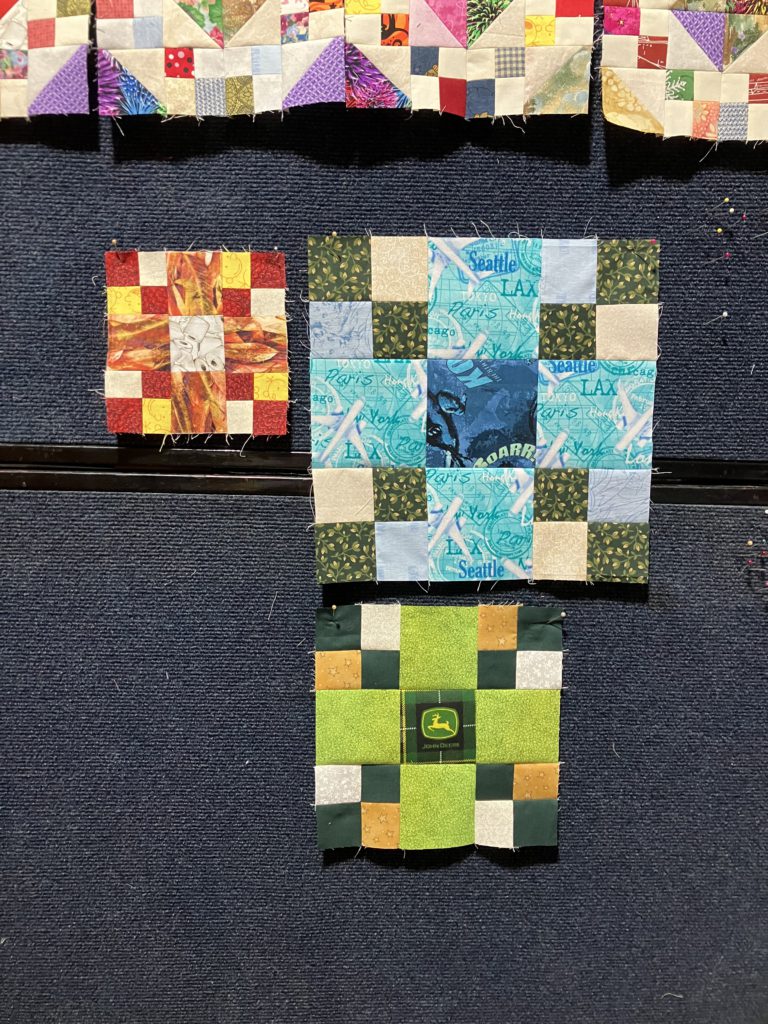
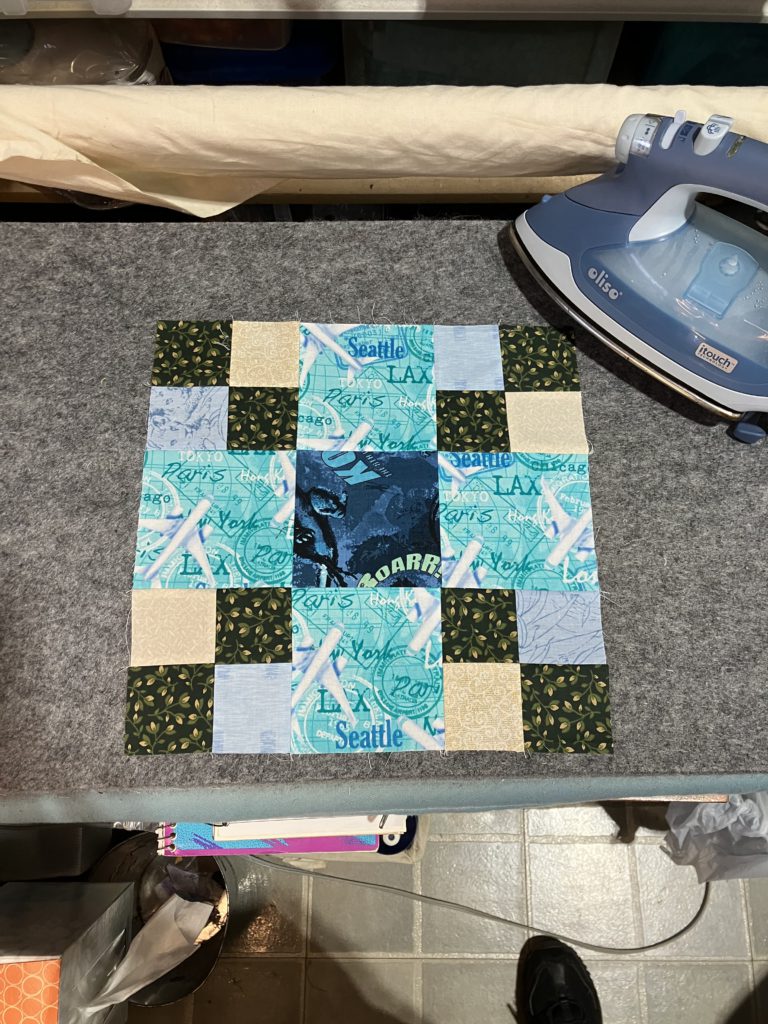
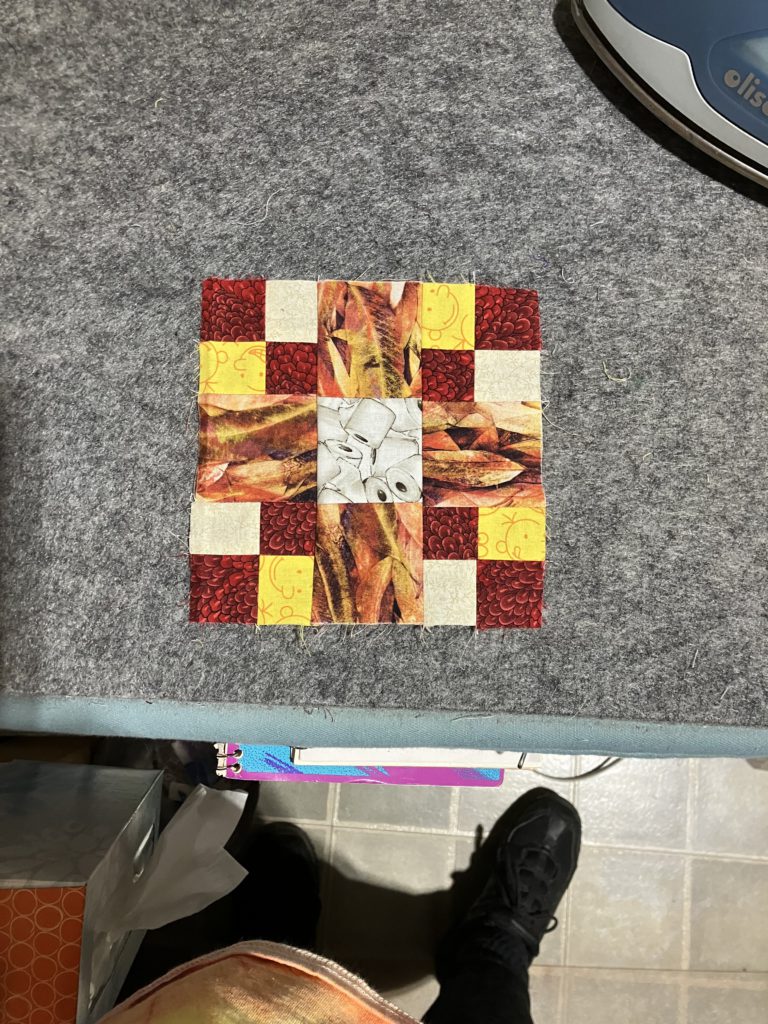
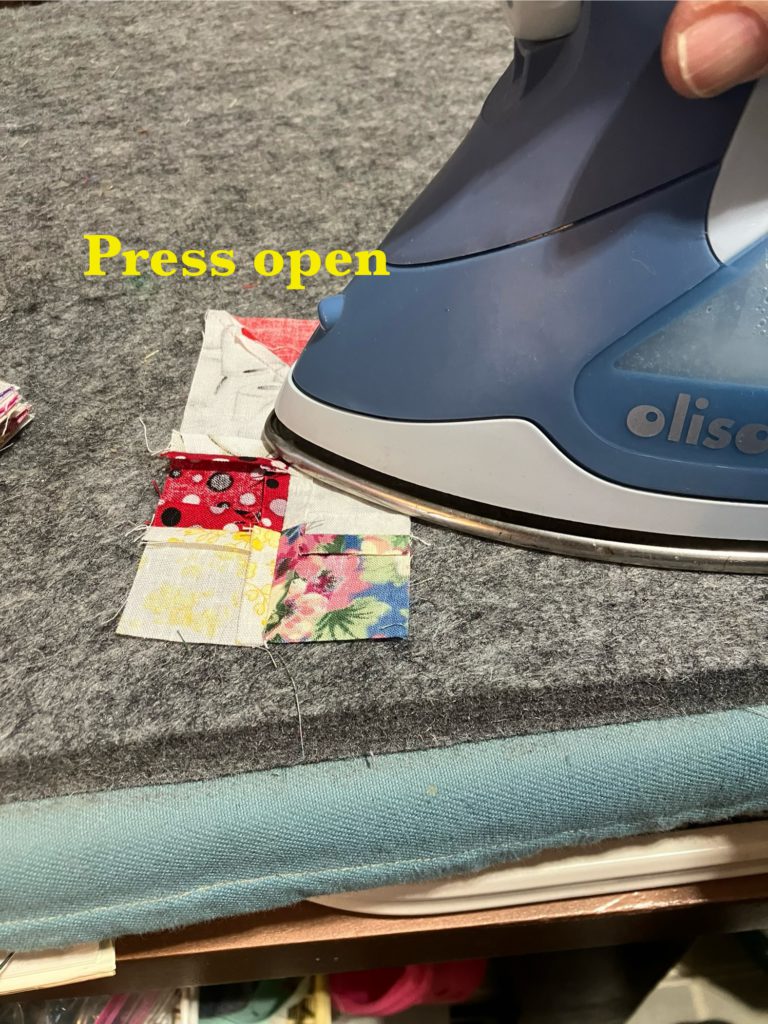
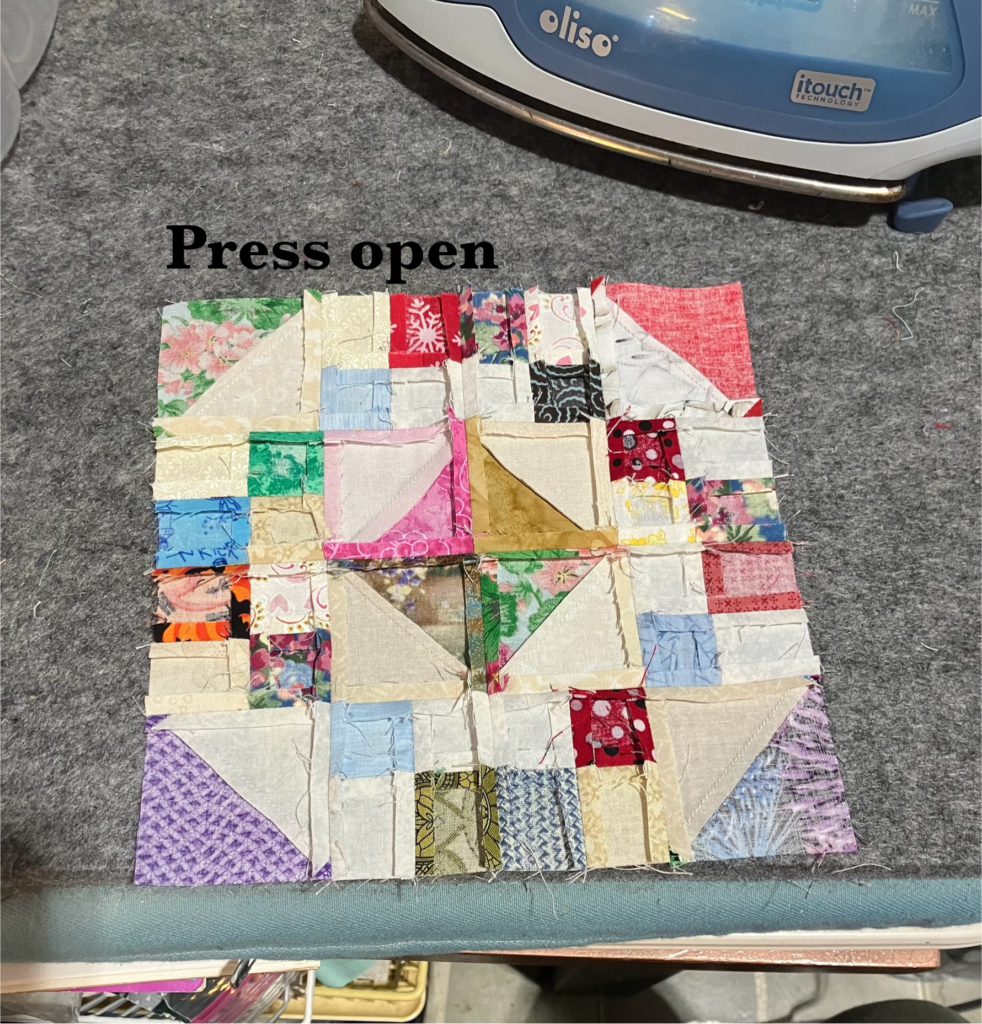
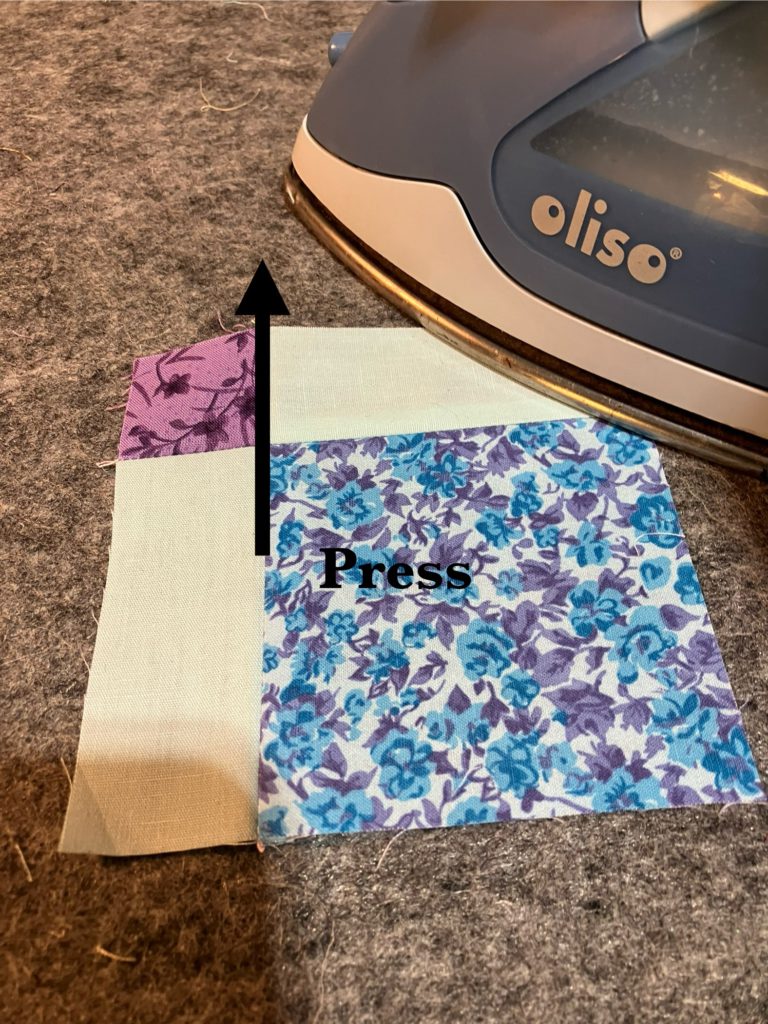
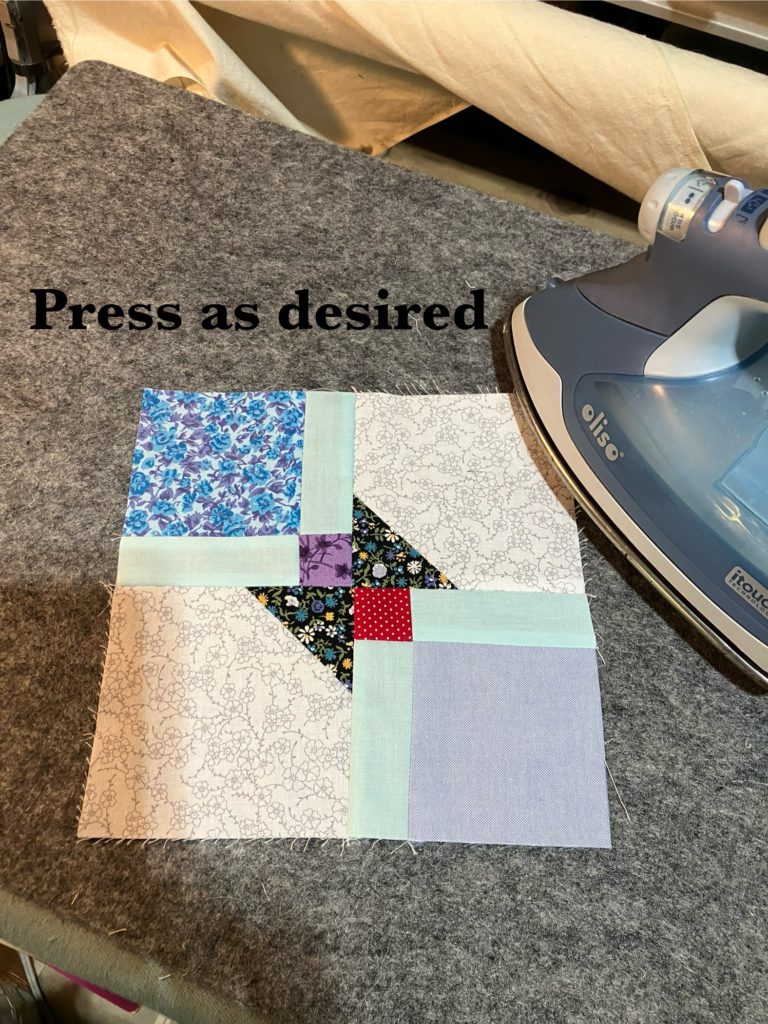
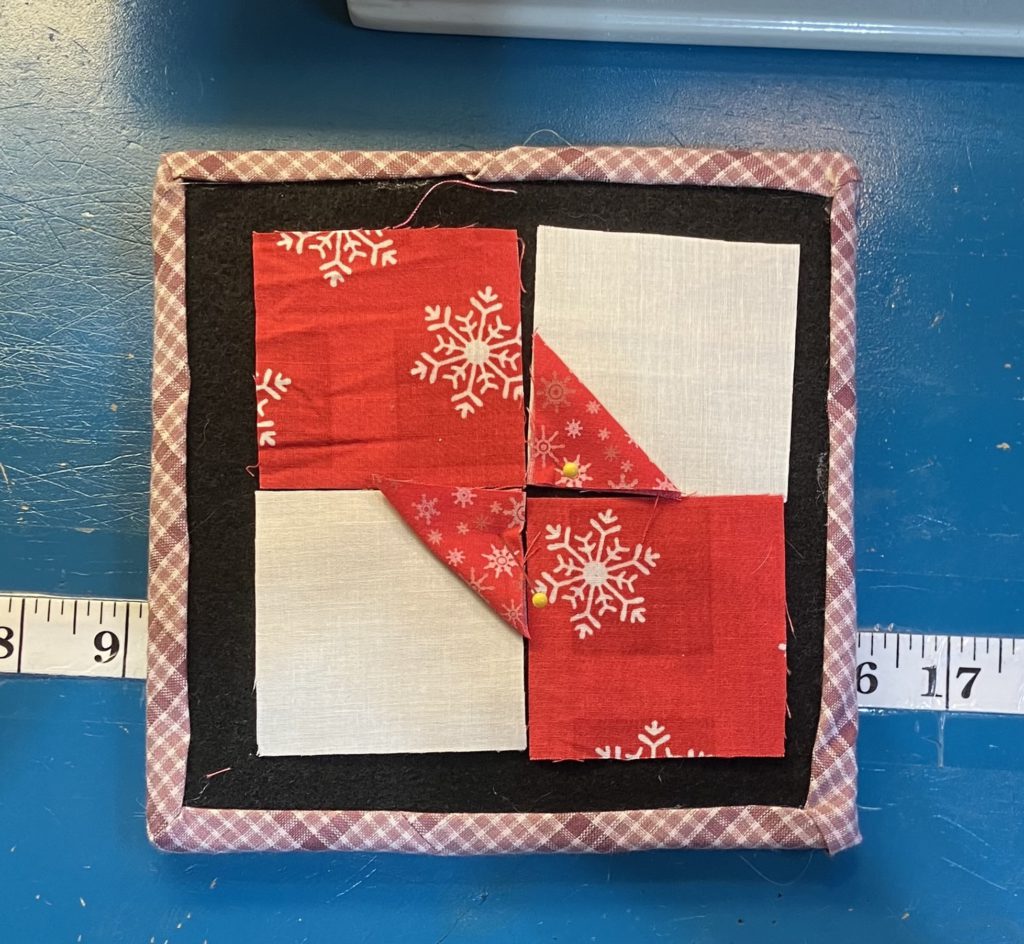
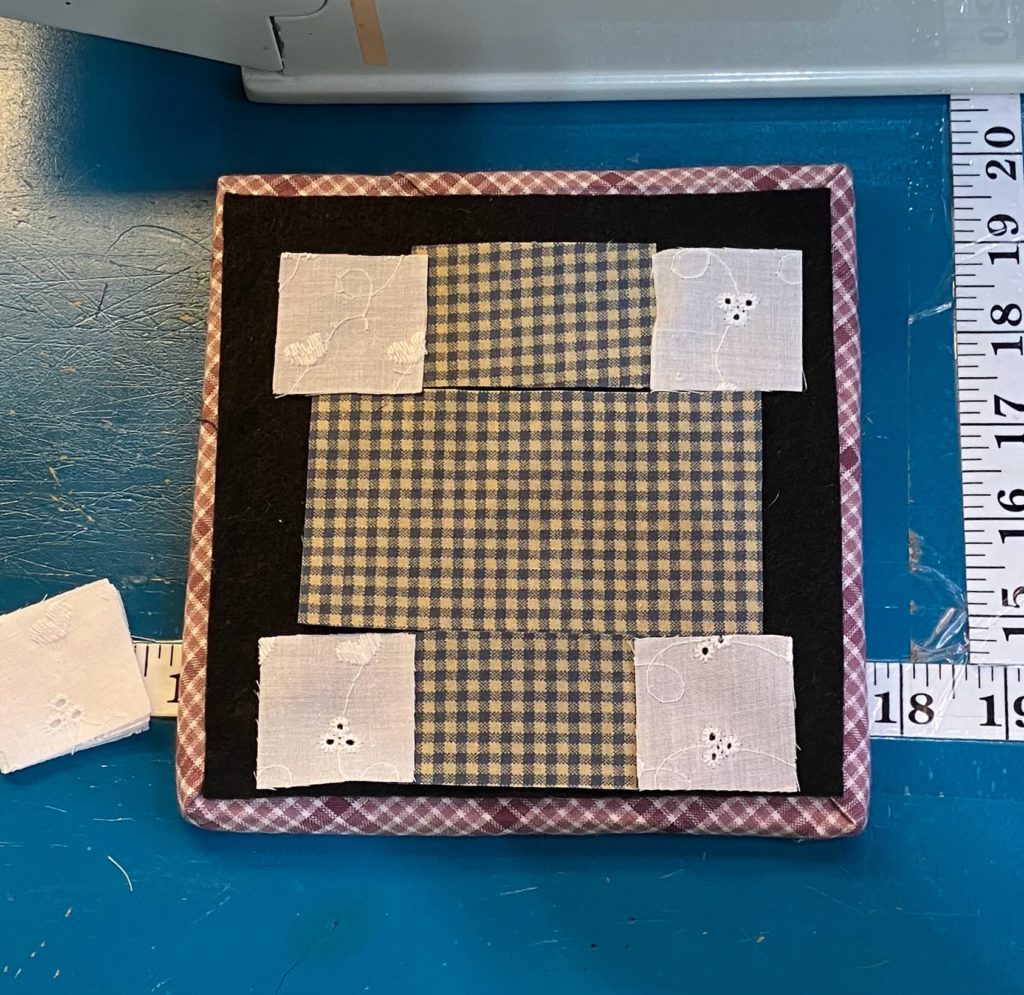
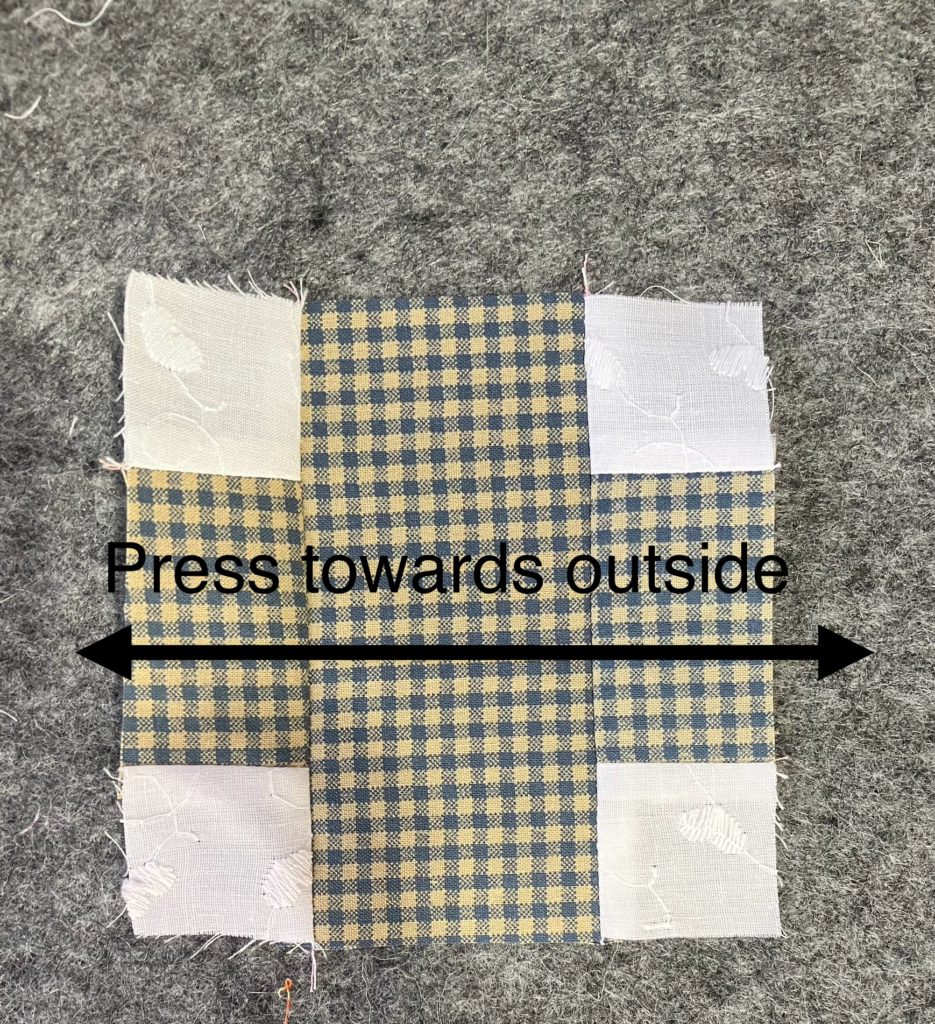
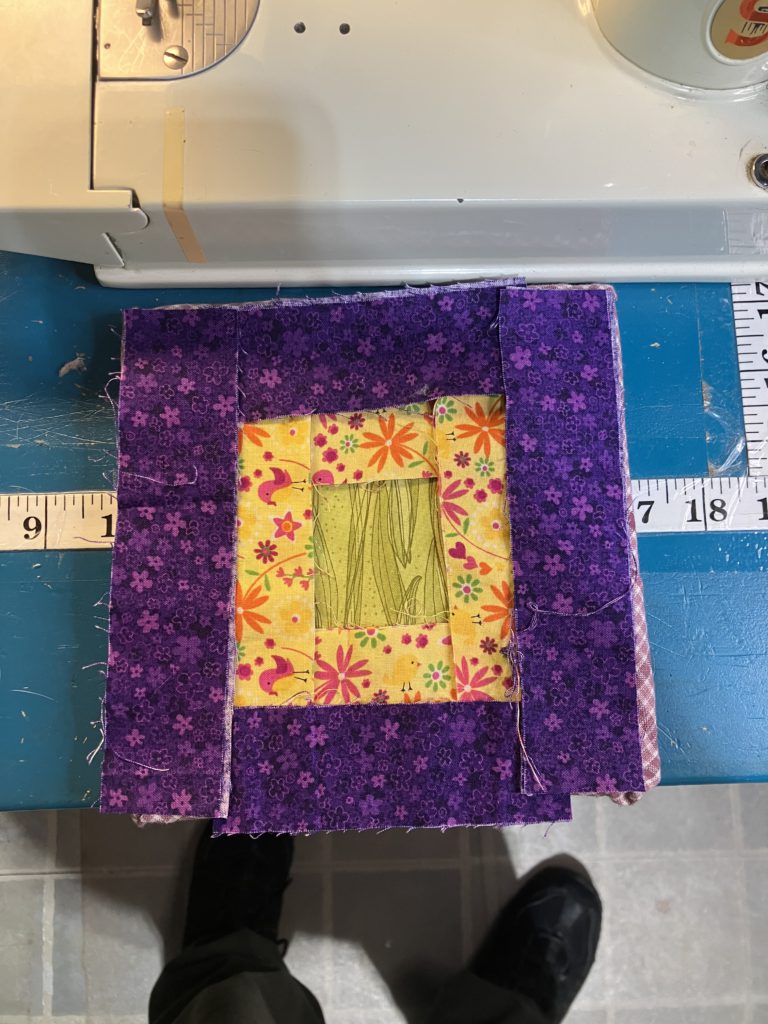
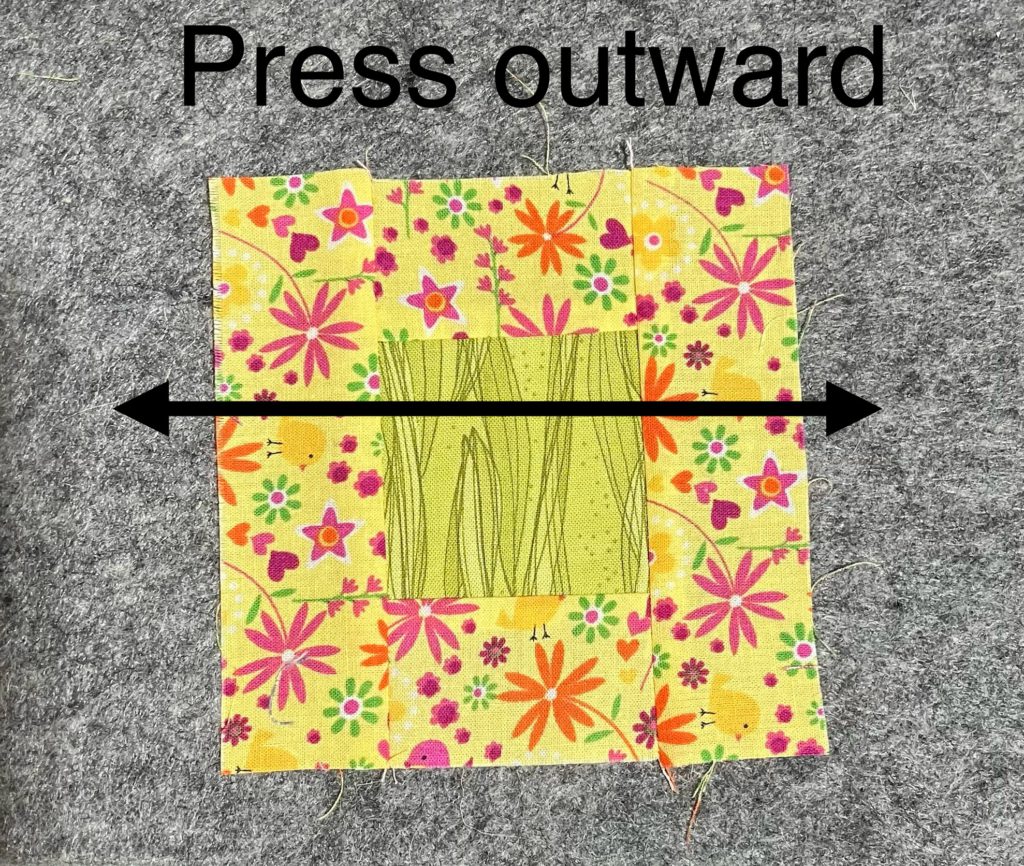
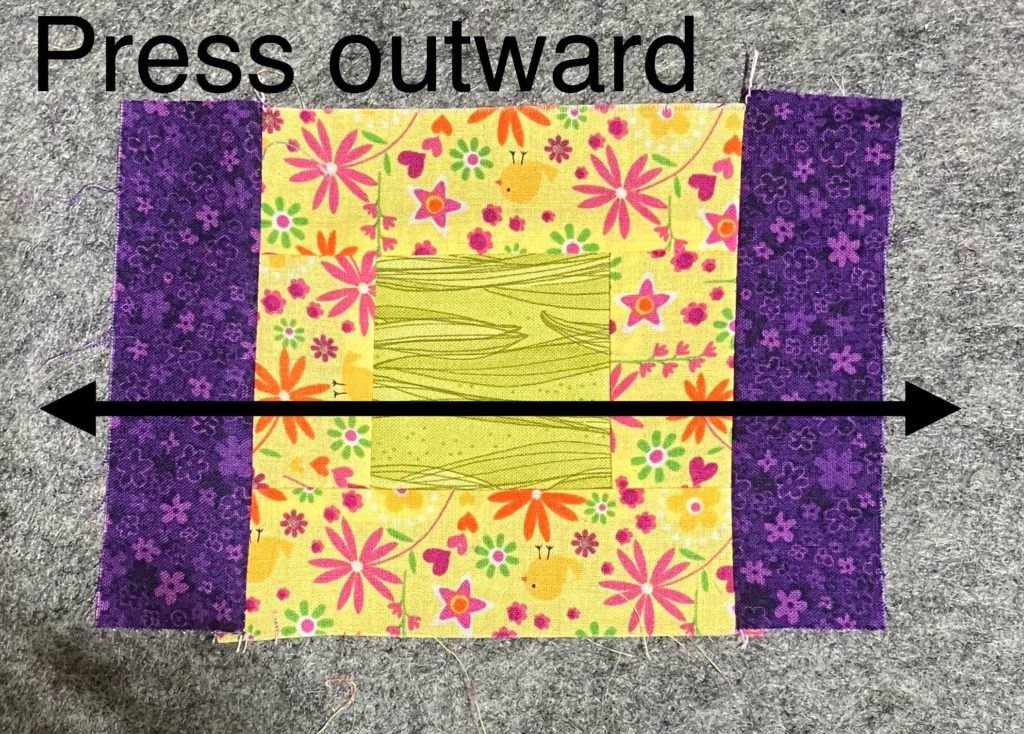
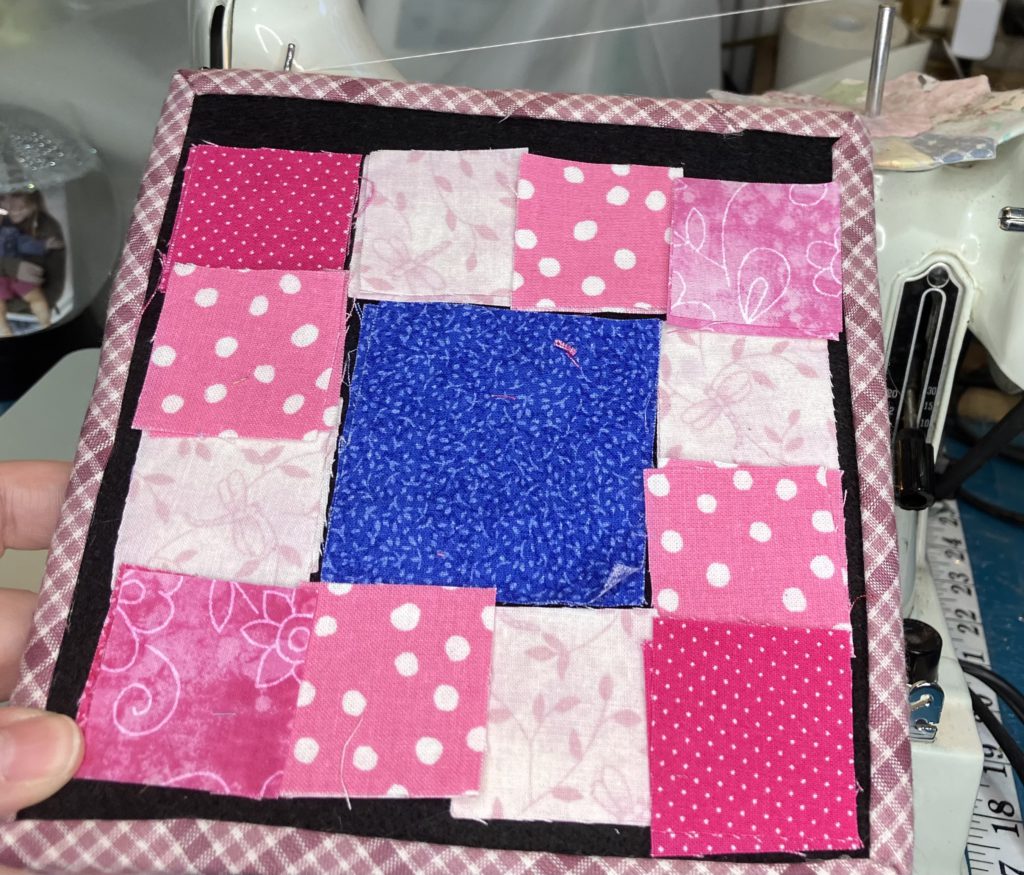
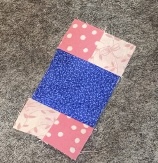
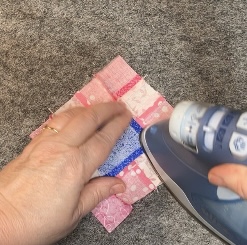
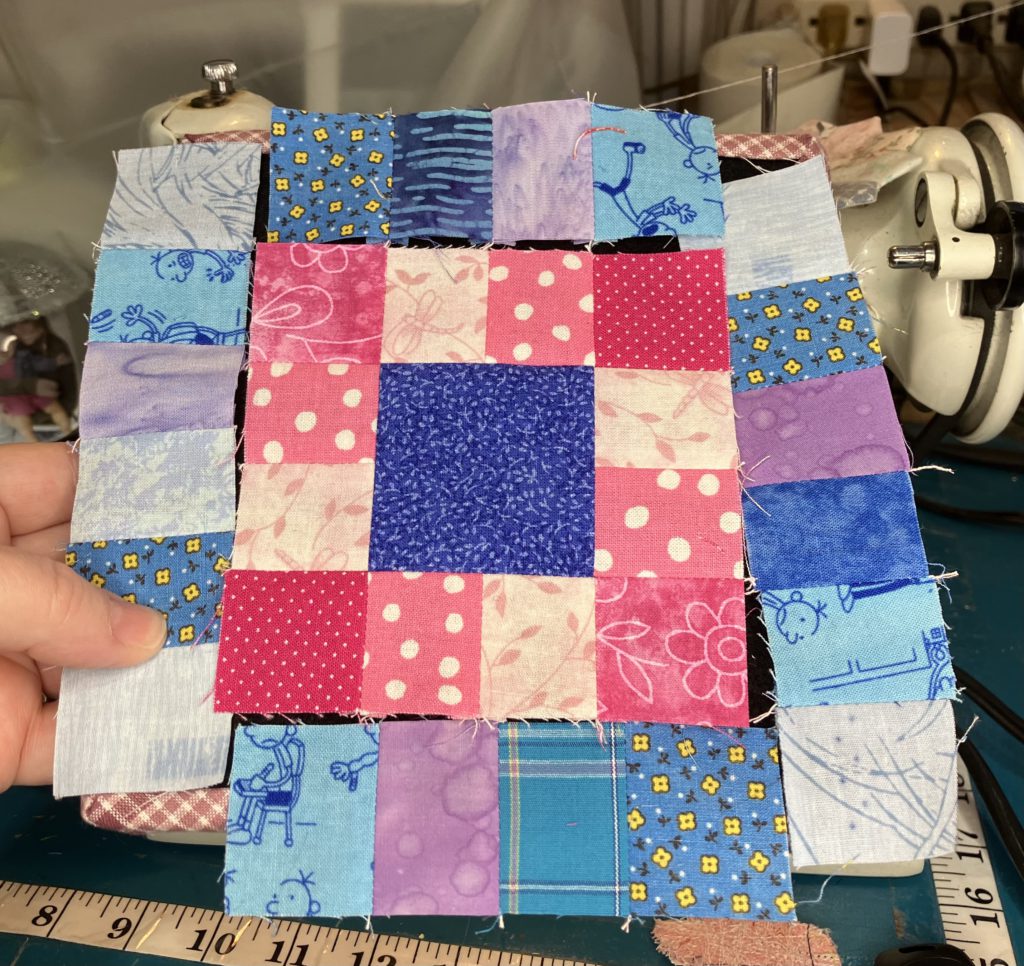
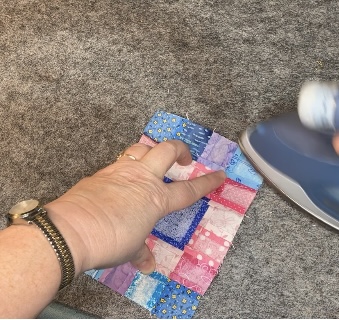
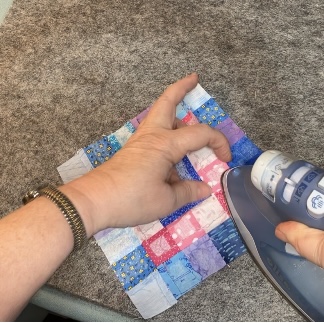
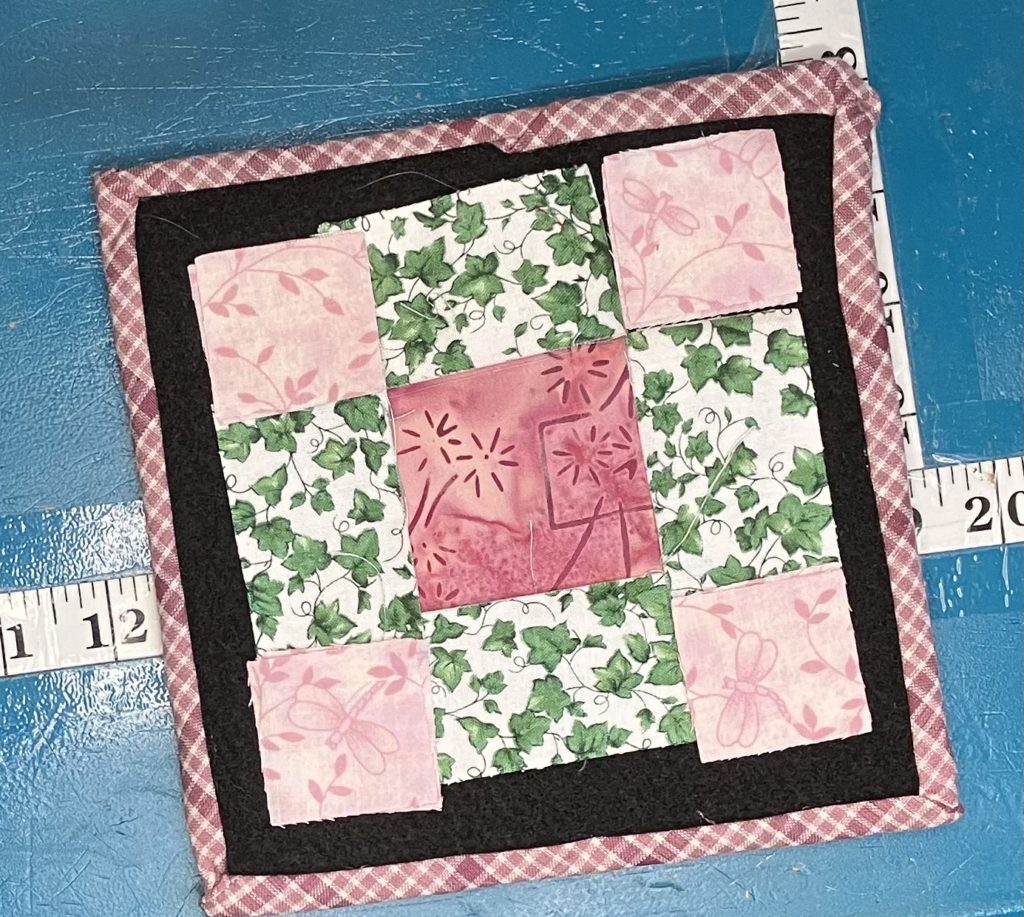
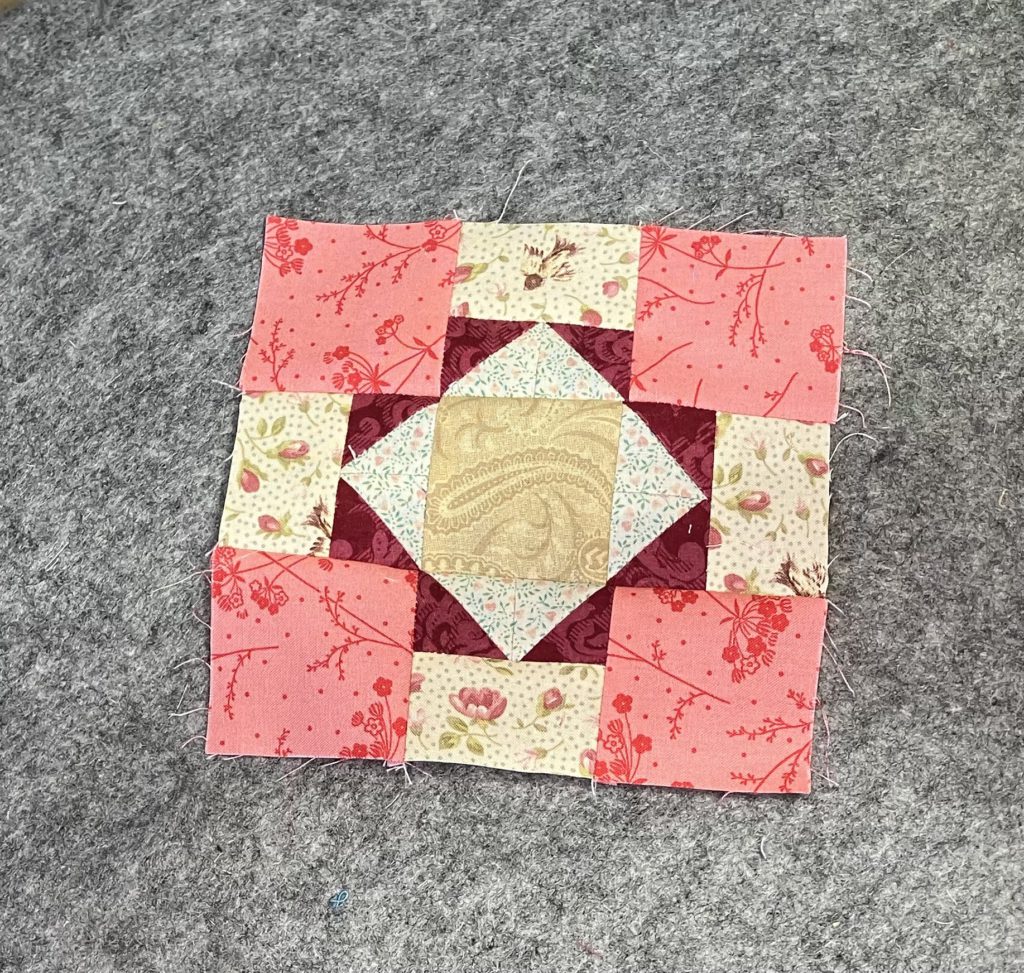
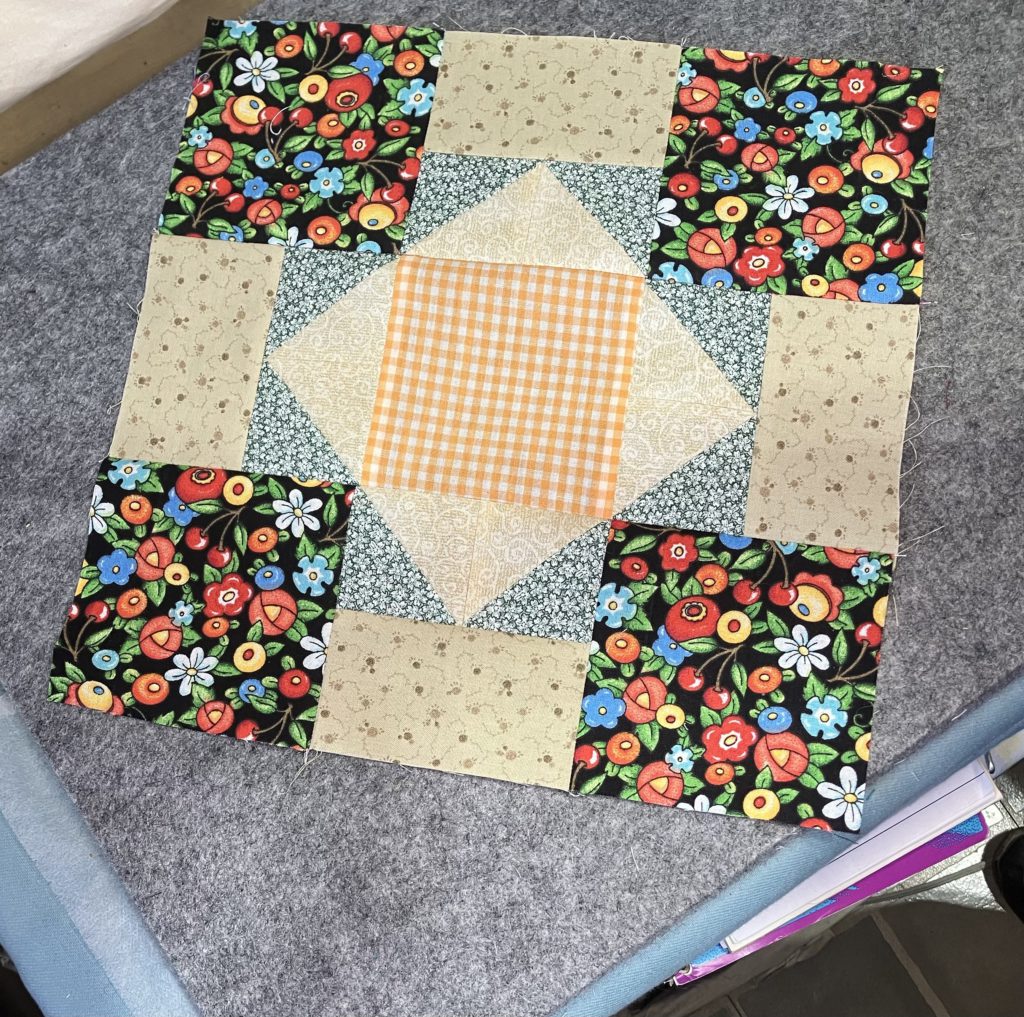
Here was my final decision in my finished block. (I probably should have pressed it so it was flat for its picture. It is straight, square, and true. I promise!)

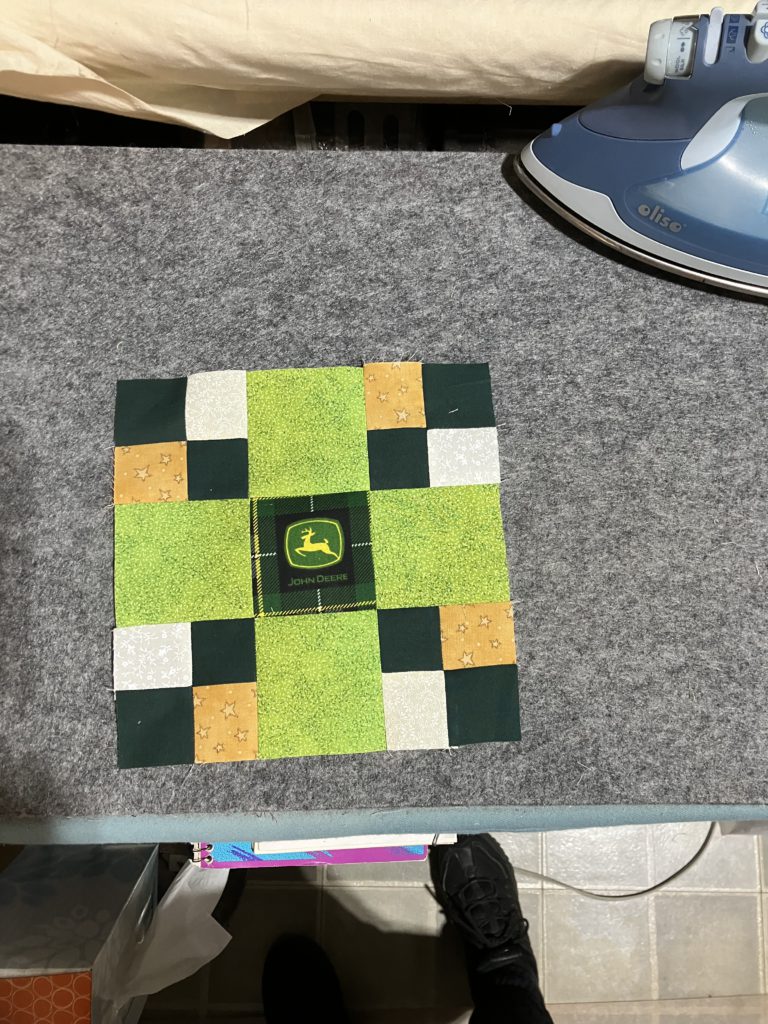
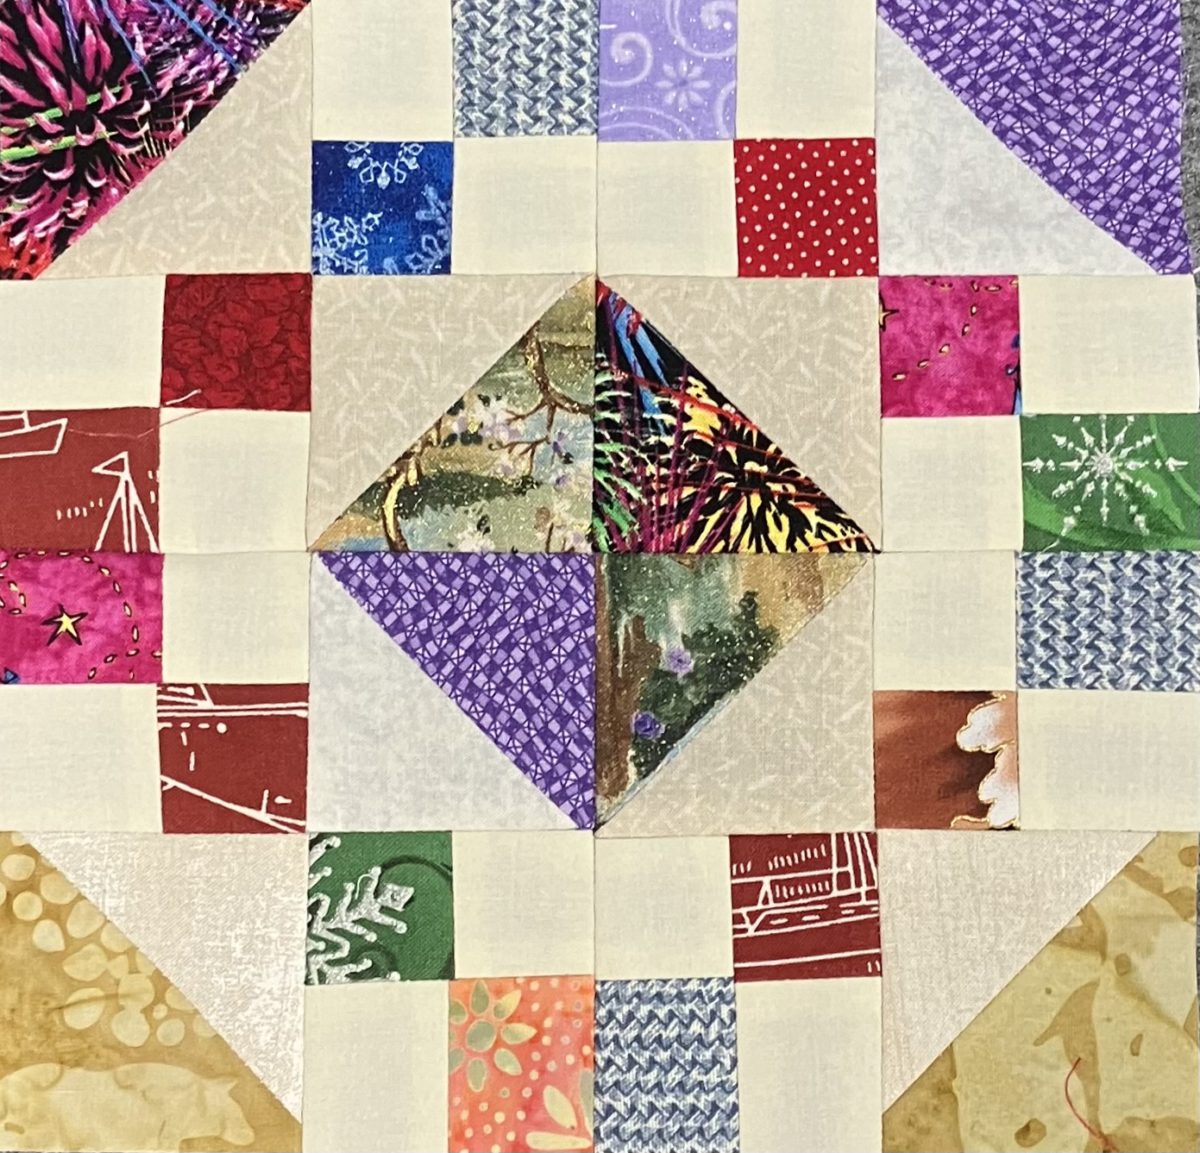
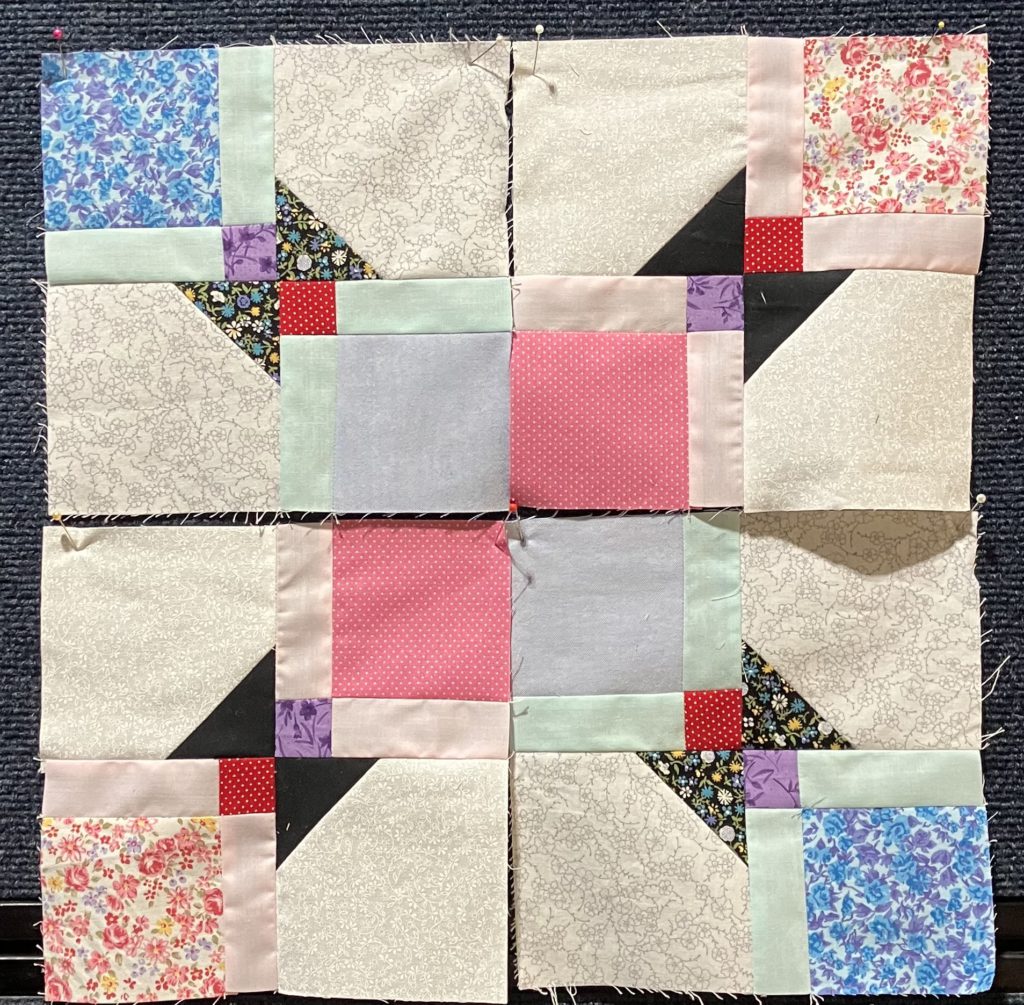
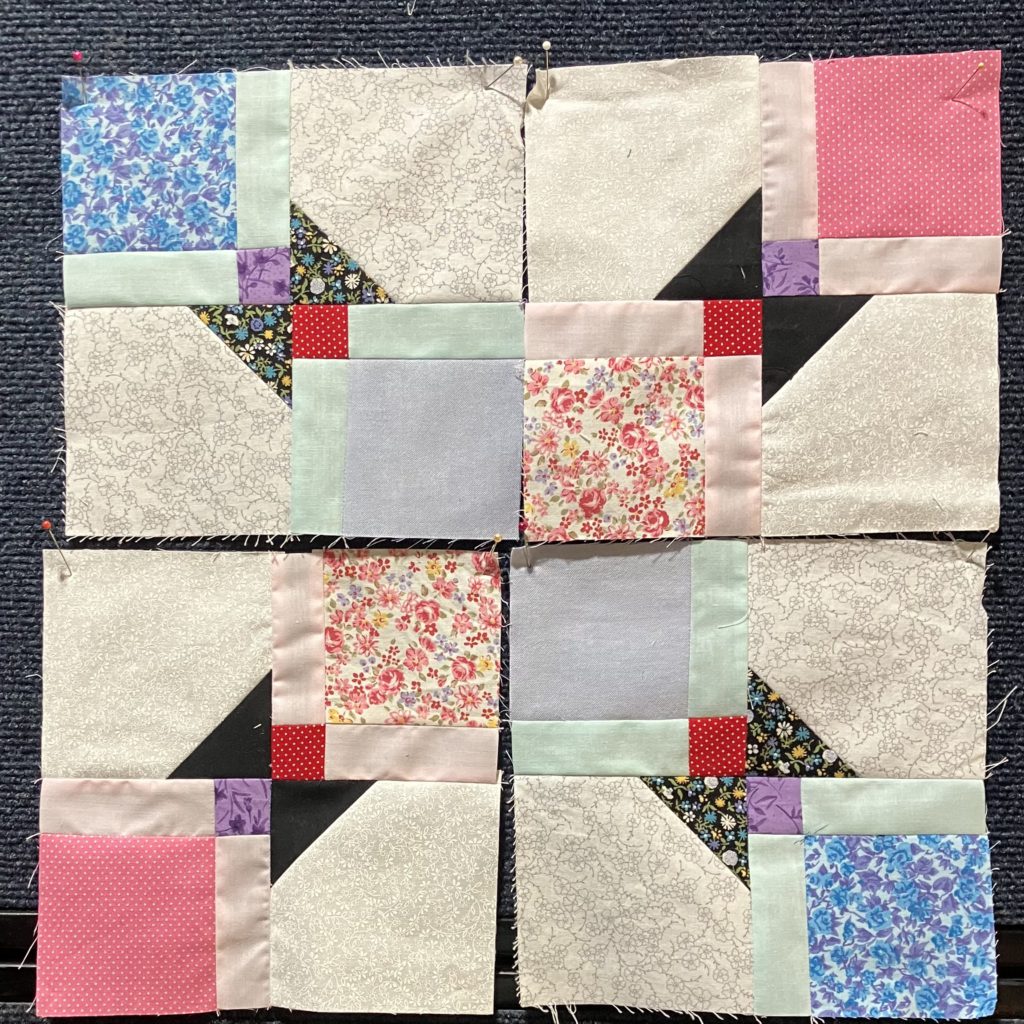
I couldn’t help myself. I just had to make a 12 1/2″ block.

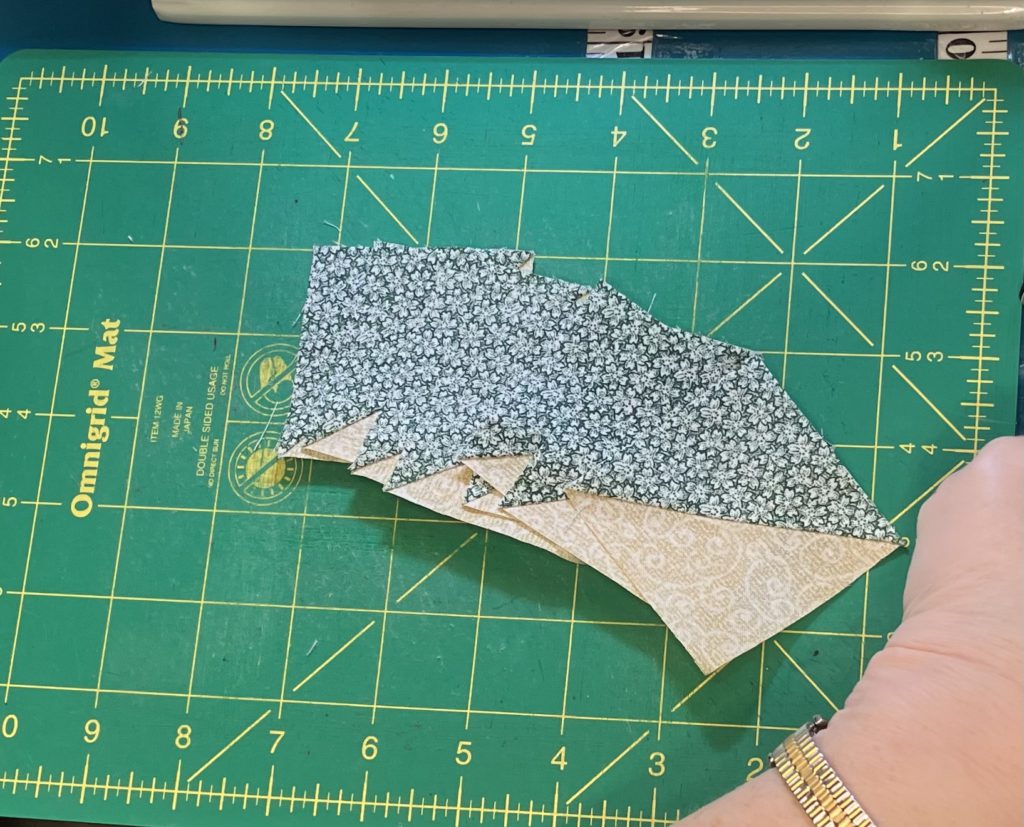
I have lots of these green and tan half square bonus blocks…lots.

Eight of them didn’t even put a dent in the pile!

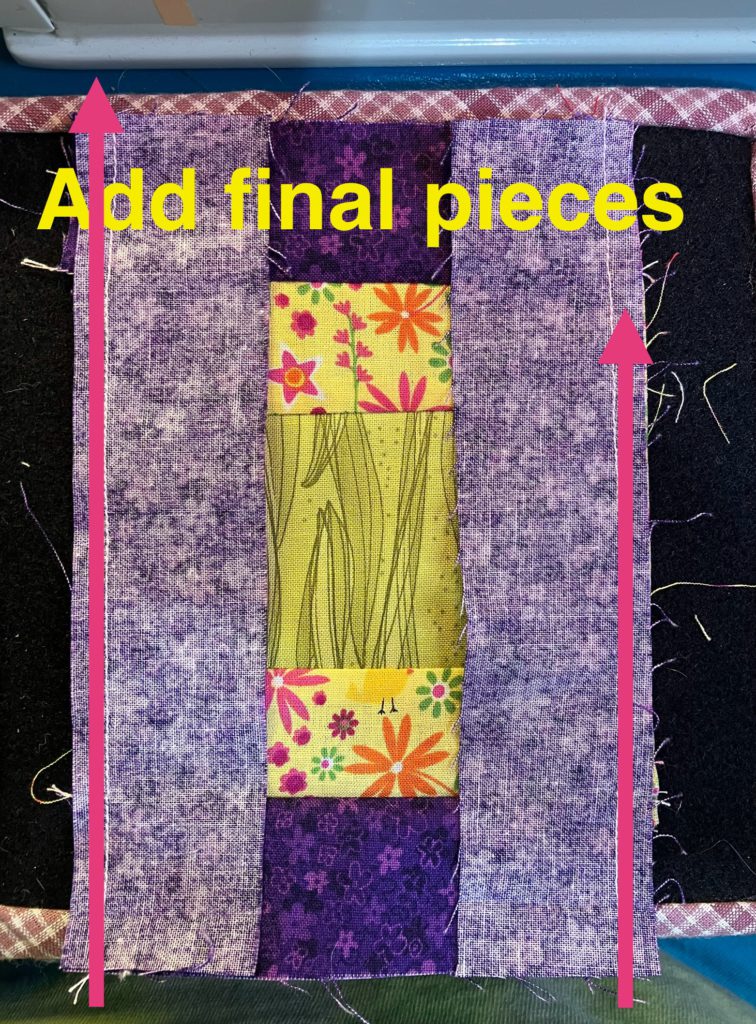
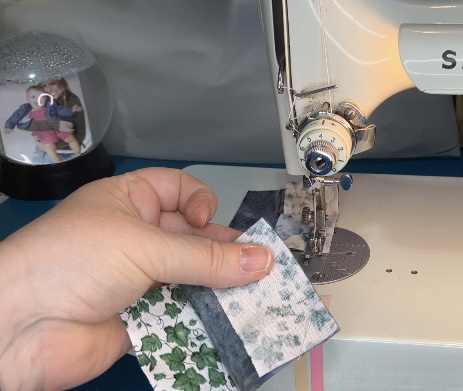
I chose four corners and a center. I will use that 2 1/2″ strip now…ha ha!

This larger block went together even quicker than the smaller one.

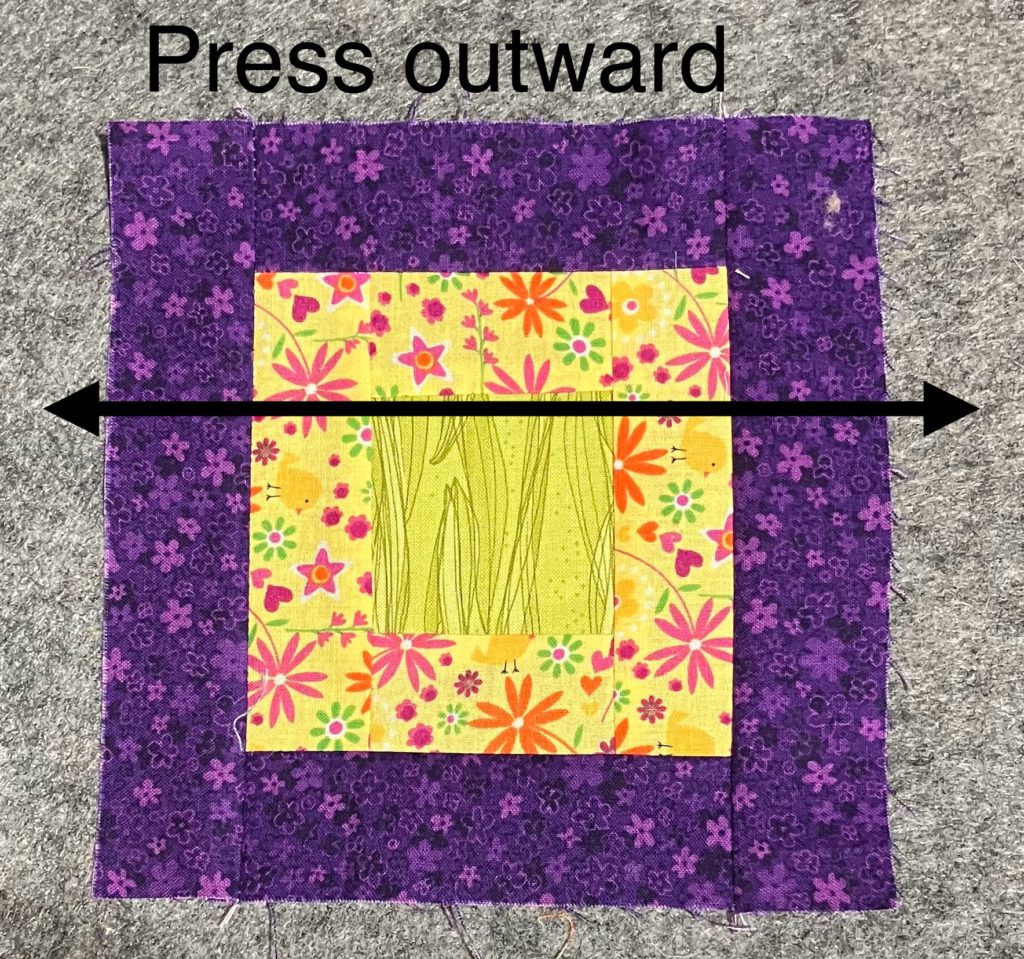
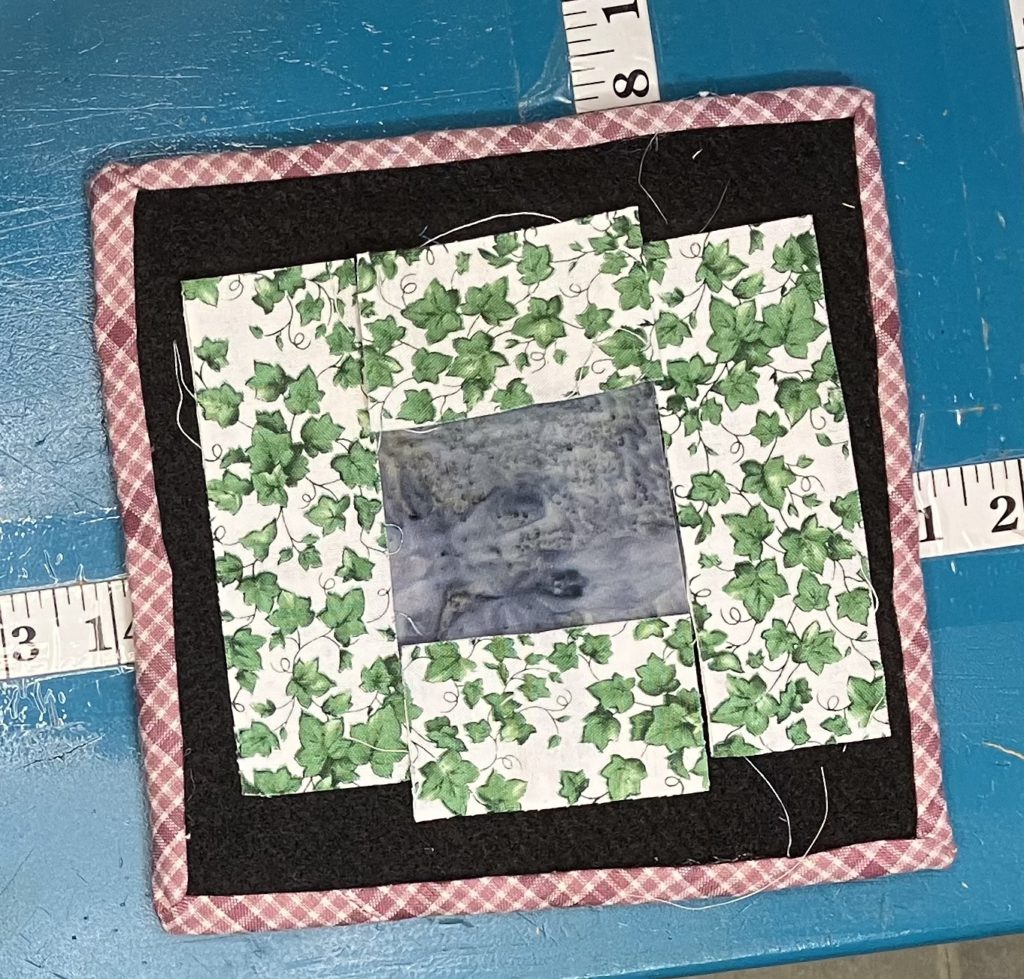
Ta-dah! Ta-done! The measurement for the pieces is listed in the chart below. I think a 4 x 5 block quilt made from 12 1/2″ blocks would be quick and easy! There would also be a nice secondary four patch design where the blocks meet in the corners if you didn’t use sashing.

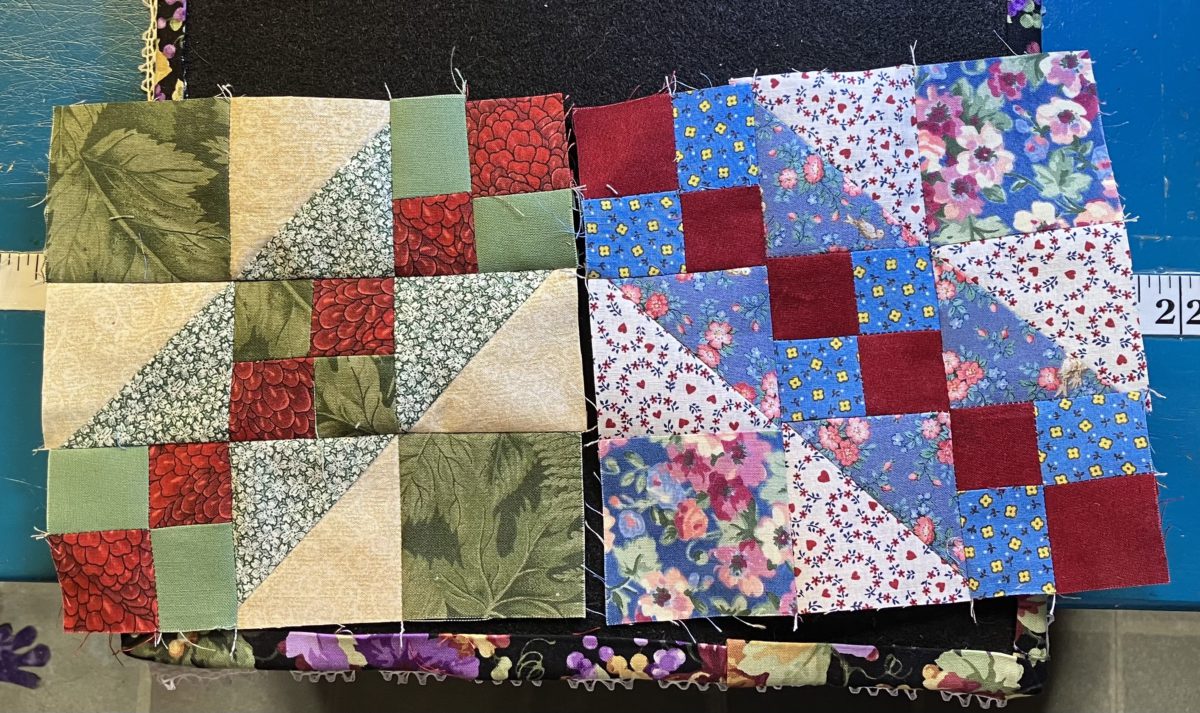
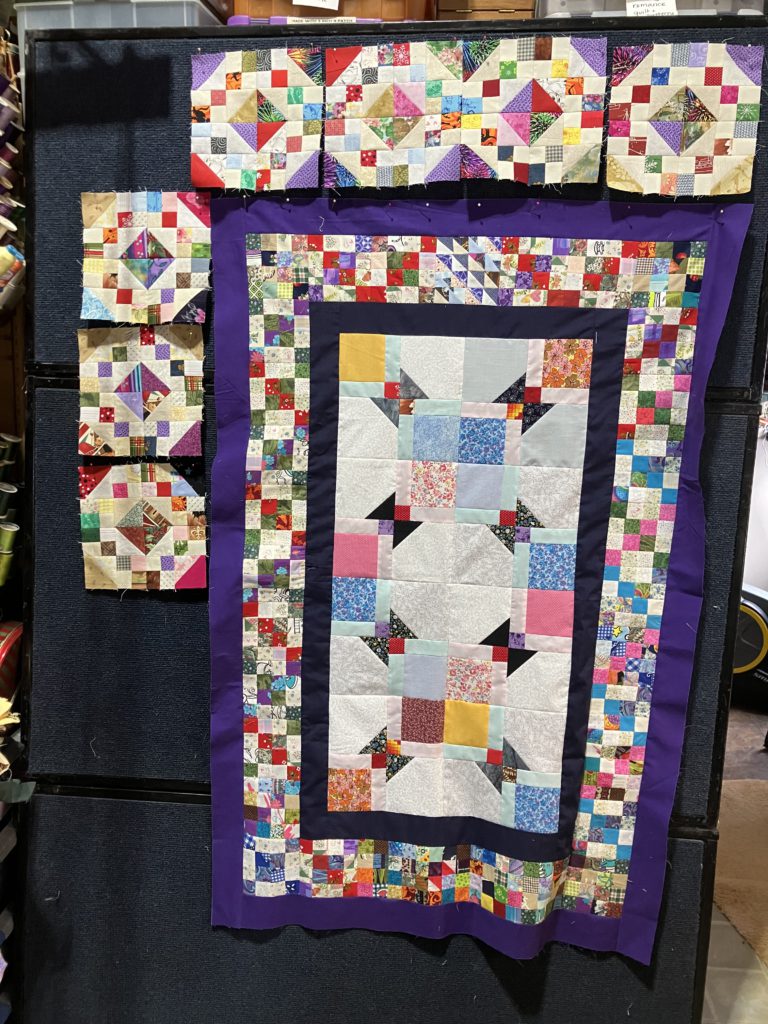
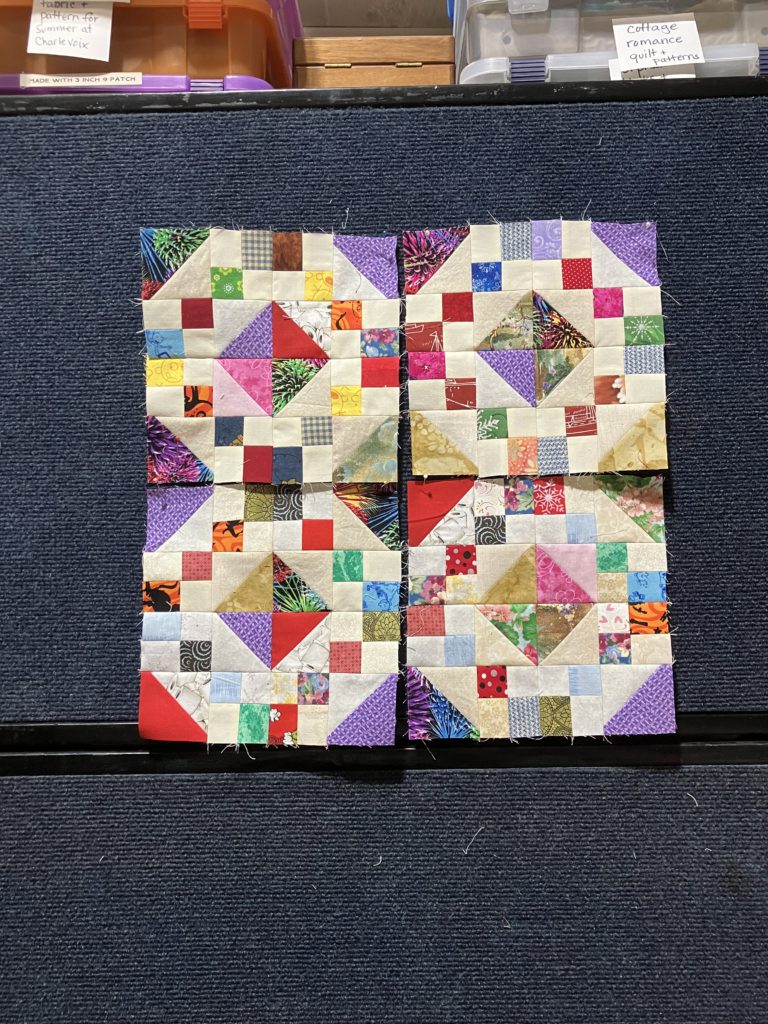
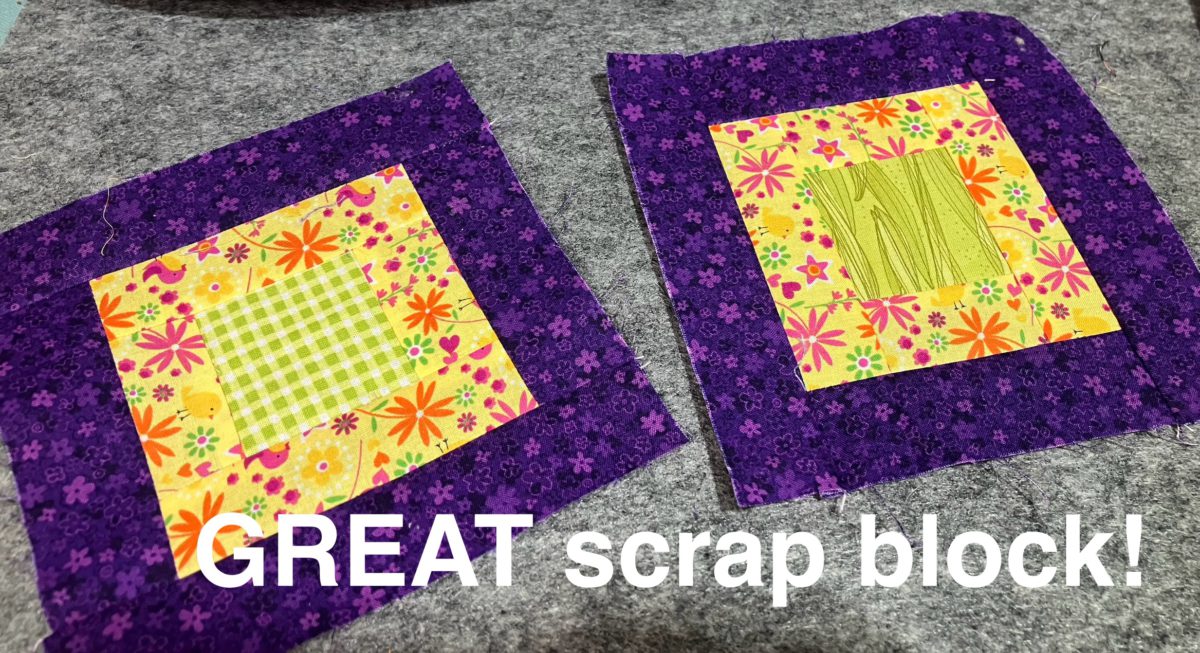
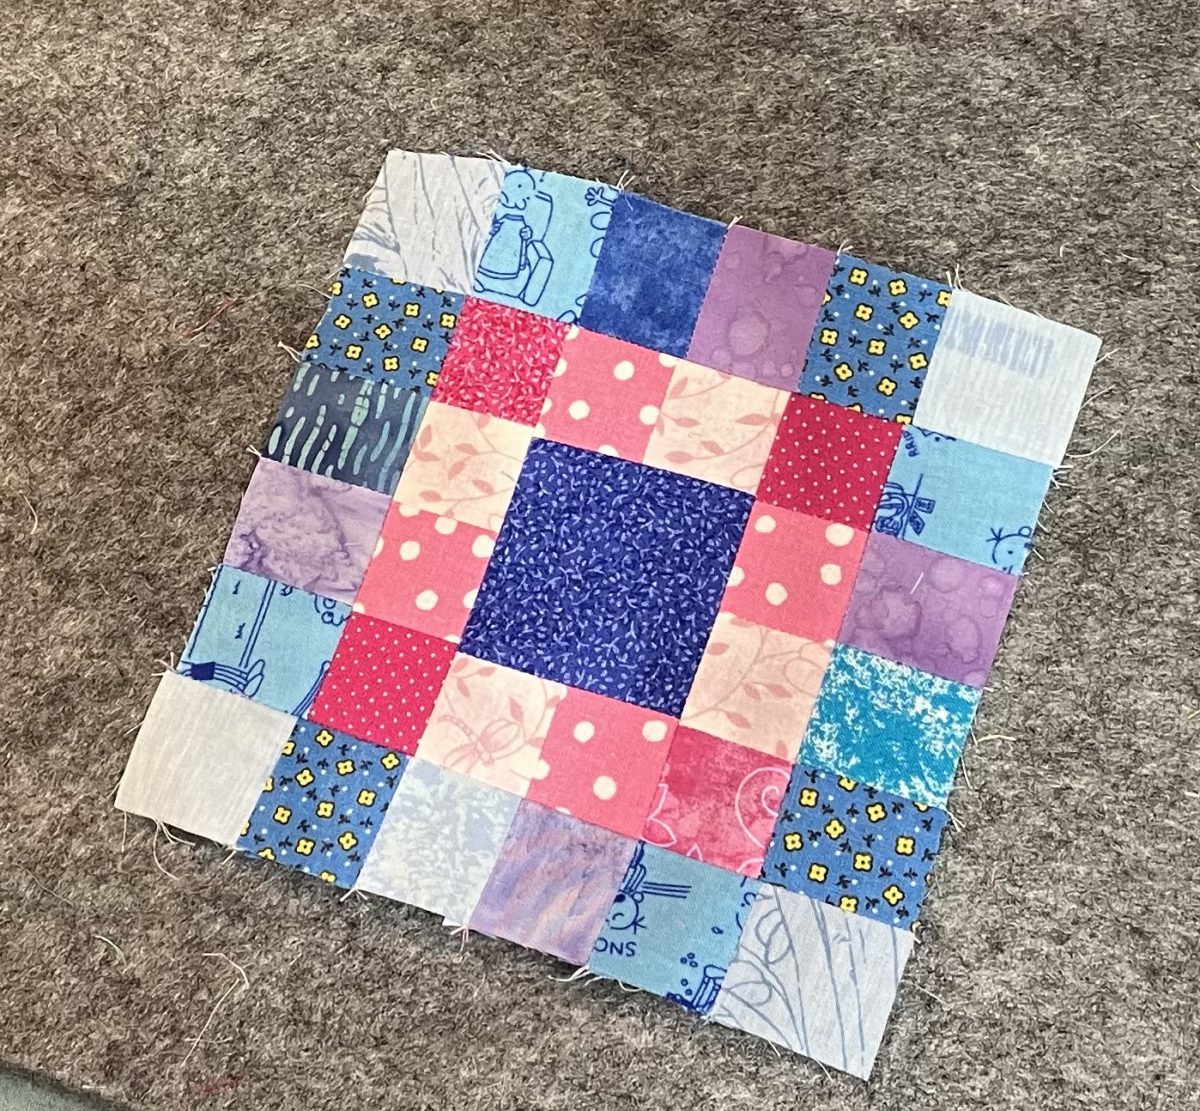
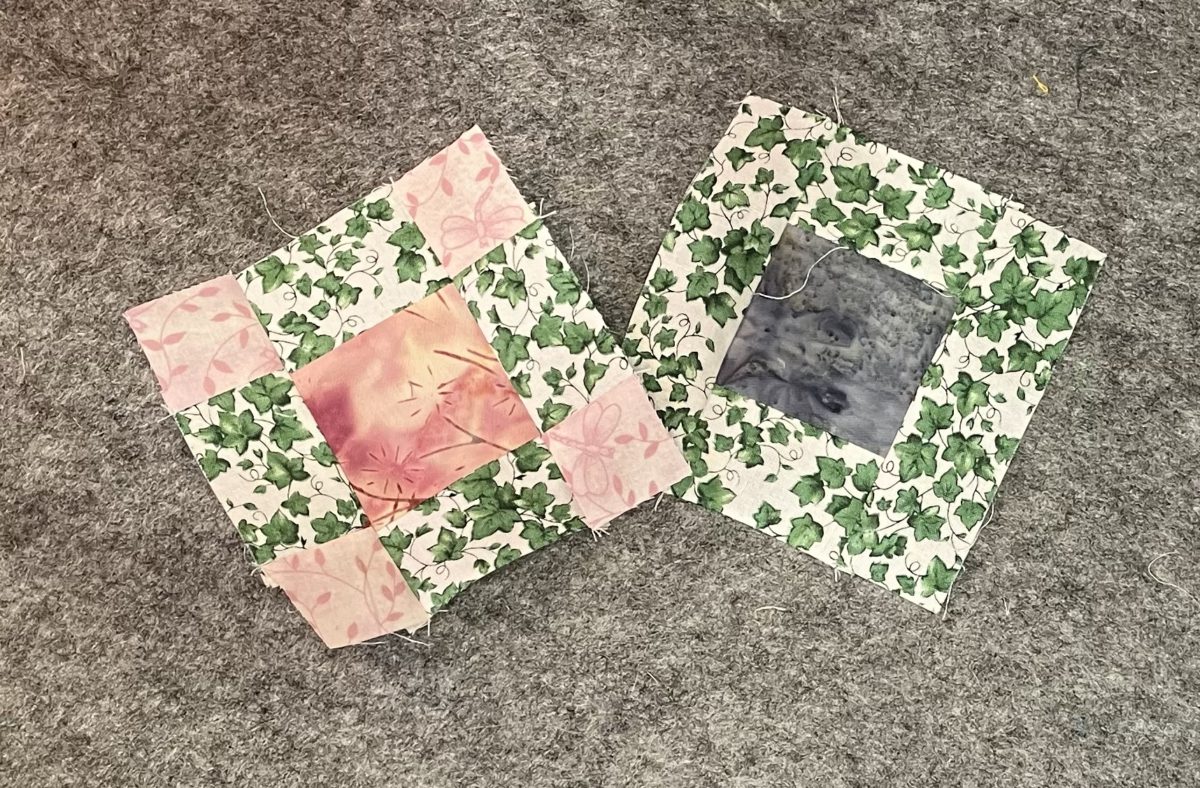
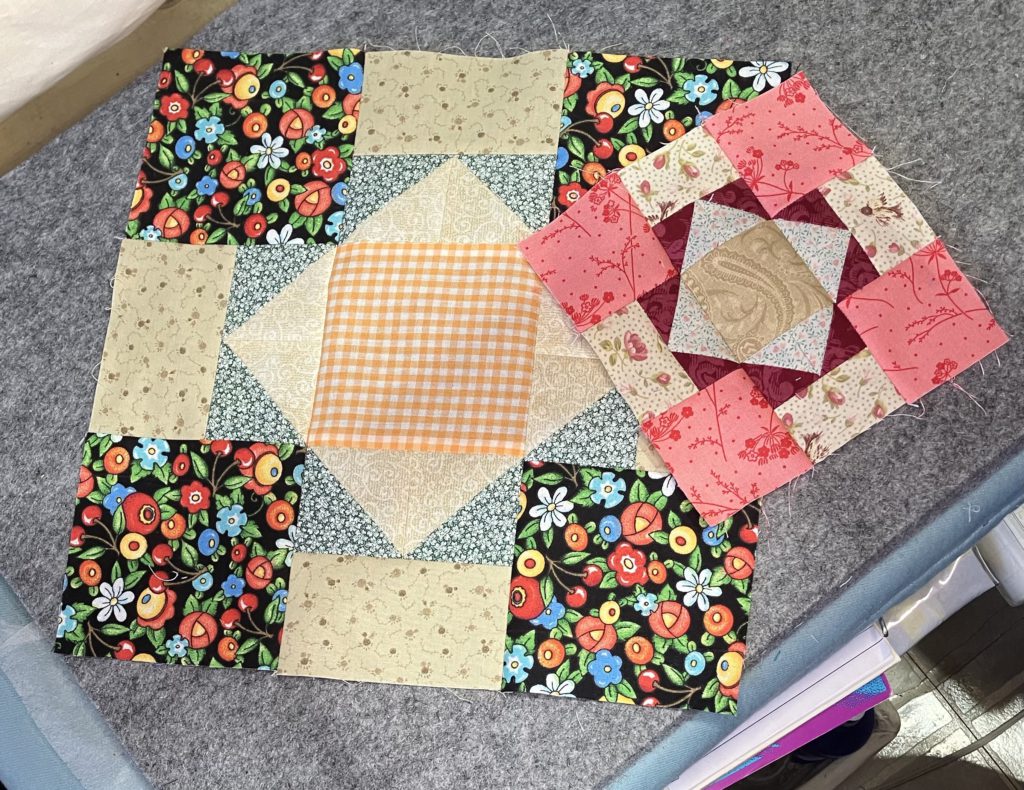
Here are both of the blocks that I made today. There is also a 9 1/2″ version in the chart below.

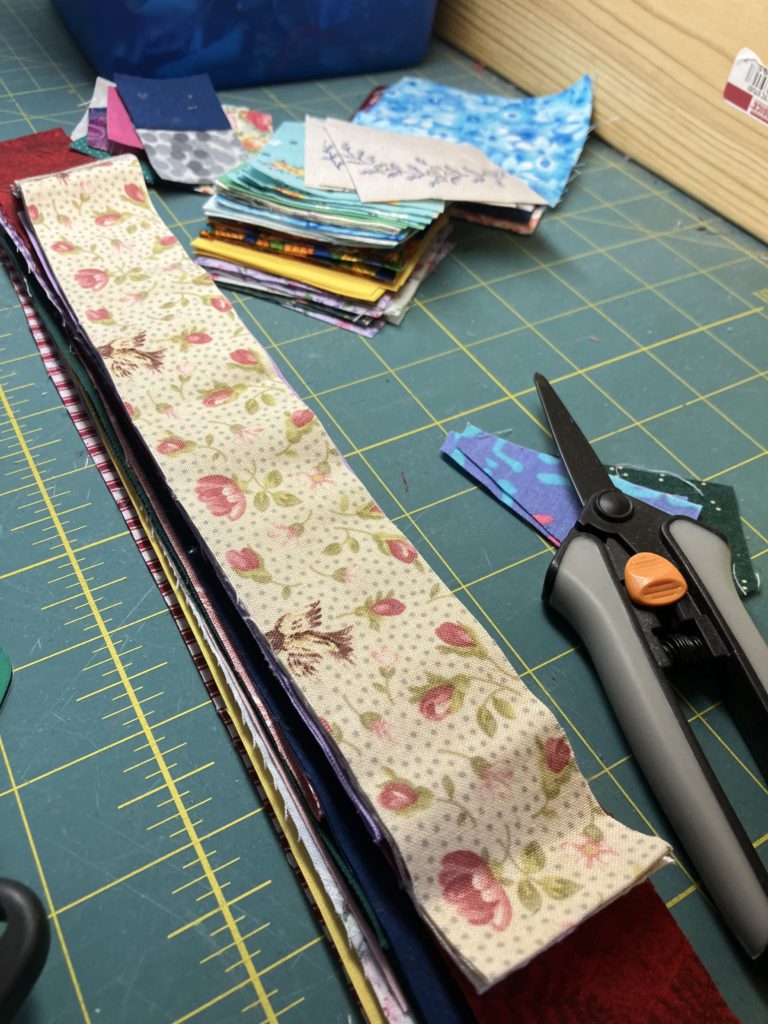
I hope you are enjoying this series on scrappy blocks. The blocks I have chosen for the next couple of months focus on using up those bonus half square triangle blocks. Time for me to go trim up some more of those!

What scrap blocks are you making? Please feel free to share your thoughts and pictures with me here or at my gmail account.

Later,

Lorrie

Categories
Build a block quilting scraps sewing

Build a Block 5M Road to White House

Again this week, I am getting my idea for a scrap block from the Maggie Malone book from the 80’s. I present this block in 3 sizes at the end of this post. A YouTube video is also available for your viewing pleasure.

This book is my muse. It only offers templates to be cut. Thank you, but not today! For the video and below, I list the pieces needed for the 6 1/2″ block.

In the video, I take time to play in my fabric scrap bins. I created a blue version and a green version of this block. The bonus half square triangle blocks have been trimmed to the appropriate size. The half square triangles were pressed to the dark fabric before they were trimmed.

I do like the diagonal movement in this block. This would make a fantastic quilt all by itself. Hmmm!

I start by speed piecing those little four patches…zoom, zoom…and away we go sew!

I press the four patches open to reduce bulk. If I were making one of the larger versions of this block, I would probably press to one side or the other. Life is full of decisions…don’t spend too much time on this one.

At this point, some people like to “web sew” the block together. I seem to get tangled and frustrated with the joined threads, so I repeatedly lay the block out on a design board so I don’t make mistakes. (Unfortunately, I still make mistakes. I have become very proficient with a seam ripper!)

I press towards the four patches and plain squares. Pressing open is an option, too. See my illustrations below. (The arrows would not cooperate when I was editing the next picture…and I had had enough fun that day!)

If you pressed towards the 4 patches and/or the solid blocks, your seams will nest nicely as you finish assembling this block. Almost completed…just assemble the rows.

Ta-dah! Ta-done! It was that easy!

Here’s another possible layout. There are many ways you could layout a set of these blocks to make a beautiful quilt.

Here is the cutting chart for additional sizes of this block. If I were making an entire quilt, I would probably go for the 12 1/2″ size for starters. I would make the second version with 6 1/2″ blocks because that is the size I am fascinated with at the moment. Please share any quilts you have using this block. I love to see your work, too!

I took a short break today from quilting to fix some jewelry, etc. I played with glue…not the hot kind…

Some of this is very blingy. I think that bracelet in the middle is Sarah Coventry. The cat will be so impressed when I am wearing that to work in my sewing room.

I used to wear pins all the time. Maybe I need to impress the cat with those, too. That one looks like a scarab beetle…creepy and cool simultaneously.

The barette is sterling silver. It is incredibly heavy. The barette part had come off the decorative piece. I think I finally found the correct glue. Hot glue was not it.

I used to work with a lady that would create and kiln her own glass pendant pieces. I added a charm and a beaded “chain” to this one so I could wear it. I love the foil in the middle of this one!

I hope you have enjoyed this week’s build a block presentation…and my other ramblings. What are you working on? We are quilters…and sew so much more!

Later,

Lorrie

Categories
Build a block quilting scraps sewing

Build a Block: 5L Thrifty

This is an easy, scrappy block, especially if you sort your scraps by certain sizes like I do…It just makes it faster to choose the bits and pieces to sew together. Here is a cutting chart for the three sizes show below:

There is a video about this block on my YouTube channel.

This 12 1/2″ block is made from all 4 1/2″ and 2 1/2″ blocks…all straight line piecing! No triangles on this block!

Here is the breakdown of my choices:

This block goes together SOOOOO quickly!

Make four 4-patch units. Please note the placement of the lights and darks in the picture below. All four units are identical. Zoom! Zoom! Speed piecing is a wonderful activity!

Normally, I show you an example of a small block with the seams pressed open. Since this is a bigger block this week, I pressed towards the darker fabrics in these 4-patches.

Now it is time to plug those beautiful and simple 4-patches into the main block.

Notice that all the dark blocks are towards the center block and radiate outward. Please note the placement of the blue and the background fabrics also.

Here is the 9 1/2″ example:

Here is the 6 1/2″ example:

Ta-duh! and Ta-done! This block would have a great secondary pattern if placed together. Easy…it would be great as a kid’s or baby’s quilt, too! Let me know what you think about this block. Have you tried it? If you have, please share pictures to my e-mail. I look forward to hearing from you.

I decided to add some pictures because this was such a short, quick post.

I found a stash of bags in my sewing room as I am zone organizing. I donated some. I washed the rest to repurpose.

This one was one that my friends and I made at quilt came with the Camp Frame Fireside quilters. The pocket is paper pieced and held on by the straps. It is lined. The top edge is a rolled down cuff, so the bag can actually be deeper if needed.

On blabfest Fridays, on my YouTube channel, I have been talking about a car quilt for my son and his family. This quilt is made from all scraps…pieces that could have been thrown away, but were repurposed instead.

I need 24 of those jewel box blocks. I have 7 finished. Time to get busy!

Categories
Build a block quilting scraps sewing

Build a Block: Jewel Box

I am in love with this scrap block! After I made one, I just couldn’t stop. I still do not have these blocks out of my system. I love the contrast of the scraps in this block. When multiple blocks are assembled together, a fantastic secondary design appears. (I show four of these blocks together at the end of this post.)

If you would like to see this presentation in video form, please view it on my YouTube channel here.

For this block, you will need: (alternate size chart is at the end!)

  • 16- 1 1/2″ background squares
  • 16- 1 1/2″ scrap squares
  • 4- 3″ background squares
  • 4- 3″ scrap squares

The pieces listed above uses the two at a time half square triangle method. That is a tutorial for another day.

OR if you have a bunch of bonus half square triangles, you can use 8 bonus half square triangle units that are 2 1/2″.

If you are using all squares, you will follow the next few steps to make your half square triangles.

More often than not, my sewing is a scant 1/4″ when I use this method. I would rather have a little extra to trim off than have a unit that is undersized.

You can use your rotary cutter and ruler for this part if you wish, but I always just cut the pieces apart quickly with my scissors.

Press to the dark fabric. If you are using this method, you will need to trim. Fabric stretches, sometimes a little…sometimes a lot…during this method. Accuracy at this step will make your life so much easier when it comes to final assembly of the block.

We are ready for the zoom zoom part of this block…speed piecing! Join all of the squares in pairs of 1 background to 1 scrap.

I am pressing open because I am piecing 1 1/2″ squares together. I want to reduce the bulk and chance of distortion. If I were making the largest size of block on the chart, I would probably press to the dark.

After you press all of you pieces to your heart’s desire, Match up pairs to make eight 4 patch units. If you pair them up before you start sewing, you can insure that you don’t have duplicates in any of your four patches…unless that does not bother you.

Sew pairs together.

Press to your heart’s desire.

Here is the only tricky part…just be a little careful! You are pairing up the four patches with the half square triangles in this step. Pay close attention to the orientation of the blocks when you lay them out. You can stack all of the pieces in two piles to get ready for speed piecing. All of the units are the same.

Zoom, Zoom! Flip one block right sides together and sew together with an accurate 1/4″ seam. Be as careful as you can to keep seams flat. (If one gets flipped underneath, it is not the end of the world!)

Press to your heart’s desire.

Layout your pieces. You will notice that some of the blocks will be turned horizontally and some will be turned vertically. It is all good!

Sew the units together to make a new and improved 4 patch.

Press to your heart’s desire.

You now have 4 units. You are so close to being finished! Lay them out again to make sure they are oriented in the right direction.

Sew them together in pairs. You now have halves!

Press to your heart’s desire…again.

Sew the final seam…

Press to your heart’s desire.

Give the front of the block a nice press. Beautiful!

Here are four blocks set together.

When I showed this block to my husband, he made a “meh” face. He didn’t really like the block…too busy. When I stepped back, across the room, he was much more impressed. When I showed him the four blocks together, he was even more impressed. These blocks are like moss…they grow on you!

Here is the cutting guide for the other size pieces:

I hope that you enjoy making this block. It is a great way to use up those bonus half square triangle blocks. It would be a great leader/ ender project.

I think that I am going to add a round of these blocks onto my son’s car quilt…but that is another story for another day, too.

Have you tried this block? Drop me a comment below…or send me a picture at gmail. I love to see your work!

Later,

Lorrie

Categories
Build a block quilting scraps sewing

Build a Block: Hidden Butterfly

Welcome to another Build a Block post. If you prefer the video, less reading version, you can find it here on my YouTube channel. This makes an 8 1/2″ block. It has a wonderful secondary design as you can see at the end of this post.

Here are the pieces you need for the block:

This block is assembled in two easy parts. First the butterfly pieces of the block. You will need the 2 1/2″ squares and the 4 1/2″ squares to create the two sections that make the butterfly at the end reveal.

There are many ways to make that diagonal so that it is sewn straight.

  • Mark the line with a pen or pencil and a straight edge, like a ruler,
  • press a crease into the 2 1/2″ block as a sew line or
  • my prefered and very lazy method…the piece of tape to follow along with the corner of the square as I sew. You can see the tape in the picture below.

I always opt for the bonus block if the original square size is 2 1/2″ or bigger. That would be the reason I am being over run by half square triangles. I am working on fixing this little problem. There will eventually be a series of blocks on this blog that use up many of those bonus triangles! I promise!

I am a big fan of pressing pieces as you go, as you all know. Butterfly wing sections are now complete.

Now for the second section of the block. It is all straight line sewing for the rest. See the layout below.

Divide the layout into 2 sections…a big section and a little section. I show it in rows in the picture below.

Sew the 3 1/2″ square to the side of a lattice piece. Sew the 1 1/2″ square to the end of the other lattice piece.

Press towards the dark fabric on both of these units…unless you prefer to press open.

Join the two units you created into one bigger unit. The other part of the block is now sewn together.

It really was just that easy.

Press towards the straight lattice pieces…or open.

If you press towards the lattice, sewing the final seam will be easy!

Sew that last final seam. Sorry, no picture of that seam!

Ta-dah…Ta-done!

Here are a couple sample layouts. This block could be much scrappier than I made it. I tried to control the scrapiness for an aesthetic pleasing effect.

I decided to make an additional four blocks and use up some other orphan blocks, too. This is the beginning of a car quilt for my son’s family. Everyone needs a quilt, a flashlight, battery cables, and a small tool kit in their vehicle. Just a thought!

Those borders will fit when they are all sewn together. I, too, am always amazed at how much is eaten up in a 1/4″ seam allowance!

If you construct any of these scrappy wonderful blocks, please share with me through gmail. I look forward to see your work!

If you are interested in making this a larger block, please use the chart below to help you resize the block.


Later,

Lorrie

Categories
Build a block quilting scraps sewing

Build a Block: Bow Tie

Happy New Year!

Welcome to the New Year: 2024! Here is my first build a block for the year. I am keeping it simple for starters! This block goes together quickly. It wins the race for fastest block in this series so far. Watch the short assembly video here on YouTube. There is a chart at the end if you would like to make this block in other sizes.

My favorite block size seems to be 4 1/2″ at the moment. That is the finished size of the block below. It is made from four 2 1/2″ squares (two bow tie color and two background) and two 1 1/2″ squares for the corners. Notice that I folded the triangles and pinned them to take the picture for this layout.

I finger pressed the small squares so I had a sewing line. I also have tape on my machine so I do not have to mark squares under 2 1/2″ when sewing on the diagonal. I am lazy and am willing to freely admit it!

These two blocks are exactly the same. They would be easy to speed piece for a larger quilt.

Since the small squares are sewn to a background piece, it is ideal to press towards the small triangle.

Never hurts to double check, right? We are almost done! Told you this would be quick!

Sew the pieces together in pairs. They are both the same!

This block naturally wants to be pressed to the tie colored square. The seams will lock together in the next step when pressed this way.

Tah-done! I show this in the 4 1/2″ and 6 1/2″ because I had to make sure the proportions were right for the parts chart at the end of this post.

If you have been watching my YouTube channel, I will show you my husband’s bow tie quilt in the Blabfest Friday video that will be live on January 5th, 2024. It is his “car quilt”. I think every vehicle needs its own quilt…just like it needs a flashlight and a toolbox.

I hope you are using up those scraps to make these easy blocks. Soon, I will have to start assembling yet another sampler scrap quilt from the pile I am accumulating! What do you do with your test blocks? I love hearing from you in the comments! Thank you for stopping by!

Later,

Lorrie

Categories
Build a block quilting scraps sewing

Build a Block: Roman Tile

This block is just a few seams above cutting out a plain square! How is that for simple construction? I wish I had grabbed some brighter colored scraps for this block, but this was in my hand waiting to be used up!

You can view the short video here of the block construction. It shows both of the ways to create this block. The first one pictured has two fewer pieces. Neither one is difficult.

I will add the variety of sizes chart at the very end of the post…after my sign off and final comments, if you are interested. This should be a printable image.

This example shows a 2 1/2″ x 4 1/2″ center. The top and bottom rows are made from two 1 1/2″ x 2 1/2″ pieces and four 1 1/2″ cornerstones. The block finishes at 4 1/2″ inches.

Sew the cornerstone squares to the rectangles on both sides. Use a 1/4″ seam.

Press to the outside.

I always like to check my layout at this point, especially when I am speed piecing…just to make sure I haven’t lost any of those important pieces.

Sew on the top and bottom rows. Press to the outside. Tah-done!

Example #2: Same block, just a little scrappier!

This example shows a 2 1/2″ square center. The top and bottom rows are made from two 1 1/2″ x 2 1/2″ pieces and four 1 1/2″ cornerstones. The side pieces are two 1 1/2″ x 2 1/2″ pieces that match the center square. The block finishes at 4 1/2″ inches.

Make a center unit. (This matches the center in the first example when you are finished sewing the pieces together.) Press this unit towards the inside…towards the block.

Assemble the top and bottom rows by sewing the cornerstones to the rectangles.

Press to the outside like pictured below.

Add the top and bottom rows to your center unit. Seams should nest together to make construction easier.

Tah-done! Press to the outside.

These blocks are quick and easy to construct. This would make a great leader/ ender project. I envision it with bright colored scraps for the center and a variety of backgrounds for the cornerstones set together with NO sashing. What a great scrap quilt that would be!

I can’t wait to make an entire quilt with these blocks! It would make a great donation or kid quilt! Would you make a quilt with these? Let me know in the comments! (about this quilt…not interested in Russian viagra or manifestos!)

Later,

Lorrie

Categories
Build a block quilting scraps sewing

Build a Block: center surrounded by 2 strips

This block is quick and easy to construct! I know that I say that almost every week, but it is true every time I say it. Using contrasting scraps is the best way to make this block pop! I pulled strips and squares from my “pre-cut” bins to make this a faster finish.

A one minute video of this block construction is available here on YouTube.

Presenting a New Feature at the bottom of this post! I have added a fantastic size chart for pieces to cut. It contains a variety of finished block sizes. Check it out at the end of this post!

The version shown below is constructed from a 2 1/2″ square in the center and 2 different 1 1/2″ strips surrounding it.

I did cut my strips to the following lengths:

  • 2- 1 1/2″ x 2 1/2″ (inside round color)
  • 2- 1 1/2″ x 4 1/2″ (inside round color)
  • 2- 1 1/2″ x 4 1/2″ (outside round color)
  • 2- 1 1/2″ x 6 1/2″ (outside round color)

This week I have words imbedded on the pictures, as well as arrows. This is a no brainer approach. Please remember to always use a good 1/4″ seam, no matter how crooked the arrows are in my photos.

Please add the 1 1/2″ x 2 1/2″ pieces to the center here.

There are not a lot of bulky seams here, so I press out.

Add the 1 1/2″ x 4 1/2″ pieces to the sides here.

Now is a great time to press it flat, flat, flat. By pressing now, the block will be crisper and flatter for the next round of strips.

Please add the 1 1/2″ x 4 1/2″ outer round pieces to both sides. (I forgot to take the picture before I sewed one of the pieces… oopsy!)

Give the strips a quick press outward.

Add the final two 1 1/2″ x 6 1/2″ strips to both sides.

Press outward one last time. If you want the block to be even flatter, give it a little shot of starch or Best Press at this point.

Tah-done! I love this little block! I told you it was quick and easy!

Below is the new size chart! This took some work to figure out how to embed this in a blog post…making the chart was the easy part!

Please let me know in the comments if you like this new feature. I look forward to hearing from you.

Later,

Lorrie

Categories
Build a block quilting scraps sewing

Build a Block: Square Surrounded & Again

This lovely block uses up lots of little scrap blocks. It is easily adaptable to larger sizes, too. It would be a fantastic leader/ ender project. As it is shown, it finishes at 6 1/2″.

The center square is 2 1/2″. The surrounding rounds are made from 12- 1 1/2″ inner ring blocks and 20- 1 1/2″ outer ring blocks. I used pink and blue to make it easier to see the block rounds. This would be a great block made up in all scraps or other high contrasting rounds. My YouTube speedy Build a Block video can be found here.

I start by moving the outer round of blocks to the side. I can only focus on one task at a time these days.

If you were doing this as all scrappy you could easily sew all the blocks in sets of two and then make the necessary 4-4 block units and 2-6 block units without worrying about placement.

Sew blocks that touch the center into 4 pair units. Two of these units will be sewn to the center soon.

Add the corner blocks to two of those pair units to make 2- four block units.

To reduce bulk, press seams open.

Sew both pair units to the center square.

To reduce bulk, press open…or however you wish to press. No quilt police here!

Add the 4 block units to the new central unit.

To reduce bulk, press seams open.

Sew all of the outer blocks in pairs, then sew pairs together until you have 2- 4 square units and 2- 6 square units.

Press open to reduce bulk. (You knew I was going to say that, but that doesn’t make you a psychic!)

I always like to lay out the block at every step, just to make sure I have placement the way I intended it to be when I started. I am fairly quick with the seam ripper these days, but I still don’t enjoy that process.

Add both of the 4 block units to the sides of the center unit.

You know what I am going to say! Press seams open to reduce bulk.

Add the 6 block units to the last two sides of the center unit.

Not saying…you know!

Tah-done! Another beautiful scrap block! This one used up LOTS of little pieces.

I hope that you are enjoying this Build a Block series of simple blocks. I am starting to have a nice little pile of these blocks just by creating ones to picture in these tutorials. I hope you are, too.

Thank you for stopping in to look at my pictures and read my block making narrative. What are you creating today? I hope it is simple and relaxing! I would love to see pictures of your work over on my Facebook page. Come join my group!

Later,

Lorrie

Categories
Build a block quilting scraps sewing

Build 2 Blocks: Square Surrounded by a Strip(s)

Welcome! Today I am constructing a simple block using a center square and strips…and for a second block, a center block with strips and cornerstones. I chose very simply constructed blocks for the next few weeks to get us through the “Silly Season” and all of the holidays. My head is spinning with all of the tasks that I need to complete before the new year. How about you?

You can also watch a 1 minute video that shows a very speedy version of the block construction…very speedy!

Let’s get started! The layout is simple. I chose a center block with good contrast from my scrap bin. I love to work small, so my center is 2 1/2″. You can make this any size you want. It is easily adjustable.

The outside strips are 1 1/2″ here. Again, with a larger center, you could easily use wider strips. I cut two of the pieces the same width as the center block to get started.

Join the cut strips to the center block on both sides.

Press however your little heart desires…I pressed the seams out on this block. There is not a lot of bulk in the seams like previous blocks made from a zillion little squares, so I did not press open.

Add the other side strips. You can cut these to the final length before or after you sew them on.

Again, I pressed the seams to the outside. The completed block is shown at the end of the post.

Ahhh! The second block…cha-ching! Bonus, Baby!

The center of the block shown here is 2 1/2″, but could be easily adapted to your favorite size. Strips and cornerstones are 1 1/2″ wide. I would change this if I were using a large center block to keep the proportions about the same. This could also be made in a scrappier version.

I assembled this block in rows. First, I assembled the top and bottom rows by adding the cornerstones to the center strips.

Next I speed pieced the side strips to the center. Doing all of the piecing at the same time makes the pressing easier.

I know that not everyone is a pressing fanatic like I am. I don’t like to wrestle with seams as I am trying to sew the units together, so I press between each step. You do you…press as you wish. No judgements here.

I pressed the top and bottom rows to the outside and the center row toward the larger center block.

When I added the top and bottom to the center, the seams locked together nicely…no pinning required.

I pressed to the outside on both sides.

Two little blocks…tah done!

I hope you are enjoying my build a block series. When my head stops spinning after the holiday season, I hope to evolve this into a printable pattern page with different sizes to make it easier to use with scraps of all sizes. What are you planning to make with your scraps? I love to hear from you…especially if you aren’t leaving comments about selling Russian viagra, etc!

Later,

Lorrie