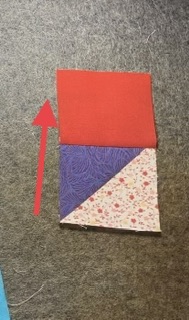
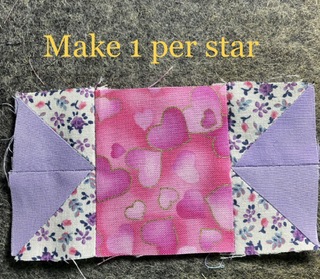
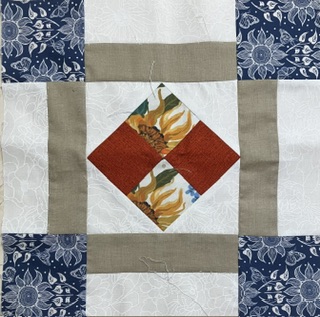
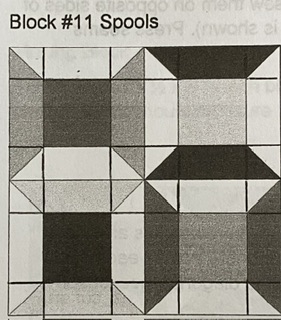
The version of this block shown below finishes at 8 inches. It could easily be a 4, 12, or 16 inch block, too.
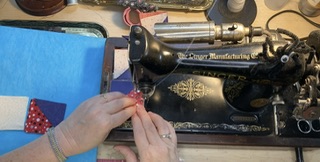
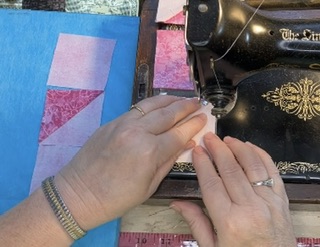
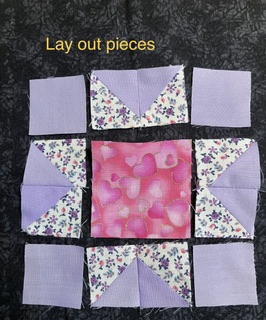
As always, and because it is so easy to get a triangle moving in an unintended direction, I lay out the block before I sew.
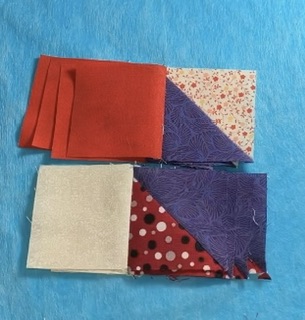
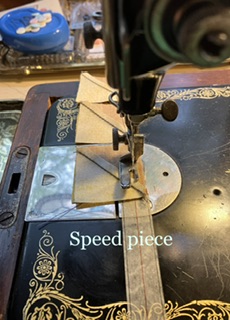
This block is actually the same 4 sections turned in different directions. That makes it great for speed piecing! Zoom, zoom!
Here I have rearranged the block into a piles that are 4 sections to speed sew all at the same time.
I love the purple trapezoid made from the 2 half square triangles. These squares are much easier to deal with than a cut out trapezoid and 2 small triangle pieces. Trapezoids have some serious bias edges that stretch and distort the unit. Starching the fabric before cutting pieces like that is helpful, but using half square triangle units is even better!
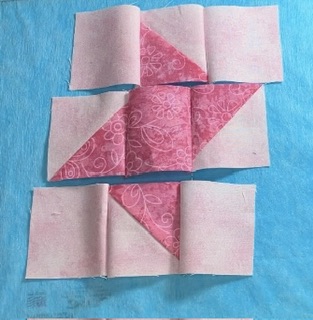
Sew the units together in rows.
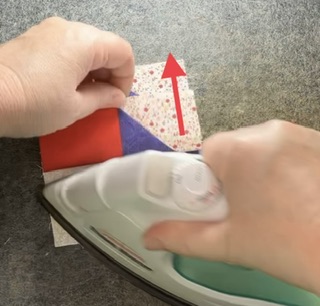
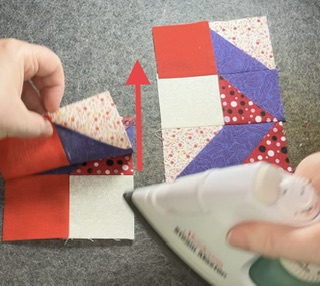
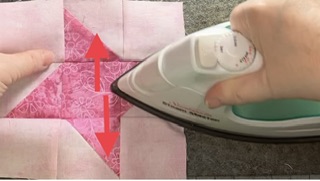
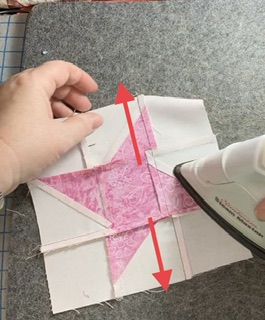
Press the top row towards the solid square on the left. It looks like up in this picture.
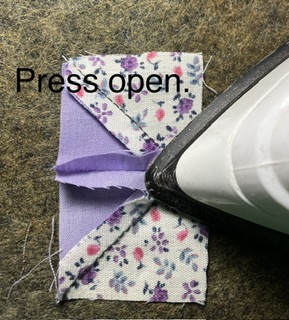
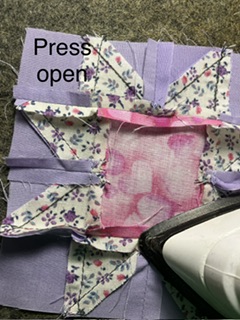
Press the bottom row towards the triangle square. I know that this seems counterintuitive, but will work out better when it comes to sewing the rows together and piecing the rest of the block. You could press the seam open if you wish for a flatter unit.
Again it looks like I am pressing upward, but I just turn the block so that I am pressing in that direction. I get flatter more accuate pieces when I press in that direction. It is a personal preference and the most comfortable way for me to hold the iron.
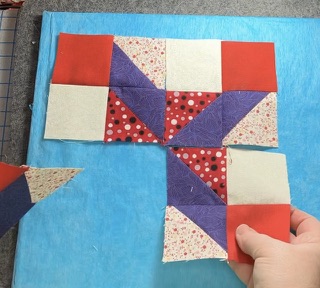
Here the blocks are laying in units by row…4 deep. Better safe than sorry!
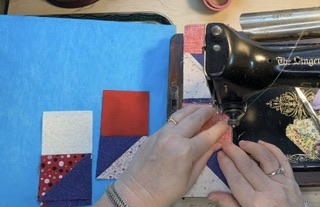
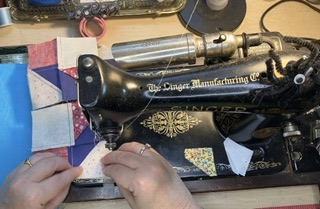
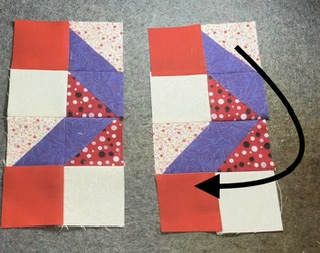
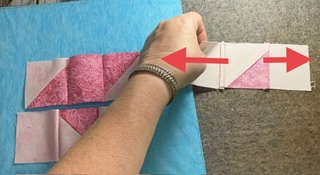
Sew the rows together. Seams should nest together nicely to make block construction easy without pinning…unless you want to, of course.
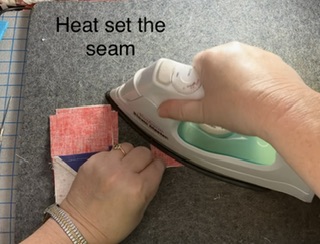
I always thought heat setting the seam was silly, until I tried it. It does make the seam press flatter in the end.
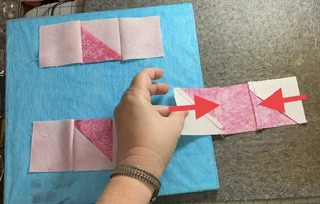
I press this unit towards the top row. Pressing the seam open is always a good option, too.
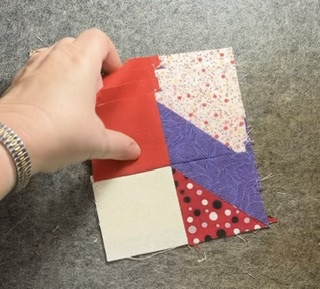
These units are nice and flat…ready to put together. Notice that the trapezoid shape has a little hitch on the right for the seam allowance.
Spin the units around to lay them out.
Sew the top 2 block units together. Then sew the bottom 2 block units together.
Press one unit to one side.
Press the other unit…which is identical…to the other side.
Turn the units to the correct layout. Sew the last 2 units together.
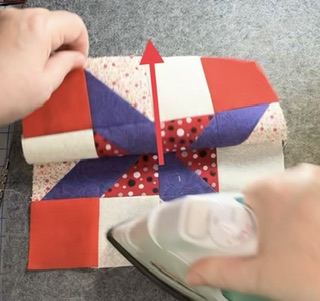
Press to one side…or in my case the top.
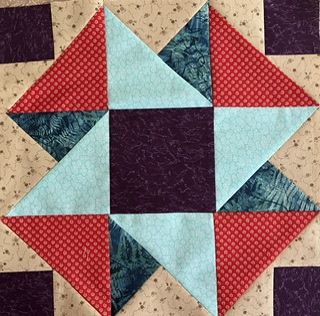
You now have a beautiful Clay’s Choice block.
As a note of warning, you will notice that my wool mat is a little discolored on the right bottom corner. That is what happens when you use starch and get it on the wool mat. To prevent this, use a pressing cloth underneath to prevent starch overspray.
I am enjoying the process of assembling blocks with the bonus triangle squares. Every time I look at quilt books I am noticing them. They are jumping off the pages at me!
What blocks are you making using these bonus pieces? There seem to be millions out there!
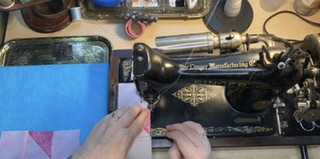
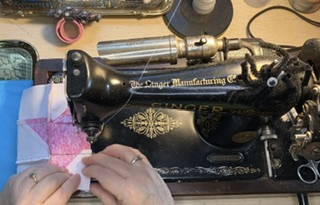
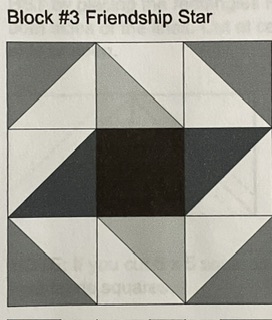
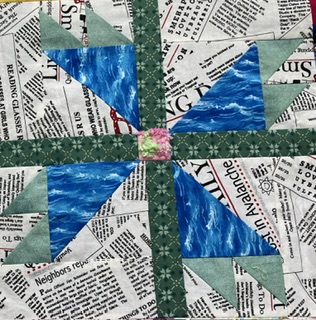
This post goes along with my YouTube short of the same title. It is part of my series on using up bonus half-square triangle blocks. I like friendship star blocks because they are simple. The asymmetrical aspect of the block makes me a little crazy. I always lay the pieces out ahead of time so I don’t have to pick them and fix them later.
I will practice a little more with this fish-eye zoomed in view. It is an interesting perspective.
After laying out the pieces, sew the pieces together like you would any old nine patch.
After sewing the first two pieces together in each row, I lay the pieces back on the design board. Better safe than sorry!
Add the rest of the blocks of the blocks to each row. Lay them out again….safety, safety, safety.
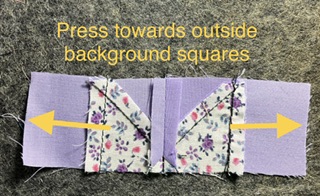
Press the top and bottom rows outward.
Press the middle row toward the center.
Sew the top and middle row together. Seams should nestle together.
Sew the bottom row to the unit you just created.
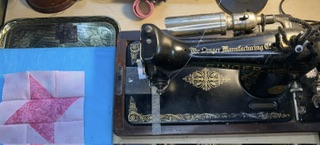
The little friendship star is assembled and ready to press.
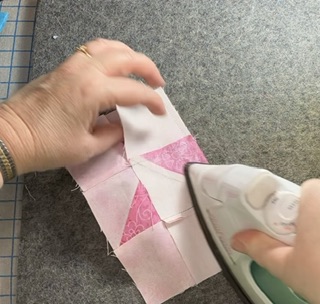
I heat the block first to make it more willing to press the way I want it to go.
I pressed the rows towards the outside, but you could press the seams open or towards the inside. This was just my personal preference today and at the moment.
I also gave the block an extra little press from the back.
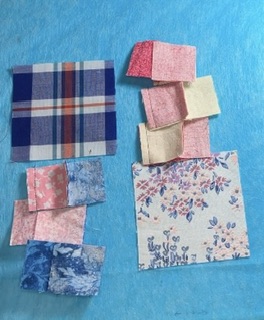
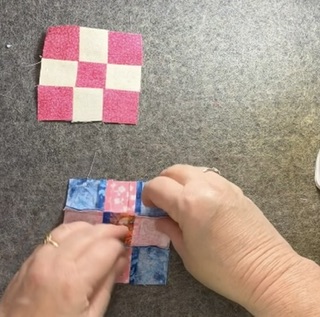
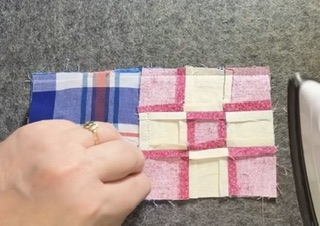
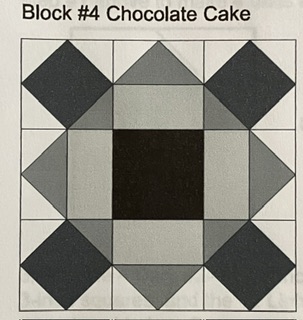
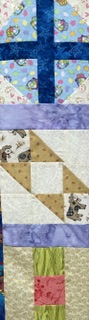
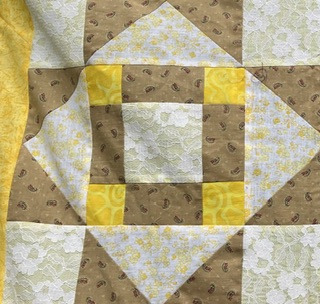
It is time to use up some more of those scraps! Let’s make another basic block…9 patches added to larger squares to create a 4 patch. These blocks are versatile. When set together, they make an adorable scrap quilt. See my YouTube short showing this same block. It is part of my series on using up bonus half-square triangle blocks.
Here is a block waiting to be sewn. You will need the following pieces to make this 6 1/2″ block:
2- 3 1/2 inch squares
18- 1 1/2 inch squares to make both nine patch blocks
This block could easily be made in a variety of sizes: 12 1/2″, 18 1/2″, etc.
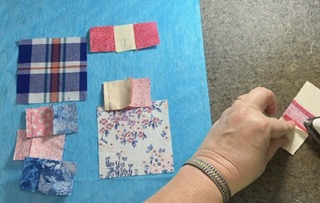
Start by speed piecing the rows of the nine patches.
Press the seams open…if you wish.
Sometimes I use my fingers to gently pull on the block so I can get the seam open to press it. Without burning my fingers, of course.
Look at those nice, little rows. Sew the rows together.
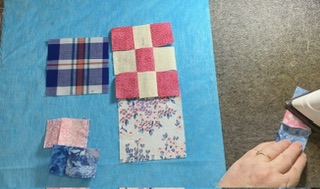
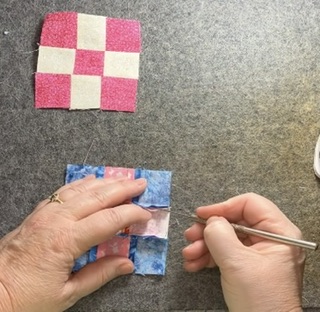
I press these seams open, too. It cuts down on the bulk and the blocks lay flatter.
Occasionally, I have difficulty getting those seams open. I have a stylus…actually it is a dental tool from the hardware department of a flea market…that helps me grab the seam.
You can see my stylus a little better here in this picture.
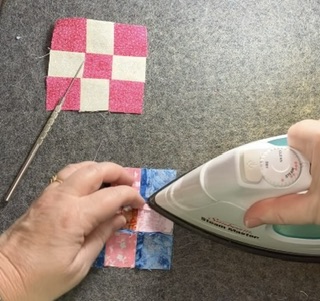
After the 9 patches are ready, sew the bigger blocks to them. Press towards the larger block.
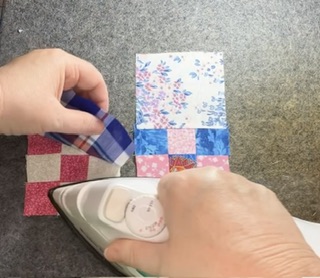
When you turn the block pieces around, the seams will nestle.
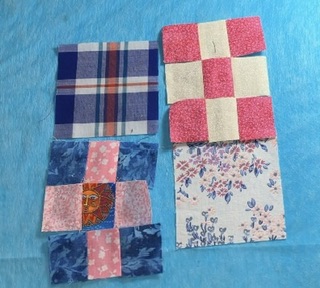
Press the seam whichever direction you so desire…or open if you want.
Tah-done! What a cute little scrappy block!
What blocks have you been making to use up your scraps? Please comment below. I can’t wait to hear from you!
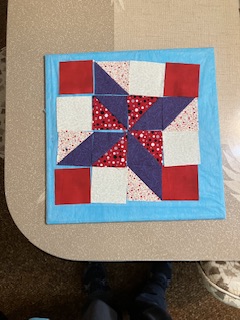
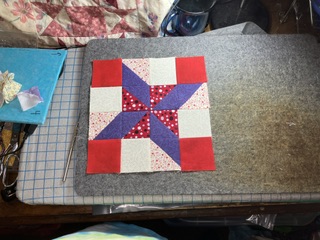
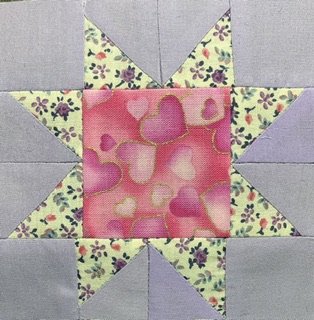
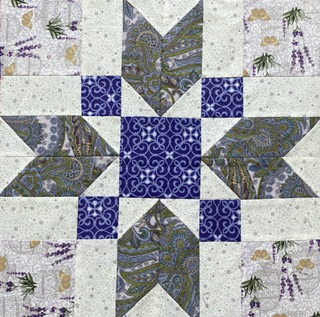
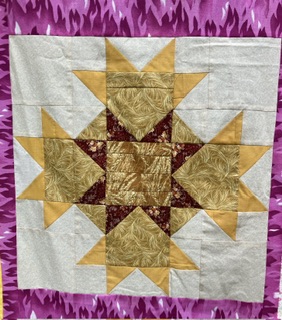
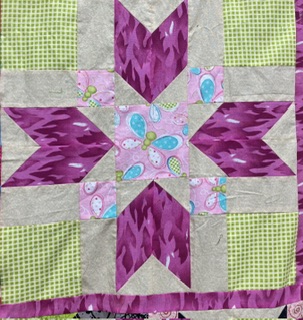
This week, I am adding a second block, the scrappy star. It is pictured here as a 4 1/2″ block. It could easily be made into a 8 1/2″, 12 1/2″ or 16 1/2″ block.
This tutorial reads like a picture book. I learned how to edit photos! Many of the directions are right in the picture. This also matches my YouTube short that shows how to use up some of those bonus triangles we all have. Most of the pictures are the same as those in the video, too.
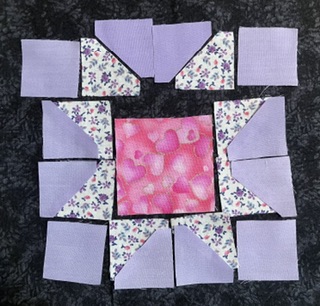
Here is the finished star:
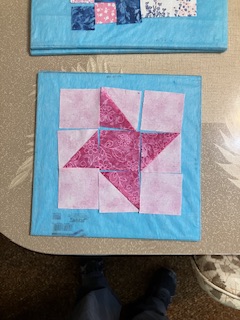
I have been making these as leader/ ender blocks for the entire summer. I have a nice little pile going.
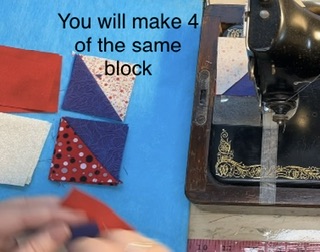
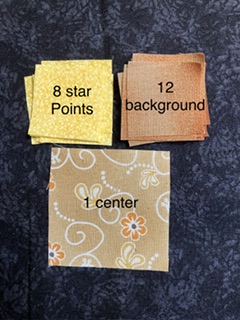
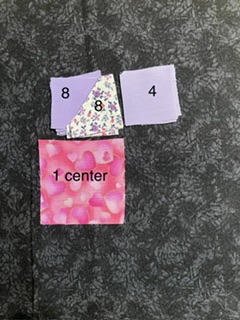
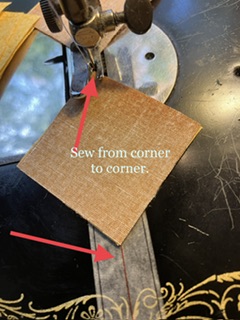
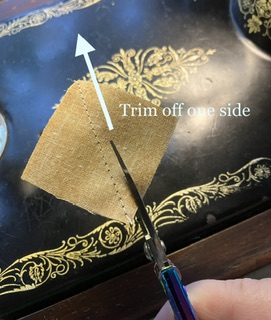
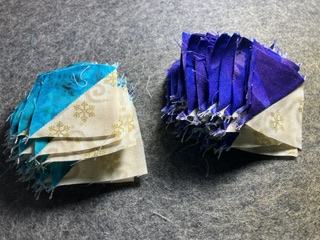
The first image is parts you need if you don’t cut triangles to make this block. The directions are in the pictures below to make the triangles from squares. Just look for the tan and yellow squares.
This second picture, with the lavendar background, is the number of pieces that you need if you ARE cutting the triangles. I use an accuquilt die to cut those little triangles, but it is not necessary to have one of those to cut pieces.
The easiest way to make any block, is to lay out the pieces before you start.
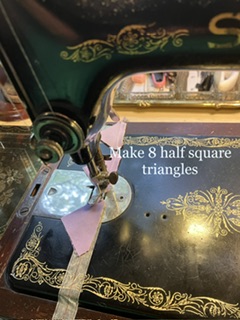
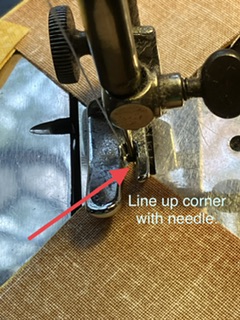
The first sewing step is to make the 8 half square triangles, whether you are using triangles or squares.
The images with brown fabric are constructed from squares.
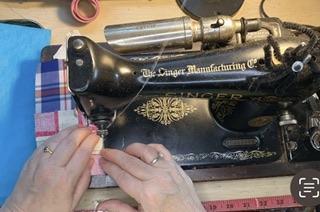
I love the washi 1/4″ tape. It doesn’t leave a residue. It stays on for a long time. There is a lot of it on a roll.
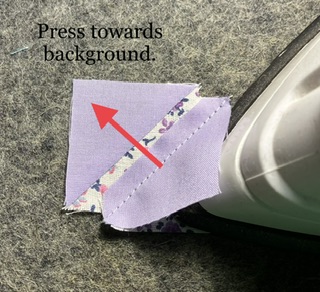
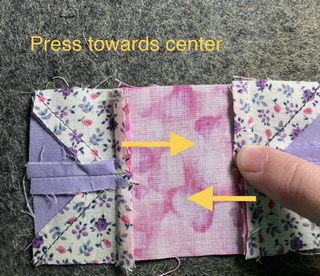
Now that your star points are sewn, it is time to press.
Background fabric should be towards the inside. Star points should be on the outside.
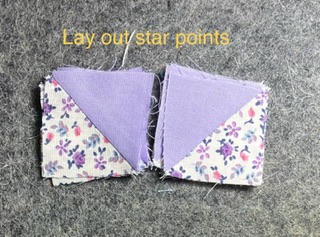
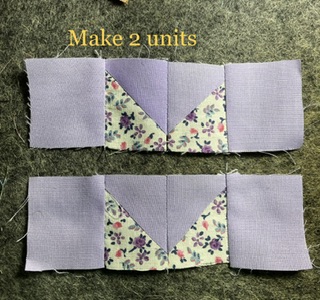
Sew the star point pieces together in pairs.
I prefer to press these seams open to reduce bulk. You can press the seams to the side if you prefer. I know this is a controversial topic in the quilting world. No judgements here!
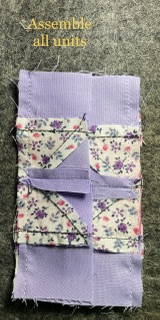
Lay your pieces out again. This is a double check of your star points, etc.
You have the parts assembled for all 3 rows.
Time to finish the block. Sew the rows together.
Again this is to reduce bulk in these little seams.
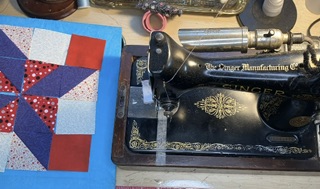
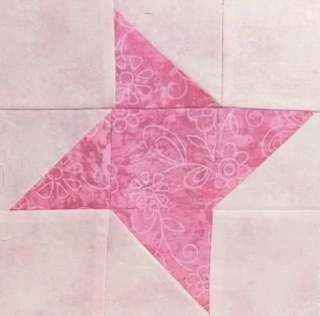
Here it is again…the cute, scrappy star block.
I hope you are enjoying making little scrap blocks. There are many more blocks to come!
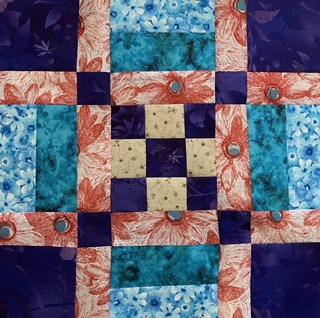
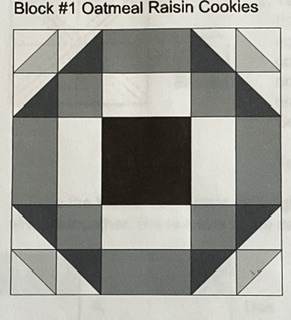
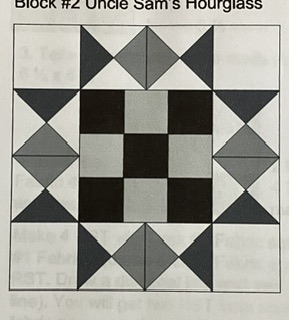
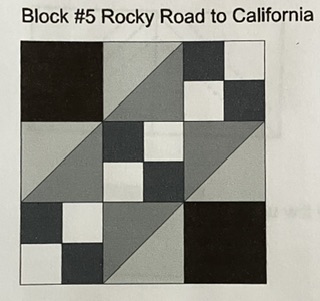
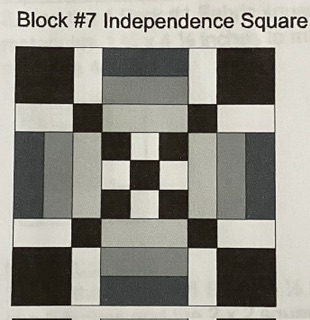
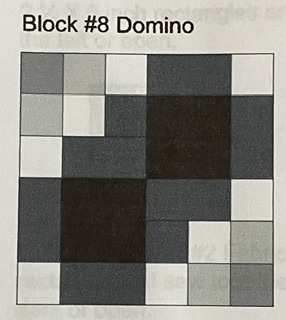
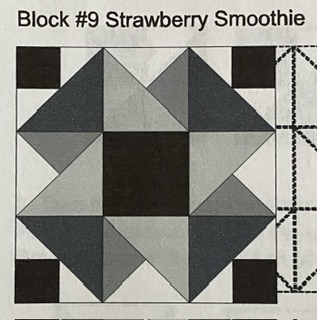
I am slowly making progress on this block of the month. Here is block seven, eight and nine.
Janice did a great job with the directions on this one! Thank you, Janice! I changed the color placement from the original pattern to make the red pop out a little more.
I changed the middle reds on this block so that they looked like hearts. The original block only had one red.
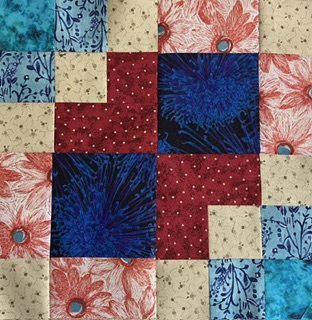
This block had a lot of little tiny trimming to make it fit perfectly. Once it was trimmed, it was easy to assemble. There is a lot of swirl going on there!
Are you working on any “installment” projects? Please share! I love hearing from you!
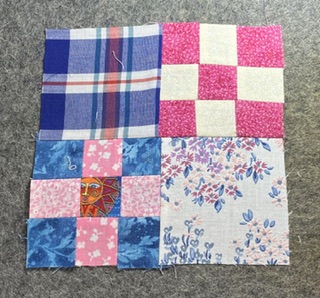
You will need 16 blocks of your choosing for this block. Choose one of the following sizes for the best results: one and a half inch, 2 1/2 inch, 3 1/2 inch or 4 1/2 inch. Block should I have a nice contrast between them.
Lay the blocks out in a 4 x 4 formation like the illustration above.
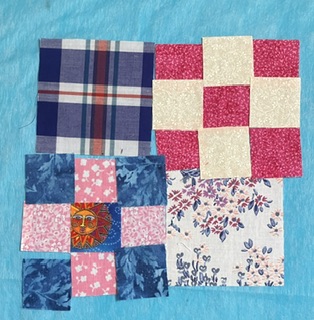
Sew the blocks in each row together. You will have four rows.
it is now time to press the seams of your block. There are two options. You can press the seams to one side or the other or you can press the seams open. I recommend pressing the seams open even though this seems counterintuitive. It creates a flatter block in the long run. I have never had any problems with weaker seams because of pressing seam allowances open.
Recently I joined Hale Country Quilt Guild. I have only been to 3 meetings, but I am enjoying this experience. At the last meeting, I shared my Sweet Childhood Memories quilt tops. The ladies made me feel so good!
Sheryl, my wonderful Up North neighbor, invited me to a meeting because she knows how much I love quilting and sewing. When we joined, the BOM was on the 10th out of 12 blocks.
Sheryl has several blocks completed. I love her colors! So pretty! I love the Autumn colors and earth tones with a touch of blue she chose.
I needed some time to make this project more complicated. Yes…that means I have not started the blocks yet. I am using teal, purple and a touch of red.
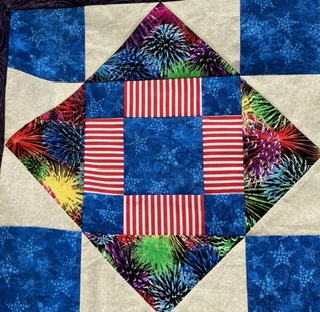
However, I have all the setting blocks completed for the quilt in my head. I am using the large center start from Pat Sloan’s Festivals and Fireworks quilt sew along.
I am using a block I saw on Pinterest for the four 16” corner blocks. Here is a link to the free, printable pattern. It is called Blue Ridge Mountain Star.
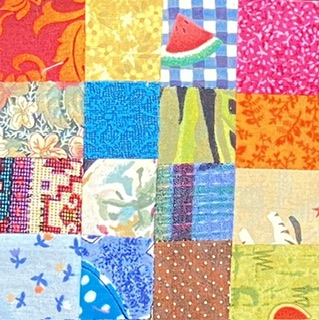
Just as a side note, look at all of these bonus half square triangles!
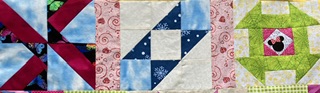
Here is a quick snapshot of the patterns:
I like that the patterns all use 1 background and a light and dark of two colors. The directions are well written thanks to Janice Berg. I love playing along with friends. Time to get to work!
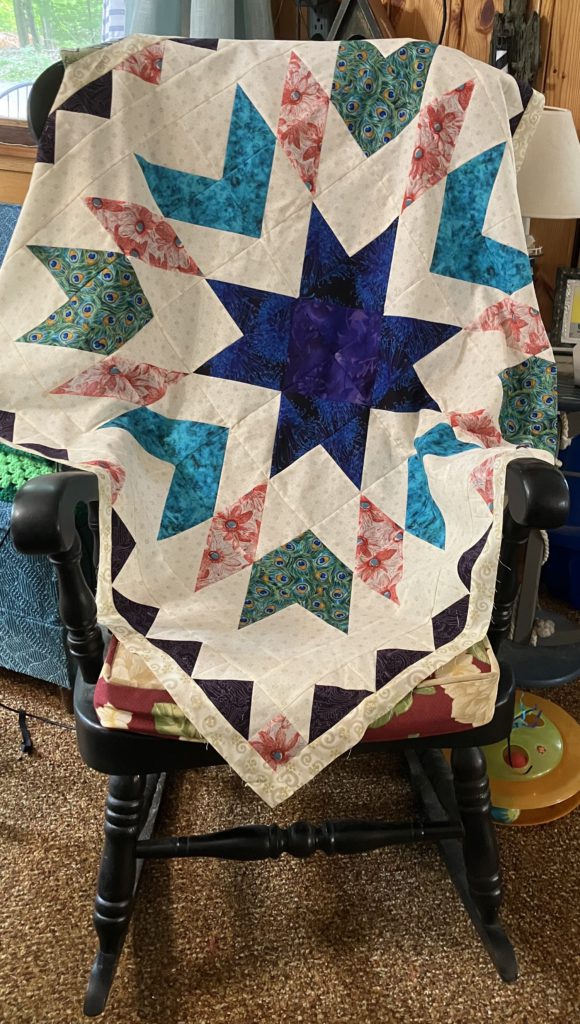
I finally got it all together. Well, maybe not ALL, but this fourth and final version of the Sweet Childhood Memories quilt. This is the quilt that holds my memories. Ta-Dah!
In this quilt, Sweet Childhood Memories, designed by Pat Sloan, each block has a theme. I chose fabrics from my stash to represent the given theme of each block. Here is a detailed look at my fabric choices:
My favorite color is teal. Any shade of blue is great, too. Purple and red are great accents. The inner border that looks black is in reality a deep purple.
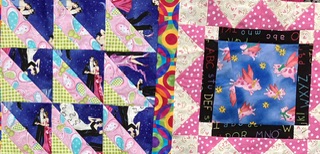
Block: Fairy Tales
When I was young, I had a Raggedy Ann doll that I loved to pieces. She had several surgeries to reattach her arm, her leg, etc. I also had a book about the adventures of Raggedy Ann and Andy. There are many of these books still available from Amazon, Etsy, etc. The dolls are also very collectable. I have several of the dolls decorating my sewing room, but not the poor original that was so well loved.
This block reflects the colors in the Raggedy Ann’s clothes. I even found some striped fabric…just like her socks.
Block: Best Friend
My best friends were all in the band. The fabric selection in this block reminded me of a John Philip Sousa march…that my friends would have been playing. Listen here.
Block: Bedtime Routine
Like I said, all four of these quilts had the printed background. Story time or reading was an important part of the bedroom routine. Brushing teeth and taking a bath was important, too.
Blocks (from left to right): Easter Sunday, Outdoor game, and Summer Break
Easter Sunday was the time to visit with grandparents. My grandmother loved to color Easter eggs with us. My grandparents had 200+ chickens, so eggs were never in short supply. They also had rabbits. One always left tracks somewhere in the house for us to find.
I had an basket that I used year after year. A Gardener’s solid chocolate rabbit always appeared in it. I always got a new Easter dress and dress shoes.
As a teenager, our youth group was always in charge of the breakfast after the sunrise service. Someone from the Ladies Auxillary group usually supervised us. That poor lady!
The middle block represents outdoor games. I used to love to play hide and seek with my brother. I would hide and he wasn’t good at the seek part…because I was in the hay loft in the barn where we weren’t supposed to be. I didn’t fall and break my neck…no harm, no foul, right?
Ahhh! Summer! This block goes well with the block above it. I loved playing outside…or reading a book outside. I spent a great deal of time in the hay loft of the barn or up a tree, hiding and reading a book.
Block: Ride a Bike
The Christmas that I was six years old, I got a bicycle. It had a purple and silver paisley seat, that my dad immediately changed to a more comfortable plain, white one. The body of the bike was purple sparkles. It took me forever to learn to ride, because I was so afraid of crashing! No helmets back then!
Blocks (from left to right): Books, Sing a song, and Movie Time
My favorite book was Charlotte’s Web. When the movie came out, I was thrilled, but as always, it was not as good as the book. I used web fabric in memory of Charlotte and pink fabric for Wilbur. Sorry, Templeton, no rat fabric was available.
The middle block is for Sing a Song. Senor Don Gato was a favorite song from elementary school. Listen to it hear. The fabric speaks for itself.
The last block in this row was for favorite movie. I would have to say Cinderella. She did have to clean up a lot of cobwebs!
Blocks: Nursery Rhymes on the left, Fun School Memory on the right
Ring Around the Rosie was my favorite nursery rhyme. We would join hands and spin around like maniac, then all fall down. I used as much flower fabric as I could. The contrast in this block is not the best, but it is still a pretty block.
When I was in high school, I did a term paper on nursery rhymes. I was appalled to find out it was about the black plague.
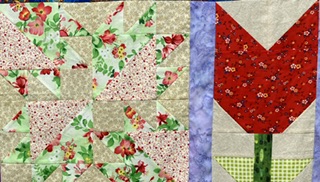
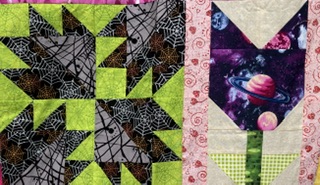
The tulip block is the fun school memories block. My greatest school memory was a school wide trip to Philadelphia, PA for the bicentennial celebration. Our school did fund raisers for two years to make sure that every student got to go on this trip. It was a five hour bus ride from central PA to get there. We left at 4 AM, but I got to touch the Liberty Bell. I still have the miniature version on a shelf in the sewing room. We got to see the mint in action making money. I was in 4th grade. Don’t waste time on calculations…I am old.
The flower body was cut from red, white, and blue calico. I probably have some Liberty Bell fabric in the tub of American fabrics, but I was content with the red.
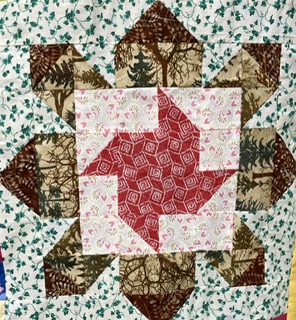
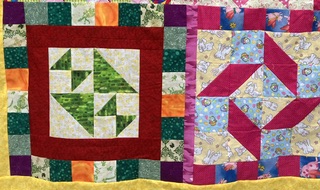
Block: Childhood Home
This block is so appropriate for my childhood home. That whirling shape in the middle…someone was always coming or going…Mom, step-mother, etc.
The purple in the center is for a great patch of irises that were beside the house. There was wild garlic mixed in with the irises, so when it was time to mow them off for the fall, it had a wonderful garlic aroma.
My parents had beef cattle and milk cows, thus all the cow fabric. My mother used to make butter in my Grandmother’s antique barrel churn to sell. She also sold pastuerized milk, too. When my parents divorced, dad sold the cows.
The house itself had gray tar paper siding on the outside. At one point, the house had belonged to my great-great-aunt and uncle…maybe more greats. Then it was sold and turned into a hunting camp for a while before my parents purchased it.
Blocks: Toy Box on the left, and Favorite Teacher on the right
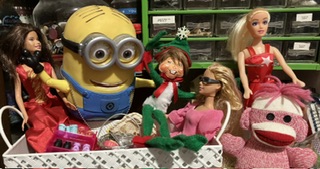
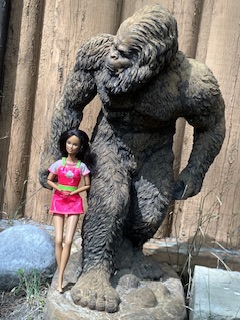
My favorite toys were Barbie dolls…and, yes, I still have some. They are friends with my elf and sasquatch statue.
I have two favorite teachers. In high school, Mrs. Neary was a wonderful teacher. She had my dad as a student when she was a brand new teacher. From the stories he told, it is no wonder she became strict and scary. She was wonderful!
My other favorite teacher was Miss Richards in 6th grade. She was sweet and kind. She taught me a lot about being compassionate…that carried over into my own teaching career.
I chose the fabrics for this block because I liked them. I am not sure when I learned to be the recycling “hippy” that I am. Maybe it was on that walk in 6th grade when we didn’t get to go camping…
Blocks: Favorite Bedtime Toy on the left, Holiday Memory on the right
On the right, the block represents bedtime toy. Again, Raggedy Ann.
The block on the left was favorite holiday memory. For years, my grandparents had a big Christmas party. All the aunts, uncles, cousins, great aunts, great uncles, etc. came to this party. I hated it. I whined about it. My dad said that someday I would miss that stupid party. I hate to admit it, but he was right. He was so right.
Block: Something You Learned
This block is about something I learned. There is not enough space here…Let’s just say I survived, I adapted, I overcame and here I am! Now I am old enough to wear purple and red anytime I want!
All four quilts pieced and ready to be quilted. I hope to have these ready to give as Christmas gifts (this year, smarty pants!).
I am already working on my next two projects. I need to keep busy so that Dan doesn’t think I have time to substitute teach. I am having way too much fun being retired!
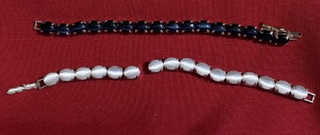
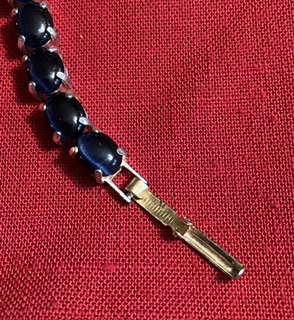
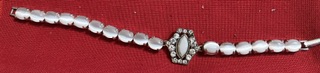
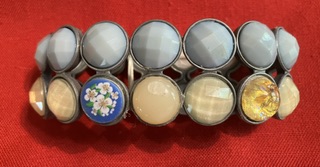
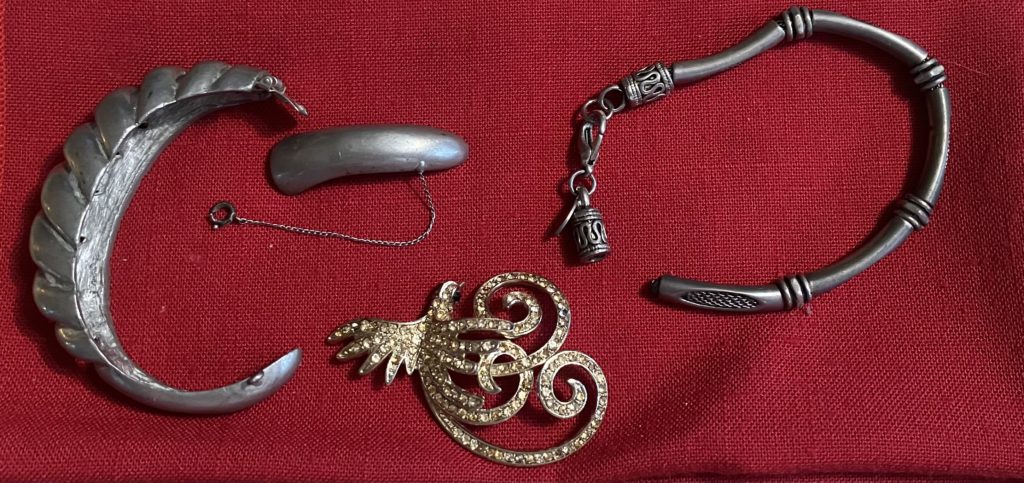
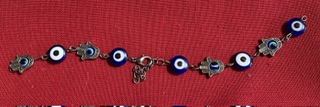
Here are the first two pieces to be repaired. The blue bracelet on top needs a clasp. The white bracelet is missing a part that holds a joining link.
I found a link on a different, not repairable, bracelet. It is not the correct color, but it works.
My solution for the white bracelet was more elegant. I found a “bead” on a broken necklace that could be fastened to the bracelet pieces with jump rings. It is a little longer, but beautiful!
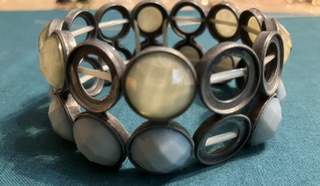
I showed you this bracelet in the original post, but I forgot to post about it with a follow up.
Most of the original cabochons were in the bag of pieces, but they were still a few missing. I improvised.
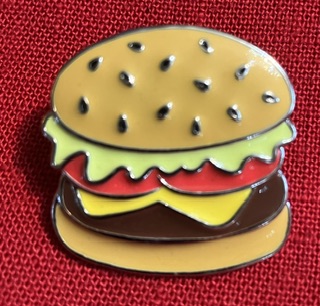
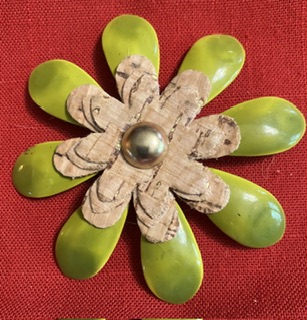
This cute little pin was in the bag .
I am not quite sure what someone did to bend the back like this. Oh my!
I straightened it as best I could with a pair of jeweler pliers… Not perfect, but functional.
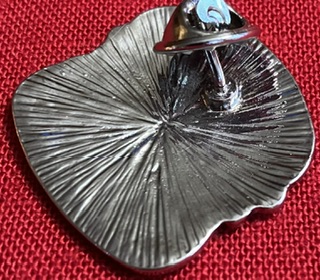
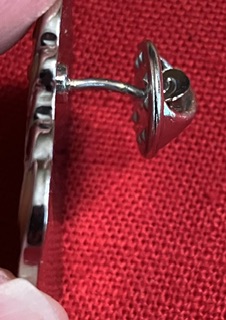
These items need a little bit of glue or jewelry cement. The middle piece is a pin.
The two bracelets below just need a jump ring inserted to make them whole and useable again.
This pin was actually in two pieces. I glued one on top of the other to make it usable again. It measures 2 inches across…welcome back to the 60s or 70s.
I hope you’ve enjoyed the update on the bling from the scrap bag of jewelry pieces. There are many more of these to come.
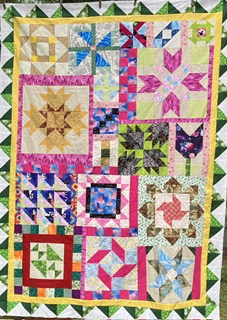
I did finish the final quilt today and will be showing you that later this week…
I started this sew along to get to know my new daughter-in-law better. We are glad to have her in our lives. She makes our son happy. She also seems to like my sense of humor. I enjoyed hearing stories about her childhood and where she grew up. This quilt gave us topics to talk about and share. She also got to hear stories about our family, too. She didn’t run away screaming, so that’s a good thing.
In this quilt, Sweet Childhood Memories, designed by Pat Sloan, each block has a theme. I chose fabrics from my stash to represent the given theme of each block. Here is a detailed look at my fabric choices:
My daughter-in-law’s favorite color is green. I used as much green as possible with yellow and pink as accent colors.
Block 1: Fairy Tales
Rumplestiltskin was a favorite childhood story. I used straw fabric for the center and golden threads fabric, too. Straw spun into gold. The pink flames just happens to be the sashing between the blocks.
Block: Best Friend
Tracy had a great story about the best friend theme. When she was little…6 or younger…she spent the night at a friend’s house. In the middle of the night, they prepared breakfast for her friend’s parents. They made toast and raw eggs! She said that she didn’t ever remember staying the night with that friend again. Hmmm!
I used egg yolk and toast colors in this block. I had some scraps of fabric that had lace fused on top. I am certain that these scraps came right out of the 1970’s!
Block: Bedtime Routine
All four of these quilts have newspaper print for the background in this block. Everyone reads or has been read to at bedtime in our family.
The water fabric represents bathtime before bed every night. Bathtime was an important part of bedtime routine at Tracy’s house. She remembers playing a game called, “You are a washcloth” with her mom to help her identify items around the room. The center of this block is made with textured fabric to represent the washcloth.
I modified this block with a green sashing because I cut the squares incorrectly for the half square triangles…oops!
Blocks (from left to right): Easter Sunday, Sing a Song, and Summer Break
Tracy said that one of her favorite Easter things was getting a basket. We talked about egg hunts and coloring eggs, too.
The middle block is for Sing a Song. Tracy loved the Alphabet Song. The small black blocks have the alphabet in print on them. The pig fabric was extra from a previous block…storytime. Tracy introduced me to the story, Perfect the Pig. It is a great story. It is out of print, but you can listen to it here.
Ahhh! Summer! I used colors that reminded me of climbing trees. Tracy had a yard and neighborhood full of great trees to climb.
Block: Ride a Bike
Tracy had a bike that was glittery pink and white. I added the pink flames just for fun!
Blocks (from left to right): Books, Favorite Outdoor Game, and Movie Time
Tracy’s favorite book was Perfect the Pig. I didn’t find that great flying pig fabric until after I made this block. I used sky fabric and butterfly wings to represent the story. Eventhough this story is out of print, she did find a copy for baby.
Freeze Tag was a favorite outdoor game that Tracy played with the other kids in her neighborhood. I used sky fabric to represent the outdoors and snowflakes for freezing.
Tracy loved Cinderella, Snow White…any Disney movie as a little girl. I had some very small scraps of Minnie Mouse…perfect. I used green spider web fabric to represent all the cobwebs that Cinderella cleaned up.
Blocks: Nursery Rhymes on the left, Fun School Memory on the right
Little Miss Muffet sat on a tuffet and had to put up with a lot of spider webs. I have an amazing amount of spider web fabric. I HATE spiders. I know that in crazy quilts they were added for good luck.
The tulip is for a trip to the planetarium. I love this fabric, but never found a use for it…until now!
Block: Childhood Home
After I made this block, based on Tracy’s description of the house she lived in, she found a picture. Her house was red brick. The yard was full of big trees to climb. There was ivy growing everywhere. I found fabric for all of those elements.
Blocks: Toy Box on the left, and Favorite Teacher on the right
Tracy loved playing with Barbie dolls. I had a great collection of these, too. The dancers in this block remind me of Barbies in elegant gowns and cute shoes.
Tracy’s favorite teacher was Mrs. Baney, an English teacher. I used more alphabet fabric…and the great Perfect Pigs.
Blocks: Favorite Bedtime Toy on the left, Holiday Memory on the right
Since bathtime was an important part of her bedtime routine, Tracy said that her favorite toy was stacking cups that she played with in the tub. I used colors that represented stacking cups. I also found a set of these at a yardsale that I gifted to her.
The fabrics in the Holiday Memory block represent Easter…lots of bunnies and baskets.
Block: Something You Learned
Tracy’s lesson learned was, “Never burn bridges.” One of the star points has a bridge on it. You will notice it is not on fire.
I am happy to assemble another one of these quilts after months of work. Hopefully, the third one will be ready for viewing soon. I hope you enjoyed this quilt narrative.