The election is over…no more political adds for a while. Whew!
This is the last block in this quilt. Next week, we start the setting pieces so that we can have the top done by the end of the month.
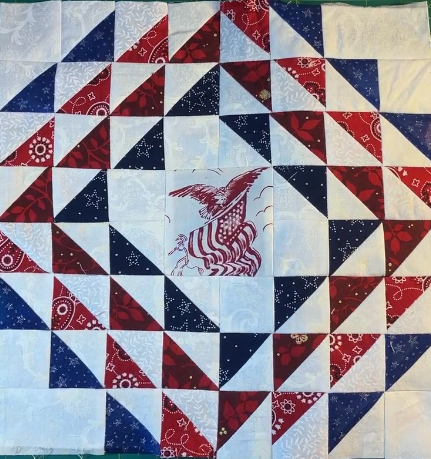
This block finishes at 12″ when set in a quilt. It is made up of mostly 2″ squares.
When I assembled this block, it took about 40 minutes to trim the triangle blocks. This is not my favorite task, but I powered through by taking short breaks between block stacks.
I like that this block looks complicated, but it really is not.
My hints are:
Pin when you feel like you need to…
Consult the pattern for correct placement…frequently…
Press diagonal seams to the dark, and
Press most straight seams open to reduce bulk at corners.
Here is the printable PDF:
I hope you are enjoying this build a block series. If you have any questions about cutting pieces at a different size for a different piecing technique, I would be glad to help you! Contact me through e-mail at werquilters@gmail.com.
Here it is! The center block for this layout! I used several techniques to make this nice, big block. Please take your time and enjoy the process of making this block! You have the skills to create this!
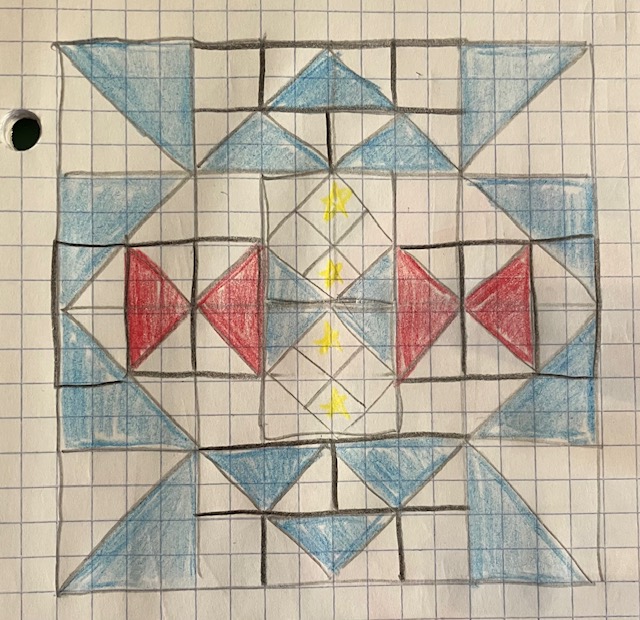
Here is my original graph paper design. I am including this to help you with unit placement!
Last, but not least, here is everything from above in a printable PDF:
Please remember to contact me in YouTube comments or through gmail. Comments are turned off here. Sorry if you are a spambot!
I love to see and share pictures of your finished work! (Even if they are not necessarily the blocks or the quilt in this series!) We all love eye candy!
I hope you are enjoying this series! Have a fantastic day!
This is a nice and easy block for week 6 of the build a block. For complete directions, please watch the video on YouTube.
The spinning graphic of this block reminds me of all of the commercials about the current elections here is the USA. They make my head spin! How can 2 candidates say opposite things about each other, but everyone is telling the “truth”? Oh, my! I am glad to turn off the television, put on some music, and sew some quilt blocks!
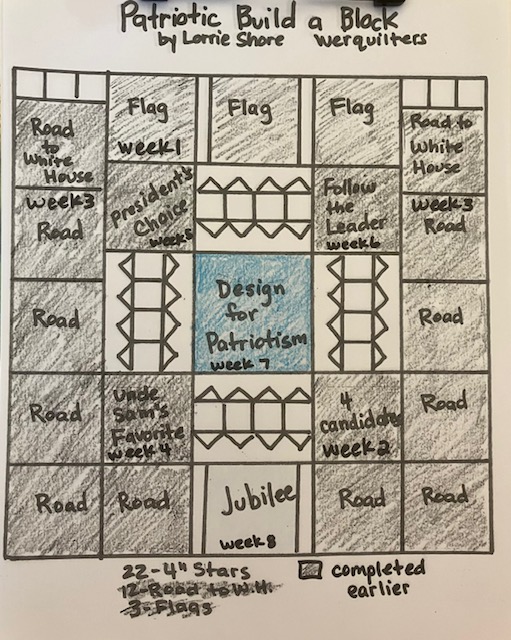
Here is the placement guide for the block in the quilt:
Here is the pattern, with 2 choices of cutting/sewing methods:
I hope you have enjoyed creating this block! I can’t wait to see pictures of progress you have made!
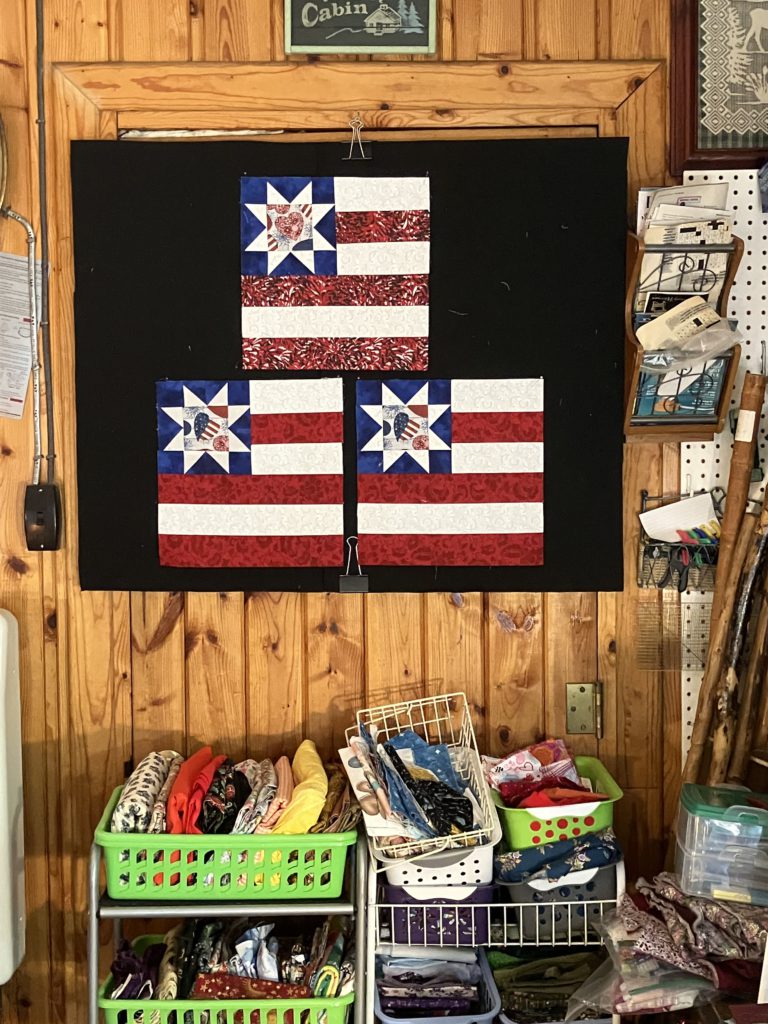
Here is the first of the eight blocks in this series. Please enjoy the pictures below. This block finishes at 12″ (unfinished at 12 1/2″).
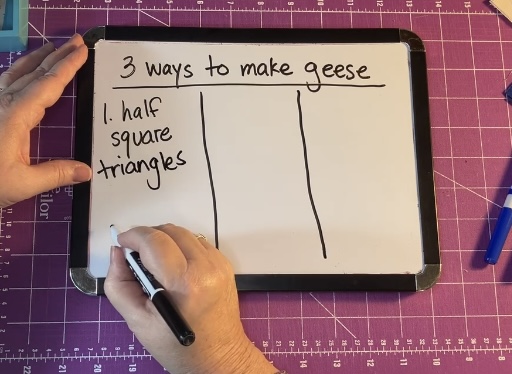
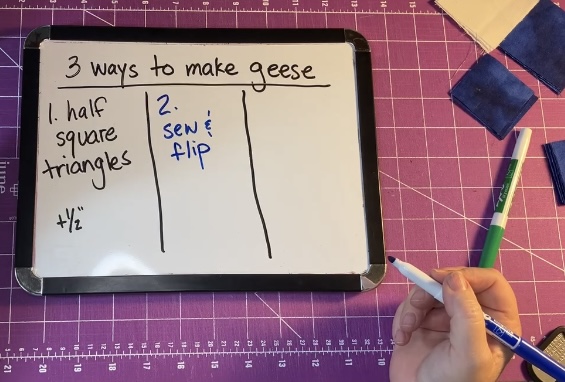
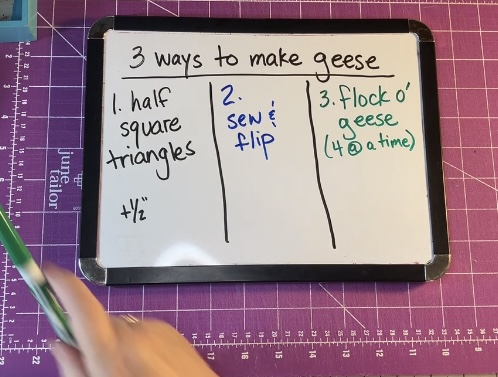
In my YouTube presentation, I show you three different ways to create the flying geese for the star. I just couldn’t resist the educational opportunity. You can take the teacher out of the classroom, but you can take the teaching out of the teacher!
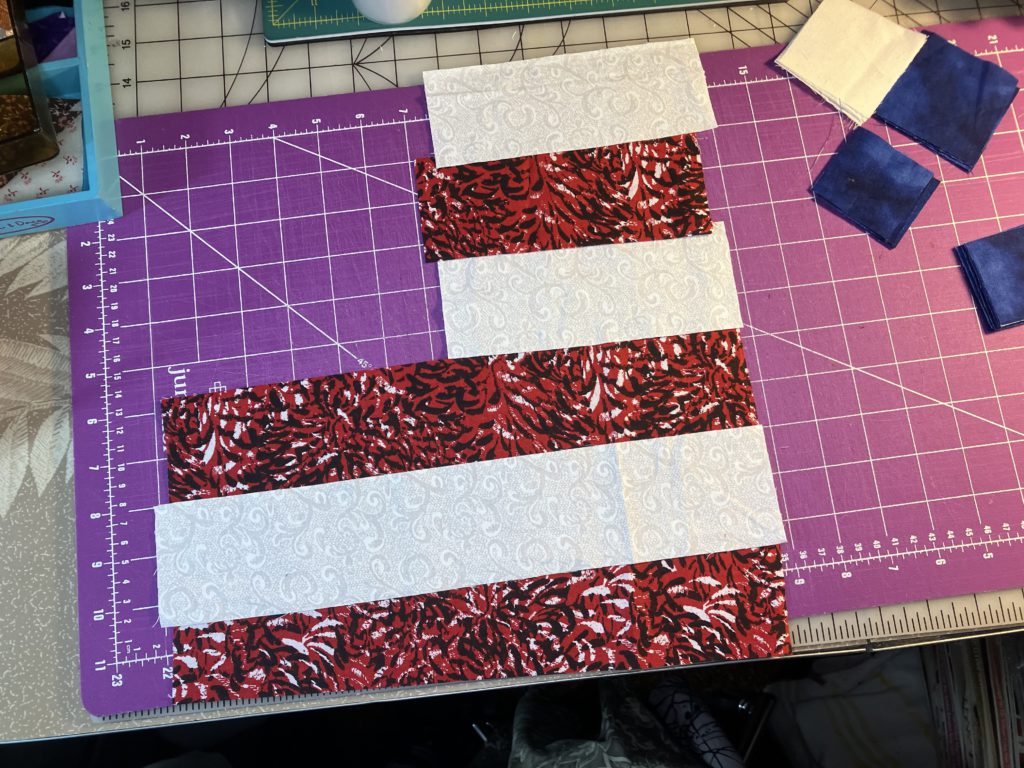
The striped part of the block is made from red or white 2 1/2″ strips. See the chart at the bottom for lengths.
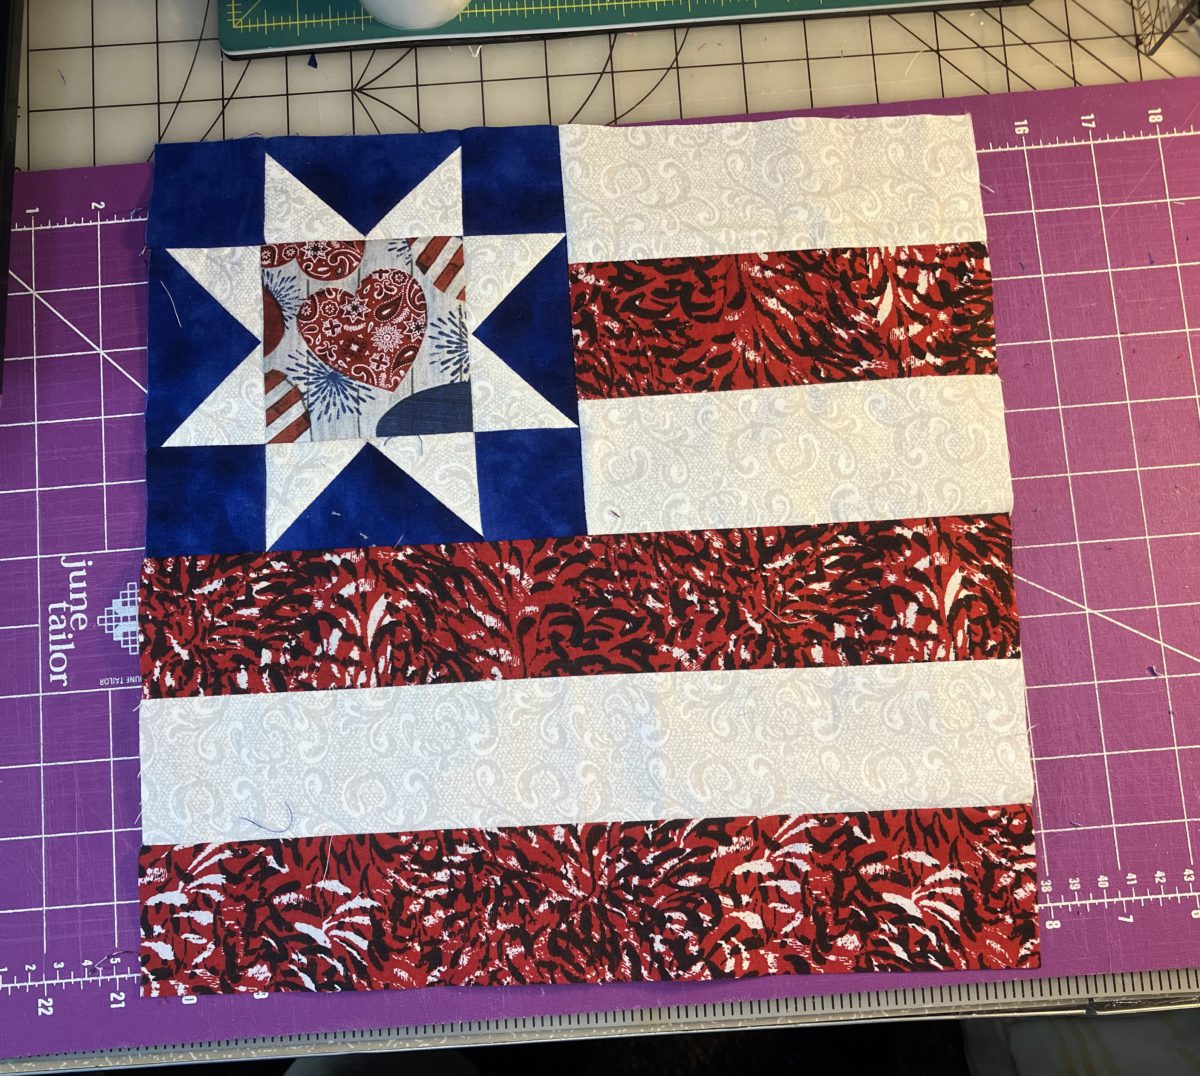
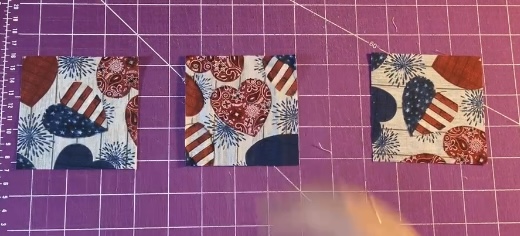
The empty corner in the above picture is filled by a 6 1/2″ star. I am making three blocks for my layout. What a great opportunity to make flying geese for the stars three different ways. You can choose your favorite method after giving them all a try. Keep in mind, the more you practice, the better your skills will become.
Here are the three methods:
Making two at a time half square triangles, that are combined to make geese, are probably easiest for beginners who might be intimidated by the flying geese block. I always make blocks oversized and trim to make them perfect. It does take a little extra time, but the results are much better for me.
The second method is sew and flip.
Sew and flip is great because it starts with the finished size block as a base. There is some waste unless you make bonus square triangles. (I only do this if the starting blocks are 2 1/2″ or bigger.)
The third technique is the four at a time method. I am calling it the flock o’geese method.
This method requires cutting less pieces. It is a technique to consider if you have adequate fabric pieces. I always make pieces larger so I can trim to have perfect pieces. I think this technique is the fastest and wastes the least amount of fabric.
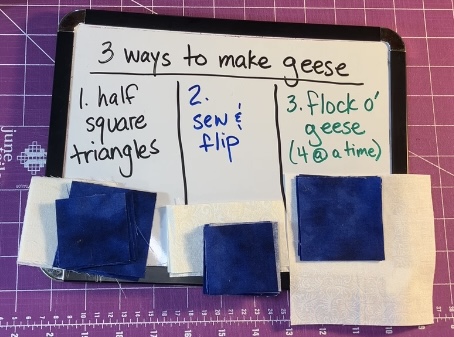
Here is the geese fabric (plus corner squares) for each method. All three of these methods are worth perfecting!
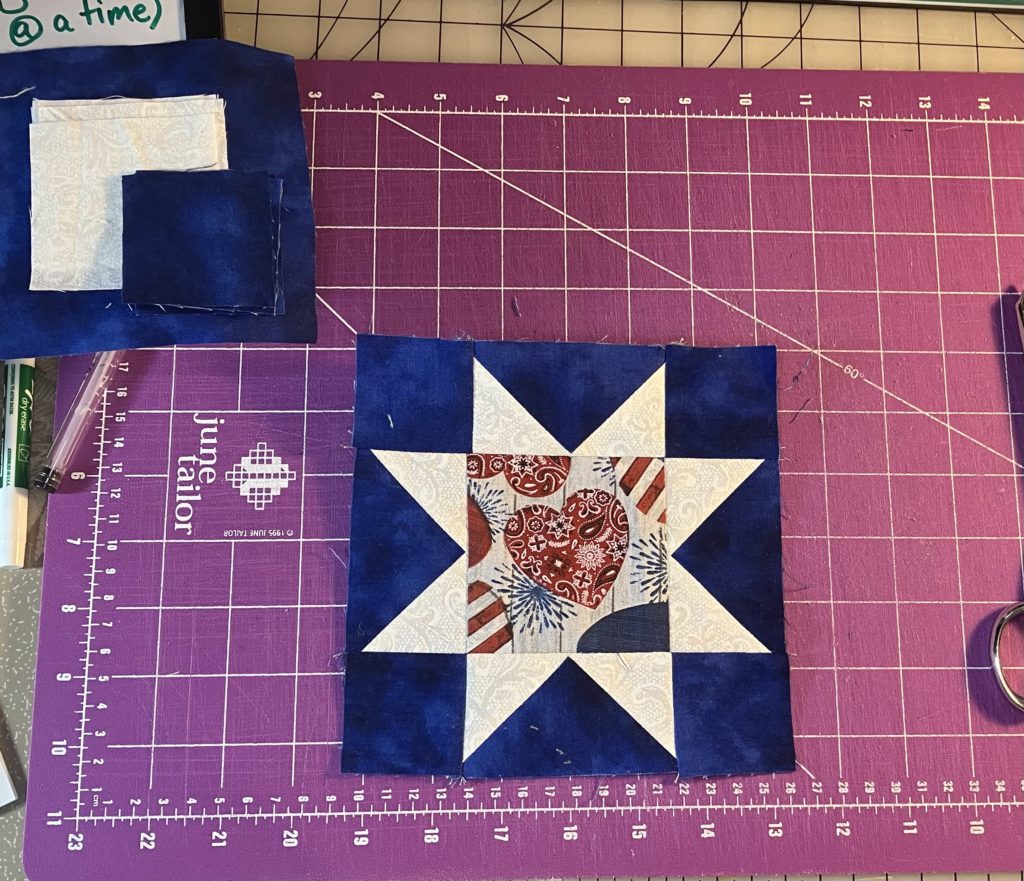
Oh, I almost forget! Here are the centers of the stars…3 1/2″ squares.
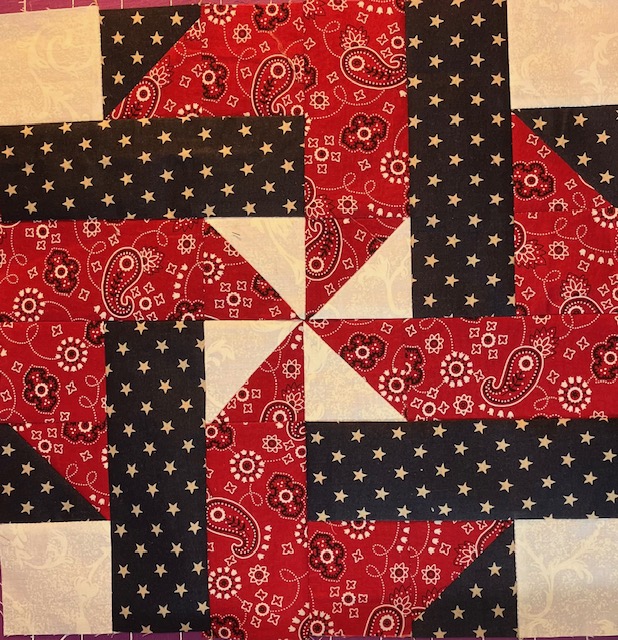
Here is the finished block:
It is so cute!
Here are all three for my quilt layout:
Here is the printable PDF pattern sheet:
I hope you enjoy making these blocks!
Please remember to leave comments and feedback on my YouTube channel or Facebook page. Comments for this page are turned off because of spammers.